How to make a beautiful fall door hanger with dollar tree supplies. Includes supply list, tutorial, and video. #diyfallwreath
This is my first fall DIY of the season and I’m super excited to share it with you!
I know what you’re thinking-it’s 98 degrees outside why are you showing us fall door decor?
Well, the answer is simple. The supplies needed to make this beautiful pumpkin door hanger sell out really fast.
So fast that I had to shop at two different Dollar Tree stores to find enough of the pretty blush color leaves.
I’ve mentioned this before, but it definitely bears repeating. When you see something you like at Dollar Tree, scoop it up as soon as you can because chances are it will sell out.
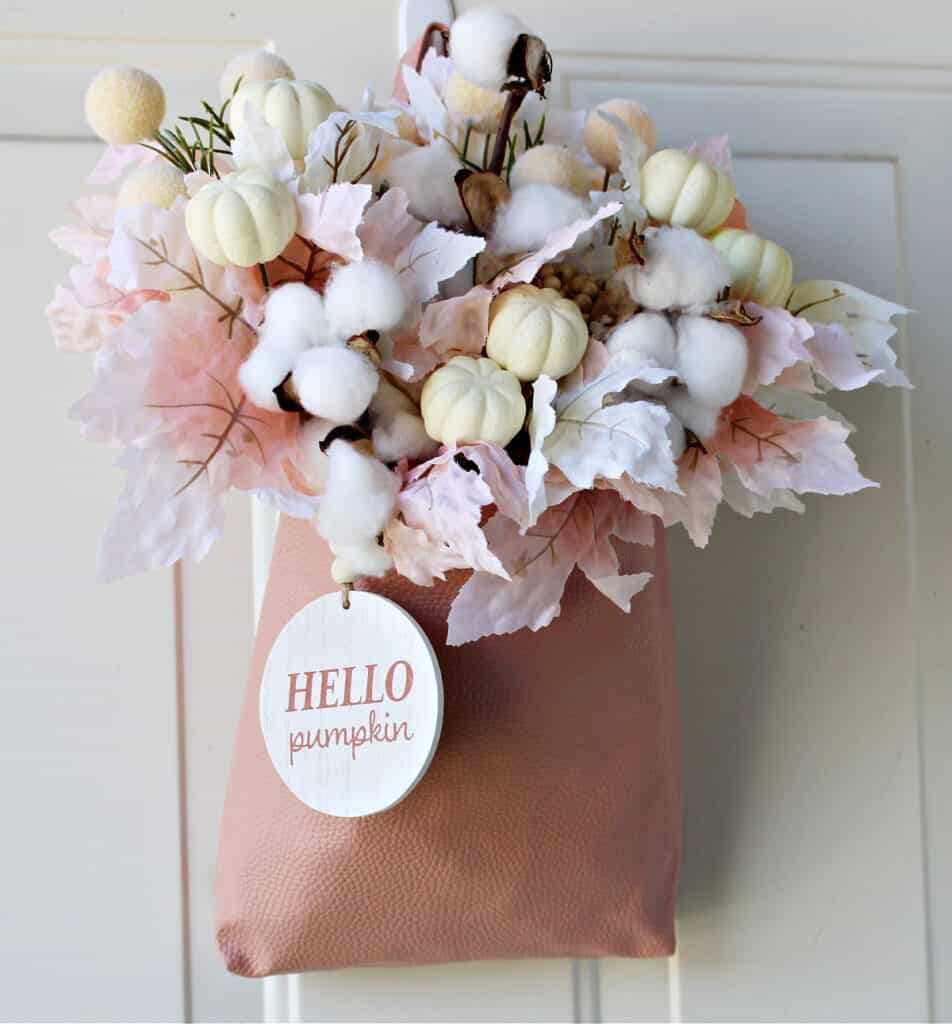
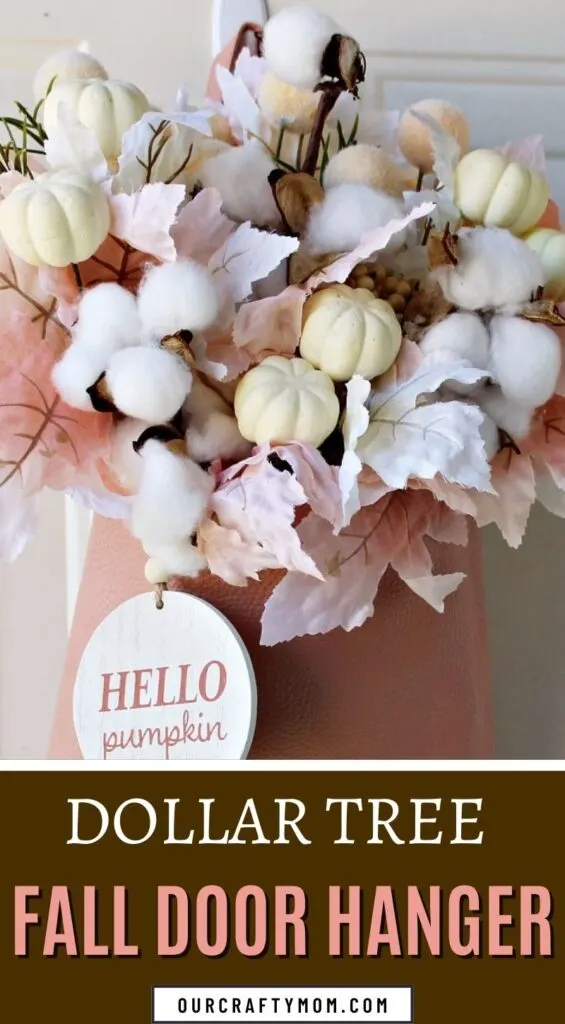
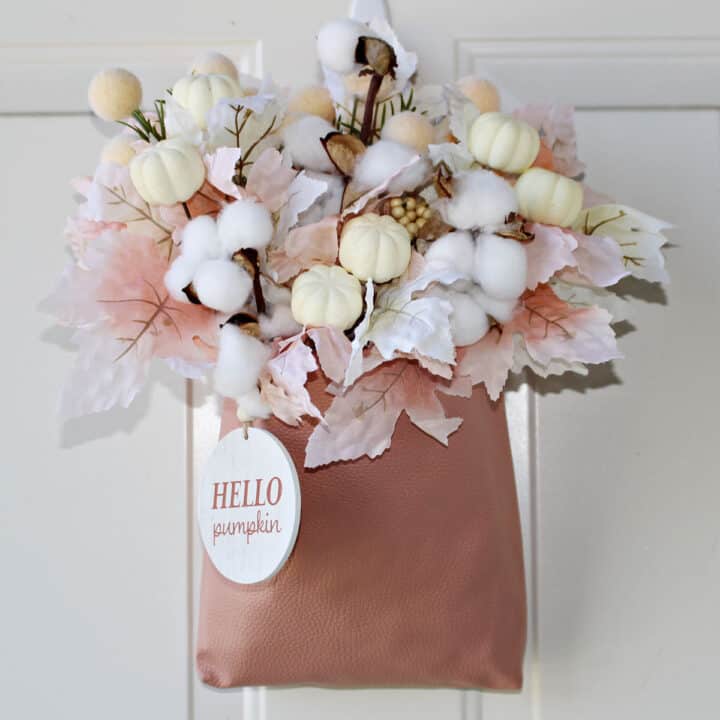
Just look at the gorgeous neutral color of the fall leaves:

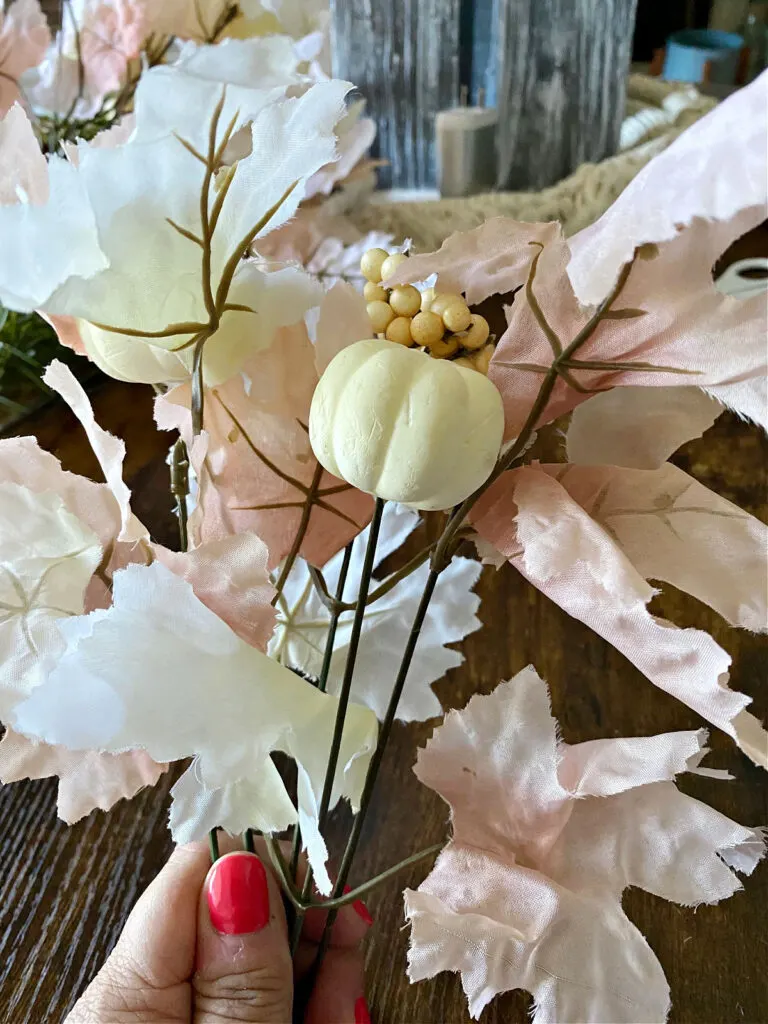
The fall leaves have a soft blush color to them so they can be used in all kinds of neutral home decor and design styles.
Are you ready for the best part? There is no hot glue needed! So you can easily remove the fall stems and use the bag to make another door sign, or even for a night on the town!
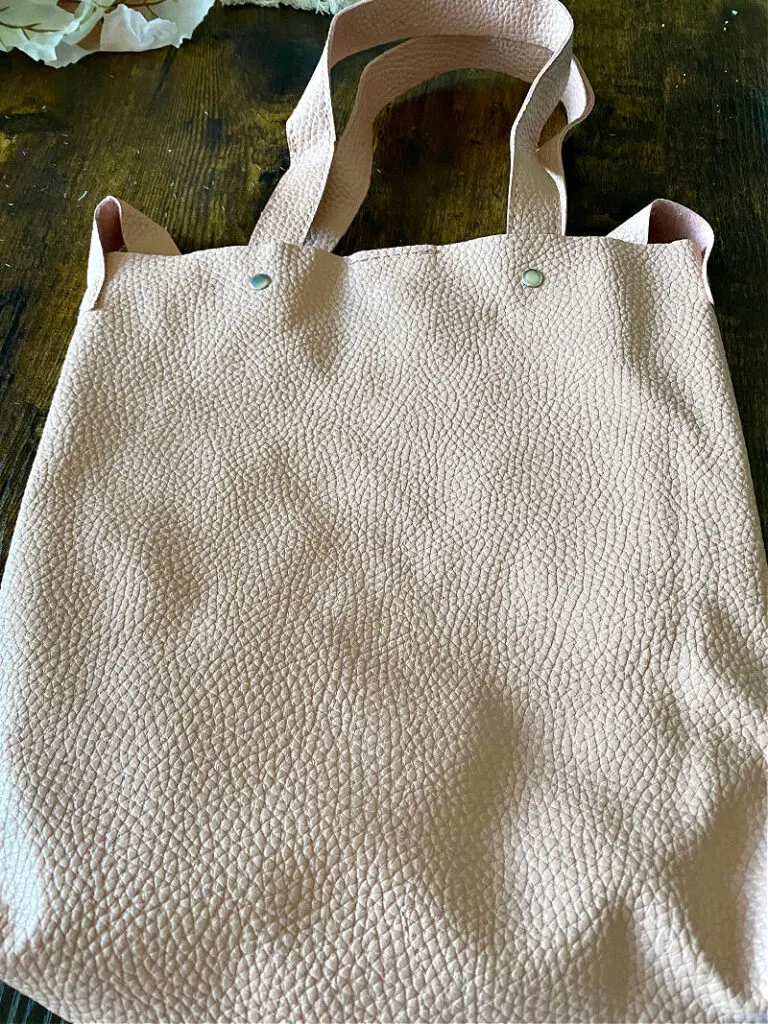
Can you believe this beauty was only $1.25? It’s not like that plastic pleather either.

This post contains affiliate links. This means if you click the link and buy something, I may receive a percentage of sales at no extra cost to you. Thanks for supporting Our Crafty Mom!
Supplies Needed to Make a Fall Door Hanger
- White Maples Leaves – I used 3 stems
- Flocking Ball Bushes – 2 stems
- Cotton Stems 2 stems – I’ve seen these for about 3x the cost at craft stores!
- Faux Leather Hand Bag
- Upcycled Packing Paper
- Hello, Pumpkin Tag (Target Dollar Spot)
How to Make a Neutral Fall Door Hanger
Step 1. Add packing paper to the bag
Do you know the packing paper that comes in Amazon packages? It’s always a good idea to keep some of that.
It’s useful for shipping gifts, packing, and sometimes in crafts.
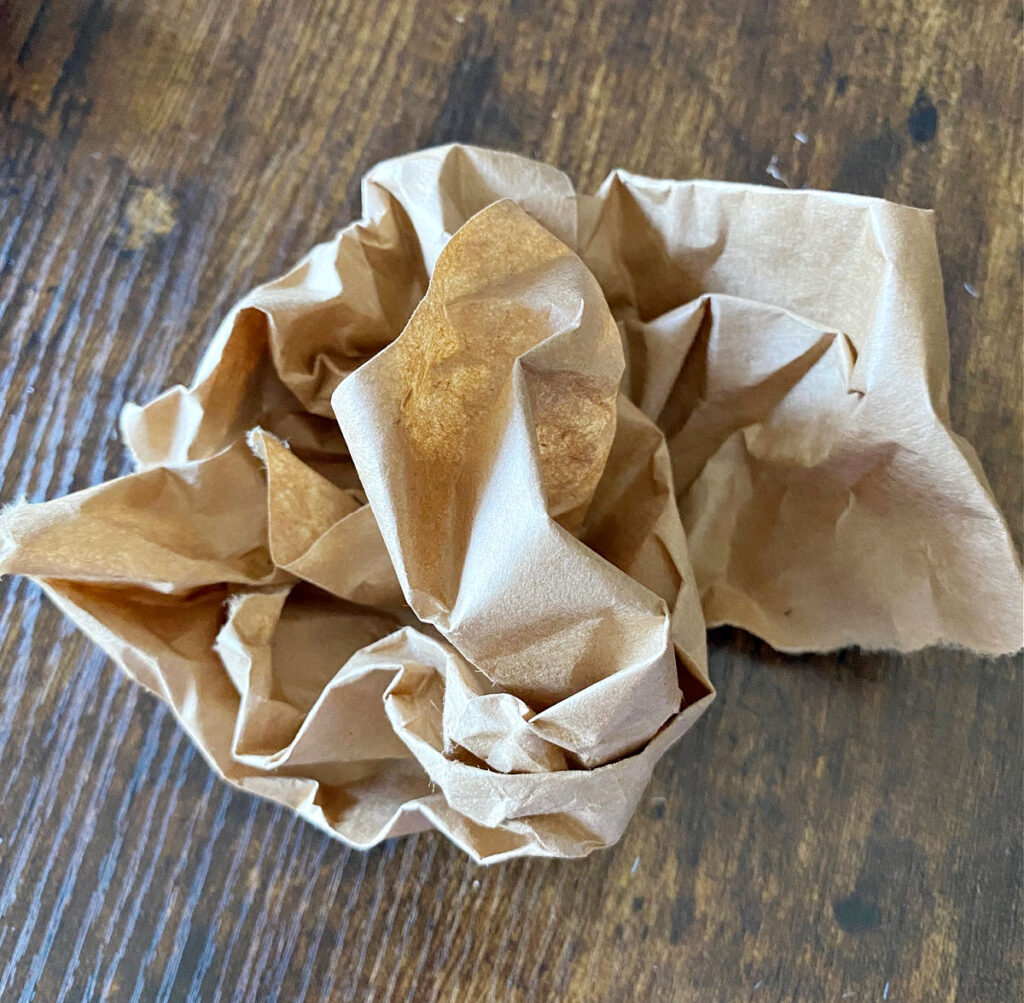

Just tear the paper and crumble up a handful at a time.
Step 2. Continue to add packing paper
You want to push it into the corners of the tote bag so it fills it out a little more.

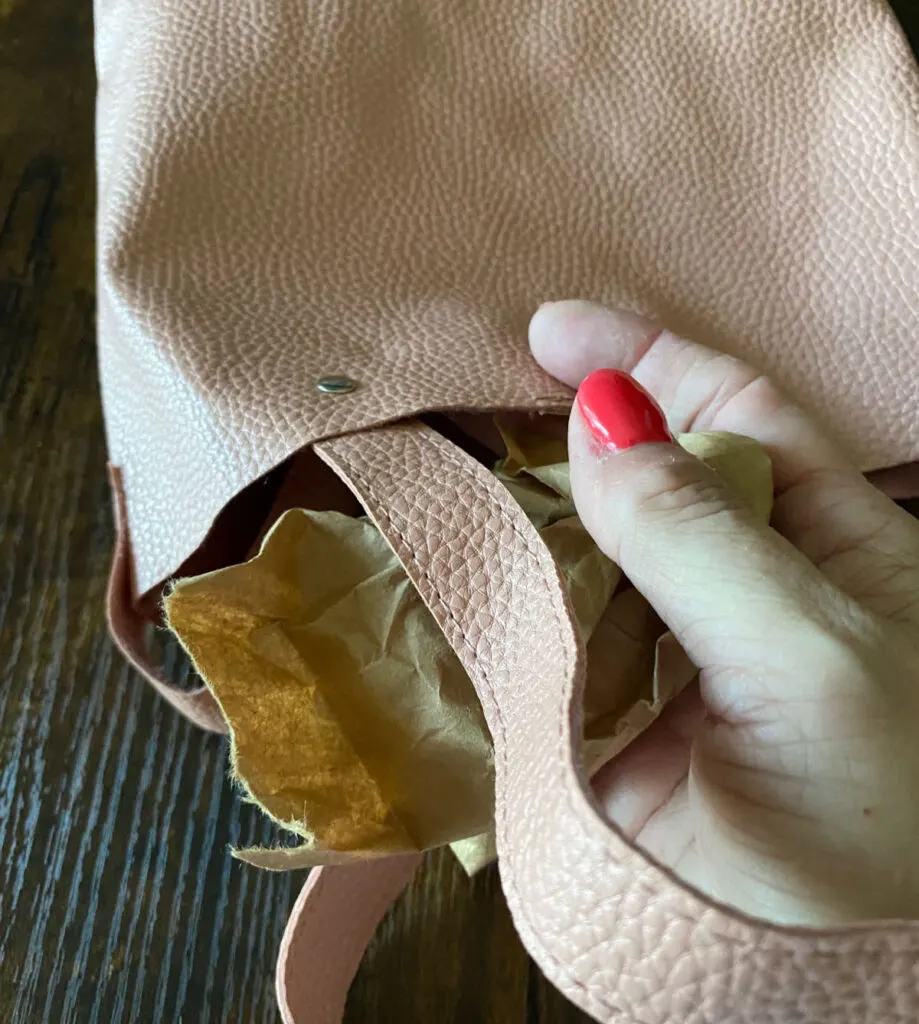
Don’t overfill it, but the bottom quarter of the bag should be filled.

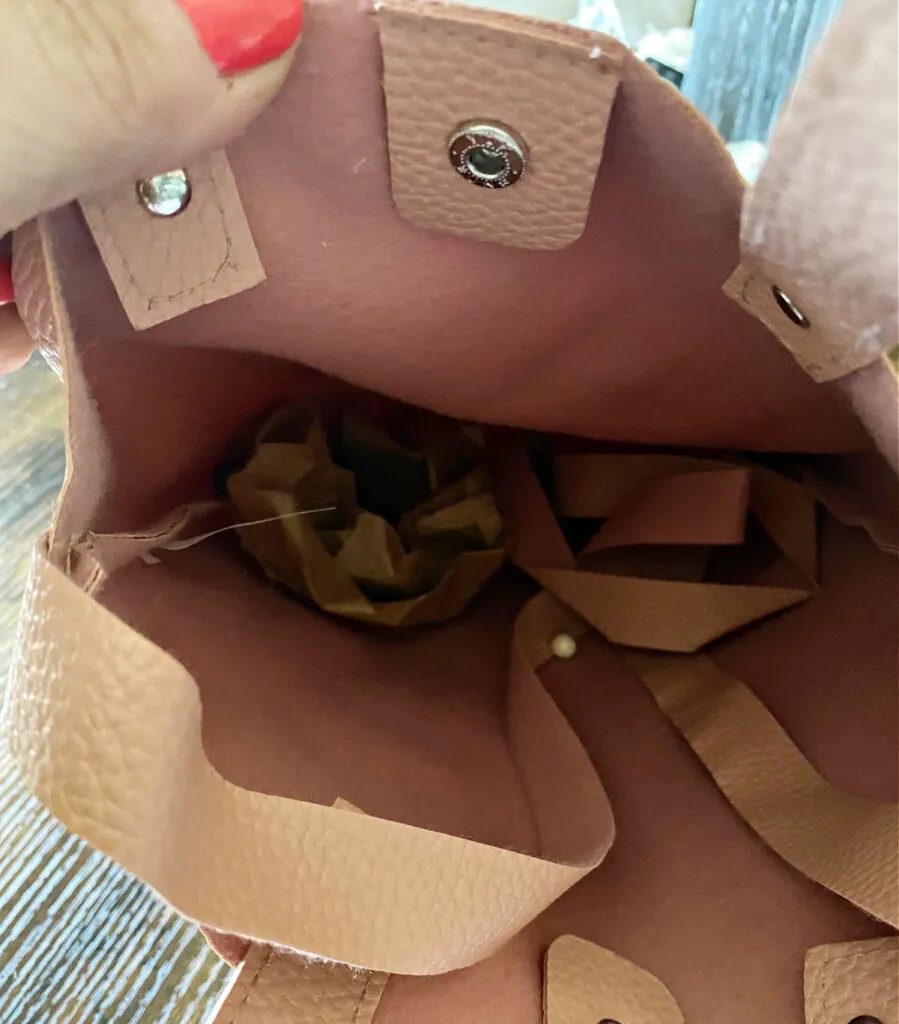
The paper will also secure the fall florals and leaves used in the next step.
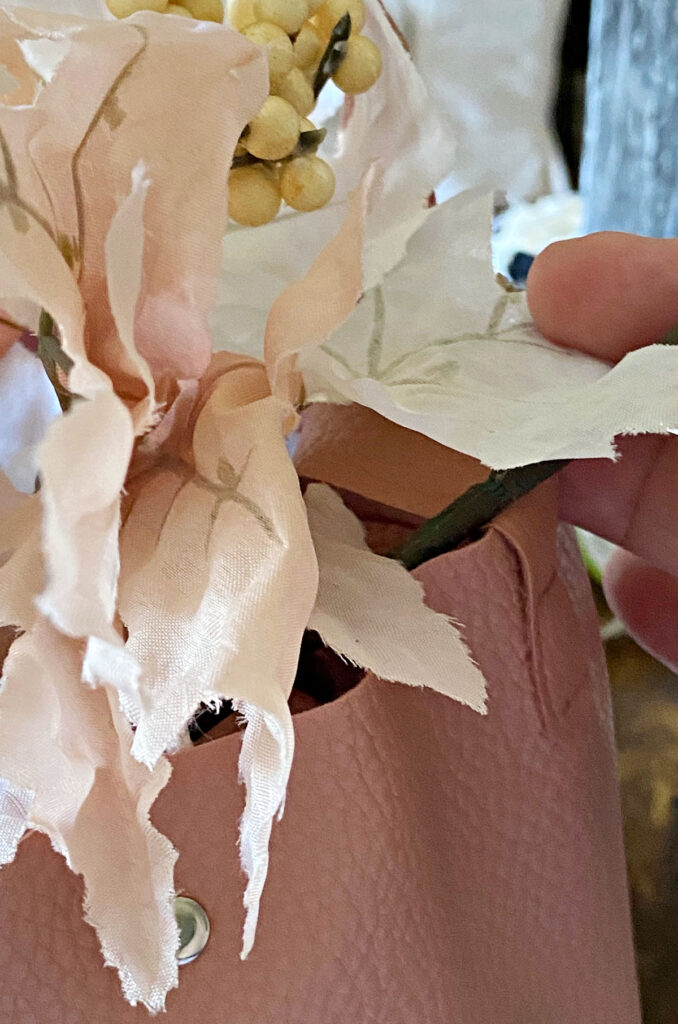
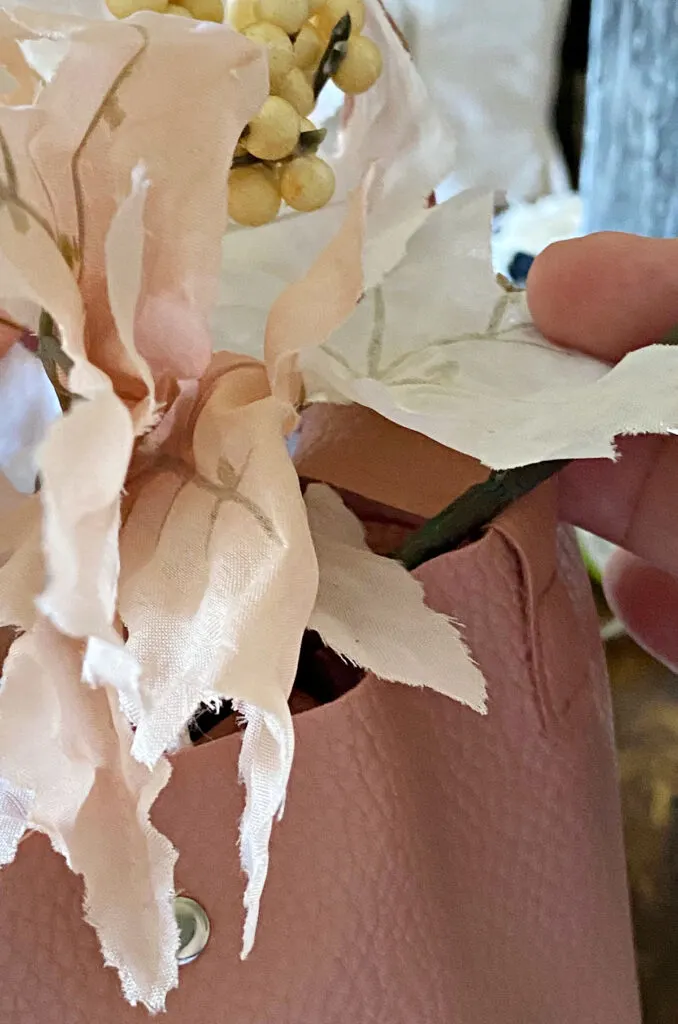
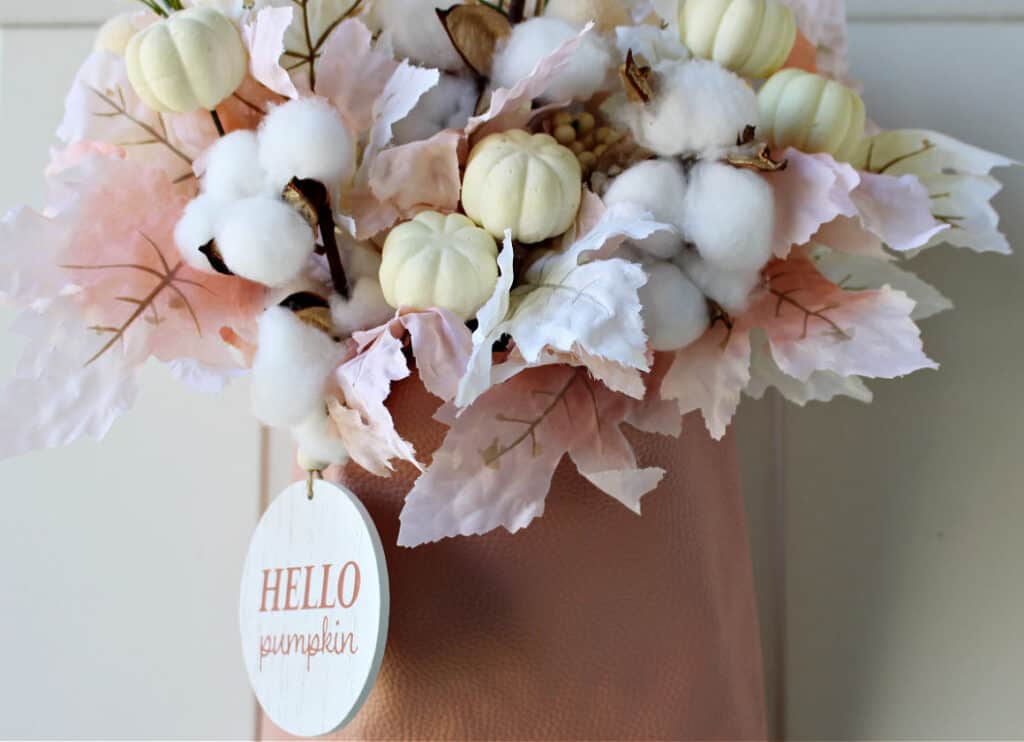
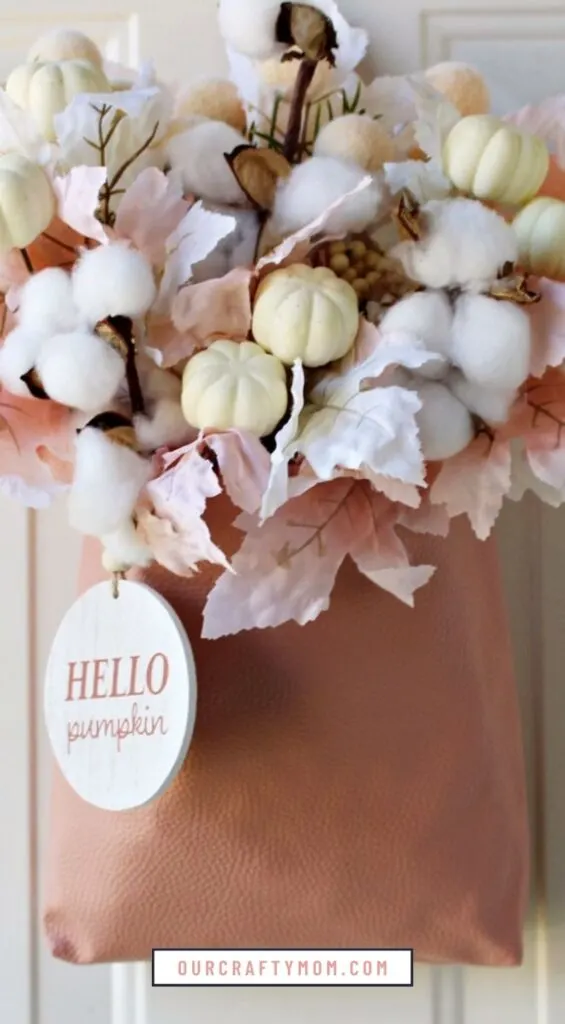
Step 3. Add Fall Leaves
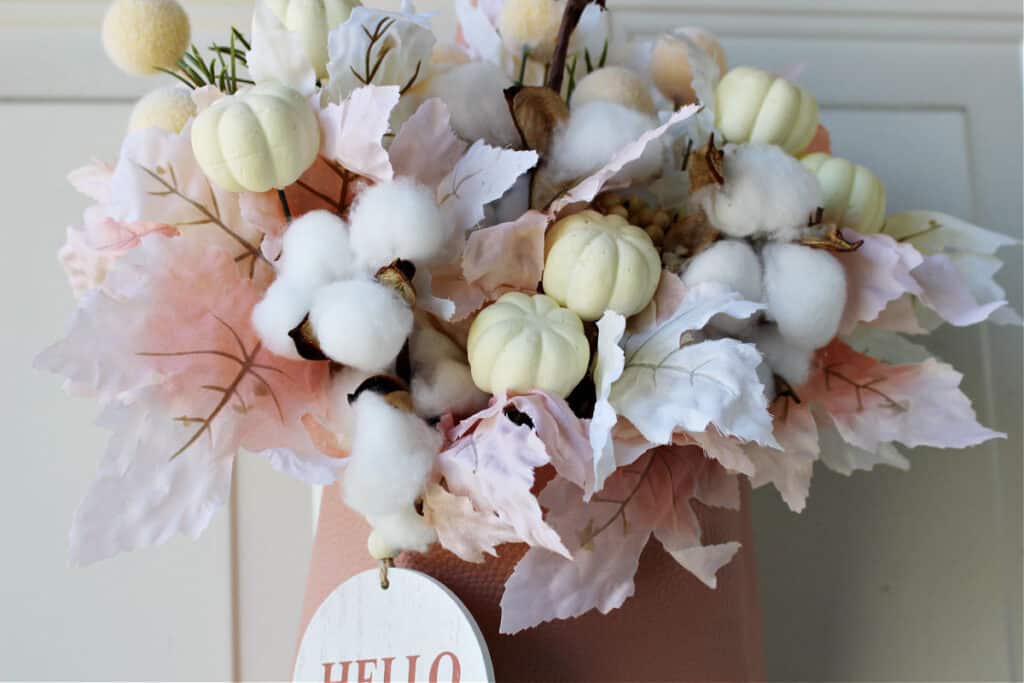
Next up, place the fall leaves into the tote bag. You don’t even have to cut the stems. It doesn’t get much easier than that to create a fall wreath.
Just place them right inside the bag. It’s best to break down the bag into three sections. Add a stem to each side then a stem to the middle.
Step 3. Add the fillers
While I only used 3 leaf stems, you can add more if you want it fuller. Once you have the leaves where you want them, it’s time to add the pretty flocking balls.
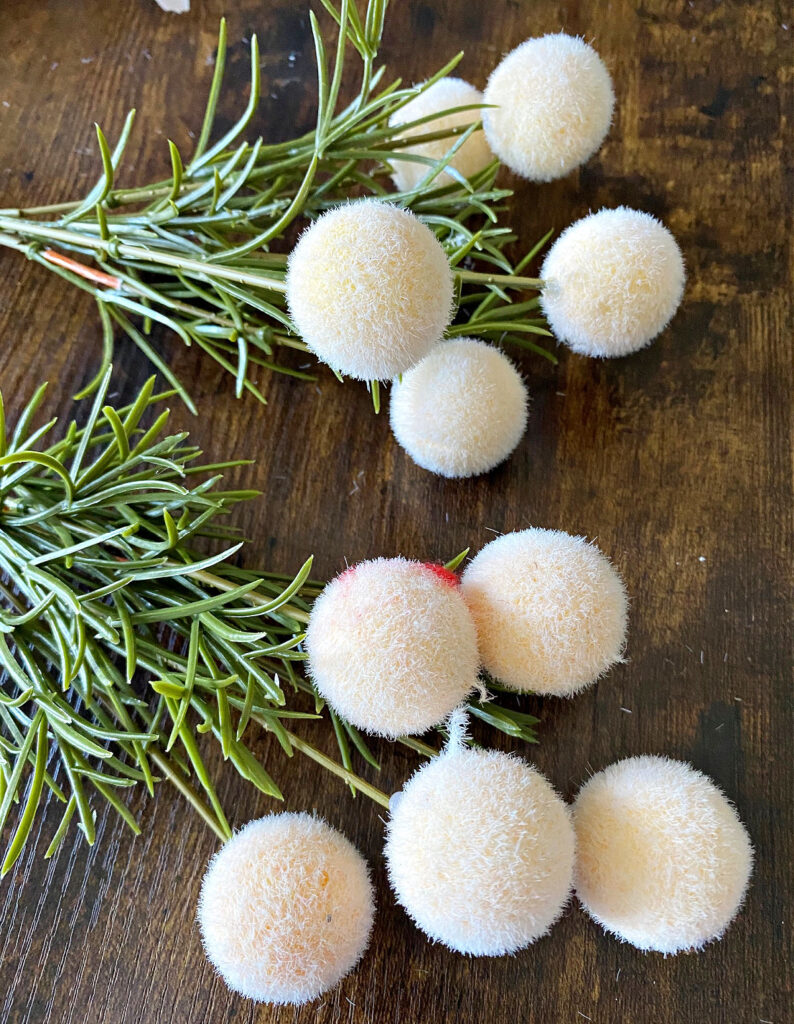

I first saw these pretty pastel-colored balls on the Dollar Tree website. I may or may not have called a few local stores to see if they had them in the store so I didn’t drive all over the state. 🙂
Step 4. Add cotton stems
Now it’s time to add the fluffy balls of cotton. I still can’t believe these babies are at Dollar Tree.

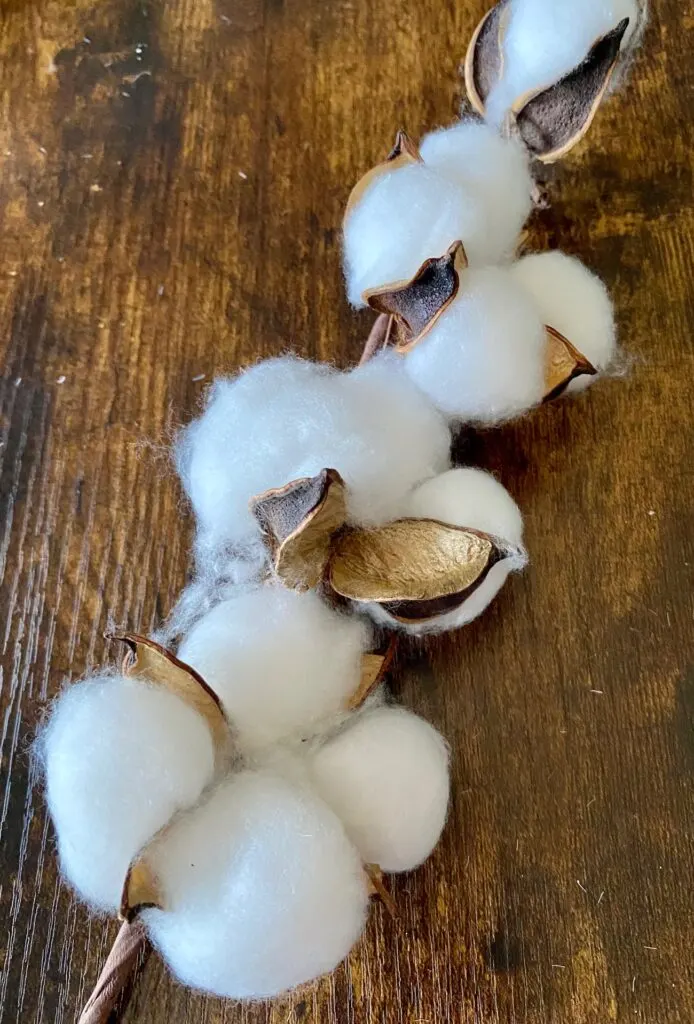
If you are a regular visitor you know I LOVE some cotton decor. One of the first wreaths I ever shared on this blog was a $5 cotton ball farmhouse wreath.
But my favorite cotton craft so far was an adorable cotton ball pumpkin.
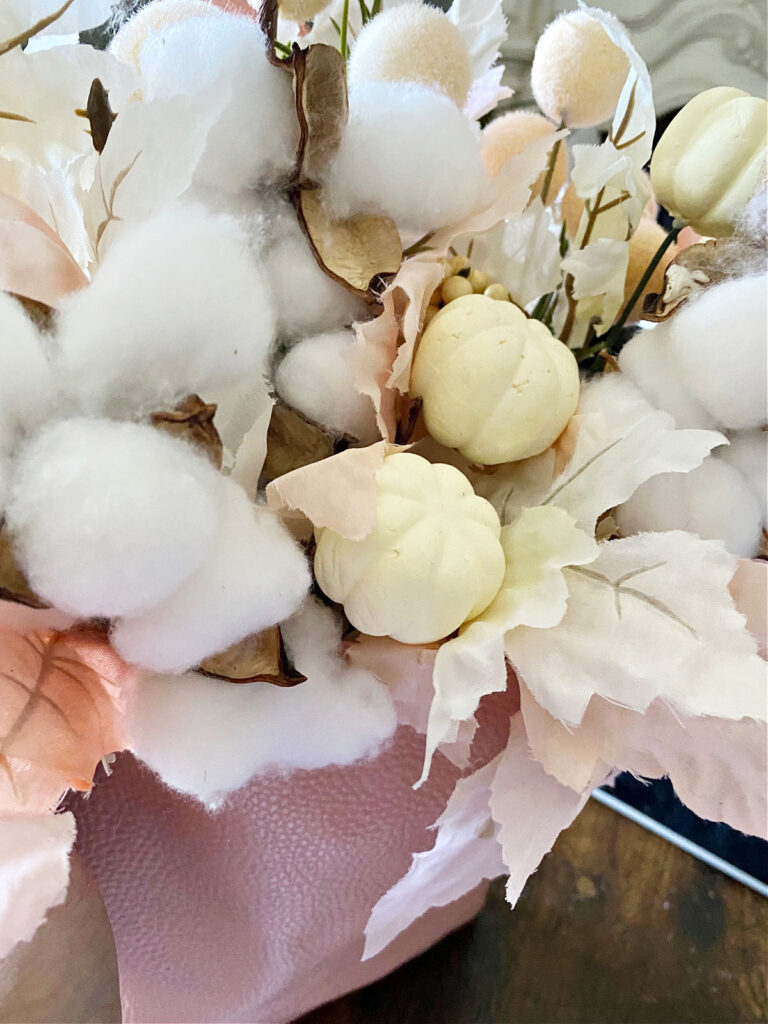
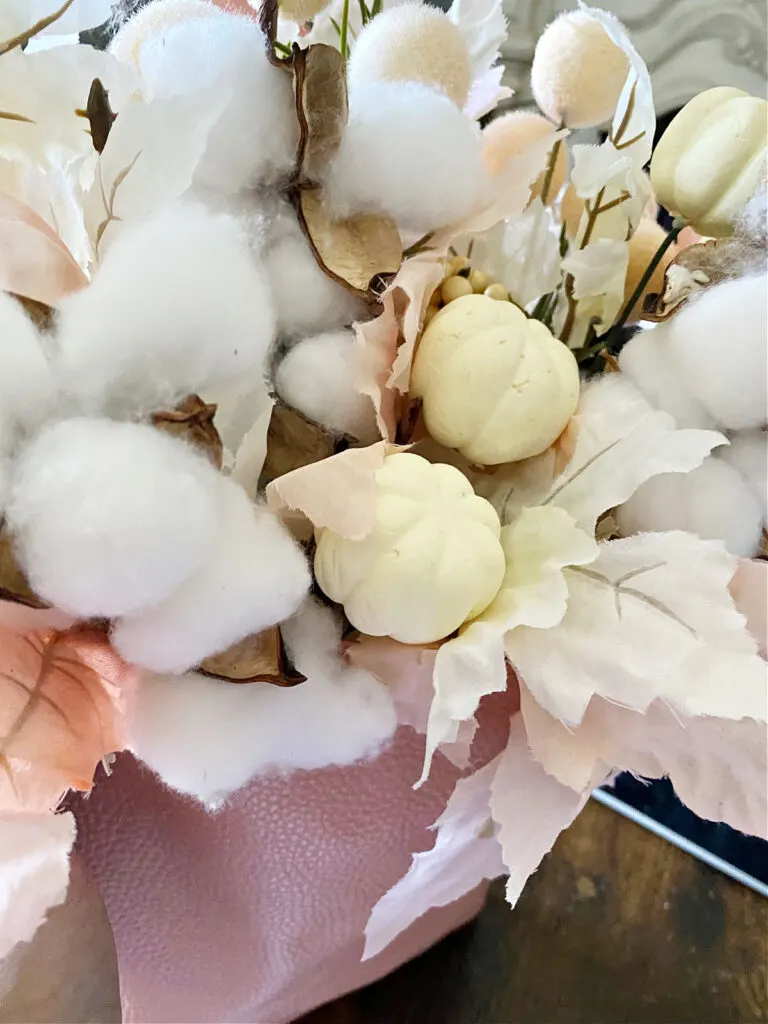
Simply place a cotton stem on each side of the arrangement. I love how fluffy the stems are and they look great against the cream-colored pumpkins and leaves.
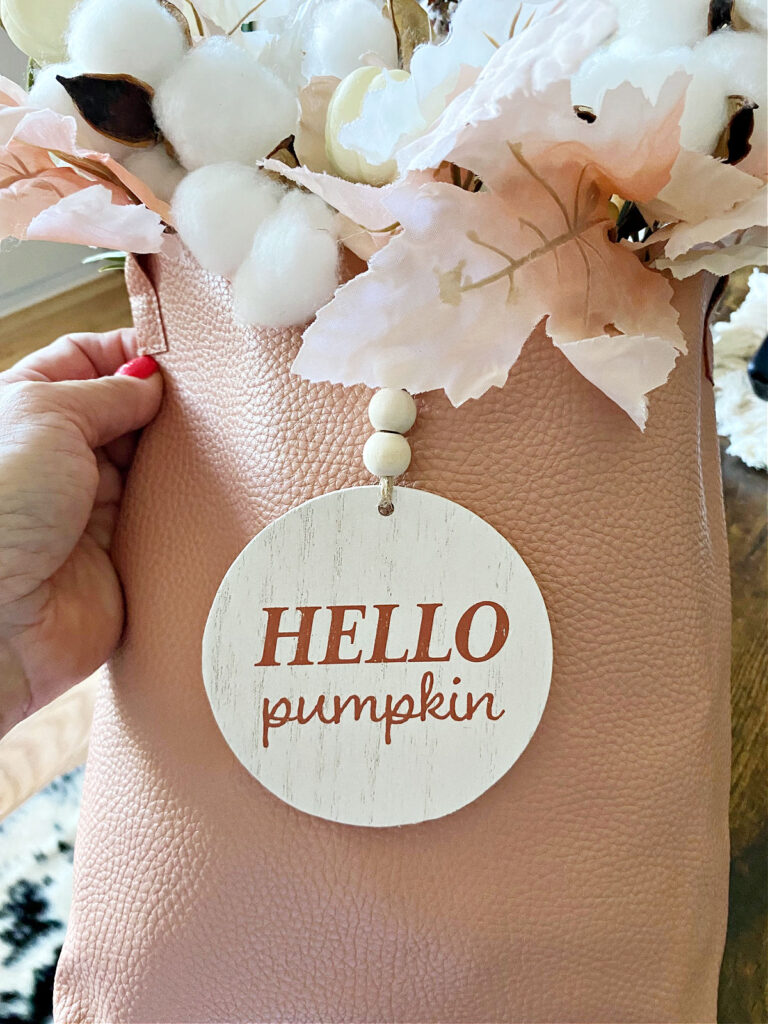
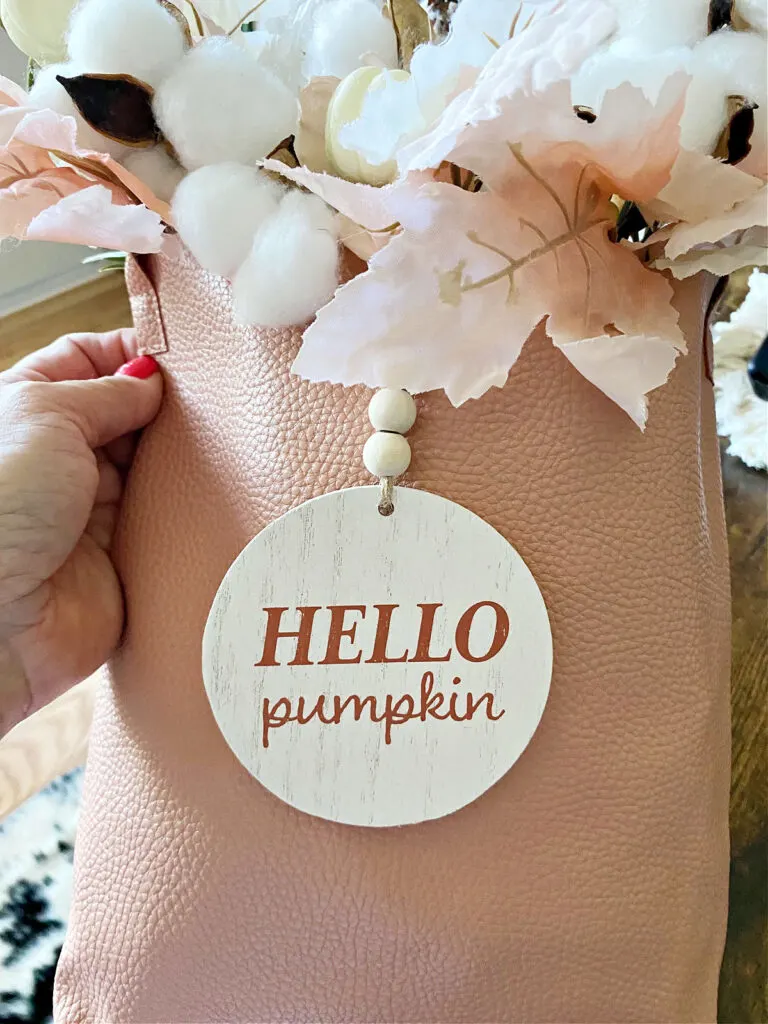
Step 5. Attach a fall tag
The last step is to attach the darling hello pumpkin tag with wood beads that I found at the dollar spot. Isn’t it so cute?

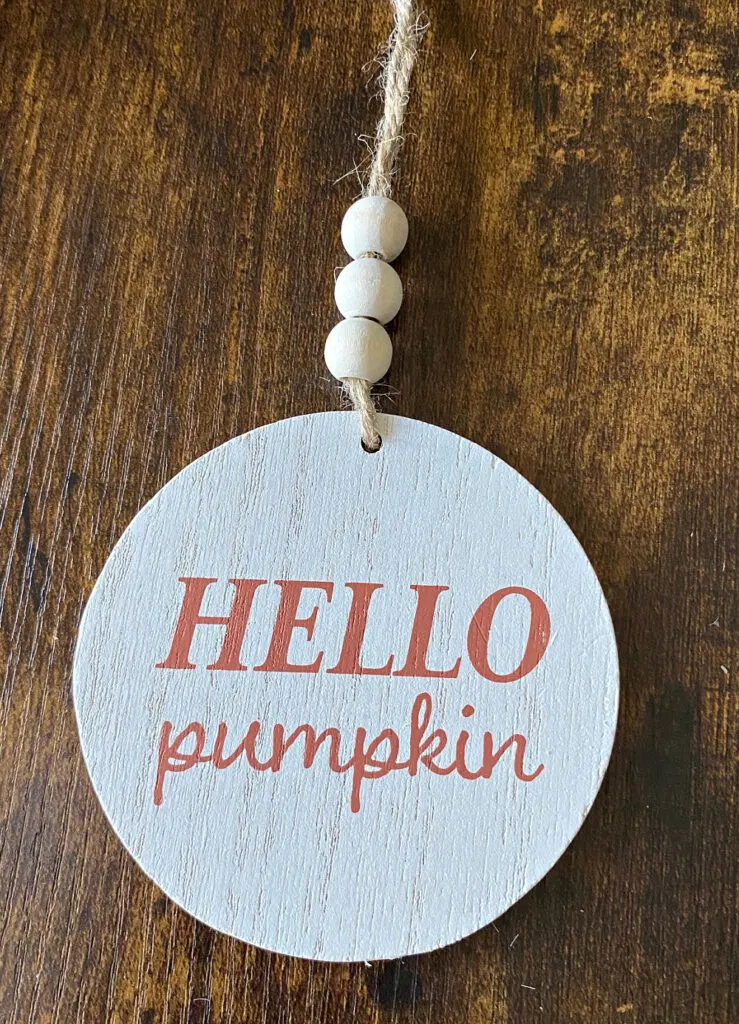
Just wrap it around the front handle of the tote bag. I also tucked the straps into the bag.
With no glue being used and the straps still secure, the bag can still be used as a tote if you want.
That’s all there is to it. A unique fall door decoration that is a nice change from a standard grapevine wreath. Plus, it was under $10 to make. You can’t beat that!

This is a large-size wreath perfect for a front door. It would look equally as gorgeous inside for a touch of fall autumn decor.
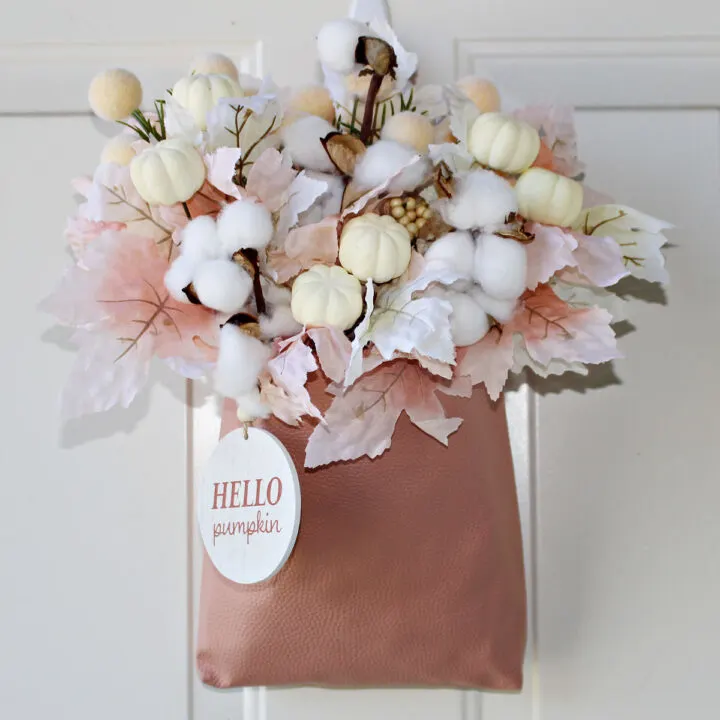
Because I took about 200 photos here are a few more. Enjoy!


The next few months are the busiest time of year as a craft and home decor blogger. I love getting to share my ideas with you and I hope you enjoy them too.
My goal is that you will leave here feeling inspired to create your own easy crafts without spending much money. And maybe you will share a laugh or two.
Please share this post with your friends…

Don’t forget to come back and let me know if you make this fun little project!

Wait…here are even more DIY fall crafts and home decor ideas:
- Rustic Glam Fall Wreath
- Faux Concrete Pumpkins
- Succulent Pumpkin for the Teal Pumpkin Project
- Chinoiserie Pumpkin DIY Centerpiece
- Dollar Tree Fall Centerpiece with Truck
- 27 DIY Fall Home Decorating Ideas
FOLLOW ALONG
Pinterest ~ Facebook ~ Instagram ~ Twitter ~ YouTube ~ TikTok
Beautiful Neutral DIY Fall Door Hanger (Dollar Tree Supplies)
Do you love fall? Here is a fun DIY project that will brighten your door and welcome friends and family to your home! It's easy, too. All you need are a few supplies from the dollar store!
Materials
- 3 White Maples Leaves
- 2 Flocking Ball Bushes
- 2 Cotton Stems
- Faux Leather Hand Bag
- Upcycled Packing Paper
- Pumpkin Tag
Instructions
- Tear packing paper and crumble it up a handful at a time. Push it into the corners of the tote bag to make it fuller.
- Place the fall leaves into the tote bag. You don’t even have to cut the stems.
- Add a stem to each side then a stem to the middle.
- Once you have the leaves where you want them, add the pretty flocking balls.
- Now it’s time to add the cotton stems, one on each side.
- Attach the darling hello pumpkin tag.
- Wrap it around the front handle of the tote bag and tuck the straps into the bag.
- Hang and enjoy!
Notes
**You can also use floral foam if you like**
Recommended Products
As an Amazon Associate and member of other affiliate programs, I earn from qualifying purchases.

