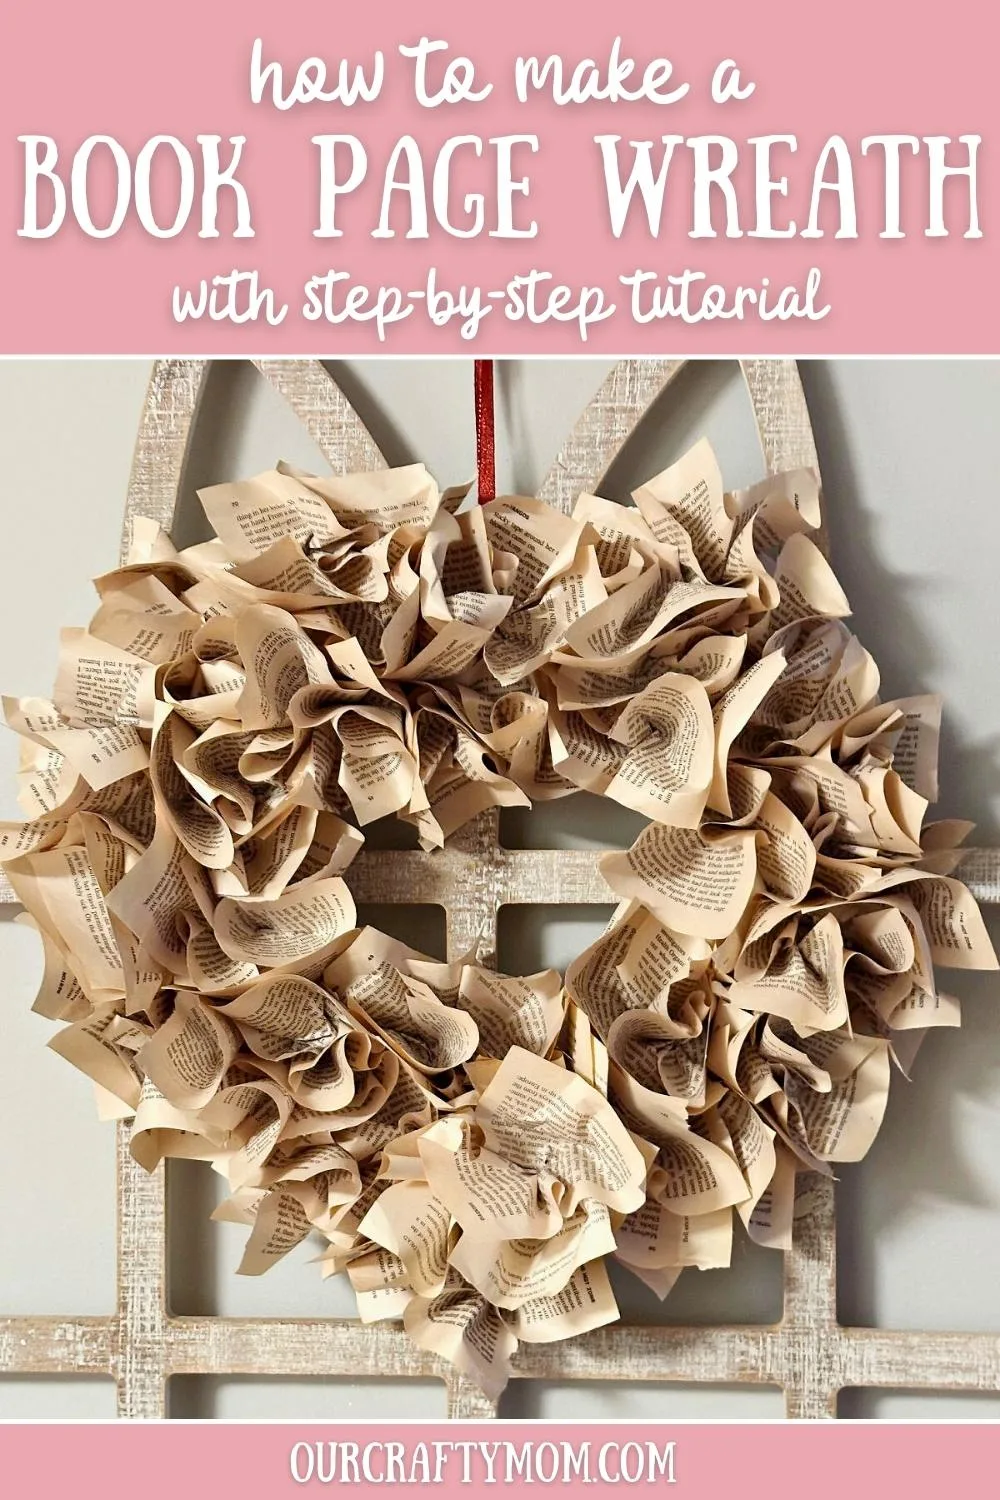
Book Page Wreath: Transform old books into a stunning wreath with these simple step-by-step instructions. Craft your unique decor piece today.

This post contains affiliate links. This means if you click the link and buy something, I may receive a percentage of sales at no extra cost to you. Please see my full disclosure here.
Book Page Wreath
If you follow me on Pinterest, you know I love to make handmade wreaths. When I was 18 yo I took a wreath making class and there was no turning back.
Fast forward many years and I’ve made hundreds of wreaths for my home, to sell at craft fairs, or for friends and family.
Surprisingly, I have never made an actual book page wreath. There have been several book page crafts, but this is my first wreath using book pages.
Let’s get to the simple tutorial so you can make your own. Good news; it’s quick, easy and cheap!
Supplies
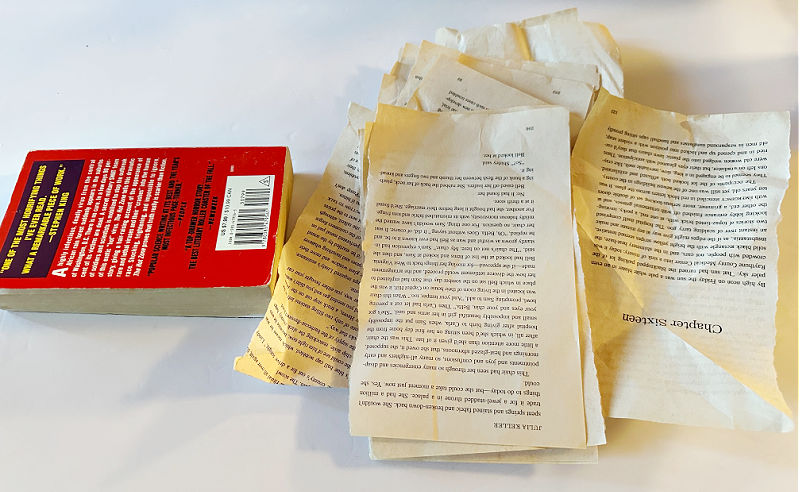
- Old book – the older the pages look, the better. I used an old paperback from my stash.
- Foam board or cardboard – my foam board is from Dollar Tree
- Scissors or craft knife – I love this one from Cricut
- Packing tape
- Hot glue gun

Step 1. Remove the book pages
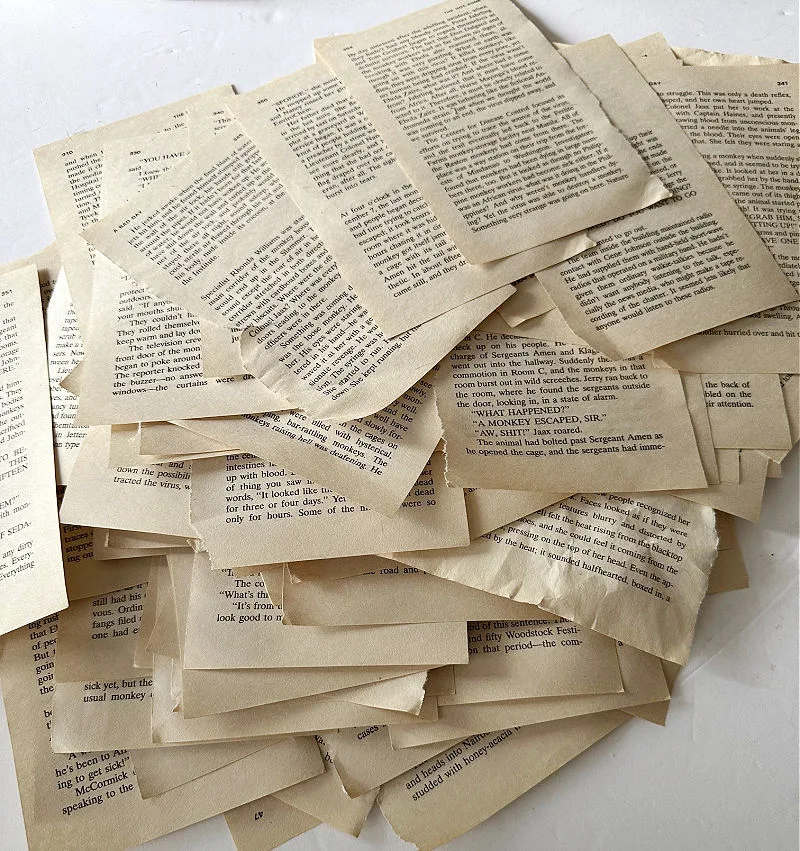
Start by tearing pages from your book. There is no need to cut the pages, or carefully tear them. They are going to be glued together, so don’t worry if you tear the edges.
In fact, you may want to have torn edges on your wreath.

There is one thing I want to touch base on about crafting with books. Of course, you don’t want to destroy a book of value, either sentimental or monetary.
The book I used was in the donate pile or headed for the trash. Why not put it to good use in a wreath that can be enjoyed for years to come?
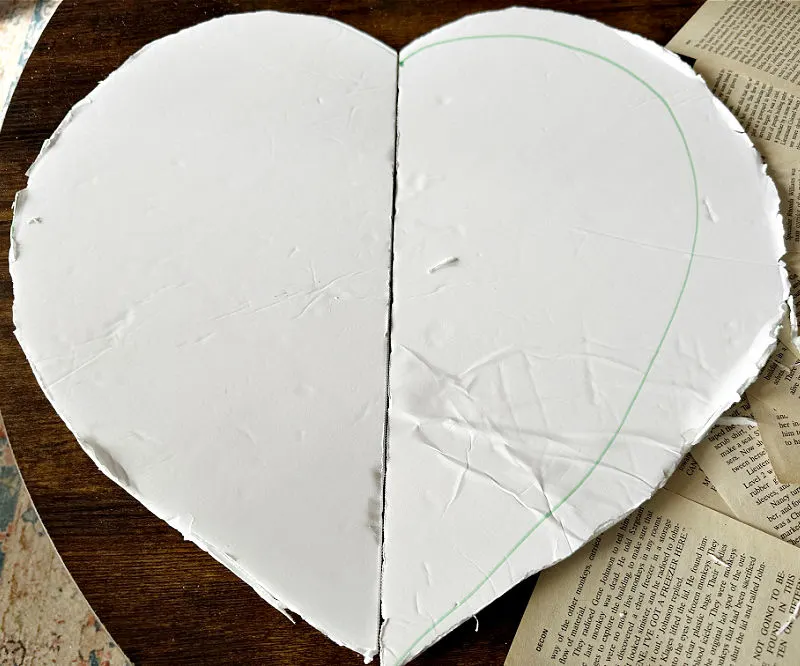
Step 2. Cut the foam board
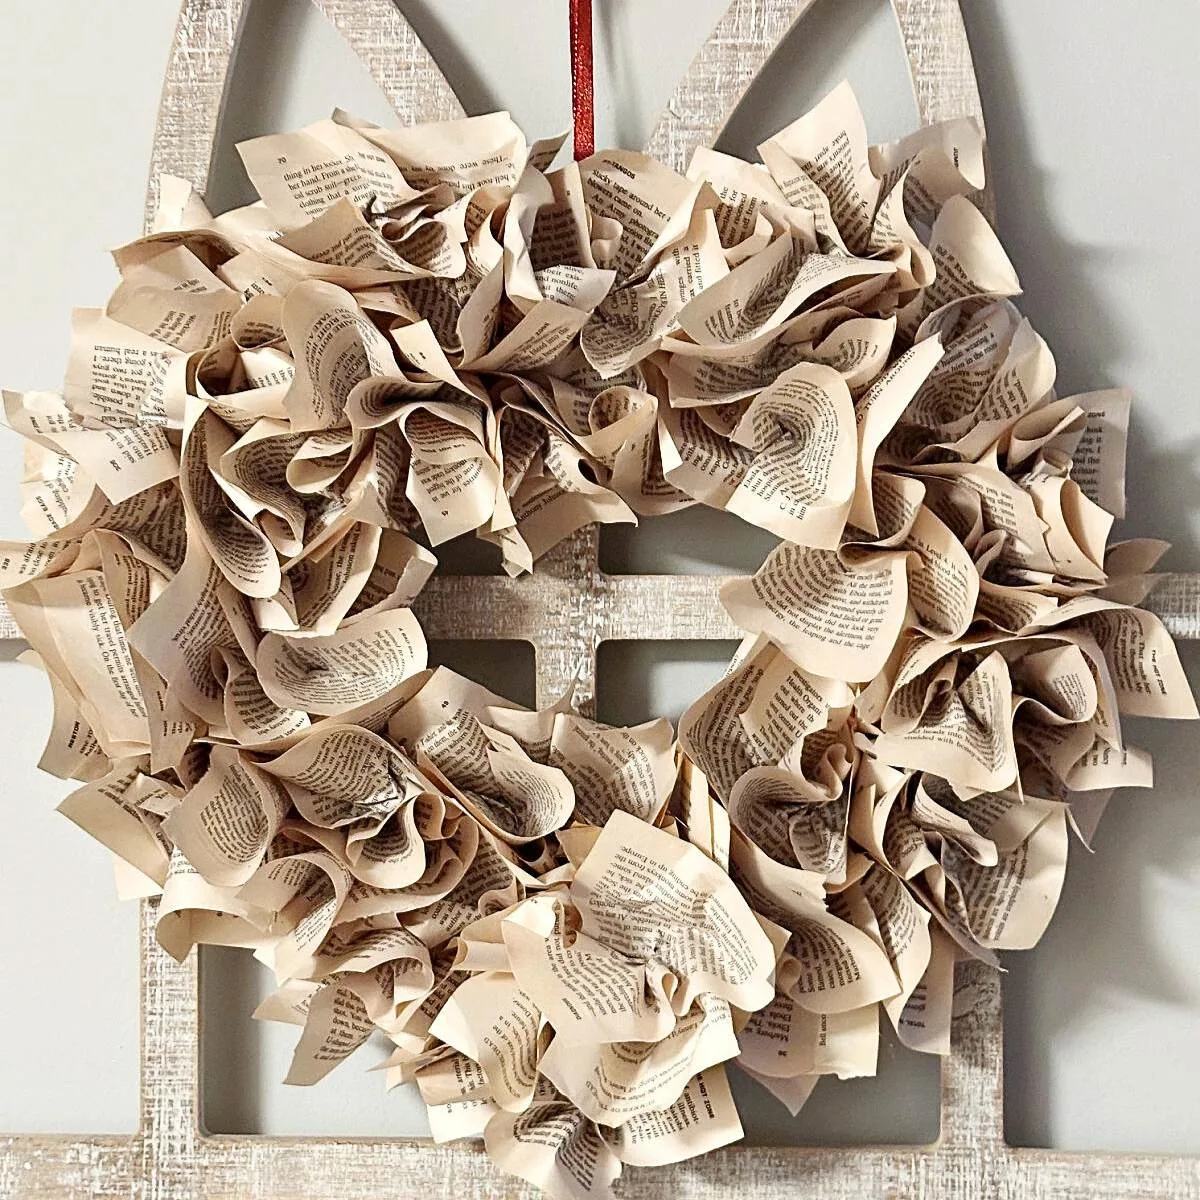
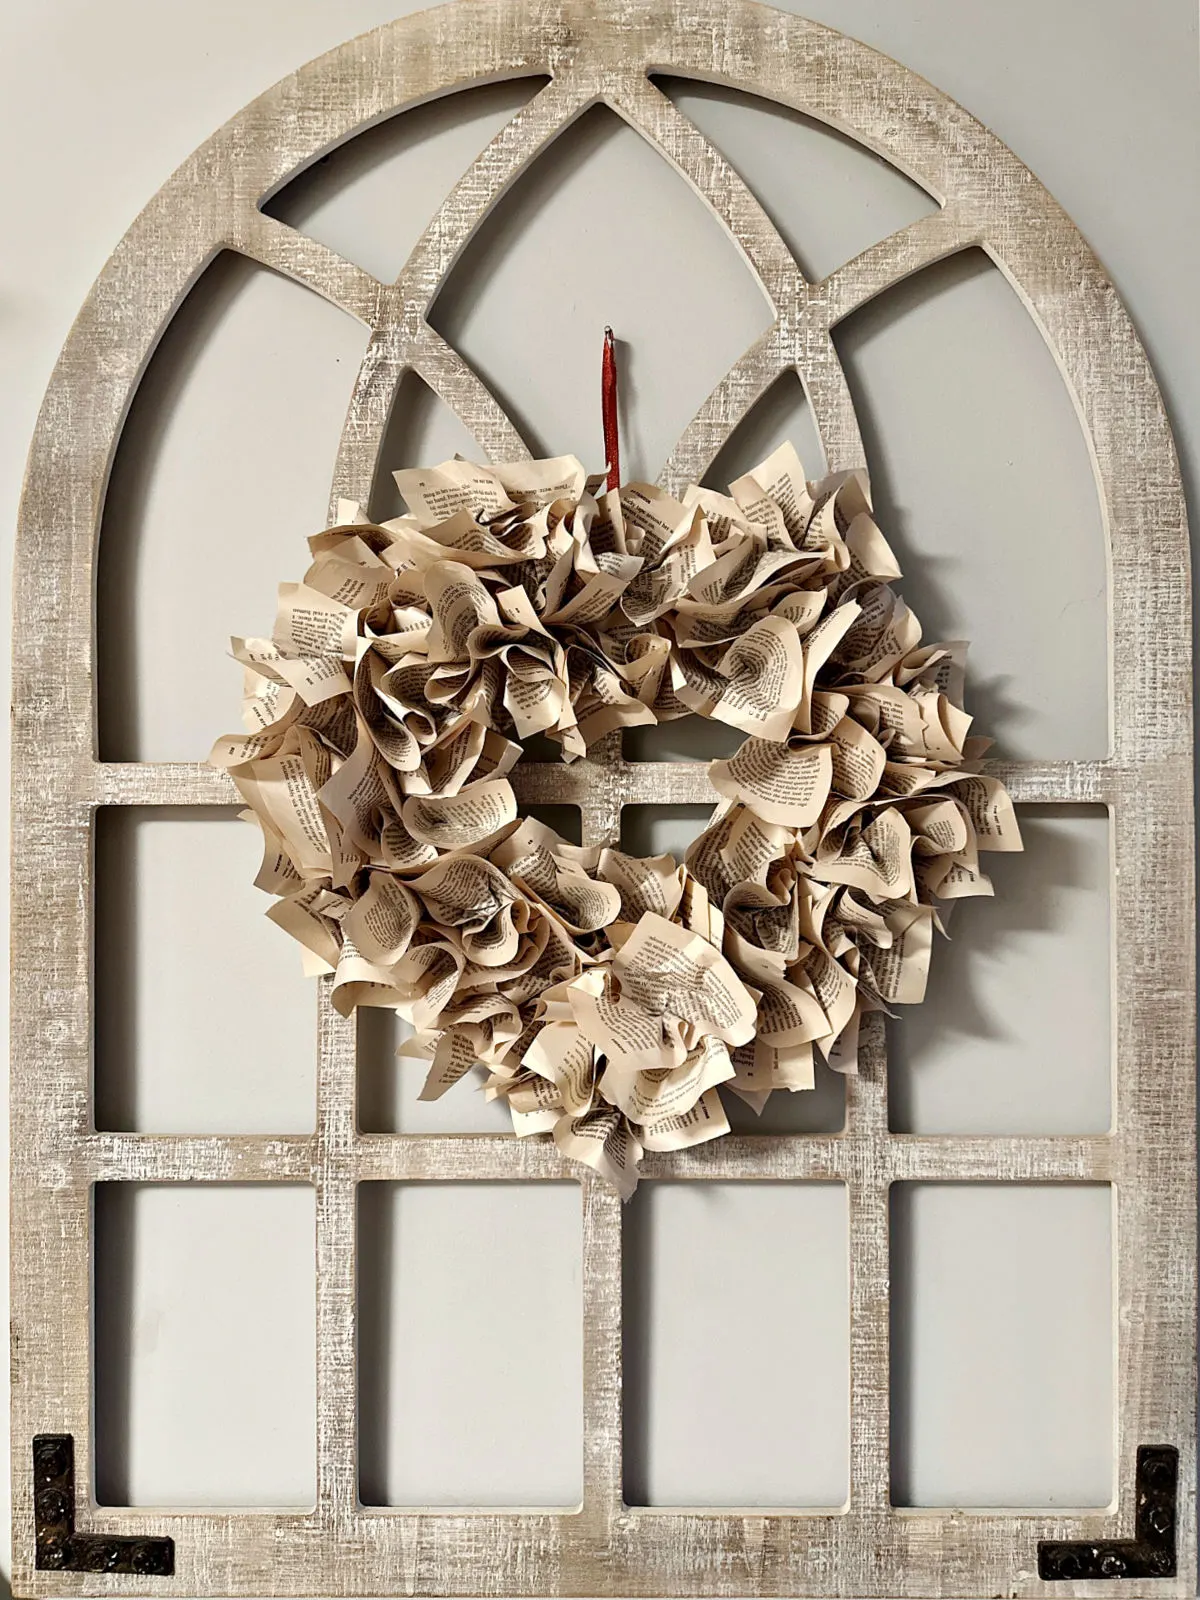
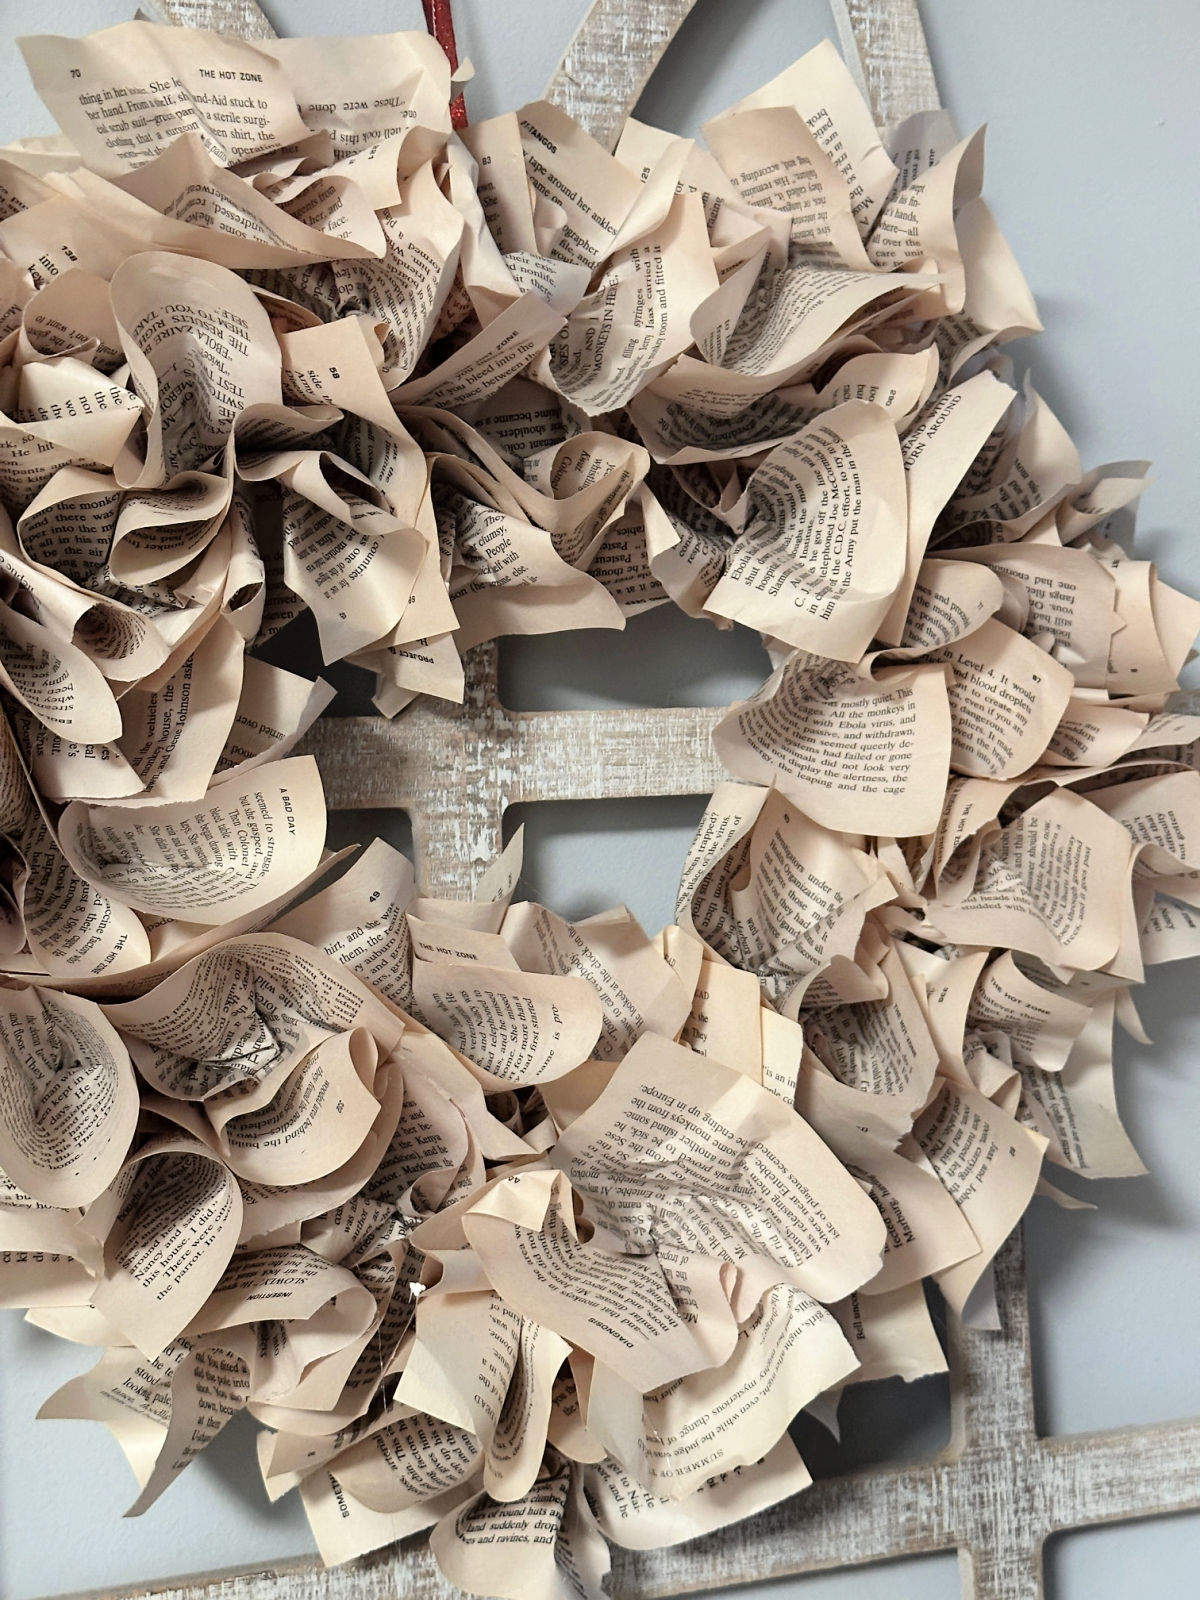
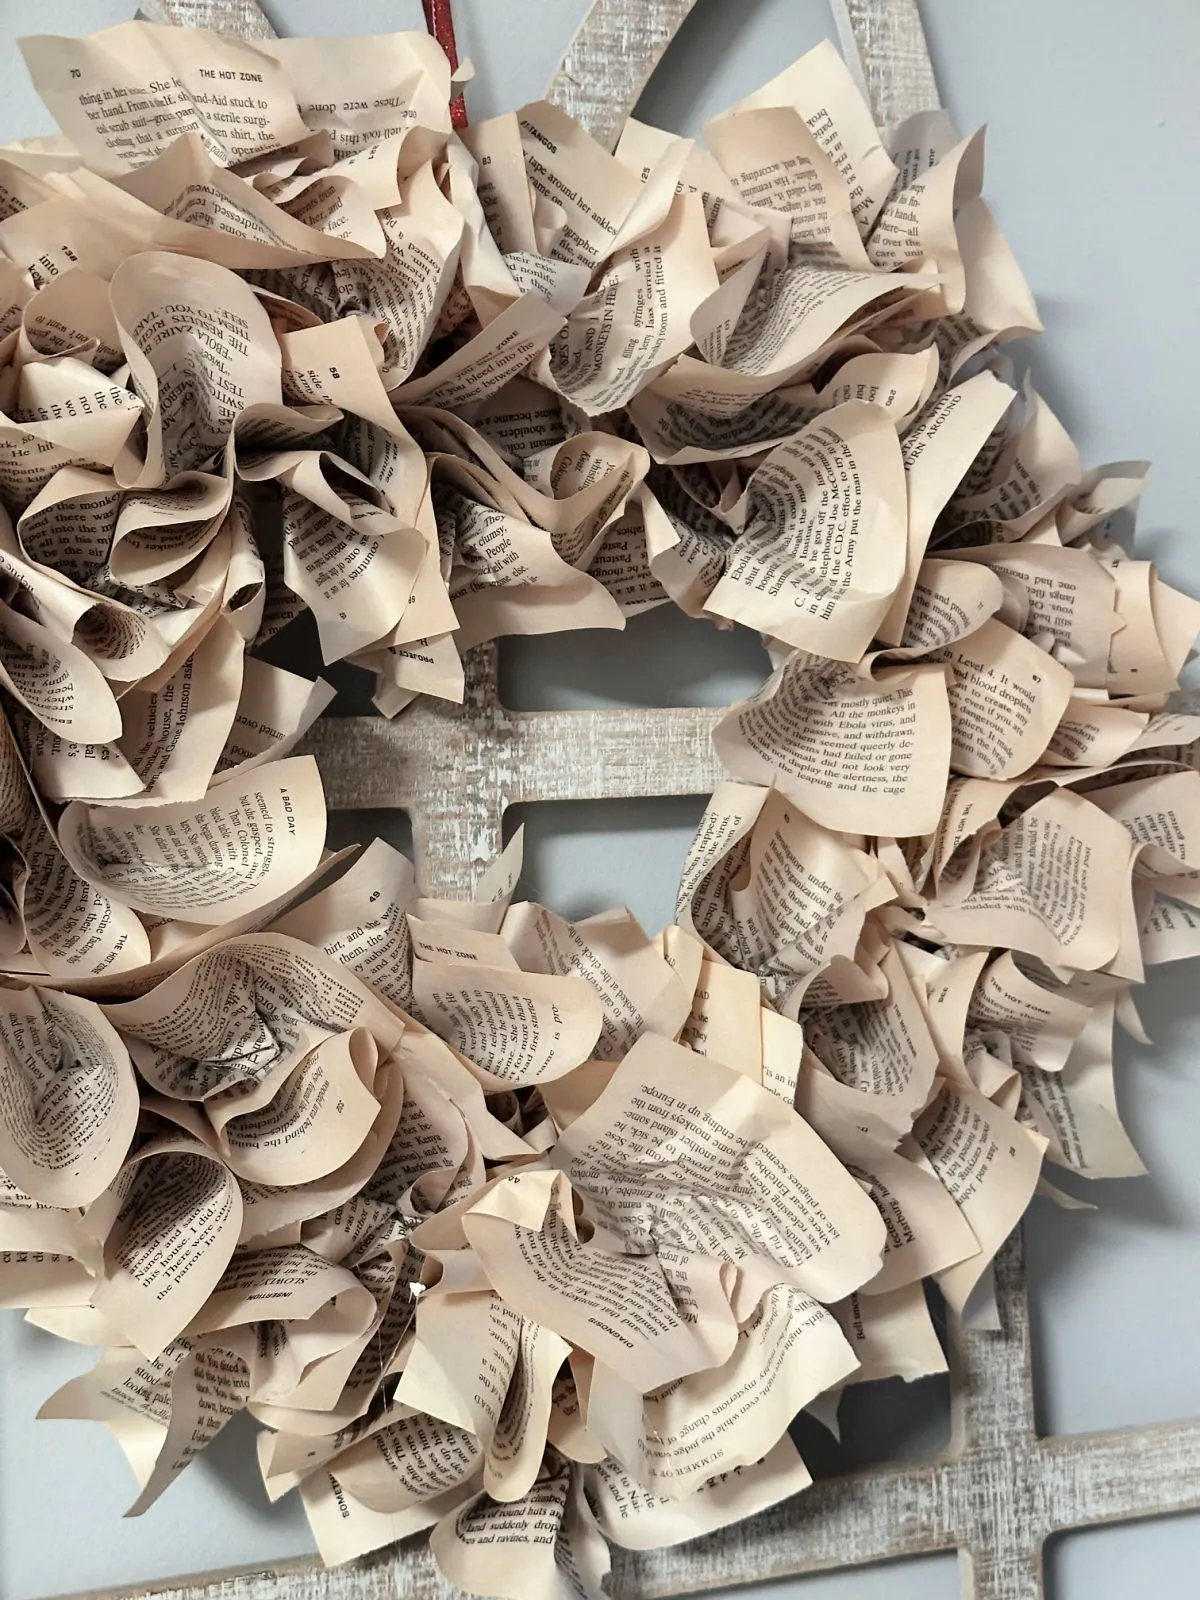
For this wreath, I chose to go with a heart shape for Valentine’s Day. But, you can go with a classic round shape if you like.
Wouldn’t a shamrock shape be cute for St. Patrick’s Day?


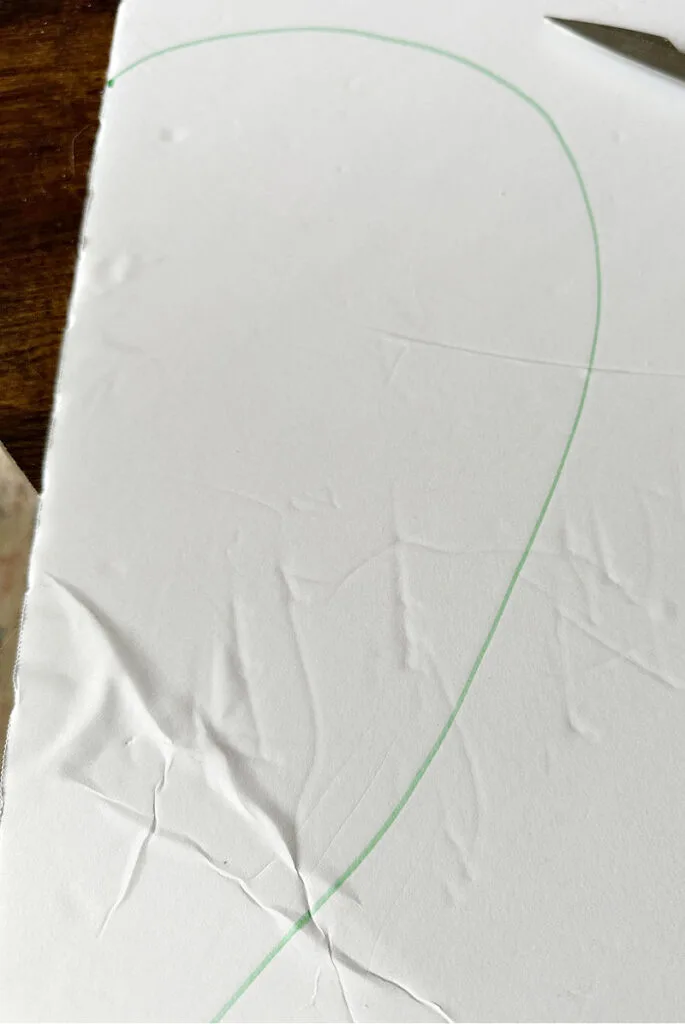

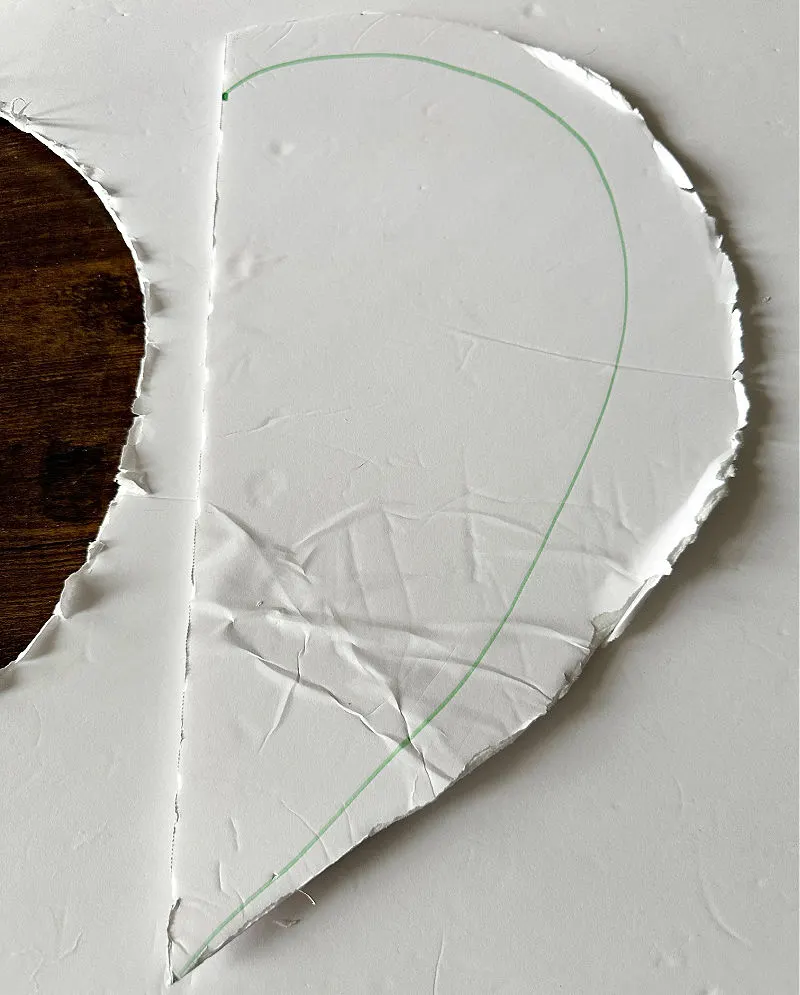
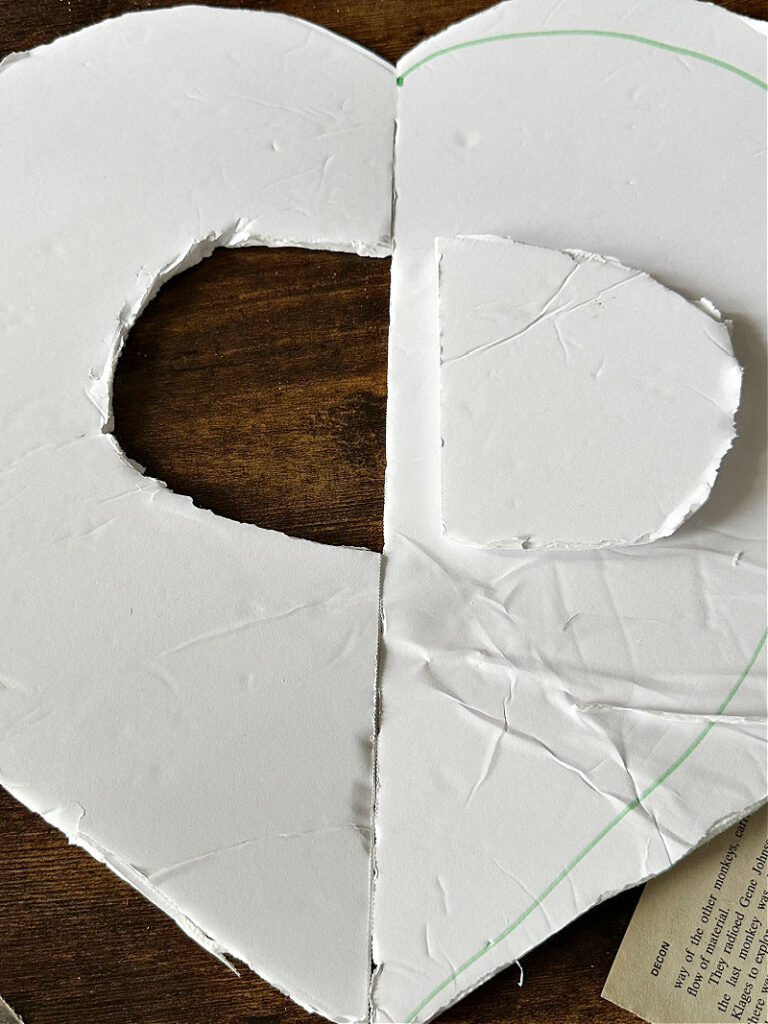
I drew a large half heart at the end of the board and cut that out. Then I traced that piece onto the board and cut that out as well, so I would have two even pieces.
You can use a full heart for your book page wreath, or cut out the center as I show below. This is totally up to what design you prefer.
If you prefer to buy a heart shape foam wreath at the craft store, you can. But, I try to work with what I have to keep costs down and declutter.
Easily follow this same craft technique for any wreath shape. Also, repurpose those cardboard boxes instead of using foam board.
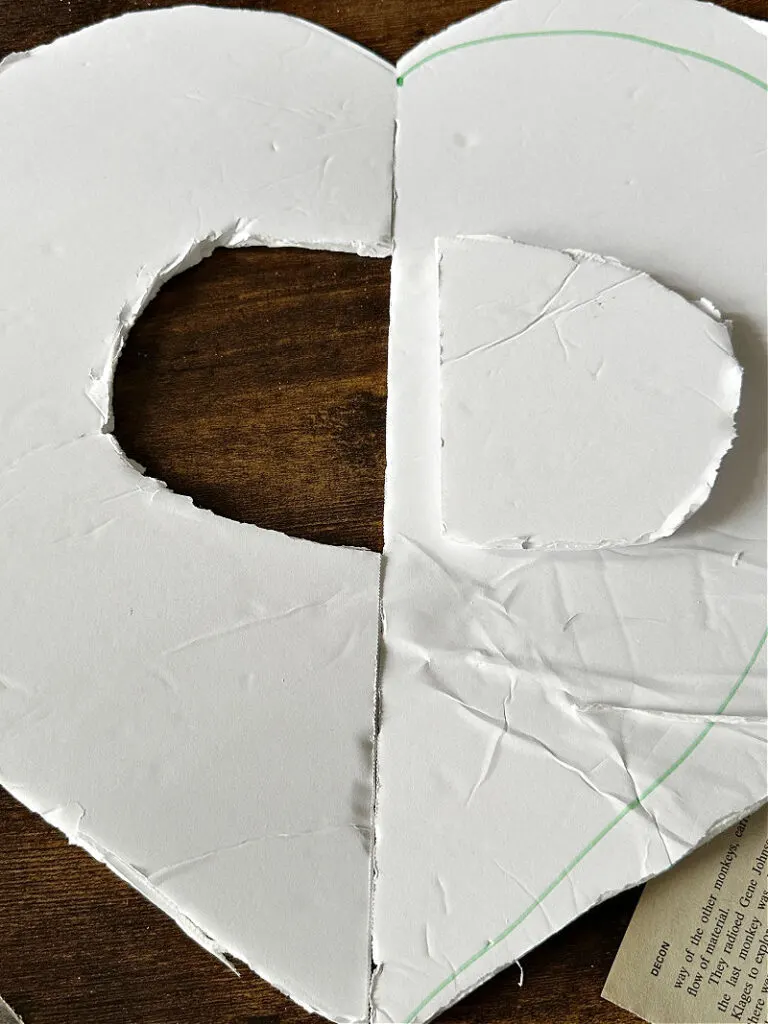
Step 3. Secure the foam board
The next step is to secure the two pieces together. Keep in mind, you will not be seeing the foam board at all, so it does not have to look pretty.
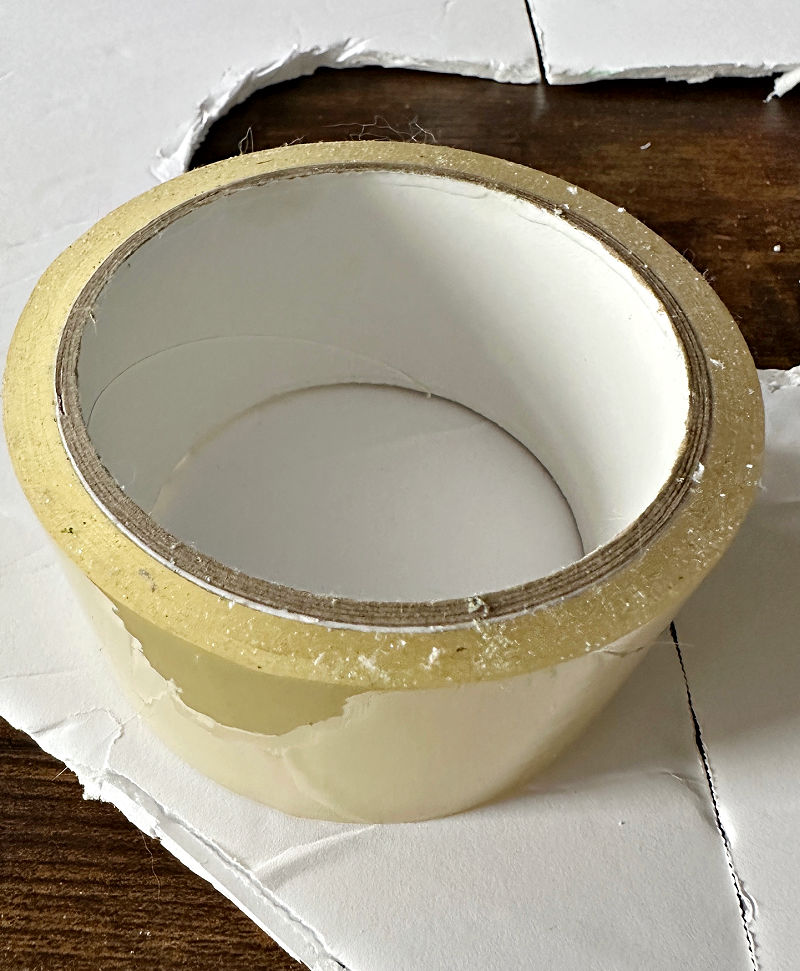


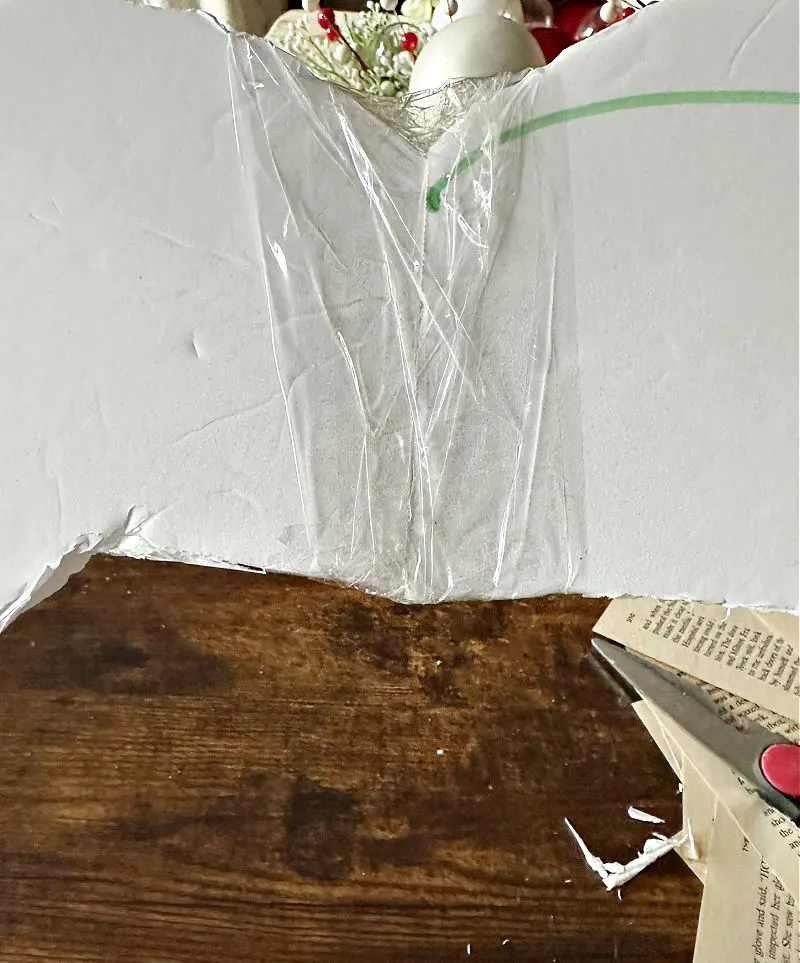
I chose to use packing tape rather than hot glue. This is a very heavy duty tape that worked great!

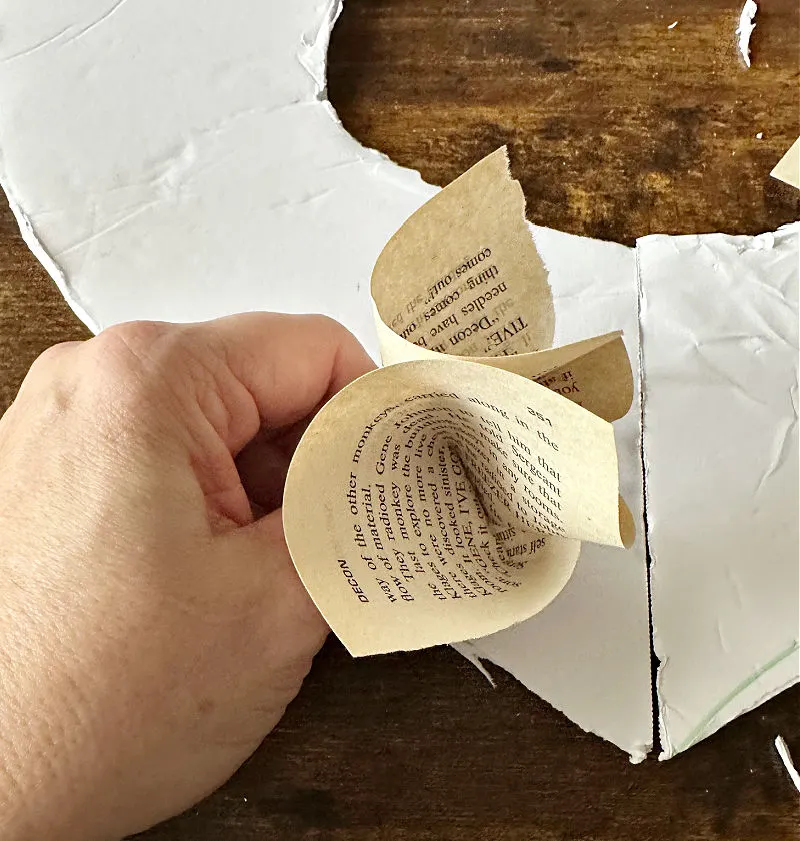
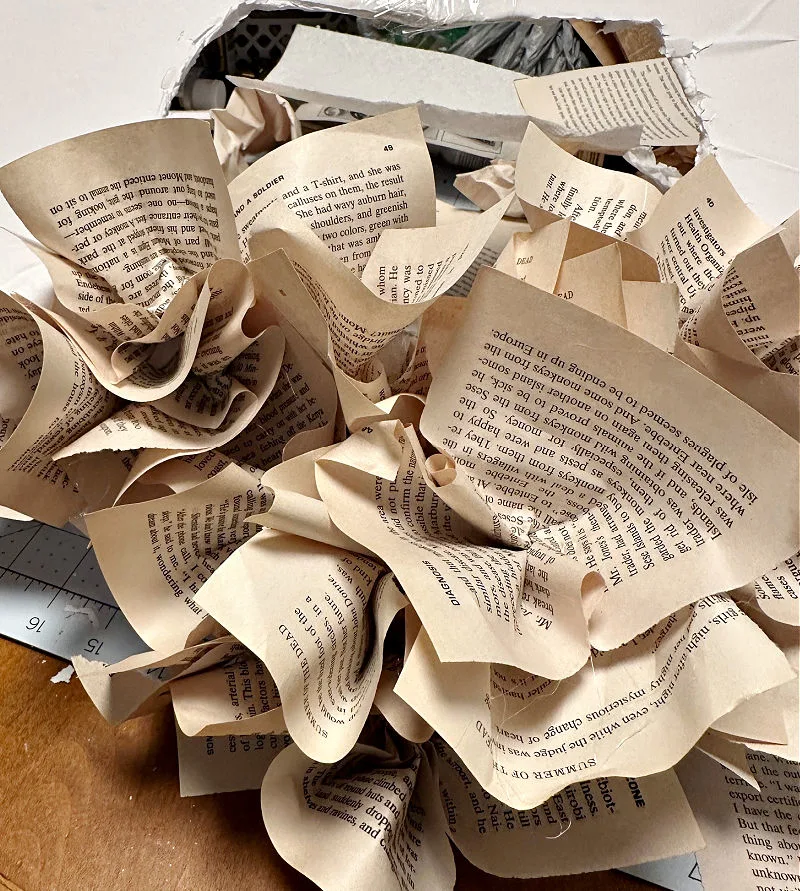
Step 4. Fold the book pages and glue, glue glue!
Let me warn you ahead of time that this craft project takes a lot of glue. But, it is not difficult. I put on my favorite design show and set myself up in the living room.
Start by pressing the outer edges of each page vertically into the center and do the same horizontally. Dab hot glue onto the bottom of the folded page and press it down onto the foam board.
Be sure to hold it for 30 seconds until it is secure. Repeat this process until the entire board is covered.
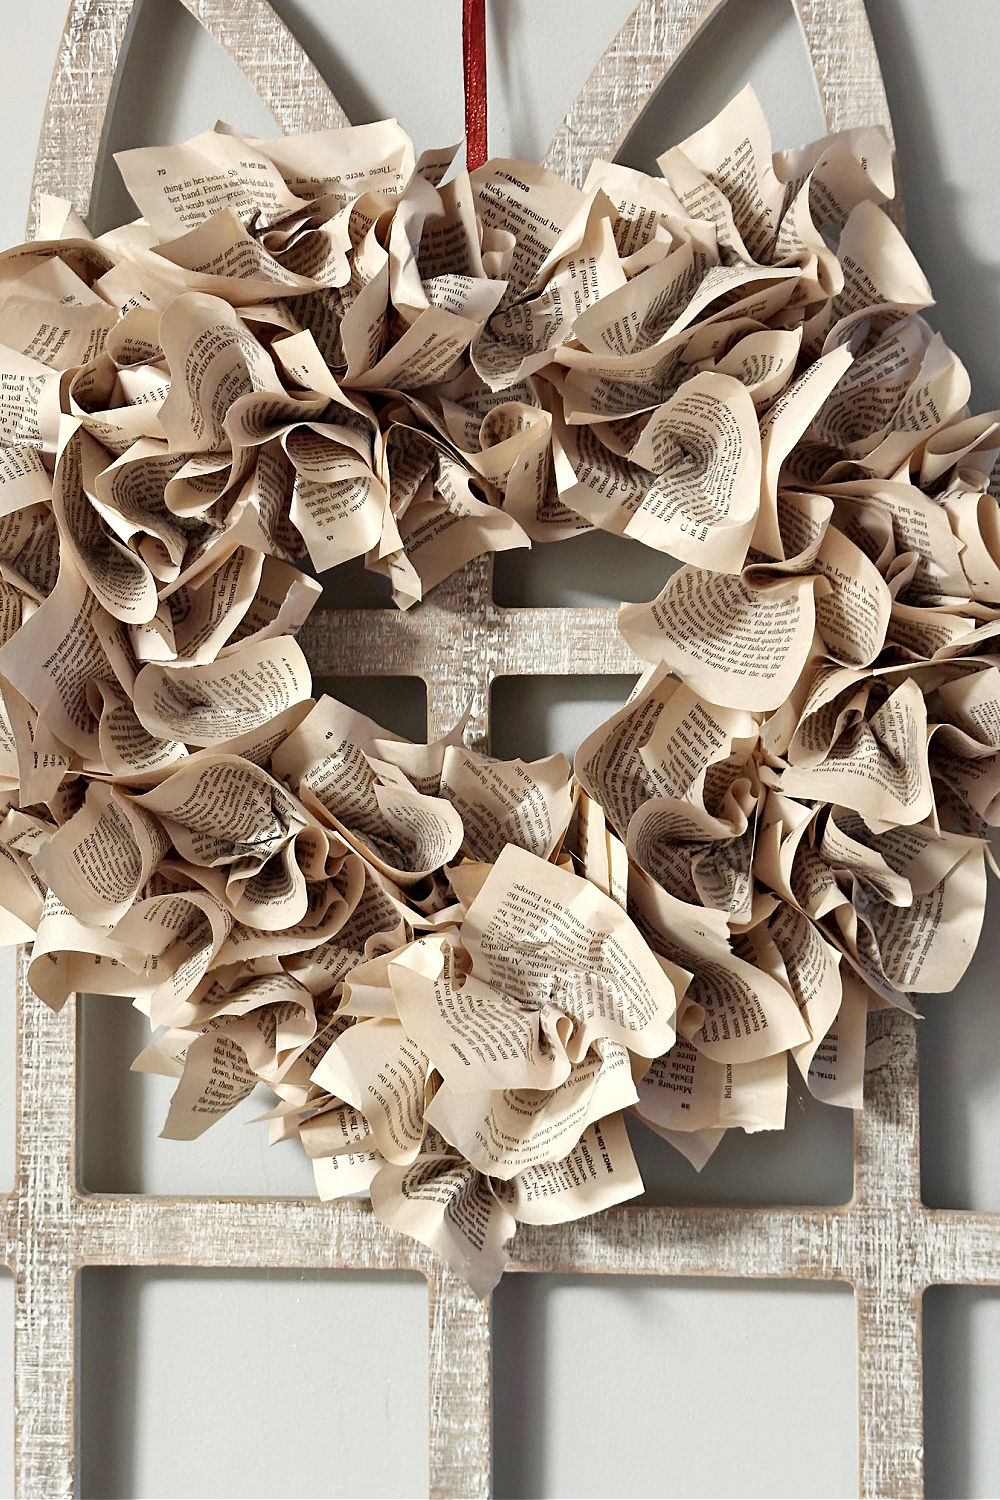
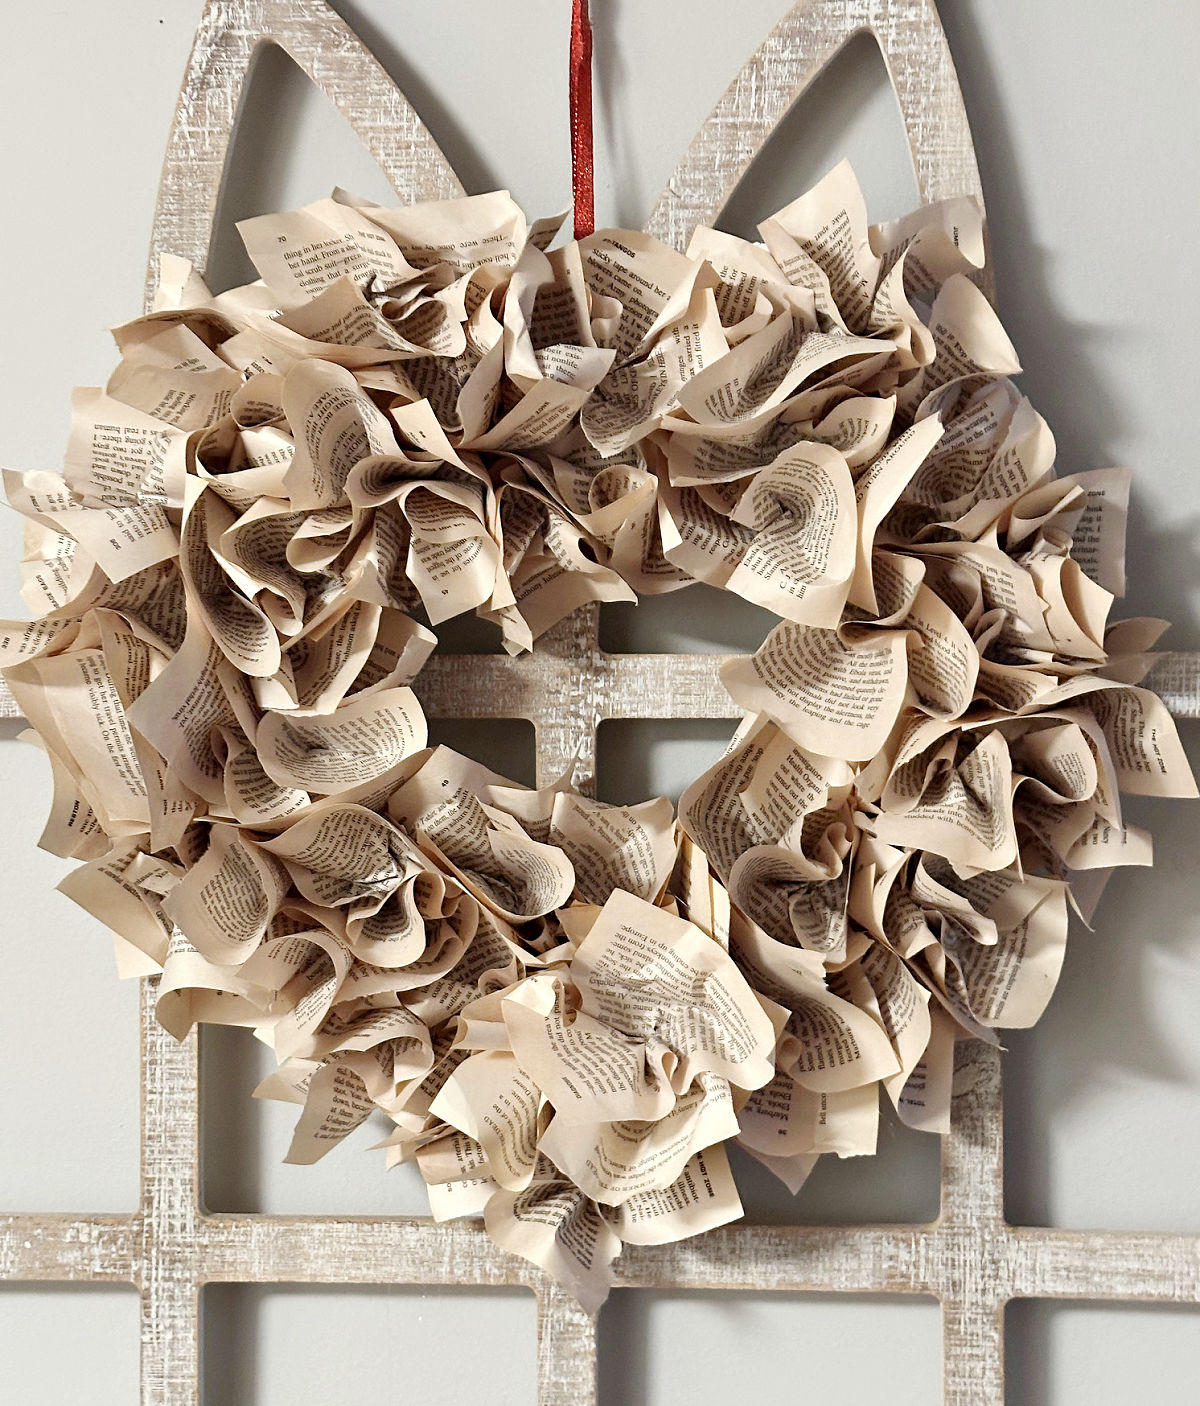
As noted above, this is not meant to be perfect. That is one of the reasons why this is a simple wreath to create. It looks a bit vintage to have older, faded book pages and different sizes if you like.

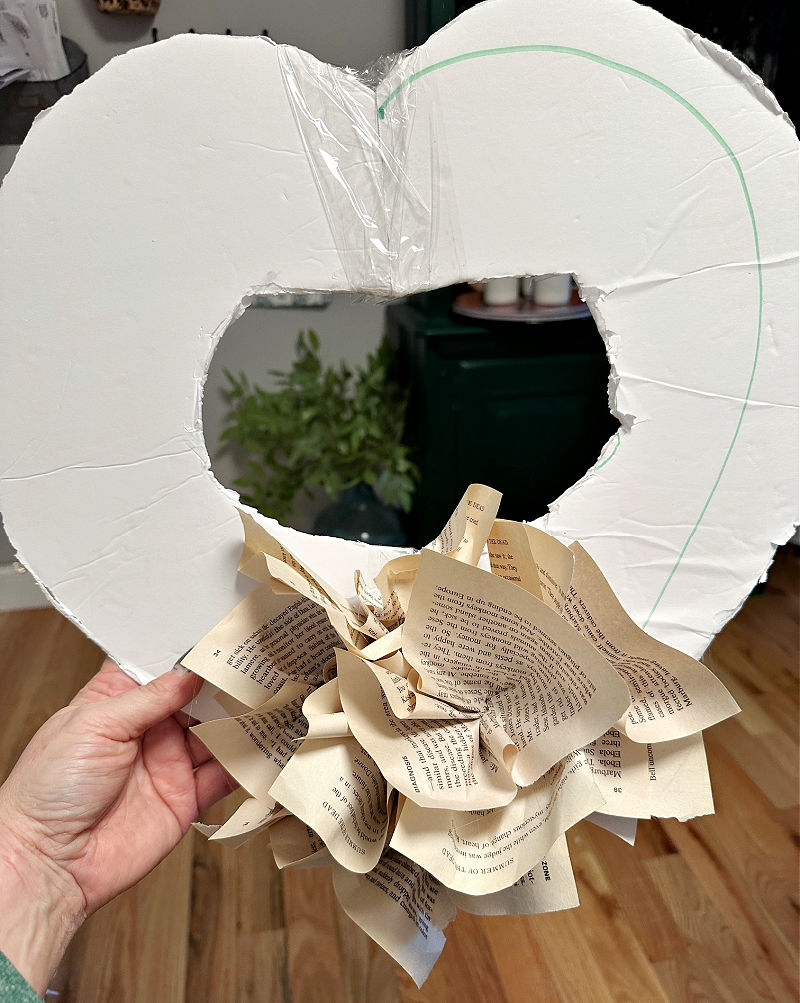


My top tip with any type of craft is to have fun with it. There is no right or wrong way to create.
Look at how lovely it looks already. It comes together so easily!
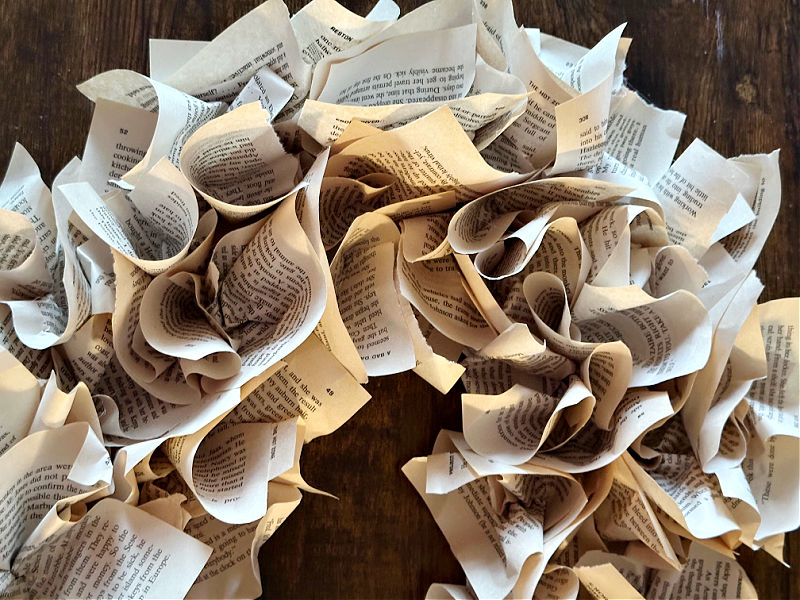

Another top tip with any wreath design is to take a step back and look at the wreath to see if there are any visible spots that you may have missed.
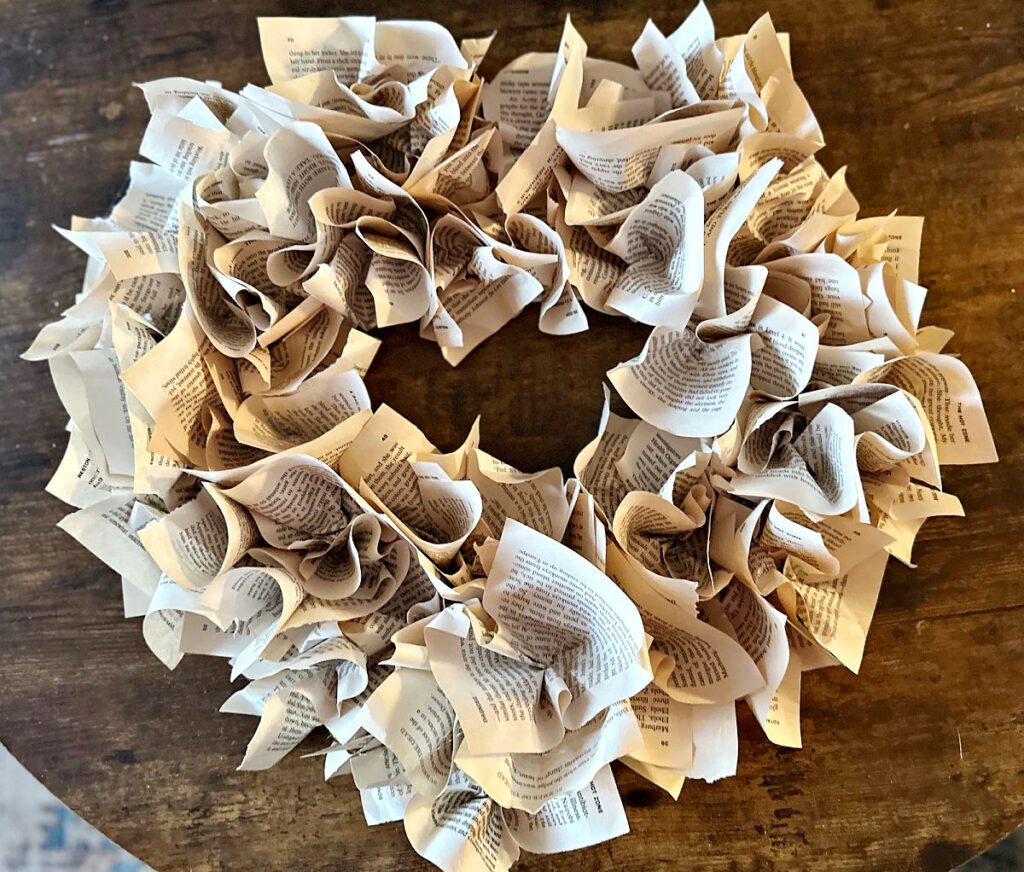

Fill in any spots as needed.
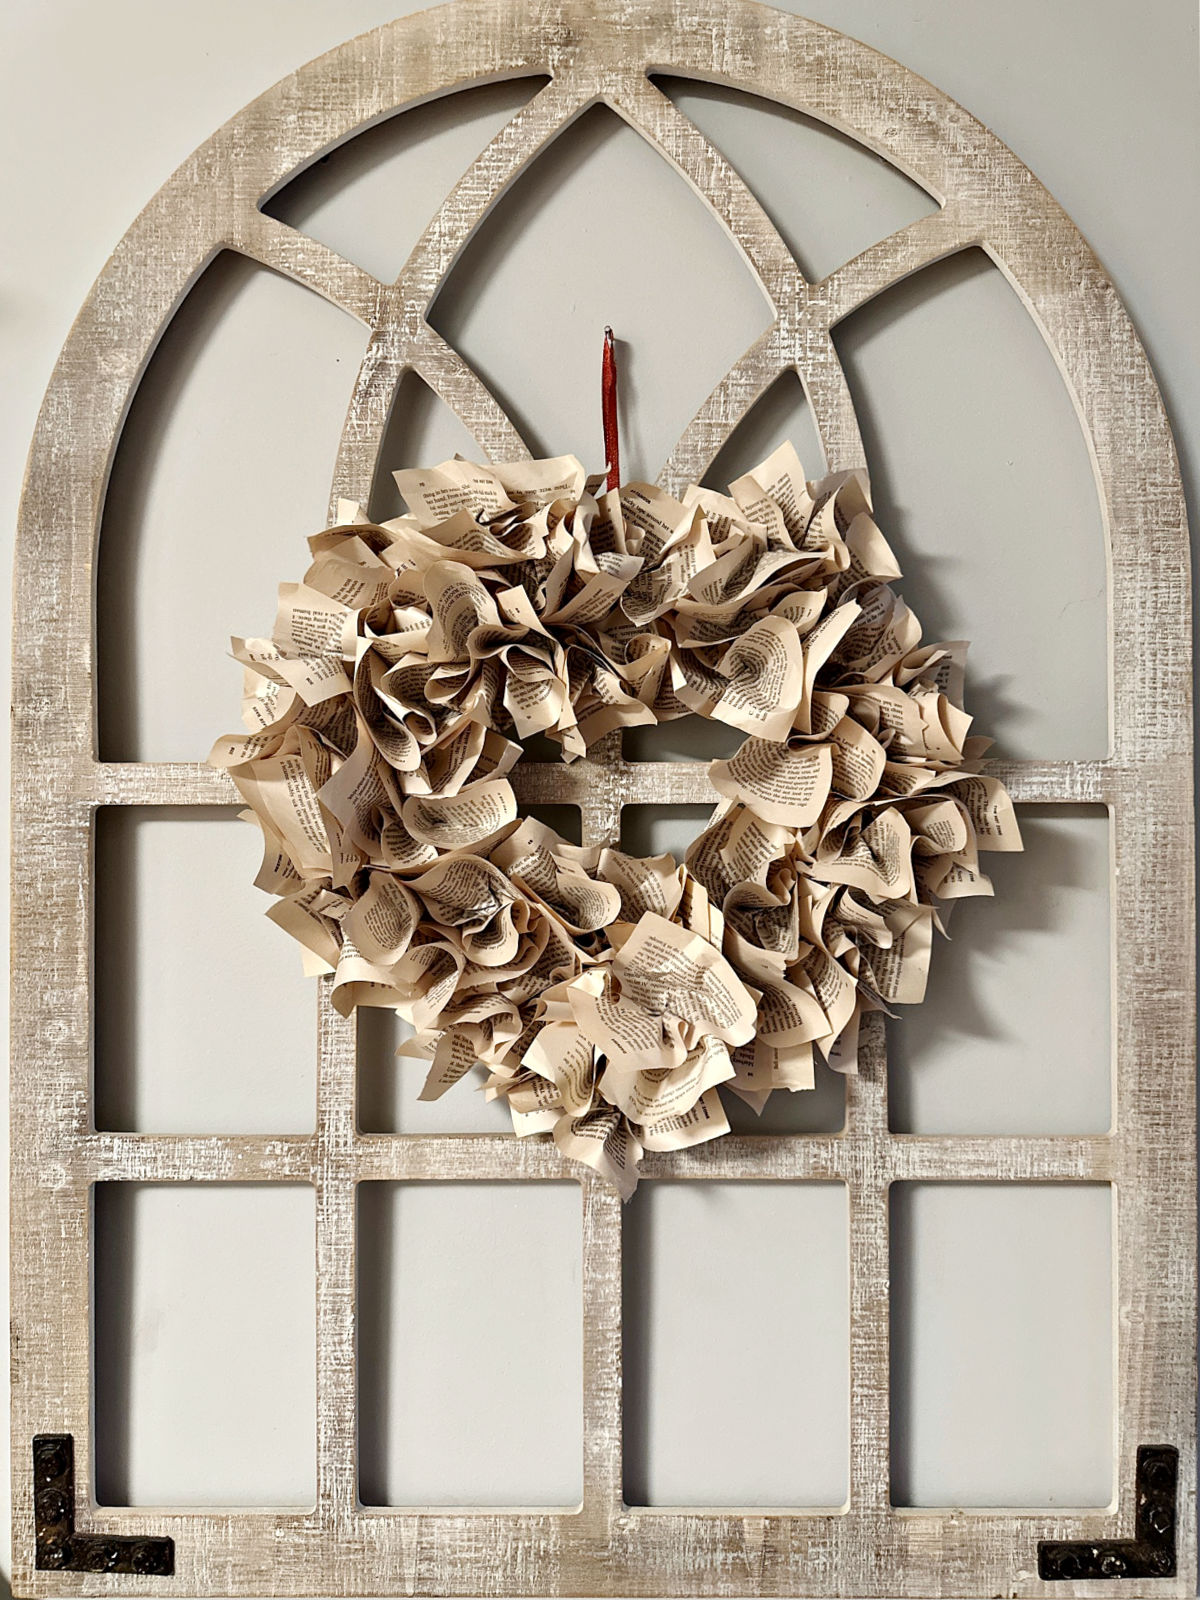
Step 5. Add ribbon for hanging
The final step is to add a ribbon for hanging. I chose to keep it simple with a narrow satin ribbon in a burgundy color for Valentine’s Day.
However, you can go with a larger ribbon if you like.
There are several other finishing touches you can add if you want such as, gold glittered edges, or distressed book pages with an ink pad.
Another option is to tear the edges of the pages for an aged look.

Display your wreath
Find the perfect spot to display your beautiful handmade book page wreath! This is the type of wreath that looks great anywhere.
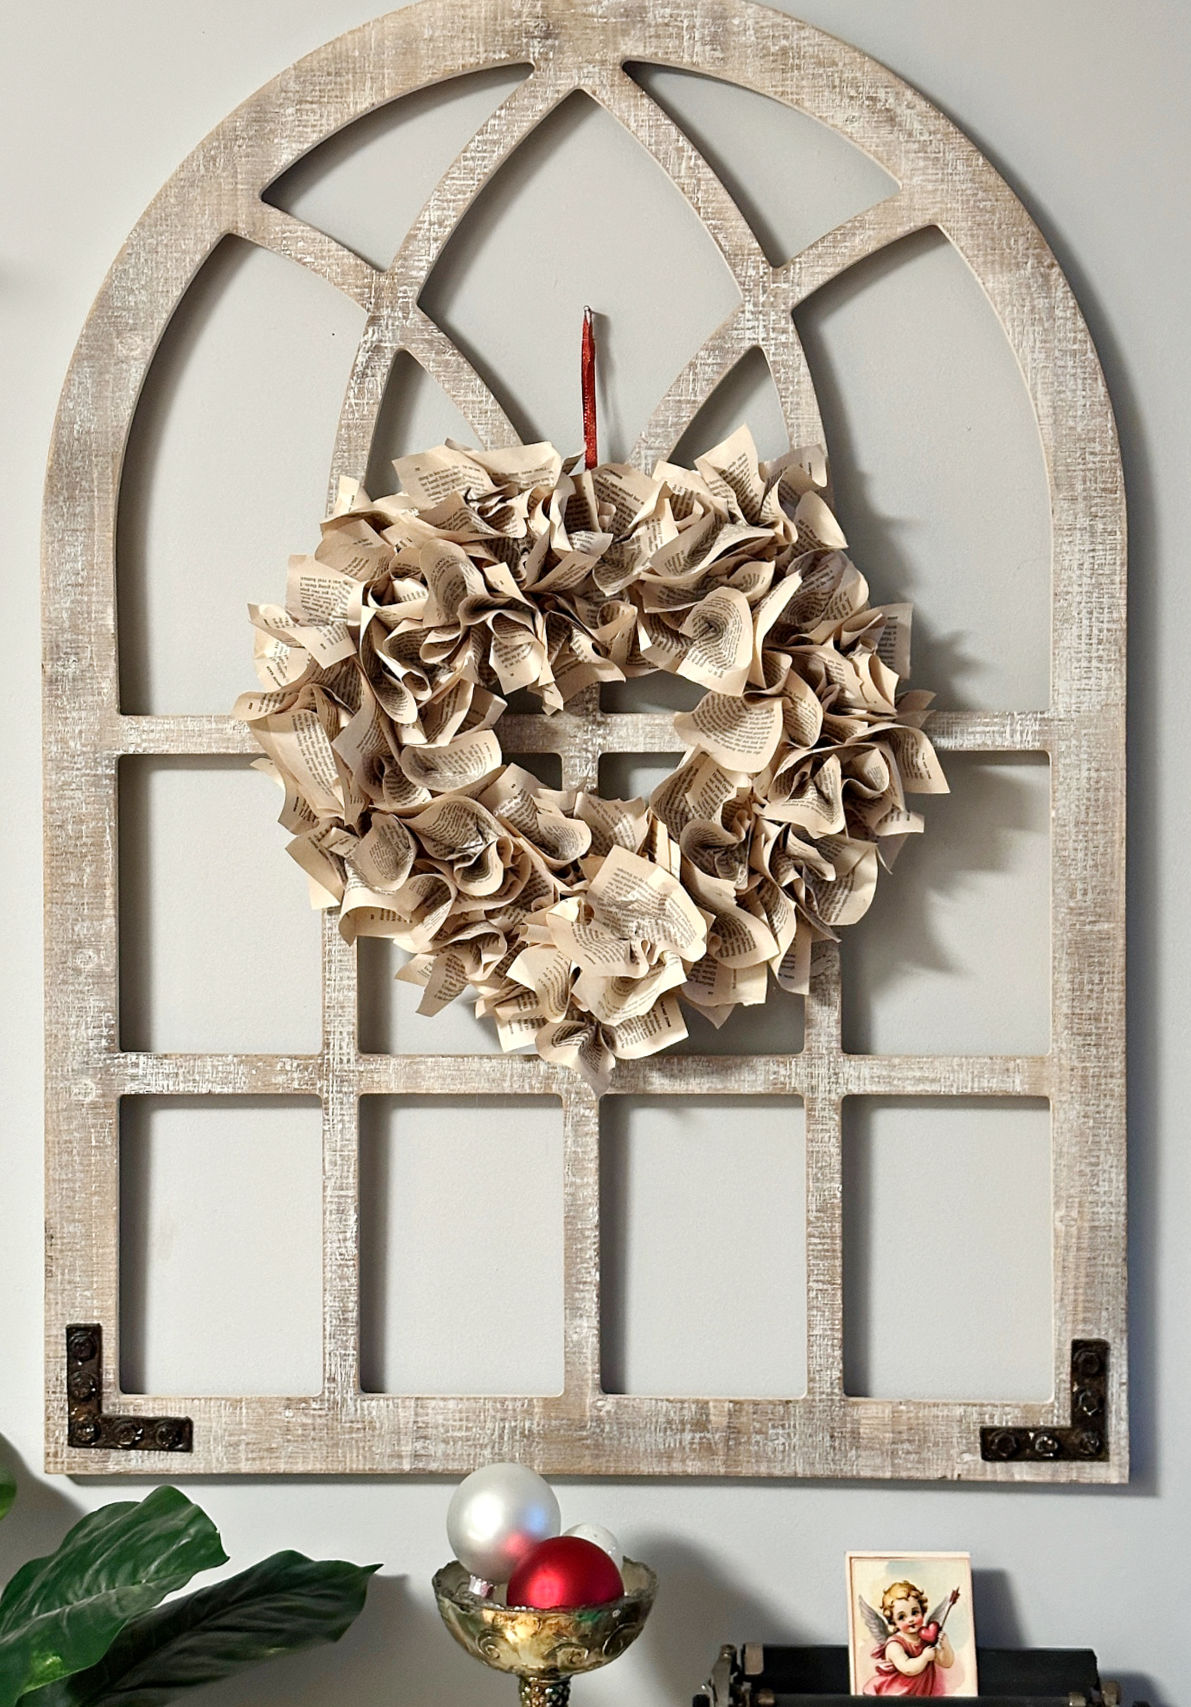
I chose to hang it on my favorite wood arch that I have had for several years.

Hanging the wreath on a frame adds depth and dimension and makes the wreath a feature in any room. It would look great on a black chalkboard, or hanging on a mirror.

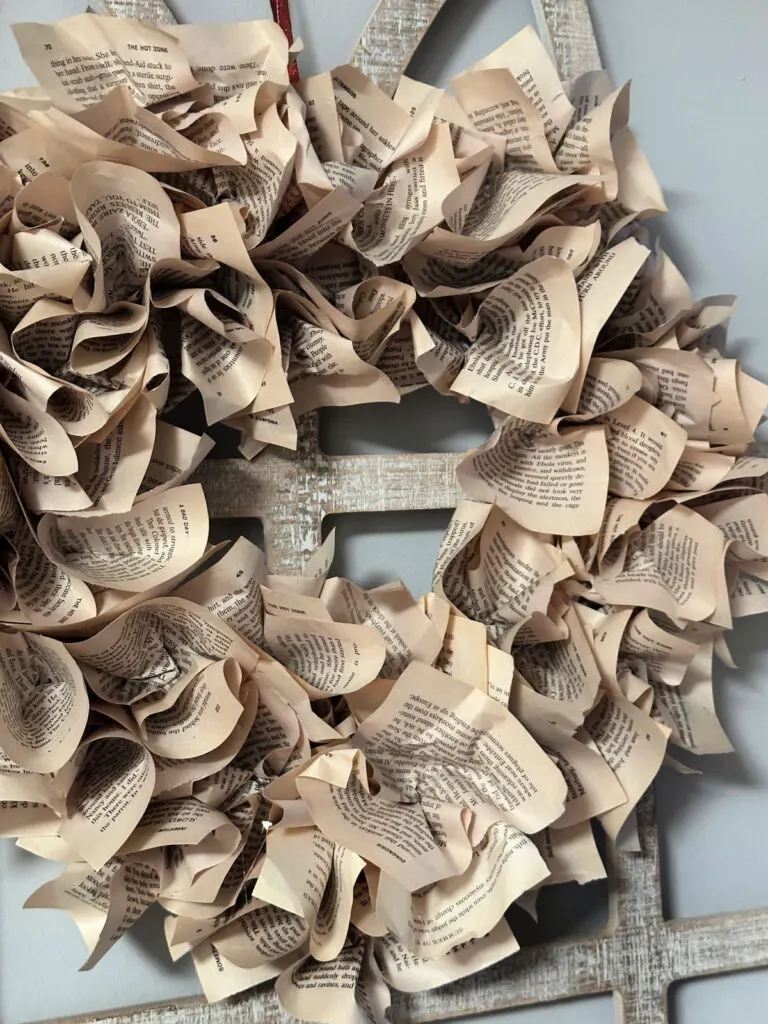
Here is a side view so you can see all of that yummy crinkled goodness. It definitely has a vintage vibe, doesn’t it?
What do you think of this book page wreath? Is this something you could see yourself making? I had everything on hand, so this beauty was free to make.
However, even if you purchased foam board and an old book at the dollar store, you are still looking at just a few dollars. You can’t beat that!
I’d love it if you would share this article with your friends on Pinterest by pinning the below image.
It helps my blog to grow and doesn’t cost a thing! 🙂

Let me know if you are inspired to make your own book page wreath by sharing it with me on Facebook or Instagram. Just tag @ourcraftymom. It totally makes my day!

Thanks so much for stopping by. Happy crafting!


Follow me on social media below: