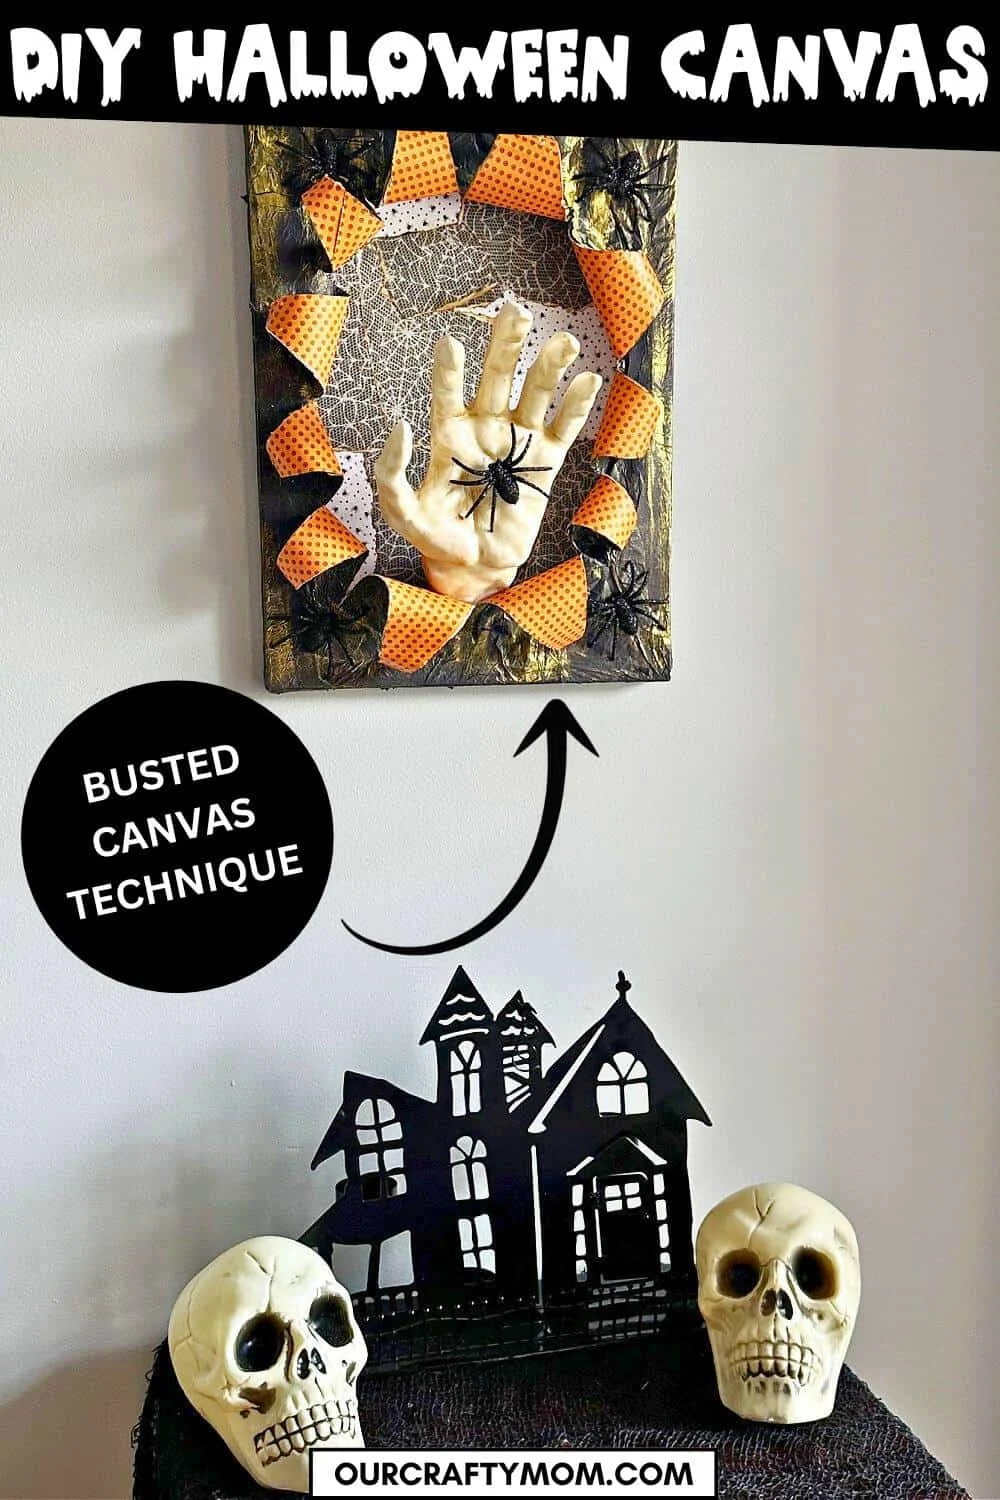
Make your own viral busted canvas Halloween art with these 5 simple steps. Follow this same technique to make art for any holiday or season.

This post contains affiliate links at no extra cost to you. Please see my full disclosure here.
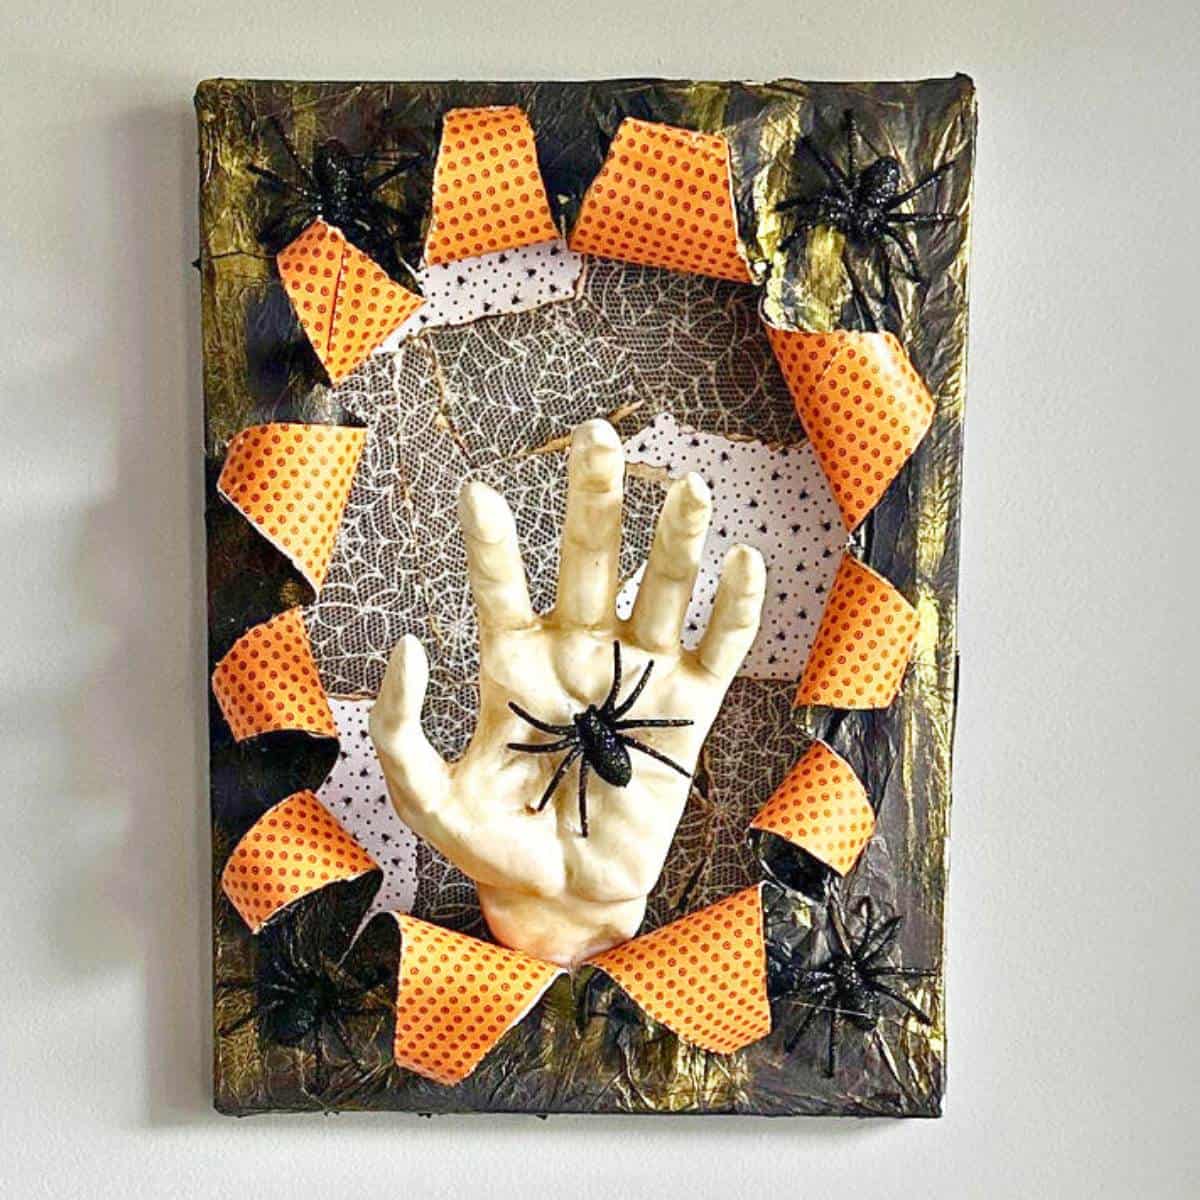
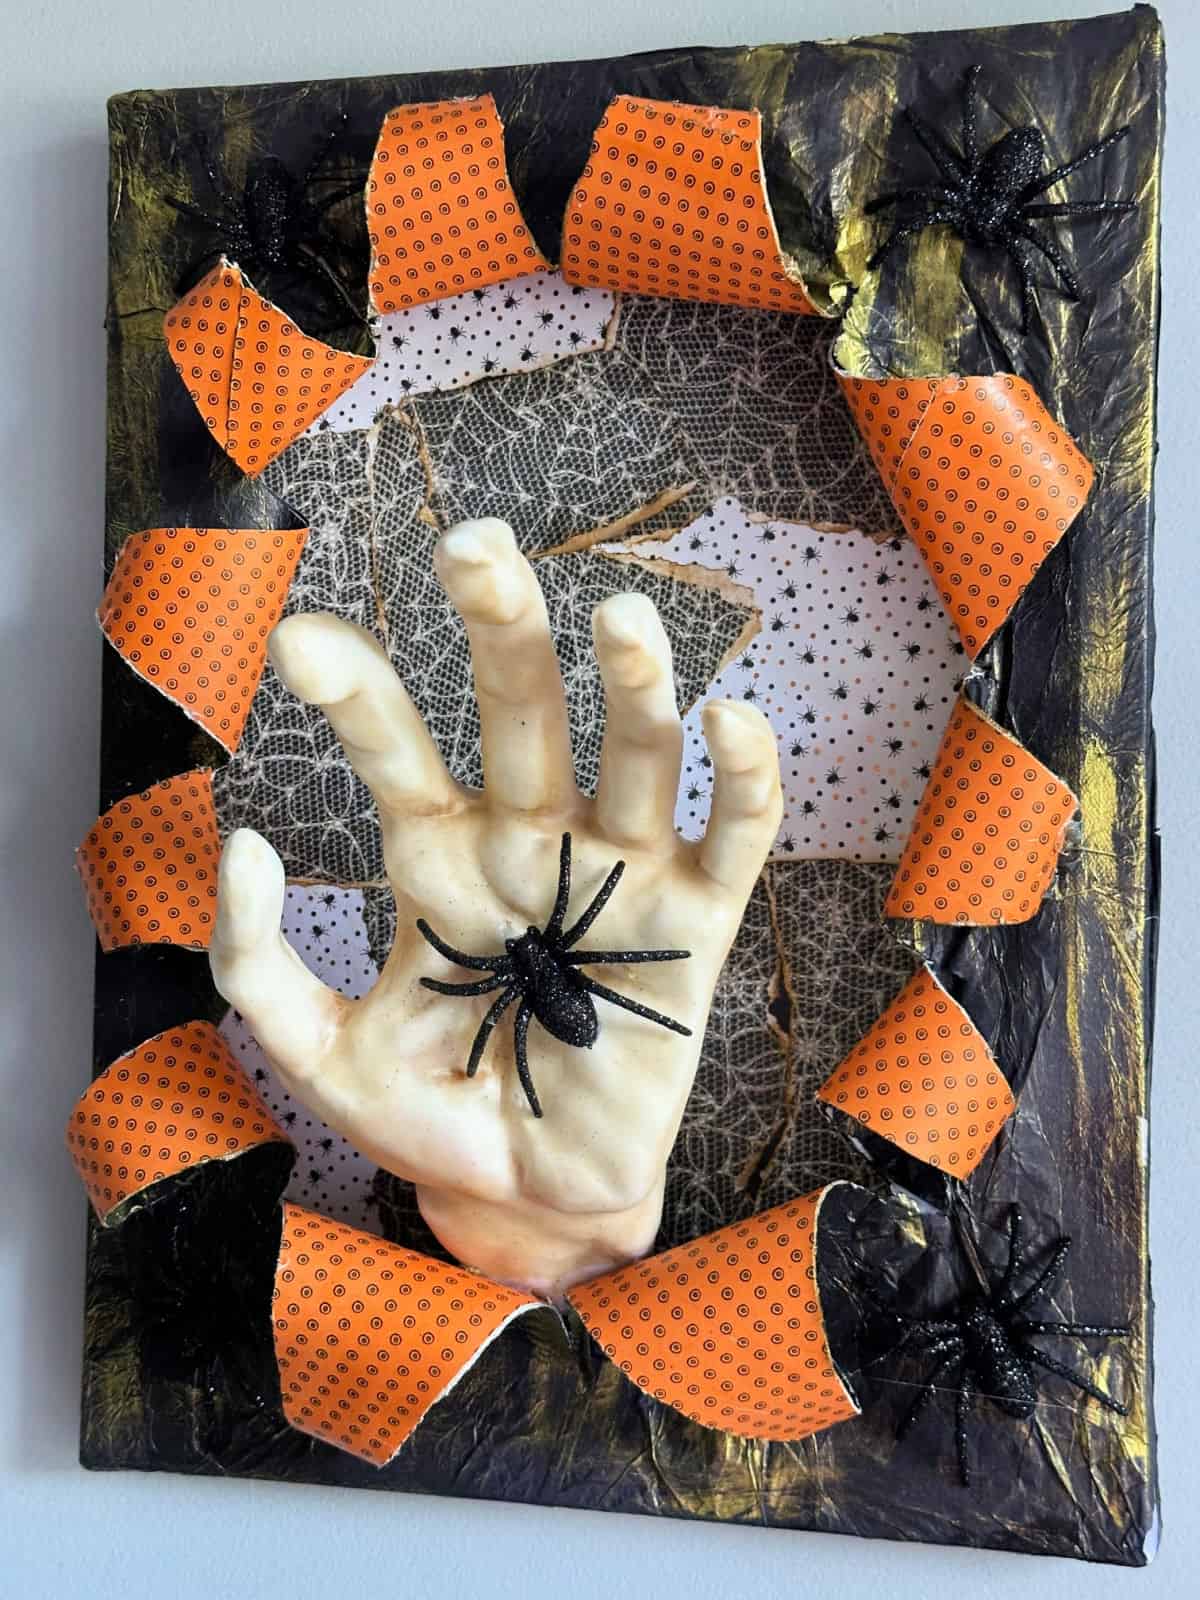
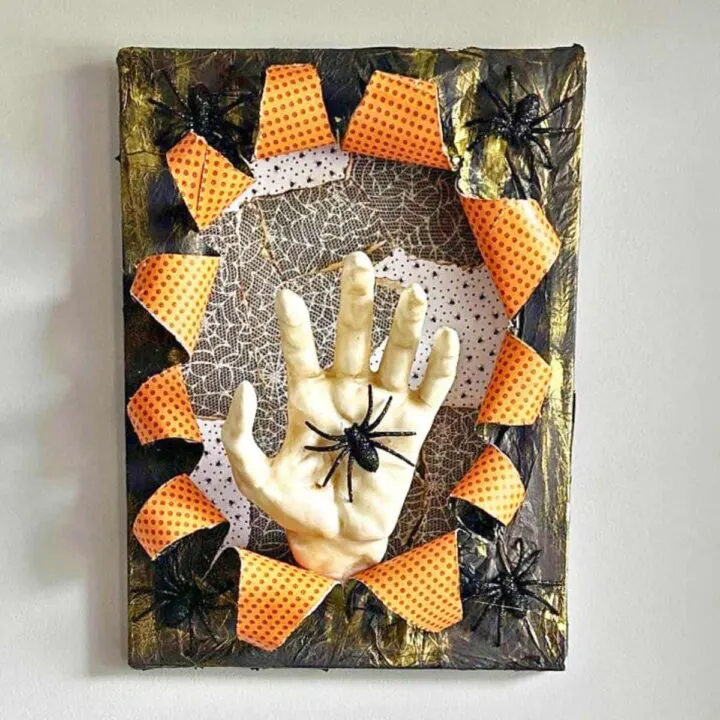
Busted Canvas Halloween Art
If you saw my thrifted ghost art you may remember me mentioning how much my daughter loves finding new viral craft trends on TikTok for me to duplicate, especially for Halloween.
Well, I’m afraid to admit I’ve been bitten by the TikTok bug! For some time I didn’t really get it. I thought it was just funny dancing videos.
There are definitely those, but what I love are all of the creative craft, DIY and home decorating projects.
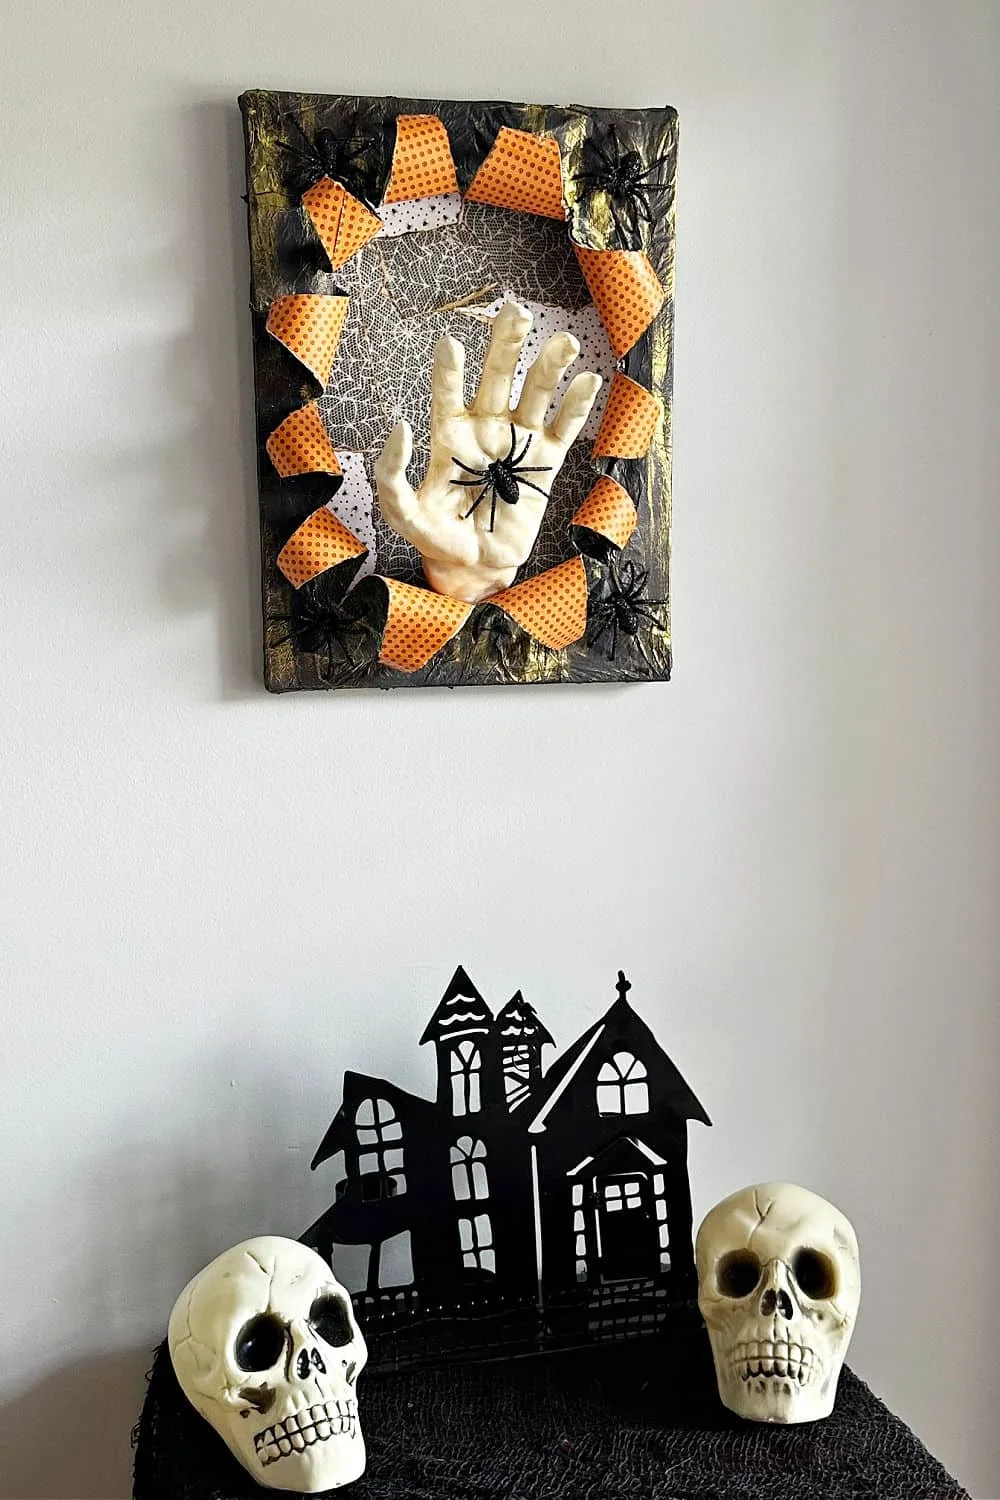
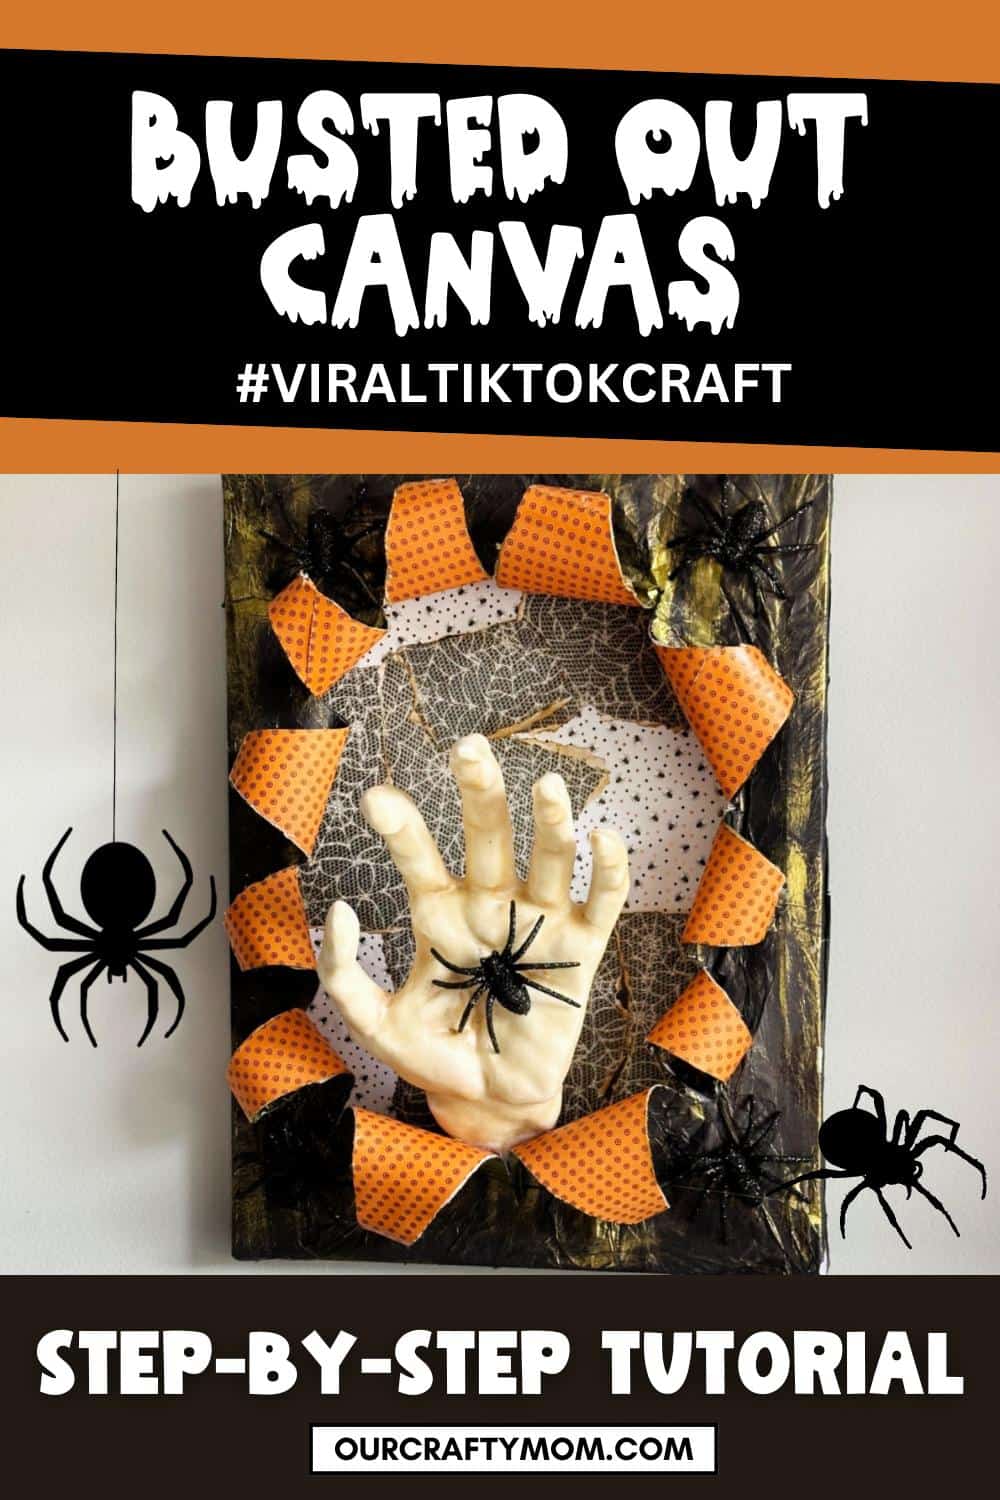
I spotted the new viral trend called a #bustedcanvas. It is so fun! It takes a bit of time because there are several steps, but it is not difficult at all.
The first one I am sharing is for Halloween. The moment I saw this technique, I immediately thought of this Halloween art.
The idea of a spooky hand busting out of the canvas seemed absolutely perfect for this process.
So, let’s get to it!

Supplies For DIY Halloween Art
There is a printable craft card at the bottom of this post with detailed instructions to make your own busted canvas Halloween art, but I am sharing some easy tips for you first.
You can get just about everything at Dollar Tree, with the exception of decorative paper.
- 8×10 Canvas – Dollar Tree – I found a set of 3 canvas pieces at the thrift store for $3, so I used those, but they do have them at the dollar store.
- 8×10 Canvas Boards – Dollar Tree
- Tissue Paper – I used black
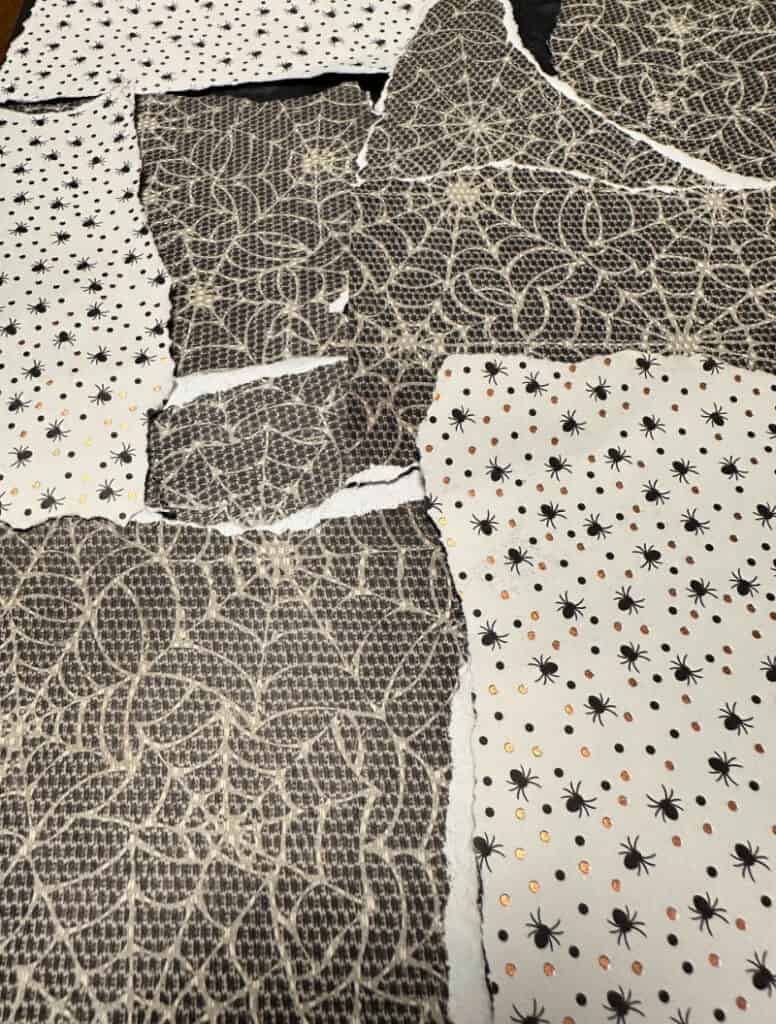
- Cardstock or Decorative Paper – for more dimension and texture use at least 2 designs
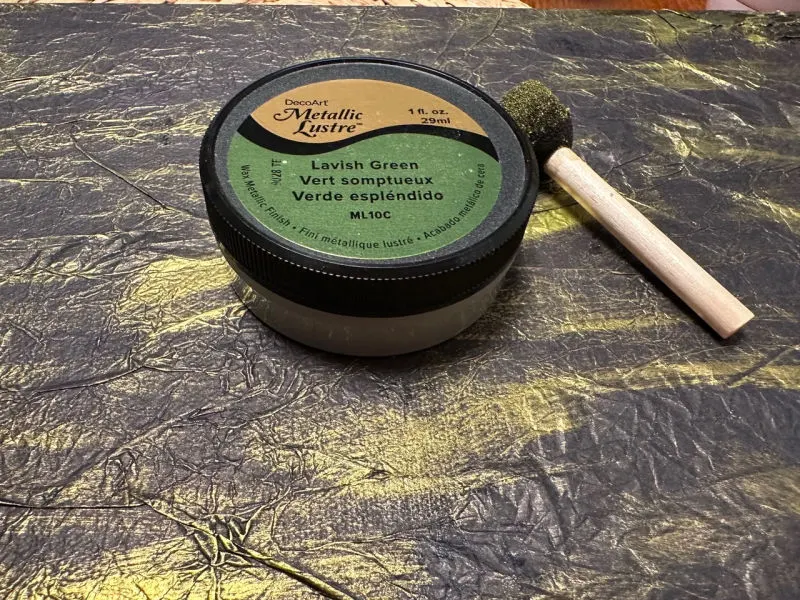
- Mod Podge – I went with matte
- Glitter Spiders
- Spooky Halloween Hand or Large Halloween Hand
- Craft Knife – I love the Cricut knife kit
- Foam Brush


How to Create Busted Canvas Art in 5 Simple Steps
There are several steps so let’s break them down into the 5 main steps to make it easy for you to recreate.
- Decorate the main canvas
- Decorate the back of the main canvas
- Decorate the flat canvas board
- “Bust the canvas”
- Add your detail piece to the center of the main canvas
Step 1. Decorate the main canvas
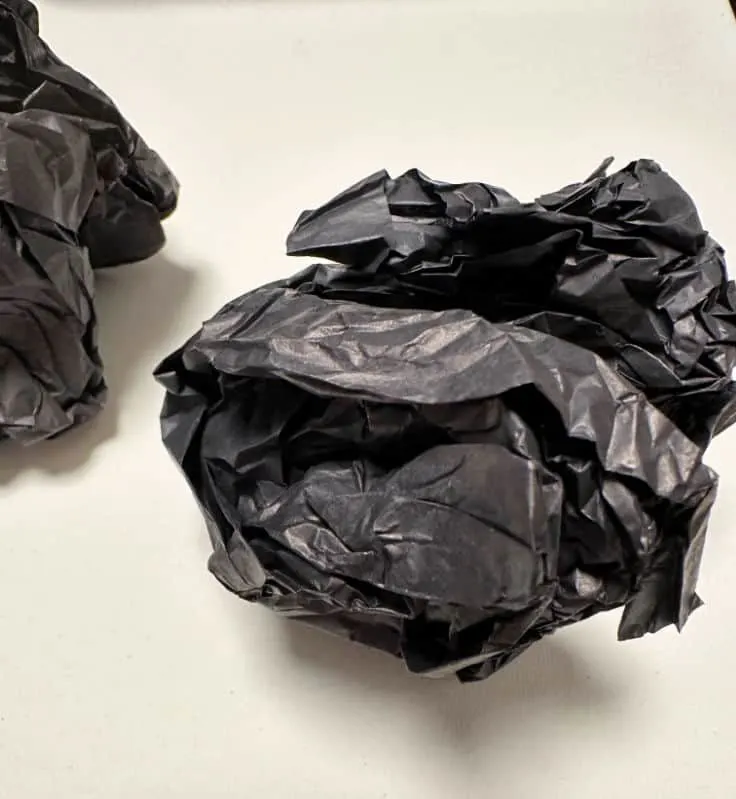
Decide how you want to decorate the main canvas. This will be the top of your busted canvas. I started with black tissue paper.


Add a layer of mod podge directly to the canvas and pat it down. Normally with mod podge crafts we remove the wrinkles.
For the busted canvas technique you want the wrinkles.
Roll the tissue paper into a ball and get it nice and wrinkled. Add it to your canvas.

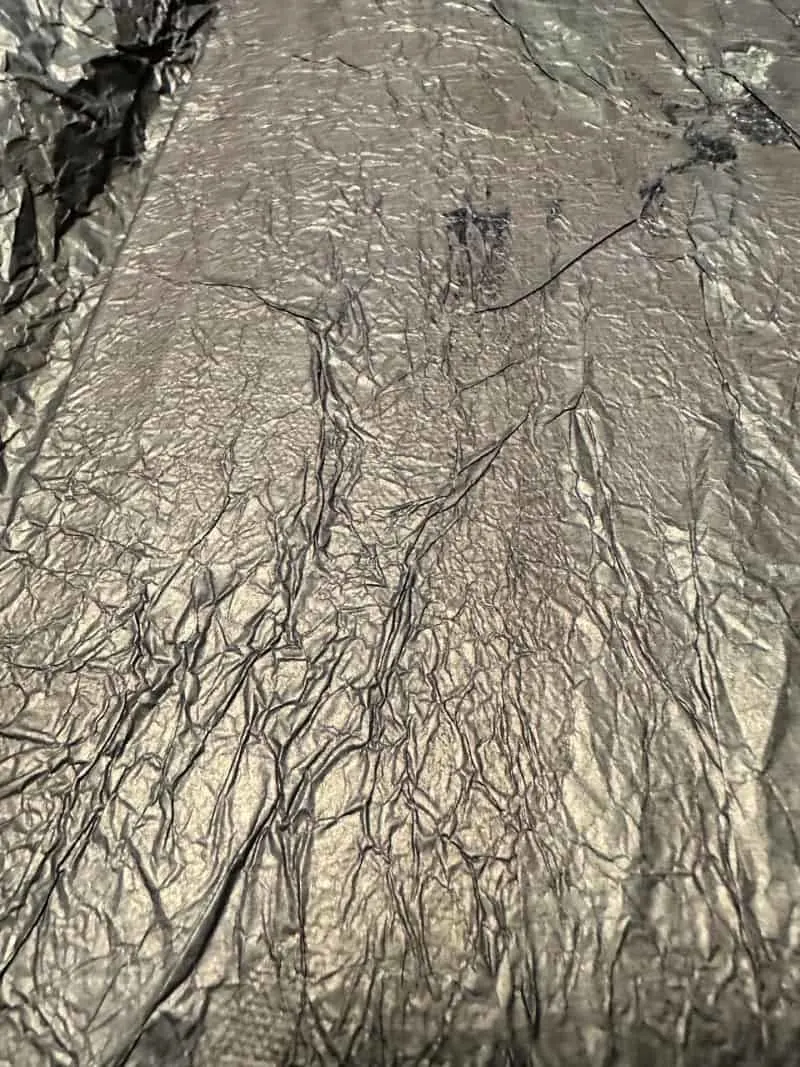
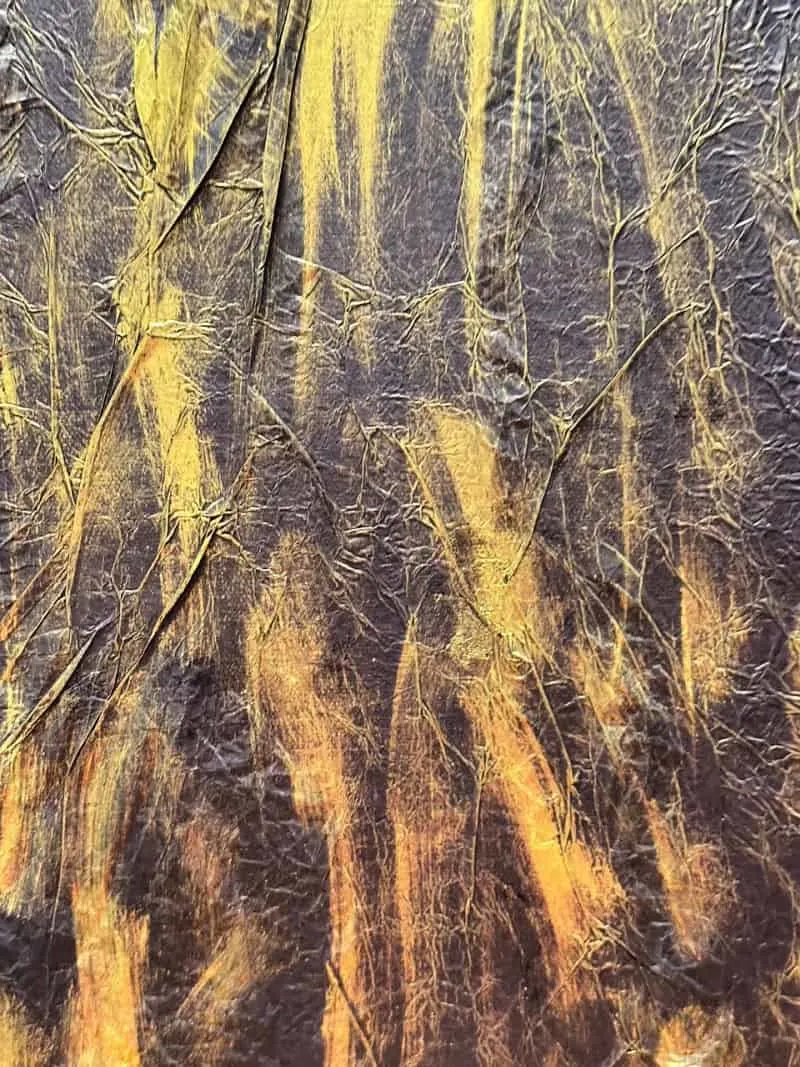
This gives it a nice, textured and aged finish, especially with the next step. Use a foam brush or sponge and accent the wrinkles with gold wax.

This adds so much dimension to the canvas. I just love it!

Decorate the back of the main canvas
When decorating the back of the main canvas, keep in mind this will be the accent color that will show on the “busted” part of the canvas.
So you want to make sure it coordinates well with the front of the canvas as well as the bottom board.
I went with orange and black Halloween paper and attached it to the inside of the canvas with mod podge. Trim any excess with a craft knife. Set aside.
Decorate the flat canvas board
Now it’s time to decorate the canvas board which will be the base for your broken canvas art.
This will be what shows through the opening so you want it to pop.

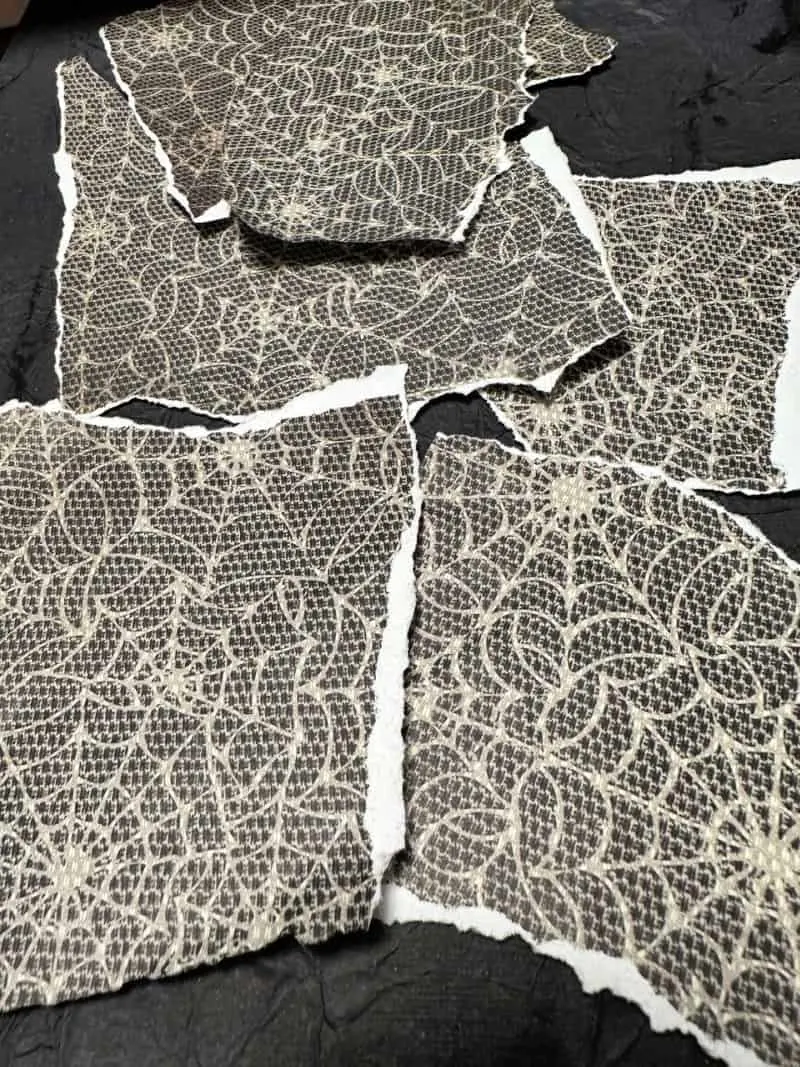
For the Halloween canvas I went with a spider web decorative paper that is double-sided with spiders on the back.
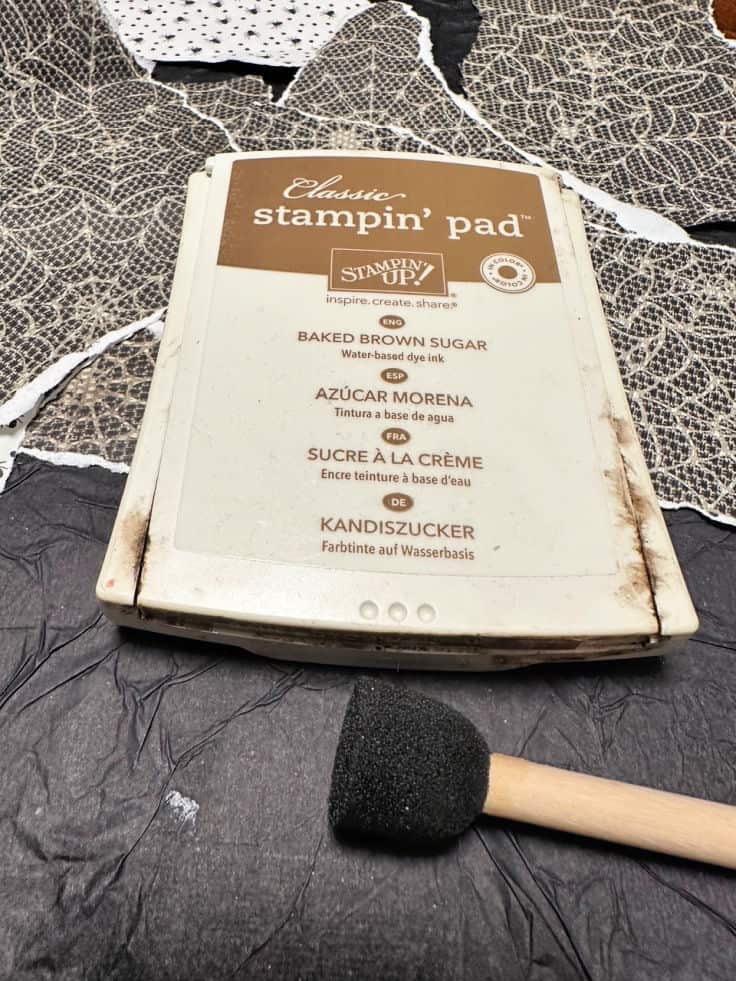
Simply tear the paper into different sizes and shapes. To age it a little I covered the edges with brown ink.

This is completely optional, but you can see how much detail it adds.
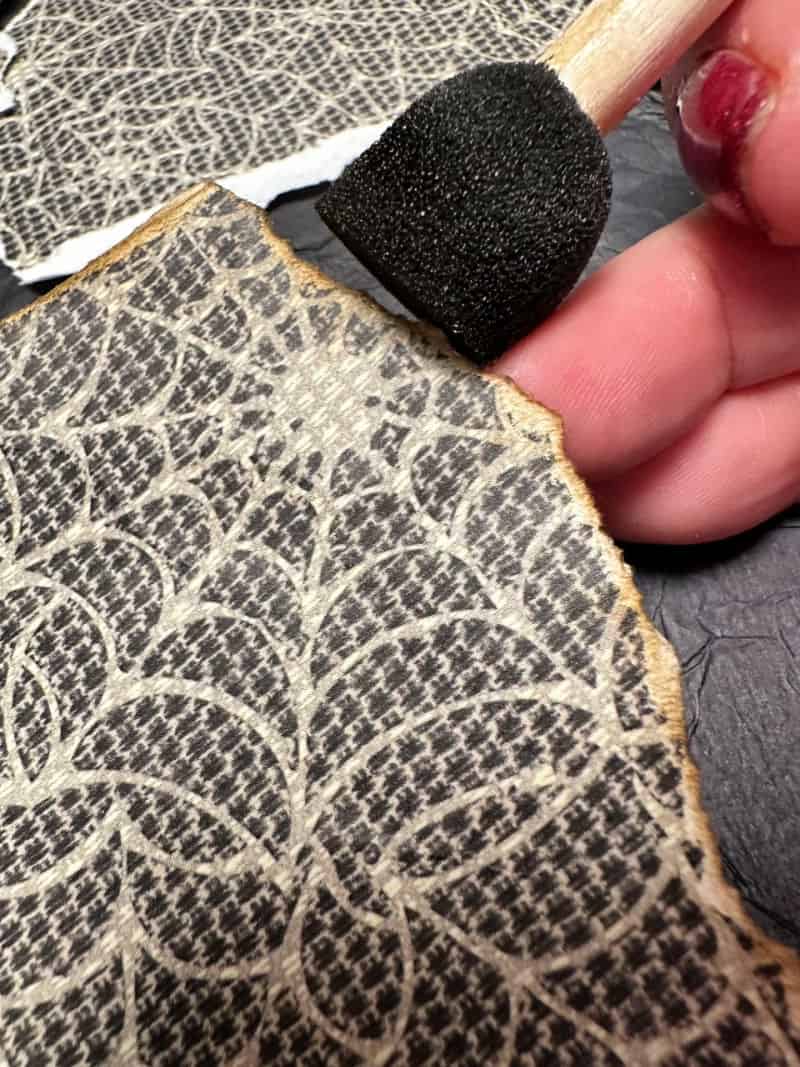

Lay the pieces onto the canvas board to get an idea of the placement. Once you are happy with the design, secure it with mod podge.
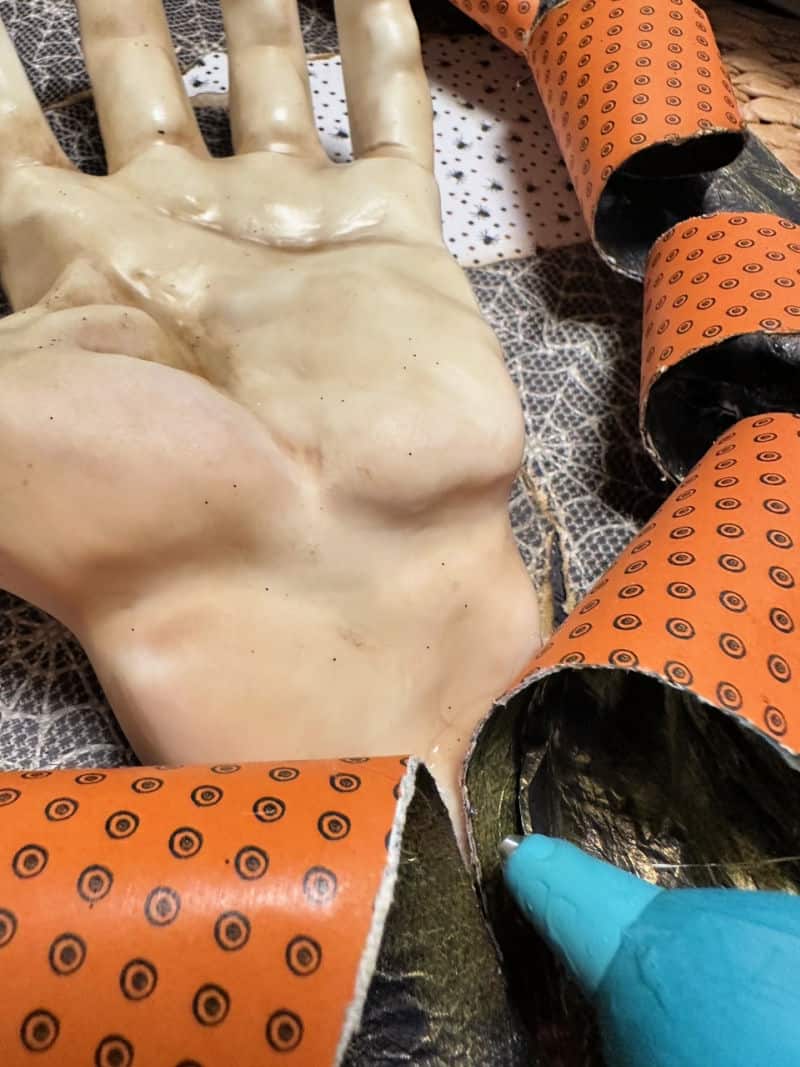
Bust the canvas
Now for the fun part-busting through the canvas! You want to make sure the opening is large enough to fit your focal piece.
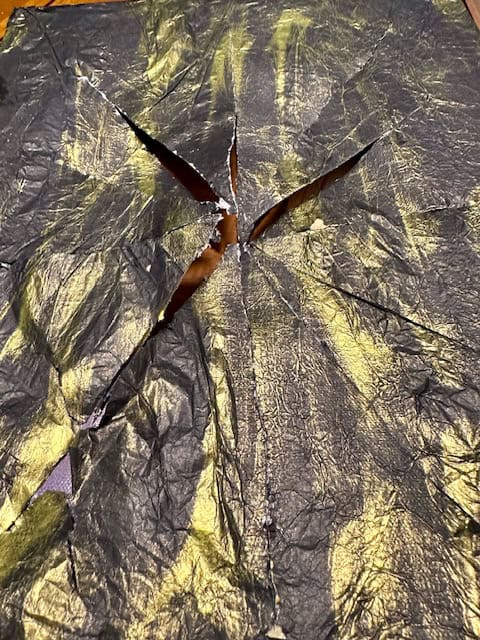

Use a craft knife to find the center of the canvas and start cutting. Leave an inch or two around the edges of the canvas.
You are basically cutting a star in the canvas. Cut from the center to the top, the center to the bottom and the center to each side.
Then cut in between the sides for the bust-out pieces.

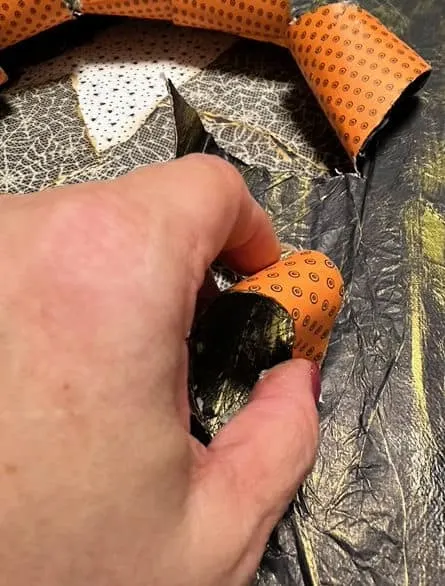
Next, hot glue the cut pieces to the canvas. Don’t use too much glue, just a dab will do.

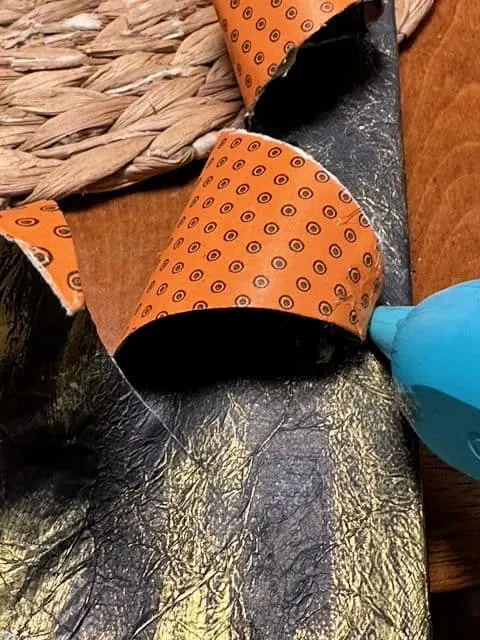
Glue the bottom board to the top canvas. Hot glue worked fine for me, but if it doesn’t seem secure enough, add a bit of E-6000.

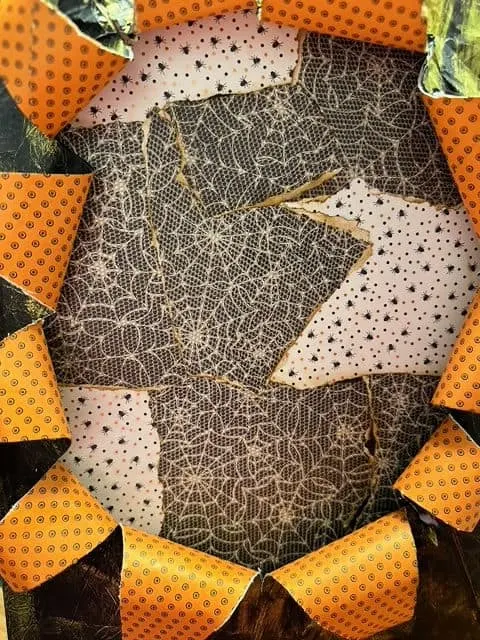
Isn’t it so cool? I love how all the different pieces come together.
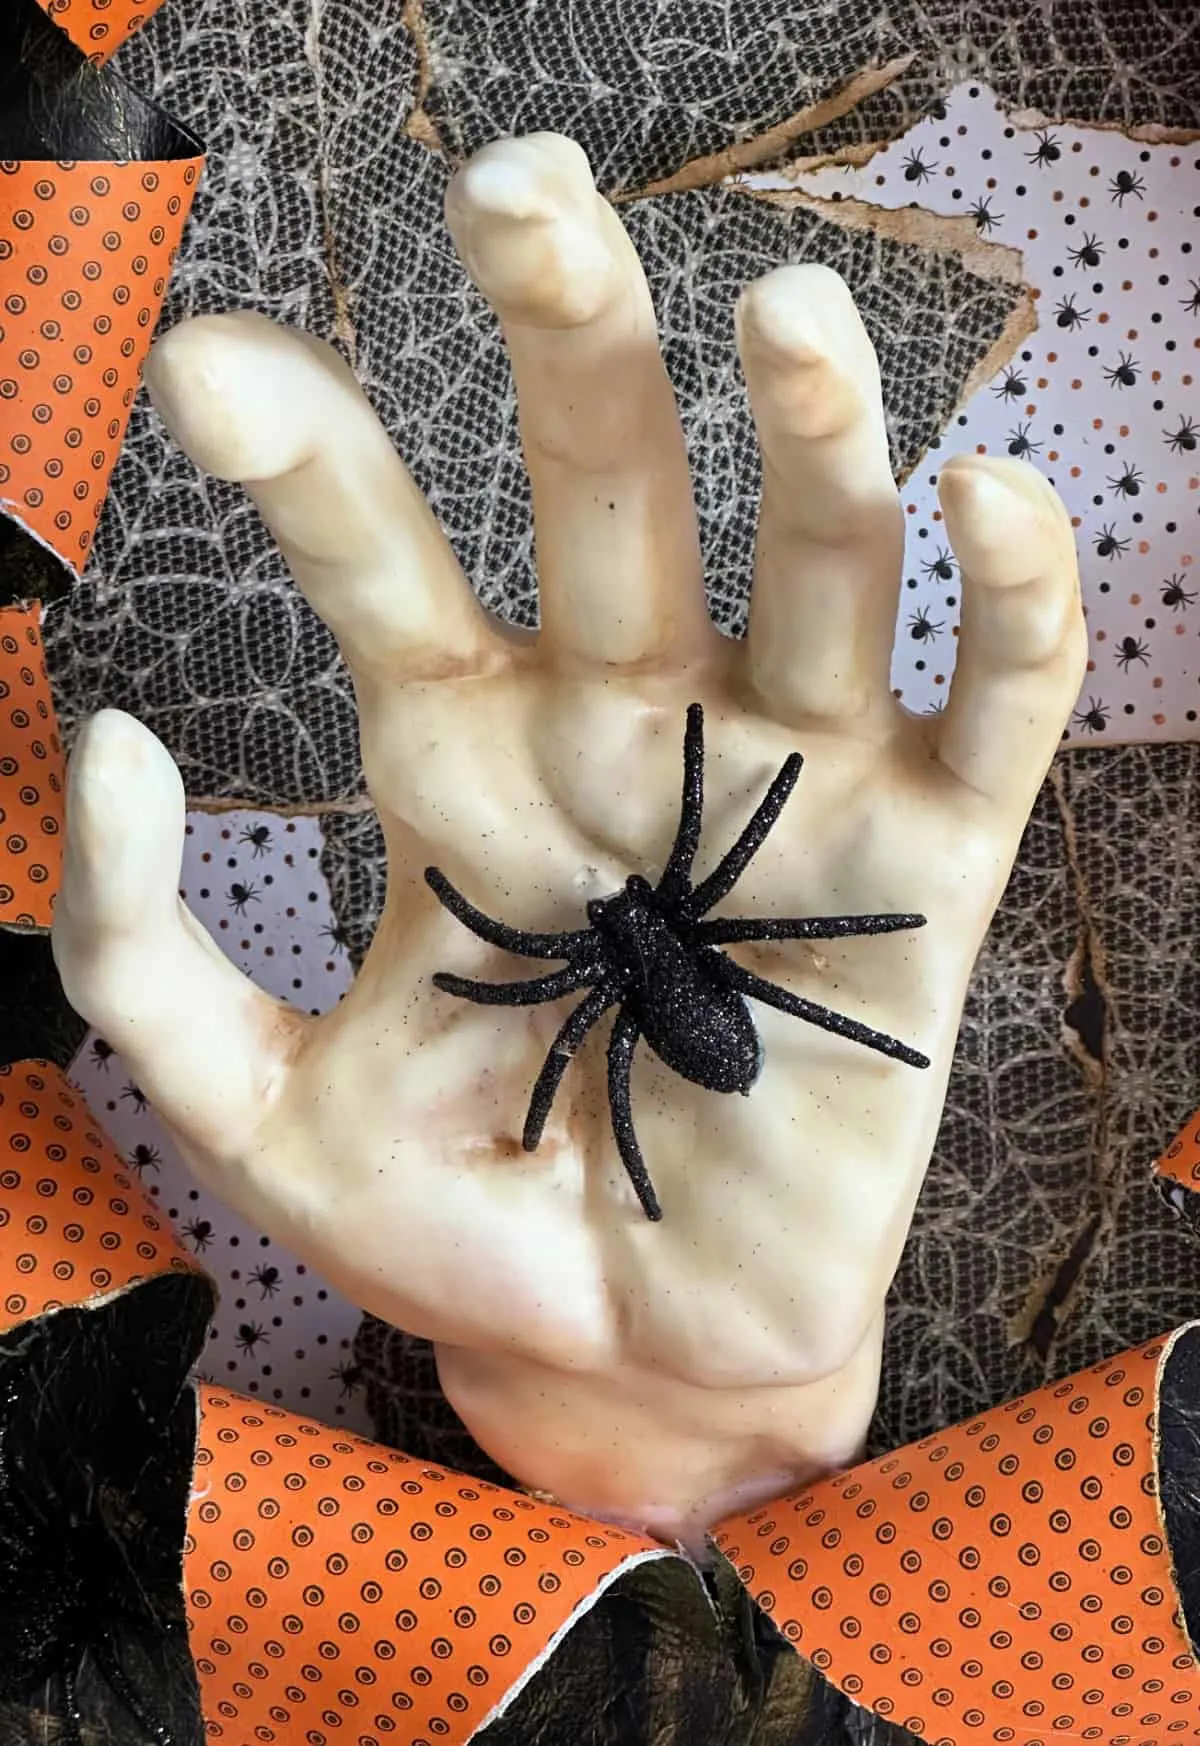
Add your detail piece to the center of the main canvas
For more detail, I added dark ink to the hand as well. This blended better with the canvas board.
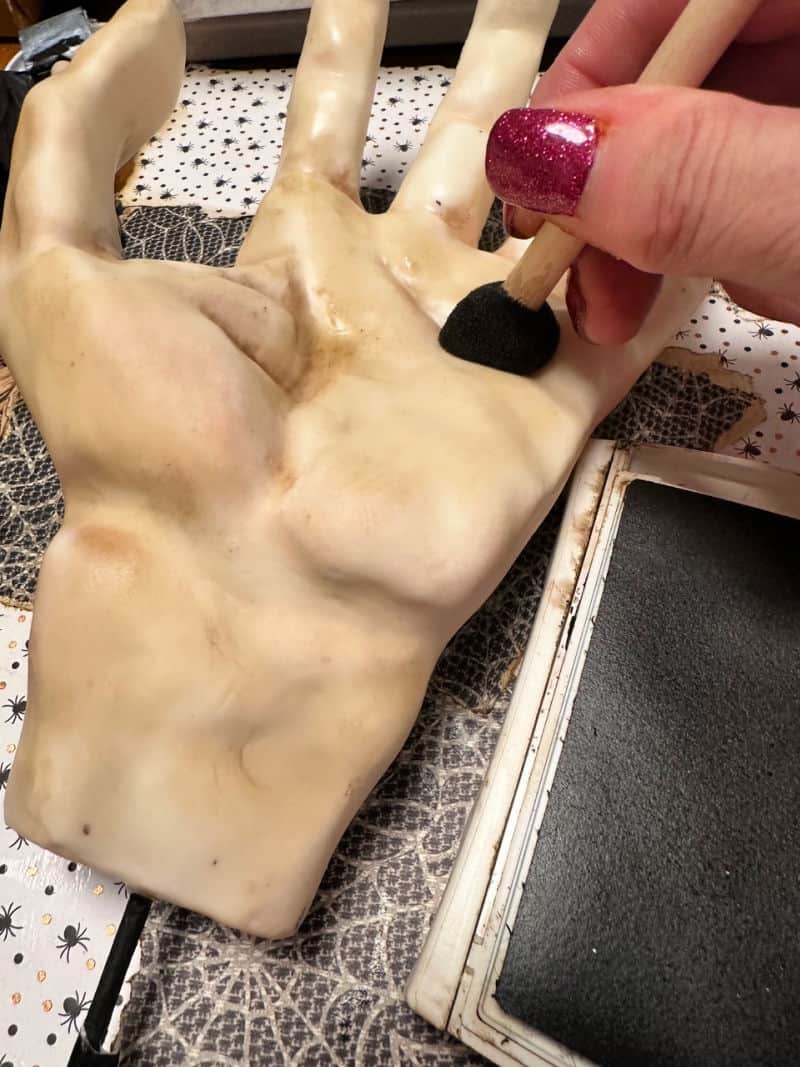

Hot glue the bottom of the hand to the bottom of the board.

Add whatever detail that you like. I chose to go with spiders as they went with the spider web theme of the decorative Halloween paper.
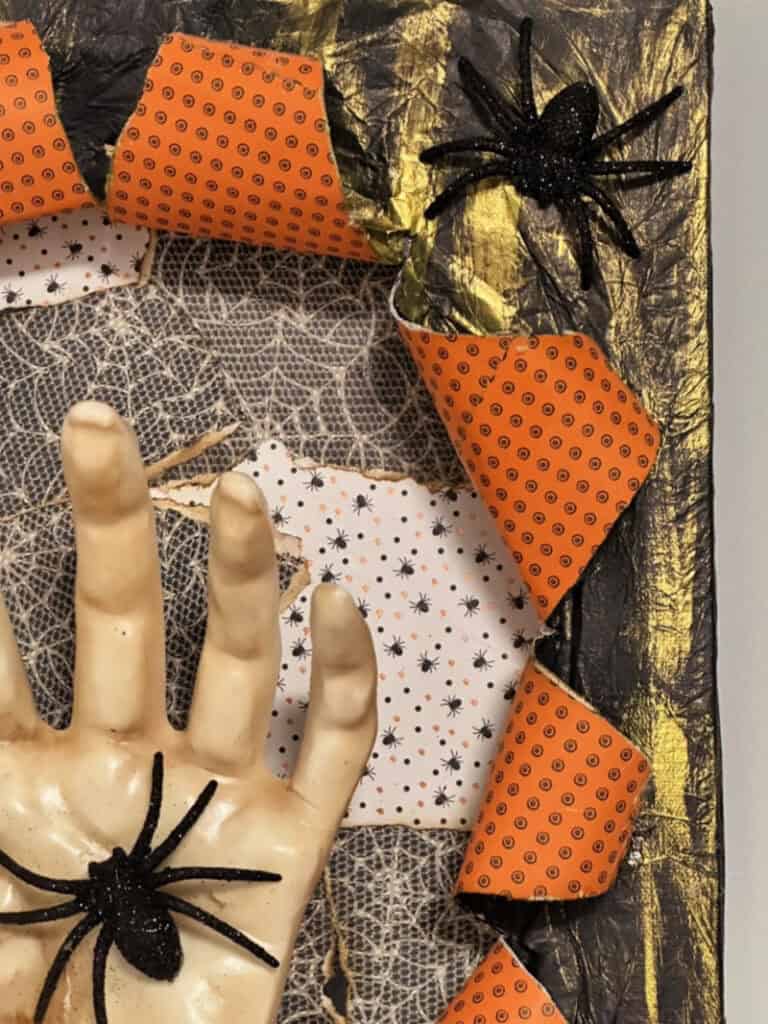

The gold detailing really pops against the black tissue paper.

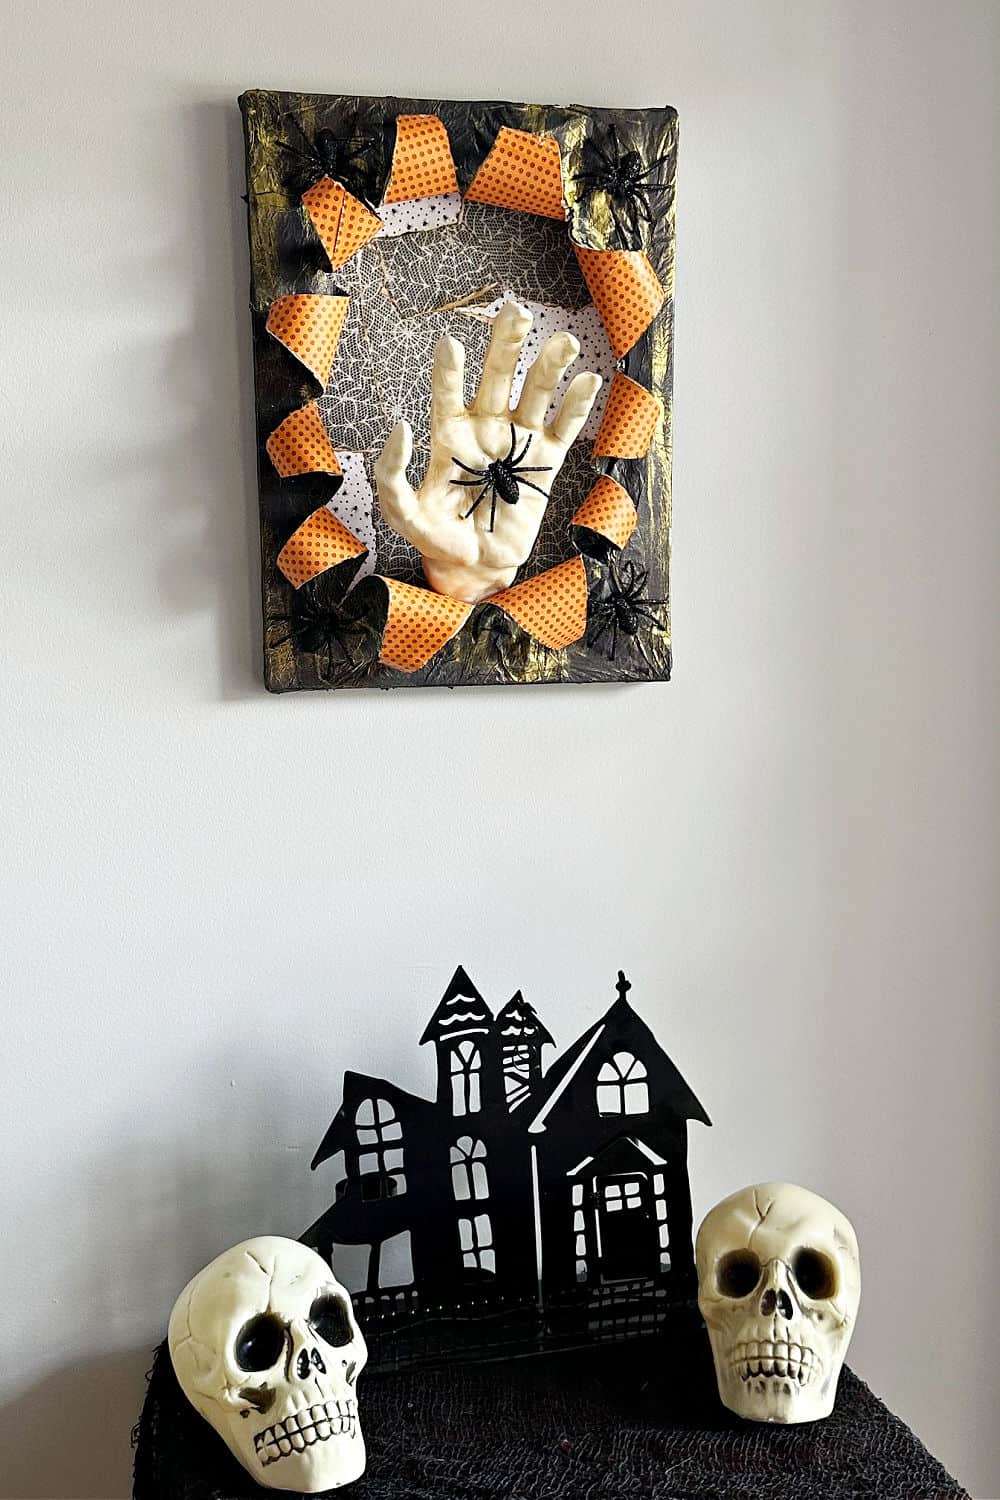
I’m so happy with how this turned out! It is really fun to make and I have a fall and Christmas one coming up in the next week or so. Hey, I had two more canvas’ to use so no judgement. 😀
This busted canvas can be hung up on the wall, or stood up on shelf. To get an idea of how it will look with some of my Halloween decor I hung it up with a small vignette.
I’d love it if you would share this article with your friends on Pinterest by pinning the below image.

It helps my blog to grow and doesn’t cost a thing! 🙂
Let me know if you are inspired to make your own busted canvas art by sharing it with us on Facebook or Instagram by tagging @ourcraftymom. It totally makes my day!
Thanks so much for stopping by. Happy crafting!


Busted Canvas DIY Halloween Art
Learn the viral 'bust out canvas' technique: Transform flat art into 3D masterpieces. Simple steps to create eye-popping, textured artwork that literally jumps off the canvas.
Materials
- 8×10 Stretched Canvas
- 8×10 Canvas Board
- Tissue Paper
- Cardstock or Decorative Paper
- Mod Podge
- Glitter Spiders or other accessories
- Spooky Halloween Hand or Large Halloween Hand
- Foam Brush
Tools
- Hot Glue Gun
- Craft Knife or x-acto knife
Instructions
- Add a layer of mod podge directly to the stretched canvas and place wrinkled tissue paper on it. Pat it down.
- Use a foam brush to accent the wrinkles with gold wax. Decorate the back of the main canvas with decorative paper.
- Decorate the flat canvas board which will be the base for your broken canvas art. Use mod podge and torn paper. Tear the paper into different sizes and shapes. Age the edges with brown ink using a sponge.
- Use a craft knife to find the center of the canvas and start cutting. Leave an inch or two around the edges of the canvas. Cut from the center to the top, the center to the bottom and the center to each side creating a star. Cut in between the sides for the bust-out pieces.
- Hot glue the cut pieces to the canvas so they are folded back.
- Glue the bottom canvas board to the top canvas. Hold until it is secure.
- Hot glue the bottom of the hand to the bottom of the board.
- Hot glue spiders or other embellishments to the canvas.
- Hang and enjoy!
Recommended Products
As an Amazon Associate and member of other affiliate programs, I earn from qualifying purchases.
-

 24 Pcs Foam Brush Set, Foam Paint Brushes, Wood Handle Sponge Brushes for Painting, Foam Brushes Sponge Paint Brush for Staining, Varnishes, and DIY Craft Projects (1'', 2'' and 3'')
 -
 Mod Podge CS11302 Waterbase Sealer, Glue and Finish, 16 oz, Matte
 -
![Cricut TrueControl Knife Kit - For Use As a Precision Knife, Craft knife, Carving Knife and Hobby Knife - For Art, Scrapbooking, Stencils, and DIY Projects - Comes With 5 Spare Blades - [Rose]](https://m.media-amazon.com/images/I/31AMfEUXOKL._SL500_.jpg) Cricut TrueControl Knife Kit - For Use As a Precision Knife, Craft knife, Carving Knife and Hobby Knife - For Art, Scrapbooking, Stencils, and DIY Projects - Comes With 5 Spare Blades - [Rose]
Cricut TrueControl Knife Kit - For Use As a Precision Knife, Craft knife, Carving Knife and Hobby Knife - For Art, Scrapbooking, Stencils, and DIY Projects - Comes With 5 Spare Blades - [Rose] -
 Surebonder Cordless/Corded High Temperature Mini Hot Glue Gun With Detail Tip, 20 Watt, Recharge With Portable Heat Stand (CL-195F)
You may also enjoy these creative Halloween crafts, recipes and home decorating ideas:
- Halloween Pumpkin Diorama
- 15 Tasty Halloween Treats
- 20 Cricut Halloween Project Ideas
- Day of the Dead Pumpkin
- Air Fryer Halloween Donuts
- Black and White Halloween Mantel Decor
- Ghost Mugs Tutorial
- FREE Hocus Pocus printables
Follow me on social media below:
Rebecca Martin
Friday 16th of August 2024
I made a Halloween Canvas burst using prints from April Waller. I am truly addicted to these myself! Working on Fall and mainly Christmas for craft shows, as the prints can be used for PU or CU.
Leanna
Tuesday 23rd of July 2024
Oh this is so fun, minus the spiders bleck foo! lol Going to try this.
Michelle James
Wednesday 24th of July 2024
It really is fun to make. I can't wait to share the Santa one with you! It's a shabby chic style. Be sure to share if you make one. :)
bonnie massicotte
Monday 22nd of July 2024
at top of post says you have a printable card at bottom.I dont see it. how do I get it or save instuctions.I know nothing of pinterest or tictok. just email,messenger and facebook thank you
Michelle James
Monday 22nd of July 2024
Hi Bonnie, I apologize for that. It is there now. But, if you have any questions at all, please let me know. Happy crafting! :)