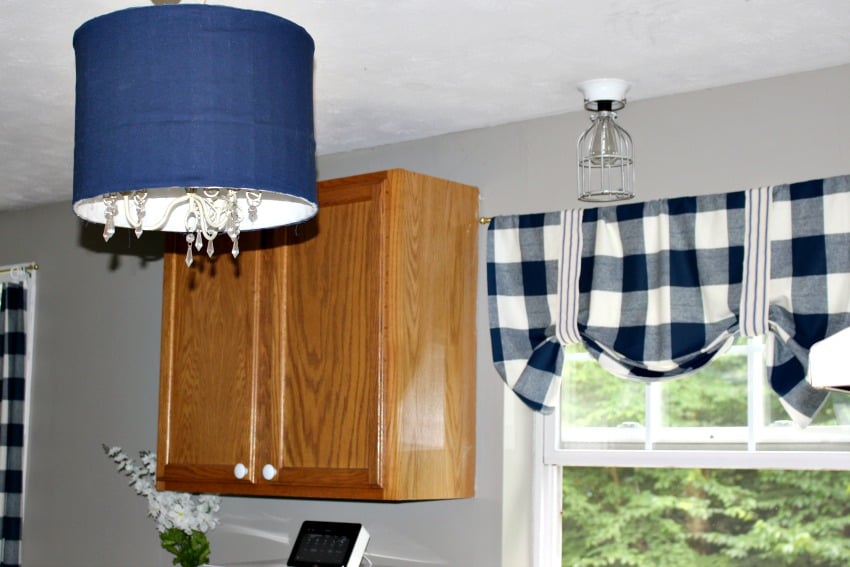
Check out this budget friendly DIY ceiling light made from a thrift store lamp shade. It is inexpensive to make, and renter friendly!
If you’re looking to add a unique touch to your home decor without breaking the bank, consider upcycling a thrift store lamp shade into a DIY ceiling light!
You can find lamp shades in great condition at most thrift stores, or you may even have one in your basement or garage that you can repurpose.
Here’s how to make your own upcycled ceiling light from a thrift store lamp shade.
This post contains affiliate links at no extra cost to you. Please see my full disclosure here.
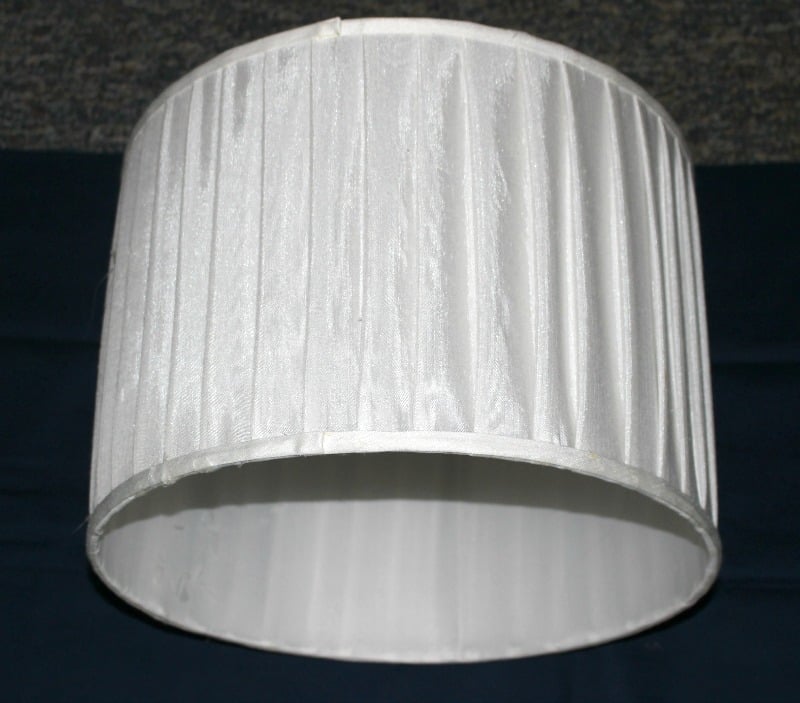
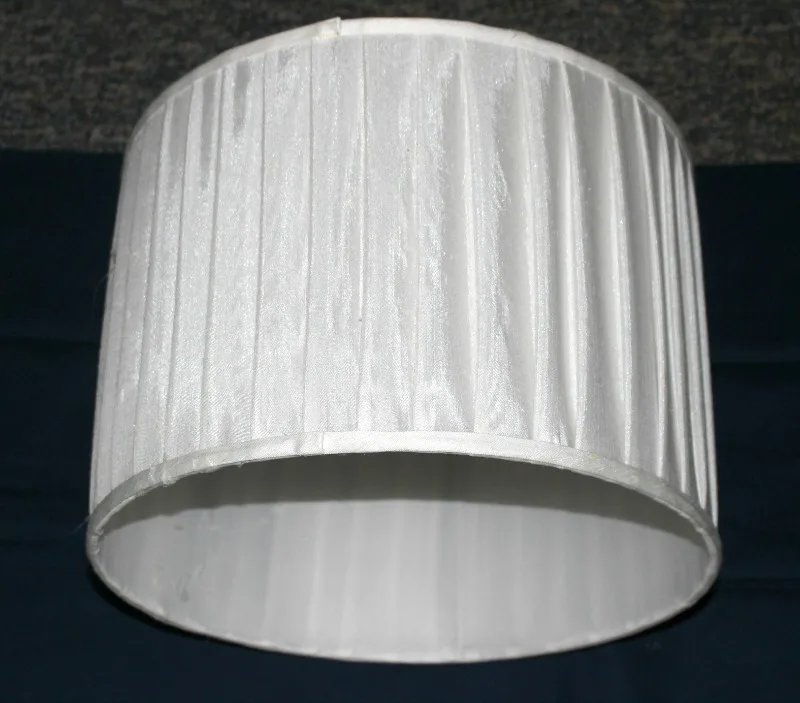
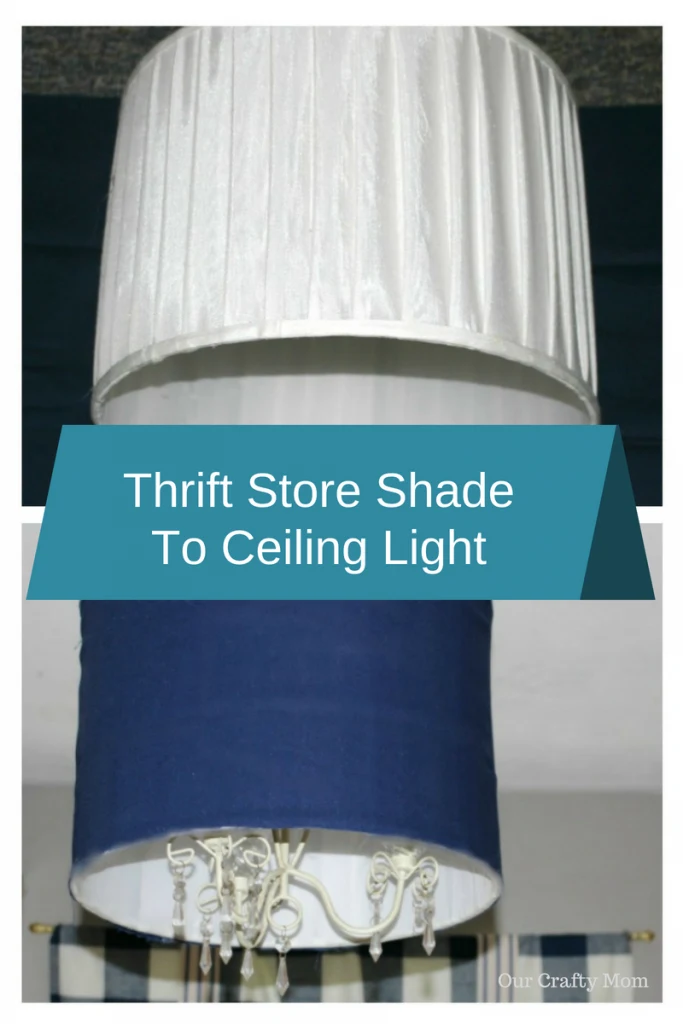
Start by choosing a thrift store lamp shade that speaks to you. I found a large drum shade for $4! You can’t beat that.
Look for something with interesting shapes or designs that can be easily transformed into a hanging fixture.
You want to make sure the size of your lamp shade is the right size for your ceiling light.
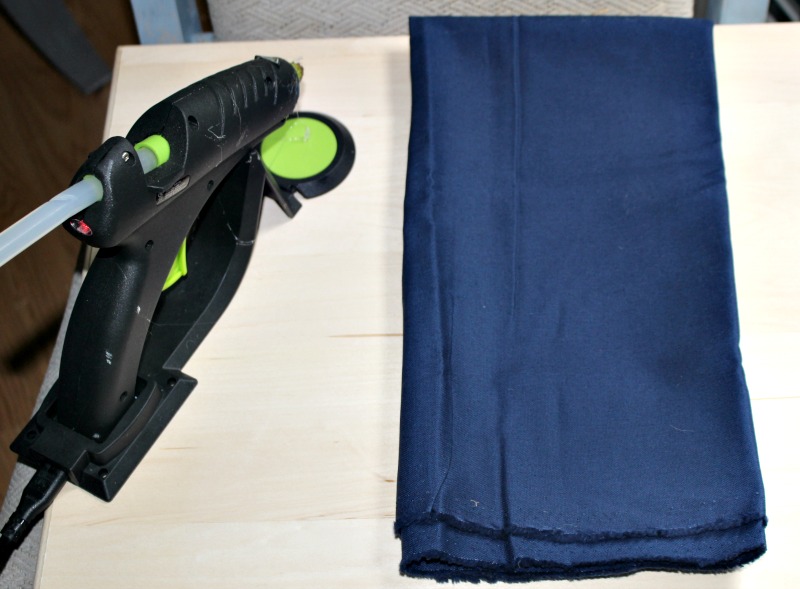
Next, it was time to take out my favorite crafting tool-a cordless glue gun-that you can get here.
Because this glue gun is cordless, it makes it so easy to create.
There is a great thrift store near my house that is ridiculously inexpensive.
I’ve talked about some of the great finds before.
Whenever I go to the thrift store I go to the furniture section first, then check out the lamps and lamp shades.
This large drum shade was a steal at $4! It was perfect for what I had in mind.
Once you have prepared the thrift store lamp shade for its new life as a ceiling light, it’s time to get creative with your lighting design.
Not only is this DIY ceiling light easy and inexpensive to make, it’s also renter friendly!
Just put the old light back in if you move.
I’m sharing this as part of our monthly Thrift Store Challenge, so be sure to scroll to the end to see what the other talented bloggers are sharing.
Next, it was time to take out my favorite crafting tool-a cordless glue gun-that you can get here.
Because this glue gun is cordless, it makes it so easy to create.
There is a great thrift store near my house that is ridiculously inexpensive.
I’ve talked about some of the great finds before.
Whenever I go to the thrift store I go to the furniture section first, then check out the lamps and lamp shades.
This large drum shade was a steal at $4! It was perfect for what I had in mind.
Gather your supplies and get the glue gun ready!
DIY Ceiling Light Supplies
Hot Glue Gun
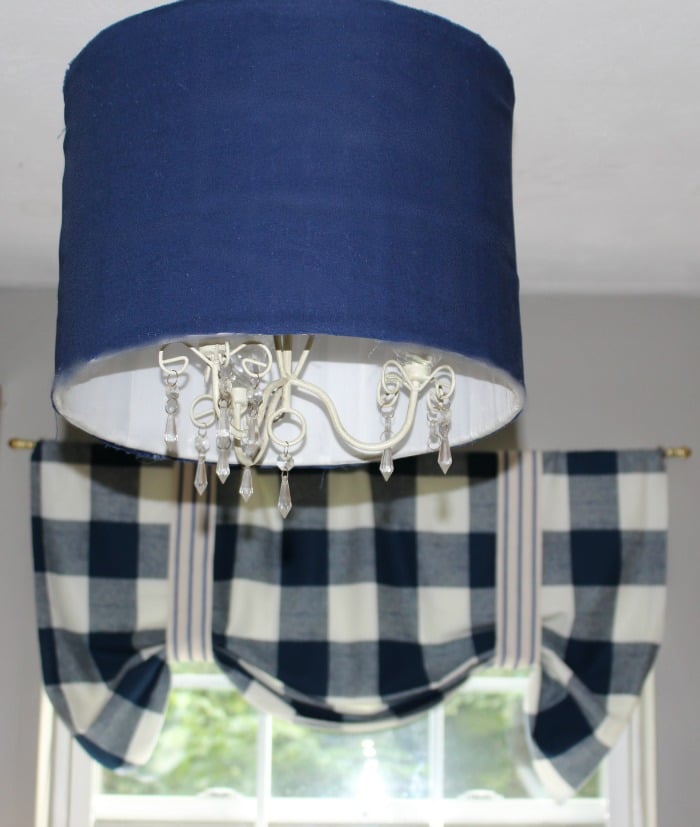
Fabric of your choice-I used a deep navy cotton duck to go along with my navy buffalo check curtains that I shared here. I did have leftover buffalo check fabric, but I thought it might be a little buffalo check overload, as much as I love it.
Thrift Store Drum Shade
Simply lay the fabric over the lamp shade and cut the excess.
Then started hot gluing the fabric careful not to add too much glue, as you don’t want it to bleed through.
To finish the edges, I ended up cutting an extra strip of fabric.
You can also add ribbon if you like. There are so many fun trim options too.
I just wanted to use what I had on hand to keep costs down.
But, if I change my mind I can always had some fun trim later.
This was seriously a breeze to make. It probably took about 15 minutes and cost about $6.
Now check out my favorite bling addition:
In the next aisle I spotted this lovely candeholder with all its jewels in place for $2!
I pick these up whenever I see them because they are great fillers for lights.
4 Easy Ceiling Light Makeovers That Are Renter Friendly
Wednesday 17th of October 2018
[…] of my favorite updates. It was inexpensive, but has a lot of impact. You can get the full tutorial here. Be sure to check out Week 1 here and Week 2 here. So far I can cross the following off the […]
Mandy Yanga
Monday 17th of September 2018
This is such a great idea! Indeed there are A LOT of great finds in thrift stores. All we need is a creative idea and the tools to do it. Anyways, very nice lamp!
Habiba
Monday 27th of August 2018
Michelle, what a great upcycling project! I have the same hot glue gun as you + for the same exact reasons!!!
Debrashoppeno5
Thursday 23rd of August 2018
Cordless glue gun? I have never heard of it but I do need it. Now on to your light. It is absolutely beautiful. And how smart to bling it up like that. It looks fantastic with the valance.
ourcraftymom
Thursday 23rd of August 2018
Thanks Debra! You will love the cordless glue gun. What a difference! I love our new place, but every light-except the dining room-is a globe light! I am slowly going to change them all and trying to come up with new ideas. I just finished an embroidery hoop one for my entry. This light makes such a difference in the kitchen.
Erlene
Thursday 23rd of August 2018
Did you remove the round light fixture or is the drum hiding it? Either way very clever!