This simple DIY Halloween pumpkin diorama is the perfect way to add a personal touch to your Halloween decor. And it’s so fun to make!

Have you seen all the cool pumpkin decorating ideas all over Pinterest?
This post contains affiliate links at no extra cost to you. Please see my full disclosure here.
Each year I pick up a few Dollar Tree foam craft pumpkins, fire up my cordless hot glue gun (my favorite craft supply) and get creative with new pumpkin decor to add to my collection.
Here are a few reader favorites that I’ve made over the years.
Pumpkin Crafts
- Decoupage Dollar Tree Pumpkin in Metallic Blue
- Dollar Tree Velvet Pumpkins
- Adorable Buffalo Check Pumpkins
- DIY Dollar Store Pumpkin Topiary
I absolutely love pumpkin dioramas and have been wanting to make one for several years now, ever since seeing this spooky house Halloween craft from Lia Griffith.
Now that I’ve made one, I have no idea why I waited so long because it is super easy.
It reminds me of decorating a fairy garden, but with a haunted house theme.

Supplies Needed to Make a Halloween Pumpkin Diorama
- Orange Halloween Fairy Lights
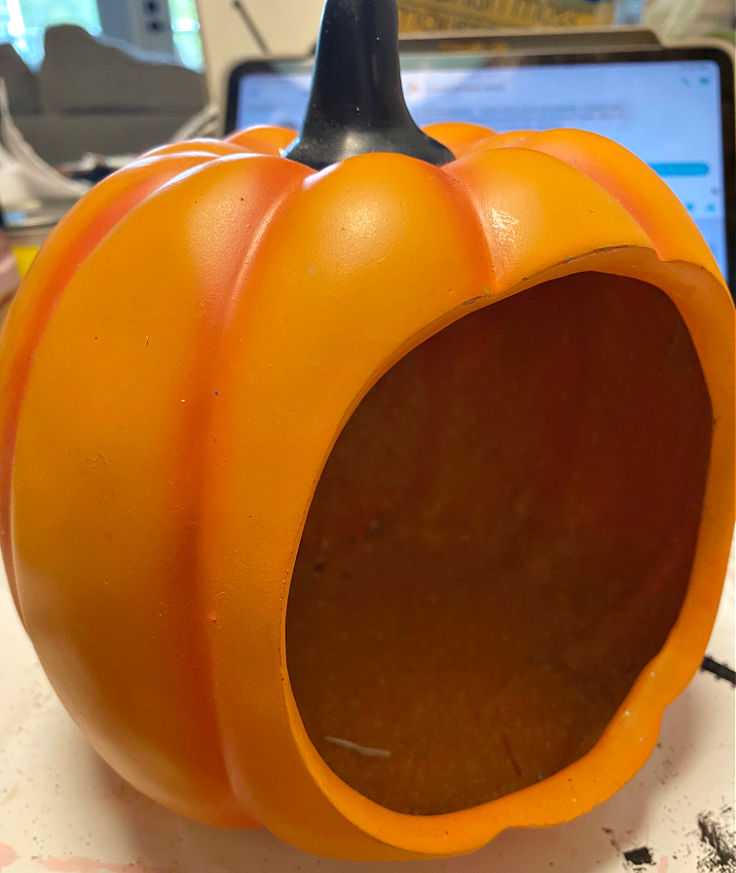
- Pumpkin – either a pumpkin diorama already made, foam pumpkin, or real pumpkin.
- Halloween fairy garden set
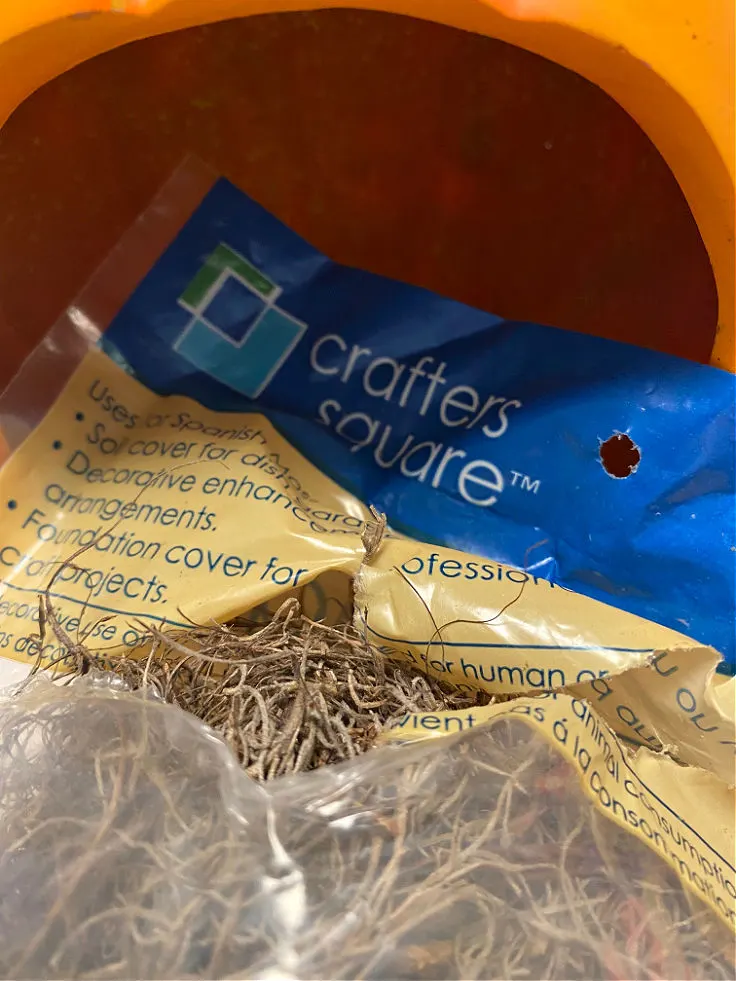
- Spanish moss
- x-ray Halloween paper
- Cordless hot glue gun – this is my favorite glue gun!
- Glue Dots
- Craft Scissors
- Wood Stain or paint (optional)
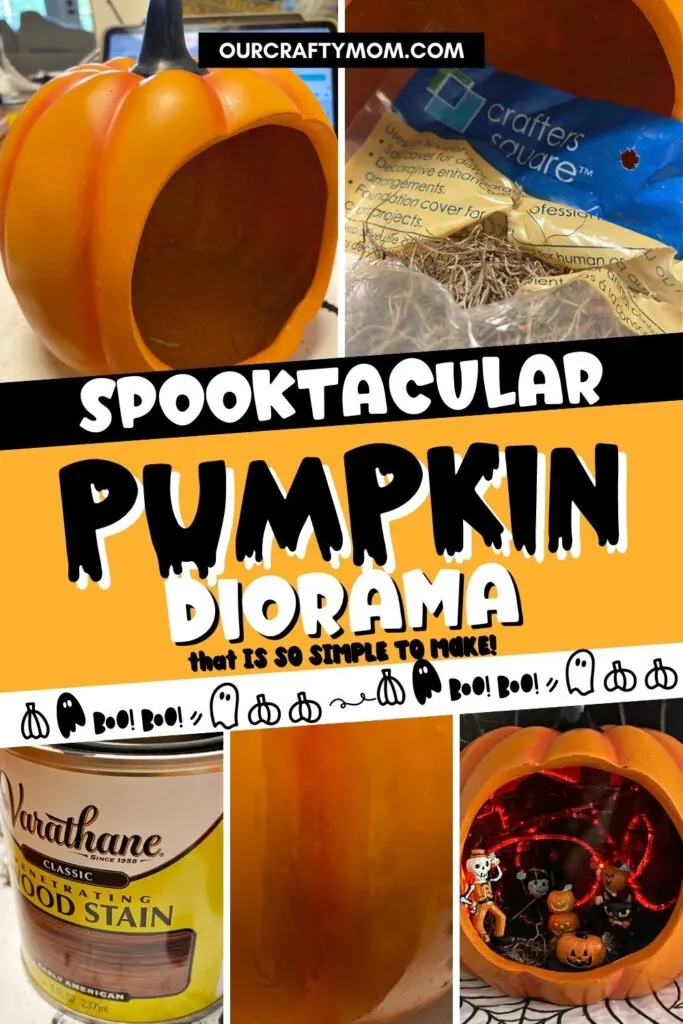
Gather your supplies
We already had most of the supplies on hand so this was a super cheap fall craft.
All we had to buy were the orange fairy lights! Don’t you love when that happens?

How to Make a Pumpkin Diorama Halloween Decoration
One of the great things about this seasonal craft is you can use either real pumpkins or fake pumpkins as I show in this tutorial.
To make a pumpkin diorama using a real pumpkin, cut a large round or oval opening on the front of your pumpkin.
Remove all of the pumpkin guts and clean well. Follow the step-by-step tutorial below.
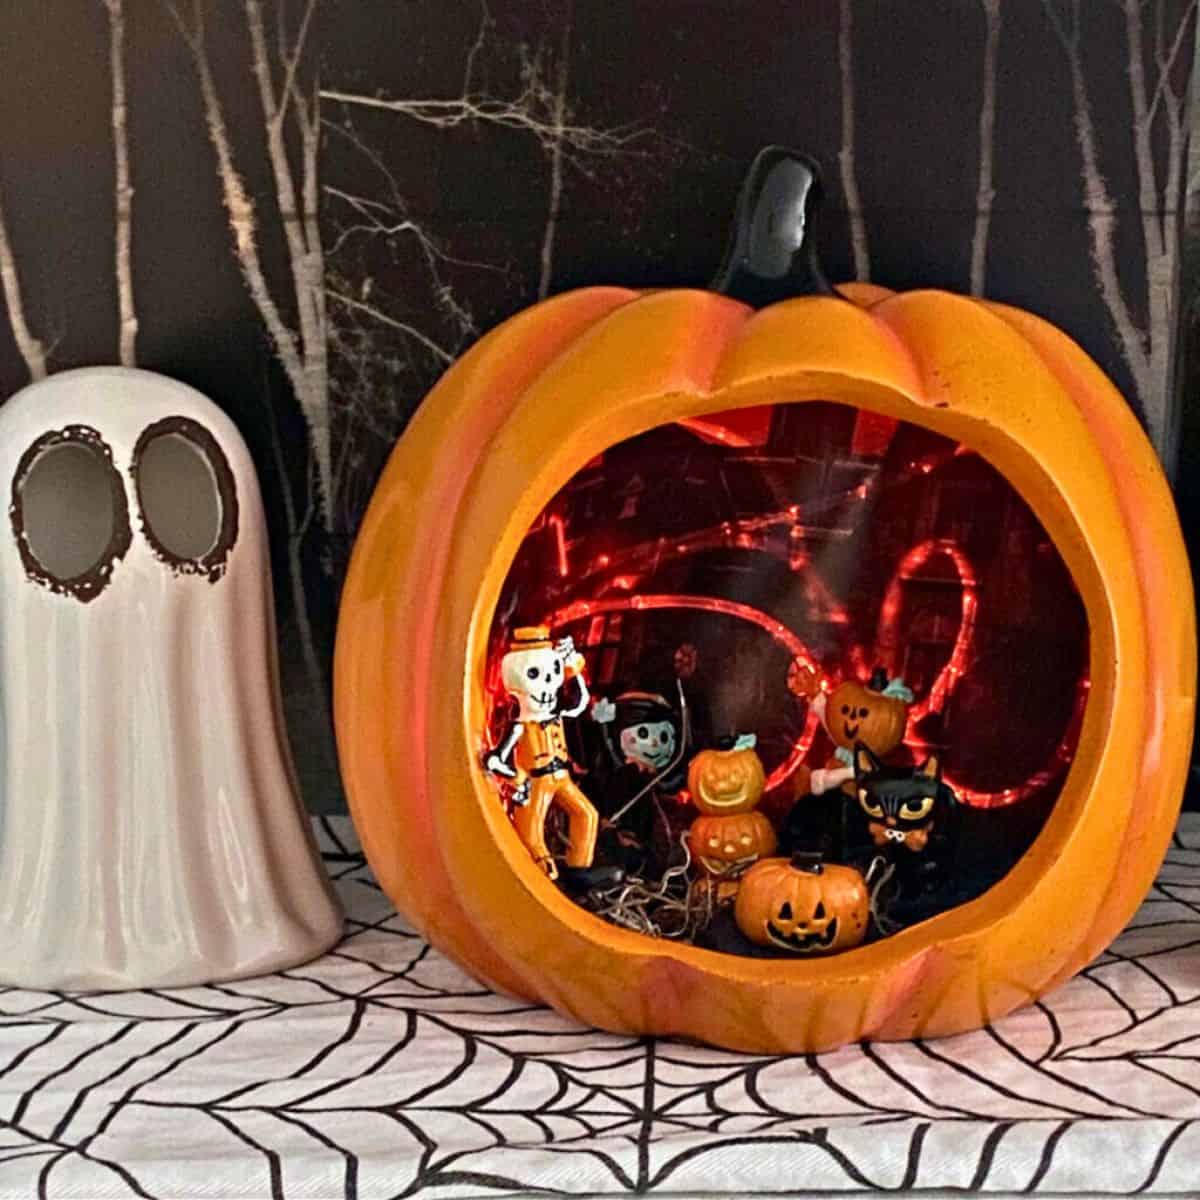
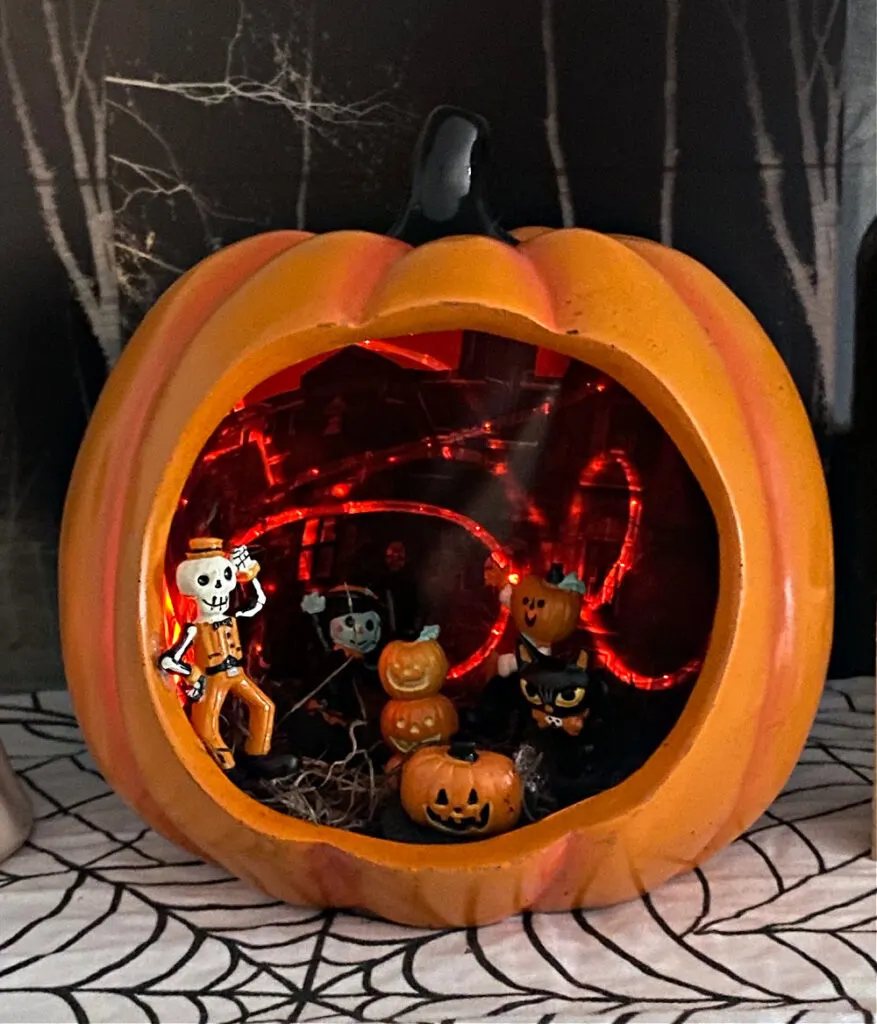
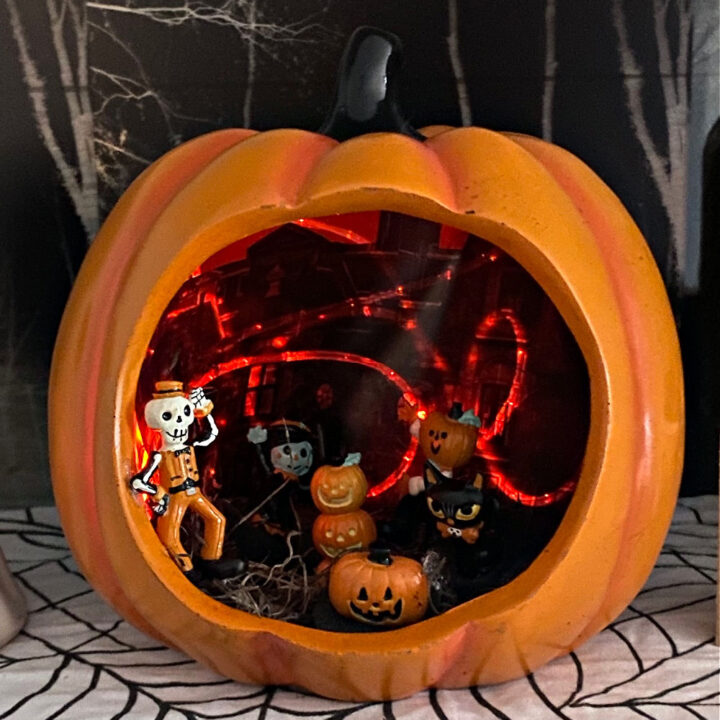
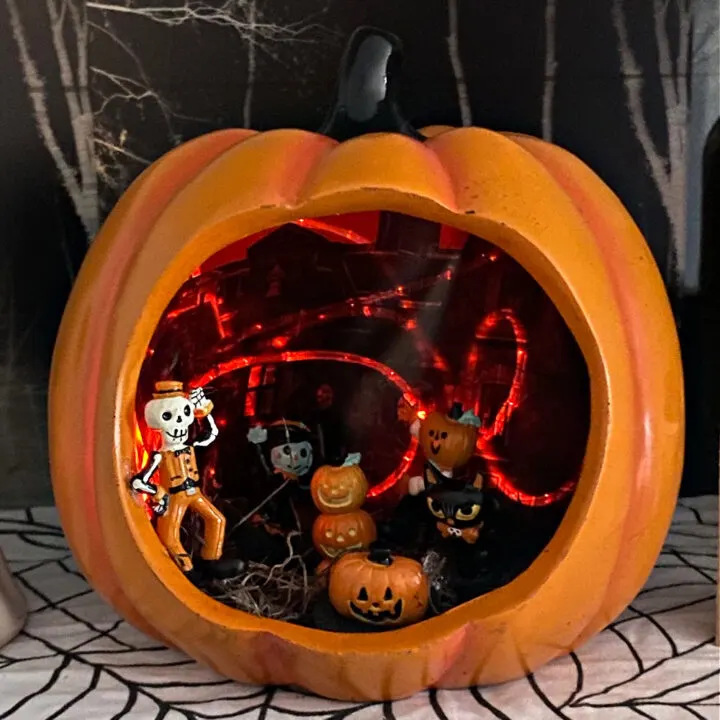
Step 1. Add the Spanish moss to the pumpkin
Start by placing a layer of Spanish moss on the bottom of your pumpkin.
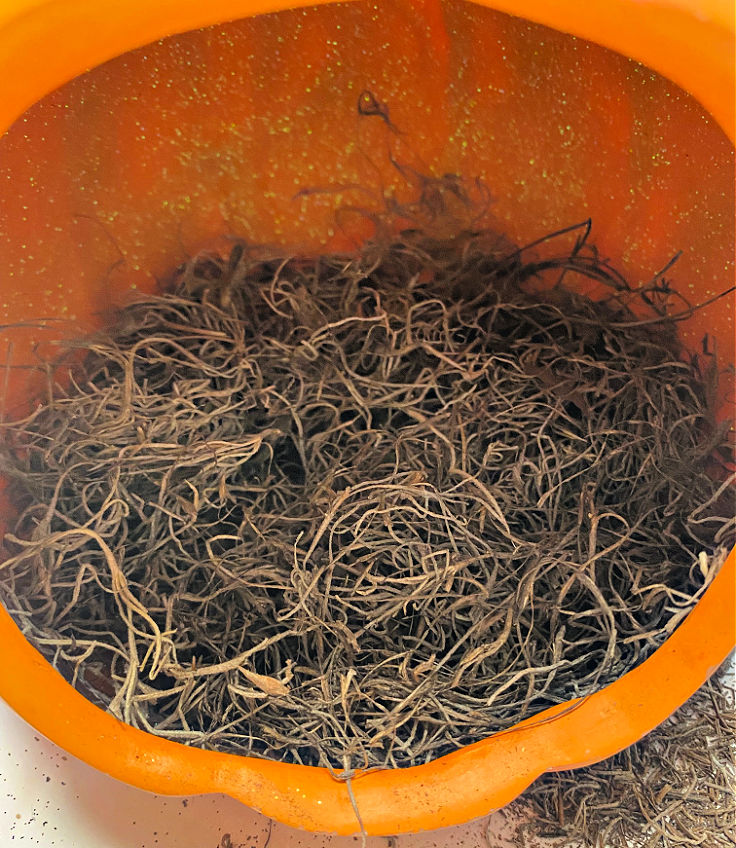

You can also use reindeer moss if you prefer.
Step 2. Cut out a Halloween haunted house
You may have heard me mention that my daughter, Amanda, has a slight obsession with ALL THINGS HALLOWEEN.
She found the coolest book pad of x-ray Halloween paper at Michaels.
There was a haunted house page that I knew would be perfect to use as a backdrop for the diorama.

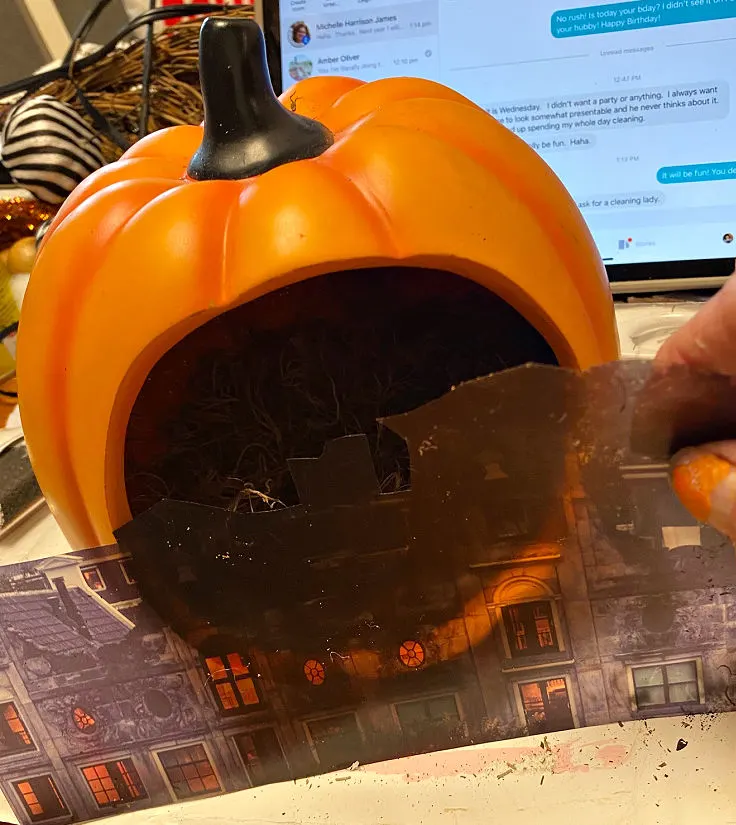
Simply cut around the spooky house with scissors so it will fit inside your pumpkin.
Another option would be to use your Cricut machine to cut out a haunted house.
Step 3. Add Lights
To really step up the wow factor of this diorama I decided to add orange fairy lights behind the paper.
Use scotch tape or glue dots to secure the lights and place them where the windows are so they make the orange pop!
The lights really make this pumpkin diorama, so don’t skip this step. Once the lights are secured to the haunted house paper, simply place it into the pumpkin.
You don’t even have to use glue or tape, it fits right in!
Step 4. Decorate your pumpkin diorama
The next step is to decorate the diorama with the Halloween figurines of your choice.
I found a cute set of characters at the craft store. Mine is a combination of spooky and not-so-spooky.
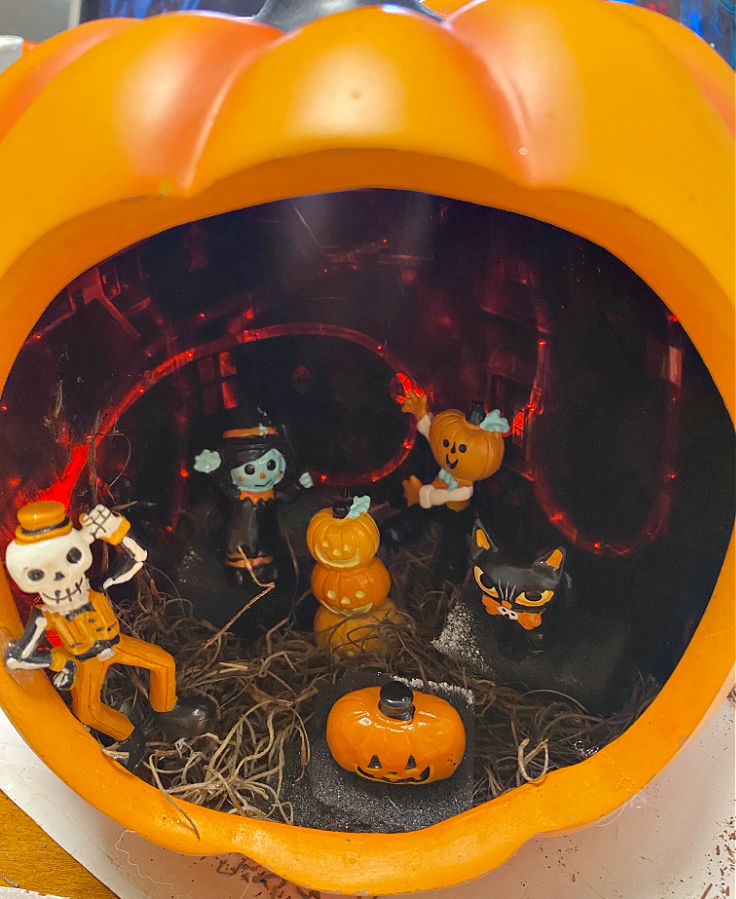
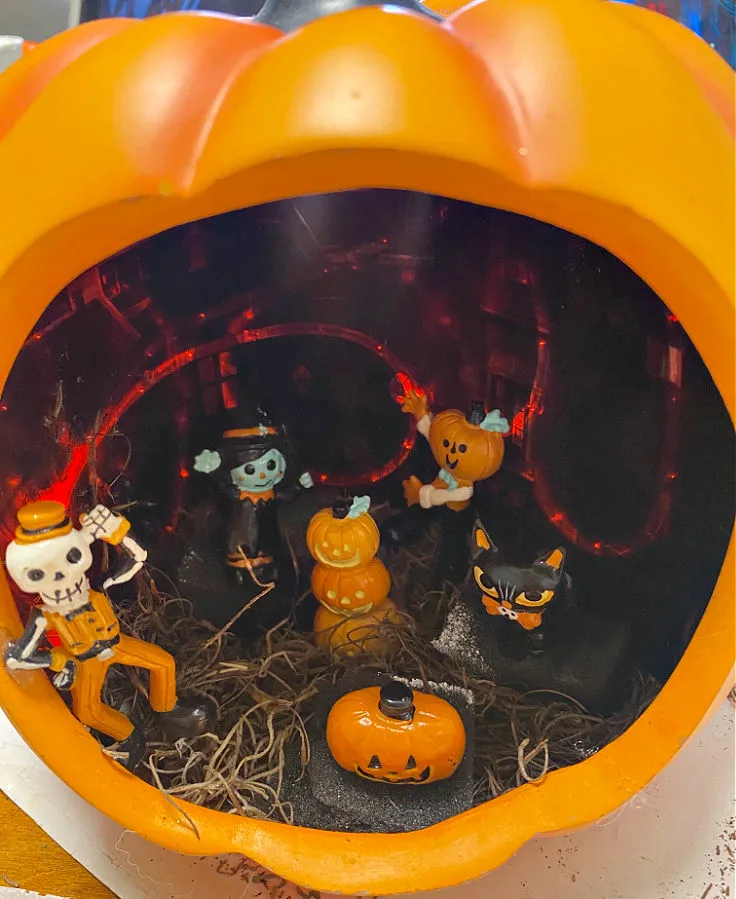
To make the figures stand up a little bit higher, I hot glued them to pieces of foam I had left over from a foam brush.
You can also use floral foam. Just cover the foam with more moss.
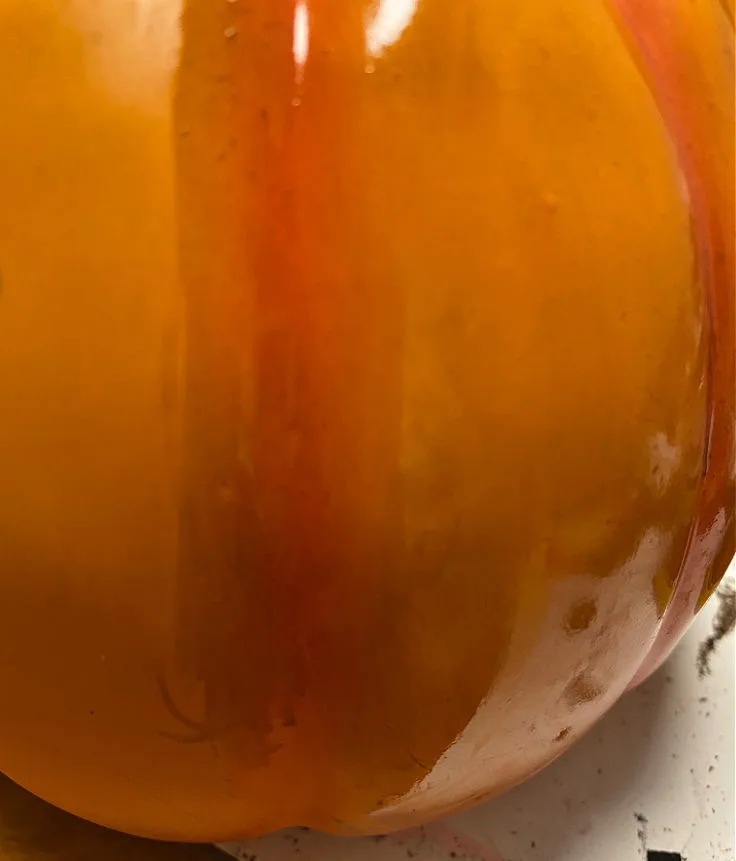
Step 5. Paint or stain your craft pumpkin
This next step is optional and definitely a matter of preference. My pumpkin was a little bit too bright for my style, so I used wood stain to tone down the orange a little.
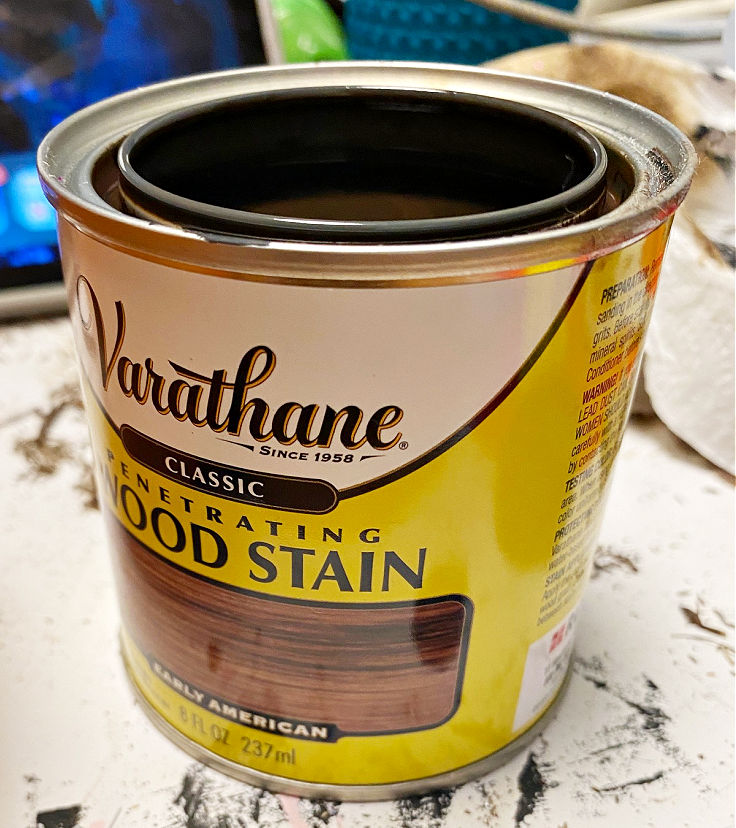

Simply use a foam brush or even a paper towel to cover the pumpkin. Another option would be to use a black pumpkin or paint your pumpkin black.
That would give it an even spookier Halloween look!

Now for the best part…decorating with your DIY Halloween pumpkin diorama!
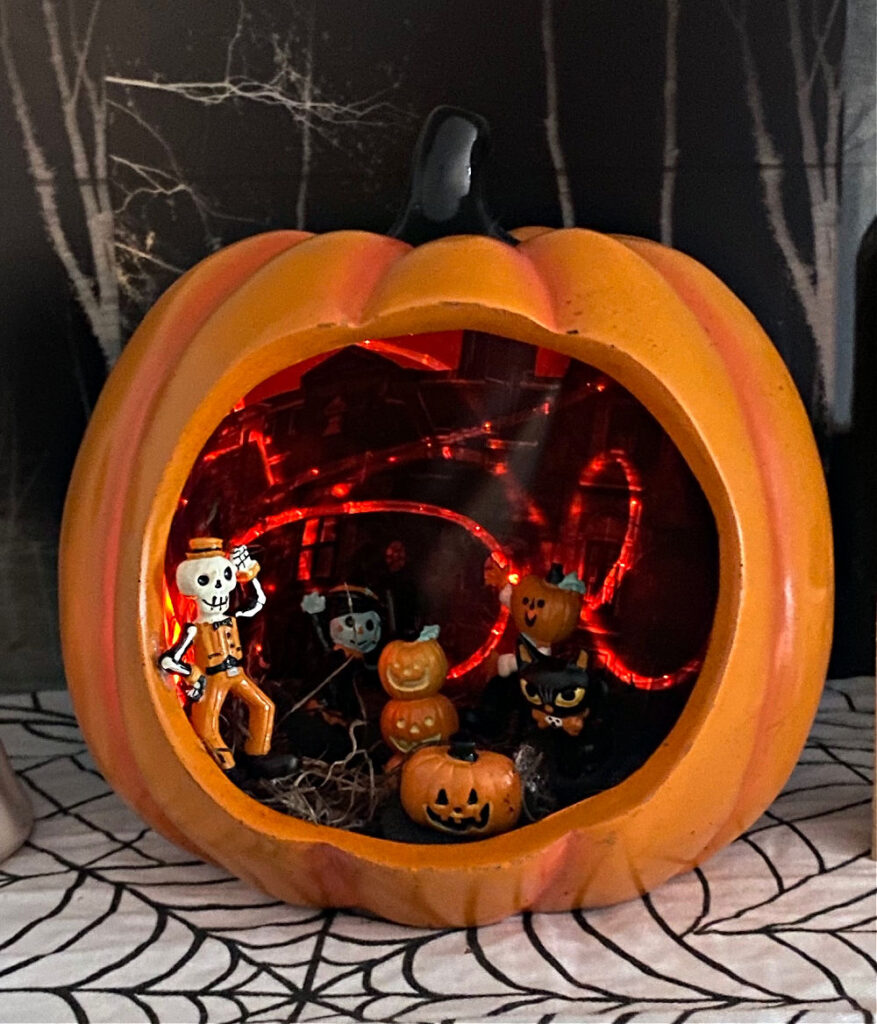
My daughter pulled out pieces from her Halloween collection to decorate the antique hutch in our entry.


I have a fall tour coming up next week so you will see the completed Halloween decorations, but you can see a peek here.
You may notice I used the same x-ray paper as a backdrop for the hutch.


Pumpkin Diorama Styling Tips
- Place your pumpkin diorama on a covered porch or patio.
- Create several to line a coffee table or dining room table.
- Add one to a kids’ room to use as a seasonal night light.
- Include batter-operated lights on a timer, or with a remote for easy on/off access.
- Create a tablescape filled with Halloween decorations including your pumpkin diorama.
This is a project that is easy enough to make with kids of all ages. Simply choose characters that are age-appropriate for your children.
Most craft stores have a section filled with haunted houses and figurines. I also found some adorable ghost figurines HERE and a Halloween fairy garden set HERE.
What about using this idea for a craft night with friends, or even as a kid’s party favor for fall birthdays?
Each child could take their pumpkin diorama home. I seriously LOVE that idea.
If you purchase the pumpkins when they are on sale you can keep costs down.
When looking for pumpkins to use make sure the foam pumpkins are hollow.
That way you only have to cut through one layer to create your pumpkin hole.
I found a great set of white foam pumpkins on Amazon HERE.
If you prefer to buy instead of DIY, below are some lighted pumpkin decorations spotted on Amazon:
Save this project by PINNING the below image:

I hope you enjoyed this simple Halloween pumpkin diorama. Please let me know if you make your own!
Happy Halloween!
Michelle
If you enjoyed this Halloween craft, you may also like these:
- 20 Cricut Halloween Project Ideas
- Dollar Tree Day of the Dead Pumpkin
- Halloween Witch Door Hanger
- 15 Tasty Halloween Treats Kids Will Love
- Easy Air Fryer Halloween Donuts
Simple Pumpkin Diorama Tutorial
Get ready for some spooky fun with this easy pumpkin diorama tutorial! All you need are a few craft supplies and some hot glue, and you can transform a plain pumpkin into a spooky scene.
Materials
- Ceramic Pumpkin
- Halloween Mini Figurines
- Glue Dots
- Spanish Moss
- Orange Fairy Lights
- Foam Brush
- Wood Stain
Tools
- Hot Glue Gun
- Scissors
Instructions
- Start by placing a layer of Spanish moss on the bottom of your pumpkin.
- Cut a spooky house with scissors so it will fit inside your pumpkin.
- Secure orange fairy lights behind the paper.
- Decorate the diorama with the Halloween figurines of your choice.
- Paint or stain your pumpkin.
- Enjoy your new DIY pumpkin diorama!
Recommended Products
As an Amazon Associate and member of other affiliate programs, I earn from qualifying purchases.
-

 Fiskars 12-94518697WJ The Original Orange Handled Scissors, 8 Inch, Orange
 -
 Reindeer Moss Preserved Floral Moss (Reindeer Moss-Basil)
 -
 Surebonder Cordless Hot Glue Gun, High Temperature, Full Size, 60W, 50% More Power - Sturdily Bonds Metal, Wood, Ceramics, Leather & Other Strong Materials (Specialty Series CL-800F)
Have a great day!
FOLLOW ALONG
Pinterest ~ Facebook ~ Instagram ~ Twitter ~ YouTube ~ TikTok