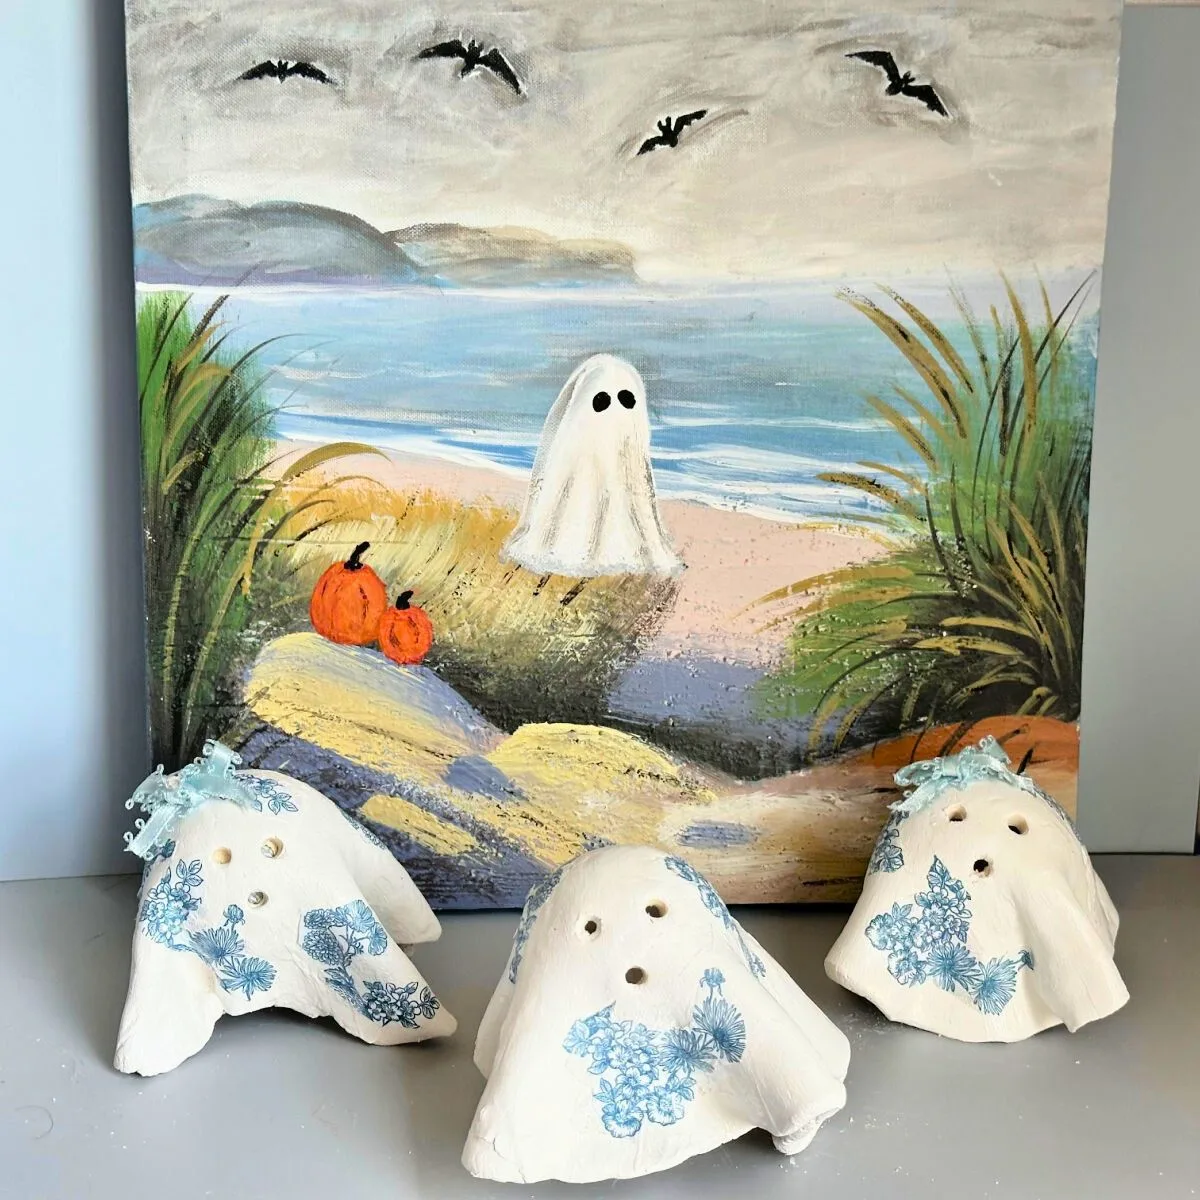
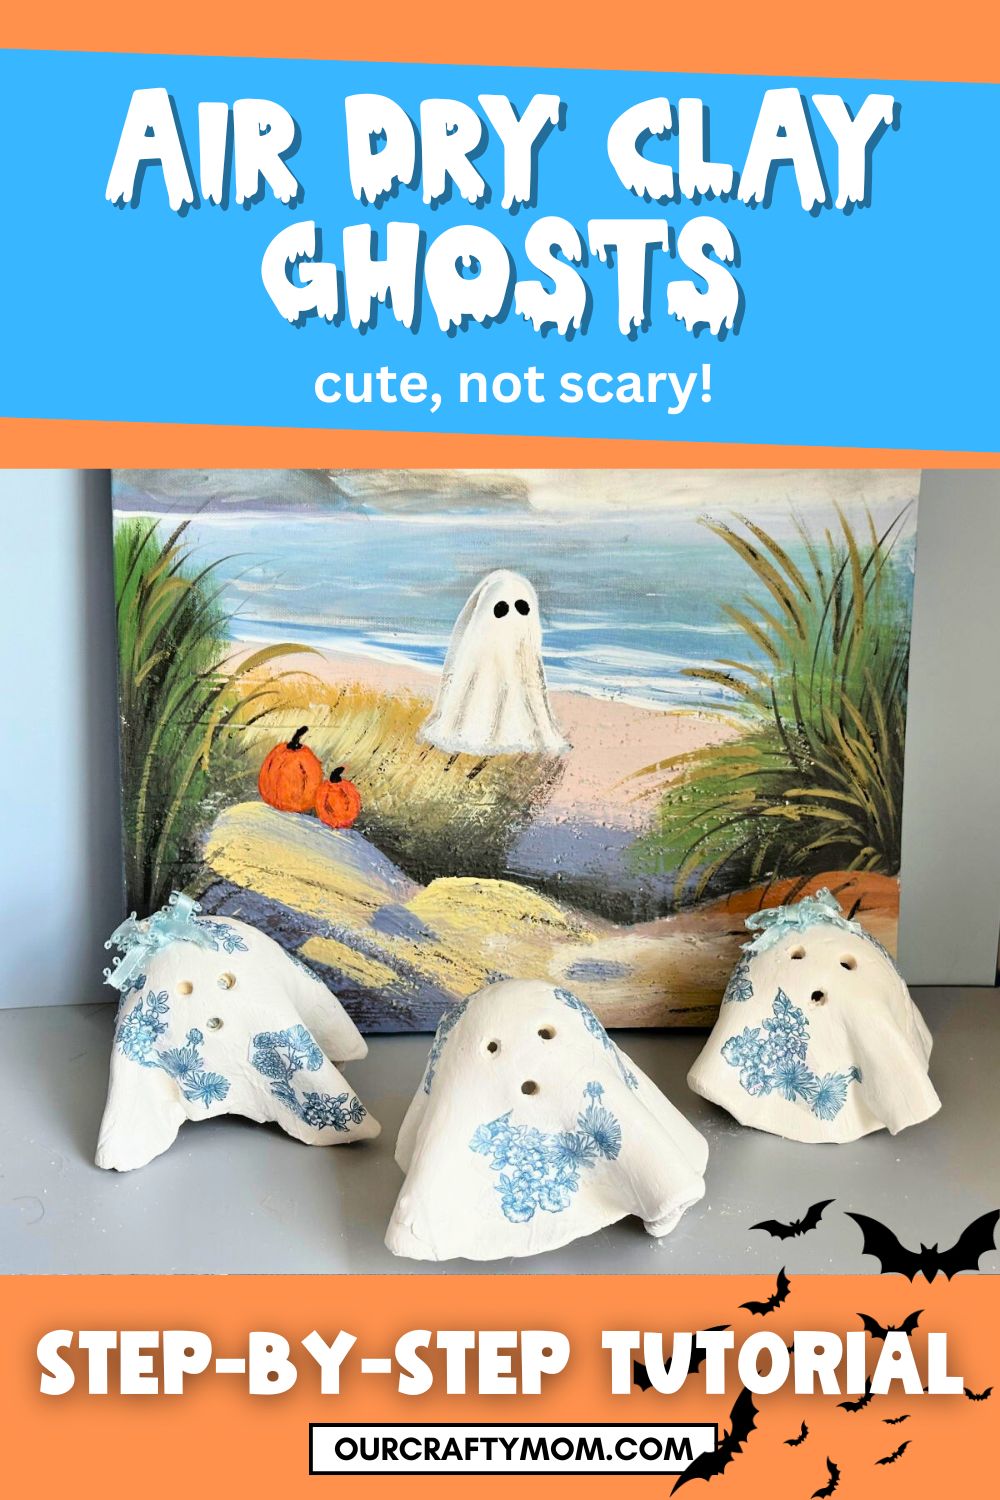
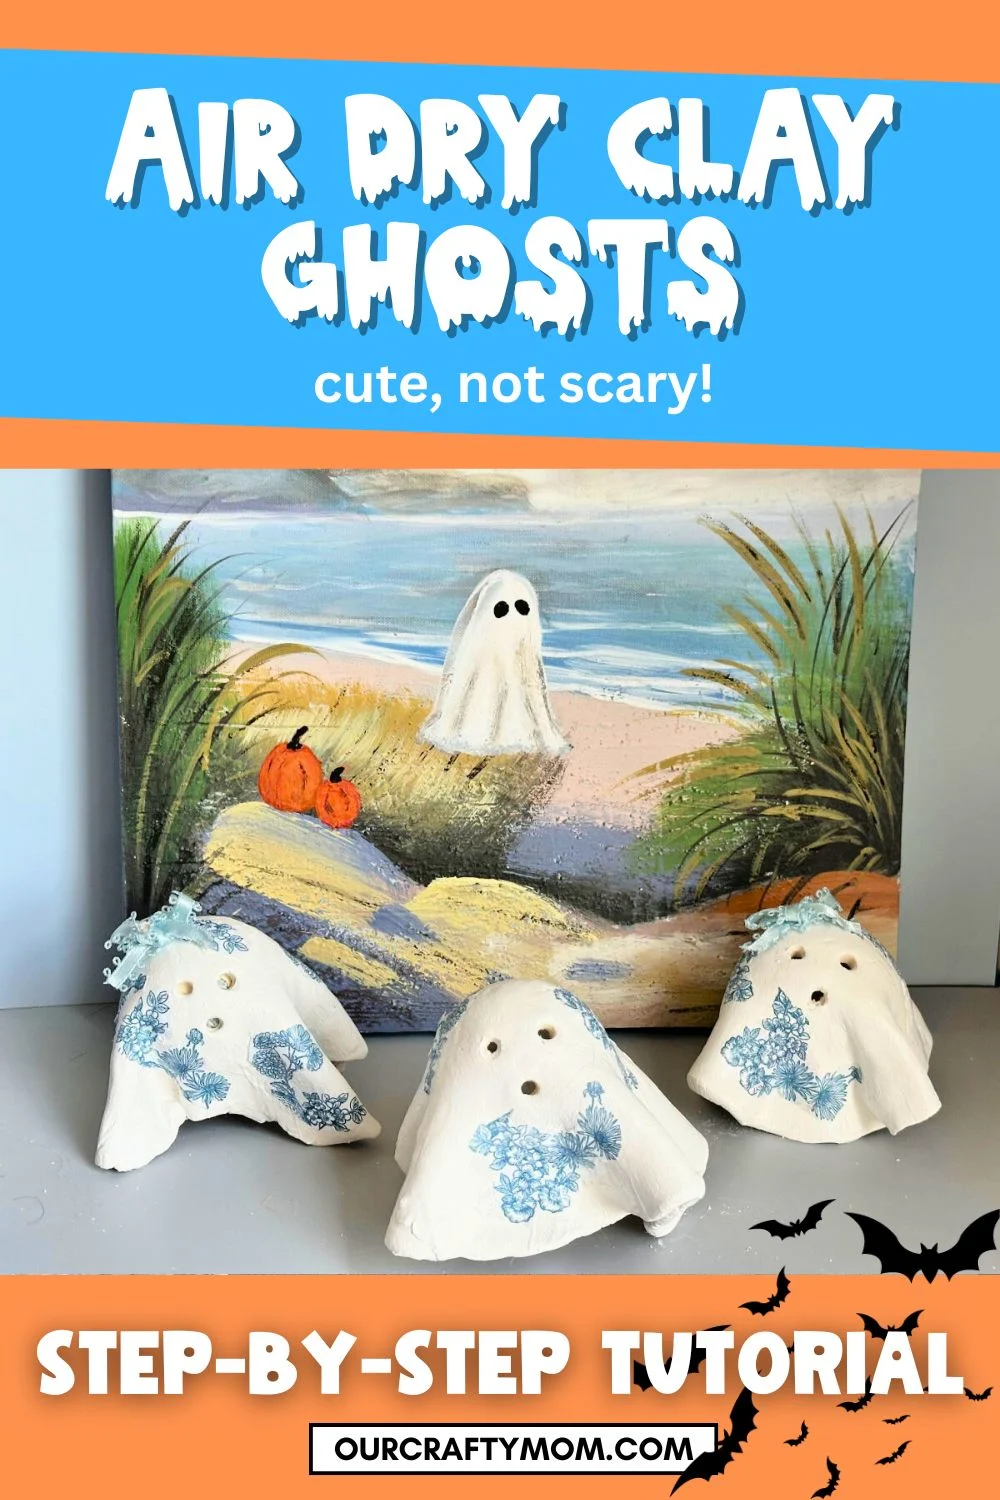
These air dry clay ghosts, with chinoiserie flowers, are the perfect way to add a trendy pastel Halloween design aesthetic to your home.

This post contains affiliate links at no extra cost to you. Please see my full disclosure here.
Summerween is Back!!
And I’m here for it!! As someone who enjoys decorating for each holiday, planning early is key. It’s fun to see what the design trends will be for the upcoming season, not that I always follow them. 🙂
Michaels has already released two Halloween Decor Collections including the Trick or Treat Decor Collection, which includes nostalgic family faves, like cats, ghosts, pumpkins and more.
The Sweet and Spooky Collection is a mix of pastels with pops of pink and black decor with lots of skeletons, ghosts and trending pop culture puns.

My air dry clay ghosts blend a mix of the two decor collections.
Lowe’s is also jumping on the summerween train by bringing back their viral 10′ skeleton and a full line inspired by Disney’s The Haunted Mansion.
The green footsteps LED lights are a best seller and a great way to welcome trick or treaters. My nieces would LOVE to see this on their front porch.
Air Dry Clay Ghosts for Halloween
I’m a huge fan of all things ghost as part of my home aesthetic DIY and each year I add a new ghost craft to my collection.
I’ve been wanting to work with air dry clay a bit more, so this was the perfect time.
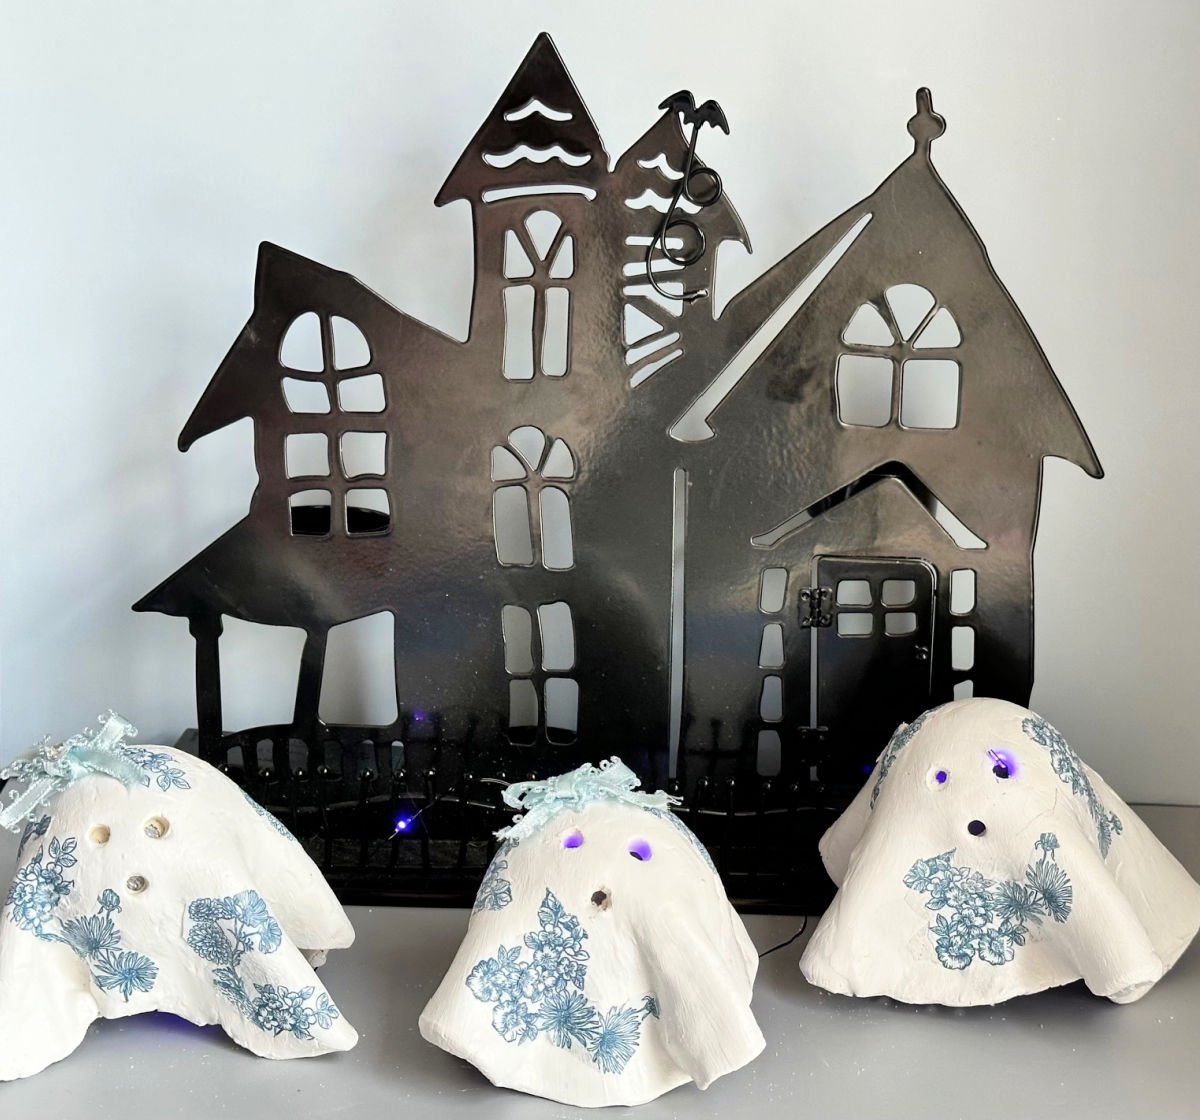
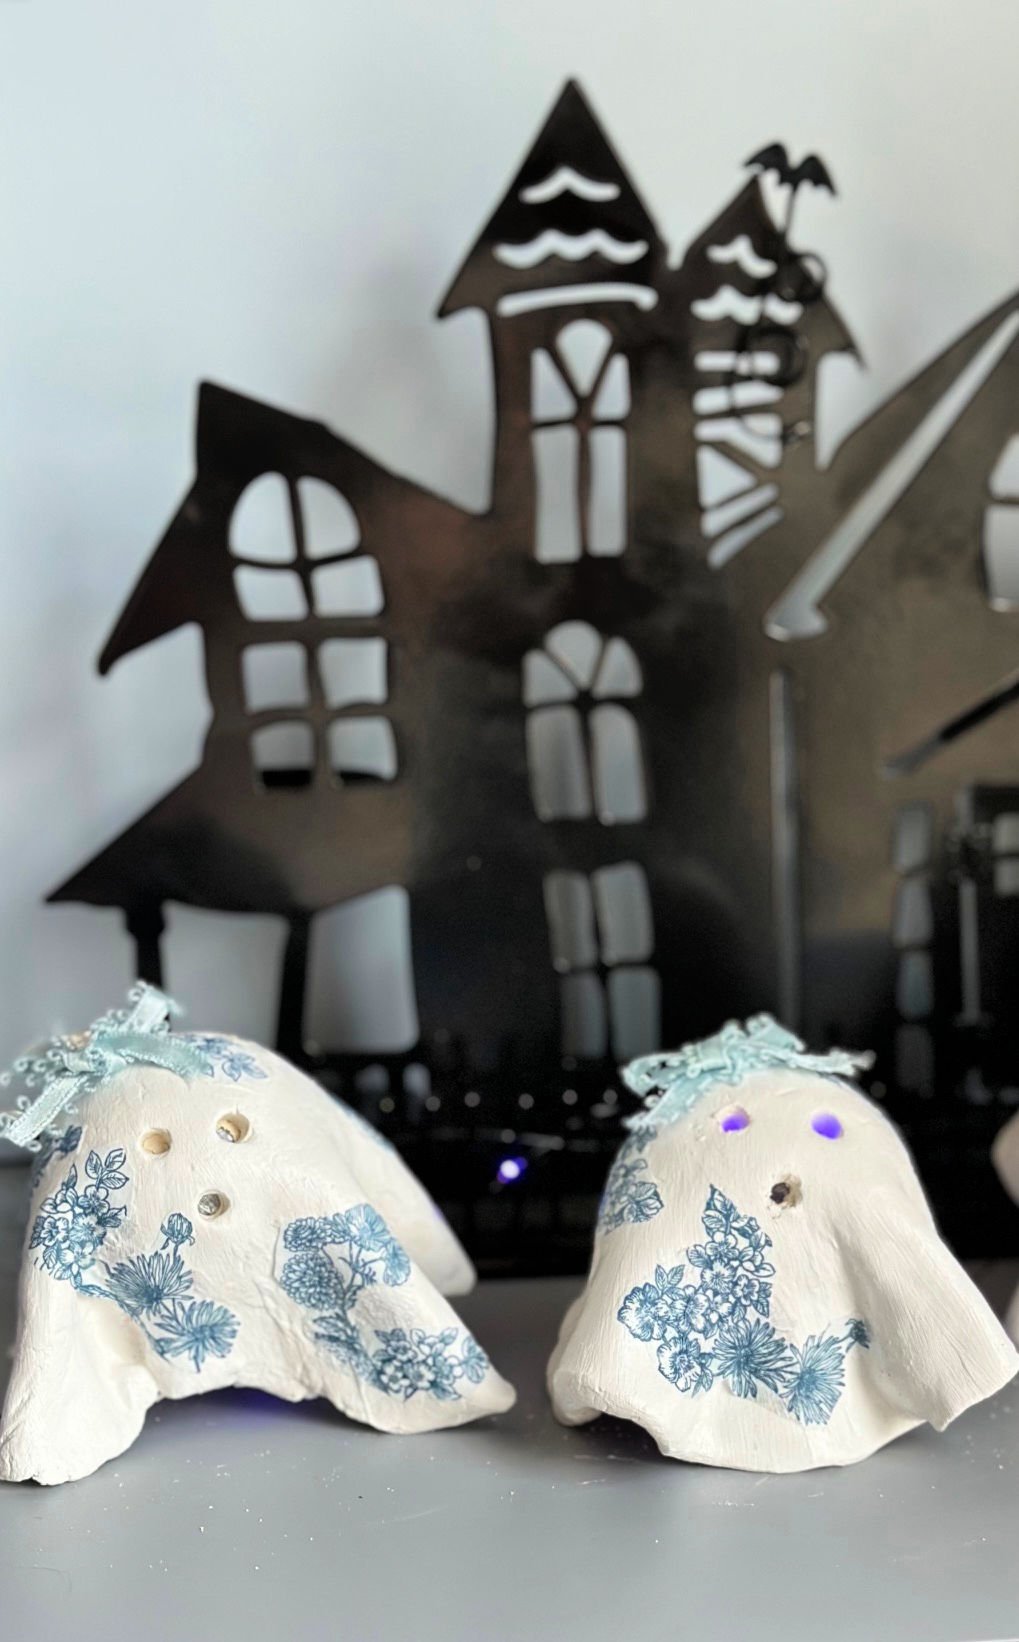
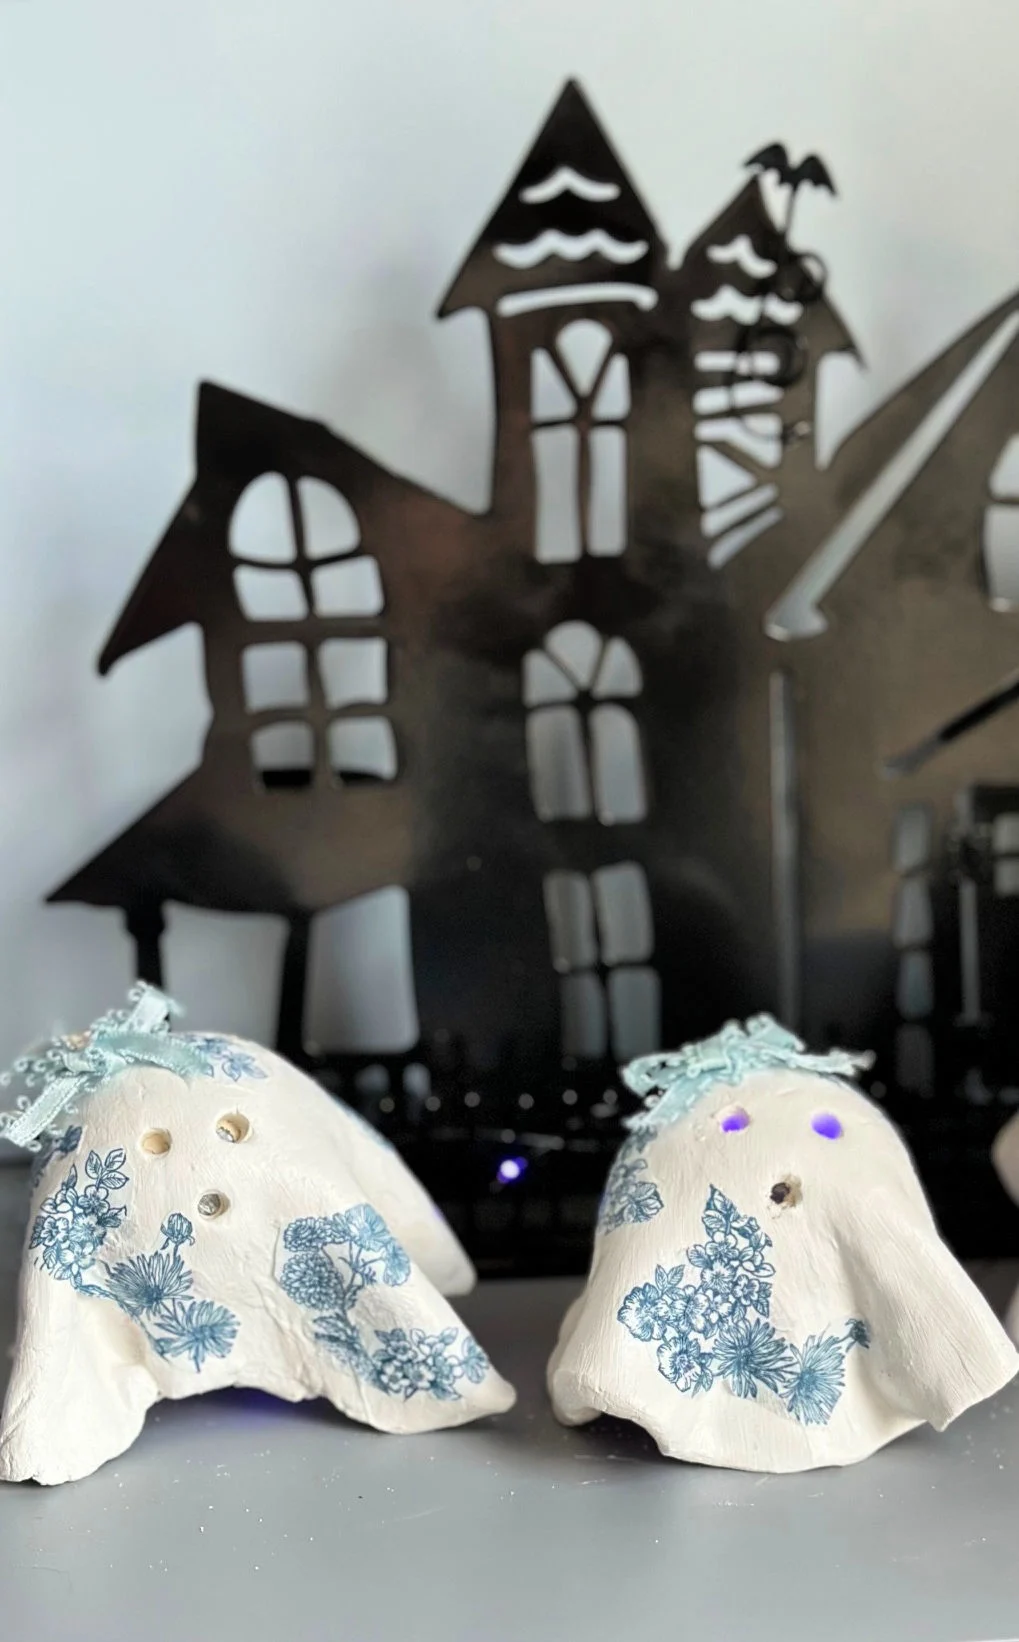
Look at how sweet these little ghosties are:

Be sure to check out the tutorial for the thrift store ghost art that was a viral TikTok trend last season and the super cute no-sew ghost pillow inspired by one I spotted at Homegoods.
Supplies Needed for Air Dry Clay Ghosts
The good news is you only need a few inexpensive supplies to make these clay ghosts. Plus, they are simple enough to make with the kiddos, with a little guidance.
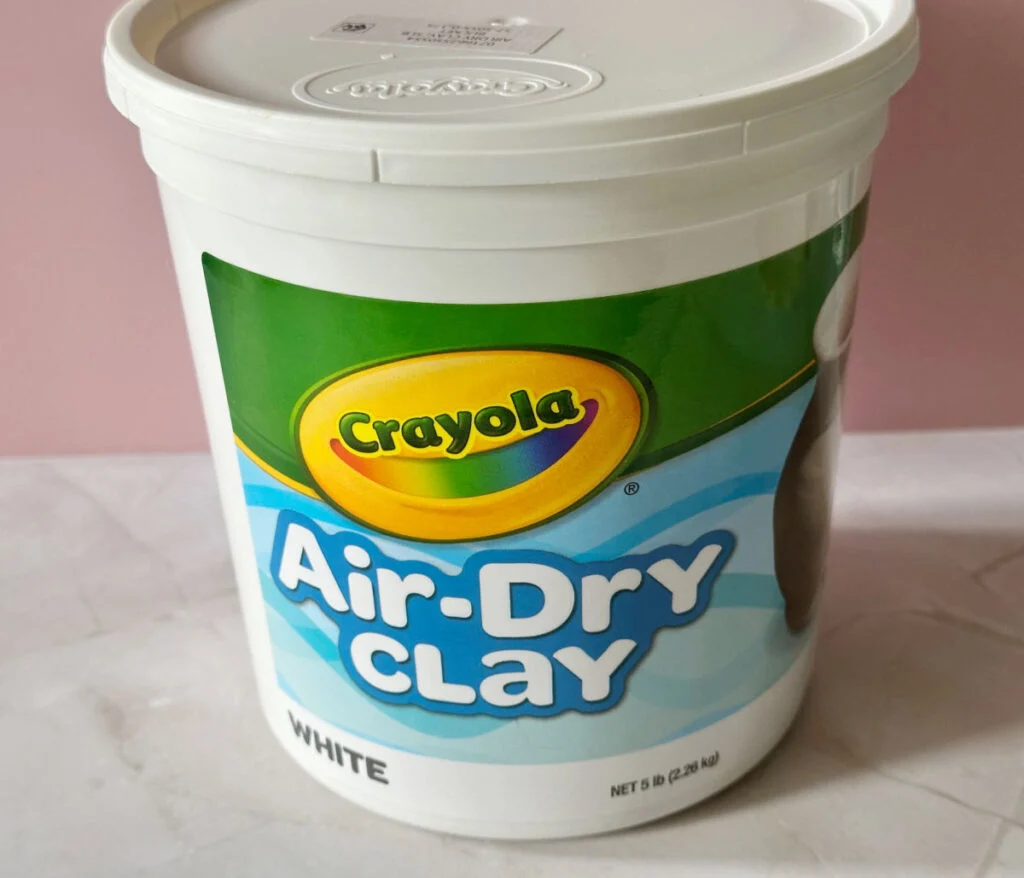
- Air Dry Clay – this 5 lb tub is a great deal on Amazon!
- Rolling Pin
- Small Ball – I used a small plastic ornament, but you can use a golf ball, or any other small round ball.
- Plastic Wrap – or reynolds wrap, to help form the ghost,
- Paint – I used white acrylic paint, but you can use any color you like.
- Foam Brush
- Mod Podge
- Napkins – I went with blue and white chinoiserie flowers, but you can use whatever you like.
- Craft Scissors – snips or detail scissors are a big help when working with small cuts.

How to Make Air Dry Clay Ghosts
Create a Mold: look around your house and find something that is the right size for the ghost you want to make. I found a small plastic ornament and a mini glass jar in my stash.
A ping pong ball or golf ball would work as well. If you don’t have anything handy, you can use reynolds wrap to form the shape and rest it on a cut paper towel tube or toilet paper tube.
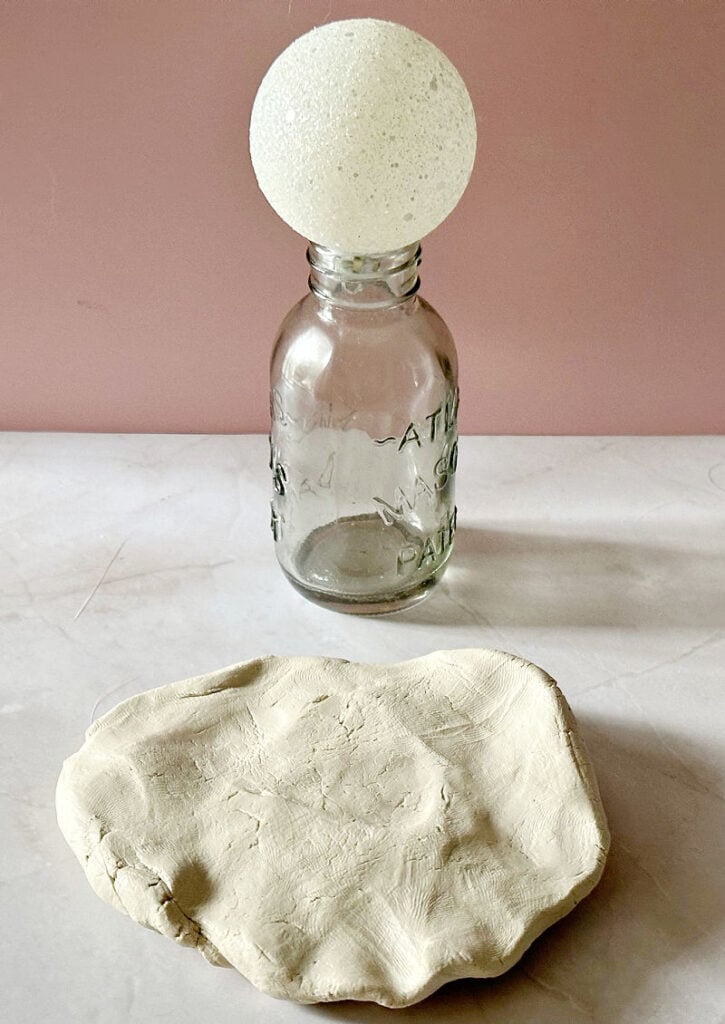


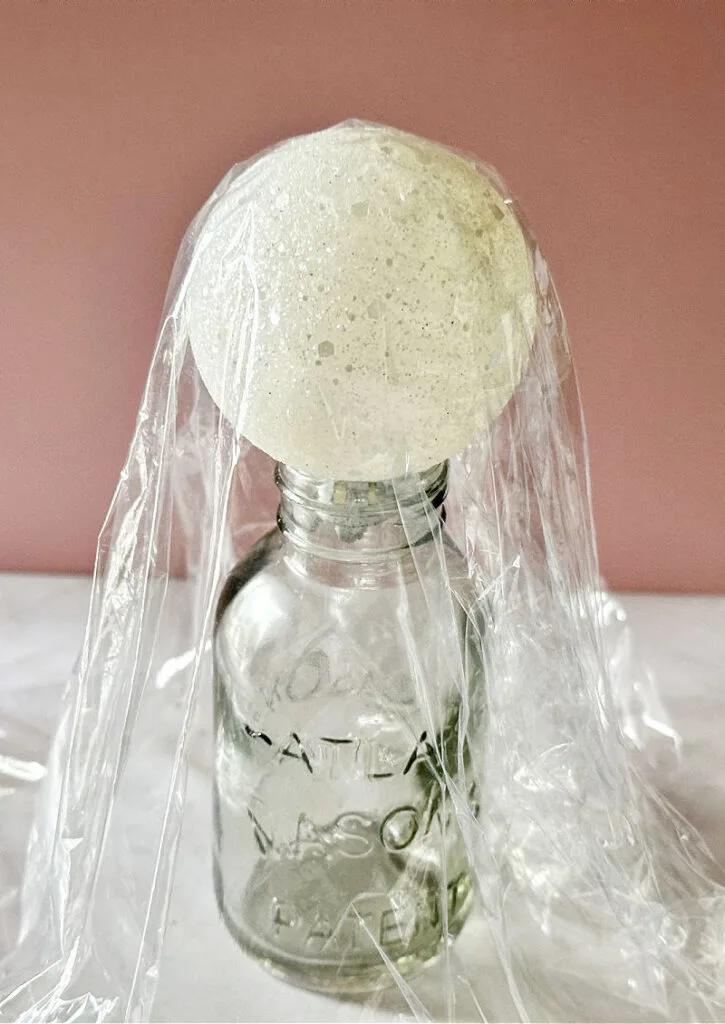
Cover the mold with plastic wrap. This makes it easier to remove the clay.
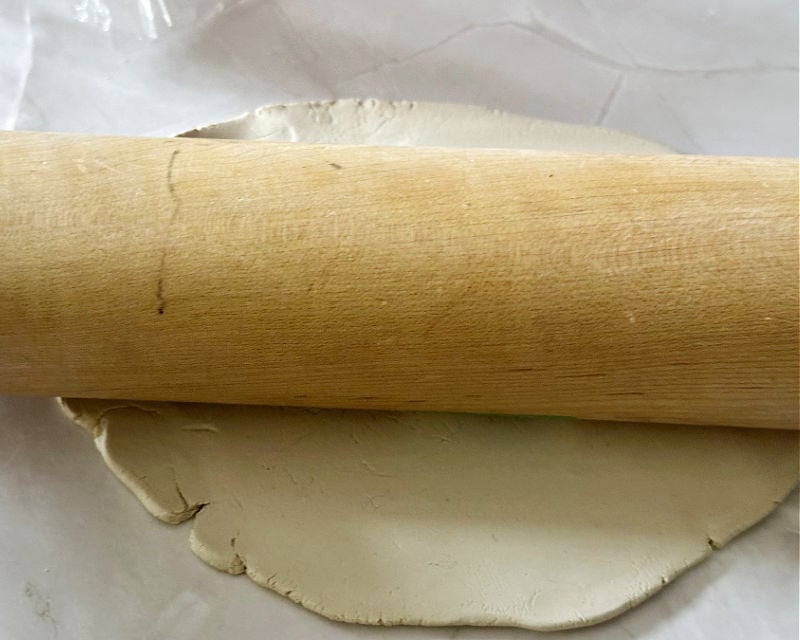
Roll the Clay: Take a chunk of clay and knead it in your hands to soften it up. Flatten it and use a rolling pin to roll it out.

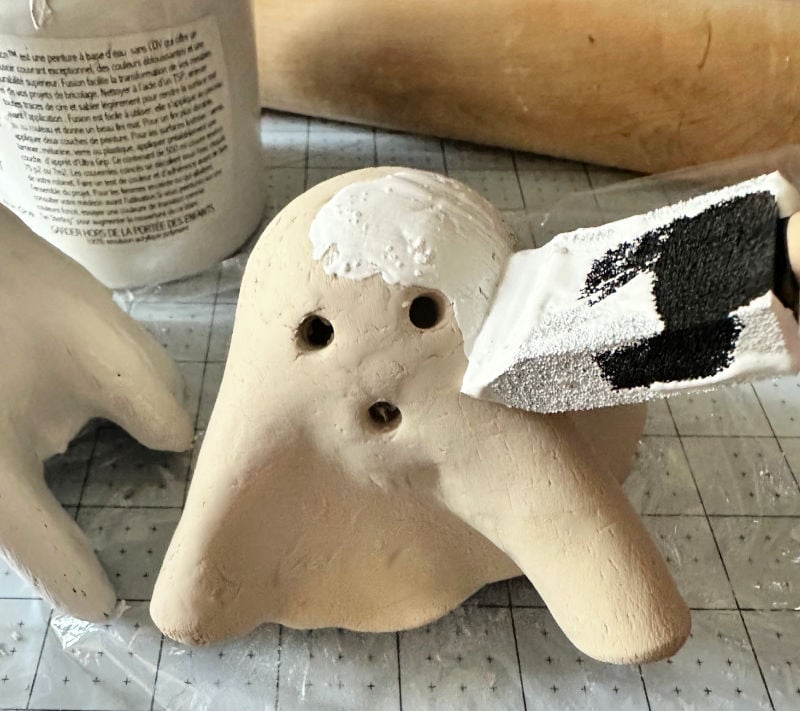
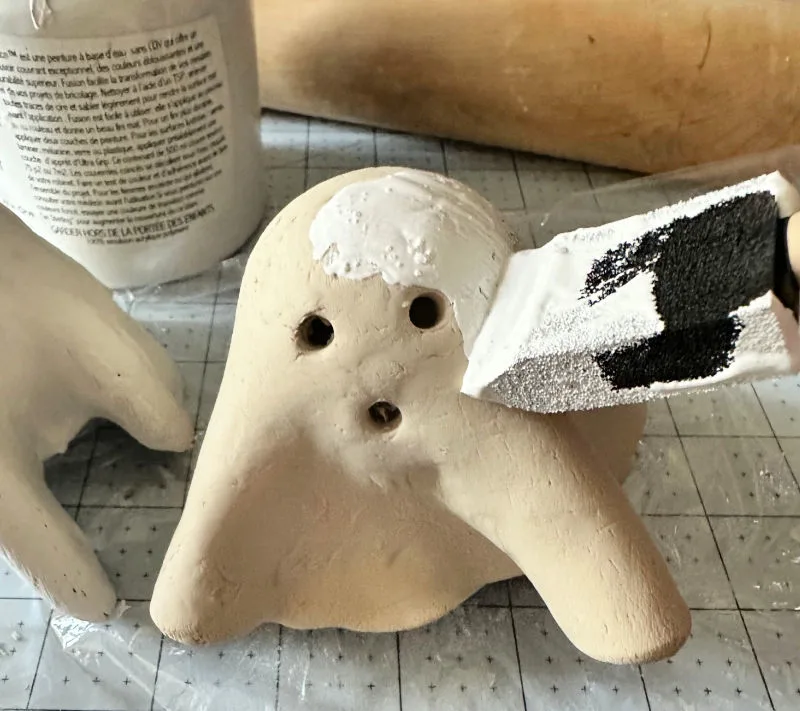
Create the Ghost: Place the rolled clay over your mold. Let it fall naturally to create the folds.
Add a Ghost Face: Use a straw or bottom of a pencil to create a cute ghostie face. I just went with a classic face, but you can get creative with your ghost face. Make it spooky if you like!
Let Dry: The great thing about working with air-dry clay is you don’t have to bake it. Simply let it air dry and you are ready to paint. I let mine sit overnight, but it should be ready in about 4-6 hours.
Paint the Ghost: Use a foam brush and your paint color of choice to paint the entire air-dry clay ghost. I was considering going with pink, but chose to go with white. Let it dry.
Decorate the Ghosts: Now for the fun part, decorating your clay ghosts! I had pretty chinoiserie chic napkins in my craft stash and thought they would be perfect for the look I wanted.
For a detailed tutorial be sure to read my post on how to decoupage with napkins.

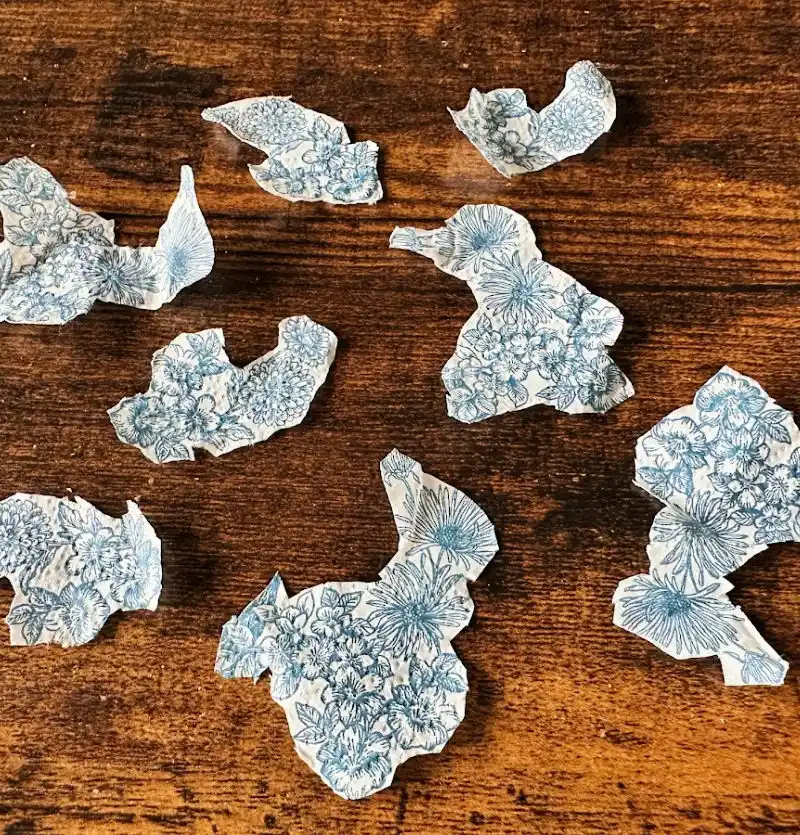
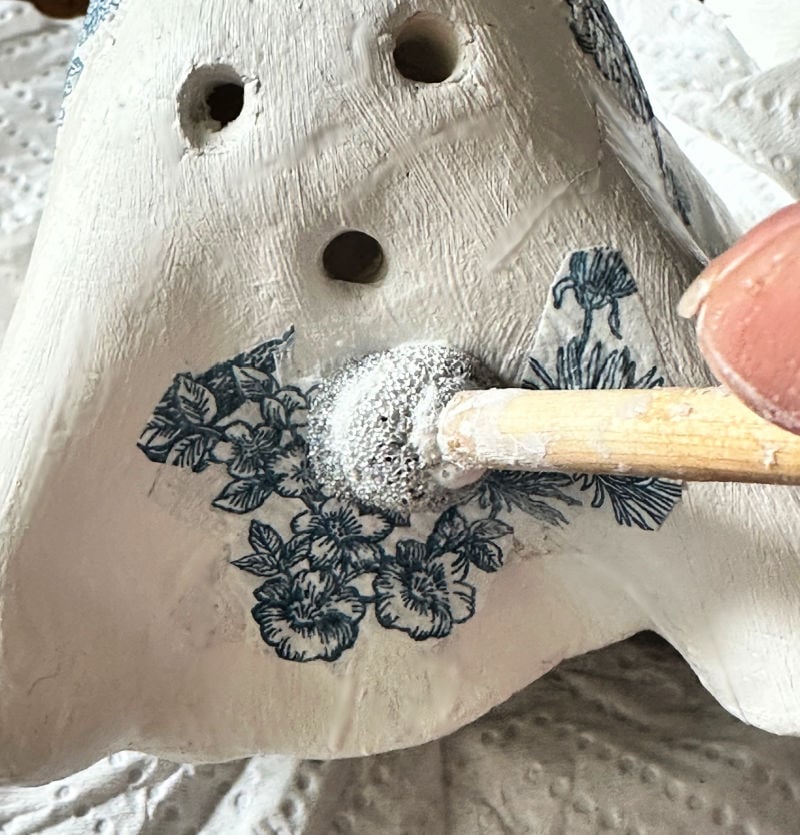
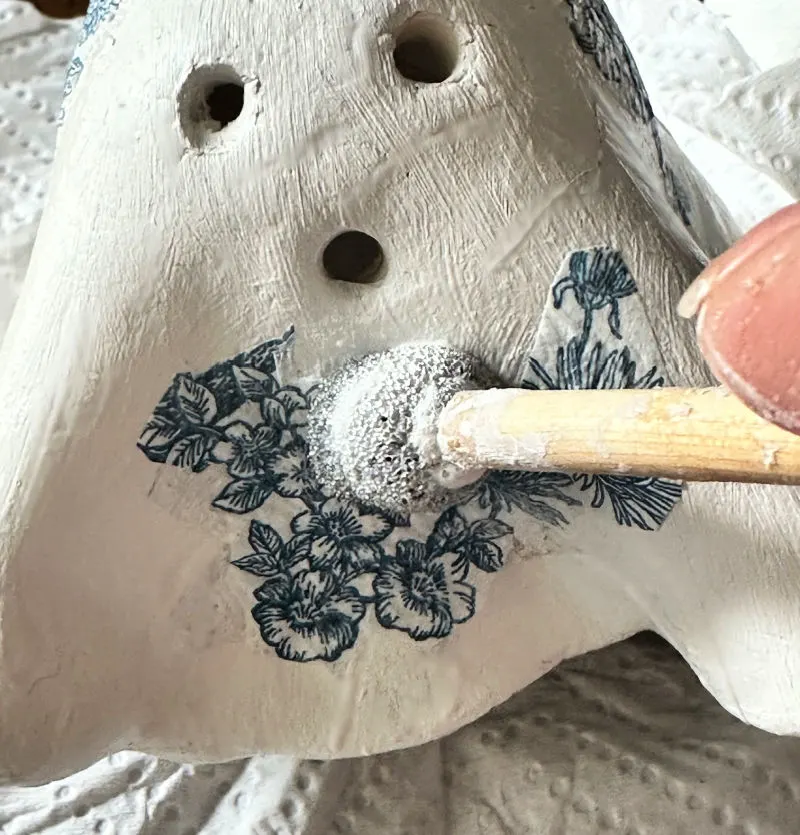
Remove the printed layer of the napkin and cut the flowers to size. Add a bit of mod podge on the ghost where you want them to go and smooth.
I used 4-5 napkin flower pieces per ghost. Cover with a top coat of mod podge. To up the cuteness factor, I added a small ribbon bow to a couple of the ghosties.

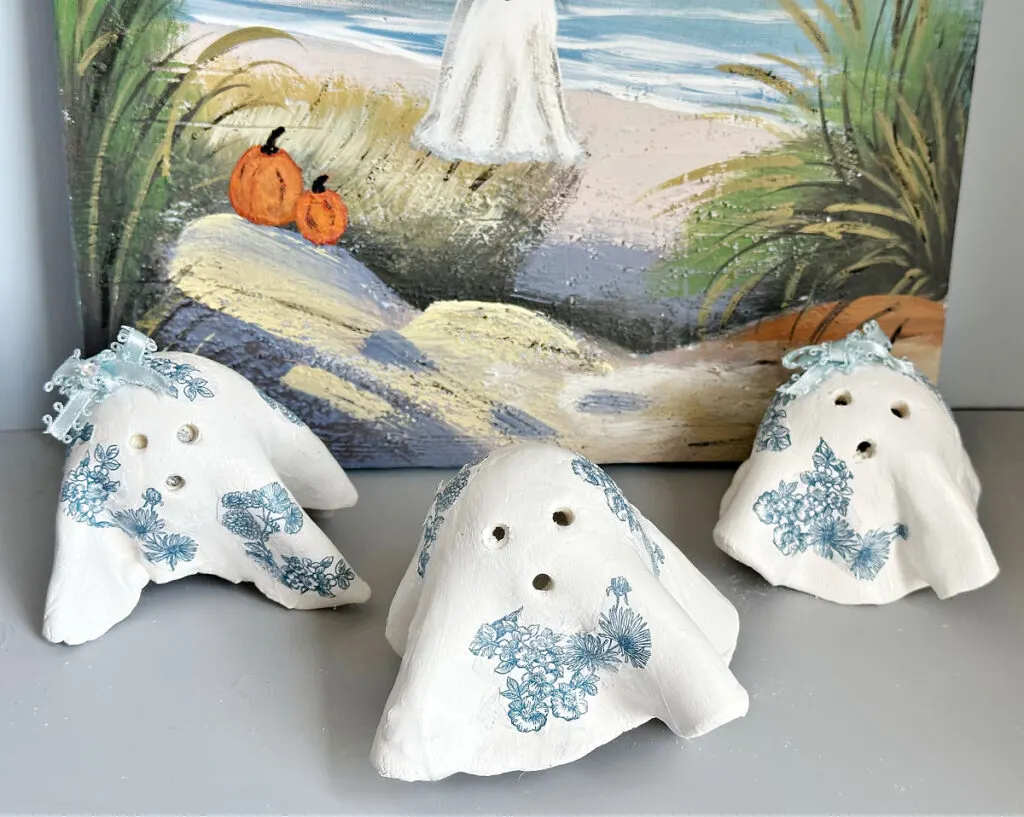
That’s all there is to it! You can light the ghosts by placing a battery-operated tea light under each one, or use fairy lights as shown below:
Pin For Later
Share this article with your friends on Pinterest by pinning the below image.
It helps my blog grow and doesn’t cost a thing! 🙂
Thanks so much for stopping by. Happy Summerween!


You may also enjoy these DIY Halloween crafts and home decor:
- Thrift Store Dollhouse Makeover for Halloween
- Thrift Store Upcycled Halloween Art
- Halloween Bat Pillow Pottery Barn Dupe
- Halloween Pumpkin Diorama
- 20 Cricut Halloween Project Ideas
- Day of the Dead Pumpkin
- Black and White Halloween Mantel Decor
- Ghost Mugs Tutorial
- FREE Hocus Pocus printables
Follow me on social media below: