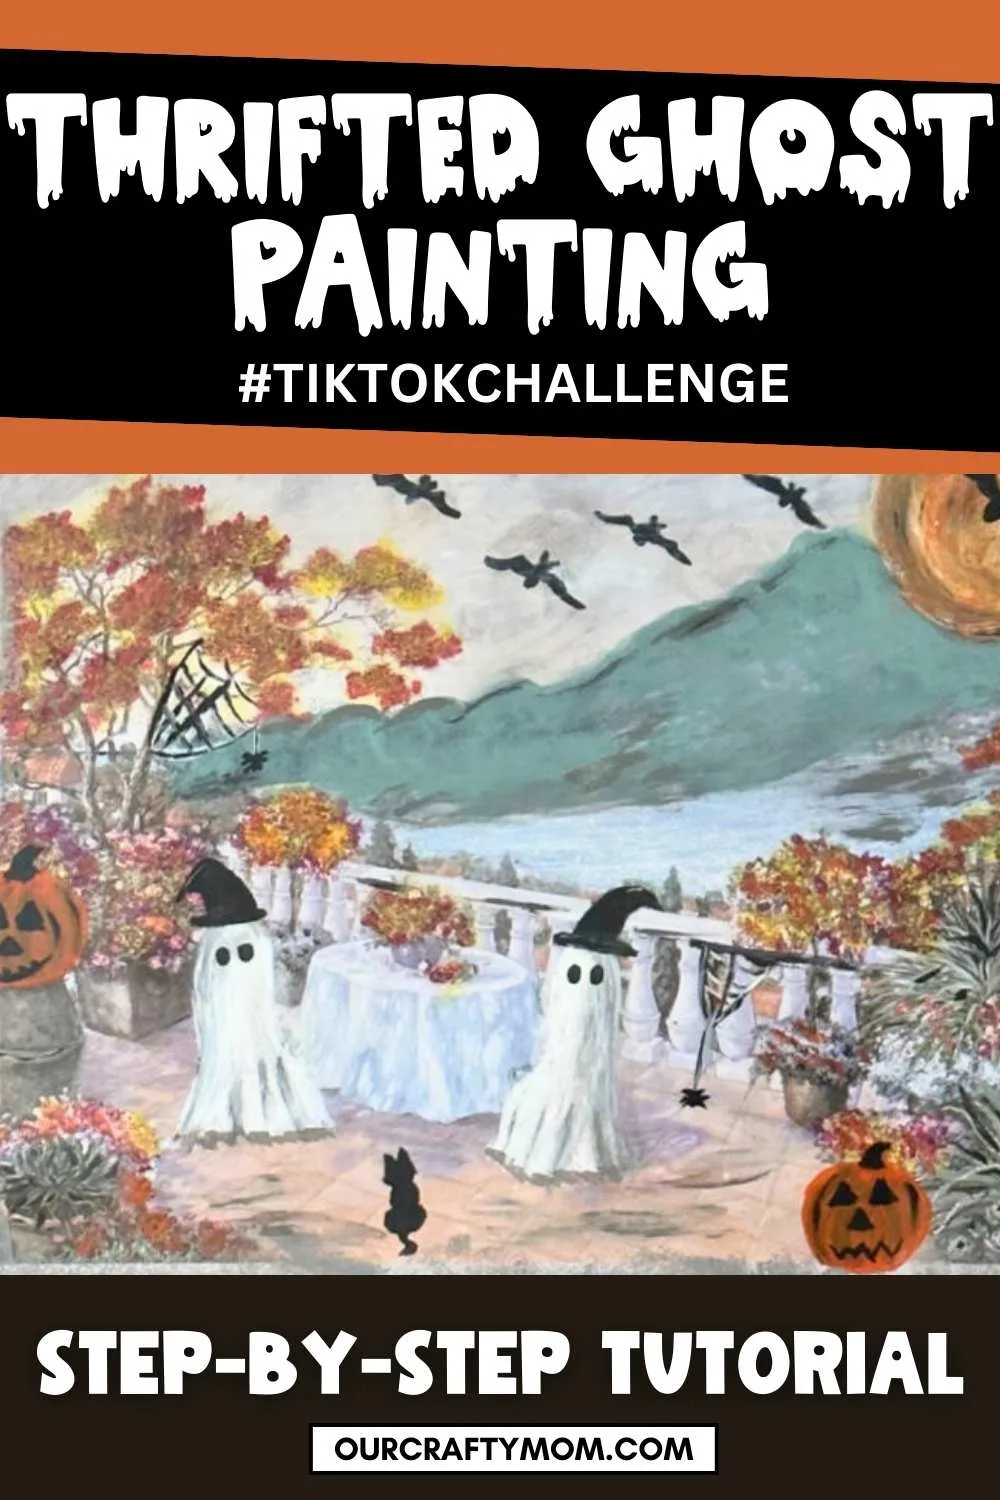
Transform your home into a haunted haven with the hottest thrift store ghost trend for Halloween art. Let me show you how to make your own!
Are you ready to jump on the spooky ghost painting trend that has gone crazy viral on on TikTok?
I am having way too much fun with this challenge and wanted to share my best painting tips so you can make your own ghostly art.
Keep reading to get the easy step-by-step tutorial.

Tips on Repurposing Old Paintings
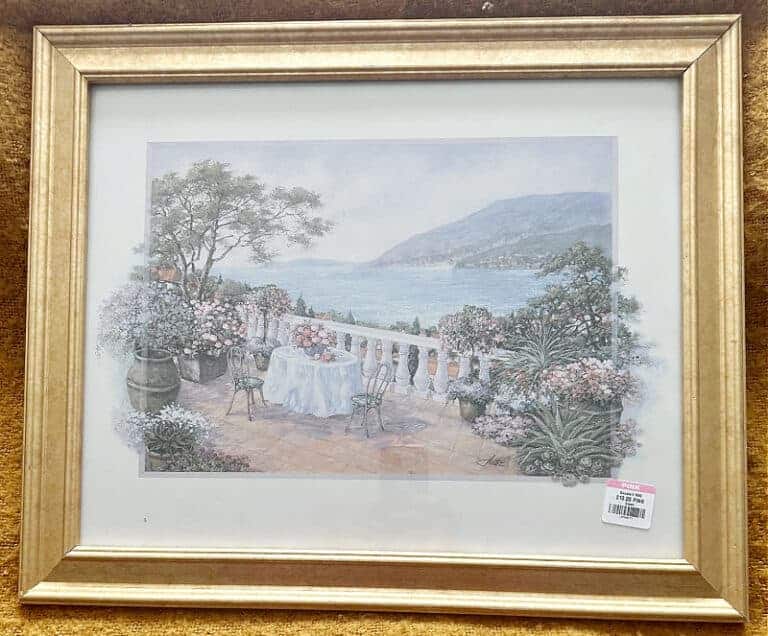
The first step is to run to your nearest Goodwill to find just the right thrift store painting.
There are a few things to look for.
- Try to find a canvas, rather than a print if you can. A canvas holds the paint better.
- Look for art work that already has a bit of a spooky look. For example, a landscape painting tends to work well, as you can paint ghosts in the trees. Look for scenes that are a bit gray and dark. Black and white paintings also work well.
- Stick with a budget. I’ve had great luck searching Goodwill paintings and never spend more than $10. You want this to be a fun way to repurpose old paintings and not stressful. Especially if you are a beginner painter, you don’t want to invest a ton of money.
- Don’t use Grandmas antiques! Before you paint over any art in your basement or attic, check to make sure it’s not valuable or sentimental. You never know what you may find.
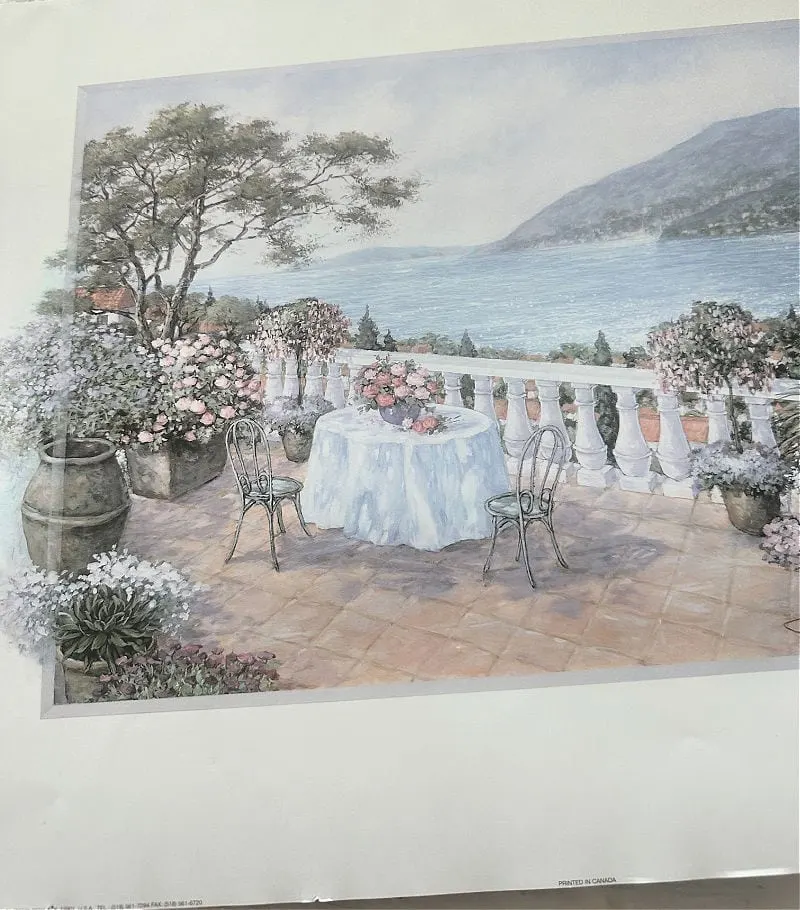
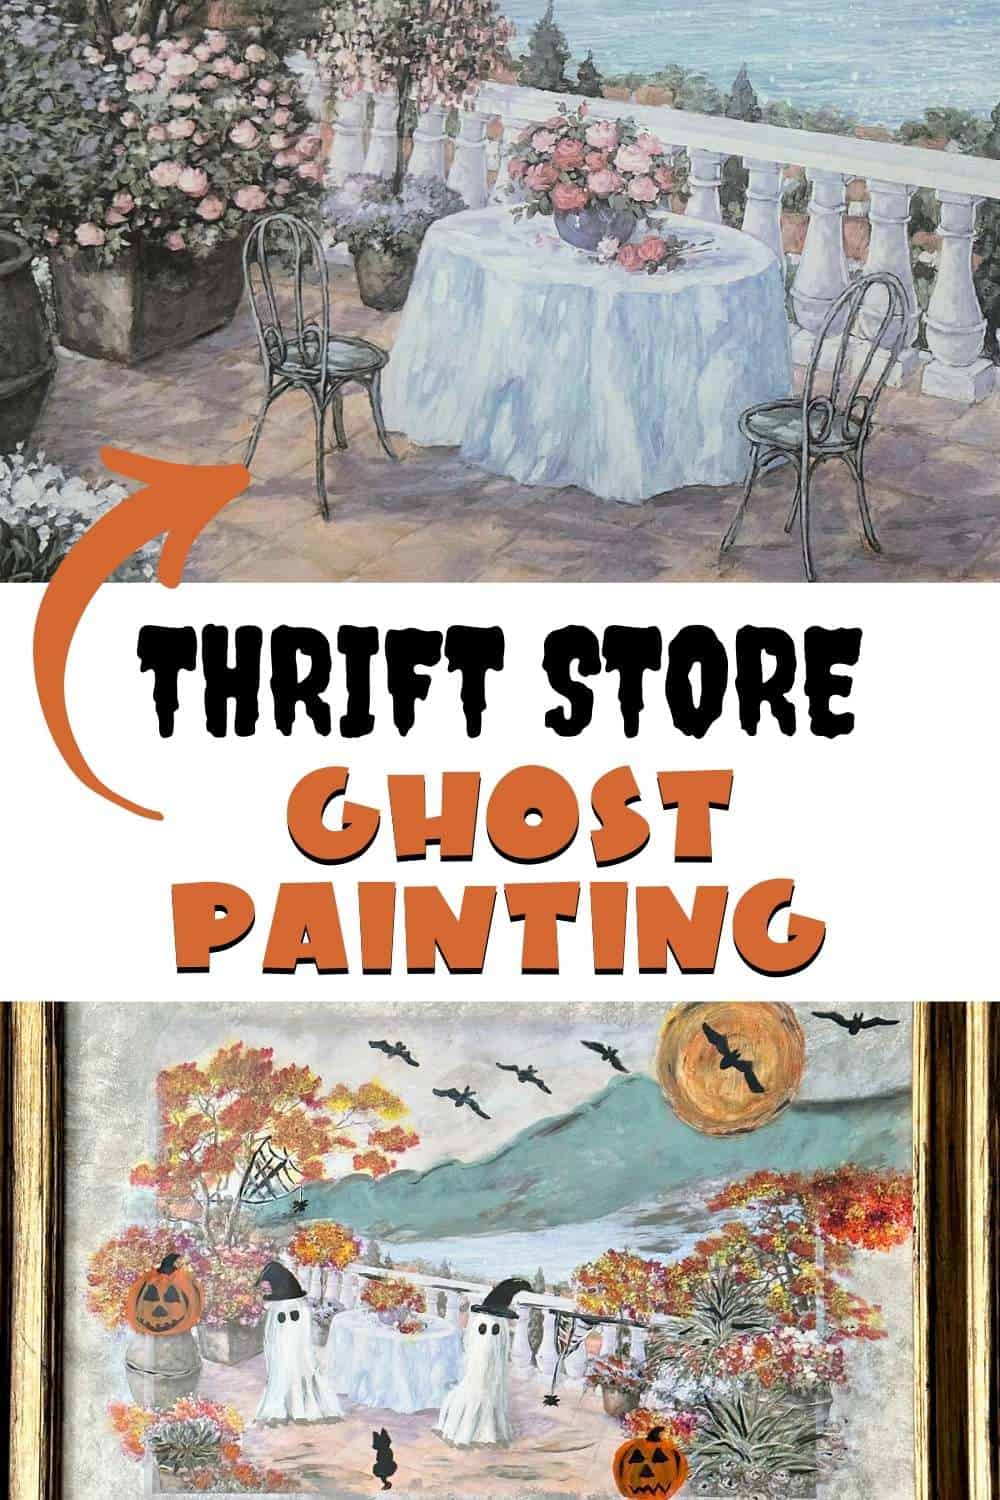
This is the painting I picked up for $7 on #NationalThriftStoreDay:

This post contains affiliate links at no extra cost to you. Please see my full disclosure here.
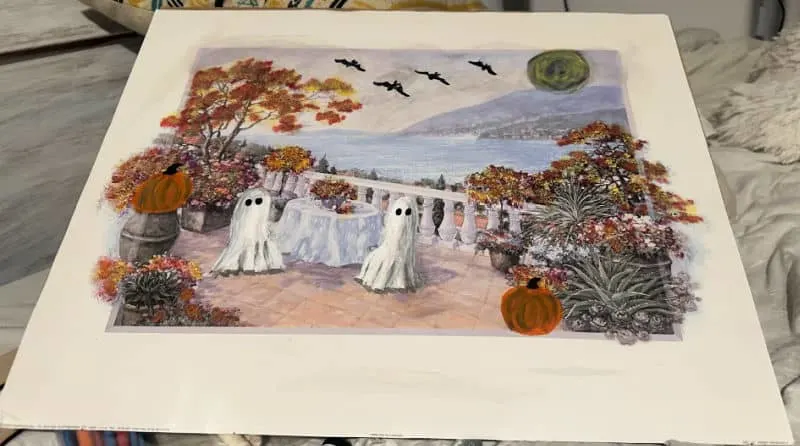
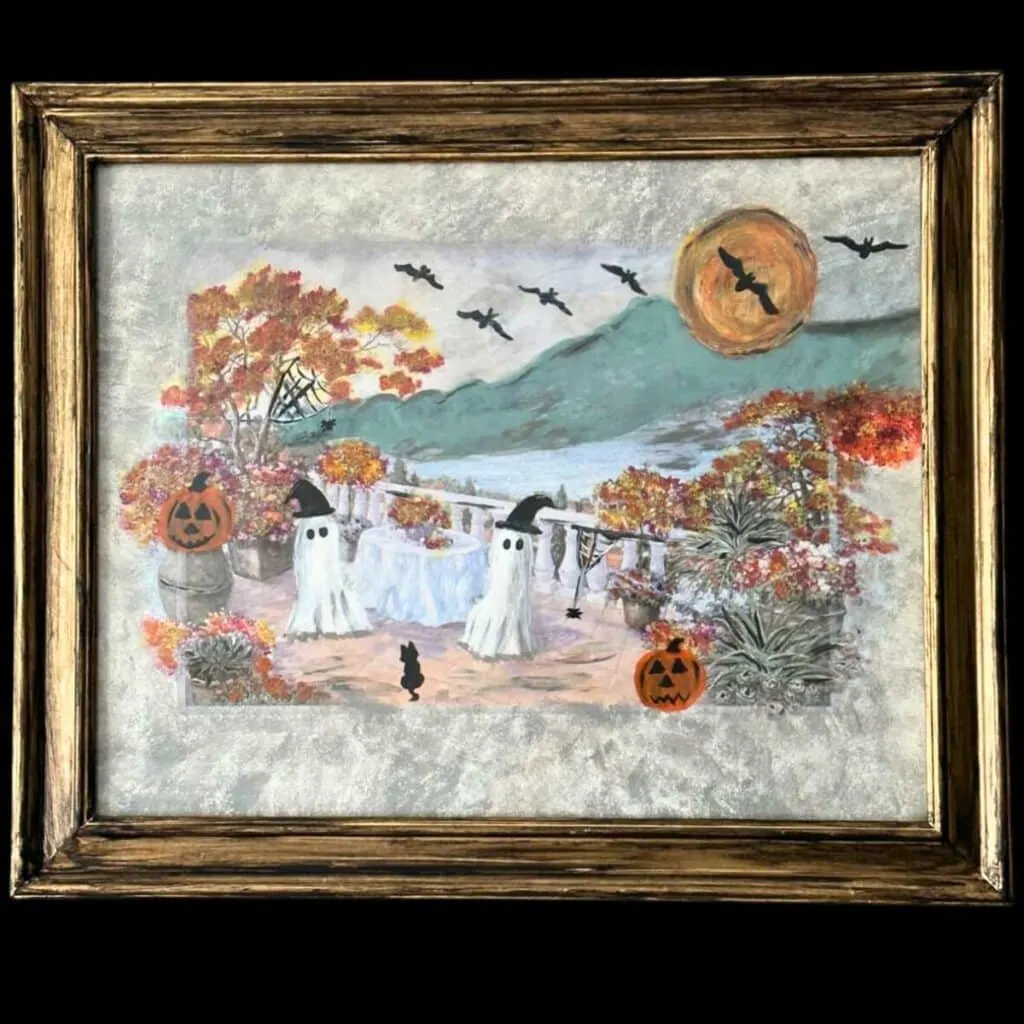
The first thing I thought of was painting ghosts sitting at the table.
I wasn’t worried about the pastel flowers because I knew I could paint them with deep reds and oranges for fall.
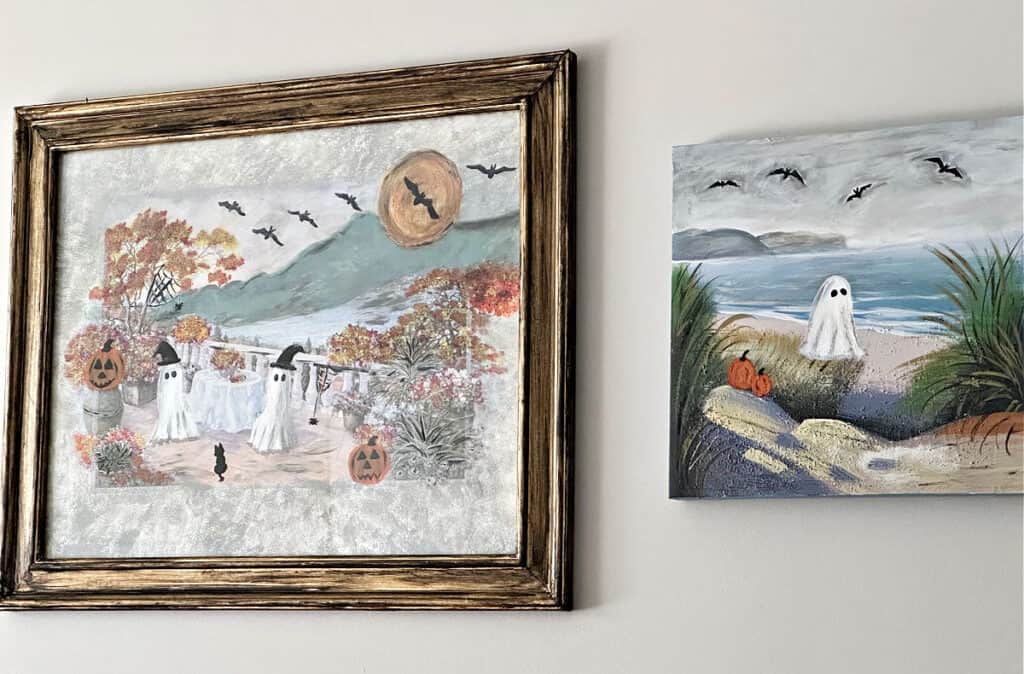
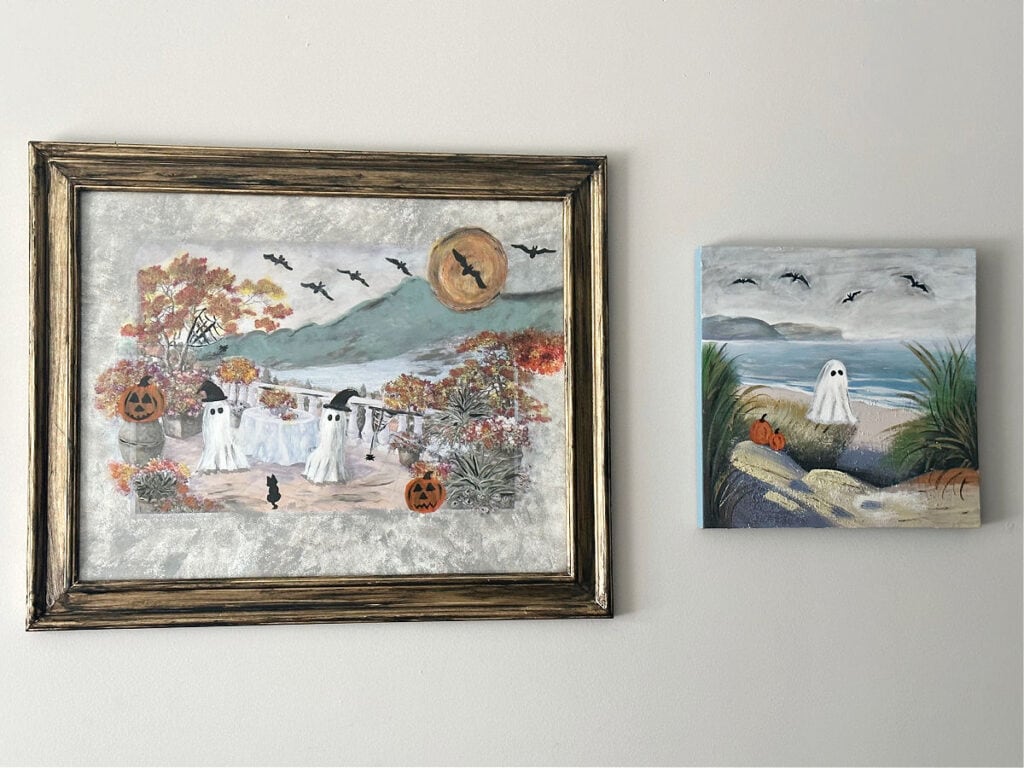
I also found a small canvas for $1 that I used on my first ghost painting that you can see here.
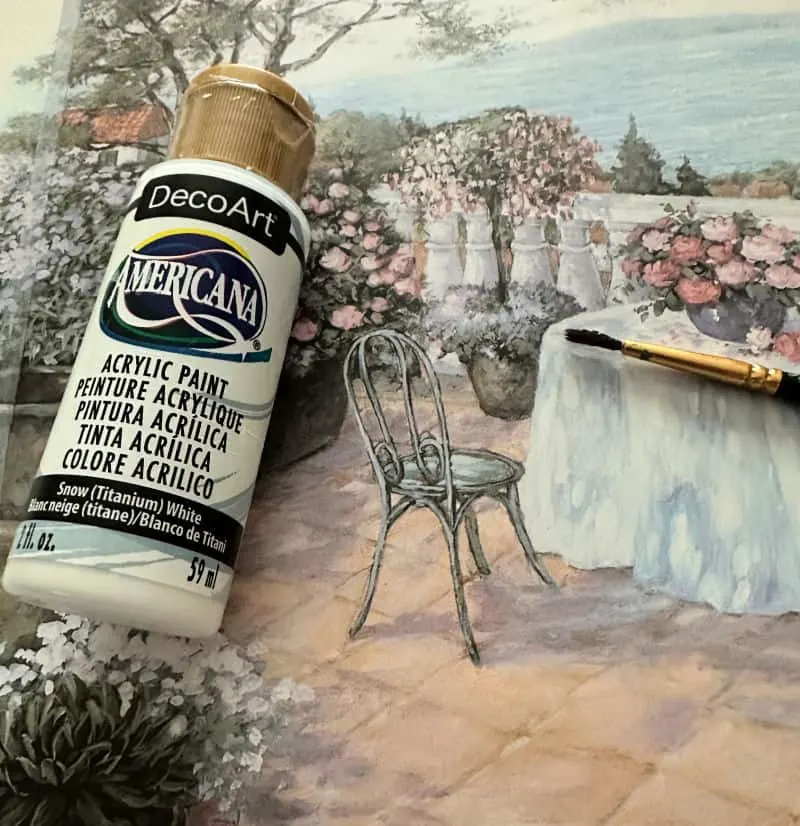
What Type of Paint is Needed?
Now that you have your painting, let’s talk about the type of paint you need to create a thrifted ghost painting.
Acrylic paint works great. You know I am a big fan of Dollar Tree crafts, but I don’t recommend using dollar store paint.
I do have some that I’ve used with my nieces and it is very runny and doesn’t have the best coverage.
Plus, you can buy the 2 0z acrylic paints at Michaels, JoAnn Fabric and Crafts or Walmart for about $1-2 depending on the brand.
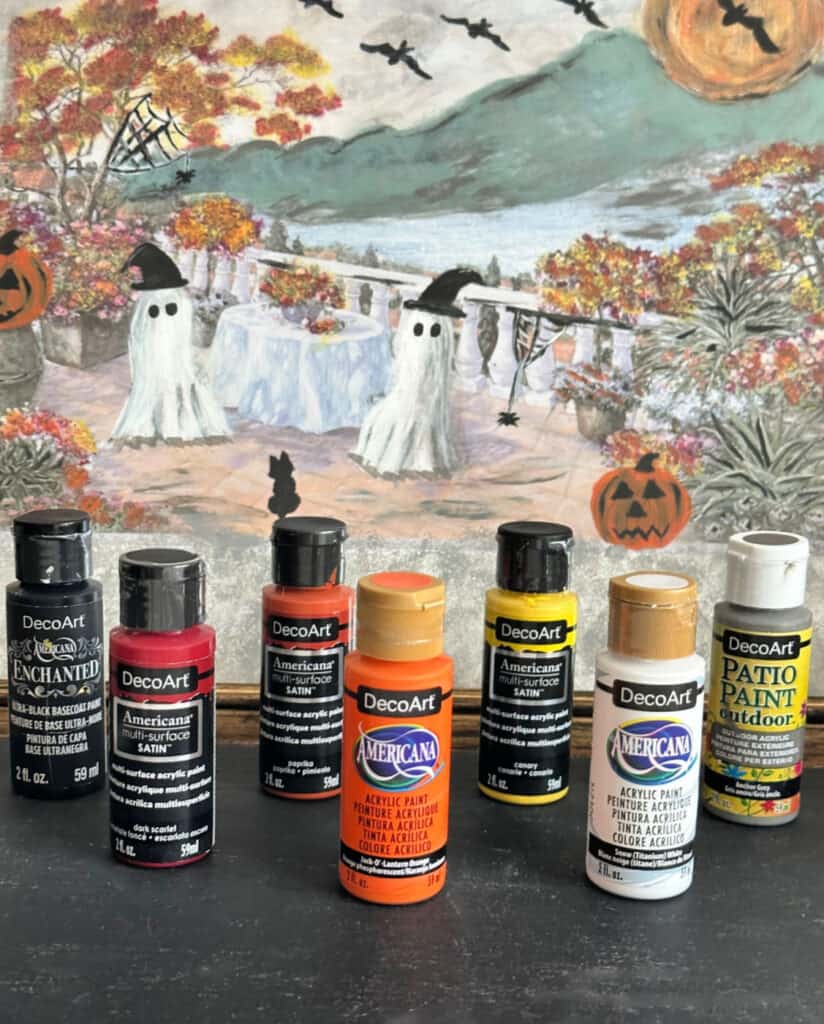
It helps to stock up when it is on sale. I’m a big fan of DecoArt products. Full disclosure, I am a Brand Ambassador for DecoArt, but I have been using their products for many years-long before blogging.
I’ll link the exact colors I used below:
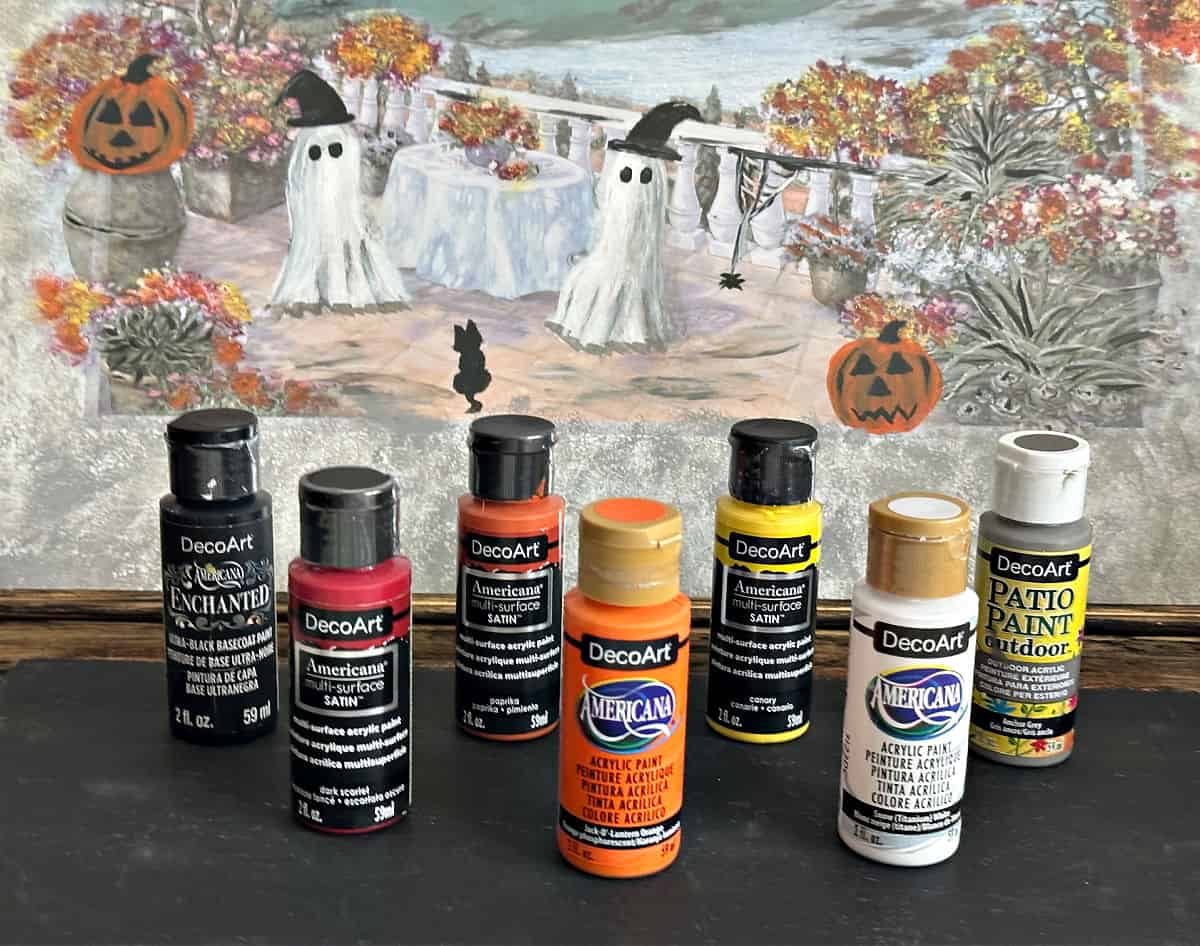

Supplies Used For Easy Ghost Painting
- DecoArt Enchanted – or any classic farmhouse black paint
- DecoArt Anchor Gray – or similar gray paint
- DecoArt Snow White – or pure white acrylic paint
- DecoArt Lantern Orange – or classic orange paint
- DecoArt Canary Yellow – or bright yellow
- DecoArt Paprika – or deep rust
- DecoArt Scarlet – deep burgundy
- Assorted Paint Brush Set – be sure to get a set for beginner painting and drawing
- Kitchen sponge
- Paper Towels
- Foam Brush – if you are going to paint the frame


How to Draw a Ghost
This is a beginners paint tutorial for painting a ghost-because I am a beginner painter. 🙂
So I am sharing what worked best for me after practicing a bit. Hopefully, you will find it helpful too.
I’d love to experiment more with shading and will share tips as I go, so if you are already an experienced painter, you can skip to the next step if you want.


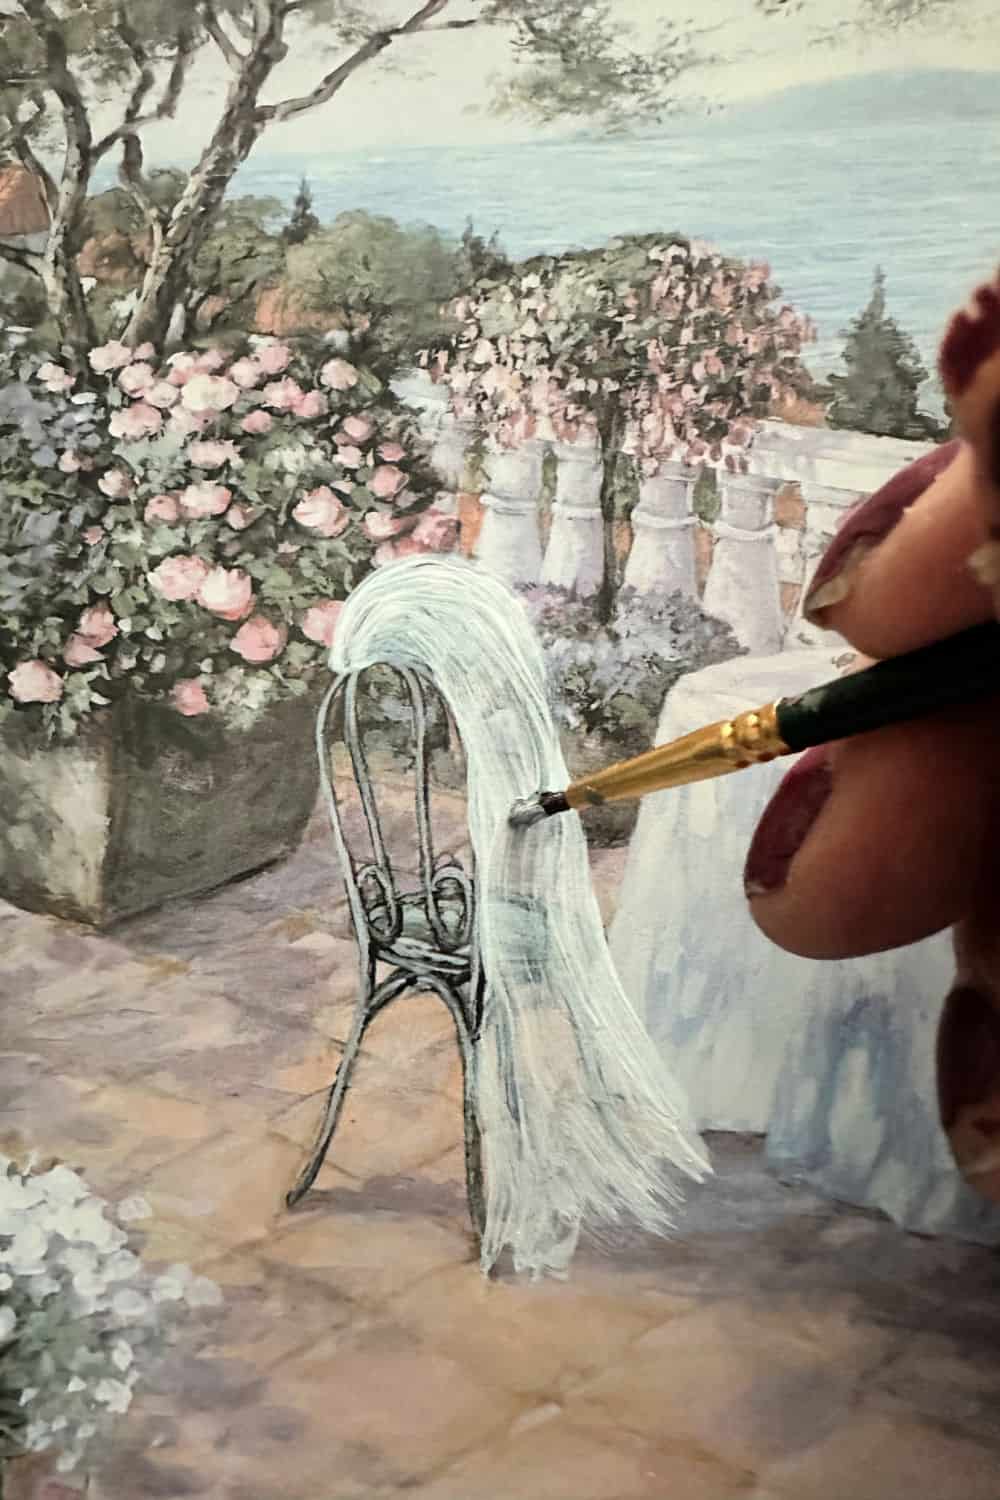
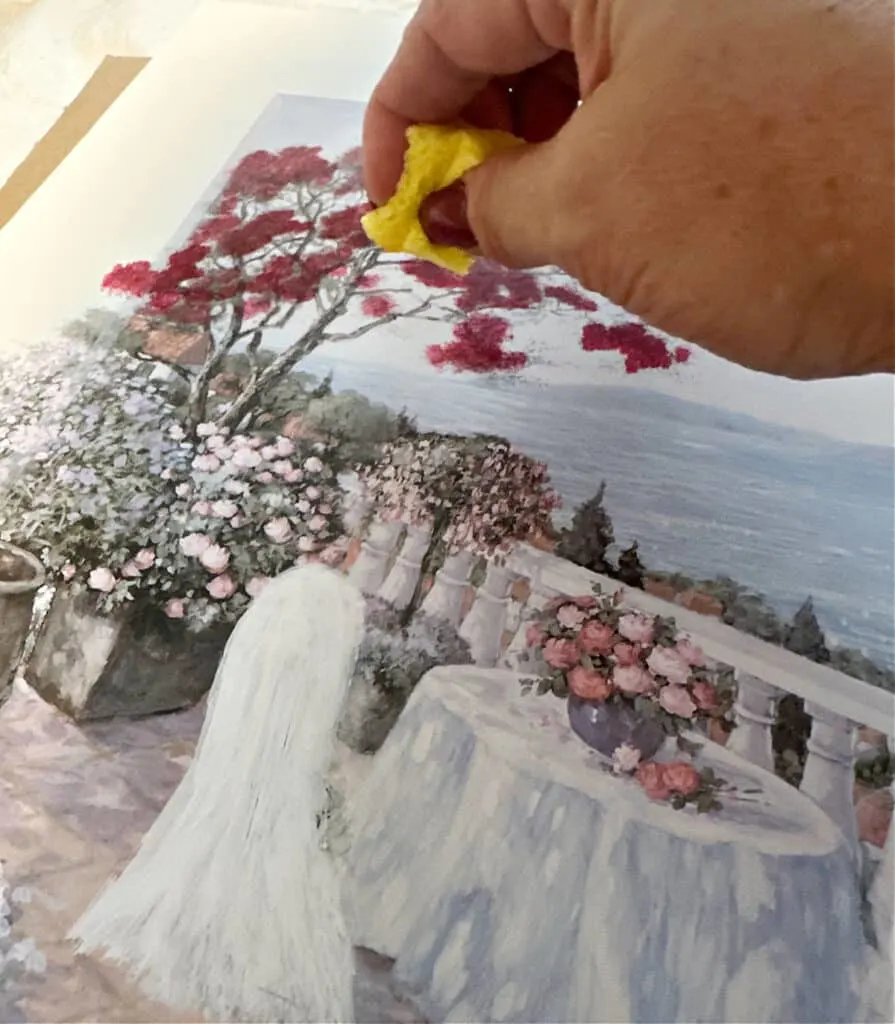
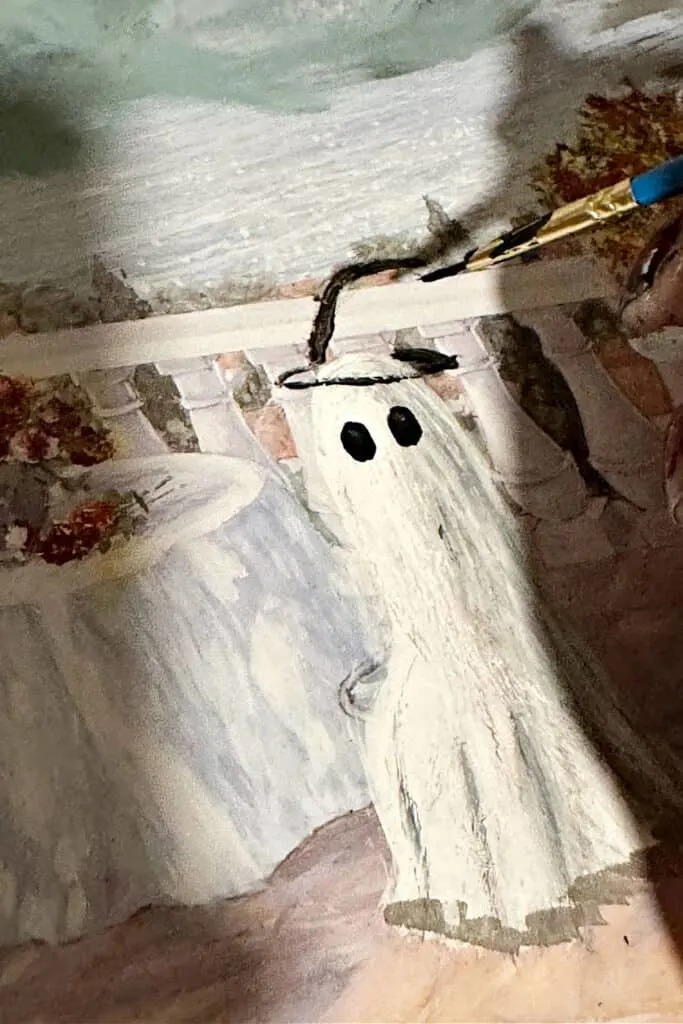
Start with a very fine paint brush and a light coat of paint. Pour some white paint on a paper plate and dab the brush into the paint.
It helps to pull up a picture of a ghost on social media to use as inspiration. You may also want to use a pencil to draw the ghost first.
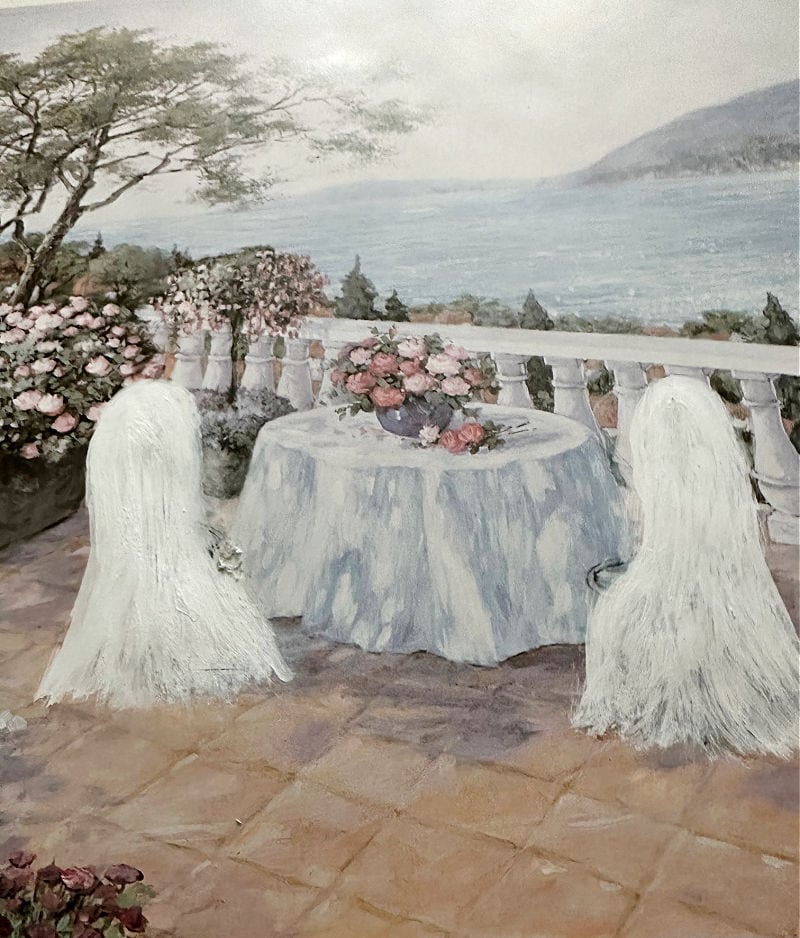
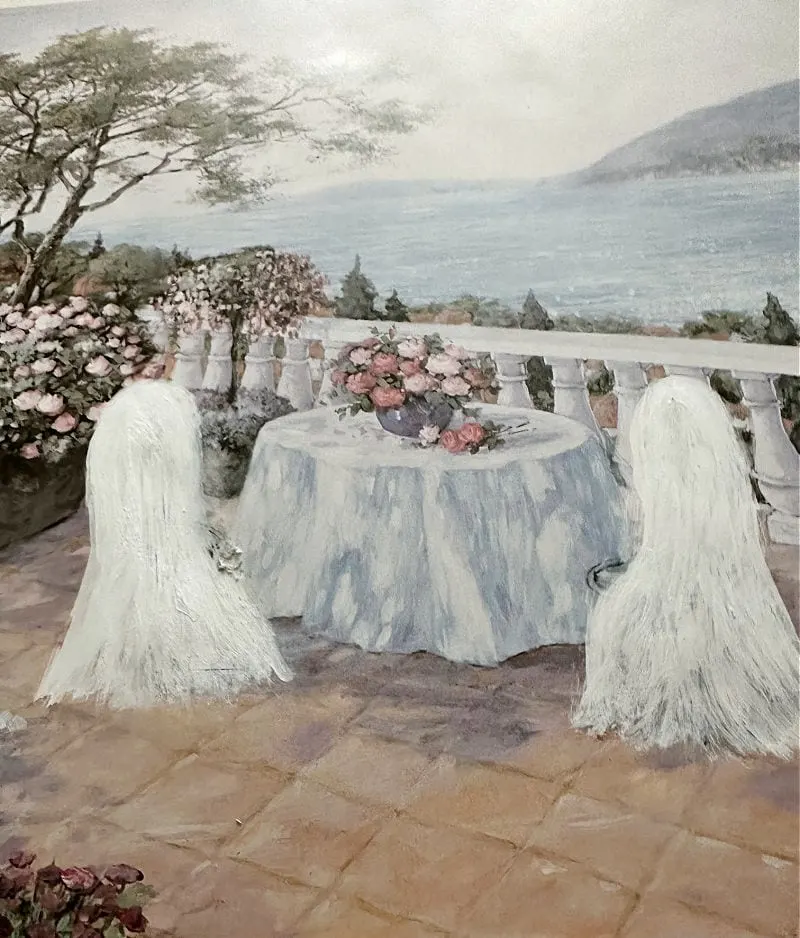


Because I wanted it to look like the ghosts were sitting at a table I indented the center of the ghost.
Start at the top of the ghost head and work your way down.
It is best to work with 2-3 light coats rather than adding a thick amount of paint.
Because this is a print, the material can get wet easily (ask me how I know).
Let each coat dry before adding the next. Flare the bottom of the ghost out so it looks like it is floating.
Acrylic Painting Ideas for Ghost Art
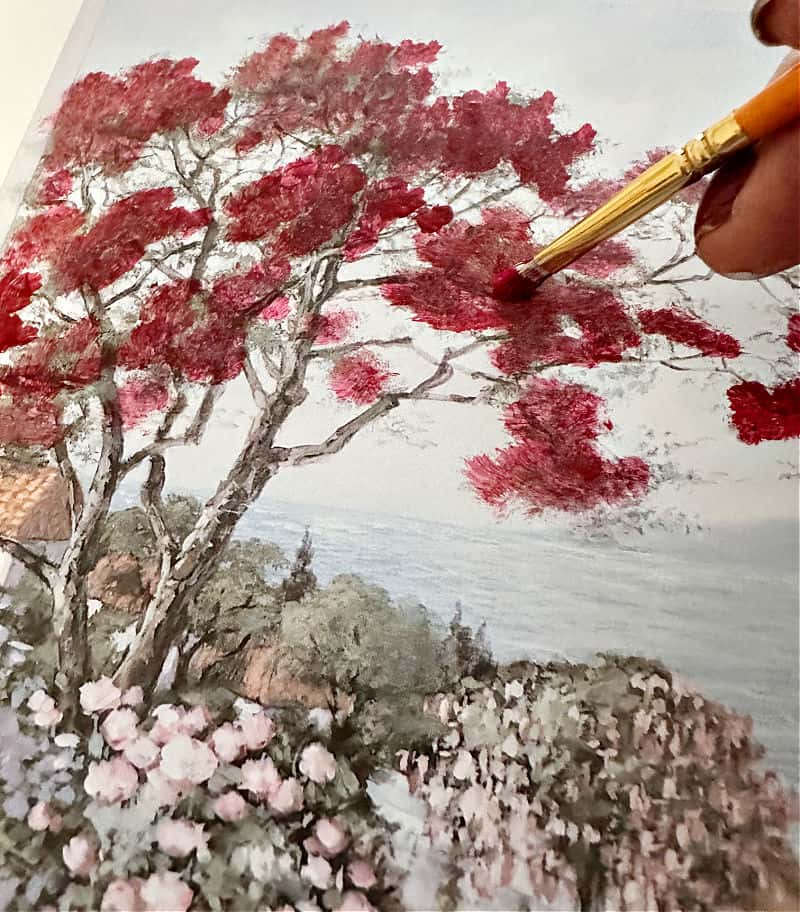
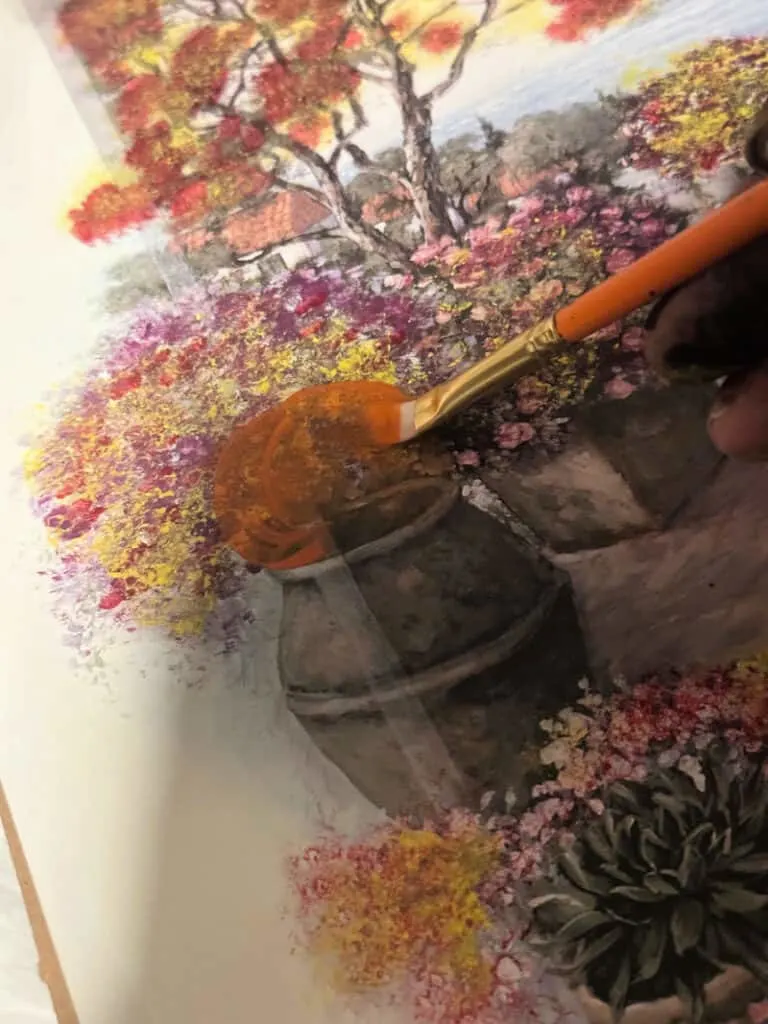
While you wait for the paint to dry, start painting over the flowers and plants with your fall colored paint.
A basic kitchen sponge cut in quarters works great for flowers.
Lightly dab on the paint and “pounce” over the tree. Add extra detail with a small paint brush.


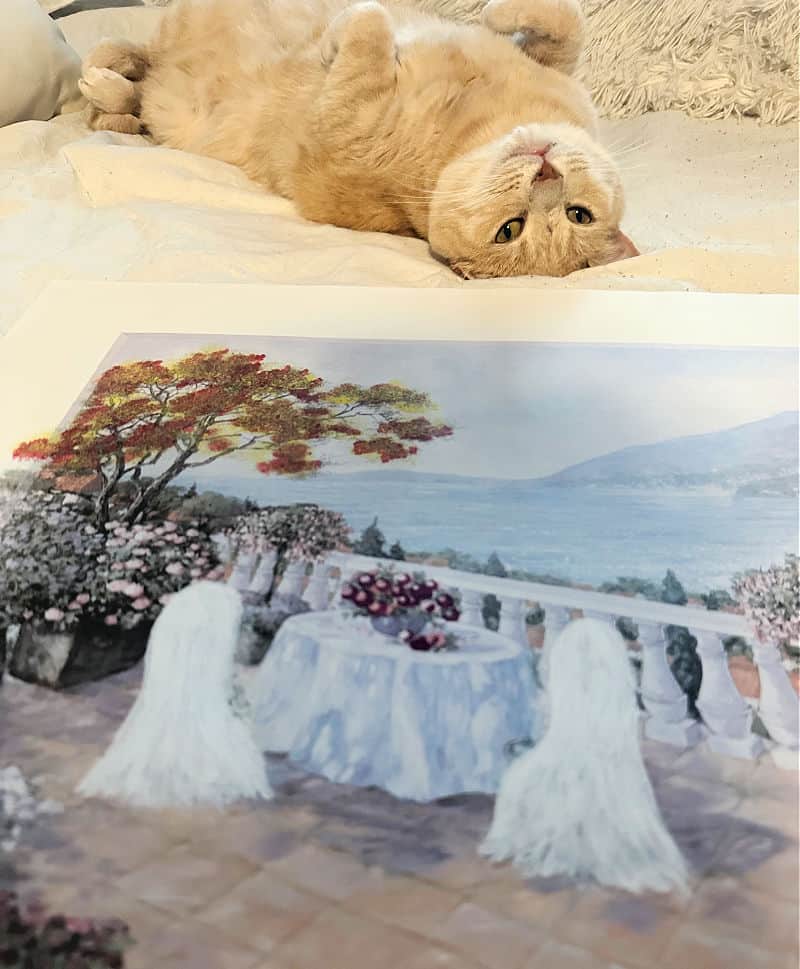
I have to share a pic of my cute cat, Nala. She loves to watch me craft:
Quick tip: it’s all in the details, get creative and have fun with it; there is no wrong way to create!
Once the white paint has dried, go back in and add some gray paint for shading.
Mix in a little black paint and create texture and dimension. It makes such a difference and gives a 3-d effect to the ghosts.

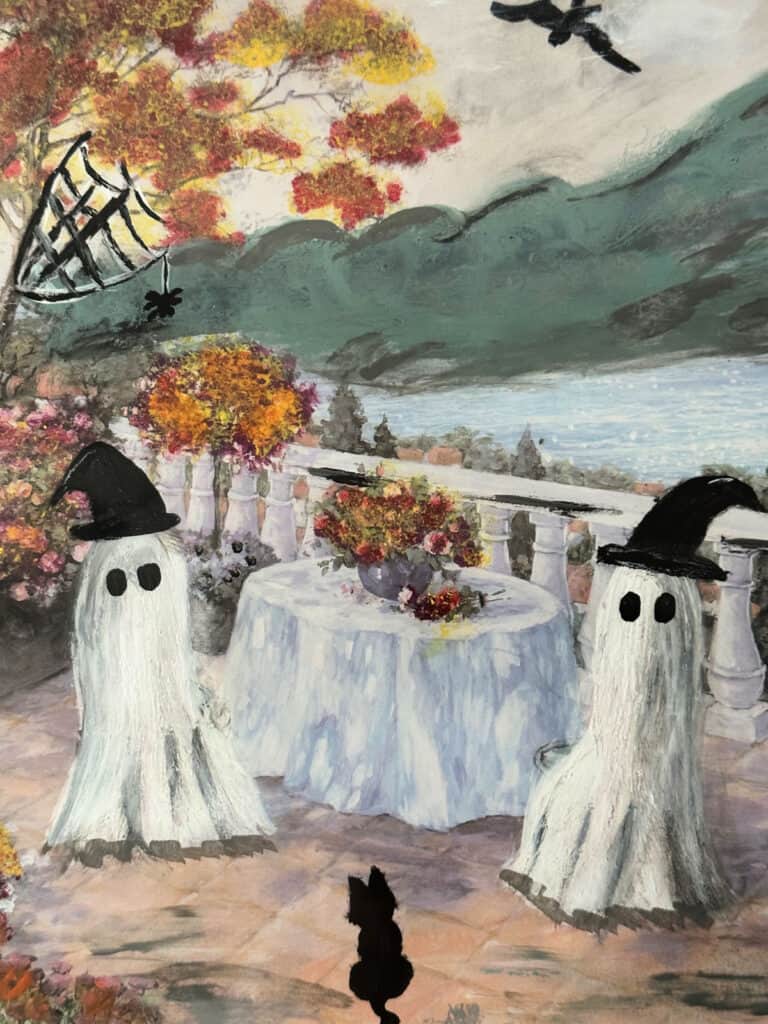

This was where I experimented and added cute details, like a witch hat to each ghost and spiderwebs with spiders hanging down.
I put on my favorite Stevie Nicks music, had a glass of wine and had way too much fun with this art project!
Draw a Bat for Halloween
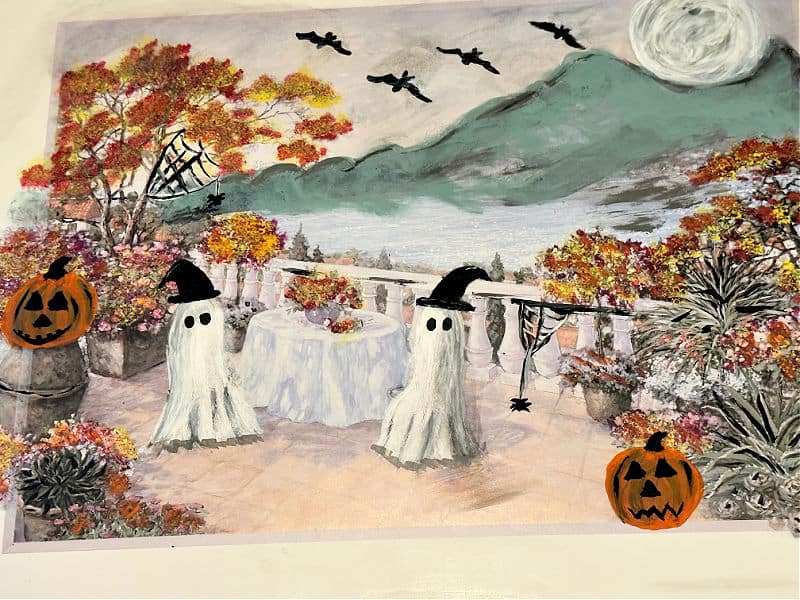
Add extra details that represent spooky season, like bats, jack ‘o lanterns and a favorite black cat!


I’m so happy with how the cat turned out. Again, I recommend pulling up a picture of “how to draw a black cat” on Pinterest to make it easier.


You can see in the photo above, I had a little difficulty drawing a pumpkin.
The print was getting wet and runny. I used a blow dryer to lightly dry it then added a second coat.

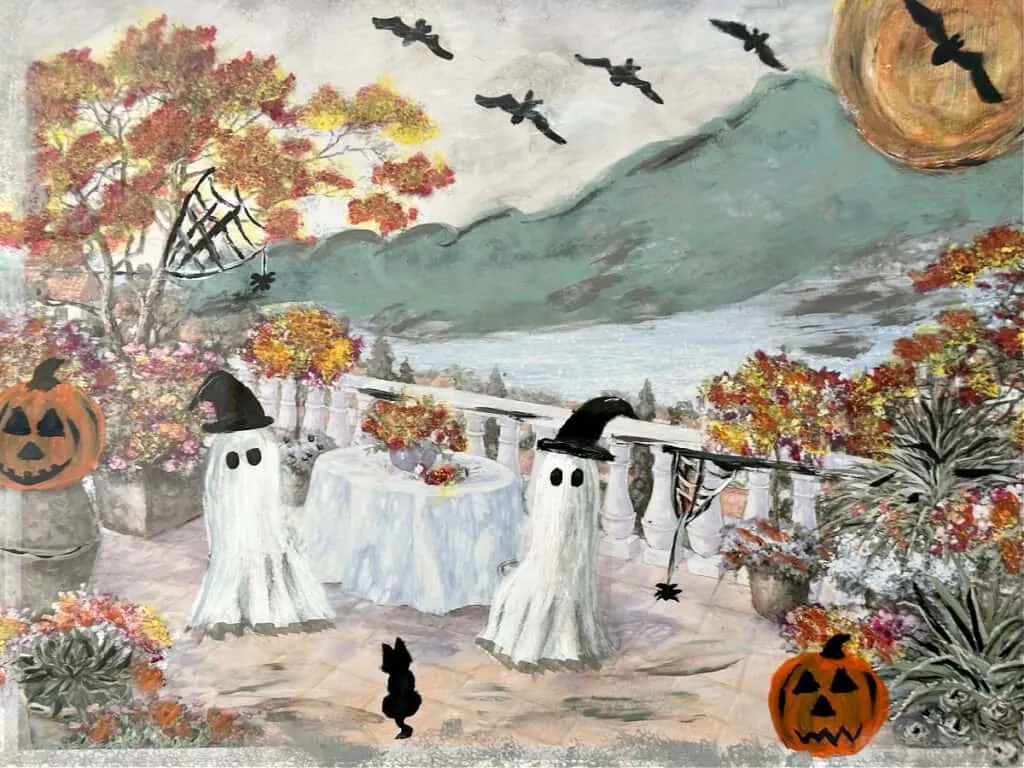
At the last minute I decided to add a full moon and a soft aqua to the background.
I decorate with soft blues and teals so I wanted to incorporate this into my color scheme. This is totally optional.
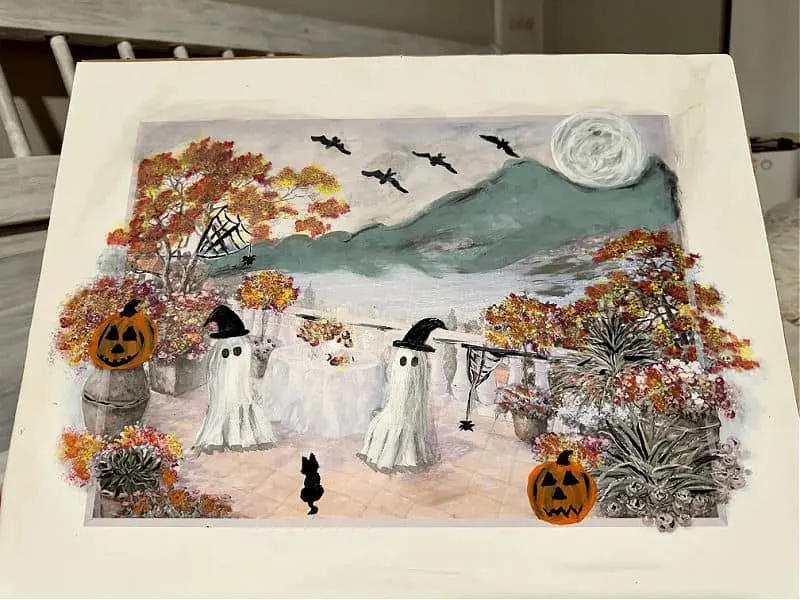
There is nothing like a before and after to see the difference:
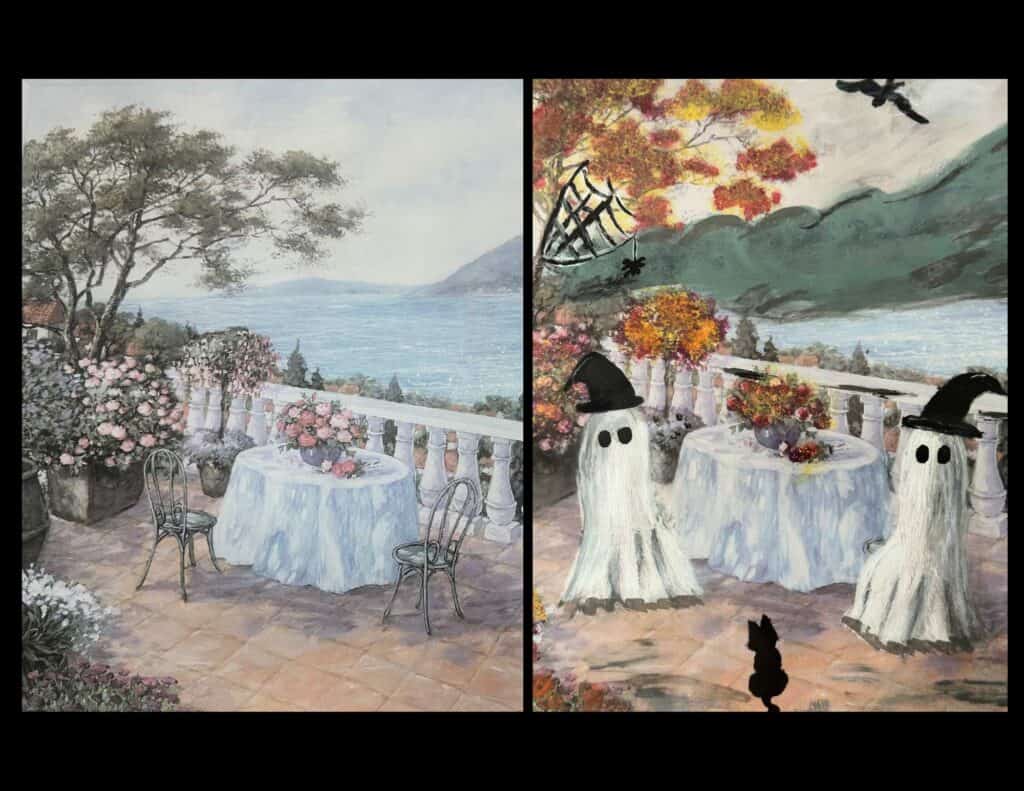

Also, you can make yours more of a creepy painting if that is what you like.
I’m going with more of a cute ghost theme for my Halloween decor this year.
Paint the Frame
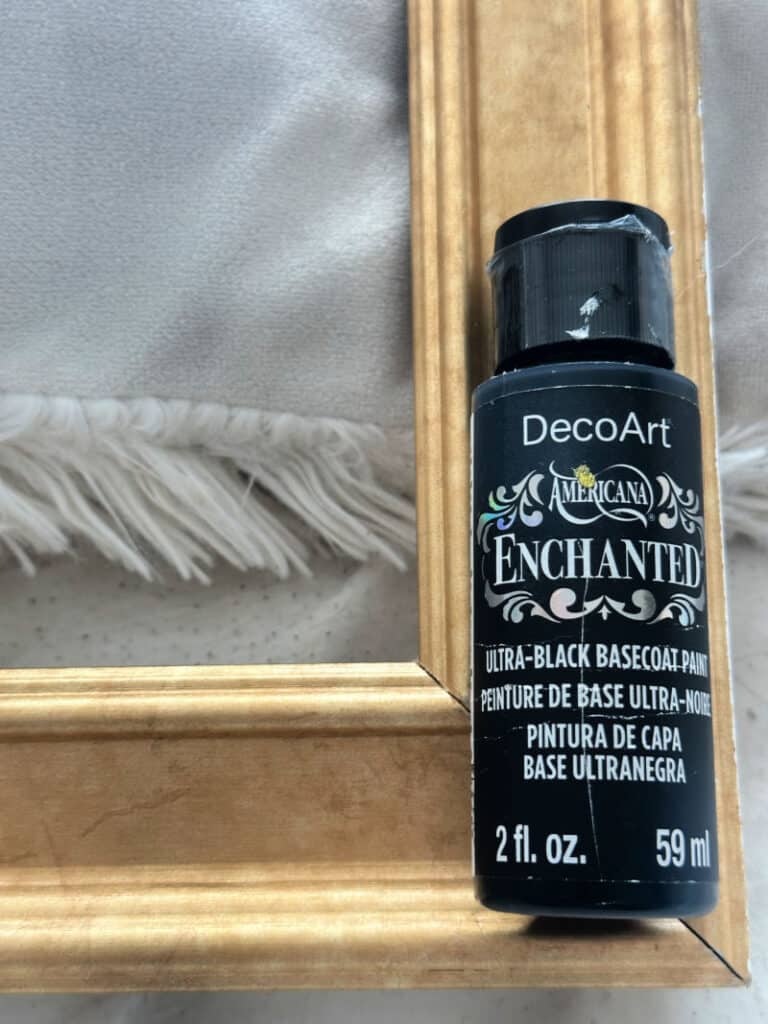
The gold frame really clashed with the style of my ghost art, so I painted it with black paint.
Instead of a solid black, I gave it more of a distressed black look and really like how it stands out against the art work.

Simply use a foam brush and lightly go over the frame until you are happy with the coverage.
If you are having trouble with the paint adhering, sand it down a bit.

That’s all there is to it! A hand painted ghost painting that you can hang wherever you want a bit of festive Halloween decor.

I hung both of my ghost art paintings in my bedroom. I may add a witch hat to the smaller painting. What do you think?


Please share this on Facebook or save it to your favorite craft or Halloween board on Pinterest.

So are you ready to jump on the thrifted ghost painting trend?
If you do, please let me know in the comments below or tag me on Facebook or Instagram using #inspiredbyourcraftymom.
It totally makes my day to see that I inspired someone. 🙂
Thanks so much for stopping by. Happy Halloween!
Before you go, be sure to subscribe to my email so you don’t miss any of the Halloween and fall goodies!
I’m also thinking about making a Christmas painting makeover. Let’s start a #thriftedsantapainting trend!
What is the TikTok Ghost Painting Challenge?
You can read a detailed article about the ghost painting trend here.
Basically, it is a fun challenge where you upload TikTok videos, that you take going to the thrift store searching for just the right painting to makeover.
If you are not tech savvy, no worries.
You can do a quick google search for a capcut template that you can use with uploaded pictures from your camera roll.
Add a bit of text overlay, specifically #ghostpaintingchallenge or #thriftedghostpainting so other creators following the trend can check out your artwork.

Here are even more DIY ghost crafts:
- Ghost Mug – Pottery Barn Dupe
- Halloween Ghost Pillow – Homegoods Dupe
- Halloween Ghost Centerpiece
- 21 DIY Halloween Ghost Decorations
Google Web Story: Easy DIY Thrifted Ghost Painting
You can find me on social media below: