Craft a charming DIY bumblebee wreath, perfect for greeting guests this summer. This playful decoration brings a cheerful buzz to your home!

Have you heard all the buzzzz..bumble bee crafts are HOT! And, this DIY bumble bee wreath will look beautiful hanging on your front door, on a porch or patio, or indoors over a mantel, or buffet table.
This post is sponsored by Decocrated Curated Home, however, all opinions and love for this product are 100% mine. Please see my full disclosure here.
Take a look at the step-by-step tutorial, with video, so you can make your own bee-utiful bumble bee wreath.
Supplies Needed For Bumble Bee Wreath
- Plastic Tablecloths – Yellow – 2
- Metal Wreath Frame
- Scrap Burlap
- Hot Glue Gun – this cordless one is my favorite!
- Scissors
- Scrap Cardboard
FOR PAINTED BUMBLE BEE
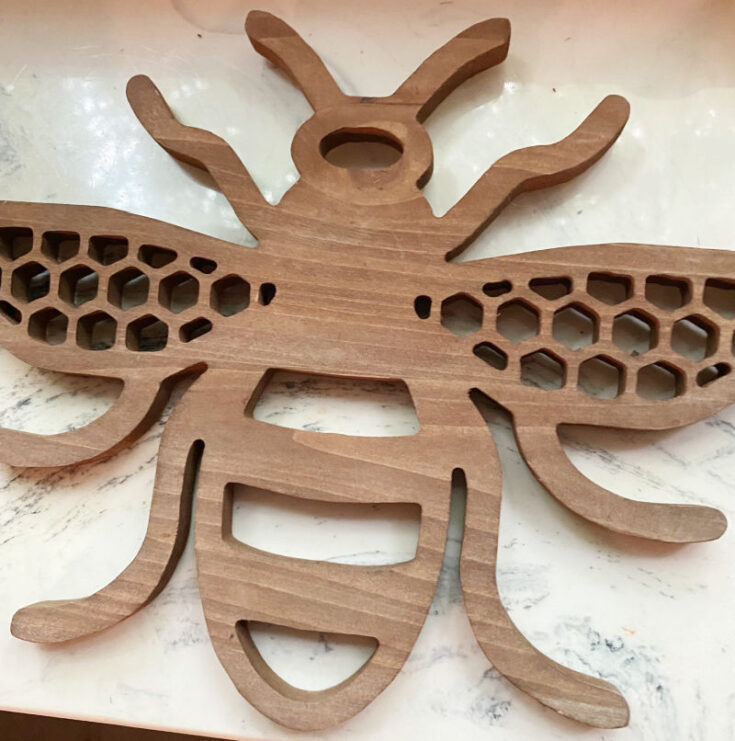
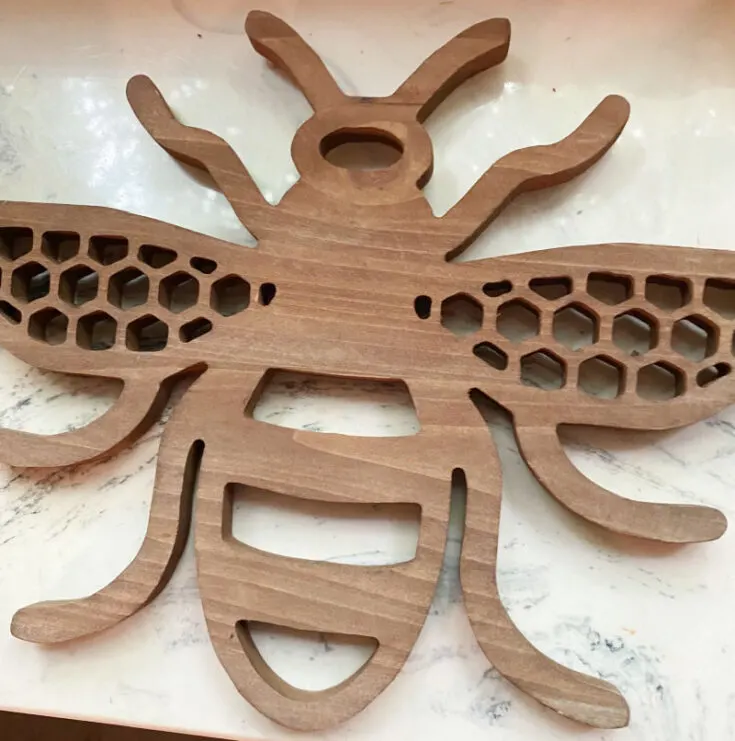
- Wood Bumble Bee – Decocrated Subscription Box
- Rustoleum Gold Spray Paint
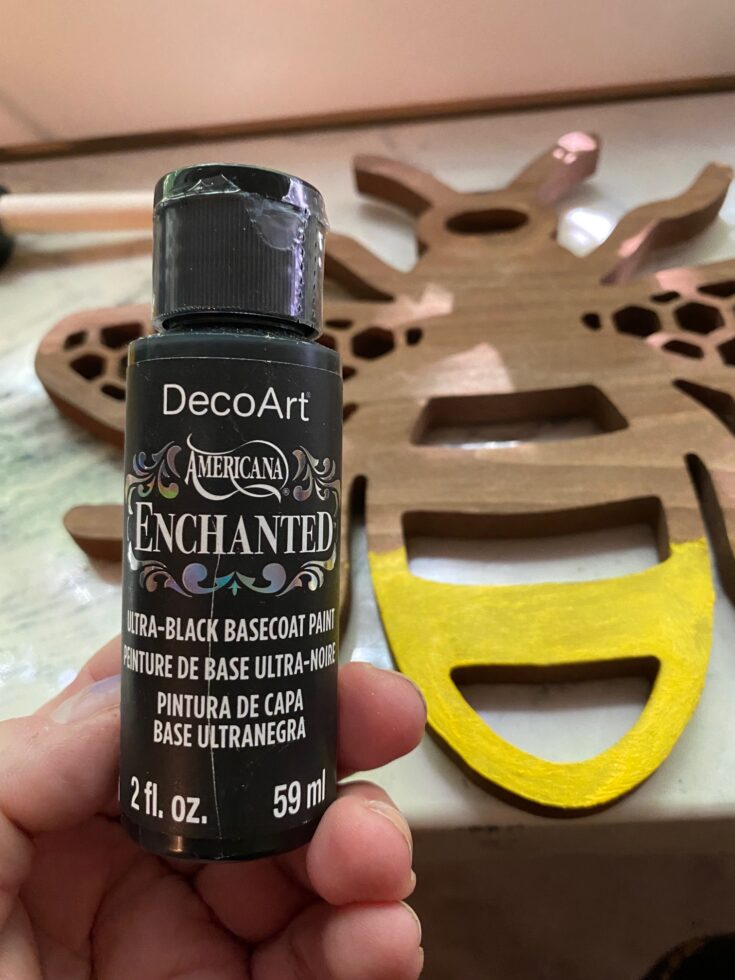
- DecoArt Black Acrylic Paint
- DecoArt Gold Acrylic Paint
- DecoArt White Acrylic Paint
- Foam Brushes
- Clear Acrylic Spray
Instructions For Making A Bumble Bee Wreath With Honeycomb Center
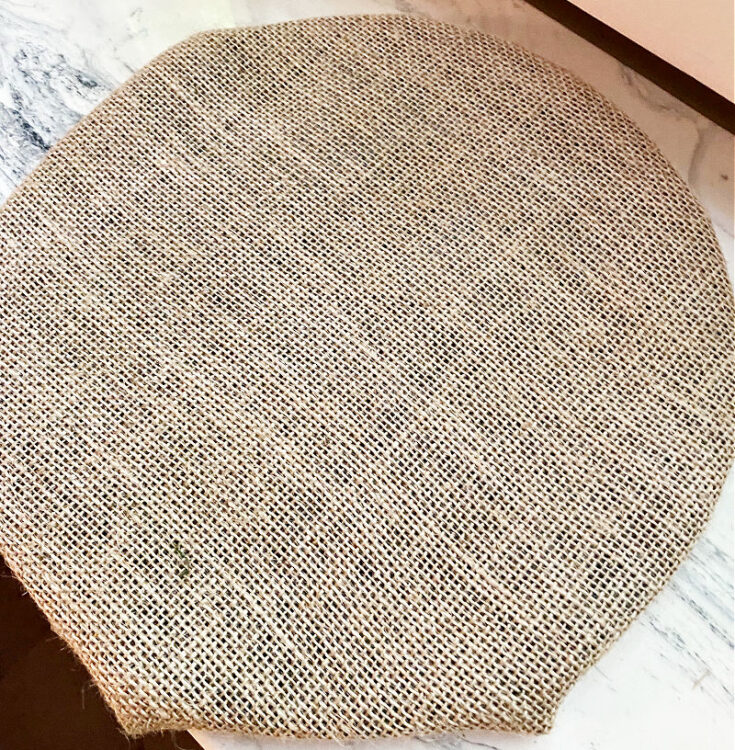
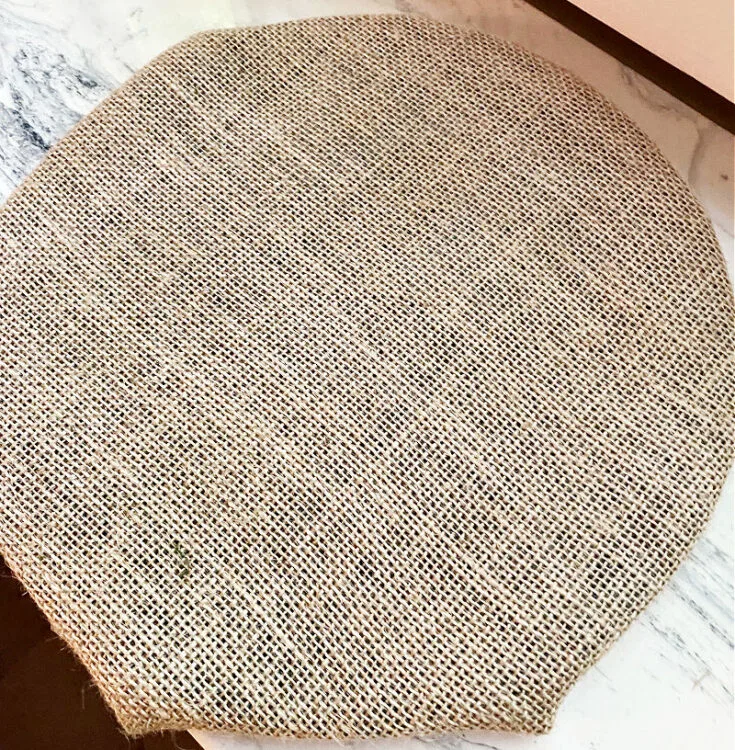
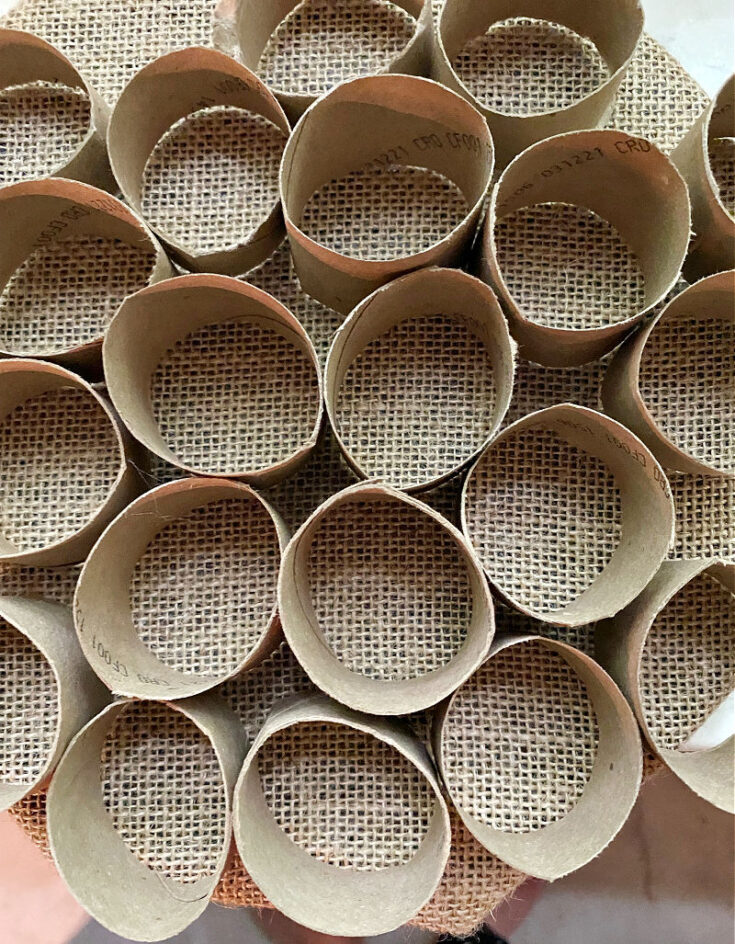
Cut a piece of cardboard to fit in the center of a wire wreath. Cover it with burlap. You can use hot glue to secure it.
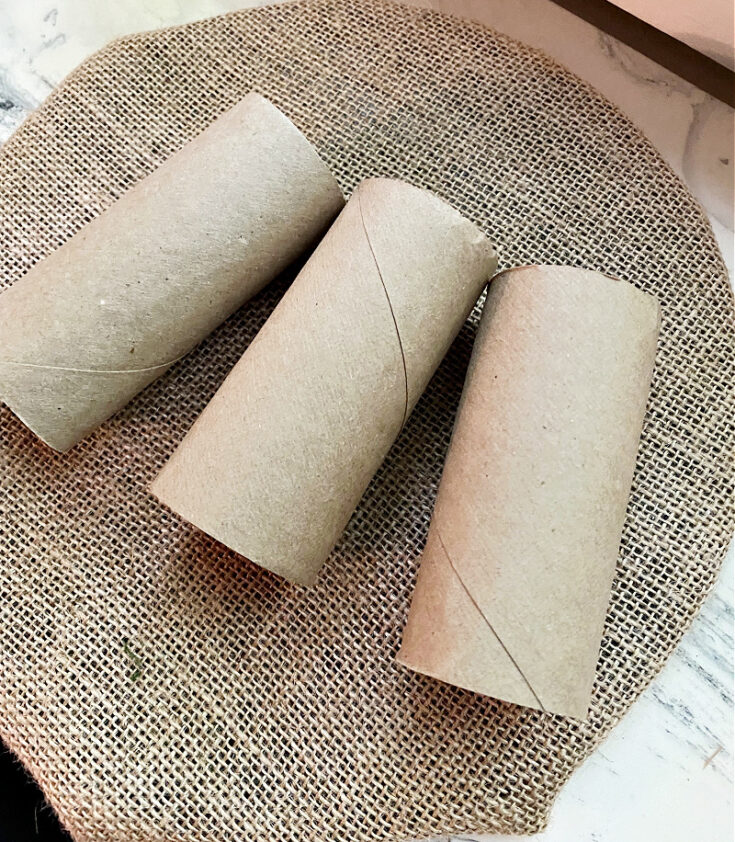
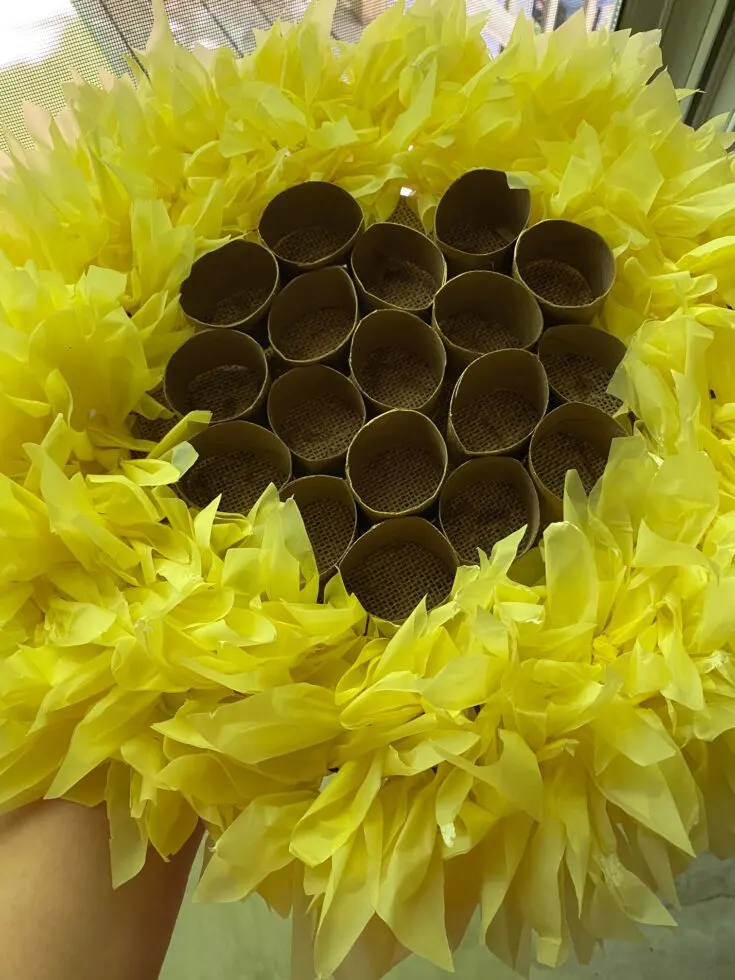
To add a honeycomb effect to the center of the wreath, cut toilet paper rolls in half to cover the burlap.


Spray paint the cut toilet paper rolls with gold metallic paint.

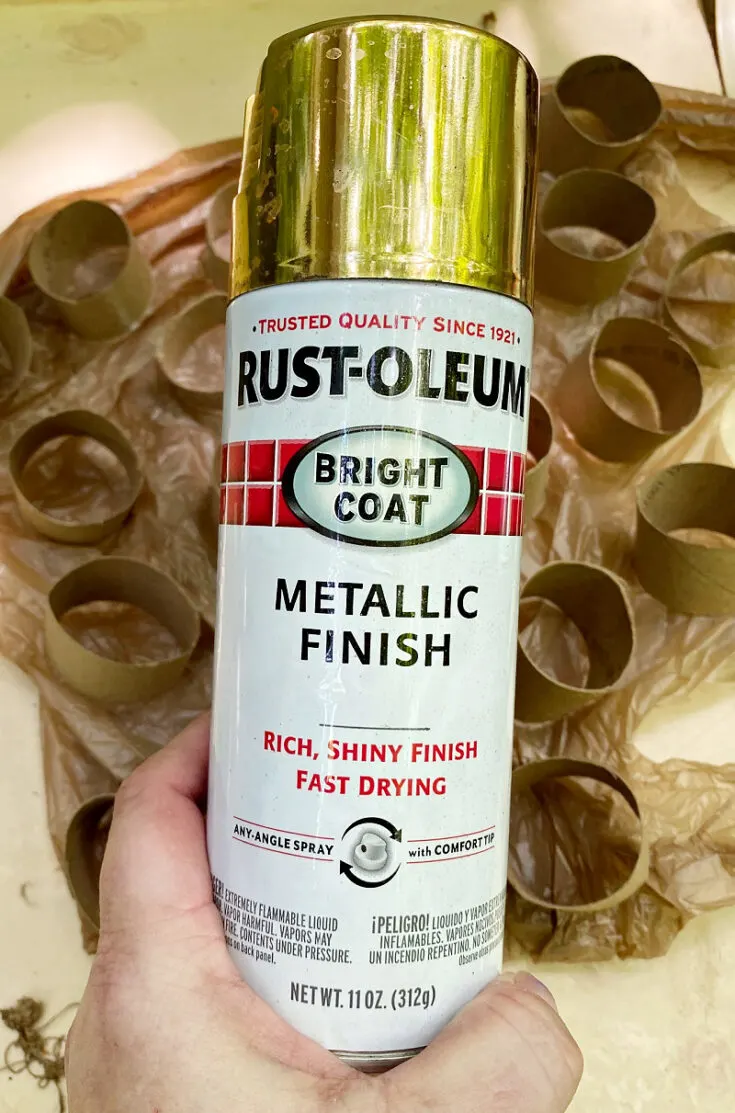
This will give a little bit of dimension to the wreath and make the honeycomb design stand out.
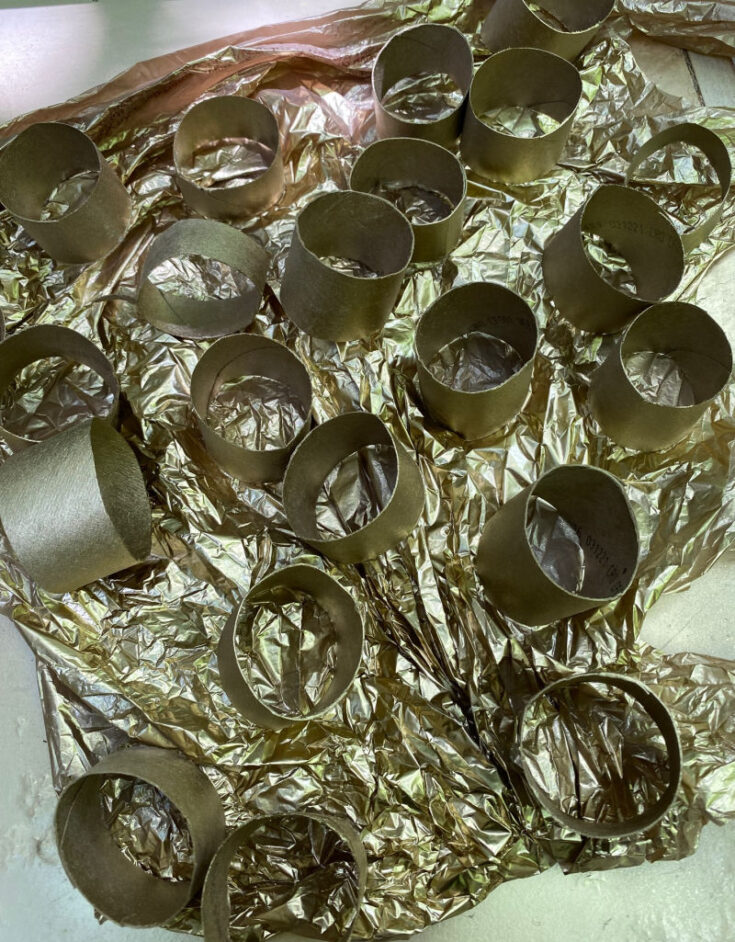

Glue the painted rolls to the wreath. You can see how the yellow tablecloth wreath was made HERE.

How To Paint Wood Bumble Bee
The cool farmhouse style wood bumble bee was included in the summer Decocrated Subscription Box. You can see all the items included in the summer box and how I used them in my home in an upcoming post. But, I won’t make you wait, here is a picture of all the goodies:


Be sure to stop by tomorrow to see how I use all these items in my home. I’ve been a subscriber to Decocrated for 3 years and love it!
When you check out all the prior boxes here you will understand why!
- Decocrated Spring Box
- Decocrated Spring Box
- Decocrated Fall Box
- Decocrated Fall Box
- Decocrated Summer Box
- Decocrated Winter Box
- Decocrated Winter Box
I have good news! Our Crafty Mom readers can save $15 off the current summer box entering code OURCRAFTYMOM15 at checkout. If you prefer the annual subscription, you can save $20 with OURCRAFTYMOM20
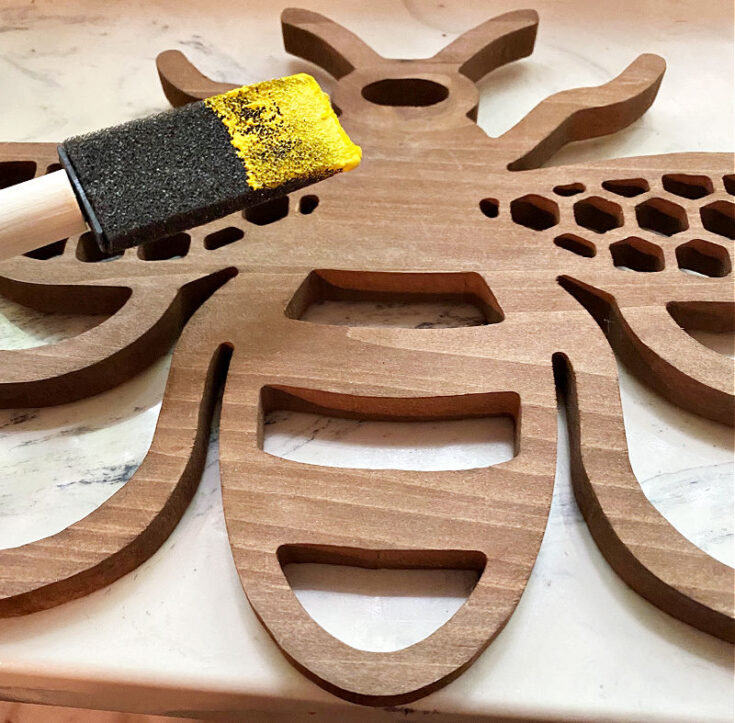
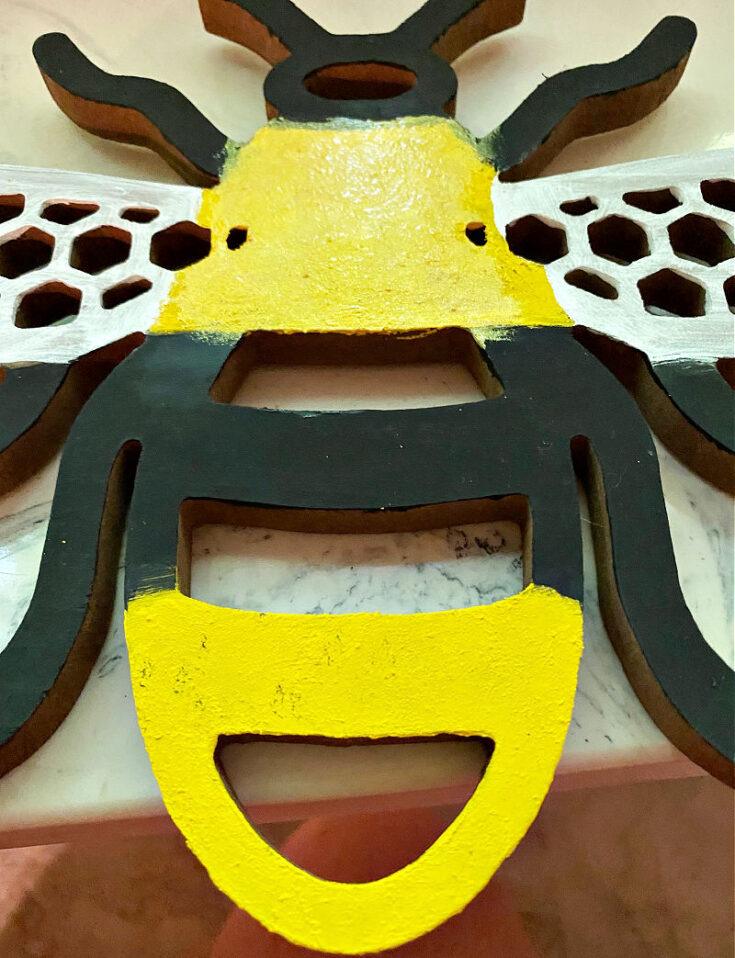
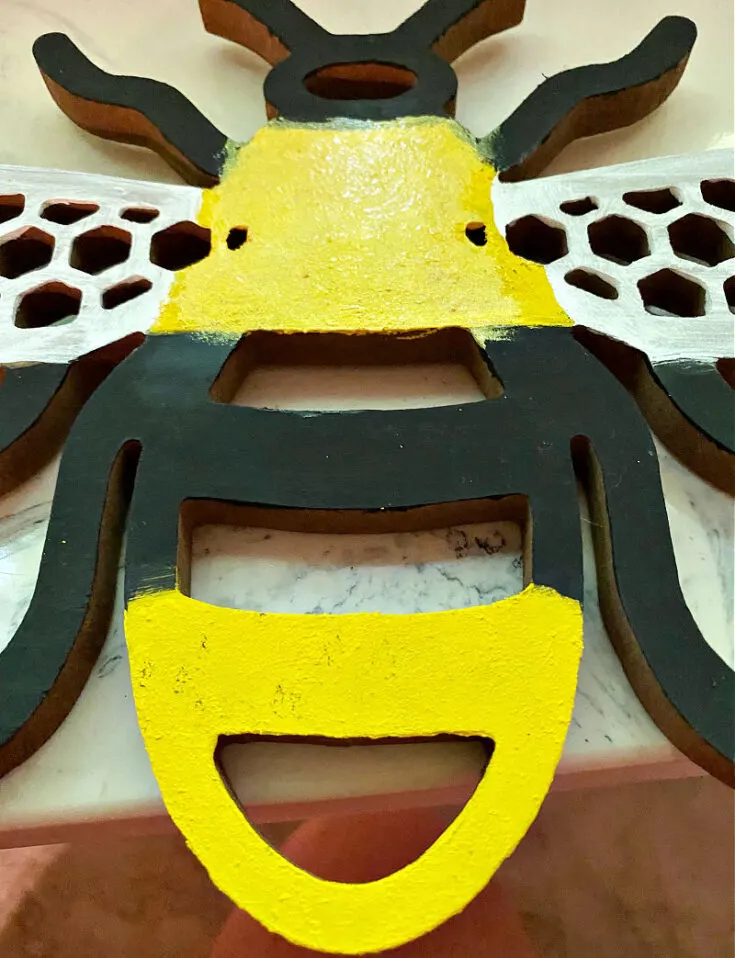
I wanted the wood bumble bee to have some color, especially because I was adding it to the sunflower wreath. I started by painting the body of the bumble bee yellow.

Next, the legs and antennae were painted black.

To brighten it up a bit, I painted the wings white.
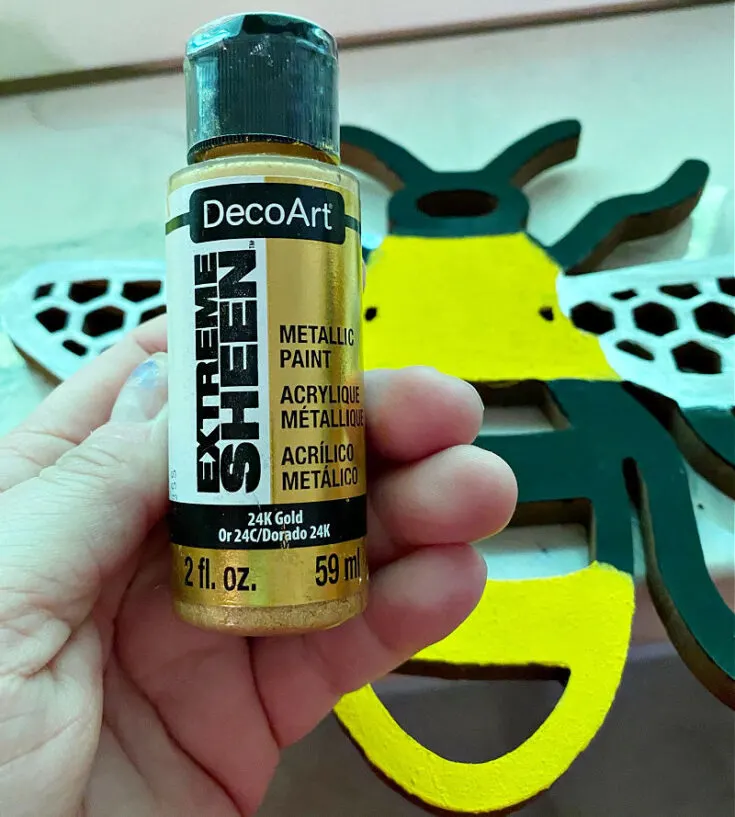
To make the yellow pop a little, I added a coat of metallic gold paint. This really makes it shimmer, especially in the light.

Since I am hanging the bumble bee wreath outside, I gave it a clear coat of acrylic sealer to protect it from the elements.

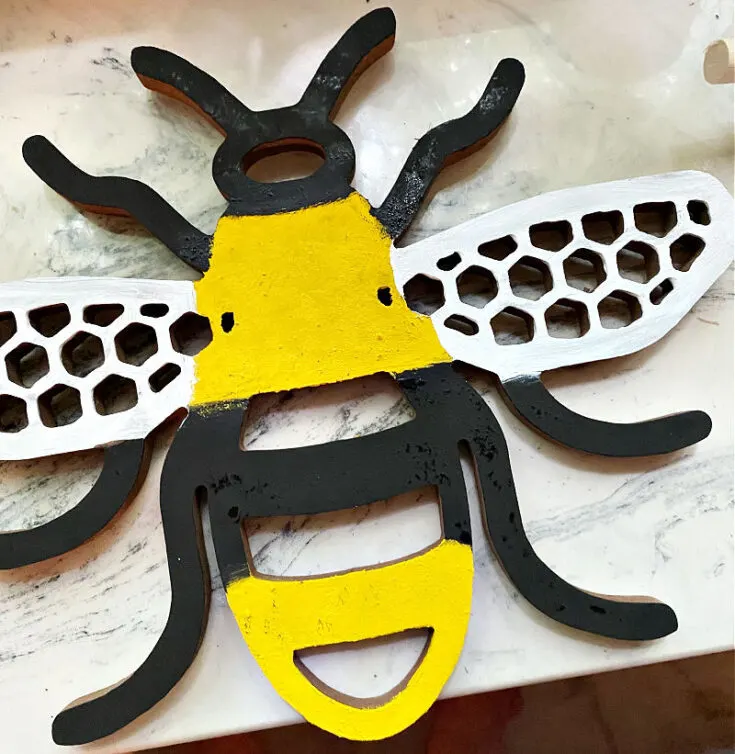
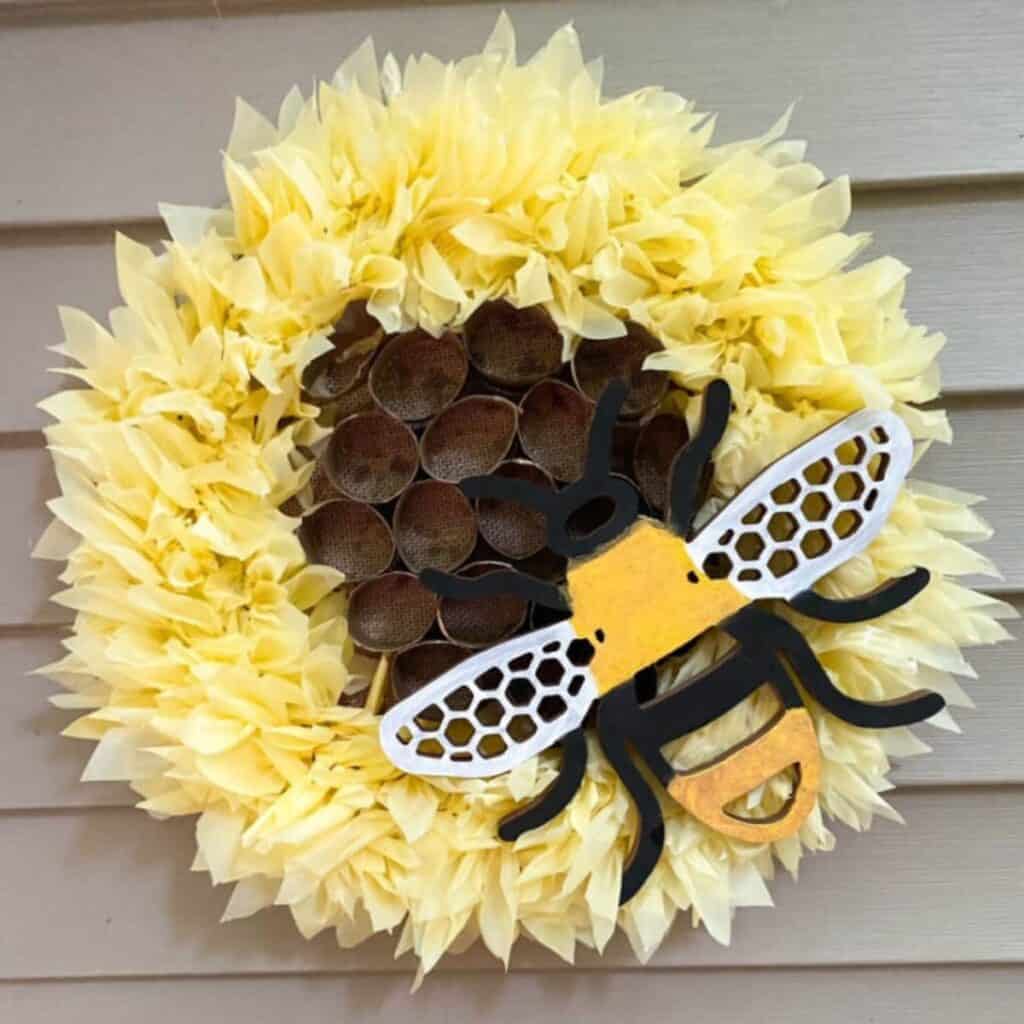
It was wired to the sunflower wreath at an angle, so it looks like the bee just landed!

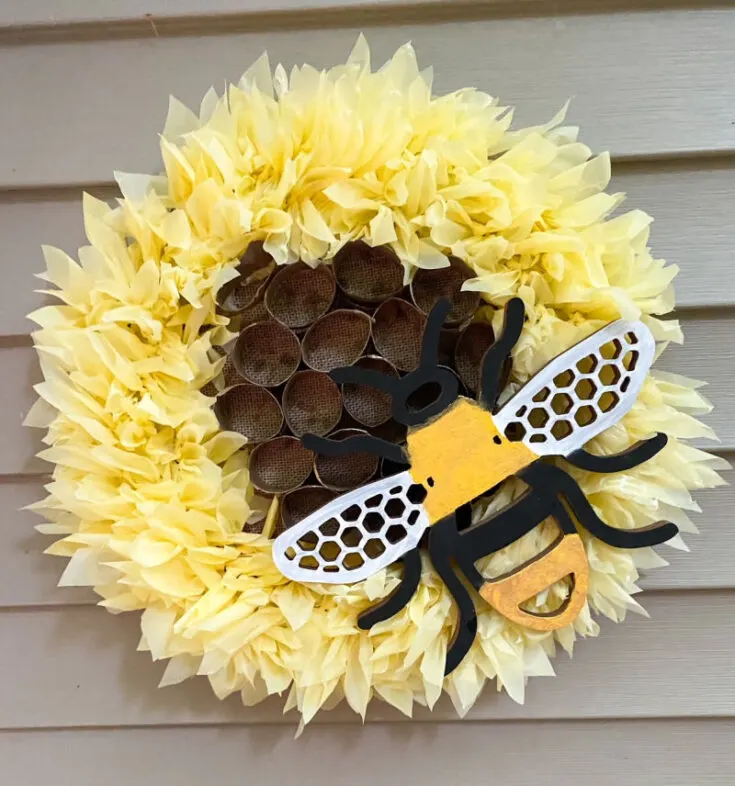
I’m so happy with how this sweet bumble bee wreath turned out.
I loved it before, but I really think the addition of the honeycomb center, and the wood bee really stepped it up a notch and made it really unique and fun.

Before you go, I’d love for you to subscribe to my email. It’s a great way to stay current on all the fun crafts, easy recipes and home decorating ideas.


Make A Beautiful Bumble Bee Wreath Perfect For Summer
Add a fun summer touch to your front door with an adorable DIY bumble bee wreath.
Materials
- Wood Bumble Bee - Decocrated Subscription Box
- Rustoleum Gold Spray Paint
- DecoArt Black Acrylic Paint
- DecoArt Gold Acrylic Paint
- DecoArt White Acrylic Paint
- Foam Brushes
- Clear Acrylic Spray
- Scrap Burlap
Tools
- Scissors
- Hot Glue Gun
Instructions
- Cut a piece of cardboard to fit in the center of a wire wreath. Cover it with burlap.
- Cut toilet paper rolls in half to cover the burlap.
- Spray paint the cut toilet paper rolls with gold metallic paint.
- Glue the painted rolls to the wreath.
- Paint the body of the bumble bee yellow.
- The legs and antennae were painted black.
- Paint the wings white.
- Add a coat of metallic gold paint.
- Spray with a clear coat of acrylic sealer
Recommended Products
As an Amazon Associate and member of other affiliate programs, I earn from qualifying purchases.
-

 DecoArt 2 Ounce, 24K Gold Extreme Sheen Paint, 1
 -
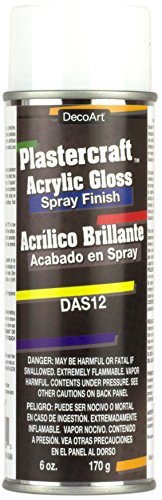 Plastercraft Acrylic Sealer/Finish Aerosol Spray 6oz-Gloss
 -
 DecoArt Americana Acrylic Paint, 2-Ounce, Lamp Black (DAO67-3)
 -
 DecoArt Americana Acrylic Paint, 2-Ounce, Cadmium Yellow
 -
 Scissors, iBayam 8" Multipurpose Scissors Bulk 3-Pack, Ultra Sharp Blade Shears, Comfort-Grip Handles, Sturdy Sharp Scissors for Office Home School Sewing Fabric Craft Supplies, Right/Left Handed
 -
 Surebonder Auto Shut Off Hot Glue Gun, Dual Temperature, Full Size, 2.5X Power of Full Size Glue Guns, Easy-Adjust Temp for Multiple Projects (Ultra Series )
You can find me on social media below: