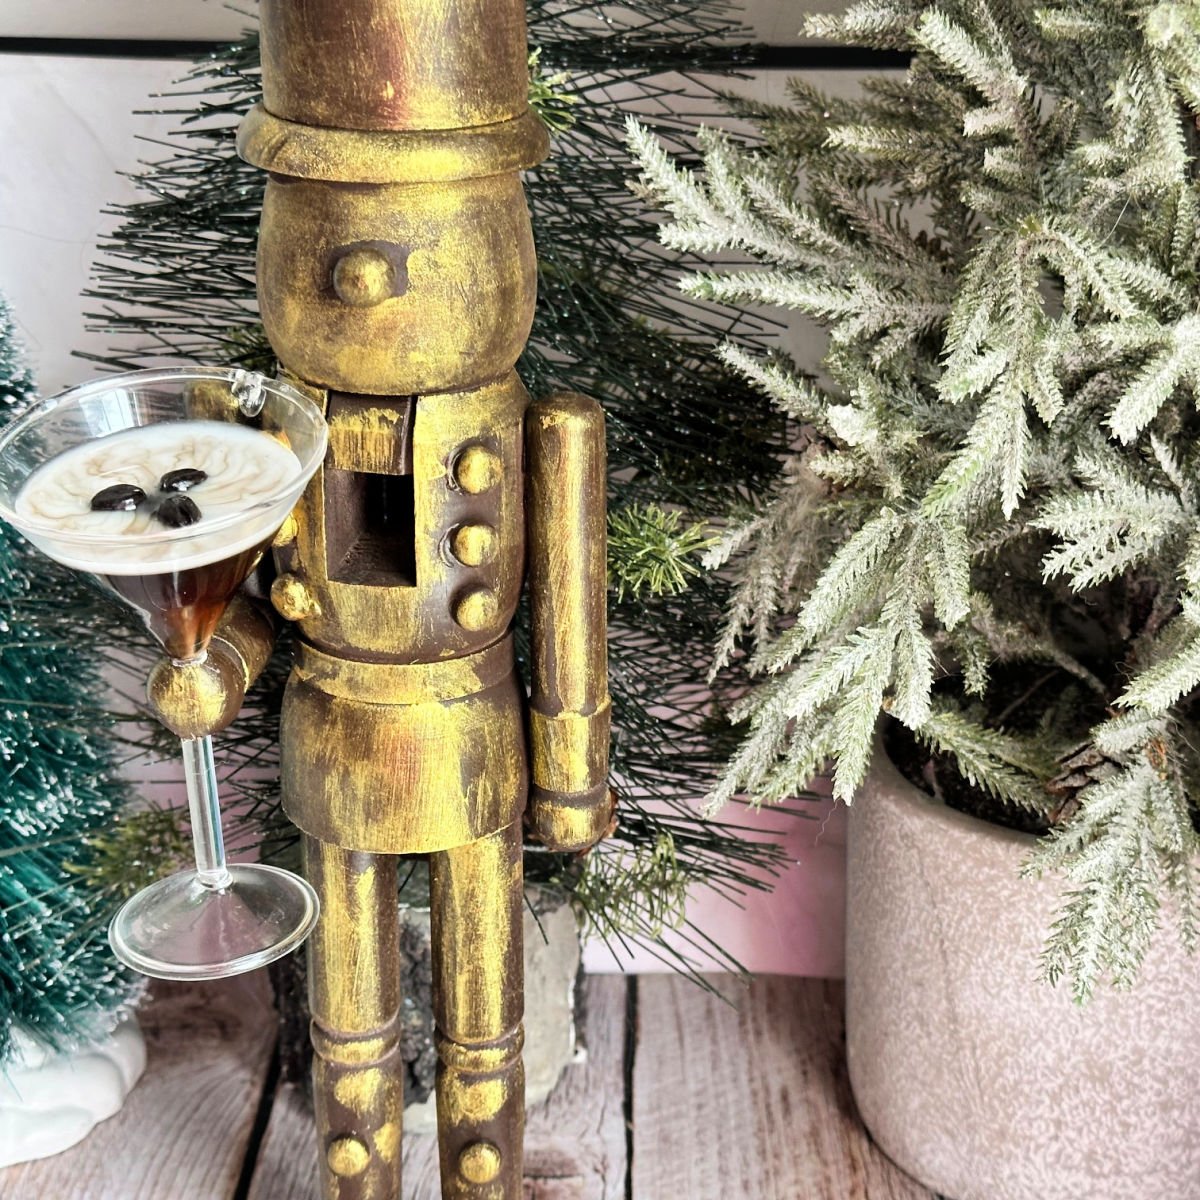
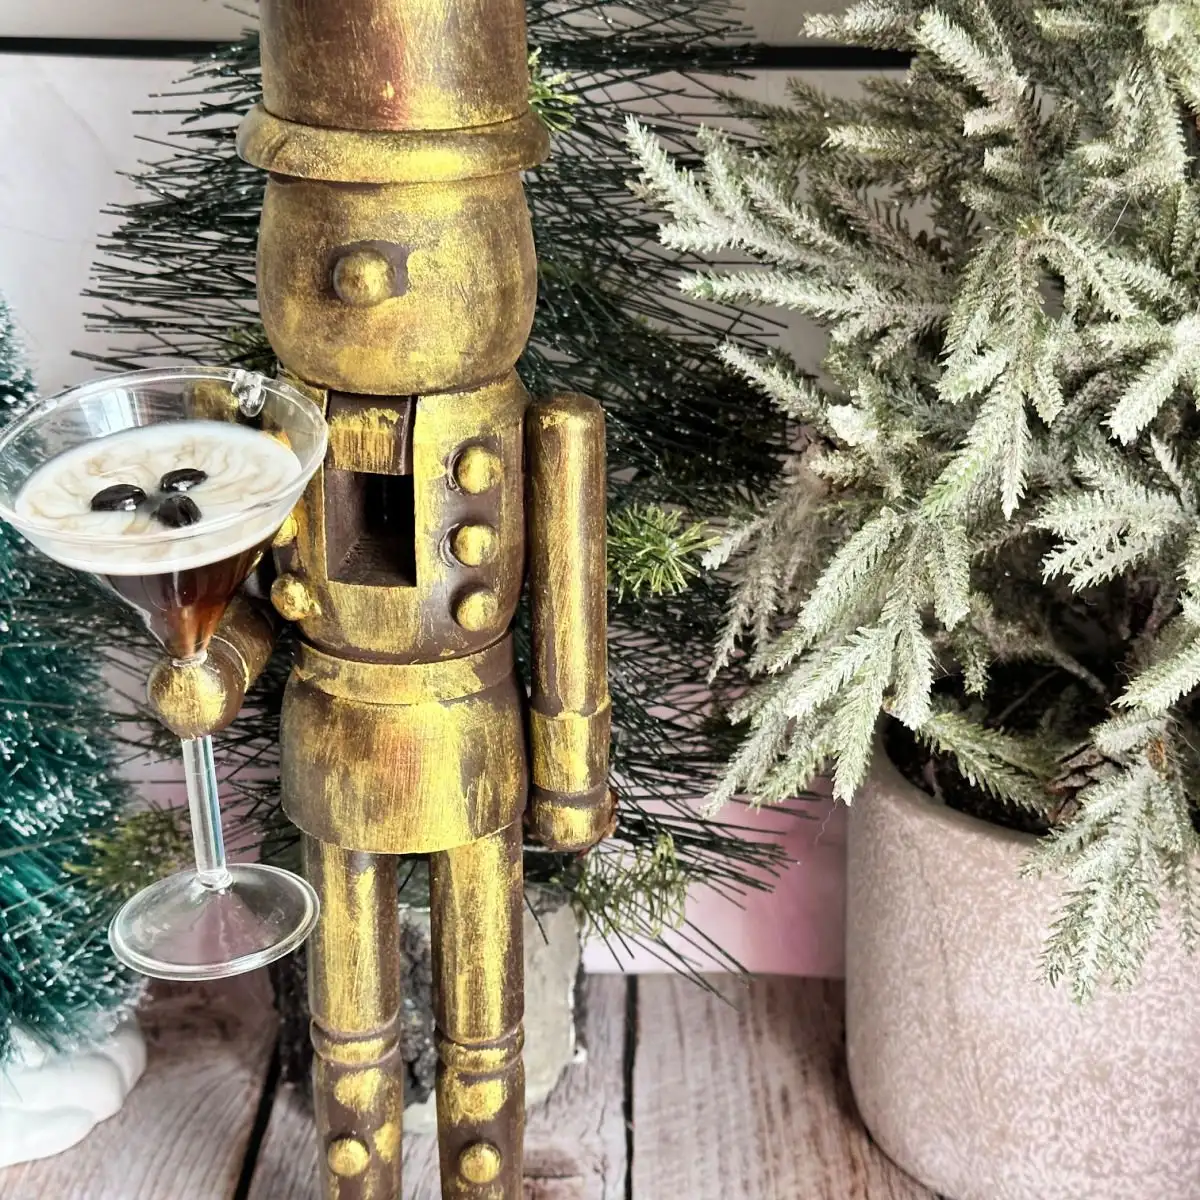
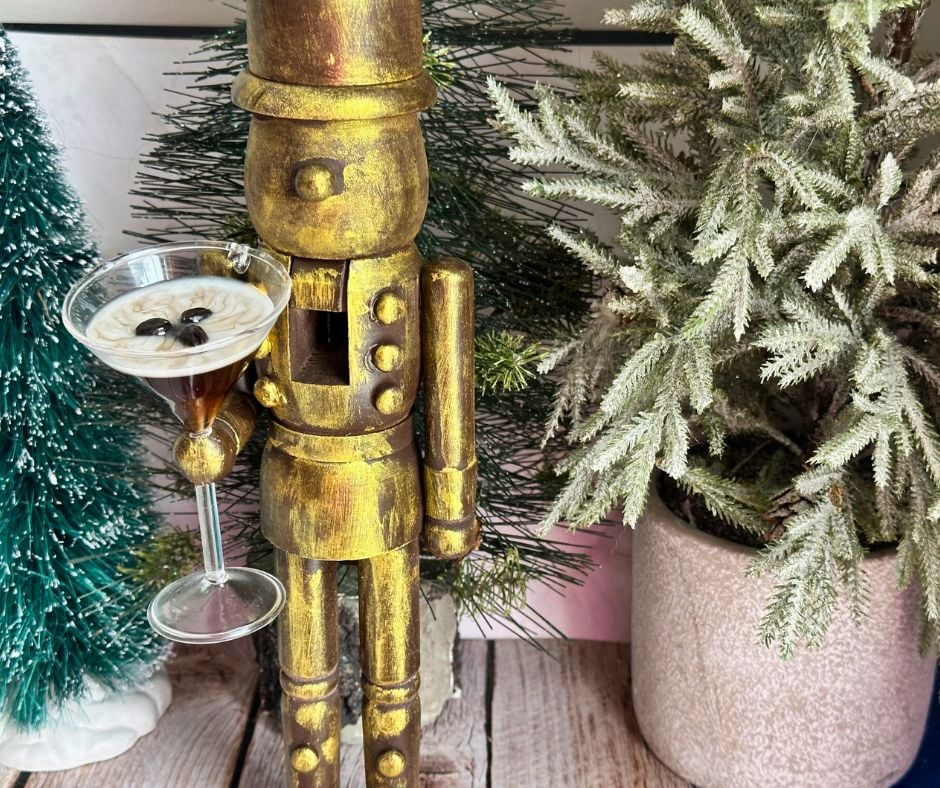
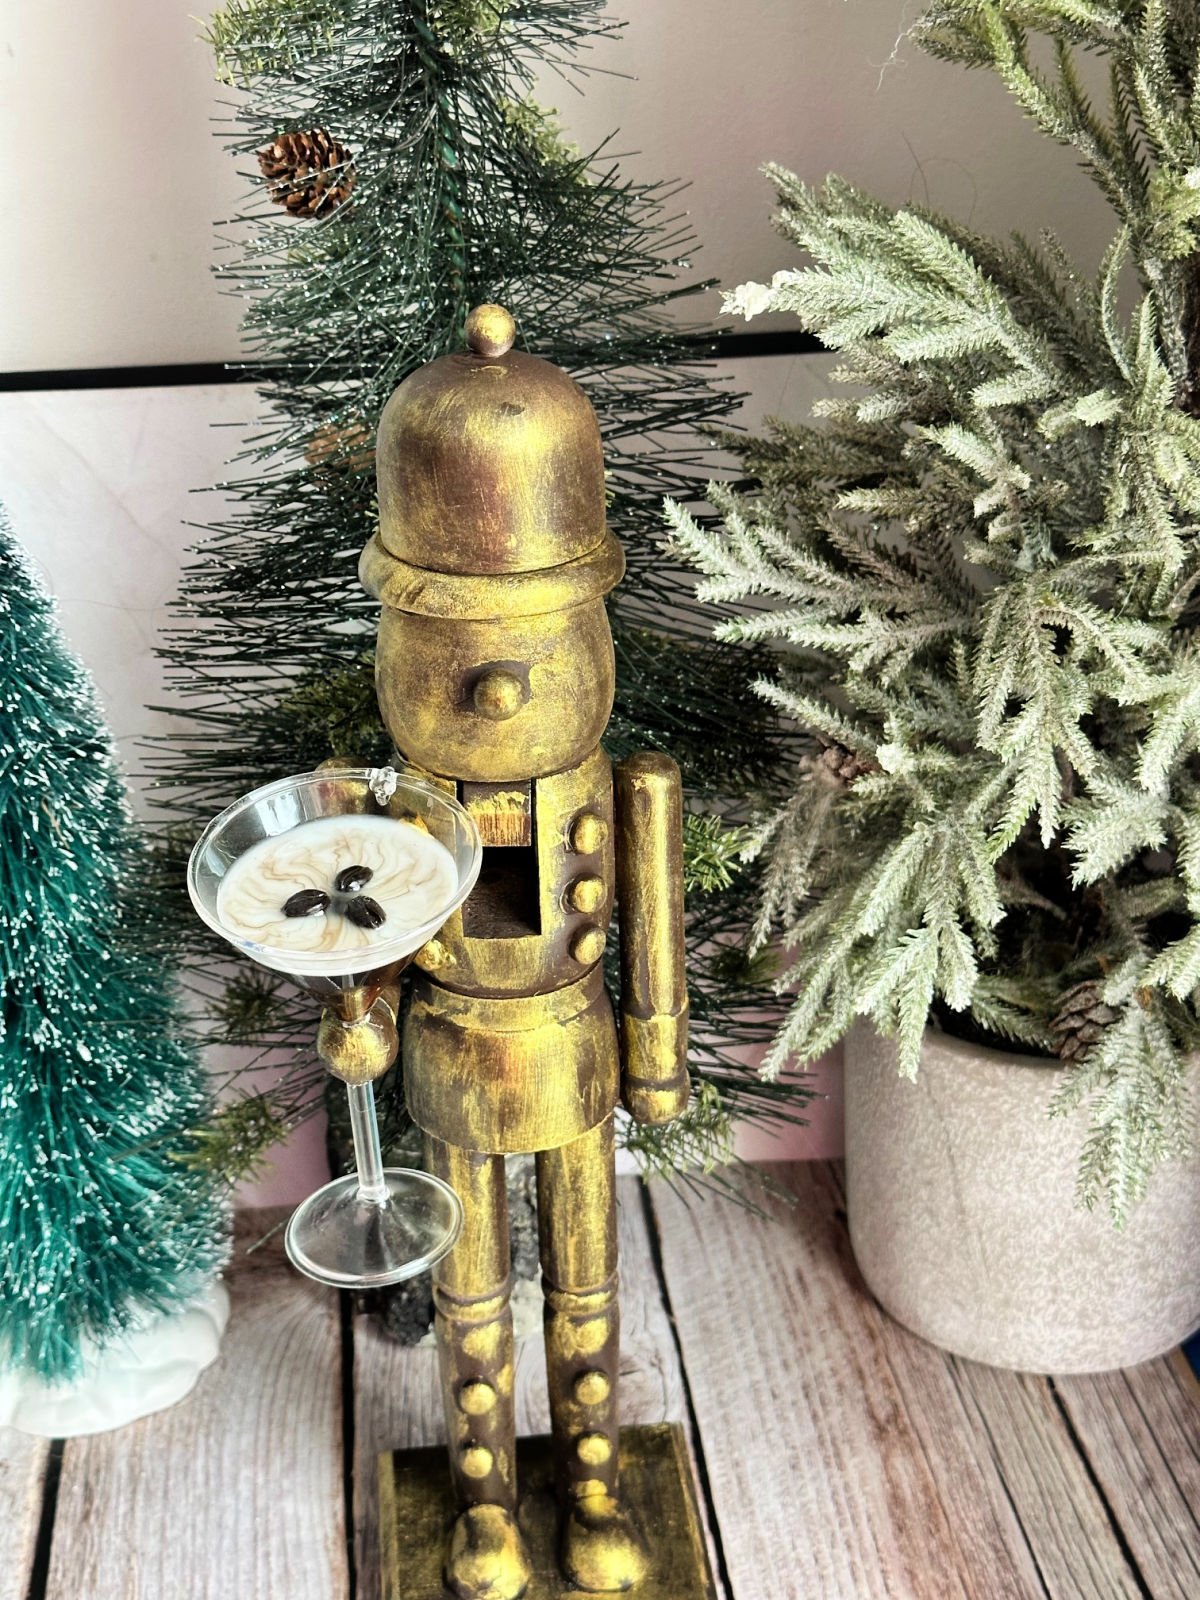
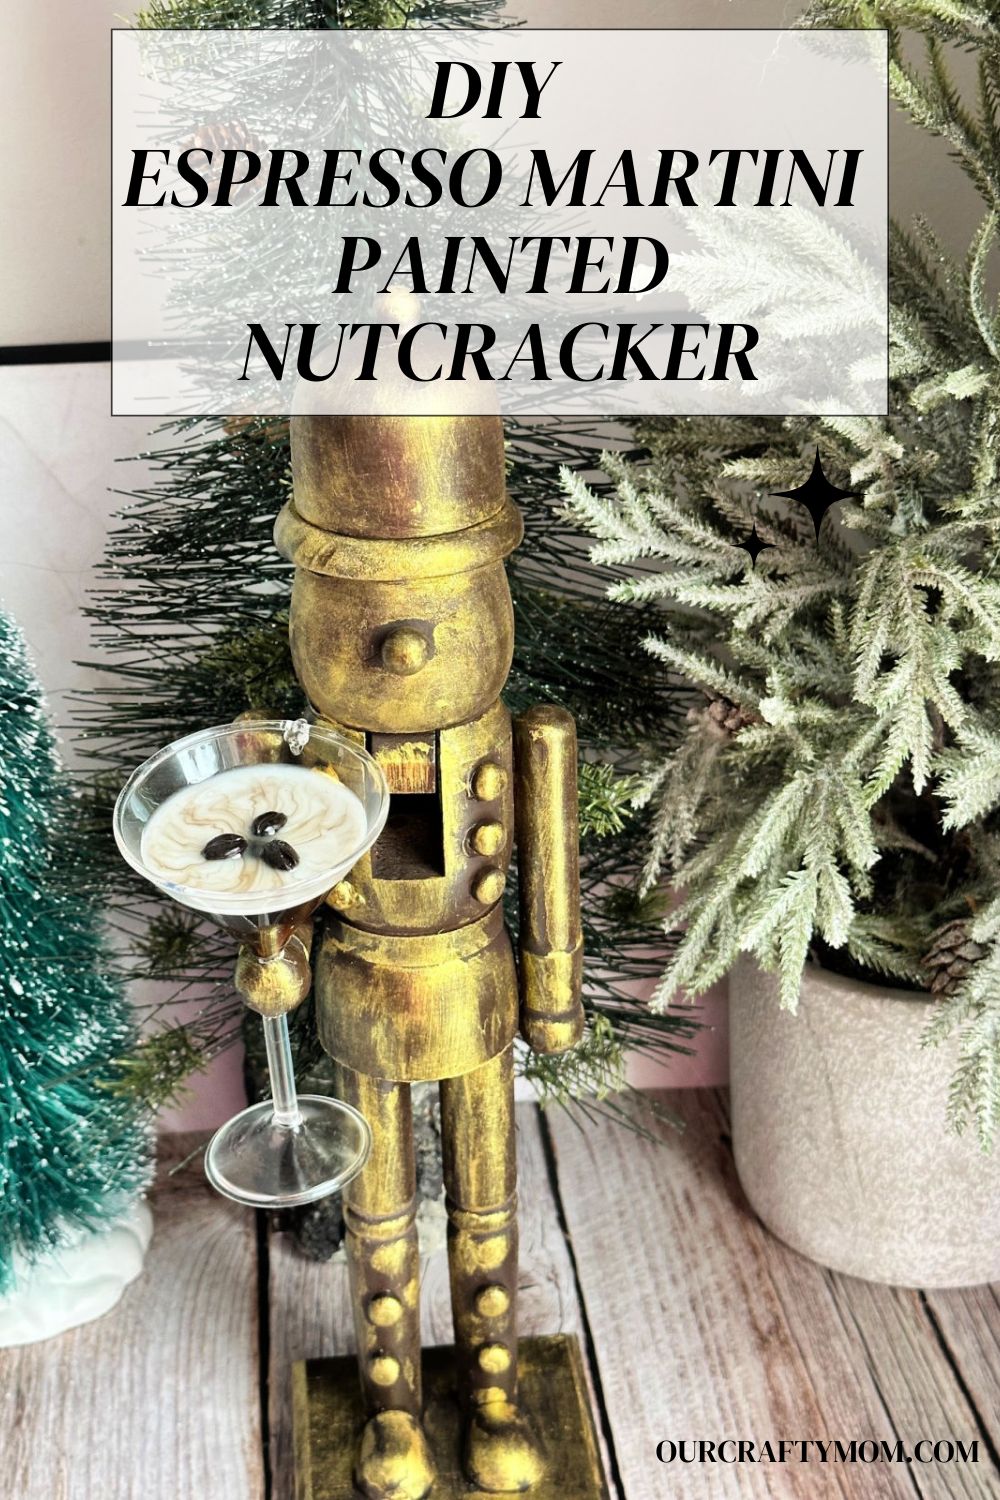
Make a glam, gift-worthy wood nutcracker painted with an antique brass finish. This elegant nutcracker is holding his own espresso martini!
This post contains affiliate links. This means if you click the link and buy something, I may receive a percentage of sales at no extra cost to you. Please see my full disclosure here.
Espresso Martini Wood Nutcracker
I’ve had this project in mind for a few weeks and finally found the time to make it. I couldn’t love it more. This is part of my handmade gift series for the holiday season.
One of my dear friends collects nutcrackers and also loves espresso martinis.
So I decided to combine the two to make this wood nutcracker DIY holding an espresso martini.
I’m seriously giddy over this little guy.
Look at how regal this soldier style Christmas nutcracker looks:

I’m so excited to see my friend open this gift, but to be honest I would love to add it to my nutcracker Christmas decor! Maybe I’ll make a second one for me. 🙂
Supplies
Here are the supplies that I used to complete this craft.
- Espresso Martini Ornament – this is from Pottery Barn. I’ve also seen them at Michaels.
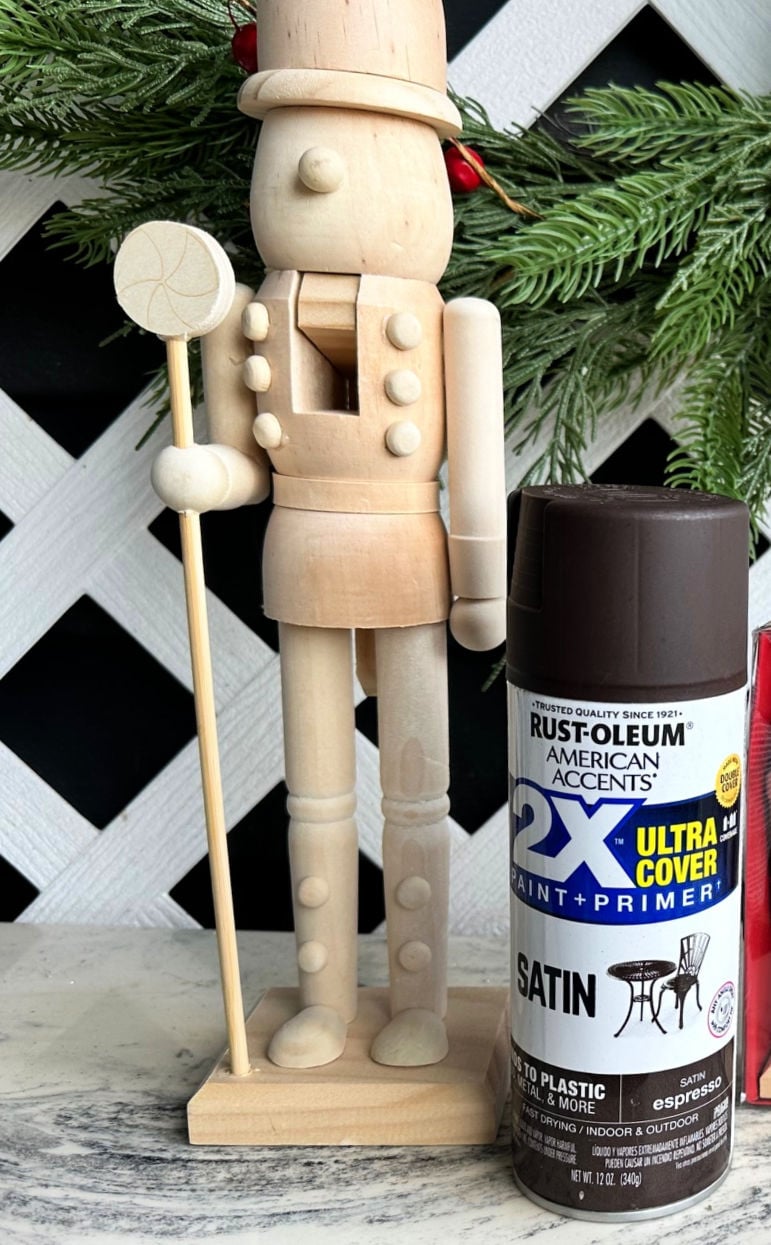
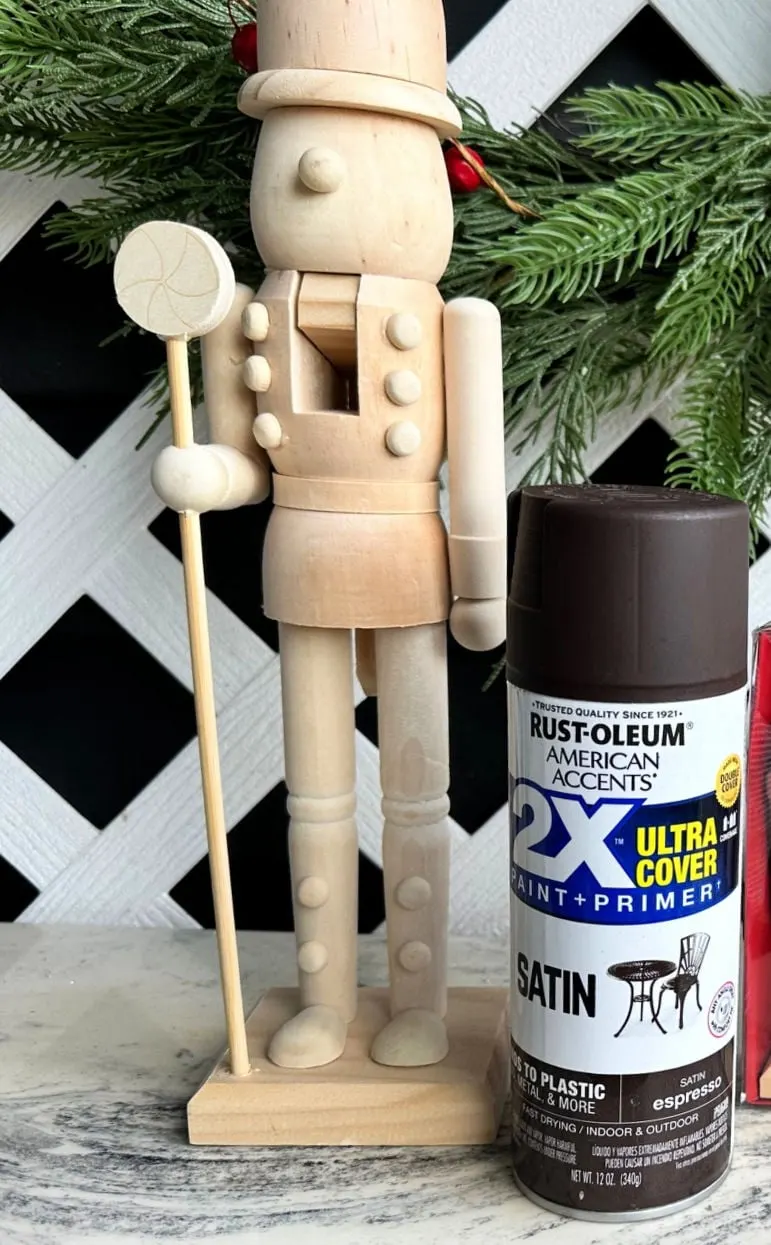
- 14 inchWooden Nutcracker – I purchased my unfinished wood nutcracker at Michaels. It is holding a peppermint staff. But you can get them at most craft stores, Walmart and Amazon.
- DecoArt Gold Metallic Paint – you can also use rub ‘n buff
- Rustoleum Espresso Spray Paint
- Foam Paint Brushes – you can also find these at the dollar store.
- Cricut Craft Knife – a Dremel would make this much easier if you have one.
- E-6000
- Hot Glue Gun – I love this cordless one!
For even more budget-friendly Christmas ideas, you don’t want to miss this amazing collection of 81 Dollar Tree Christmas Crafts and these 37+ DIY Dollar Tree Christmas Ornaments.
How to Paint a Wooden Nutcracker
You can paint the nutcracker however you like using acrylic craft paints.
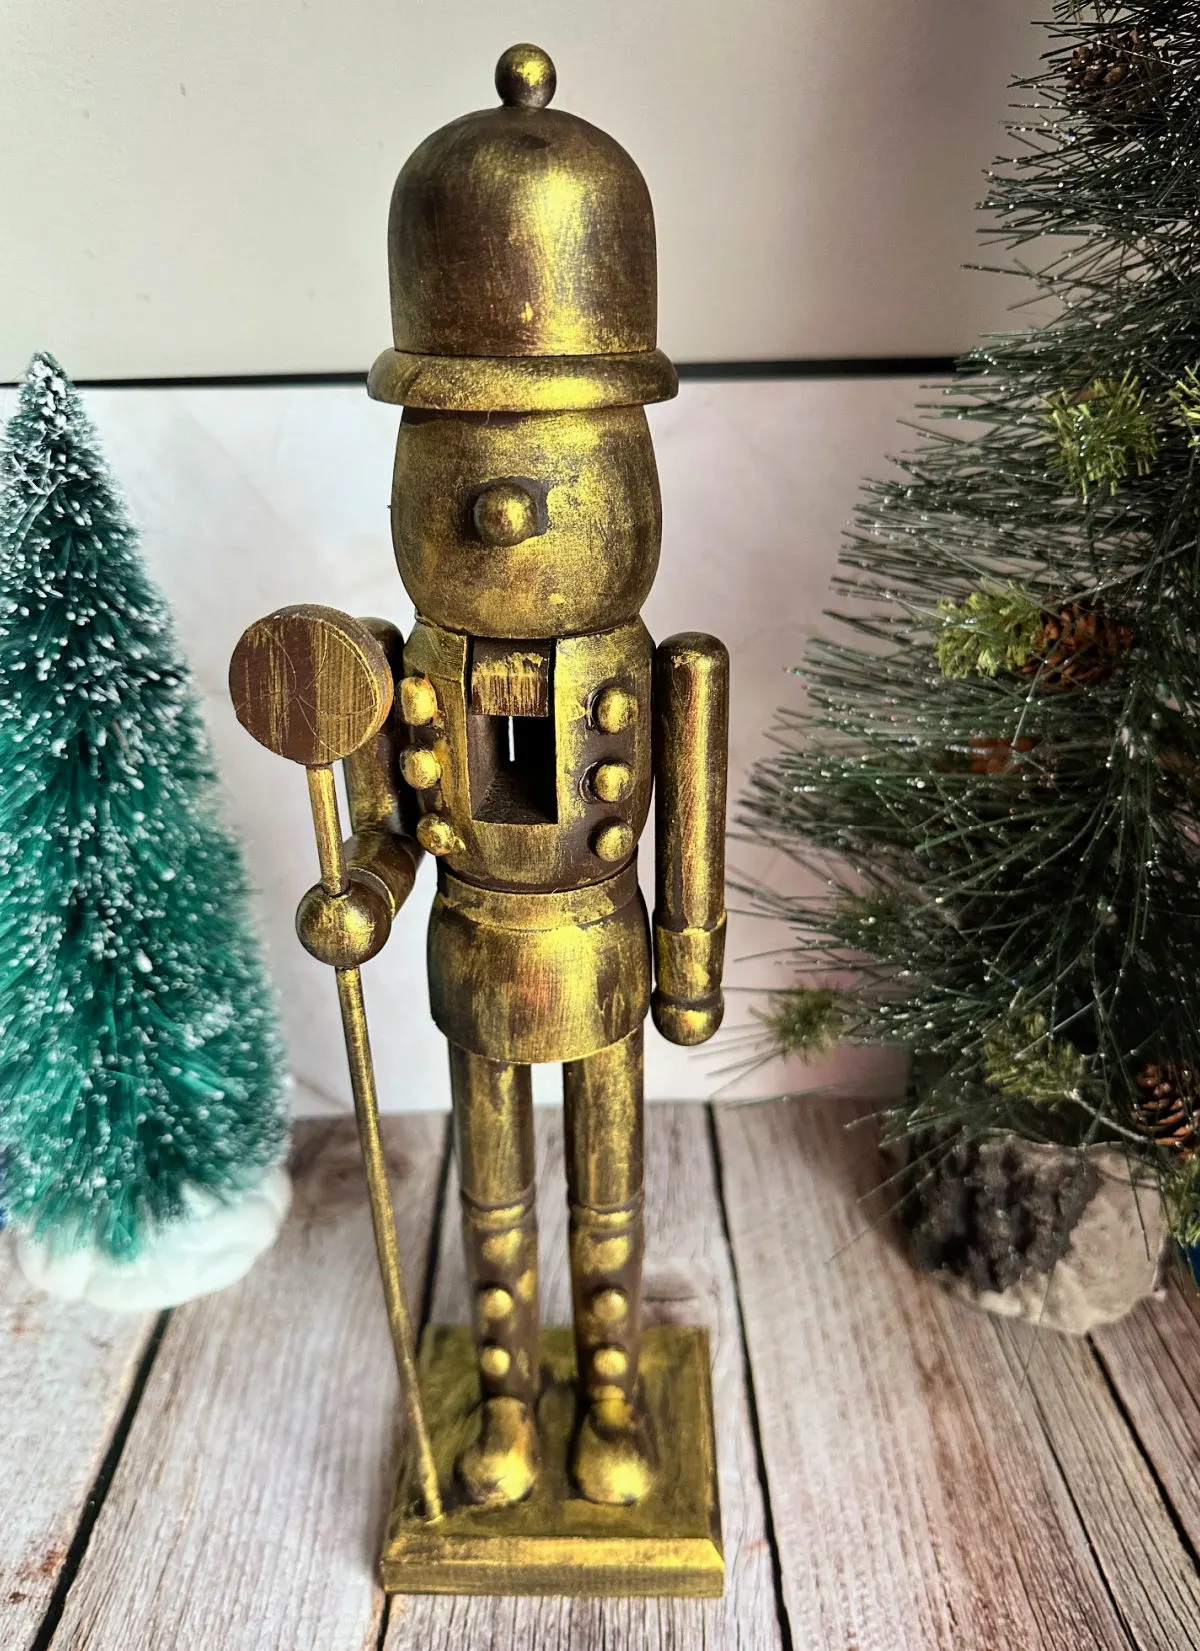
I’m a huge fan of the antique brass look that I used to update smaller 6″ wooden nutcrackers, so I chose to use that same technique.
But, if you want a pastel nutcracker, or a colorful nutcracker, go for it! You could paint several unique nutcrackers to really make a statement.
Here are the steps I used for the antique brass nutcracker.
Paint the nutcracker:
Spray paint the nutcracker with 2-3 coats of espresso spray paint. Be sure to flip the nutcracker over so you get the bottom and also the piece that flips out for the middle. Let dry.

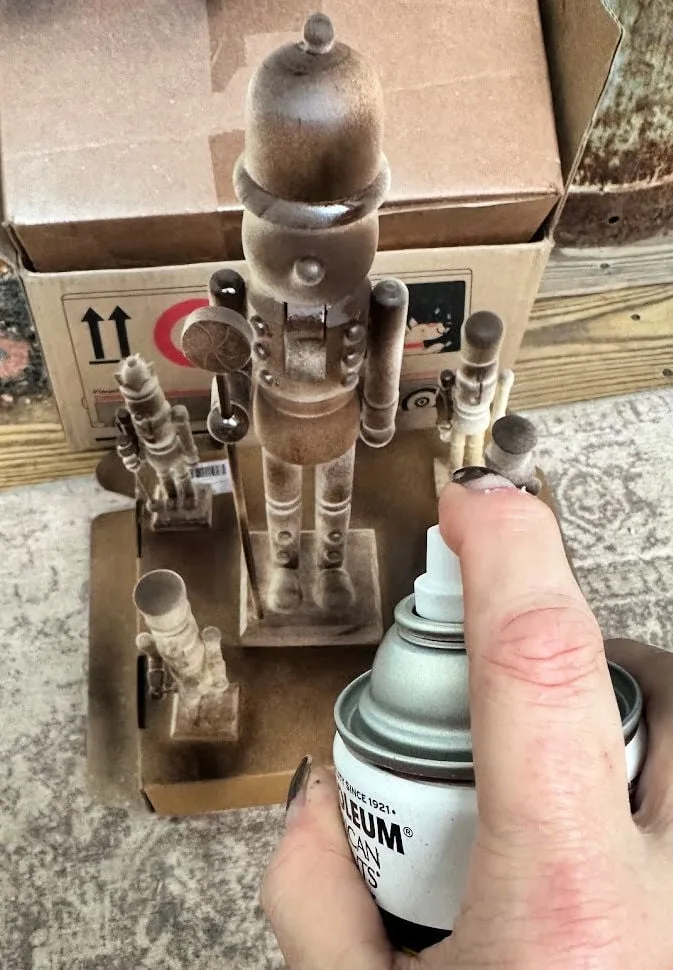
Add gold paint:
Lightly paint the nutcracker with gold paint. You can also use rub ‘n buff, but I wasn’t able to find it in stock locally and it was out of stock on Amazon at the time.
I’ve also had good luck using metallic lustre wax. You can see how this looks in my busted canvas craft.
The goal is to allow some of the espresso paint to show up under the gold. But, you can go as heavy or light as you like.
This really gives a vintage look that I just love! Isn’t the finish just stunning?

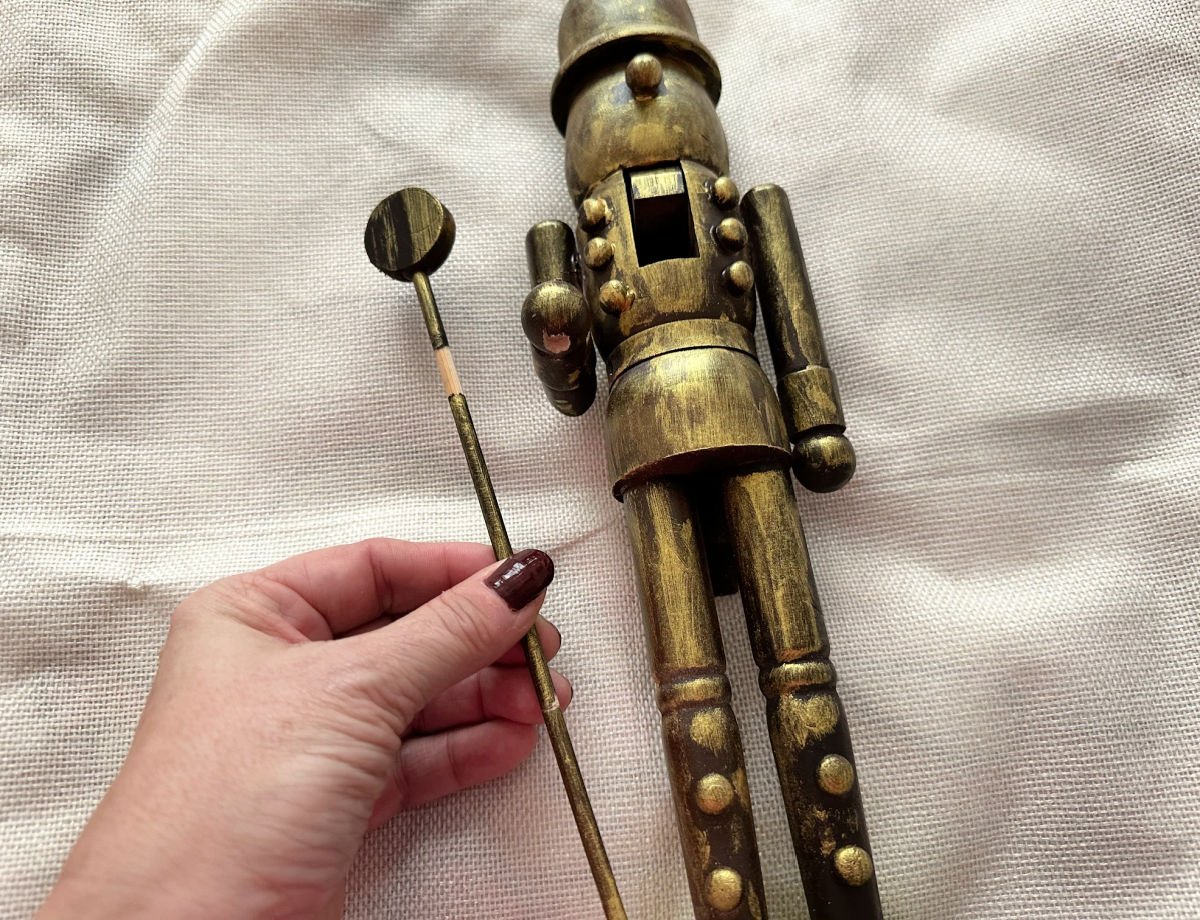
Remove the wood peppermint staff:
Remove the peppermint staff. I thought I would need to cut it, been when I started cutting it, I noticed that it lifted right out. That was a nice surprise!

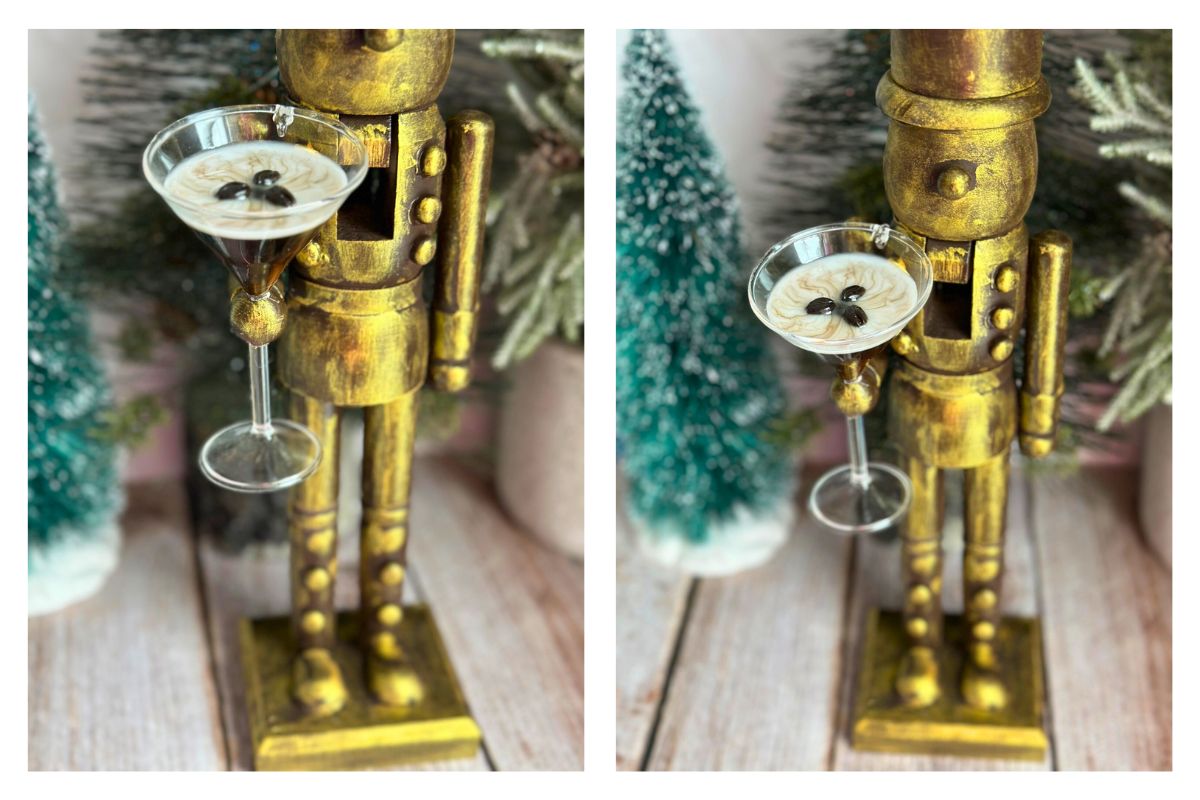
Next is the step I was most nervous about. First off, look at how cute this espresso martini ornament is:
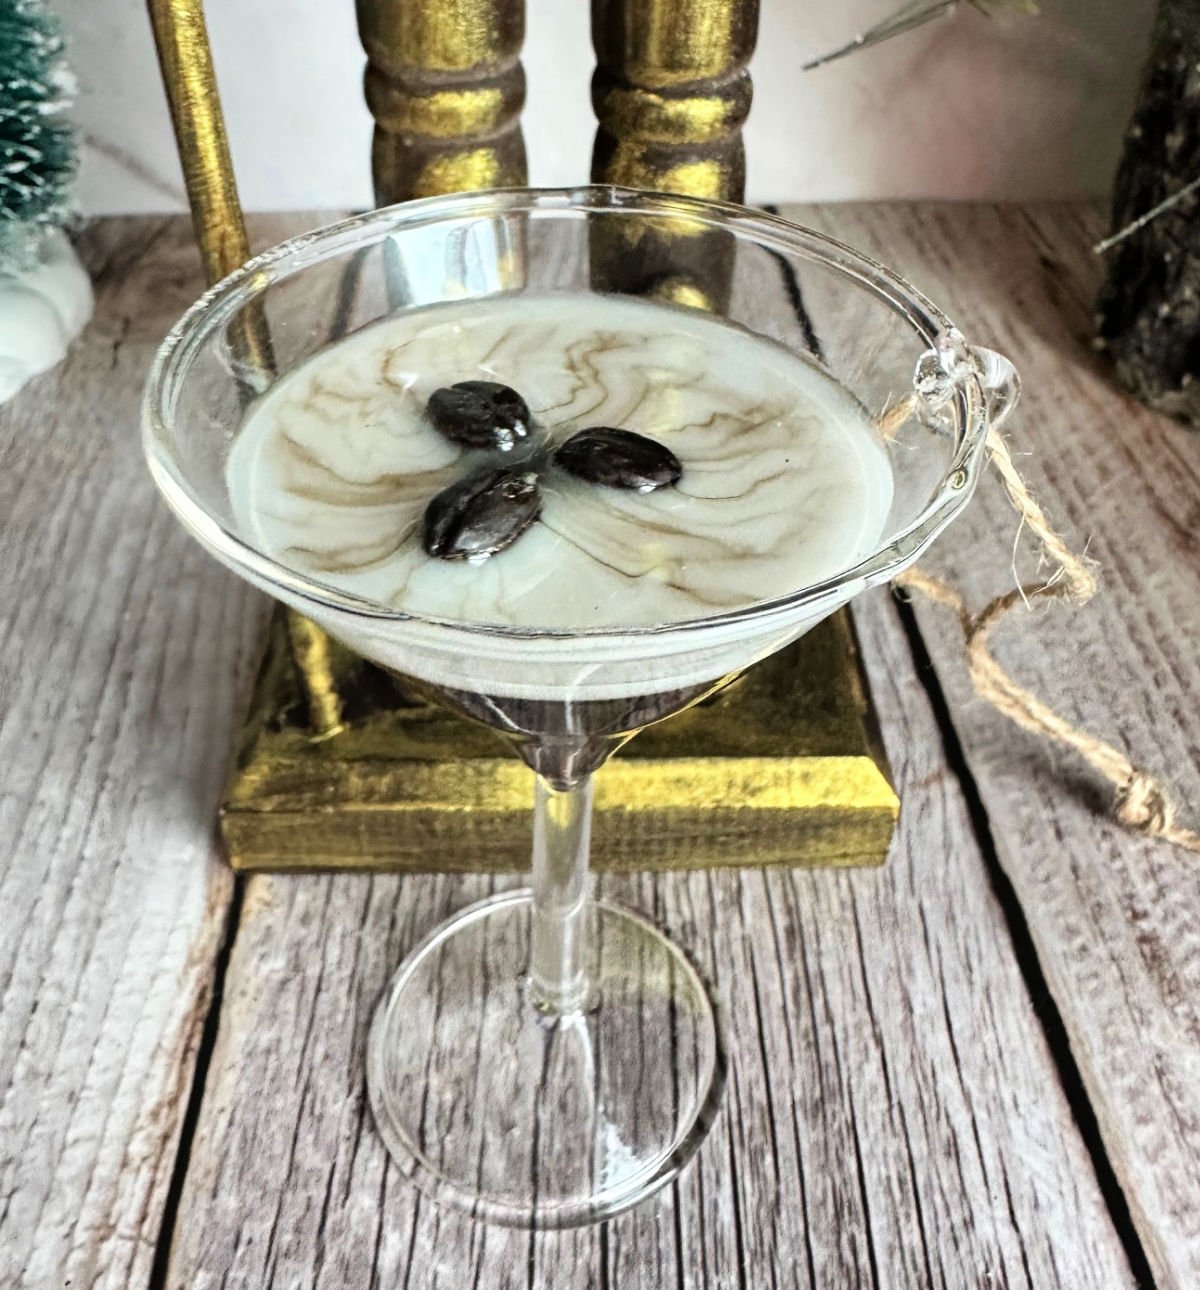
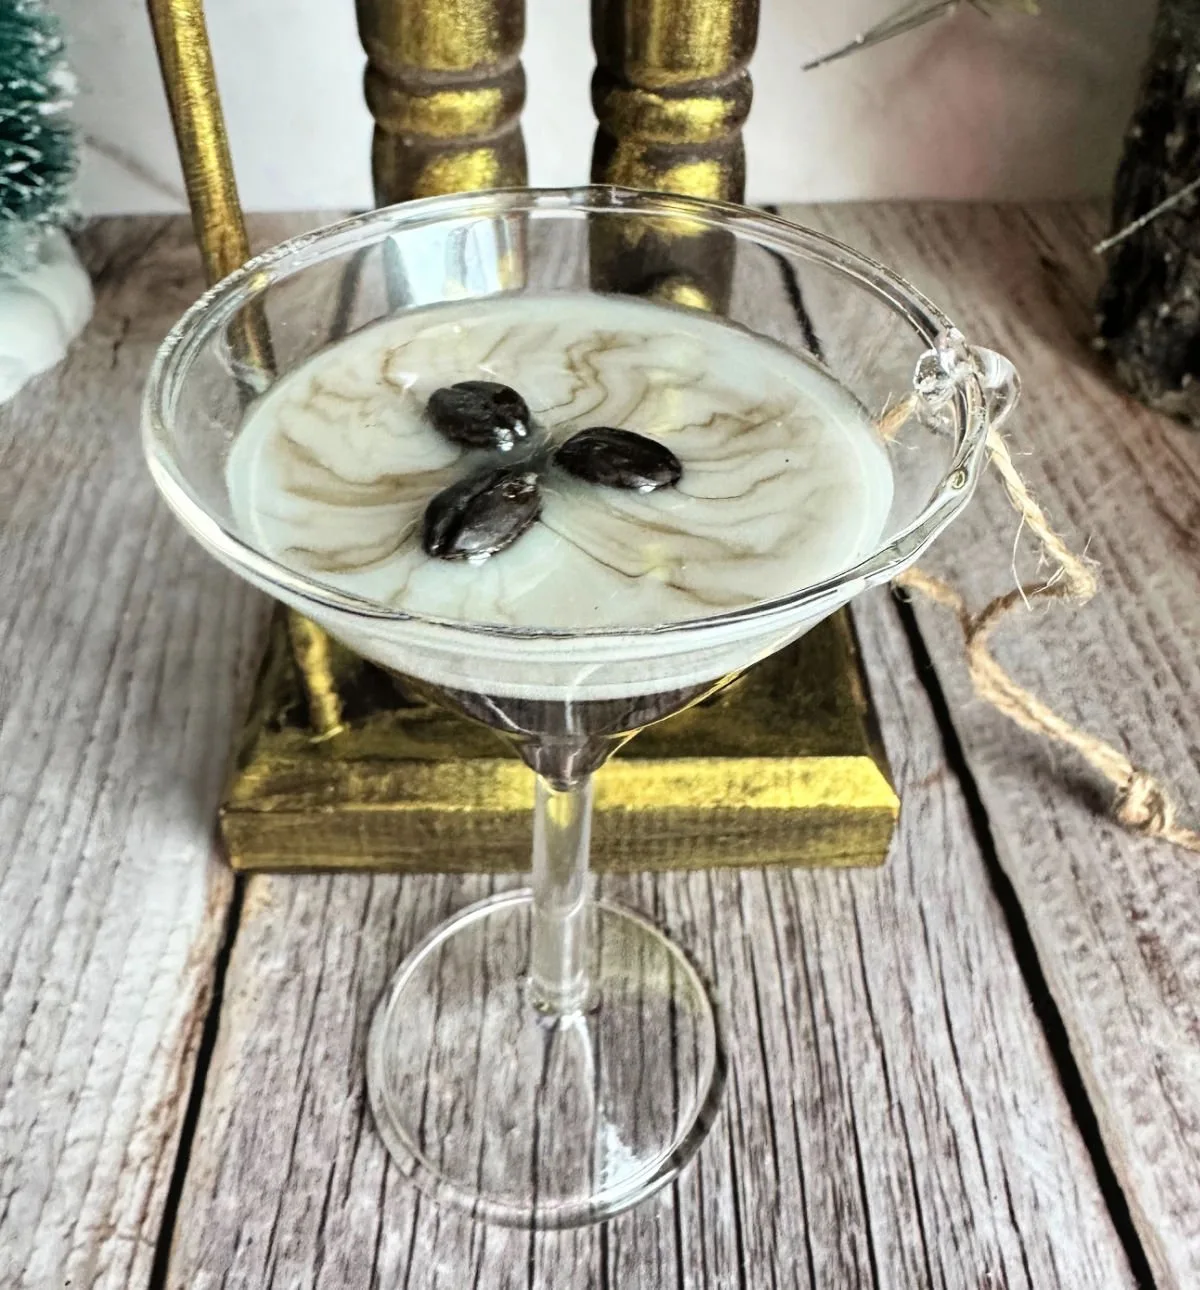
It is on sale too. I definitely did not want to break it, especially not in the wrong place.
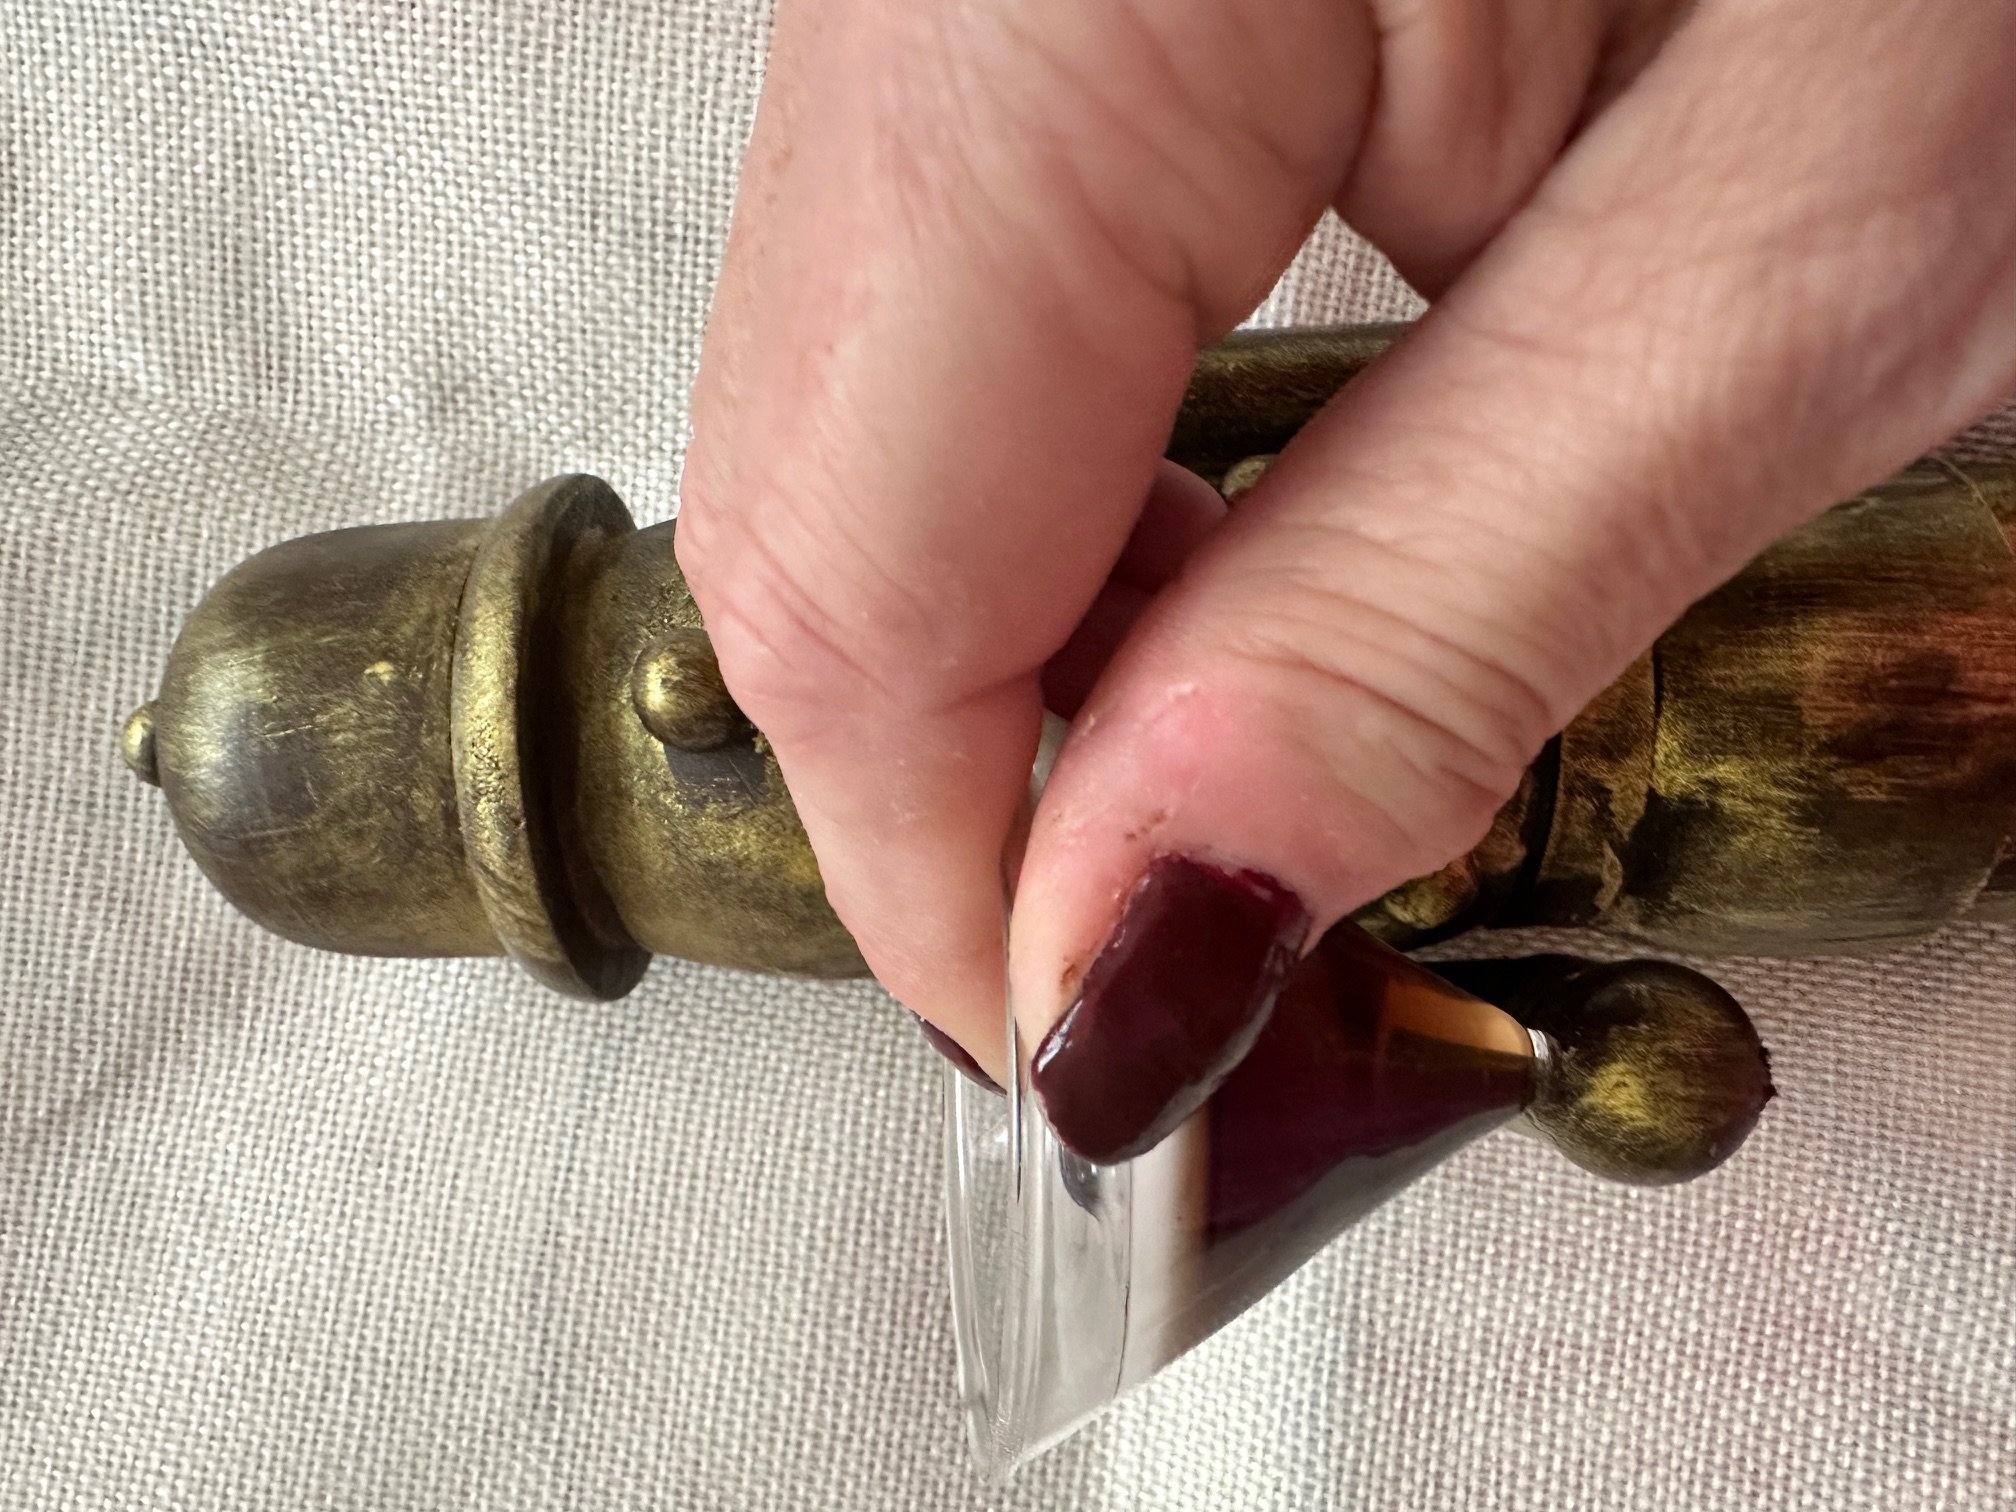
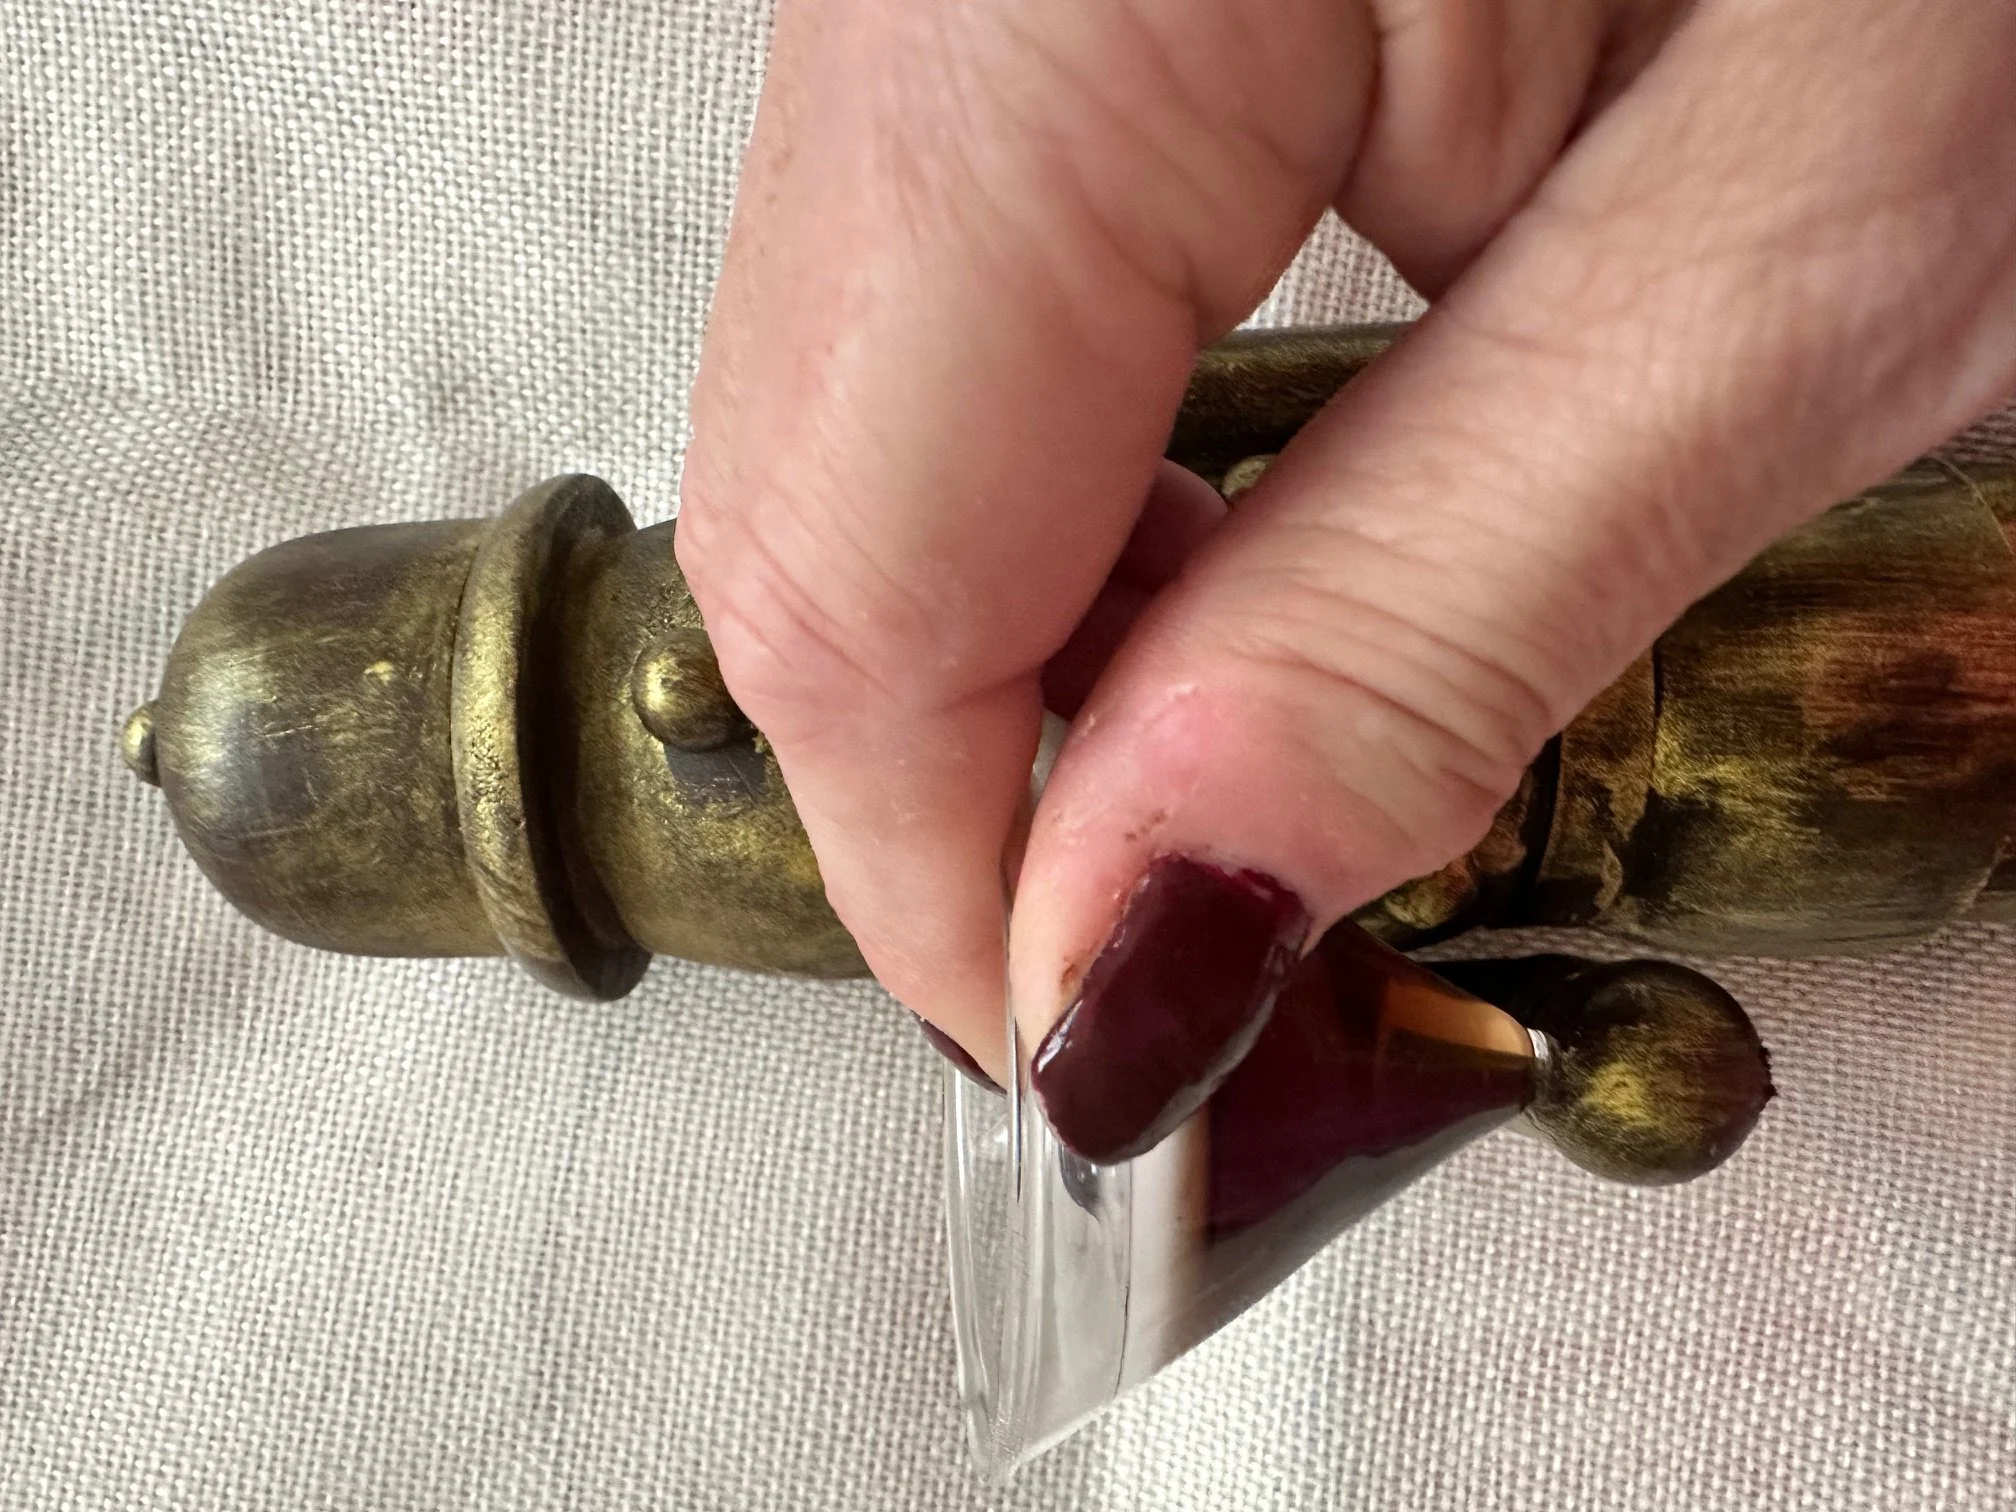
Cut the espresso ornament:
If you have a Dremel I highly recommend using that. I try to use whatever I have on hand, so I decided to use my Cricut craft knife.
Start by scoring the glass right where the stem meets the martini glass. It does take some time and elbow grease, but it did the job.
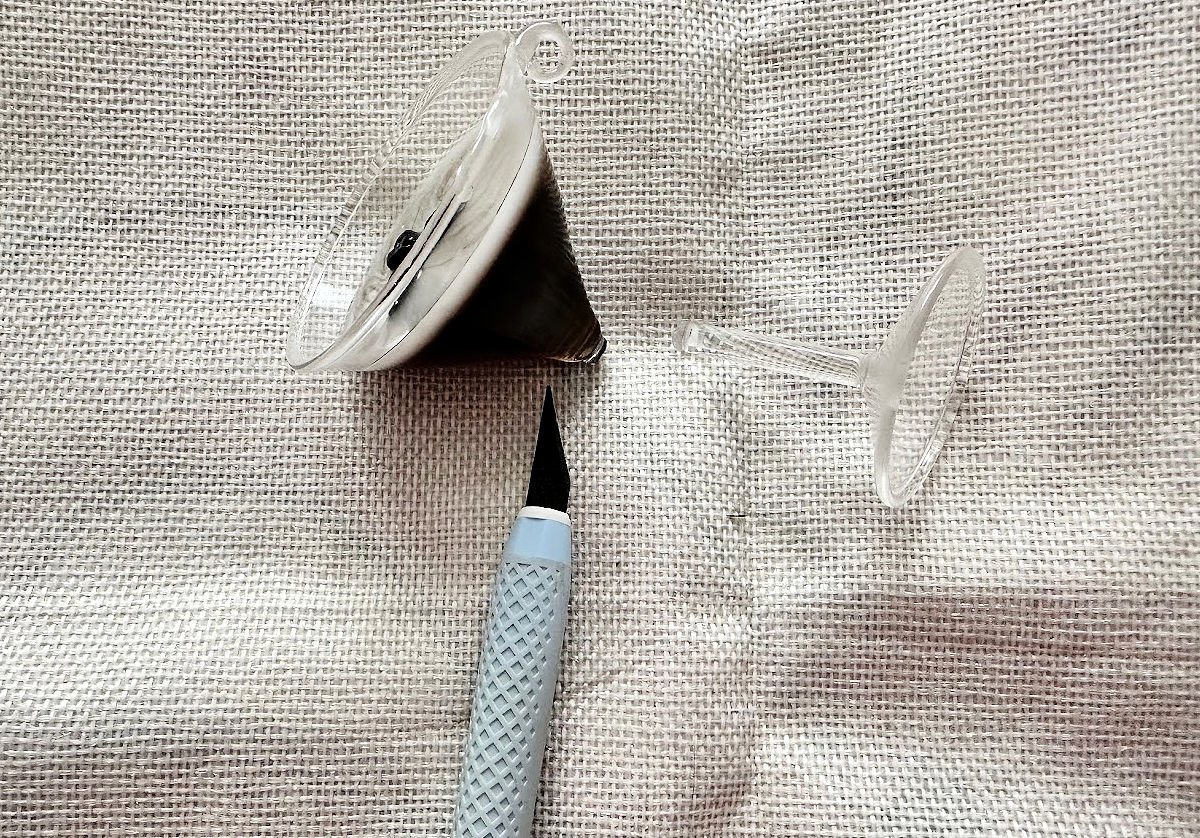
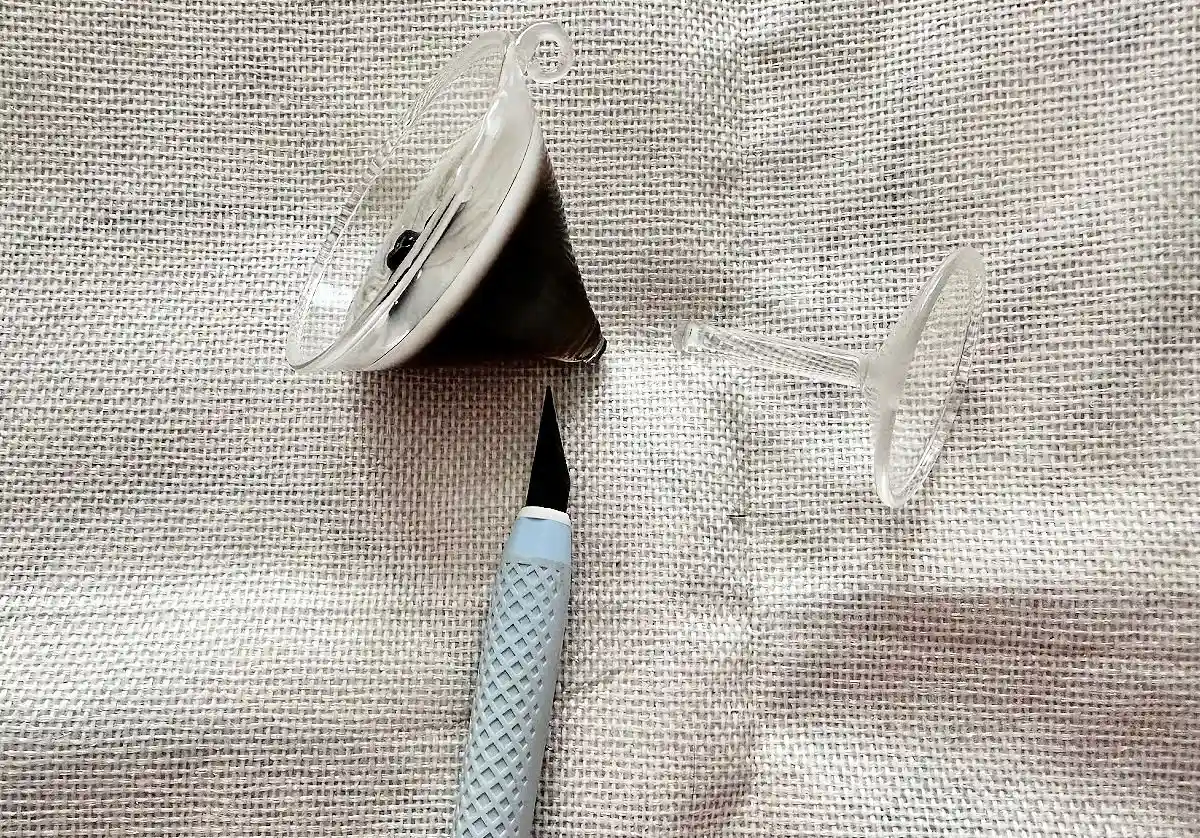
It helps to turn the glass as you are scoring it and give it a deep cut. Once it is scored, tap the stem below the score line with a bit of pressure.
I just used a screwdriver. It actually broke right off and it broke evenly. Love when things work out like that!
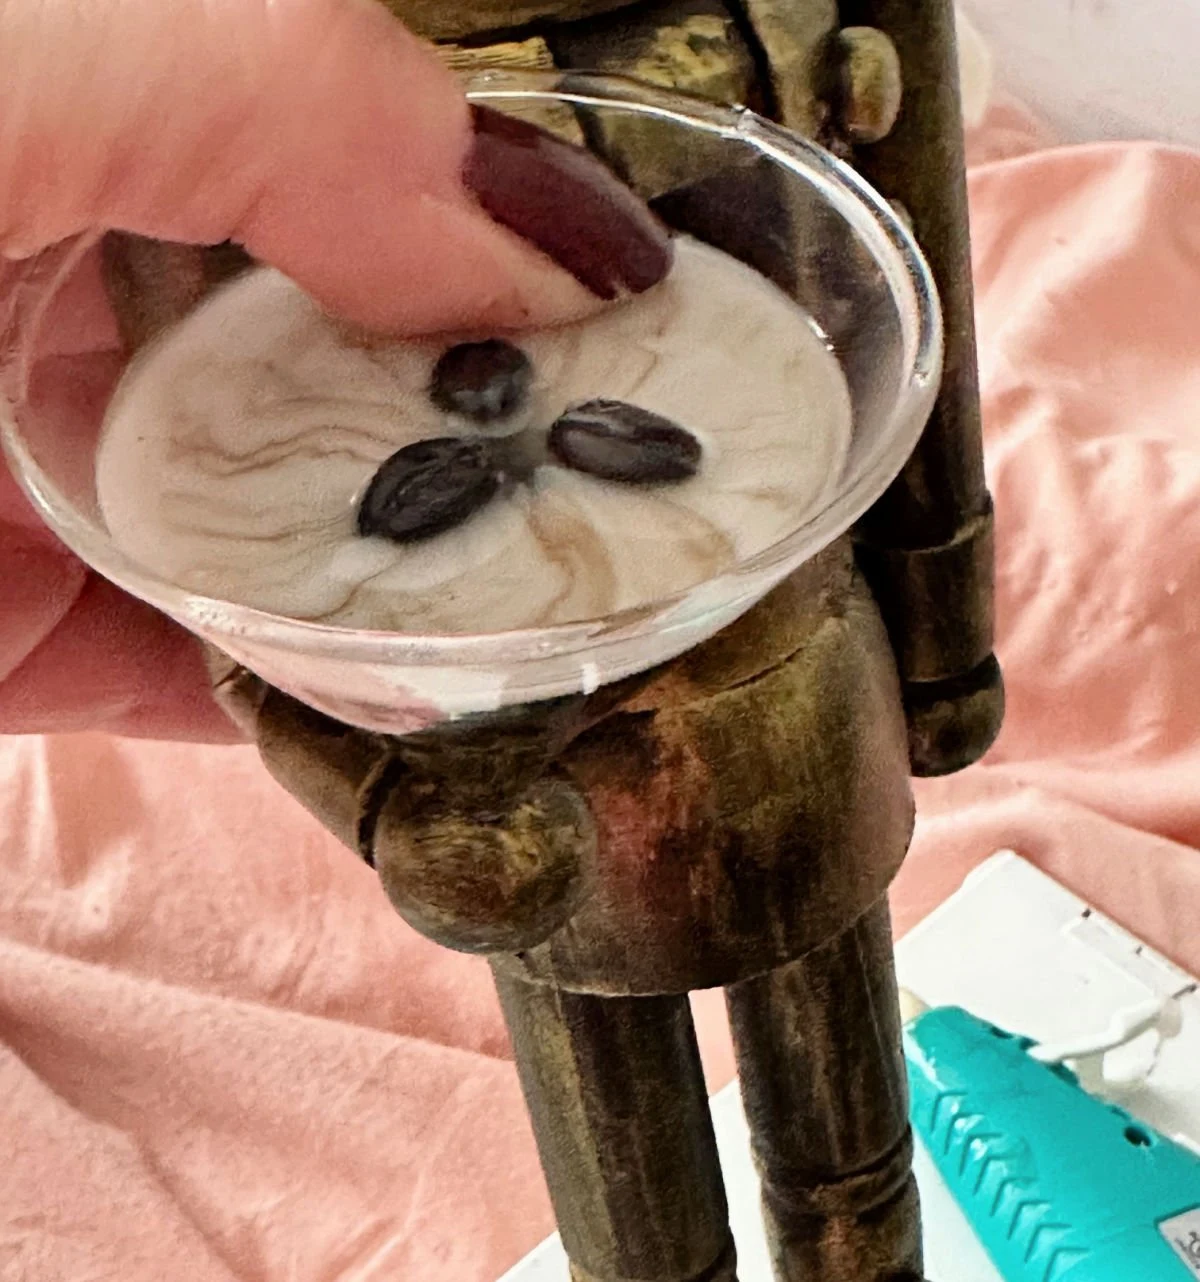
Attach the martini glass:
The two glass pieces were almost a perfect fit to the existing holes from the staff. I did use the craft knife to make it just a bit larger.
The final step is to use a combination of hot glue and E-6000 to secure the martini glass to the nutcracker. Hold it for a minute or two until it starts to set. Let it sit until it is secure.

Attach the Martini Glass Stem:
Repeat the process with the stem. This was a little easier as I was able to slowly turn the stem to fit securely in the hole.
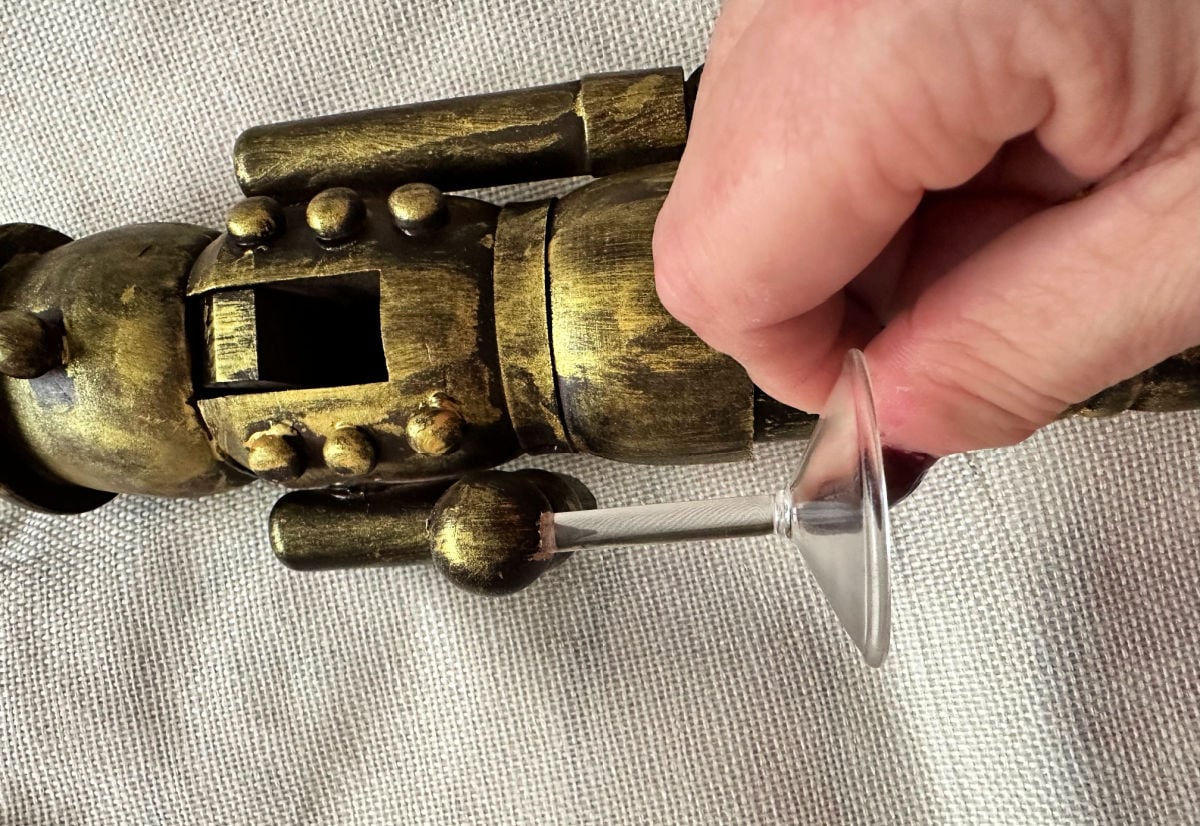

I still added both hot glue and E-6000 to make it extra secure. Let it sit a couple of hours and add additional glue if needed.
You will also need to fill in the small hole on the base of the nutcracker where the staff was.
A bit of air dry clay fills it in nicely. Cover it with a mix of gold and black paint. Spackle would also work.

I’m absolutely loving how this turned out and can’t wait to see my friend open this up.
We have some great memories of enjoying espresso martinis and this will be a fun reminder of that each year when she unpacks this beauty!

Save For Later
I’d love it if you would share this article with your friends on Pinterest by pinning the below image.
It helps my blog grow and doesn’t cost a thing! 🙂

Thanks so much for stopping by. Happy crafting!


Here Are a Few Popular DIY Christmas Crafts
- DIY Glass Angel from a Dollar Tree Find
- Nutcracker Dollar Tree Christmas Tree
- 37+ DIY Dollar Tree Christmas Ornaments
- Large Christmas Wall Art
- Folded Book Art with Printable Cardinal
Follow me on social media below: