Make beautiful and trendy DIY pressed fern wall art using Dollar Tree frames.
It’s a wonderful way to bring the outdoors in and add a touch of greenery to any room in your home.
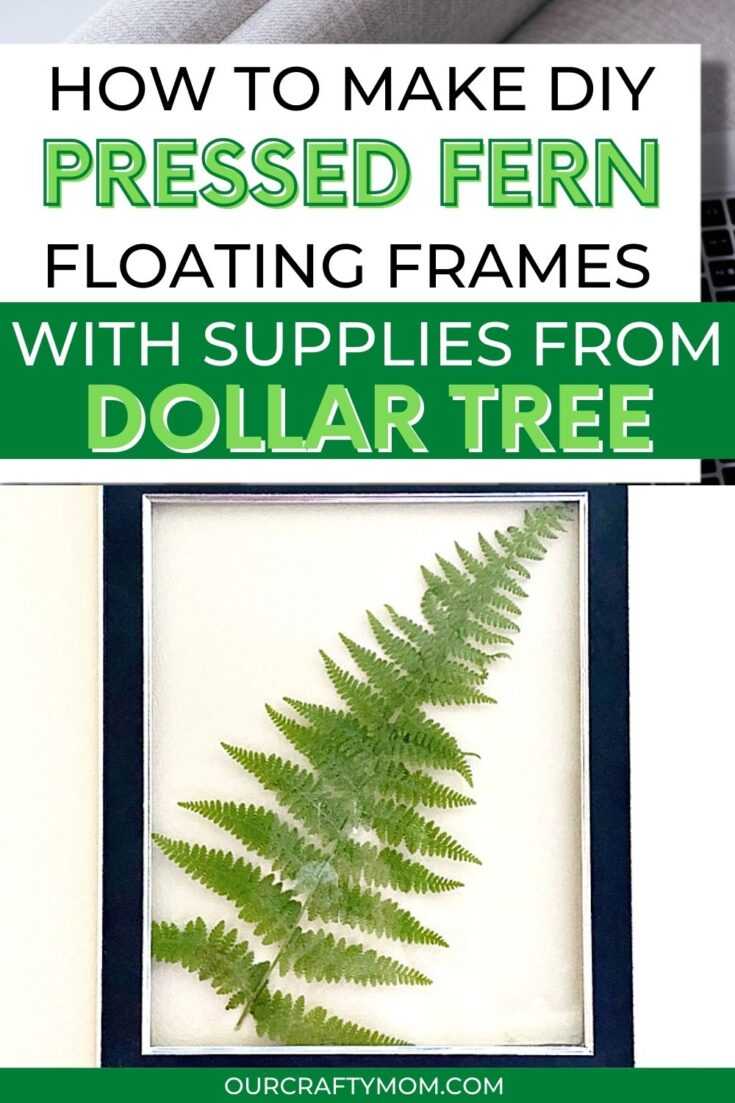

Pressed fern wall art is a great way to bring a touch of nature indoors. Not only does this nature art look beautiful, it is so easy to make, and extremely budget-friendly.
I moved recently and was thrilled to see that my backyard is filled with beautiful ferns. Take a look at this beauty:


The minute I saw it, I started thinking about ways I could bring this pretty plant inside. I plan to dry some for a wreath, but I remembered this picture I saw from Home Depot on Pinterest:

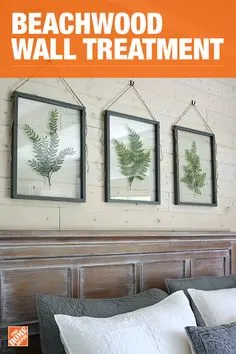
It’s actually for a wall treatment, but the fern art totally caught my eye. I said what most crafters say when they see something they love…”I can make that”!
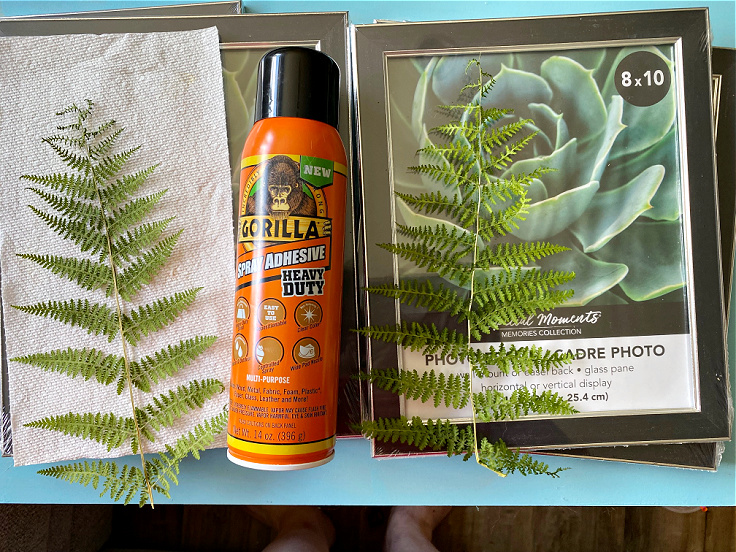
Here’s what you need to make your own real pressed fern leaves in floating frames:
Supplies Needed For DIY Pressed Fern Wall Art
- Gorilla Glue
- Gorilla Glue Spray Adhesive
- Dollar Tree Photo Frames – 8×10
- Wire Cutters
- Ferns – choose different shapes and sizes
- Paper Towels

How To Press Ferns
The first thing you have to do is press the ferns. Who remembers doing this in arts and craft class?

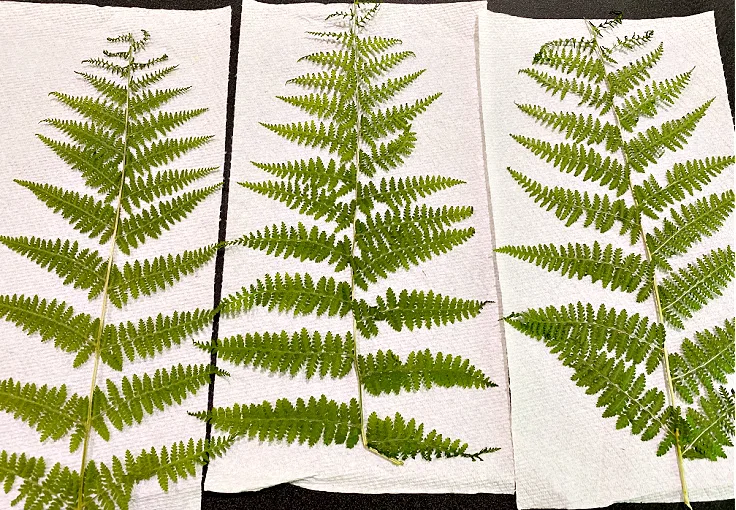
Place each individual fern on a paper towel. You can also use wax paper. Cover each fern with a second paper towel.
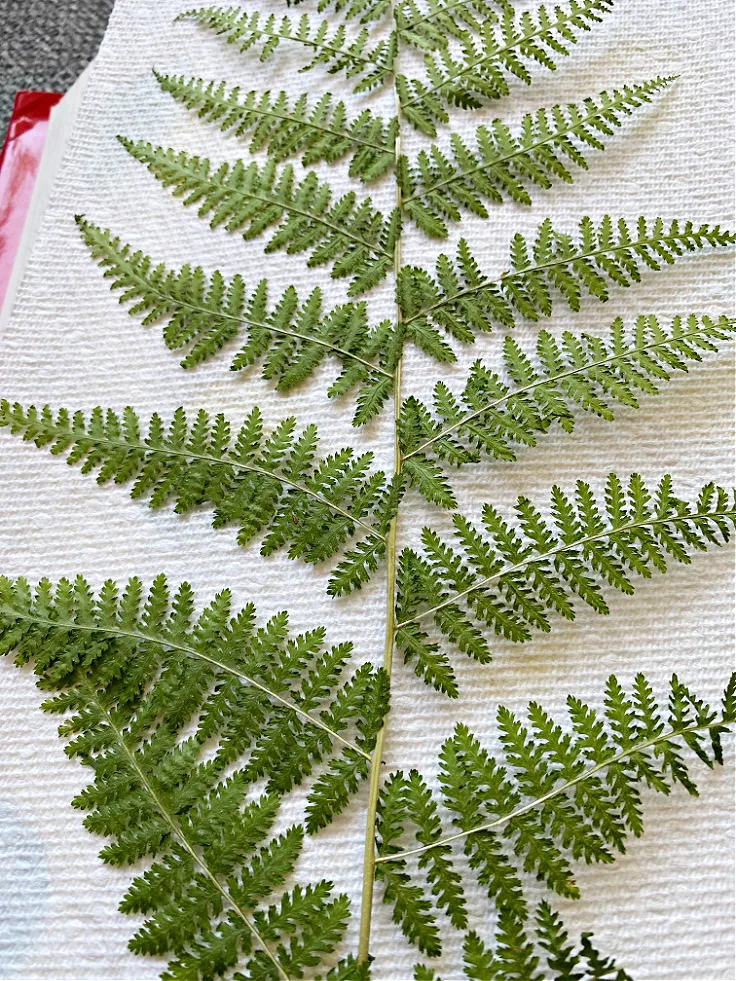
Next, you want to stack the covered ferns and press them in between heavy books. Make sure the fern is covered, otherwise any part that is not will wilt.
Let it press for about a week. It should look something like this:

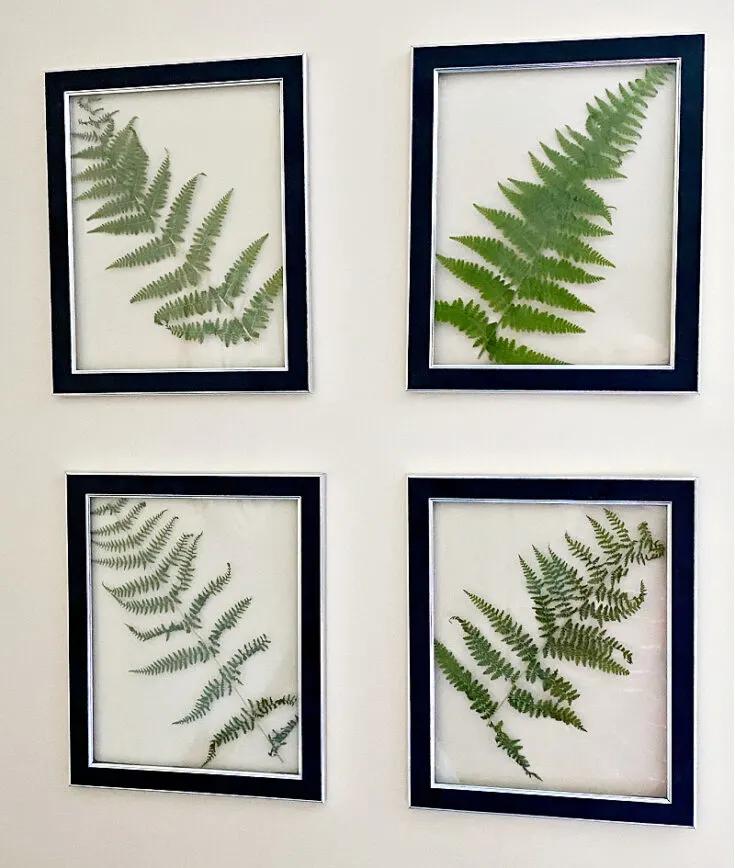
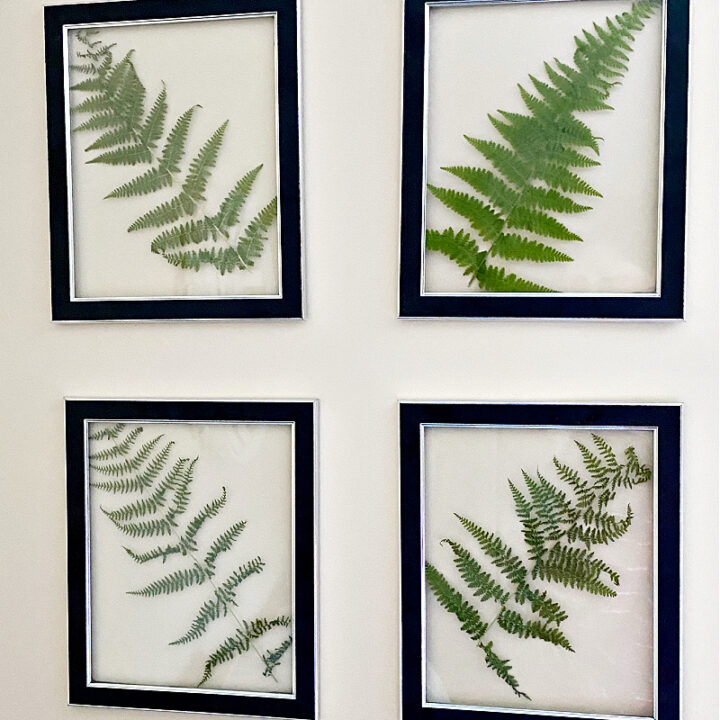
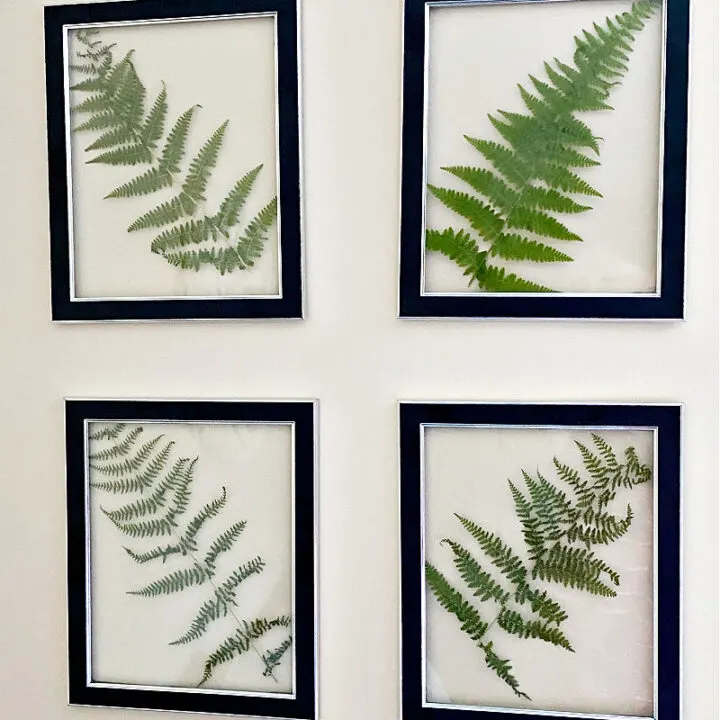
How To Create Pressed Fern Art
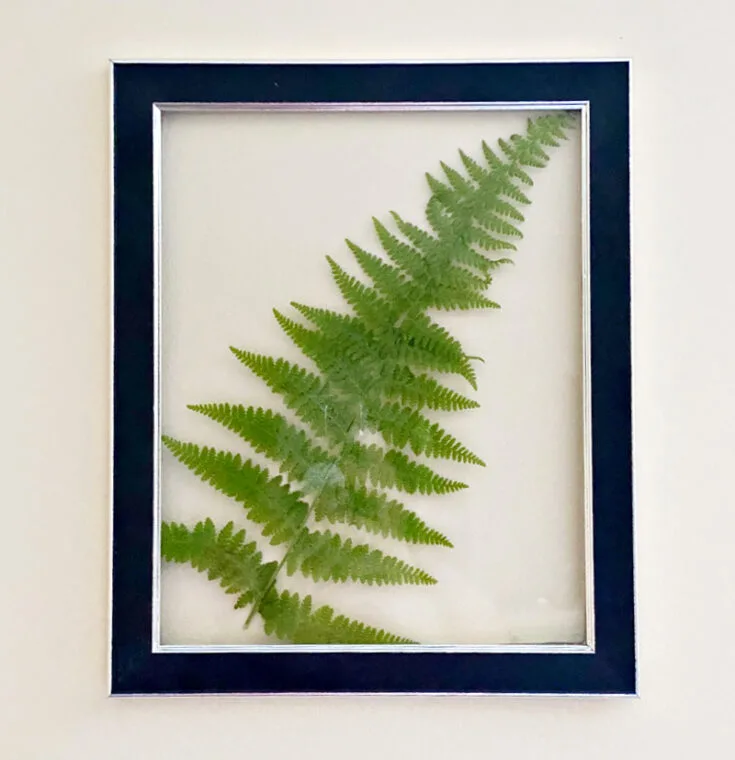
Now it’s time to get creative and make your own pressed fern art.
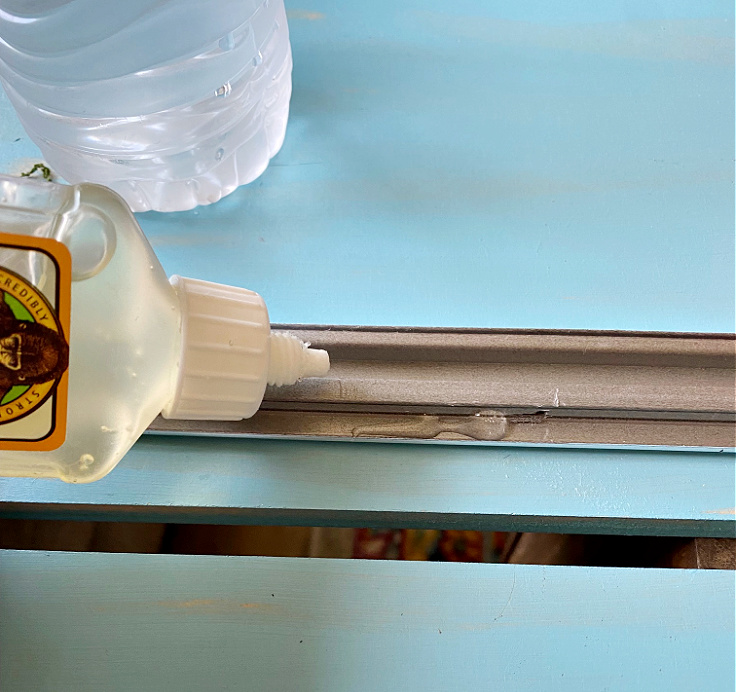
Remove the glass and backing from the Dollar Tree frames and set aside.
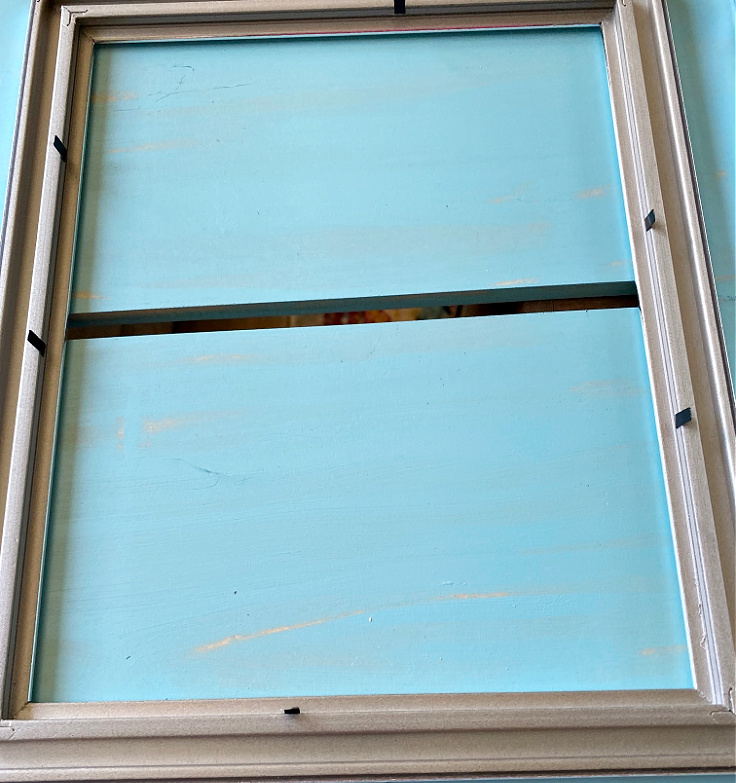
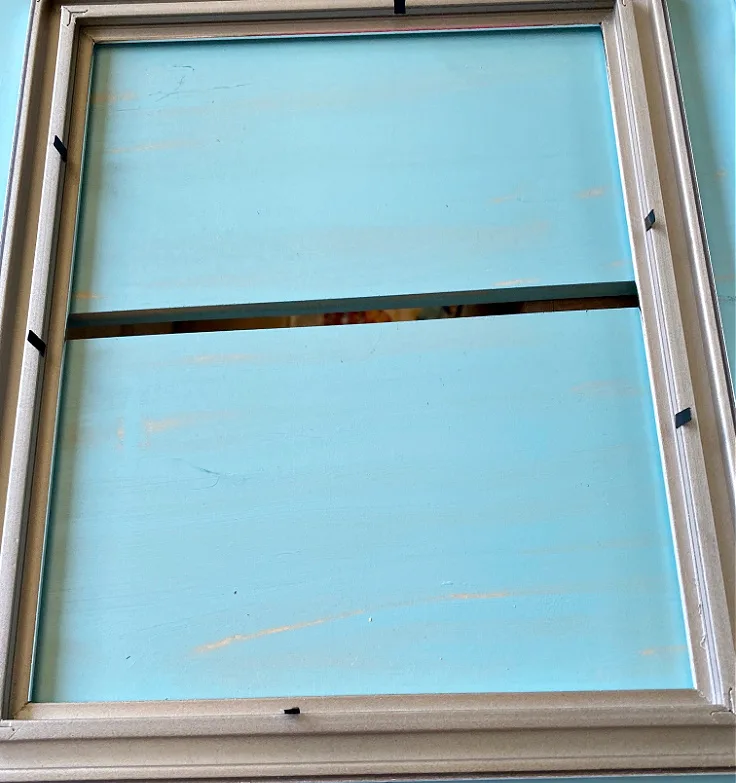
Use wire cutters or scissors to remove the clips from the frames and dispose of them.
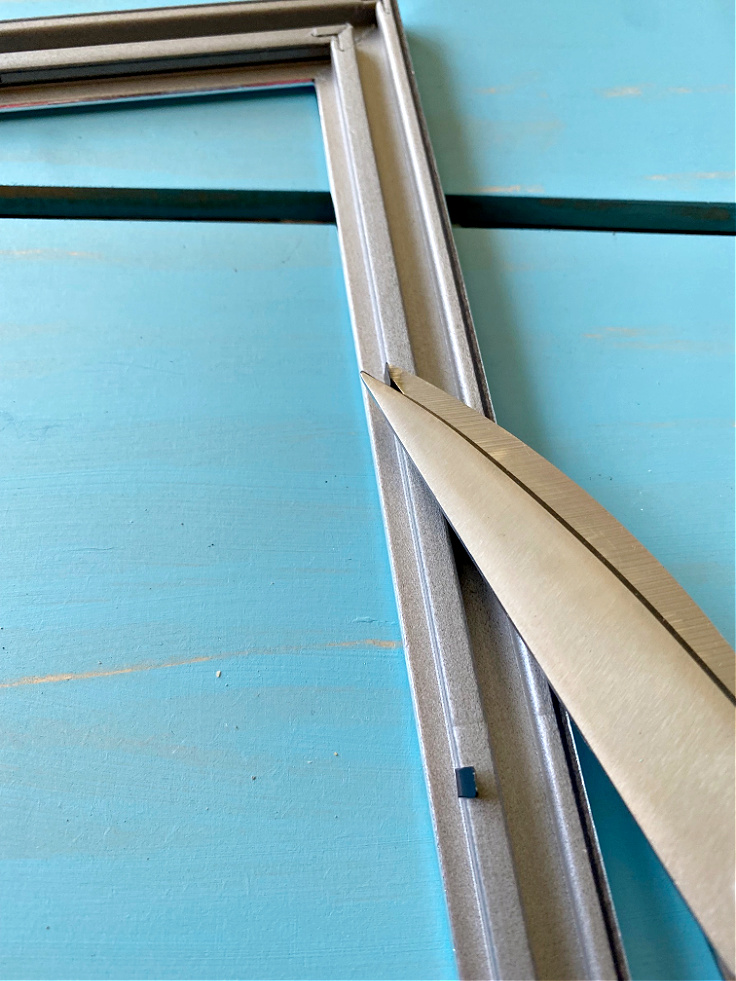

Now you want to glue the glass into the frame. The clips are removed because they would show through on the floating frame. Let dry.

Take one pressed fern and spray it with Gorilla Glue spray adhesive. Be sure to spray the side of the fern you want to be showing.
Ask me how many I sprayed wrong!

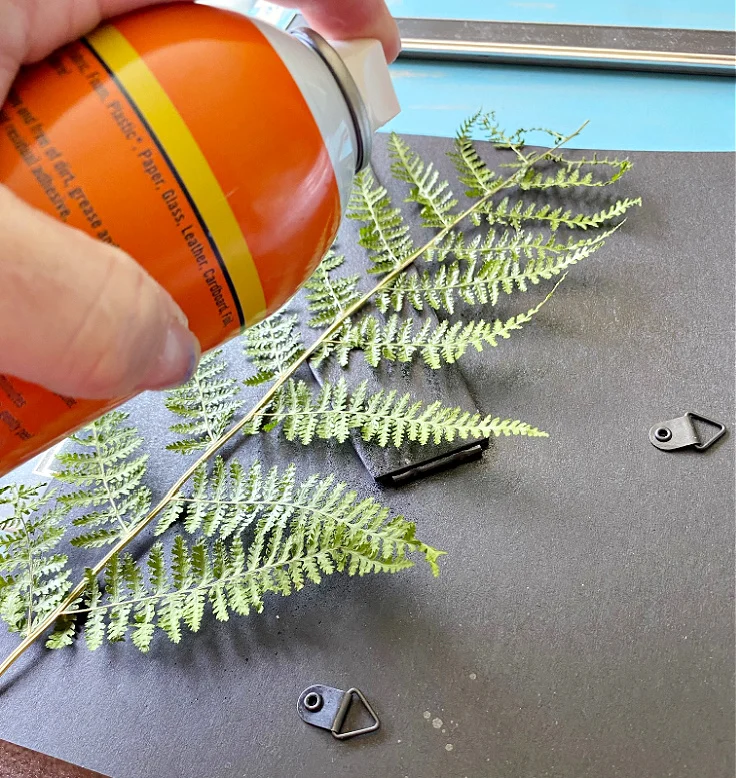
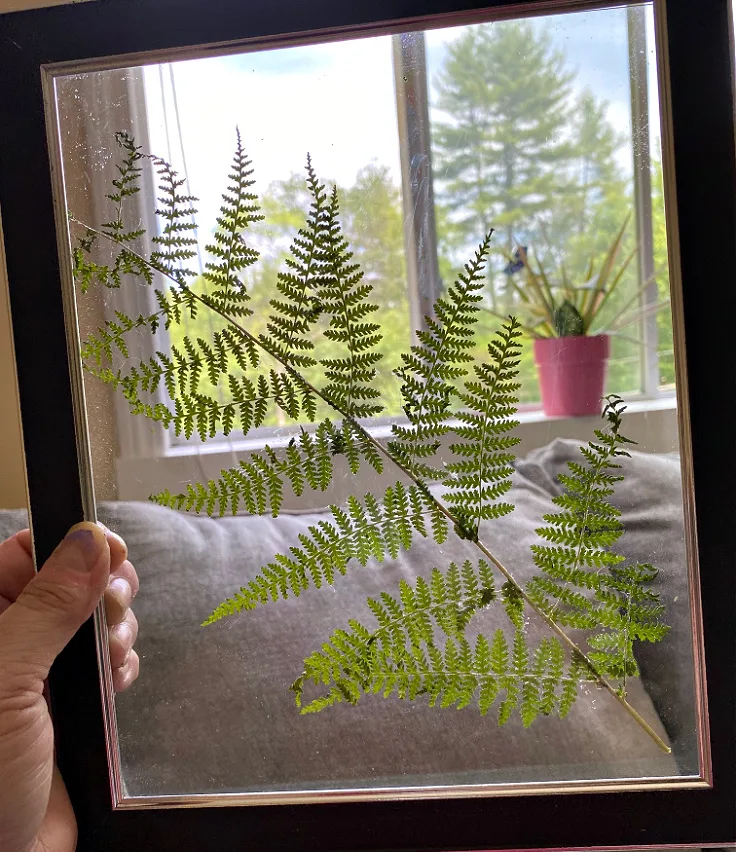
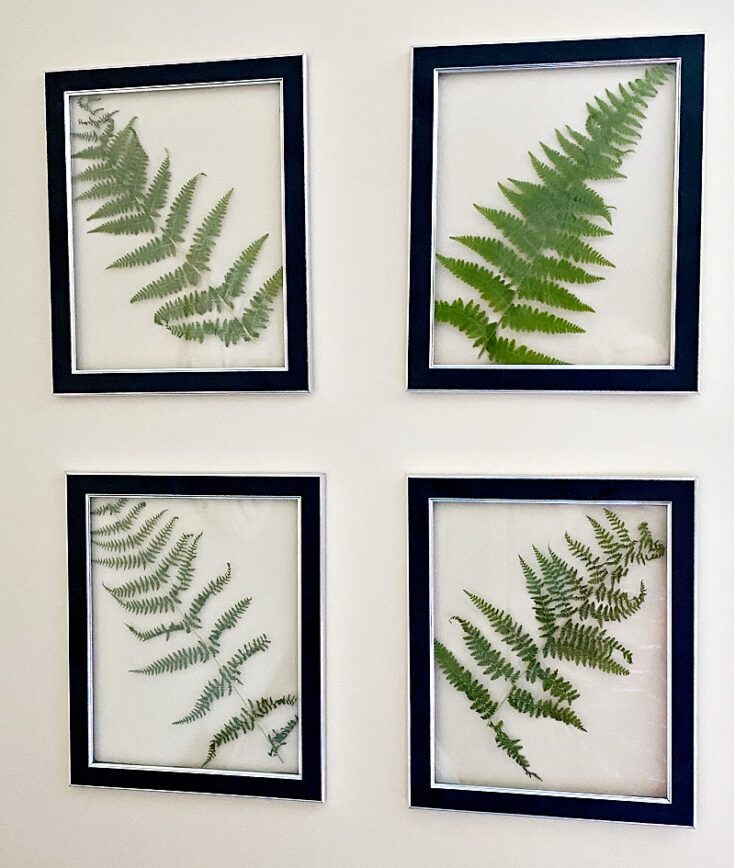
Place the fern where you want it to go on the glass. I decided to go with 4 frames, so I went with a right, left design.

Repeat this process for all of your pressed ferns.
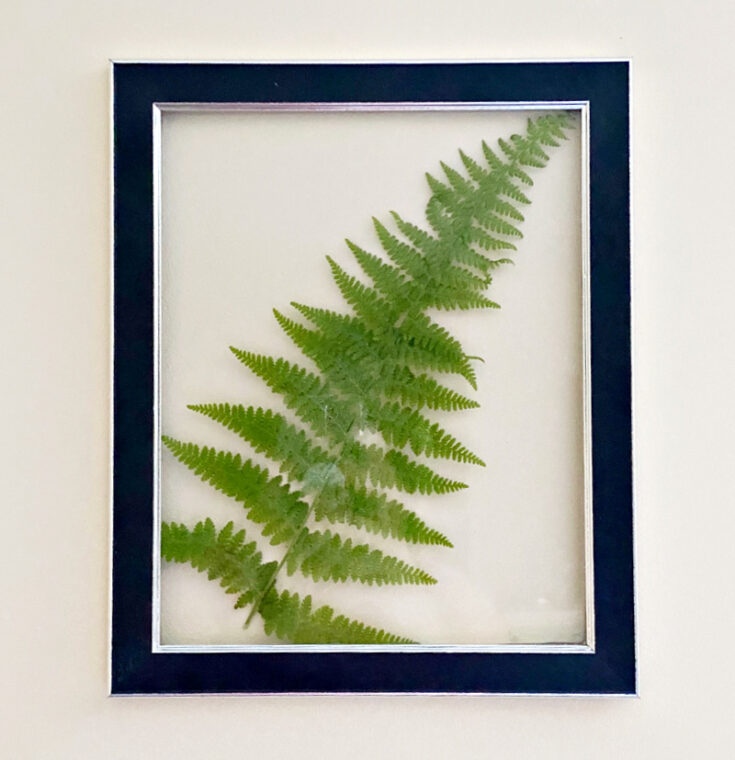
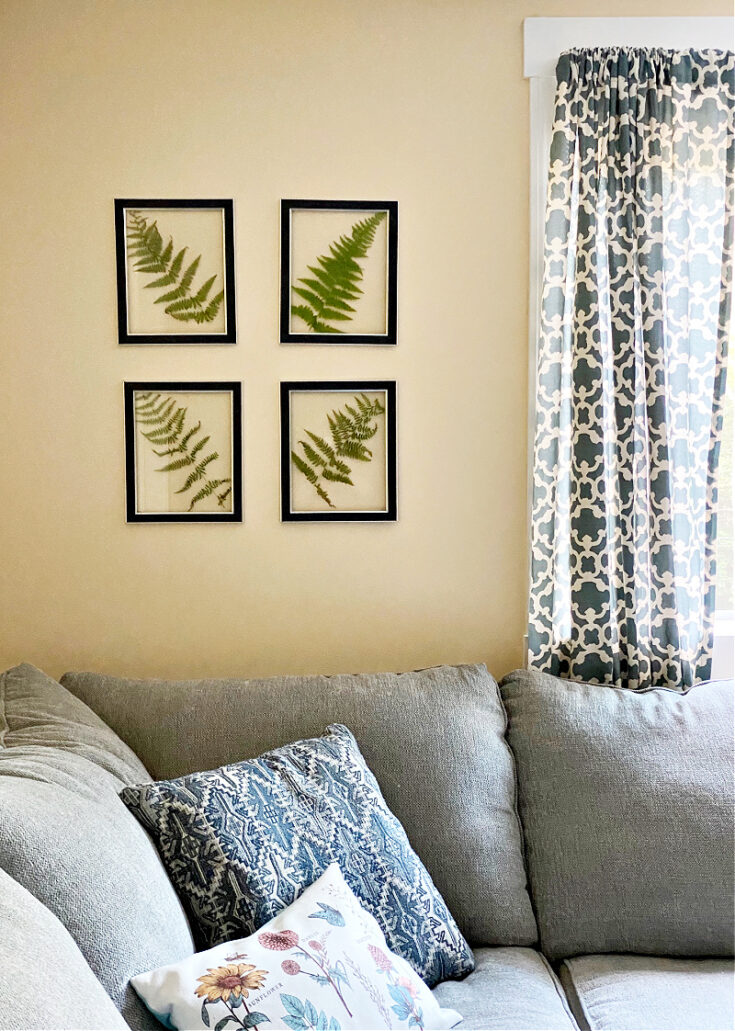
Look at how pretty this display looks in my living room:

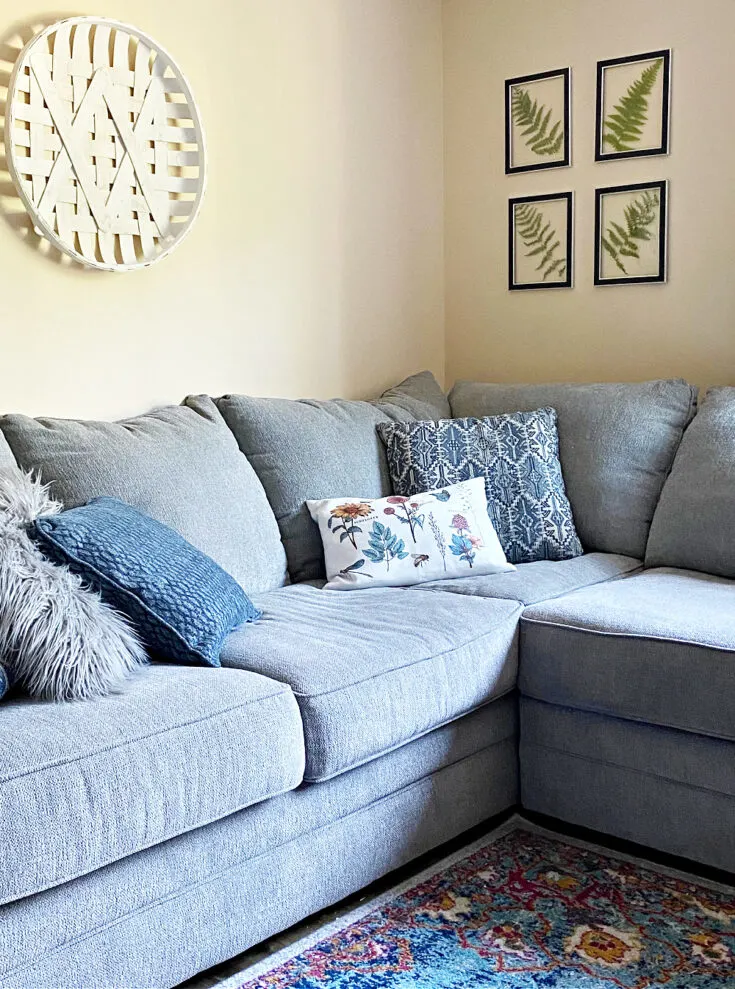
I’m decorating this living room in a kind of modern boho style and this nature themed art fits in perfectly. Couldn’t you also see this type of art displayed in a gallery wall?

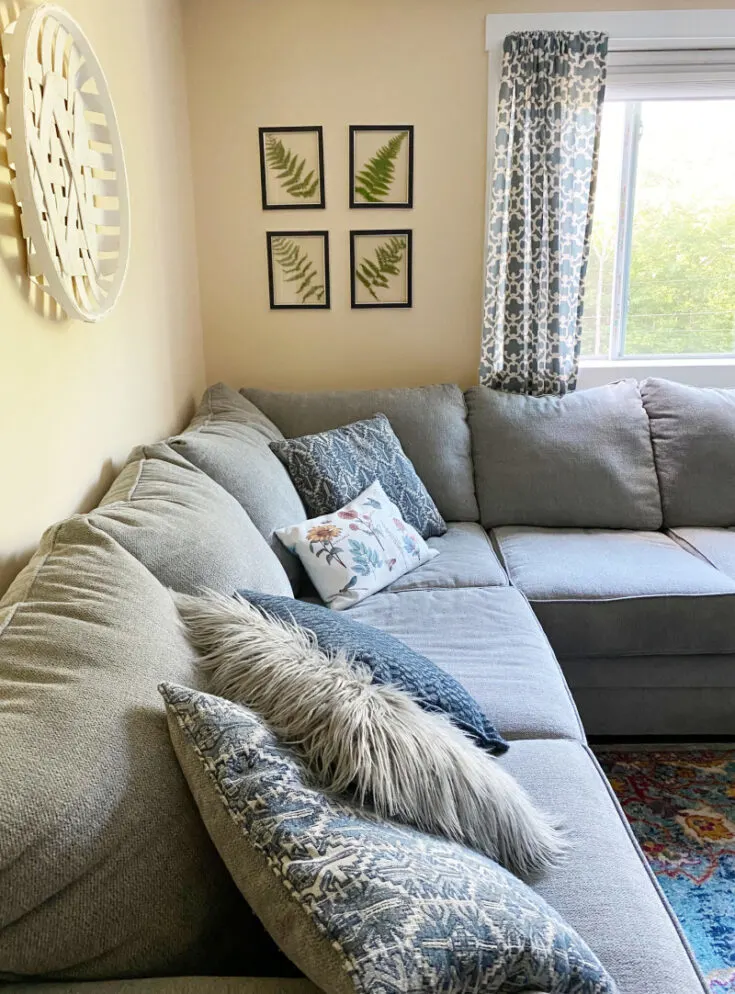
The great thing about this DIY wall art is it can be used to decorate an apartment, house, dorm room-really any place you want a little touch of greenery.
And, you can’t beat the price. The ferns were free and the frames were $1 a piece.

I hope you enjoyed this DIY wall art as much as I enjoyed making it. The best part about moving is getting to decorate new to you spaces!

I have lots of simple and budget-friendly DIY projects coming up. Consider subscribing to my email so you never miss a post:
You may also enjoy these DIY home decorating ideas:
Learn How To Make Super Cool DIY Pressed Fern Wall Art
Create your own floating frame pressed fern wall art using ferns from your yard, or a local park and some Dollar Tree frames.
Materials
- Gorilla Glue
- Gorilla Glue Spray Adhesive
- Dollar Tree Photo Frames - 8x10
- Ferns
Tools
- Wire Cutters
Instructions
- Place each individual fern on a paper towel. Cover each fern with a second paper towel.
- Stack the covered ferns and press them in between heavy books.
- Let it press for about a week.
- Remove the glass and backing from the Dollar Tree frames
- Use wire cutters or scissors to remove the clips.
- Glue the glass into the frame.
- Take one pressed fern and spray it with Gorilla Glue spray adhesive.
- Place the fern where you want it to go on the glass.
- Hang your beautiful pressed fern art.
Recommended Products
As an Amazon Associate and member of other affiliate programs, I earn from qualifying purchases.


Thanks for stopping by. Have a great day!
You can find me on social media below:
Pinterest
Facebook
Instagram
Twitter