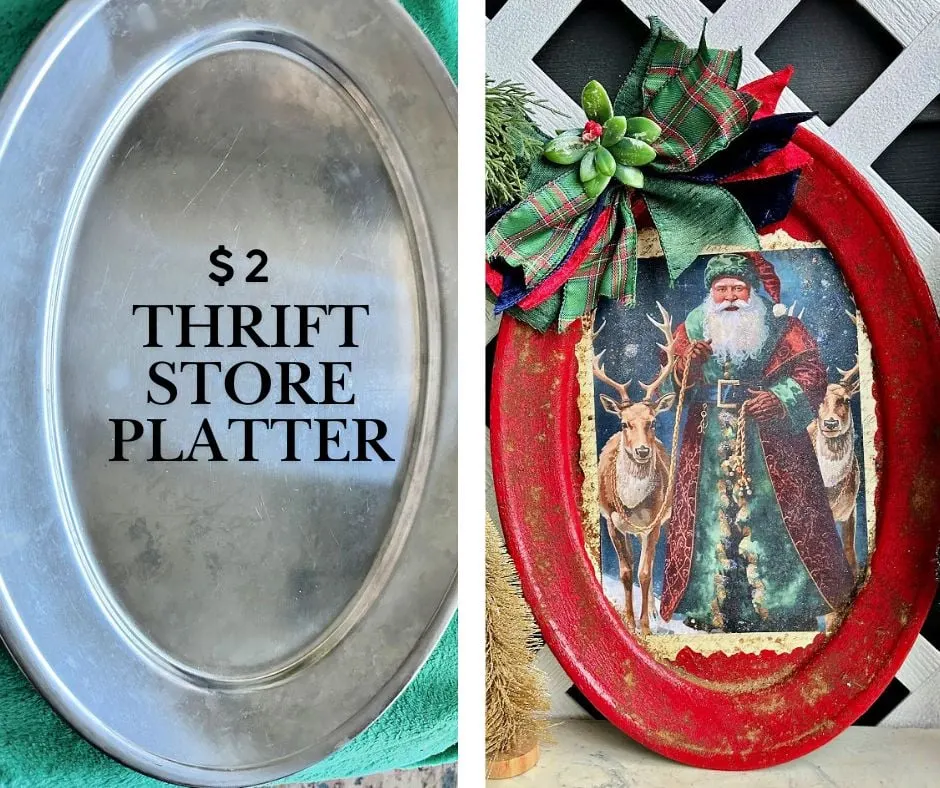
Create an Old World Santa Christmas tray from a $2 thrift store find. This easy DIY will add cozy vintage charm to your Christmas decor.


This post contains affiliate links. This means if you click the link and buy something, I may receive a percentage of sales at no extra cost to you. Please see my full disclosure here.
You may have heard me say this a time or two, but this may be my favorite Christmas project so far!
It combines my love of thrifting, decoupaging and creating all in one budget-friendly and beautiful DIY.
I’m sharing this tutorial as part of the monthly thrift store decor team collaboration, which is the second Wednesday of every month.
This talented group always inspires me and this month we are welcoming a few new members, so be sure to read to the bottom of this post to check out their projects.
Old World Santa Christmas Tray
Can you believe I scored this large silver plated platter for just $2 at Goodwill? With the holiday season around the corner, I knew I could put it to good use.
Silver trays always come in handy. They can be shined up and used in decorating or for serving. You can see how I used a classic silver tray with handles to display my antique nativity.
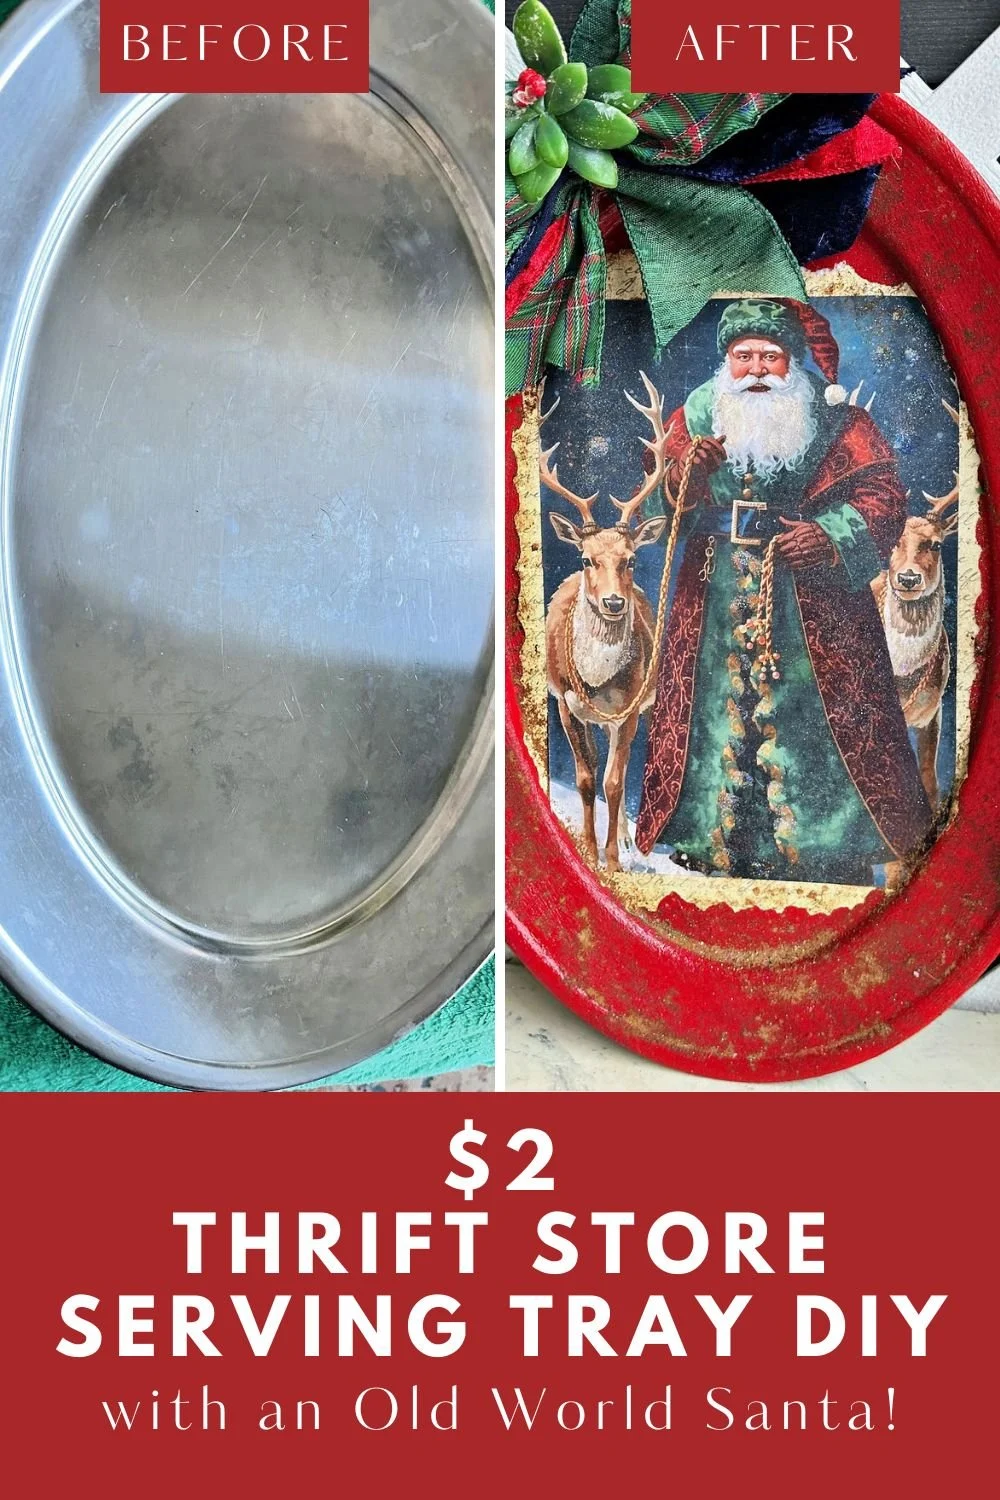
There is nothing like a good before and after image to show the transformation.
Look at this faux rusted beauty:

Supplies for DIY Christmas Tray
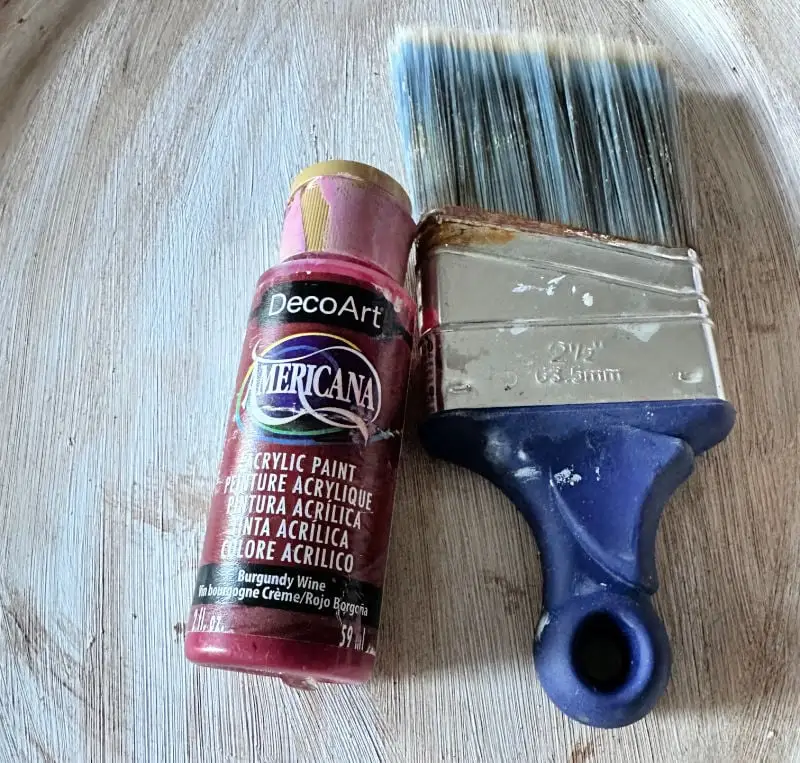
Here is what I used to makeover this silver platter.
- Large Silver Plated Tray – you can usually find these in different shapes and sizes at most thrift stores, flea markets or antique stores. Mine was $4, but was 50% off so I scored this for a song!
- Cinnamon – you read that right! I’ll show you how to achieve a faux rusty finish with cinnamon.
- Acrylic Craft Paint – I used burgundy wine, but use whatever color you like. Deep, rich colors work well.
- Mod Podge
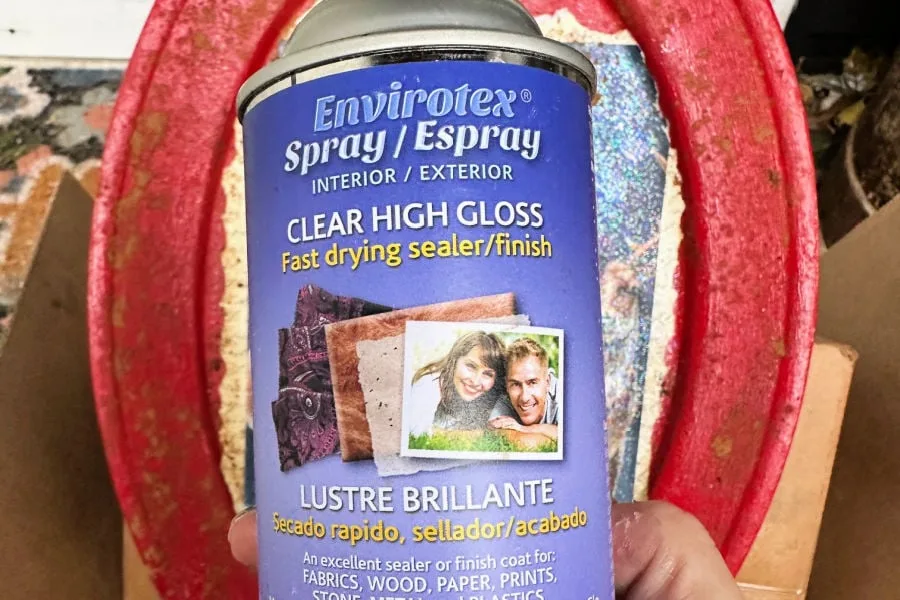
- Clear High Gloss Sealer
- Paint Brush
- Script Cardstock
- Double Sided Tape Runner – you can also use a glue stick.
- Paper Trimmer – or scissors
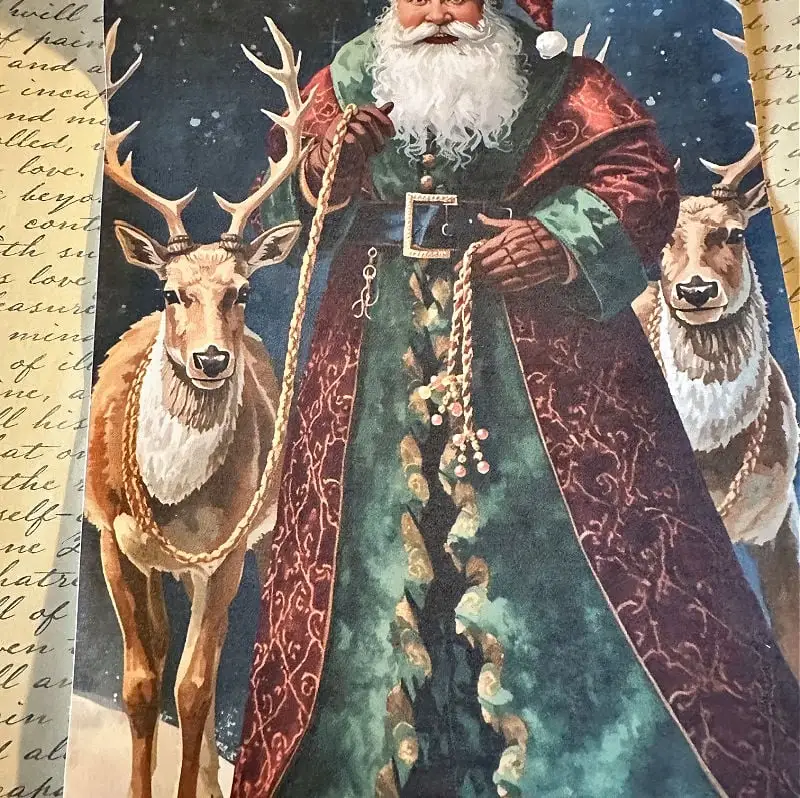
- Santa Printable – the beautiful Old World Santa is an exclusive printable offered to my VIP newsletter subscribers. It’s free to join and you get instant access to my library of free printables (including wall art, gift tags, and more)!
Subscribe below to join today. I share new printables FREE with subscribers each month as a thank you for visiting.
Subscribe to Our Crafty Mom to Receive Old World Santa Printable
How to Make an Old World Santa Christmas Tray
This is a surprisingly simple craft. As an impatient crafter, the most difficult part is waiting for the paint to dry.
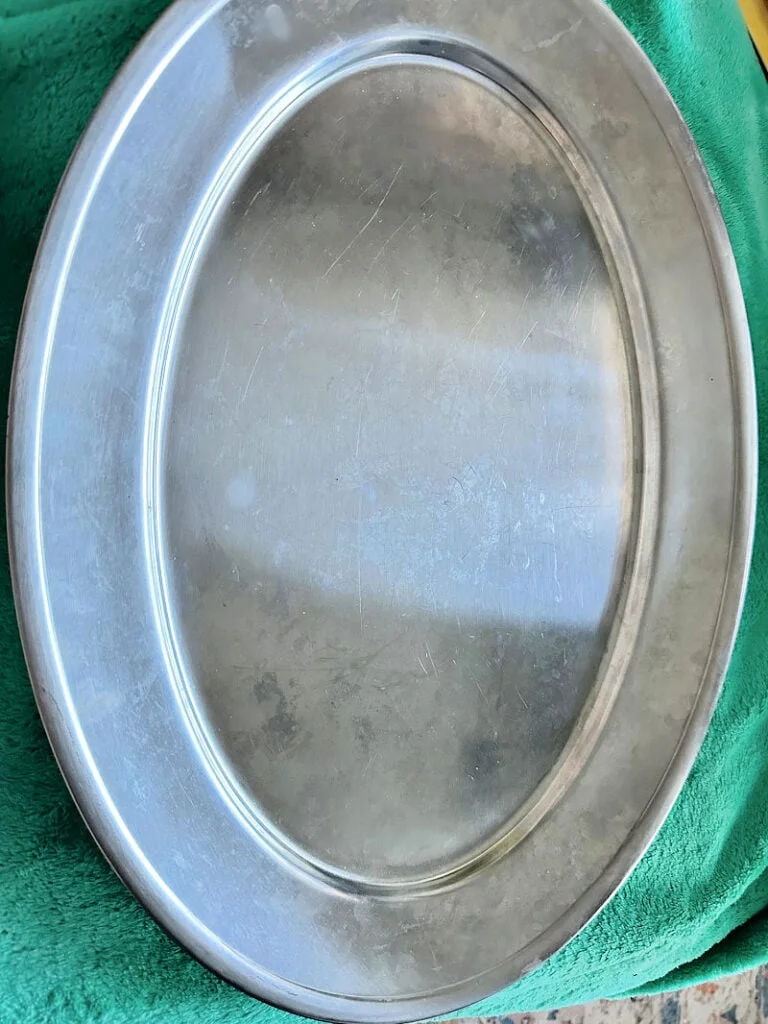
Step 1. Clean the Tray
The first thing you want to do is clean the tray to remove any fingerprints, dust or grime. Simply wash it with mild dish soap and warm water, then rinse and dry thoroughly.

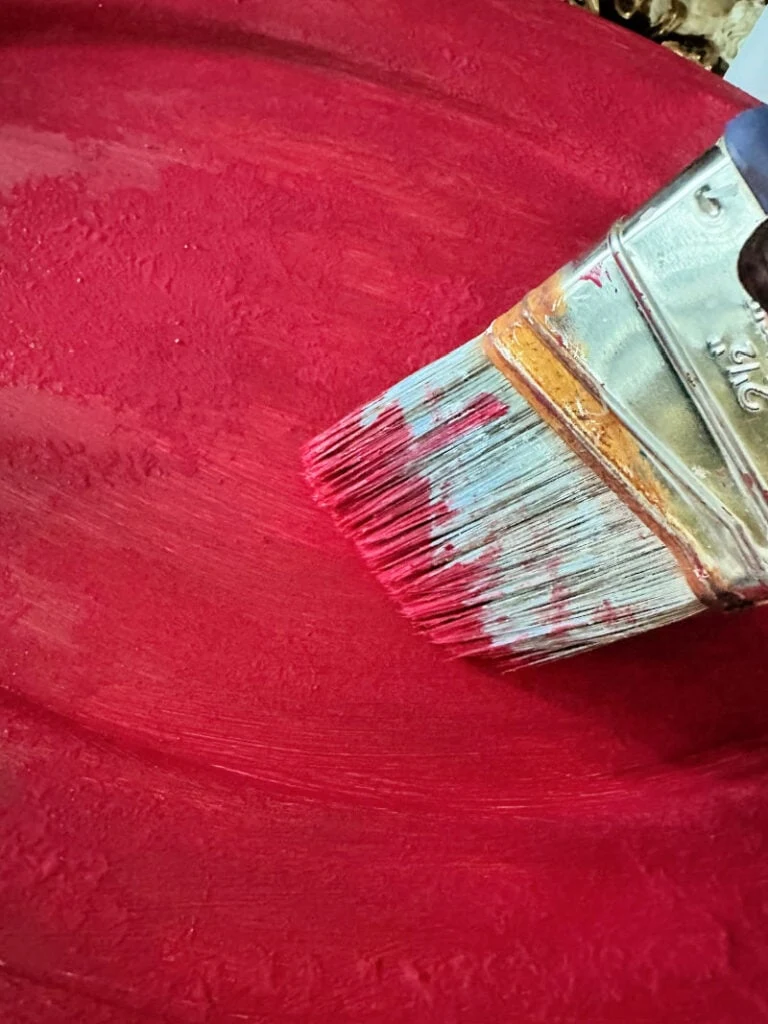
Step 2. Paint the Tray
Next up, paint the tray with 2-3 coats of your chosen paint color. Let it dry between coats. I usually let the tray dry overnight after the final coat.


Step 3. Layer the Image
While the paint is drying, prepare your image by layering the feature image on top of background paper. I love using script cardstock, especially when working with vintage images.


Trim the paper to size and secure it with your choice of adhesive. You can use a glue stick, or mod podge. Tear the edges of the image for more of a distressed look.
Step 4. Add the Image to the Tray
Once the painted tray is completely dry, brush a layer of mod podge onto the center of the tray where you will place the Santa image.
Carefully smooth it out with a credit card, or your fingertips. It helps to place plastic wrap or a baggie over your fingertips before smoothing.
Step 5. Add Cinnamon
This is my favorite part! Let’s achieve that faux rusty look that is so popular on social media.
Simply brush on a layer of mod podge and lightly sprinkle cinnamon on top. Continue adding the cinnamon around the tray, especially around the edges. Lightly brush or press the cinnamon a bit.
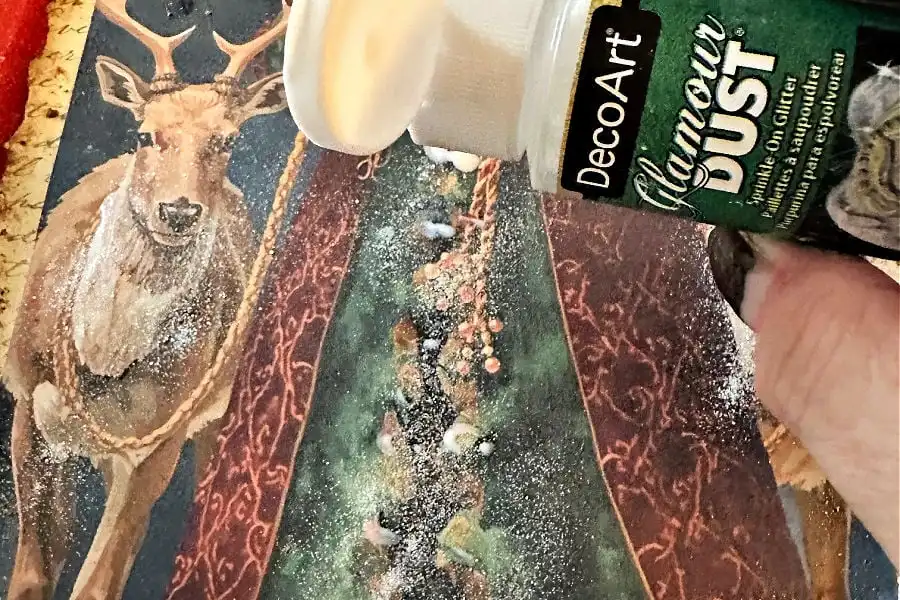
I also added glamour dust on top of mod podge to highlight Santa’s beard and other features.


Step 6. Spray Sealer
Carefully spray the entire tray with a clear high gloss sealer. Be sure to spray over the cinnamon.
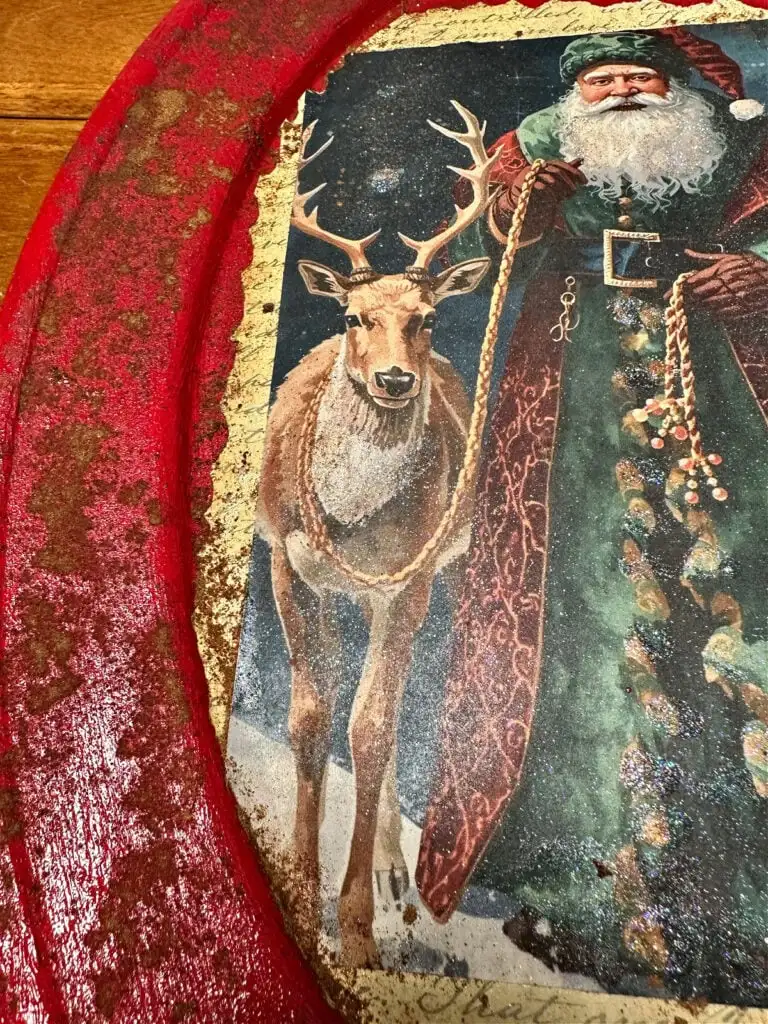
Repeat the process of adding cinnamon and spray with a sealer until you are happy with the results.

I added two layers and absolutely love the results. Look at how the edges have that old rusty finish that takes years to get.


You can see how I used this same process in a vintage wall pocket.
Step 7. Add a Bow
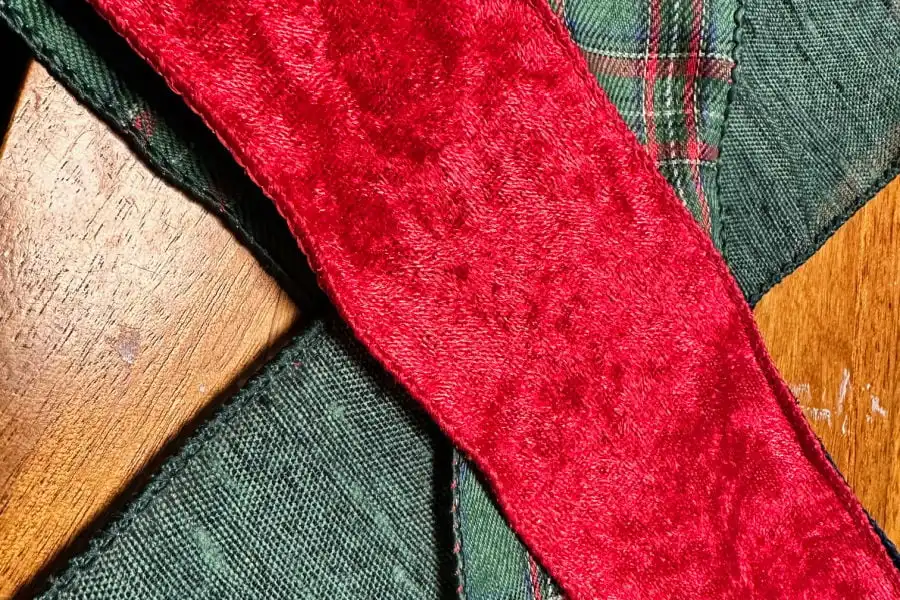
Add a pretty bow to the top corner of your tray in complementary colors. I am going with tartan plaid in my Christmas decor this year, so I layered that with deep red velvet, dark green and navy velvet.


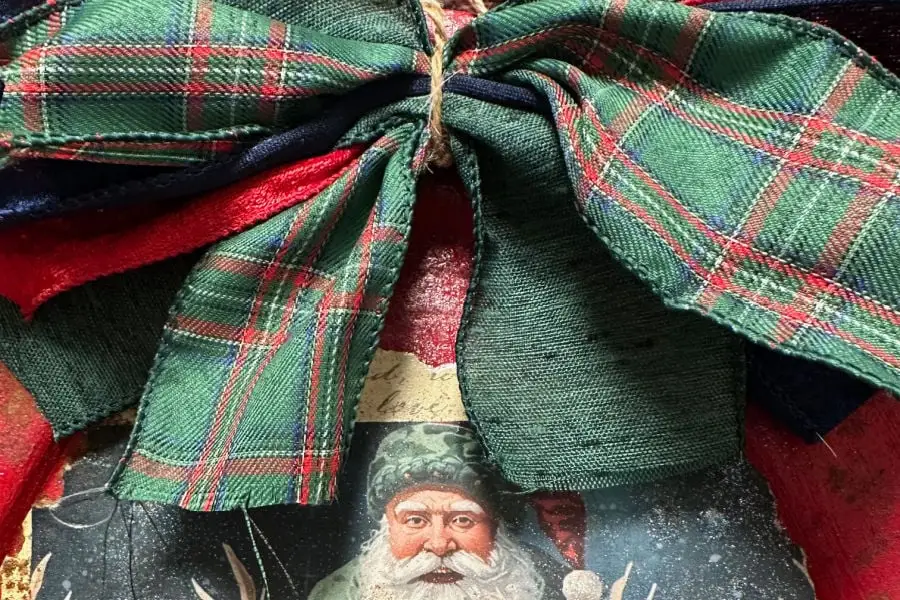
I used hot glue to secure the bow and added a bit of Christmas greenery for added dimension and texture.

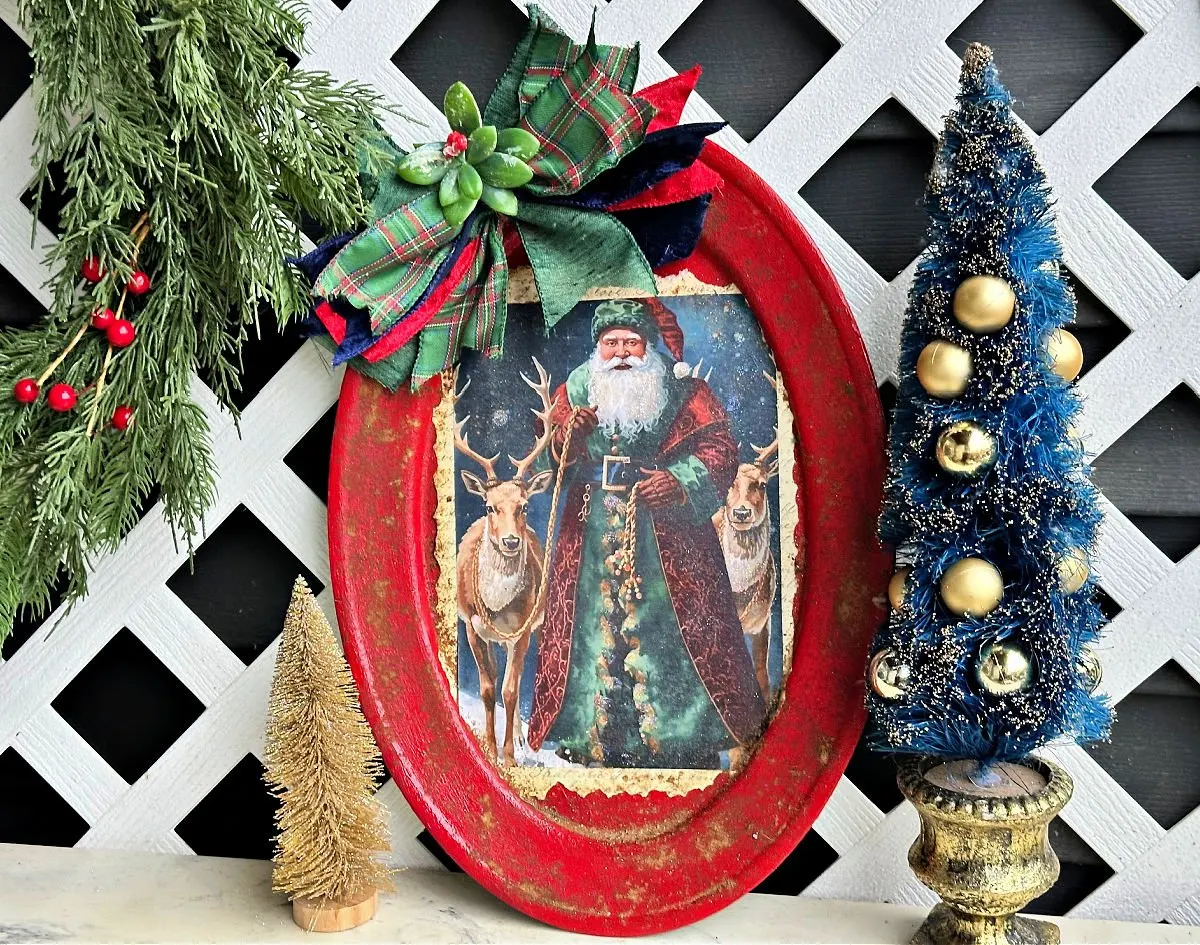
That’s all there is to it. Now you have a beautiful Old World Santa Christmas tray that you can display wherever you want a bit of Christmas cheer.
Save For Later
I’d love it if you would share this article with your friends on Pinterest by pinning the below image.
It helps my blog grow and doesn’t cost a thing! 🙂


Now, it’s time to hop on over to see the rest of the Thrift Store Decor Tour. You can take the tour by clicking the links below the “before” makeovers photo collage.

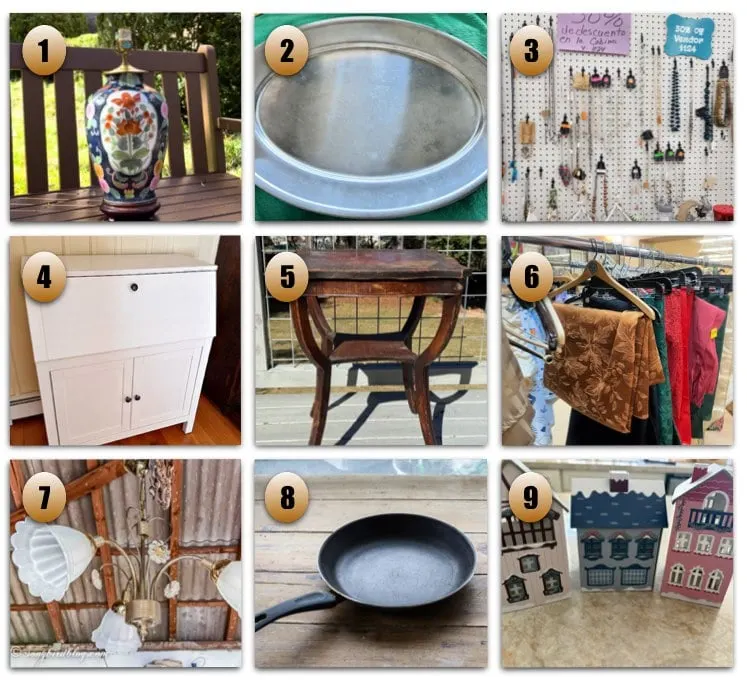
- Revamp a Lamp from Our Southern Home
- Old World Santa Christmas Tray from Our Crafty Mom
- Salvaged Jewelry Suncatchers from My Repurposed Life
- IKEA Secretary Desk Makeover from Exquisitely Unremarkable
- Mahogany Side Table Upcycle from Shop at Blu
- Beautiful Thrifted Thanksgiving Tablescape from Redhead Can Decorate
- DIY Christmas Bells from Songbird
- Fry Pan, Tiered Tray, and Decorative Bowls from Funky Junk Interiors
- Gingerbread Village from Christmas Houses from My Uncommon Slice of Suburbia
If you do make your own Christmas tray, be sure to share it with us on Facebook or Instagram.
Just tag @ourcraftymom. You never know who you may inspire.
Here Are a Few of my Most Popular DIY Christmas Crafts
- DIY Glass Angel from a Dollar Tree Find
- 81 Dollar Tree Christmas Crafts
- 37+ DIY Dollar Tree Christmas Ornaments
- Large Christmas Wall Art
- Folded Book Art with Printable Cardinal
Thanks so much for stopping by. Happy thrifting!


For even more budget-friendly Christmas ideas, you don’t want to miss this amazing collection of 81 Dollar Tree Christmas Crafts and these 37+ DIY Dollar Tree Christmas Ornaments.
Follow me on social media below:
b
Saturday 15th of November 2025
I never would have guessed that your Santa platter began as a plain silver platter. I think I may have to try the cinnamon technique on a few items I have. Thanks for sharing!
Michelle James
Tuesday 18th of November 2025
Thank you for stopping by. The cinnamon trick really is a cool technique. Once you try it, you will want to put cinnamon on all the crafts! Happy crafting.
Julie
Thursday 13th of November 2025
I hope this isn’t a double comment I think I tried earlier! Michelle, it’s so nice to work together again… your tray look phenomenal and your step by step tutorials are always so helpful!
Michelle James
Tuesday 18th of November 2025
Thank you so much, Julie! I’m thrilled to be teaming up with you again and look forward to checking out your tablescape happy holidays.
Shannon
Thursday 13th of November 2025
Can I use a plastic tray if I can’t find a metal one?
Michelle James
Tuesday 18th of November 2025
Yes, you should be able to use a plastic tray. Just make sure you prime it first so the paint will adhere. You can use a paint and primer spray paint to save time. Have fun with it!
kristin
Thursday 13th of November 2025
I had no idea about the cinnamon/rust trick, love the makeover! Need to try this little trick on something :)
Michelle James
Tuesday 18th of November 2025
It really is a cool process. You can go late with it or really go heavy for a full rust effect. Thanks for visiting.
Shannon
Thursday 13th of November 2025
Can I seal this with Polycrylic? It’s gorgeous!
Michelle James
Tuesday 18th of November 2025
Thank you so much! Yes, you could use polycrylic to seal it. They may even have a spray sealer similar to what I used to have fun with that.