Today I am sharing a sugared fruit glam Christmas wreath, that may be my favorite wreath yet, as well as my top three tips for wreath making.

Welcome to Day 1 of the Fourth Annual 12 Days of Christmas Series!

We have teamed up with 50-plus bloggers to bring you oodles of DIY Ideas and Recipes to make your holiday season merrier.
There are 12 different posts in the series and we have spread them out over a four week period with three posts per week.
Now is the time to subscribe!
GO HERE for the complete list of Dates and Topics plus a collection of most popular holiday ideas including ornaments, games, recipes and more from all 50 plus talented bloggers!
Sugared Fruit Christmas Wreath

I have to say I love wreath making.
It is something I have been doing for over 30 years and was the first thing I learned how to make.
I took a class when I was about 18 yo and I was hooked!
Hopefully soon I will put together a page here that has all of the wreaths that I have made since I started blogging.
Unfortunately, I don’t have pictures of the ones prior to that.
Supplies to Make a Sugared Fruit Christmas Wreath
- Grapevine Wreath
- Sugared Fruit Picks – I found mine at Michael’s at 40% off!
- Surebonder Cordless Glue Gun – I’ve talked about this glue gun in several posts. I received it last Christmas and it is a game changer. If you are even a sometime crafter, this is a must-have!

Here is the wreath I started with:
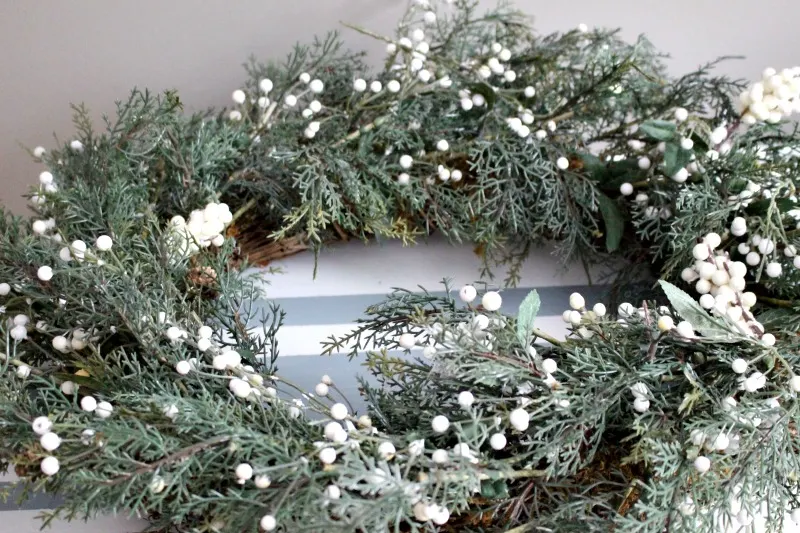
I found a couple of these at the thrift store for $3 and used one to make a fall wreath that also used the same white and gold glam theme.
Grapevine wreath forms can be very pricey at the craft store, but you can usually find them at the thrift store for just a few dollars.
It is easy to remove any of the flowers if you don’t like them.
I was lucky with these wreaths because they just had simple greens and berries that I knew I could add to easily!

How to Make a Christmas Wreath
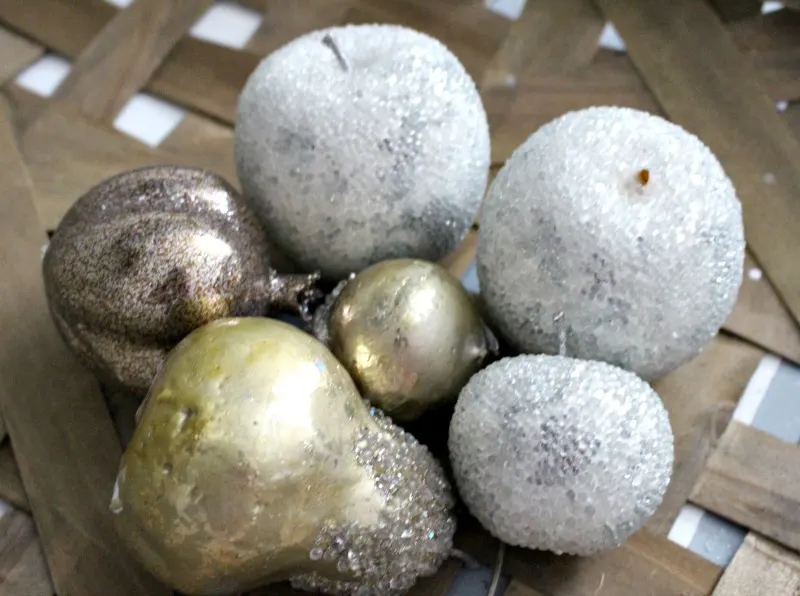
The first thing I do is use snips to cut apart the sugared fruit and leaves.
For this wreath I only needed two garland type picks.

Let me share my top 3 tips for wreath making that you can use on any style wreath and for any holiday.

Top 3 Tips For Wreath Making
- Tip 1 – Hang the wreath on the wall so you can get an idea where you should add the picks, leaves, or adornments you are crafting with.
- Tip 2 – Start by adding your larger pieces first, in this instance the large sugared pear at 12, 3, 6 and 9. Then, add leaves, berries and smaller picks around each larger piece. Once you have these 4 pieces in place it’s just a matter of adding the fillers to the rest of the wreath. If this grapevine wreath didn’t already have the greens and berries, I would have added those to the wreath first, then started with the larger pieces. When I made the fall wreath, I used the pumpkins as the large pieces and then added leaves around each side.
- Tip 3 – Use paper clips to adhere large items to a wreath. In this instance, the sugared fruit are attached to the grapevine wreath with a paper clip. Here is a picture I shared of a pumpkin that I attached using this tip:
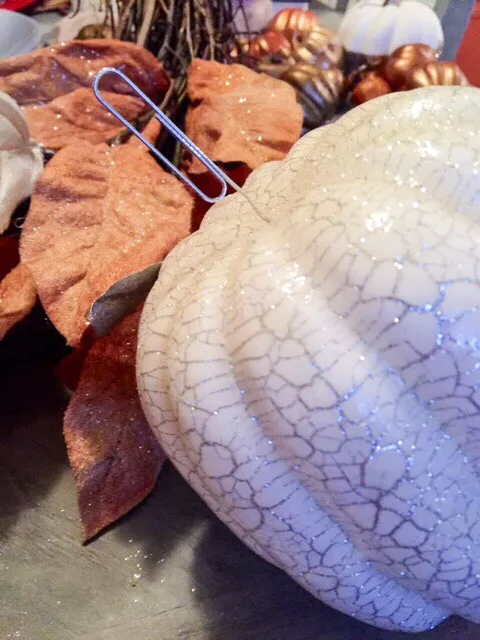
Most of the larger decorative items, like fruits and pumpkins, are foam and you can open one end of the paper clip add a dab of glue and stick it in the foam.
Then do the same with the opposite end to wrap it around the grapevine wreath-again using hot glue.
You can also use floral wire, but paper clips are less expensive!
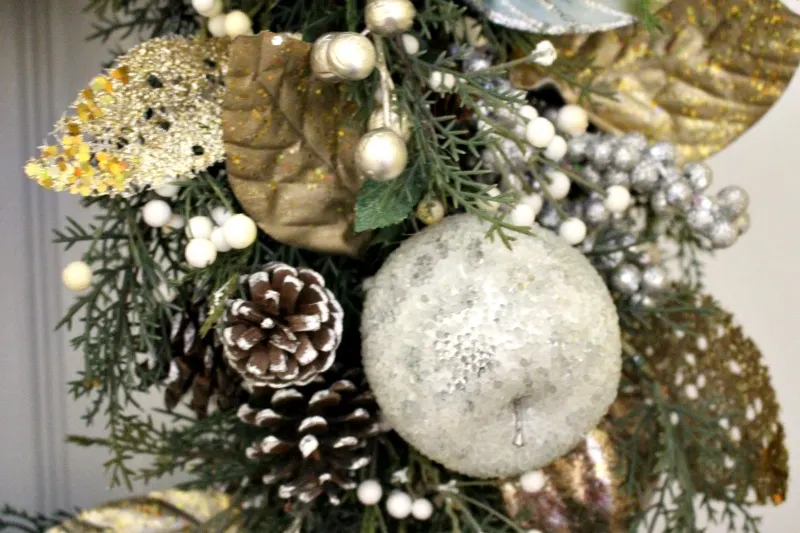
When you add the embellishments, attach them evenly around each side.
I’m big on symmetry, so I usually add an item to one section, then immediately add it to the other section working on all four sides.

Hanging the wreath on the wall while you are decorating it really makes it easy to add everything and ensure that it is even on all sides.
You don’t want to have a bunch of pretty things on one side and have the other side much lighter.

I hope you have found these tips for wreath making helpful.
If you have any questions, please leave a comment below and I will do my best to answer.
This glam sugared fruit wreath will be hung in my living room and gives you an idea of how my Christmas tree will be decorated!
Yup, lots of glitz and glam and also incorporating a pretty blush color-which I’ve never done before.
Please stop by to check out some of the other lovely wreaths below.
There is one for every style and color! I’m off to do the same!
**PIN FOR LATER**

Scroll down for many more DIY Wreath Ideas for your holiday season!
You can follow me on social media below and subscribe to my email so you never miss a post-I promise no spam!
What’s Next:


How To Make A Fun Little Red Truck Christmas Wreath
Sunday 3rd of November 2019
[…] Sugared Fruit Christmas Wreath […]
10 Must See Beautiful DIY Wreaths For Christmas
Sunday 20th of October 2019
[…] Sugared Fruit Christmas Wreath – Our Crafty Mom […]
Cedric
Wednesday 23rd of January 2019
Your sugared fruit wreath is really amazing. I love this sugared fruit wreath. Thank you for share health and beautiful information.
ourcraftymom
Wednesday 23rd of January 2019
I'm so glad you liked it! Thank you so much for stopping by!
Super Mom - No Cape!
Friday 14th of December 2018
I love your sugared fruit wreath! I try to pick up those sugar fruit picks whenever I see them on sale because they just give an wonderful Victorian look to add to Christmas decor.
12+ DIY Christmas Wreath Ideas & Tutorials • Mom Behind the Curtain
Tuesday 4th of December 2018
[…] 4. Sugared Fruit Christmas Wreath by Our Crafty Mom […]