Love the viral Pottery Barn terracotta pumpkin? I’ll show you how to make your own for a fraction of the cost with this budget-friendly DIY!


This post contains affiliate links at no extra cost to you. Please see my full disclosure here.
Like many of you, I love Pottery Barn decor, especially the seasonal decorations. Each year I look forward to seeing what new items they will offer.
However, it is often a little out of my budget, so I like to make my own DIY versions.
Today is all about the terracotta pumpkins that can be seen everywhere you look!
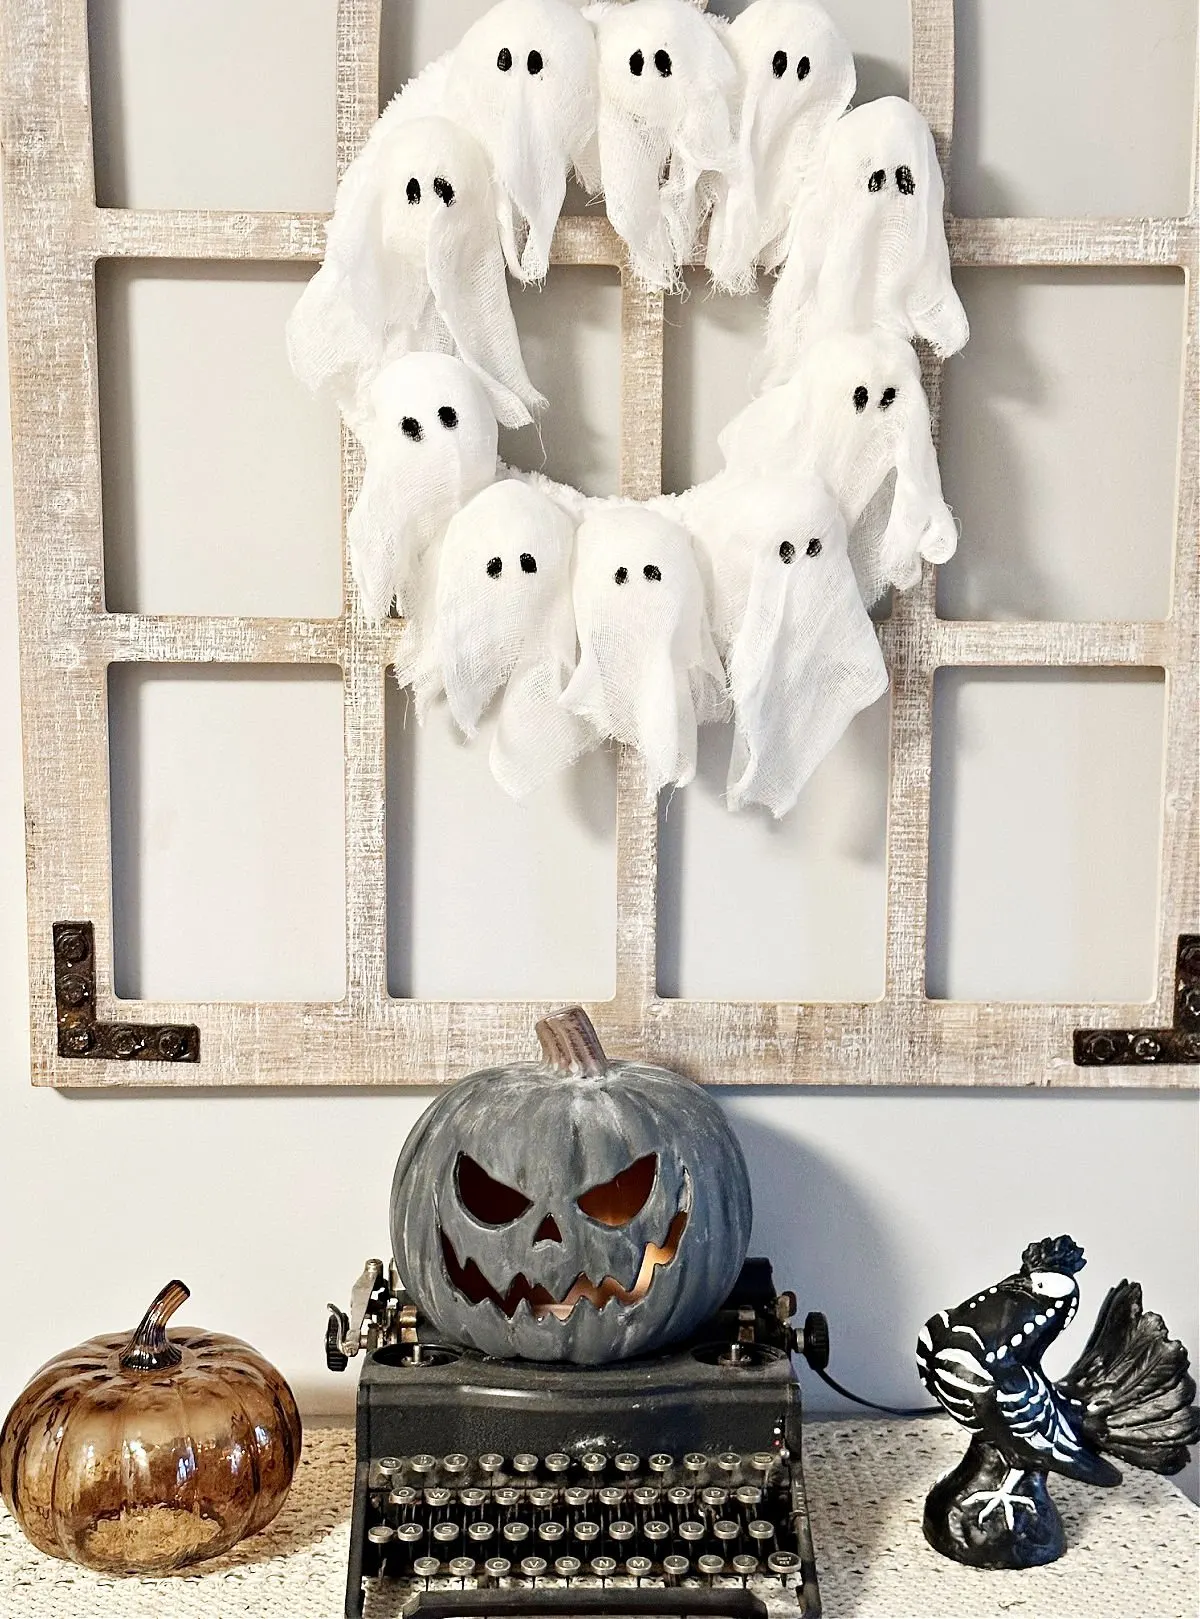
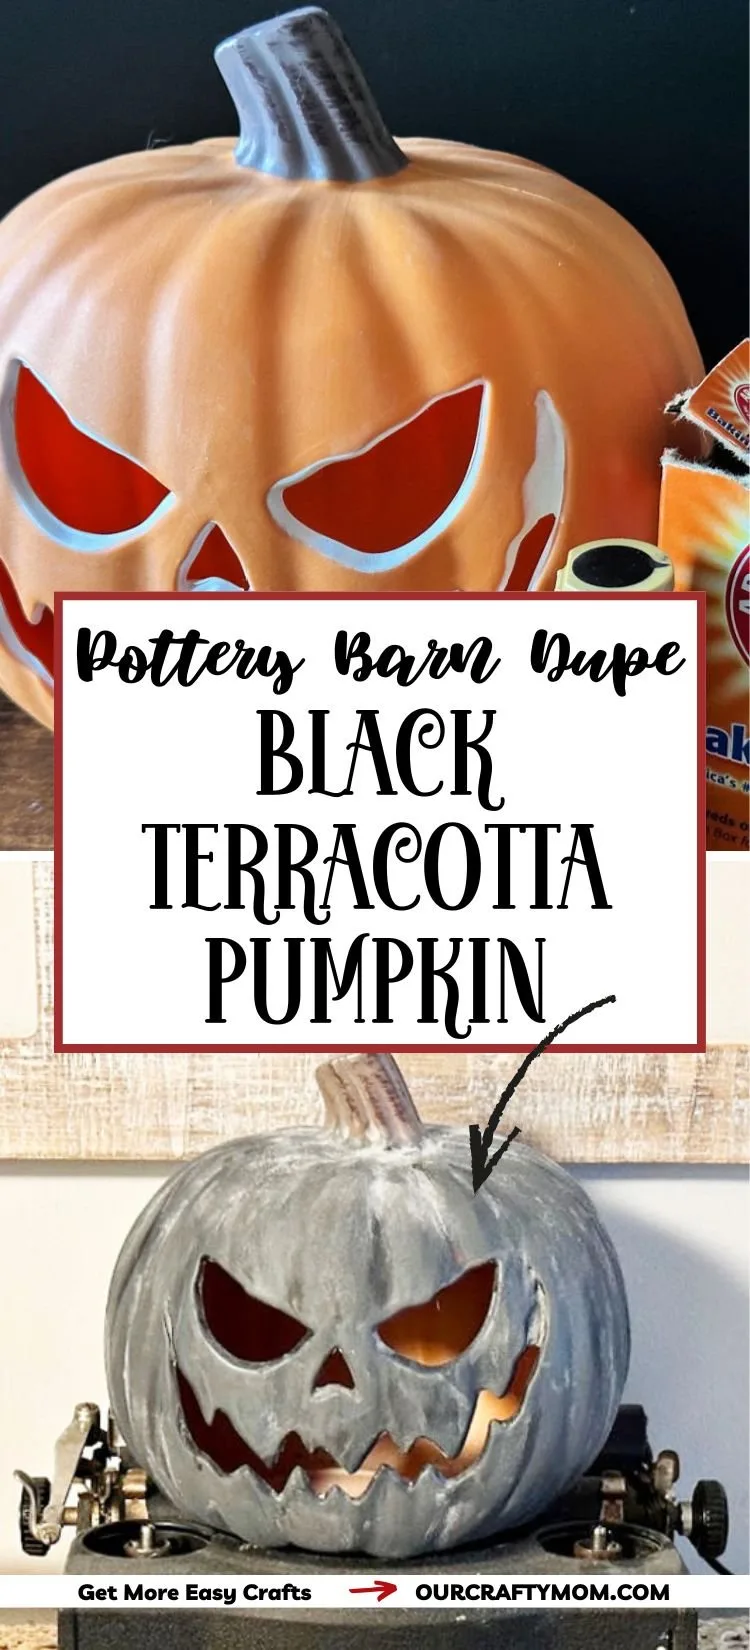
They have two styles, the classic terracotta color, and the black terracotta pumpkin, which has more of a concrete look to it. We are making the black terracotta pumpkin.
Here is a look at the Pottery Barn pumpkins:
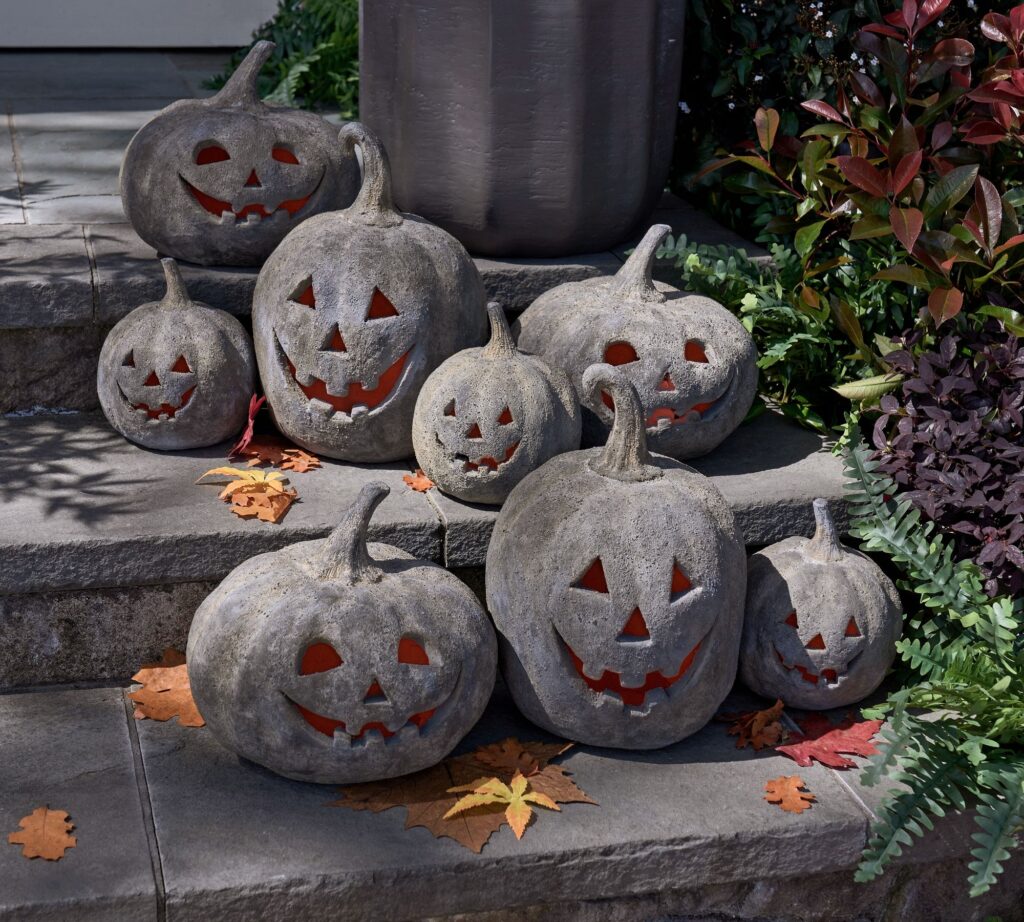
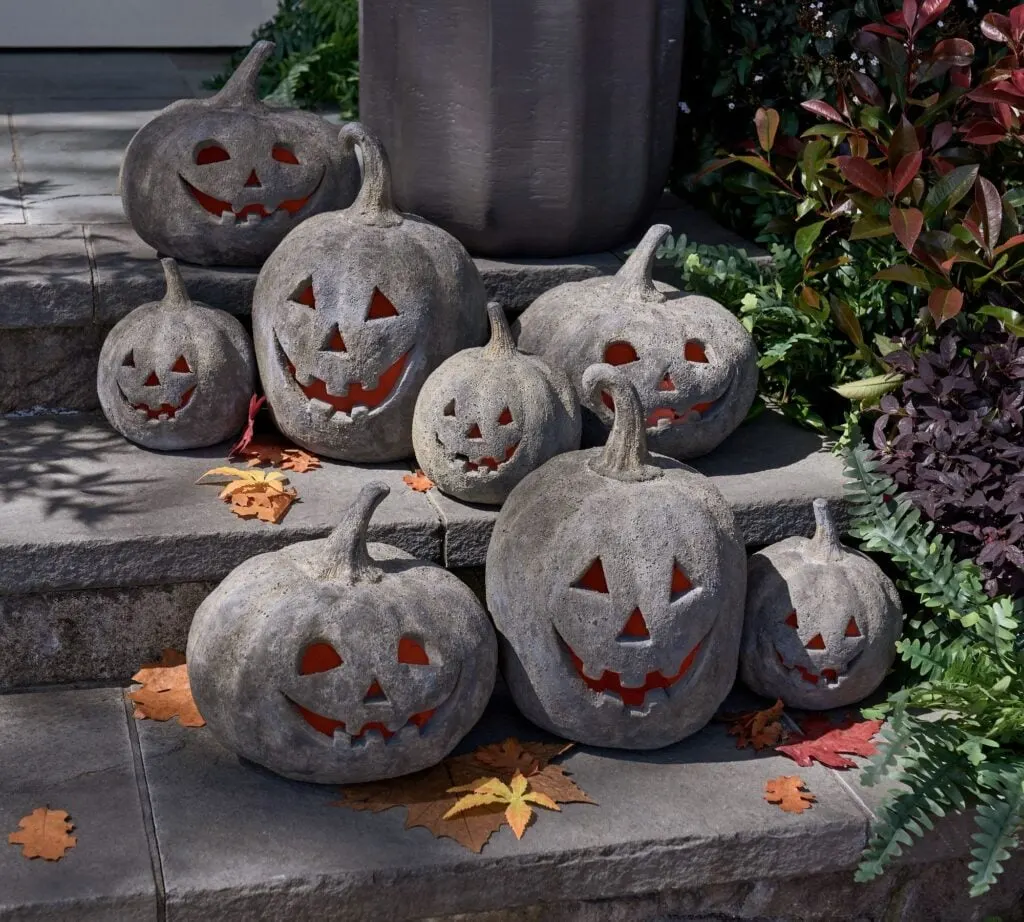
Image Credit: Pottery Barn
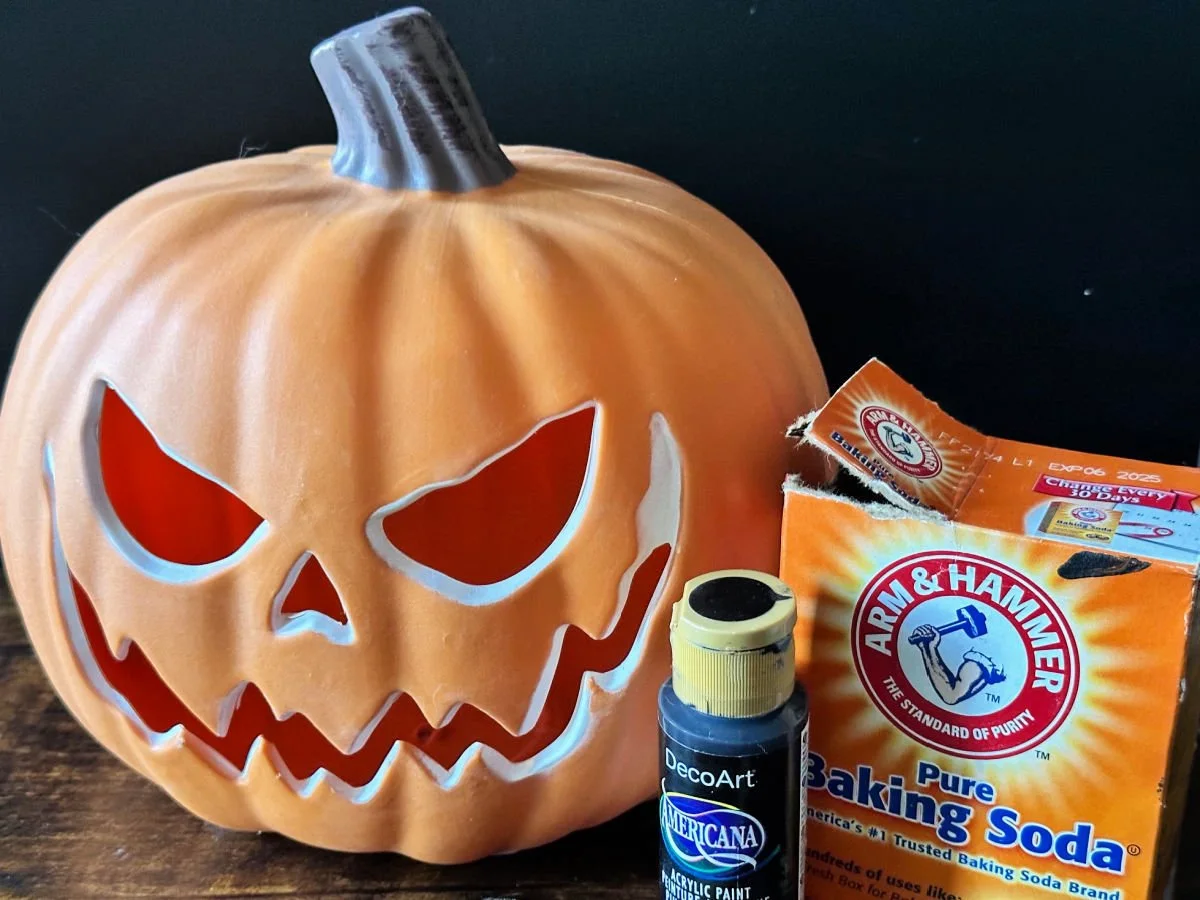
I found the perfect Jack O’ Lantern pumpkin at Lowes! The size, shape and even the face was just what I was looking for.
They do have different sizes and faces if you want to make several to line your front entry. Plus, they light up for a great way to welcome trick or treaters!
For another Halloween Pottery Barn dupe, check out my ghost wreath or my the Pottery Barn bat pillow.
Supplies Needed for DIY Terracotta Pumpkins
- Jack O’ Lantern Pumpkin
- Black Acrylic Paint
- Grey Acrylic Paint
- Chip Brush or Foam Brush
- Clear Sealer
- Baking Soda

How to Make Terracotta Pumpkins
The great thing about this Halloween craft is you can customize the color. If you want the classic terracotta color, I recommend using this burnt orange craft paint.
Mix it with white paint if it is too dark. Follow the same process below with the baking powder.
Step 1. Paint the Pumpkin
Start by painting the entire outside of the pumpkin black. You will need two coats. Make sure you get in the grooves, but leave the stem as is.
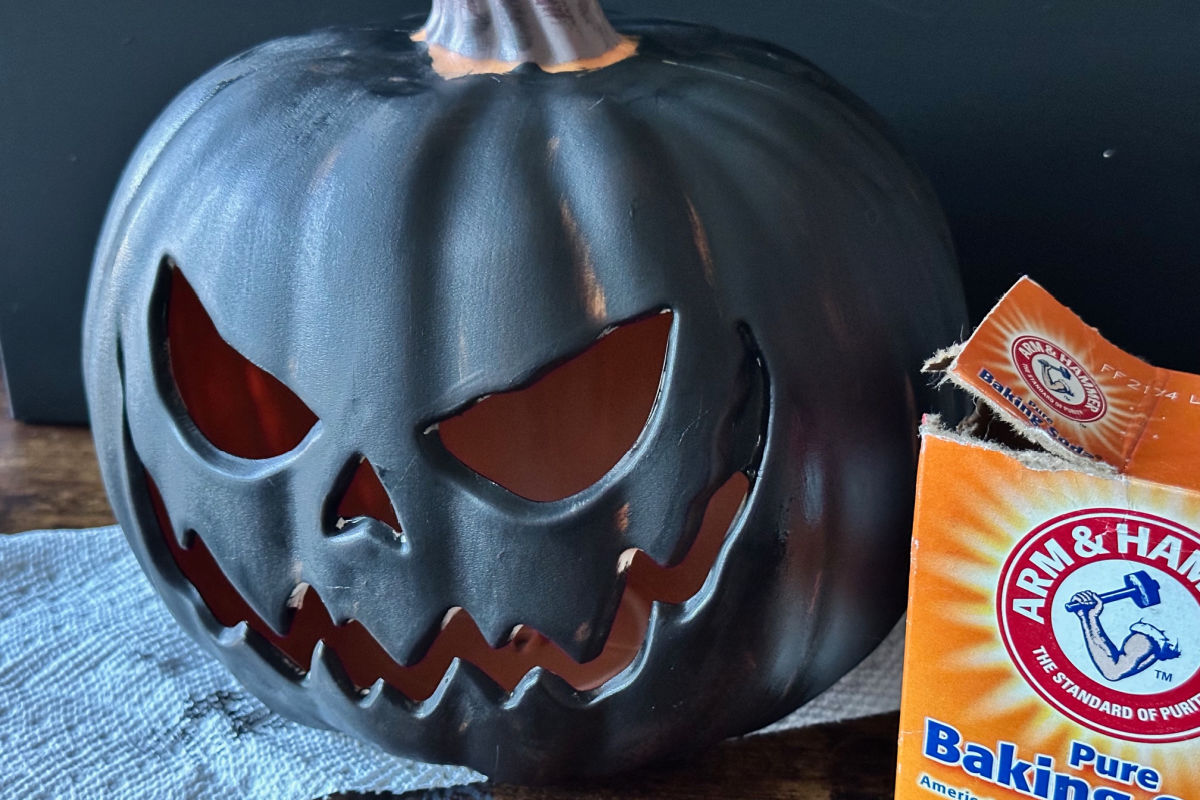

Step 2. Blend Grey Paint
Next, blend the grey paint with a bit of black to get the color you want. Play around with it until you are happy with it.


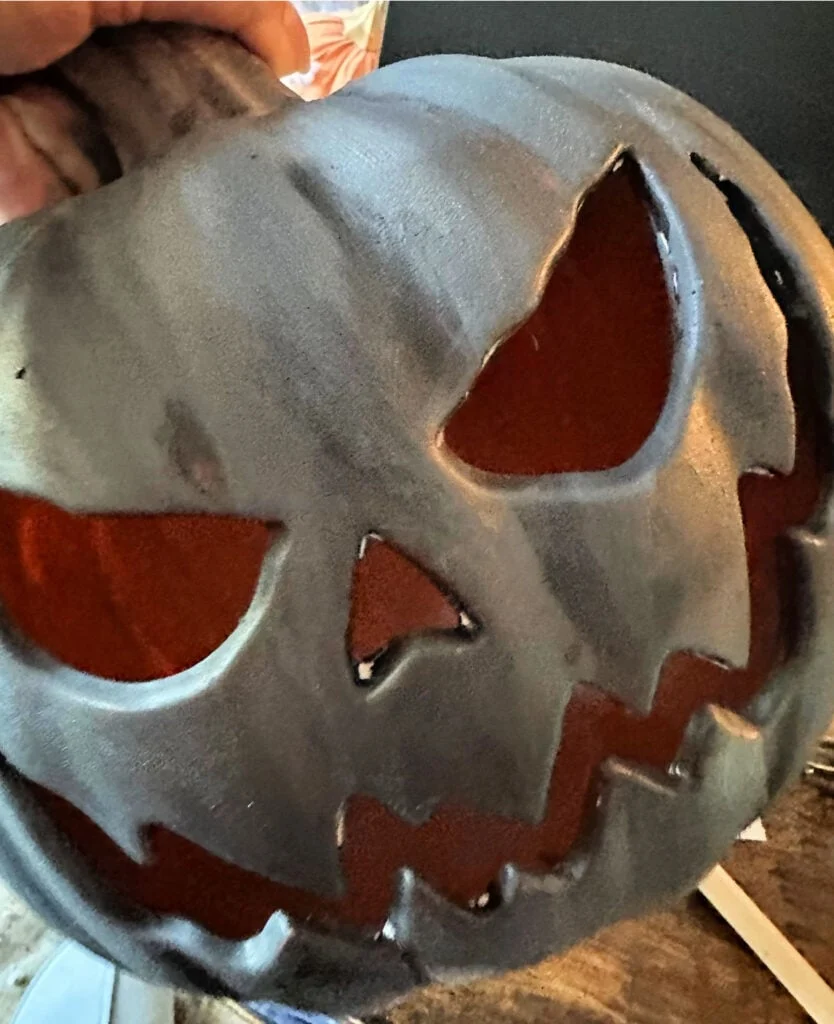
You don’t want to paint a solid color, but lightly cover the black paint so some of the black still shows through. This gives it a lot of depth and dimension.
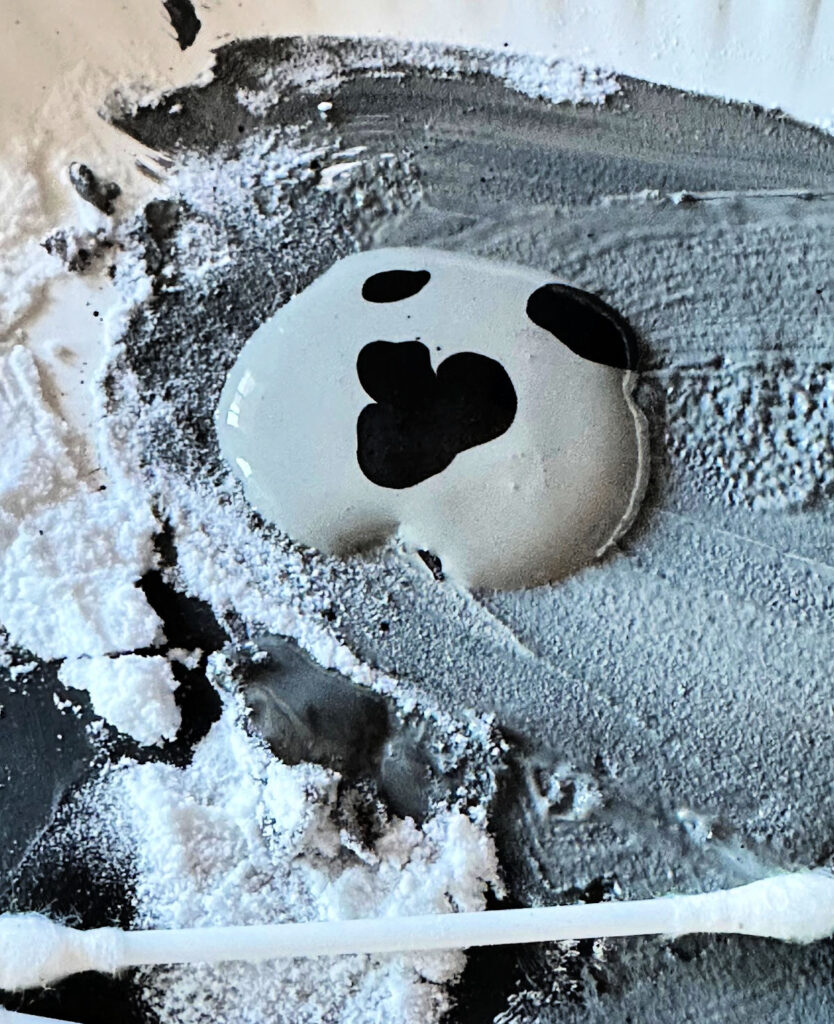
Step 3. Add Baking Soda
The next step is to add baking soda. You can use as much, or as little, as you like. If you want it to look more like concrete, you can add baking soda directly to the grey paint.

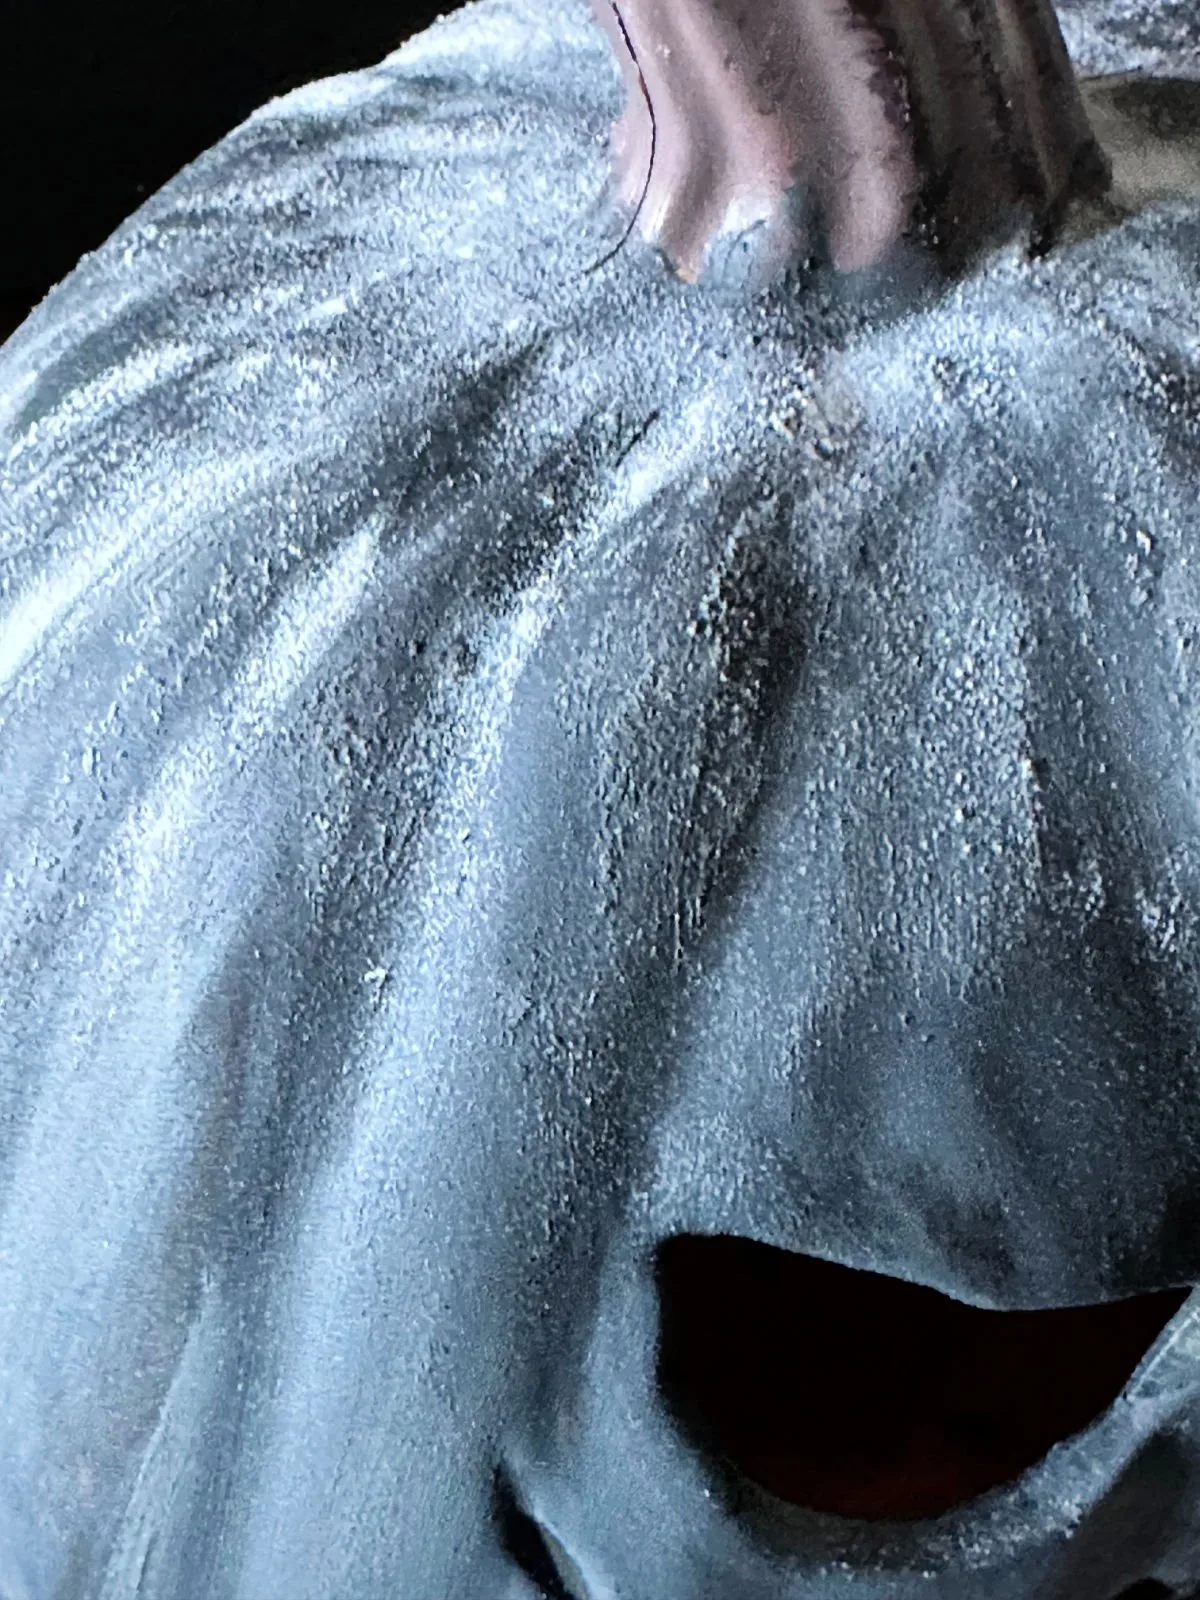
I didn’t want it to “chunky”, so I chose to go a little light with the texture. Again, this is a matter of personal preference.
Step 4. Spray with a Sealer
If you will be displaying these terracotta pumpkins outdoor for Halloween, be sure to spray them with a clear sealer. Apply one coat, let dry, then apply a second coat.
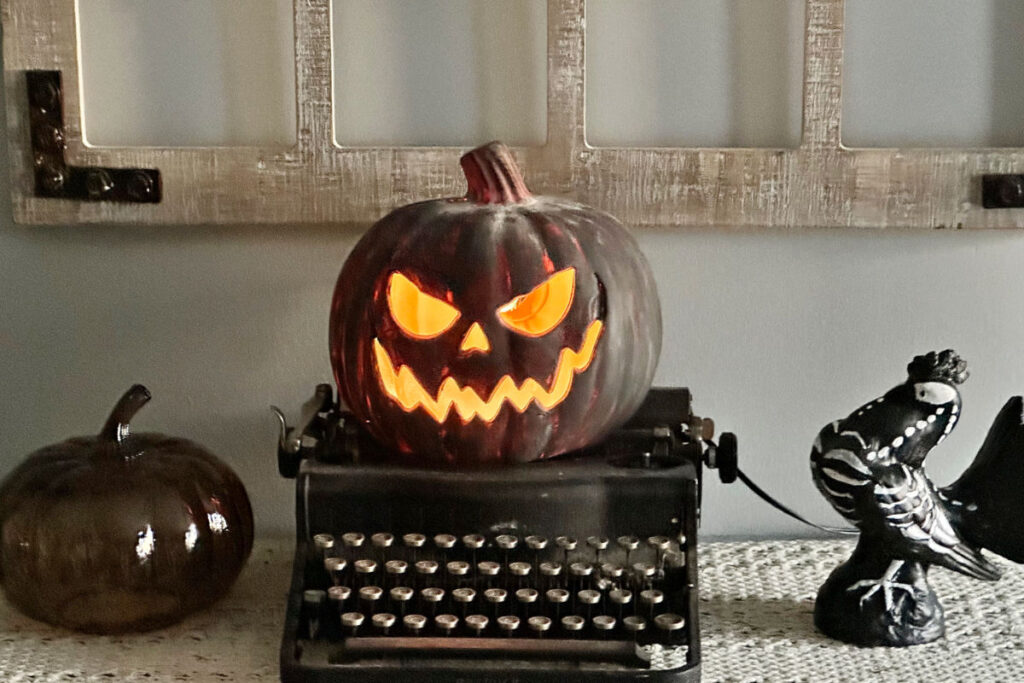
Now you are ready to display your DIY Jack O’ Lantern pumpkin anywhere you want a spooky touch of Halloween decor.


It looks really creepy lit up:


While I was checking out the cool Halloween decor at Lowe’s, I fell in love with this ghost rug.
Not only is it adorable, but it’s also pet-friendly and machine washable. It makes the perfect backdrop to display your terracotta pumpkins!
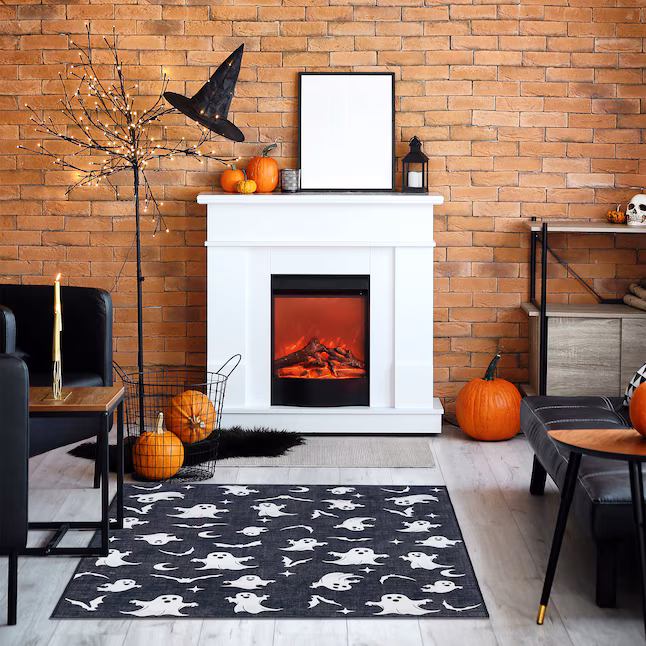
Image Credit: Lowe’s
I’m so happy with how this DIY pumpkin turned out and plan to paint a couple more to display on my balcony with the cute ghost rug.

Pin For Later
Share this Halloween wreath with your friends on Pinterest by pinning the below image.
It helps my blog grow and doesn’t cost a thing! 🙂

Thanks so much for stopping by. Happy crafting!


Enjoy even more Halloween crafts and home decorating ideas below:
- Halloween Pumpkin Diorama
- Halloween Clip Art
- Thrift Store Dollhouse Makeover for Halloween
- Hocus Pocus Printable Halloween Art
- Thrift Store Upcycled Halloween Art
- How to Decoupage on Canvas Halloween Art
- Free Witch Printables
- 15 Tasty Halloween Treats
- 20 Cricut Halloween Project Ideas
- Day of the Dead Pumpkin
Follow me on social media below: