Let’s make beautiful vintage Santa ornaments with a mini busted canvas. I’m sharing a simple step-by-step tutorial, plus free Santa images!

This post contains affiliate links. This means if you click the link and buy something, I may receive a percentage of sales at no extra cost to you. Please see my full disclosure here.
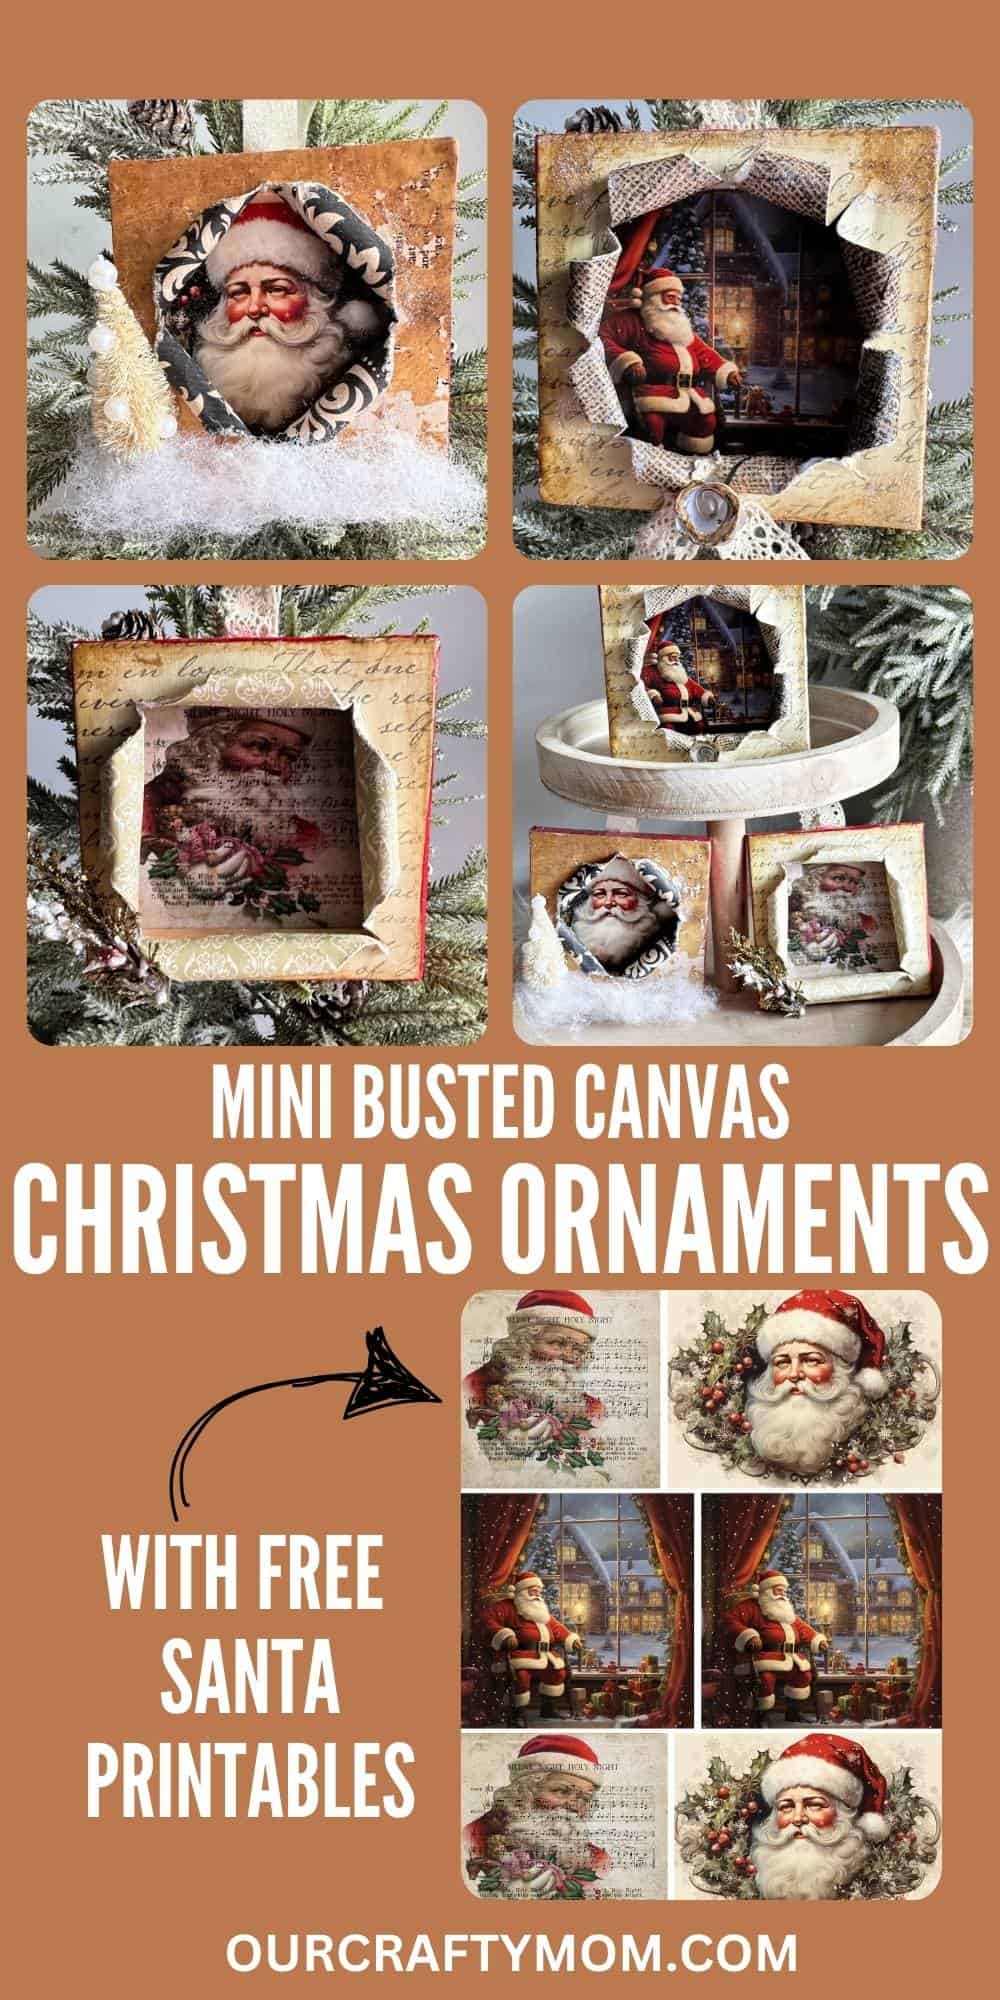
Vintage Santa Ornaments
I’m super excited to share a brand new Christmas project for the season. I’m continuing with the viral #bustedcanvas or #explodingart trend, but with a twist!
In case you missed it, be sure to check out the first one I made featuring a Halloween busted canvas craft. It went crazy on Pinterest.
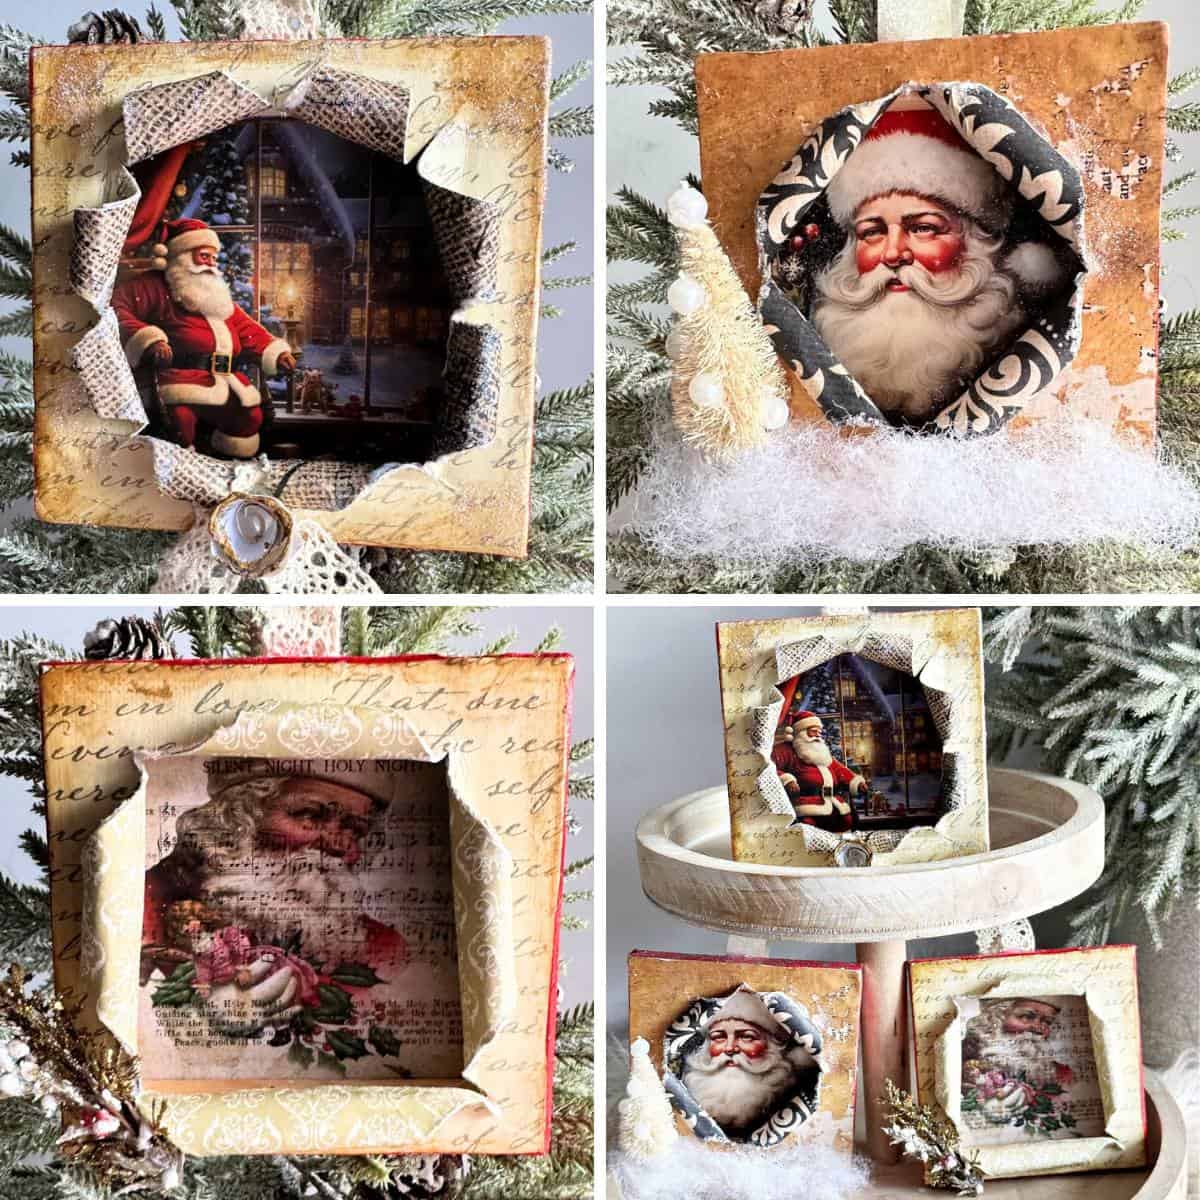
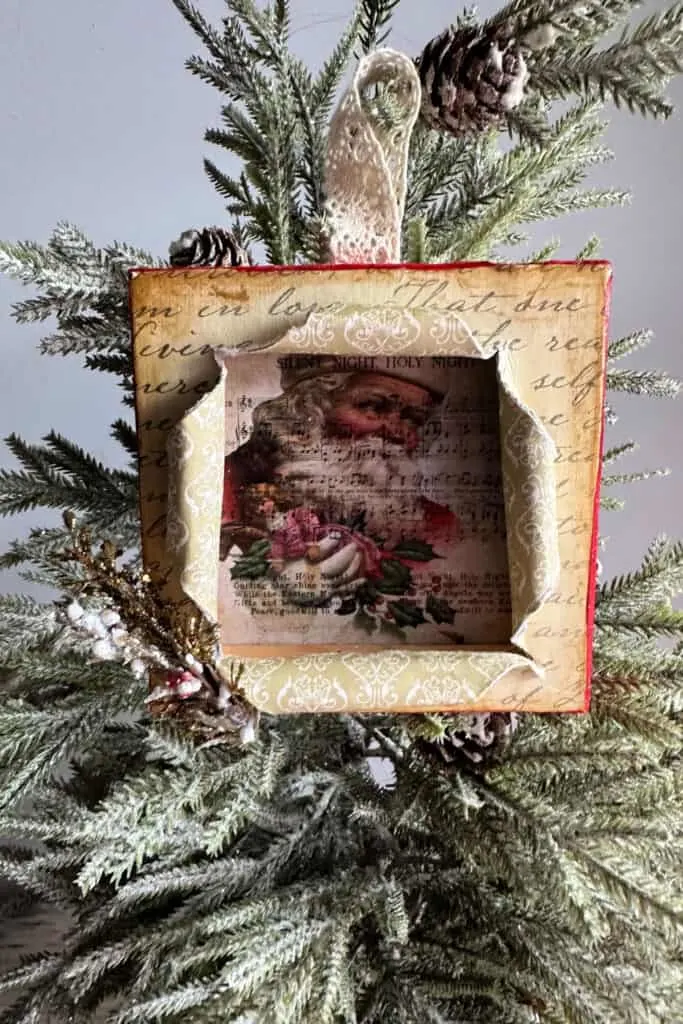
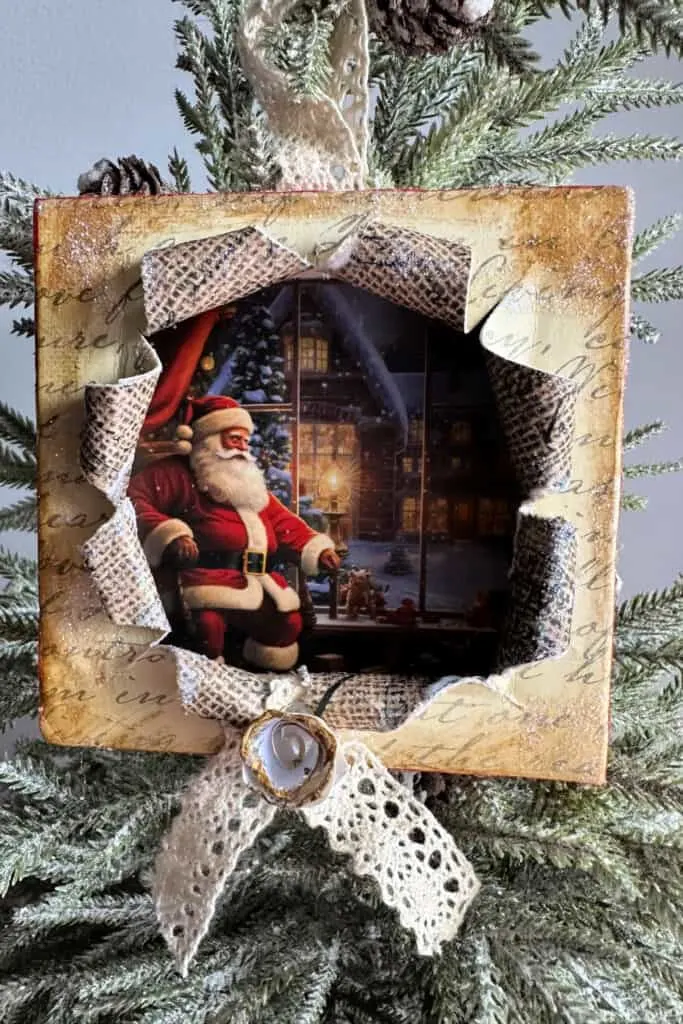
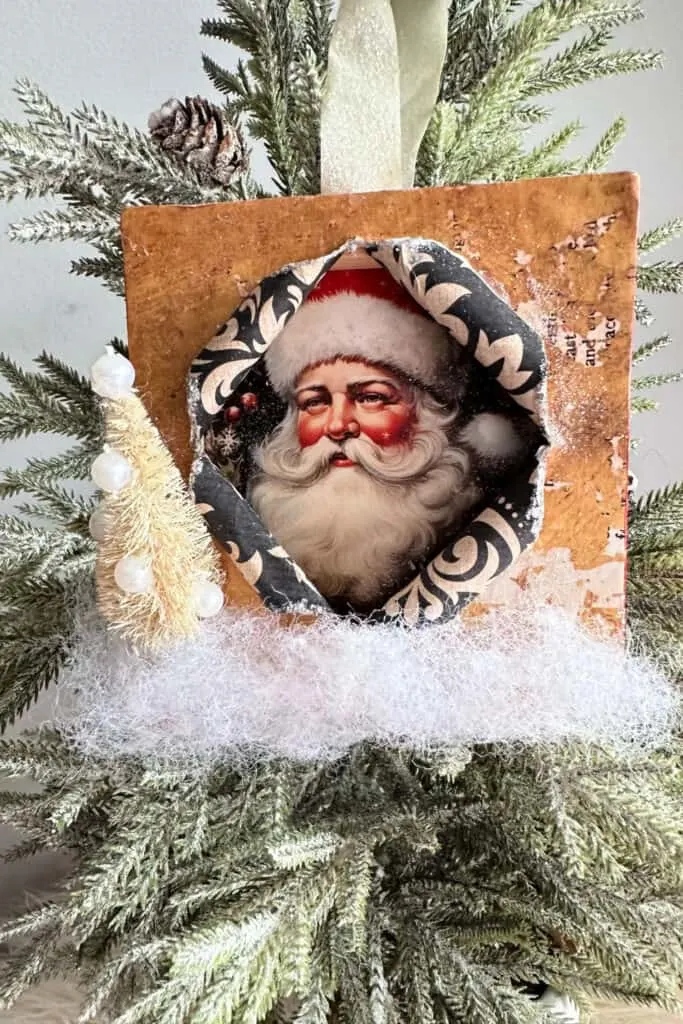
Today I will show you how to use this same technique on a mini canvas to create gorgeous Christmas ornaments with a vintage Santa in 3 different designs.
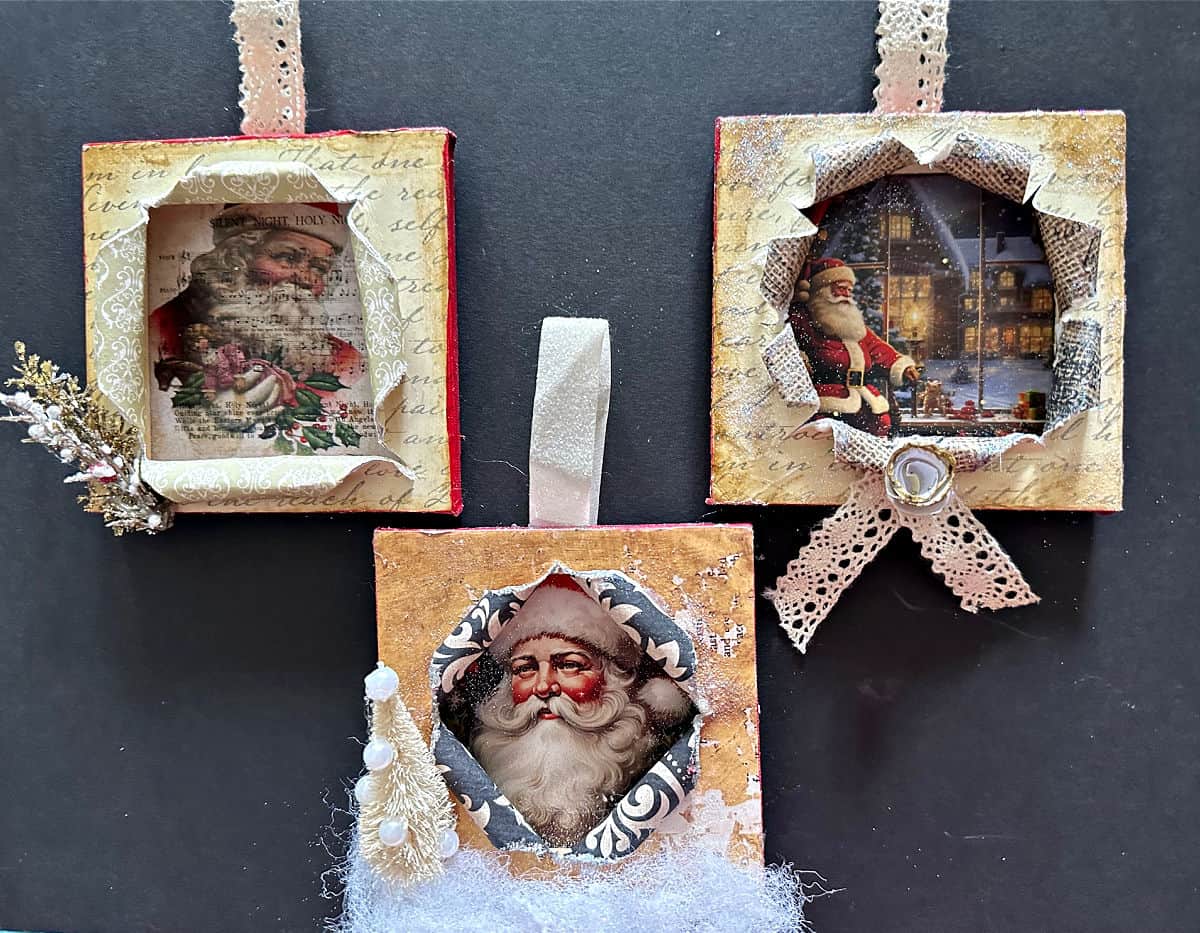
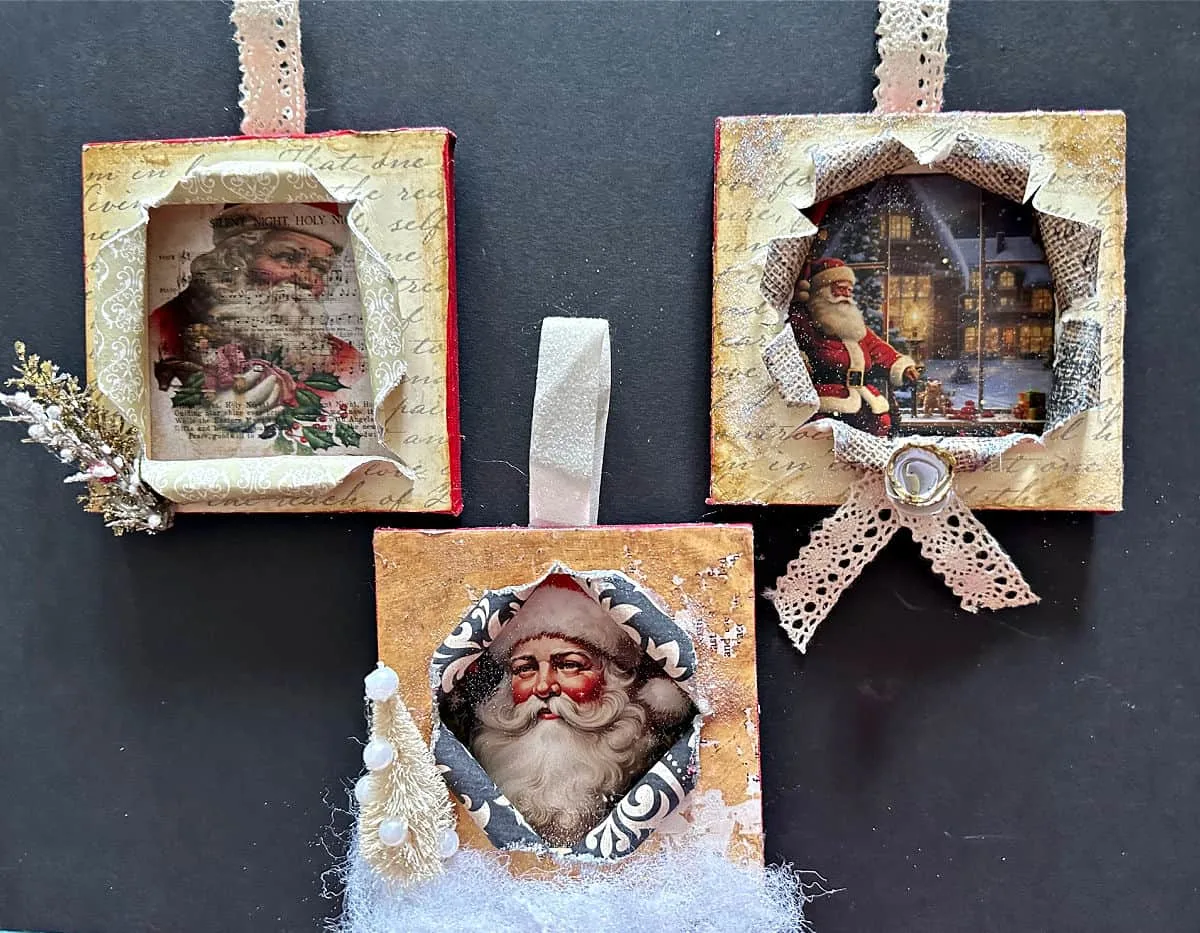
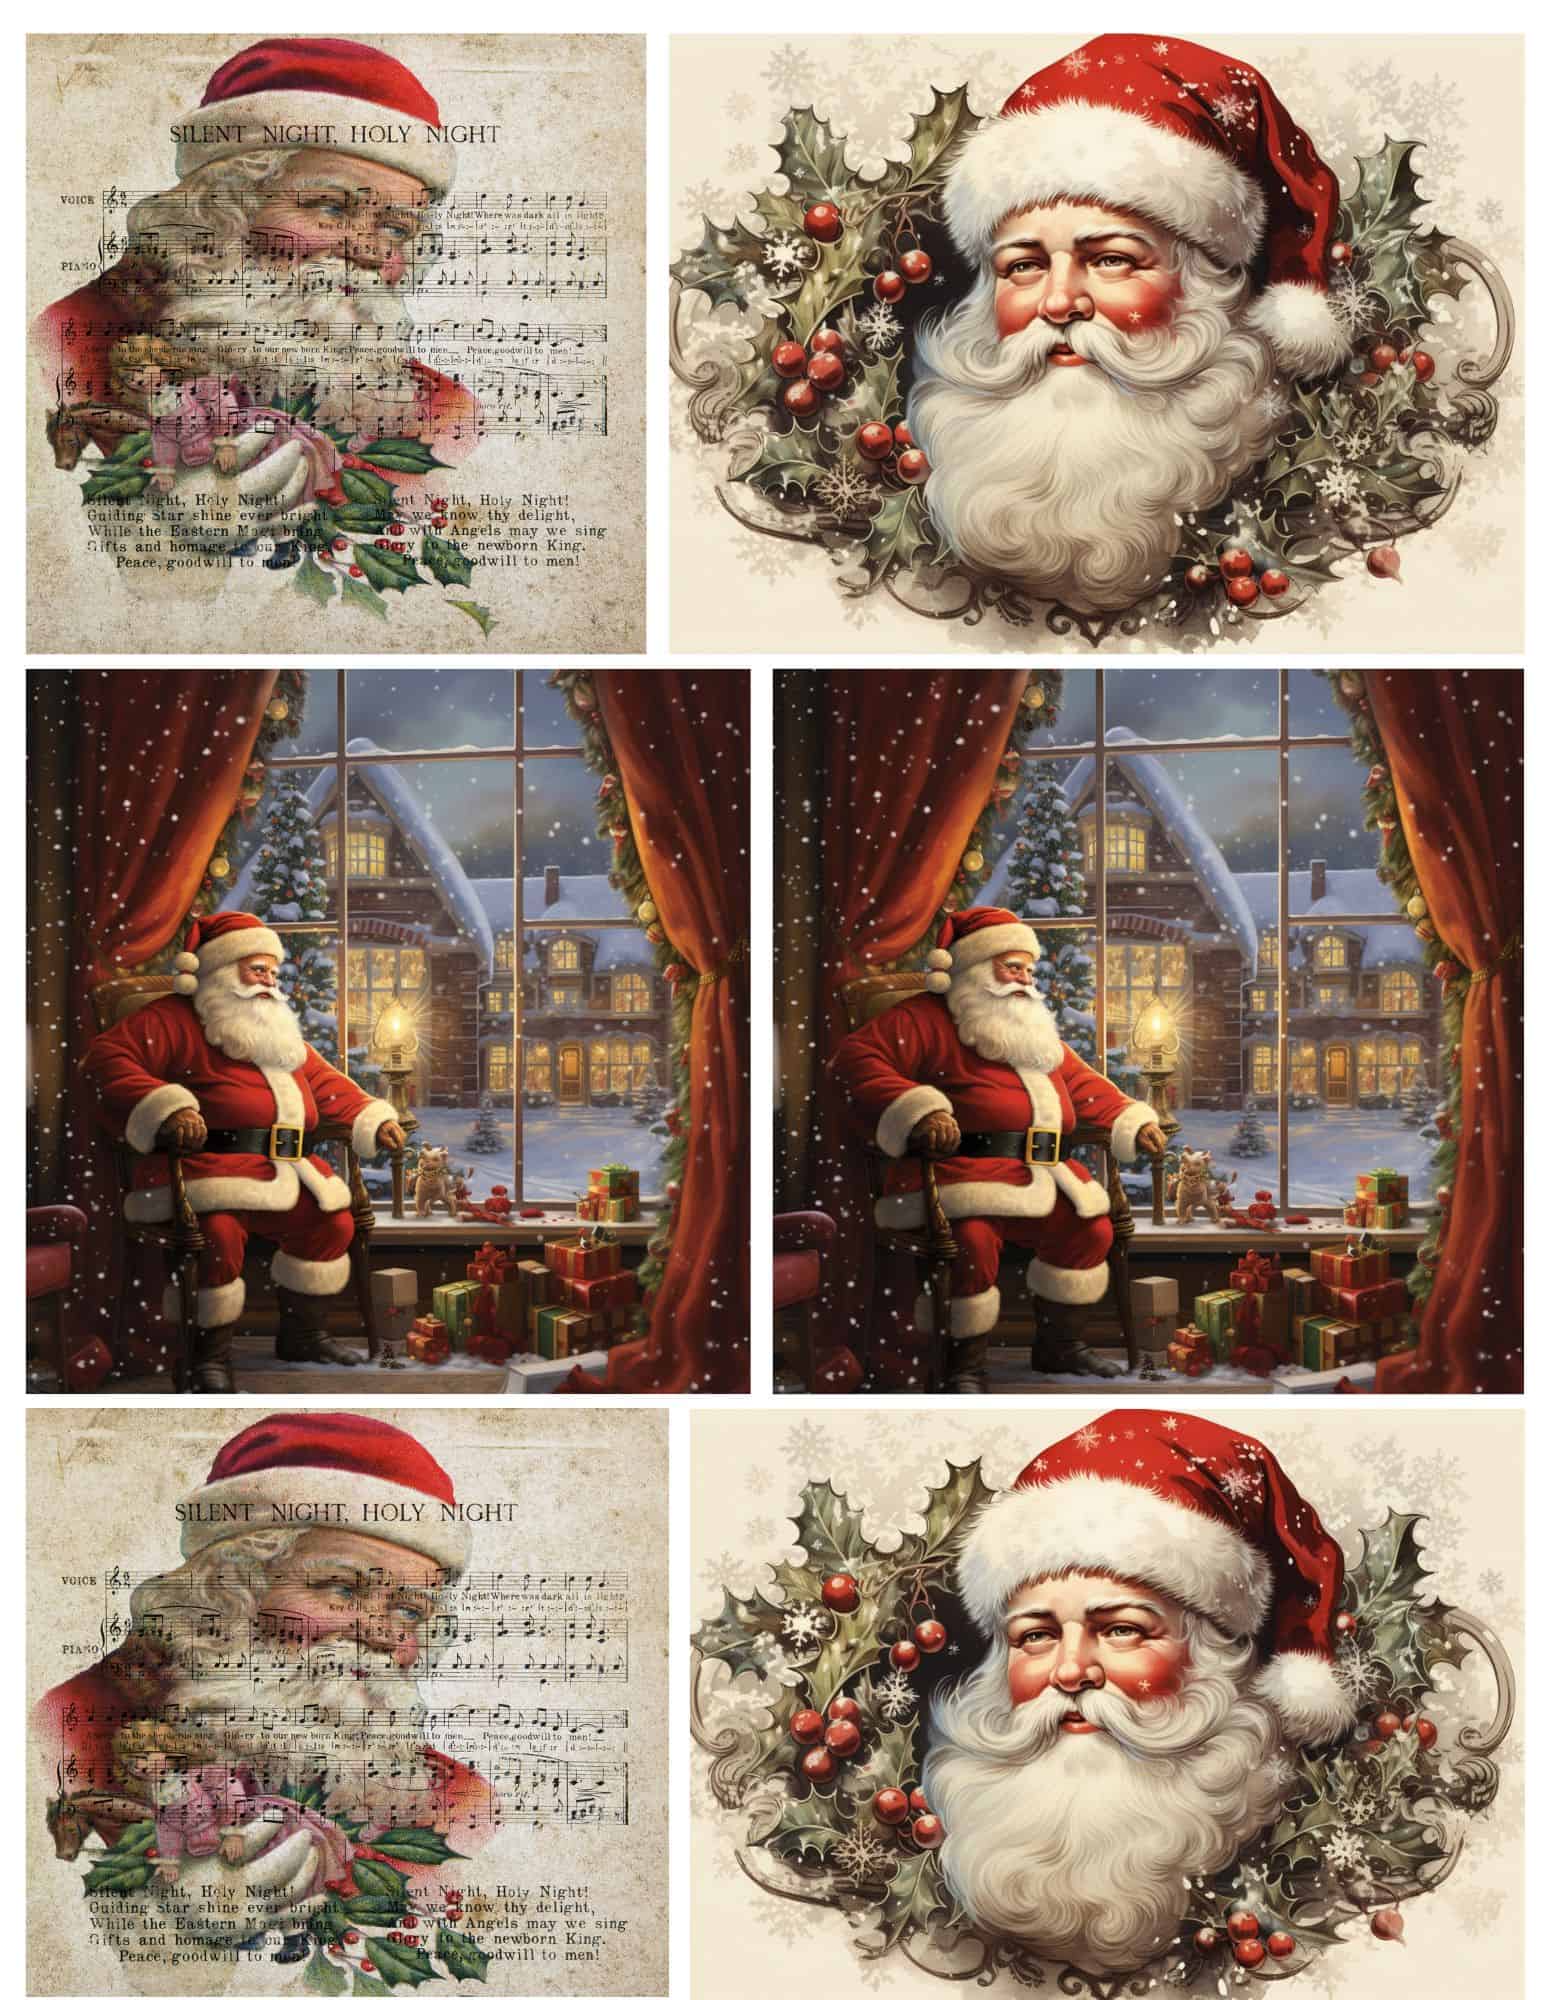
The good news is, I’m sharing all 3 images with you so you can make your own ornaments.
You can also see the large vintage Santa busted canvas I made a few weeks ago and grab that printable as well.
To learn more about this viral craft and join in on the fun, join our Free Busted Canvas Crafts Facebook Group.
It’s a great place to share your own designs, get feedback, and swap ideas with a passionate group of fellow crafters.
With the holidays just around the corner, there are so many things in the works, including contests and giveaways!
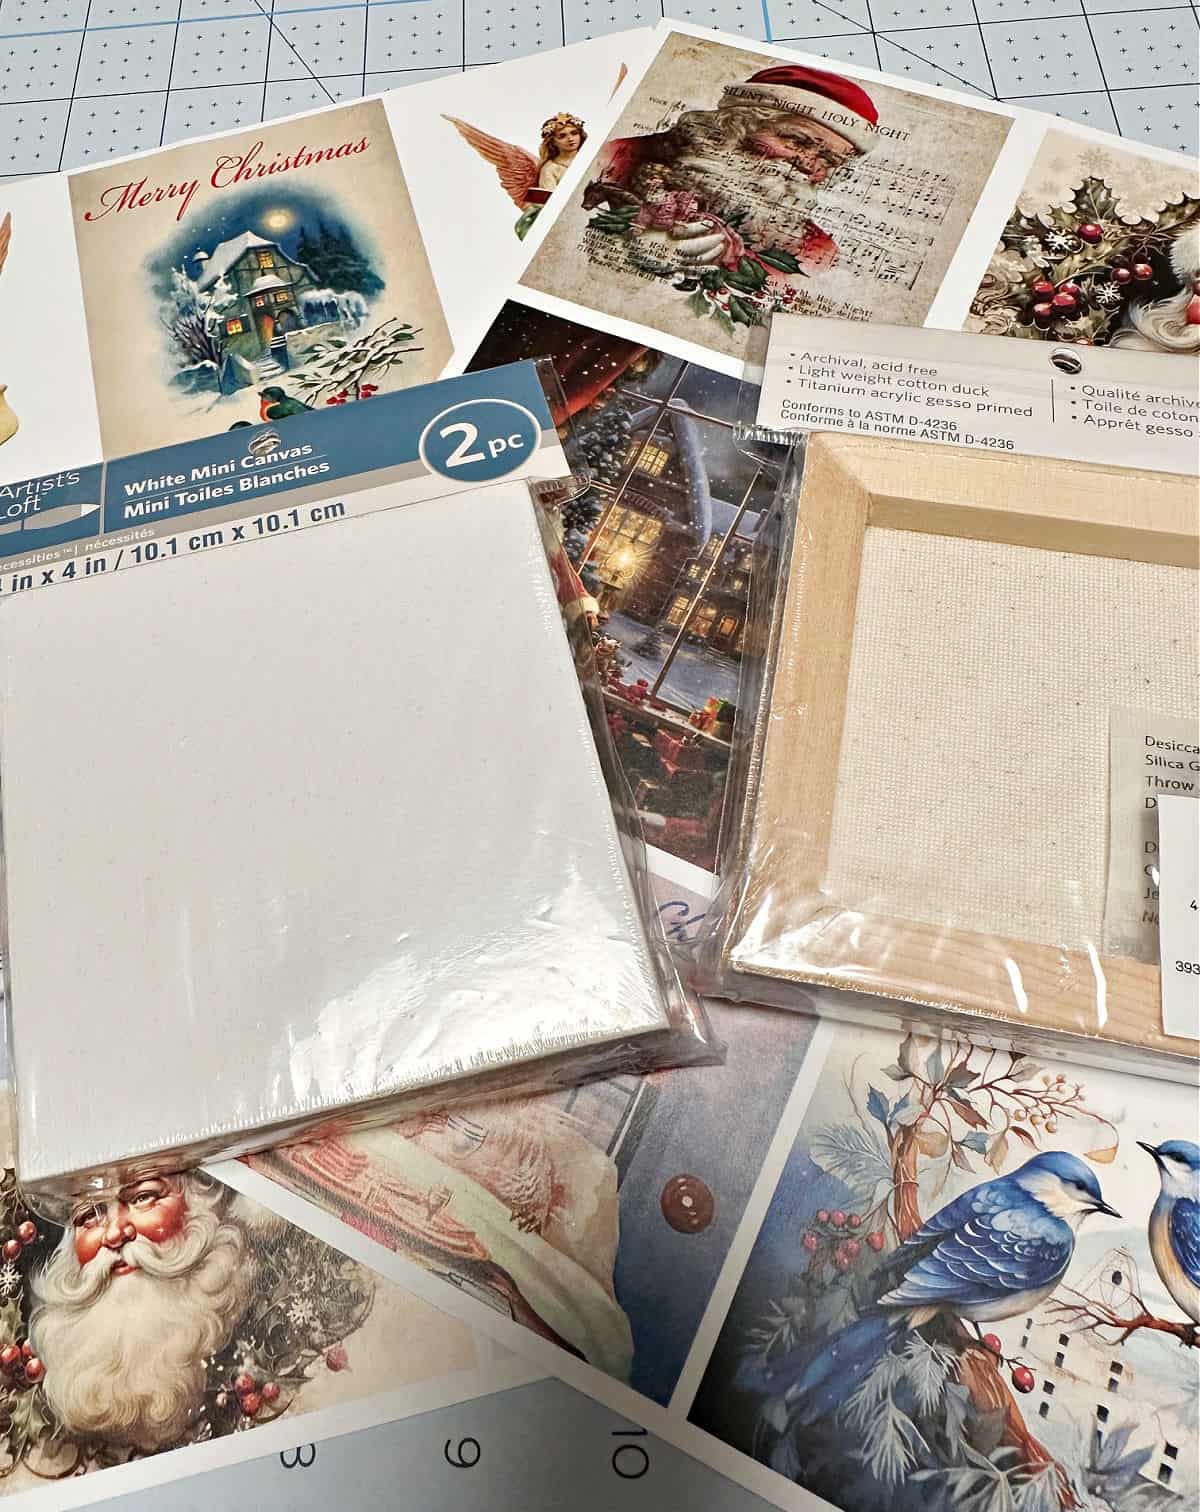
Supplies for Mini Busted Canvas Ornaments
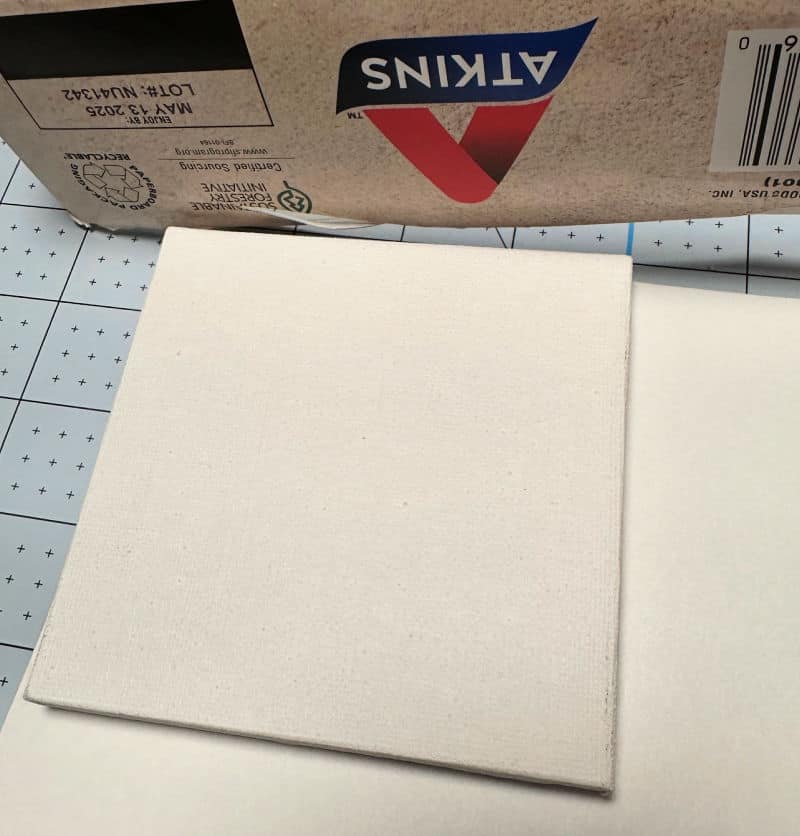
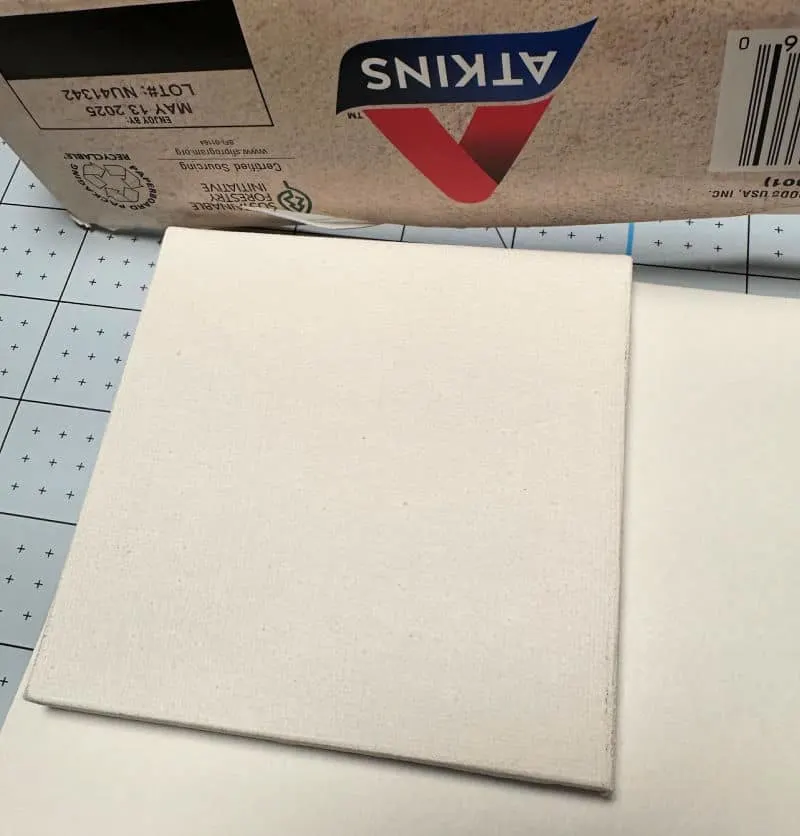
- 4×4 Stretched Mini Canvas 2 pk – I bought mine at Michaels, but Amazon has a 12 pk of 4×4 stretched canvases for under $10! You bet I ordered this set.
- 4x4 Mini Canvas Boards – I used an empty box and it worked great! Why not save a few bucks?
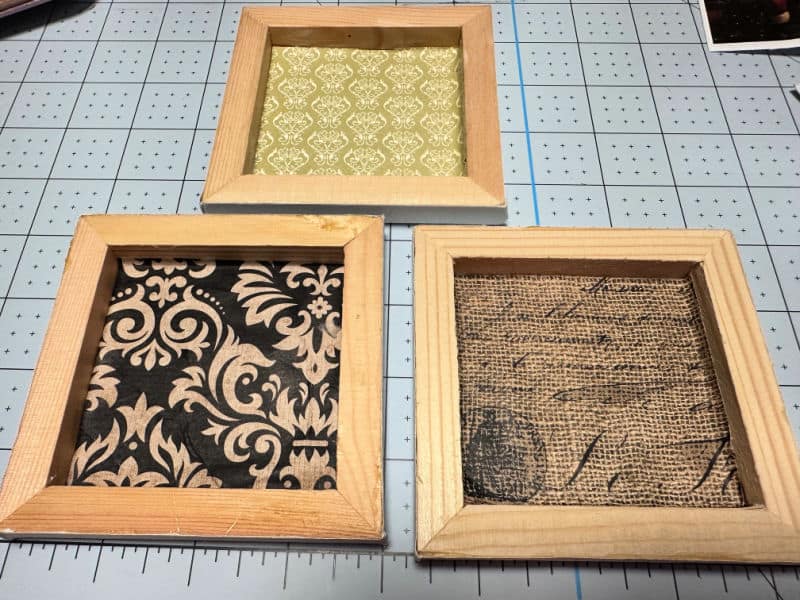
- Cardstock, decorative paper or paint – for more dimension and texture use at least 2 designs
- Mod Podge – I went with gloss for the paper
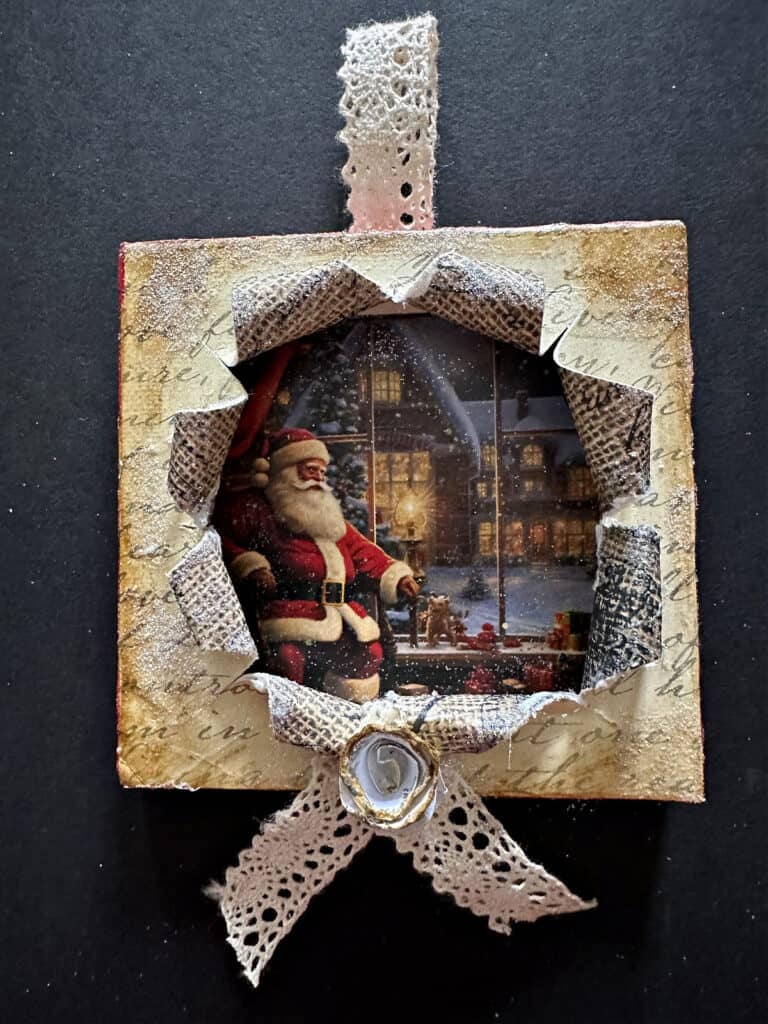
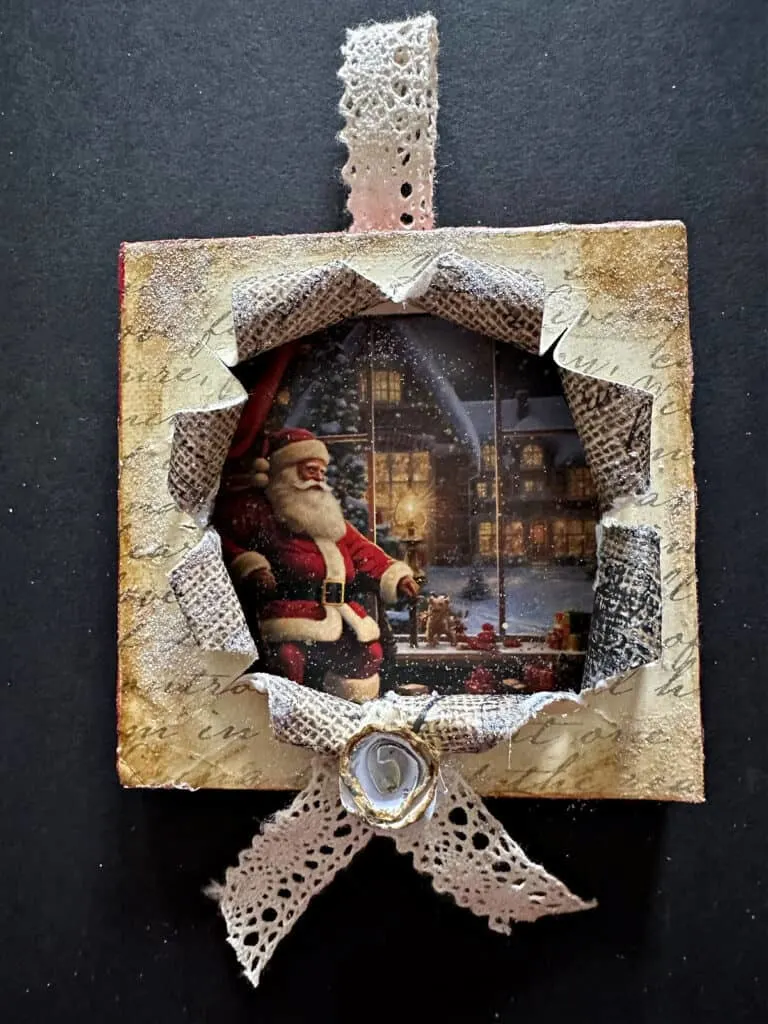
- Mod Podge Silver Glitter – this is optional, but adds extra sparkle!
- Craft Knife – I love the Cricut knife kit
- Foam Brush
- Vintage Santa Printables

How to Make Mini Busted Canvas Vintage Santa Ornaments
There is a printable craft/DIY card at the bottom of this post. But, I’ll also share each step with photos so you can see the process.
Please feel free to ask any questions in the comments and I will do my best to answer.
Here are the steps broken down for a quick guide.
- Decorate the main canvas – you will only see the corners and portion of the top and bottom, but you want it to compliment the image.
- Decorate the back of the main canvas – this will be the design that is “busted” so choose a coordinating design to the front.
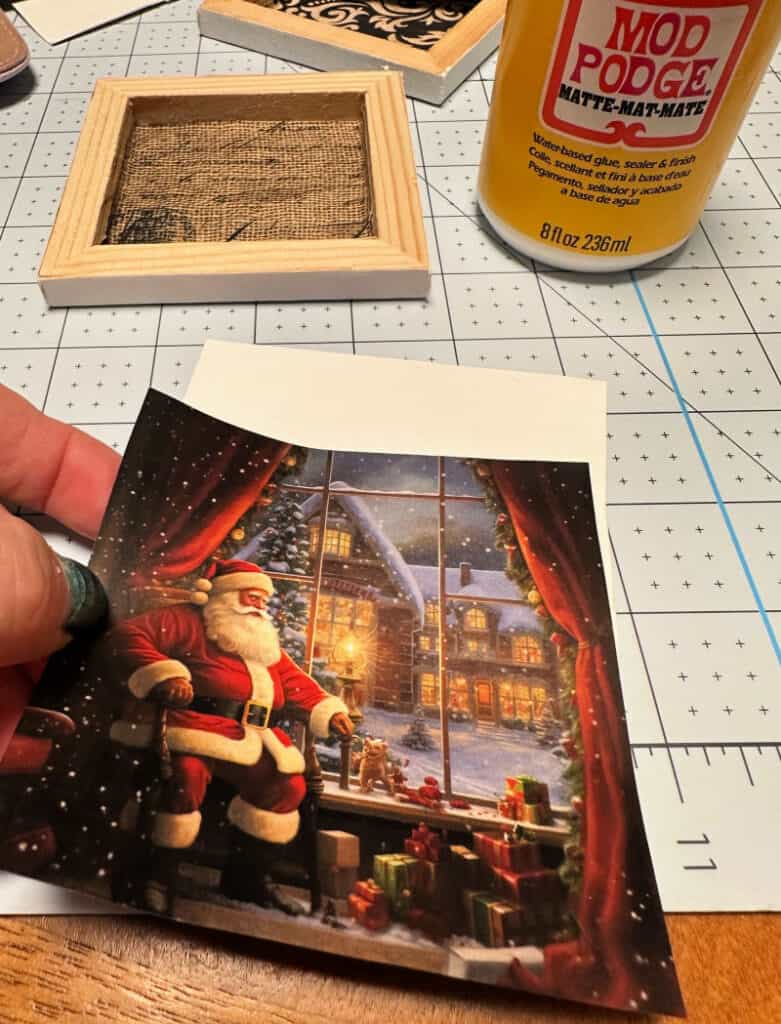
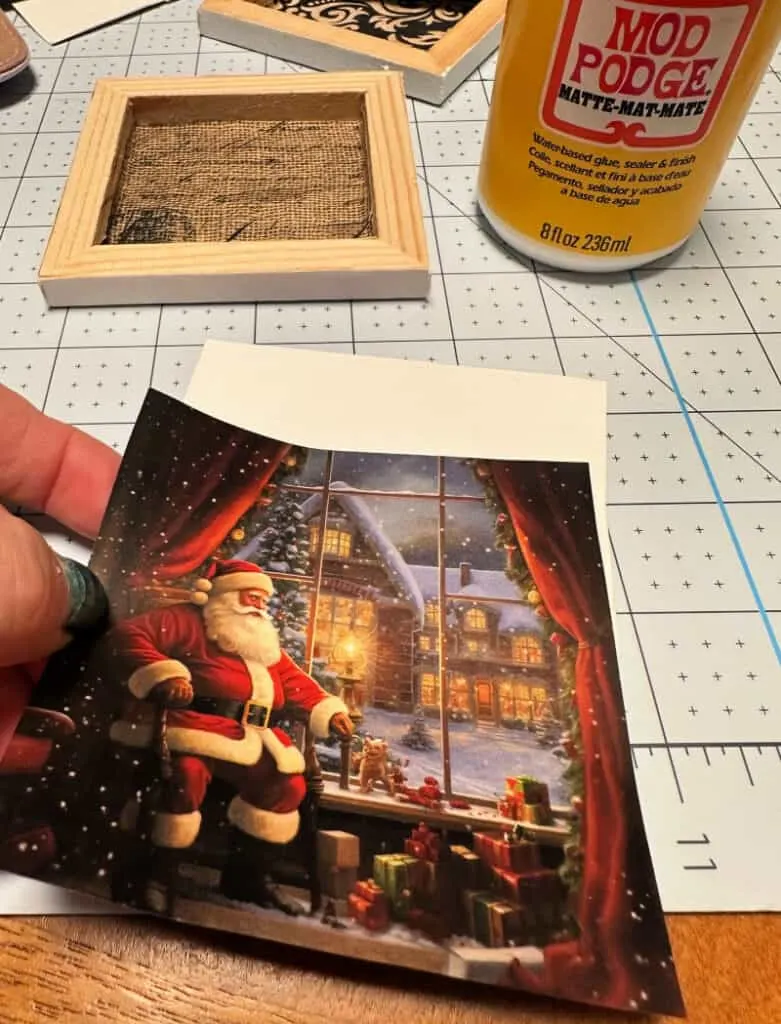
- Decorate the flat canvas board (or cardboard) – this will be your main image that will show through the busted part. Choose an image to use as a focal point.
- “Bust the canvas”- make sure your scissors or craft knife are very sharp. If you have any torn edges, trim them to keep it neat.
- Hot glue the ends of the canvas back – it helps to roll each strip around a pencil for a tighter roll. But, you can glue it flat, roll it, fold it under, just have fun with it.

The first step is to gather your supplies and place something down on your table to protect the surface. Glitter is messy!
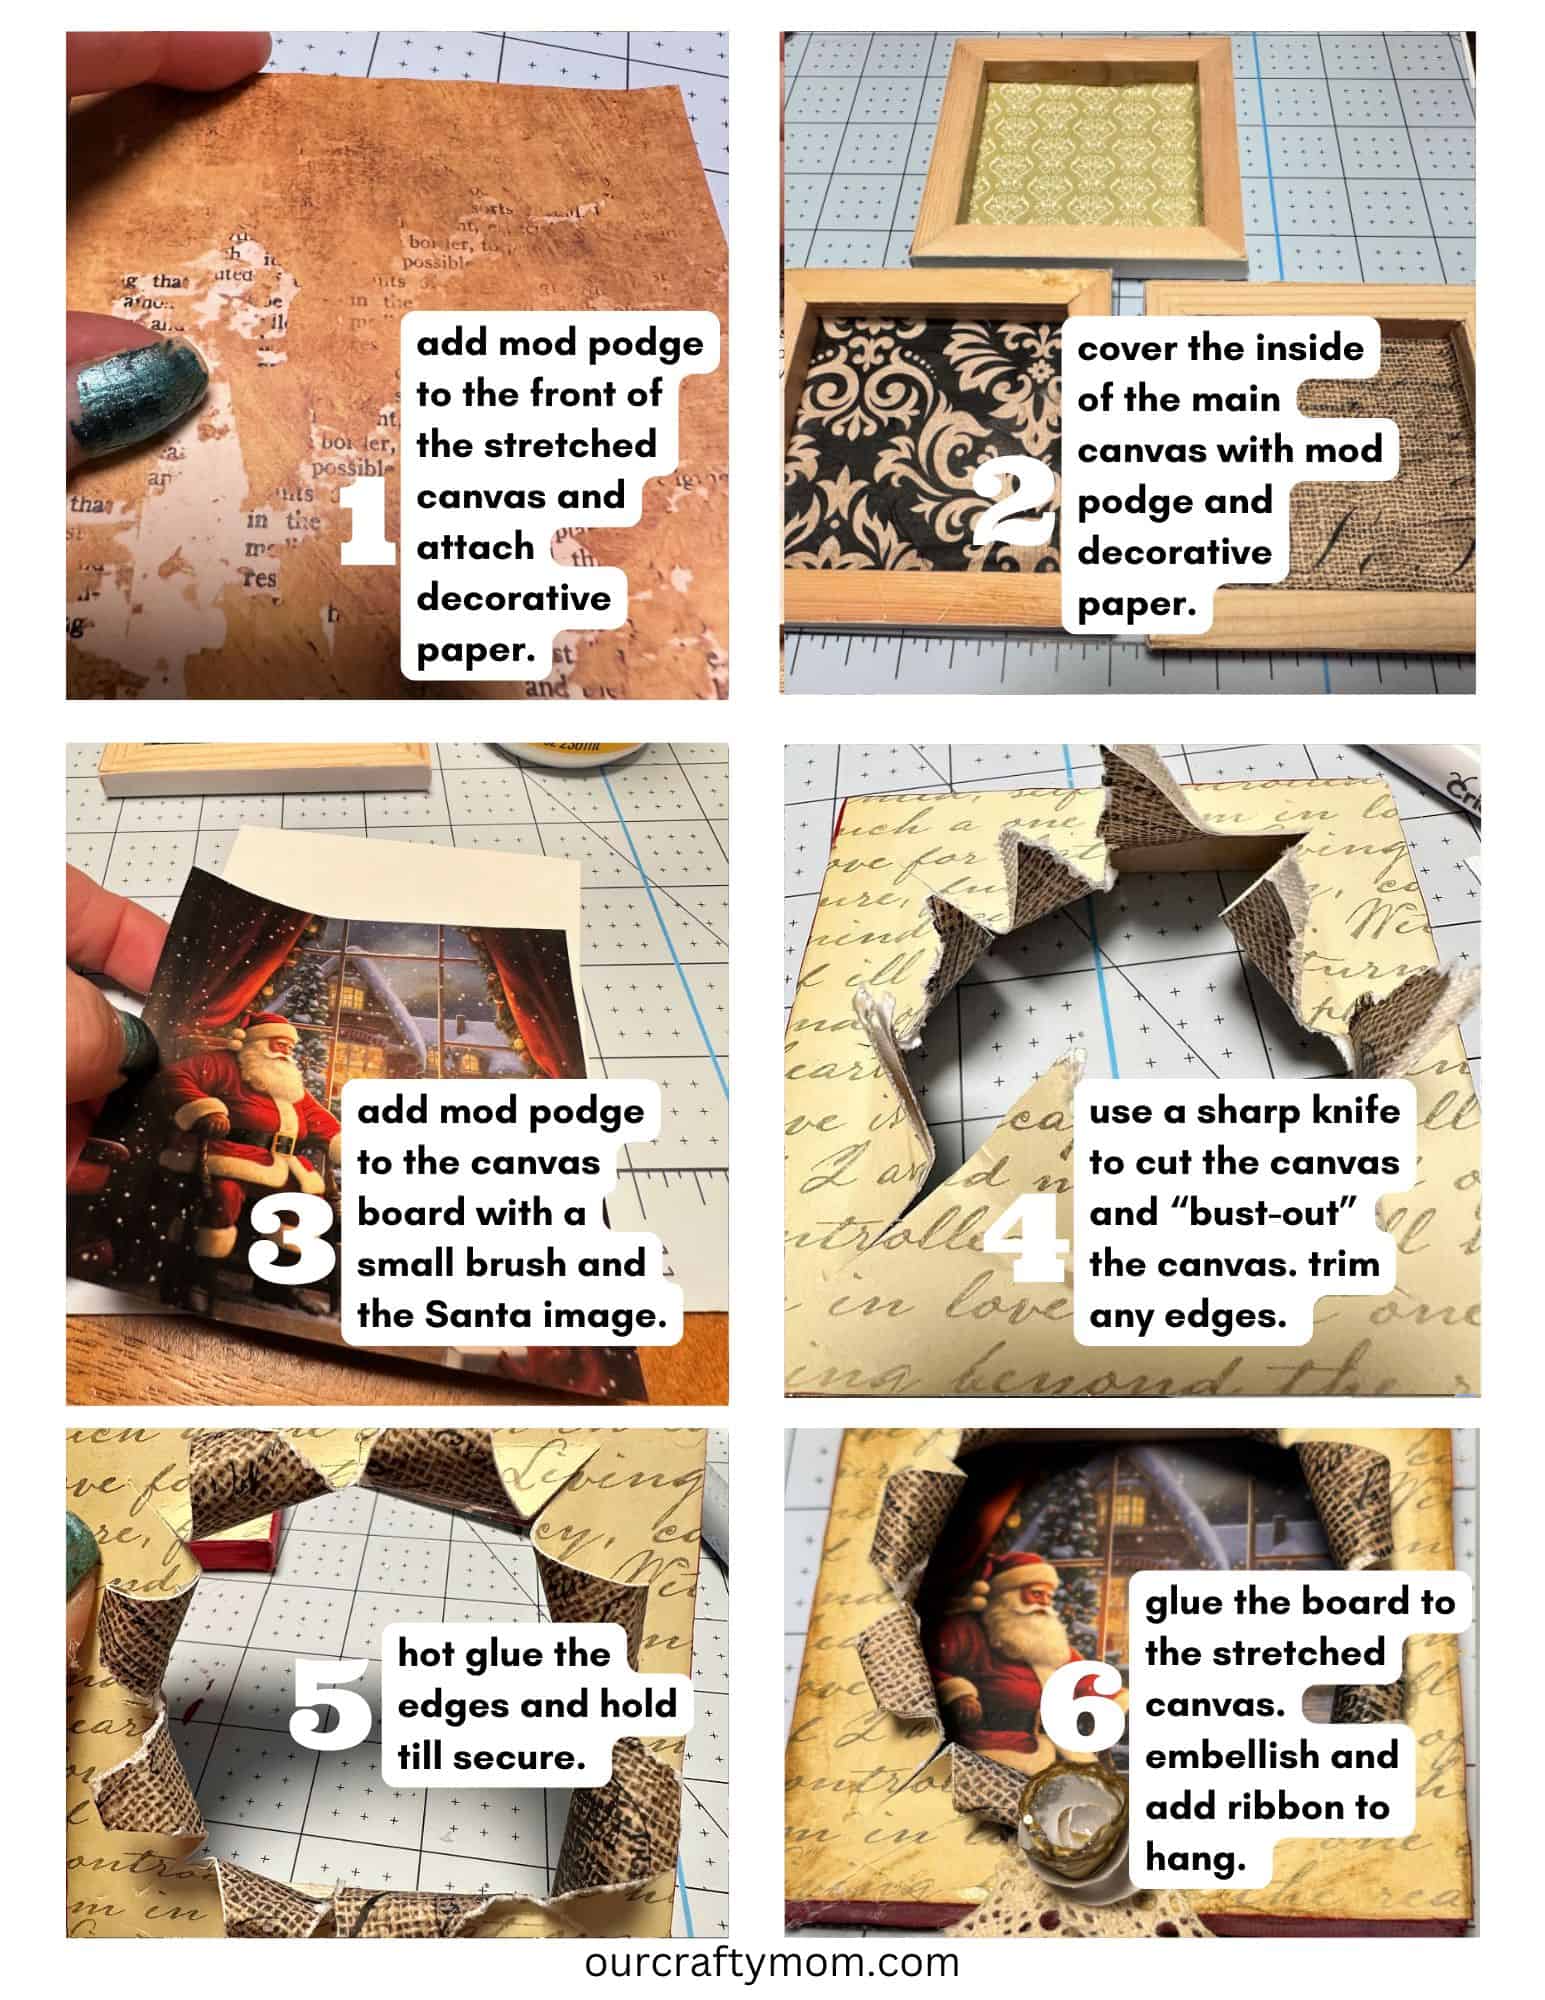
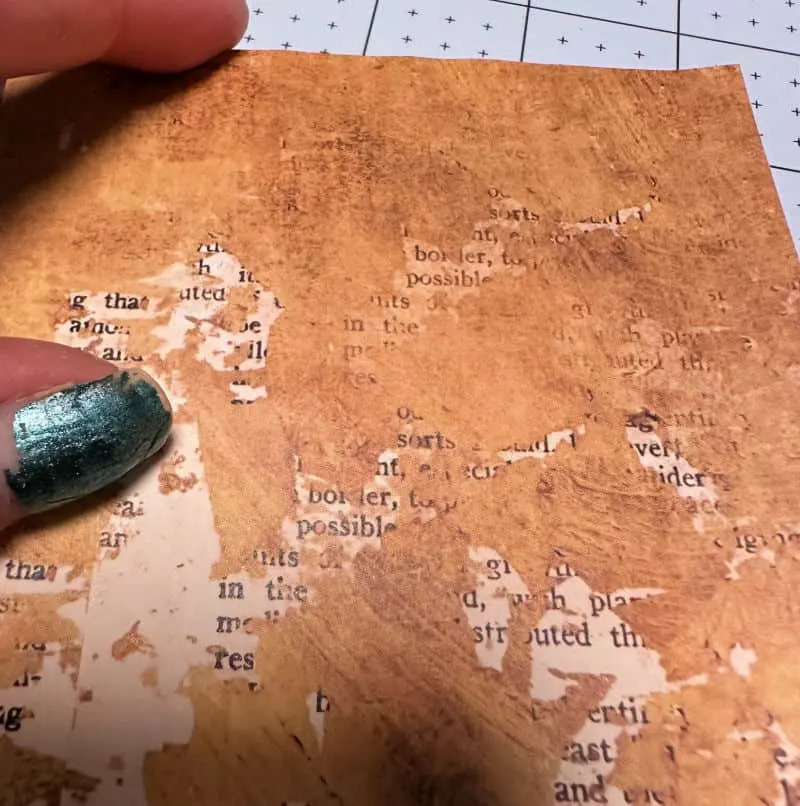
Step 1. Coat the front of the stretched canvas with mod podge
Cover the front of the stretched canvas with a coat of mod podge. Let it sit for a minute or two to get tacky. Don’t add too much mod podge or it will create wrinkles.
Step 2. Place decorative paper on top of the mod podge
Cover the stretched canvas with decorative paper. Smooth out any wrinkles.

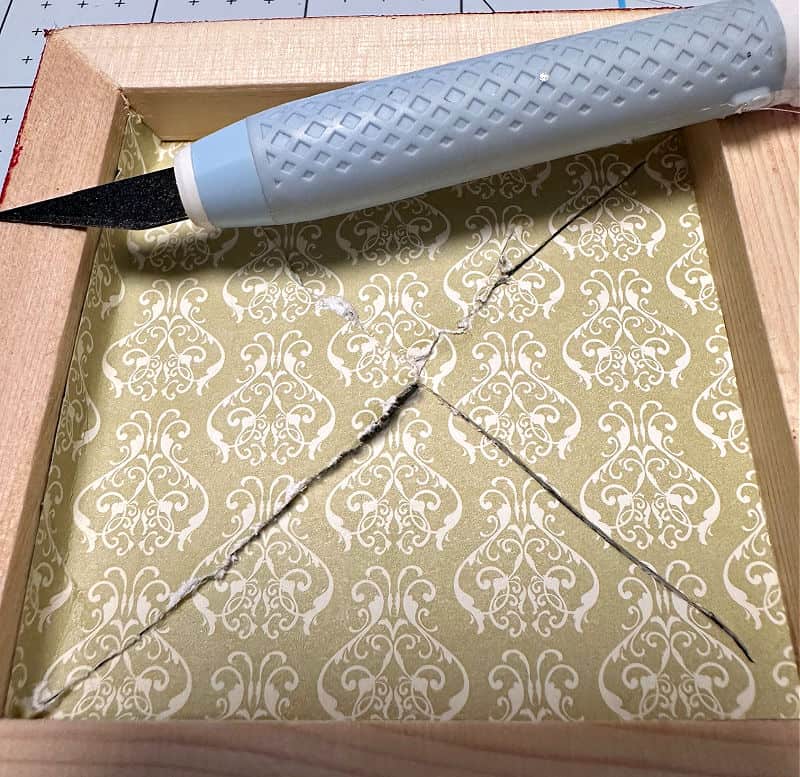
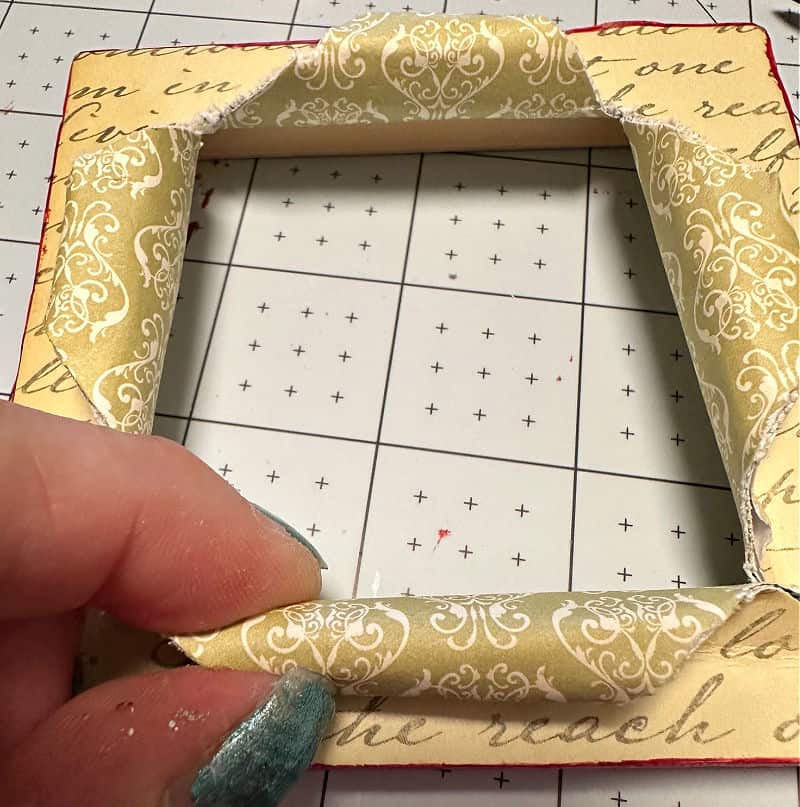
Step 3. Decorate the back of the stretched canvas
The next step is where you can really get creative. Use decorative craft paper, wrapping paper, or even paint to decorate the inside of the canvas. This is the part that will show as “busted” in the front.

Step 4. Decorate the flat canvas board
Next up, decorate the flat canvas board, or repurposed cardboard box, with your Christmas printable. This will be what shows through the cut-out so you want it to be a feature image.
Adhere the Santa image to the flat board with mod podge. Smooth out any wrinkles.
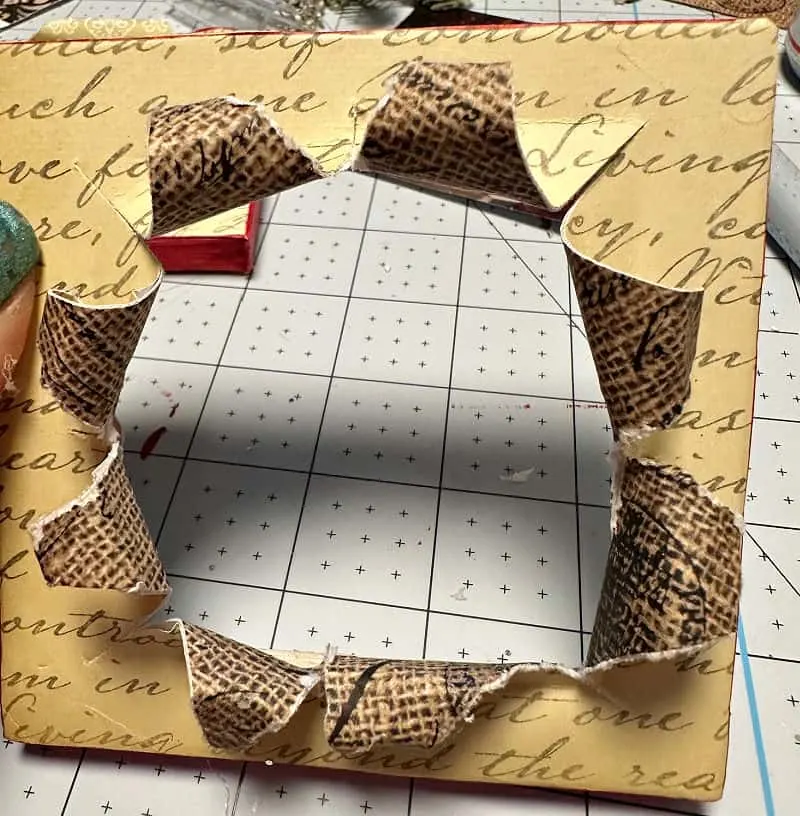
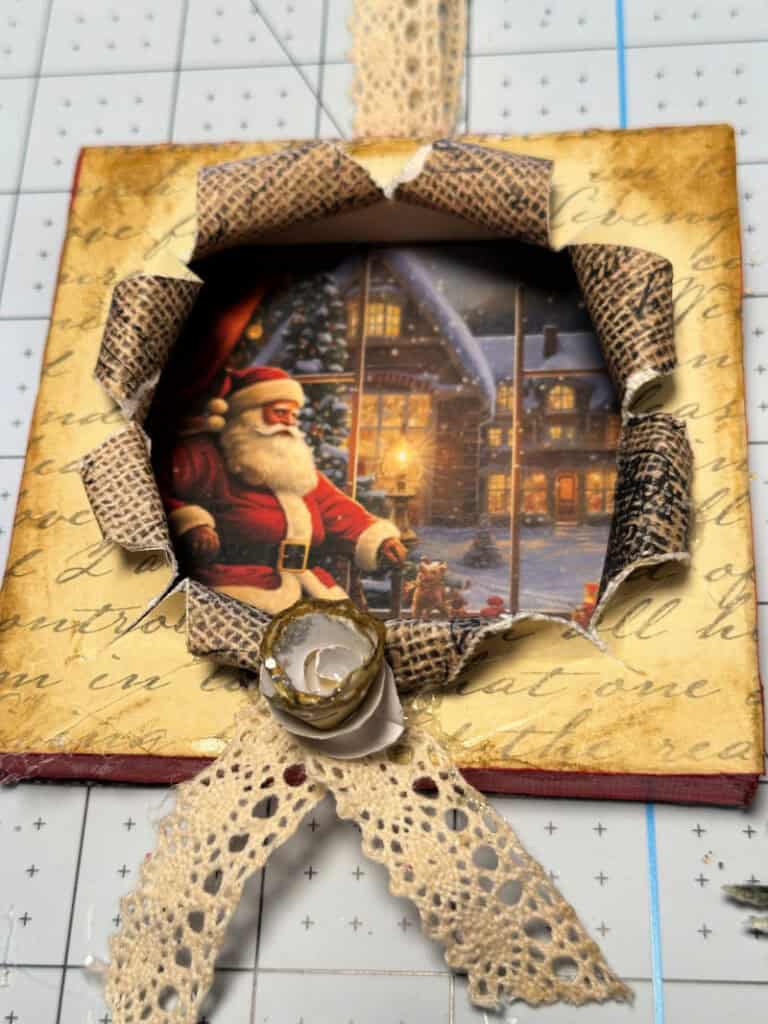
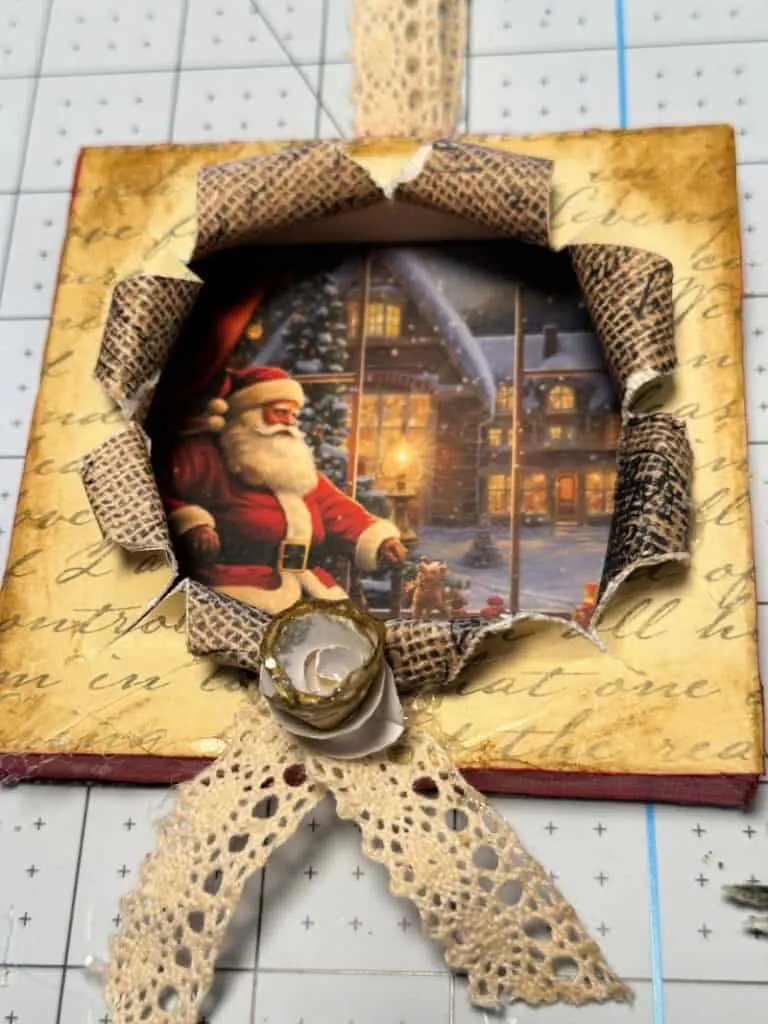
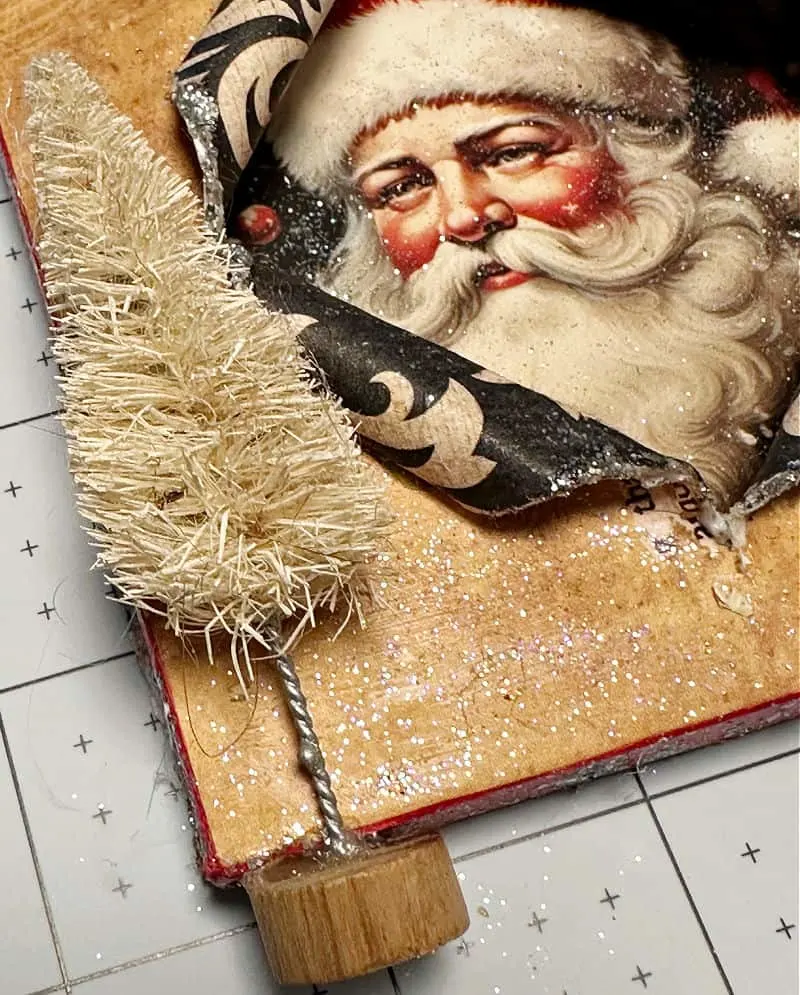
Step 5. Bust the canvas
Now for the fun part-creating the busted canvas!
Use a craft knife to find the center of the canvas and start cutting. Leave an inch or two around the edges of the canvas.

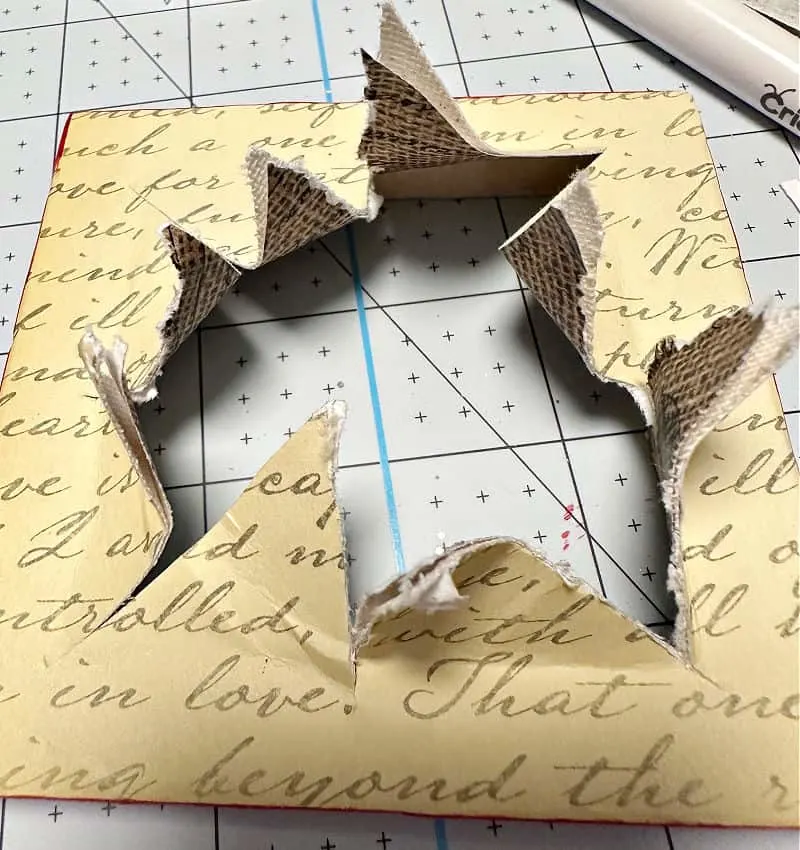
You are basically cutting a star in the canvas. Cut from the center to the top, the center to the bottom and the center to each side.
Cut in between the pieces so you are left with 8 cuts. Don’t worry about the pieces lifting up. You can fix this before you glue it using hot glue.
Secure the edges of the bust-out pieces with a bit of hot glue. You are basically curling the cut canvas back to reveal the beautiful Santa image.

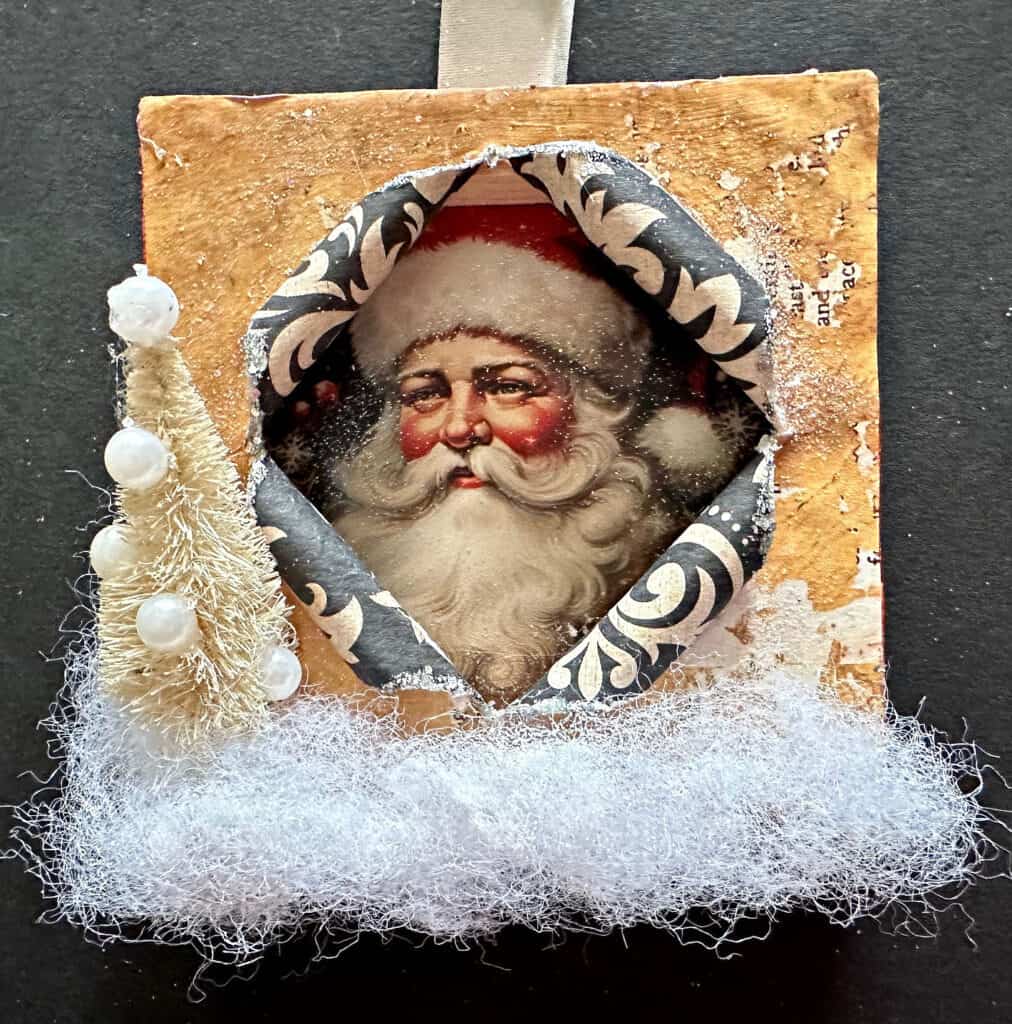
I wanted to try a couple of different cuts for these Christmas ornaments. I think I may like the 4 cut better, since this is a mini canvas.


Experiment with it and see what cuts you like best.
Step 6. Glue the canvas to the board
The final step is to glue the bottom board to the top canvas. I used hot glue, but if it doesn’t seem secure enough, add a bit of E-6000.
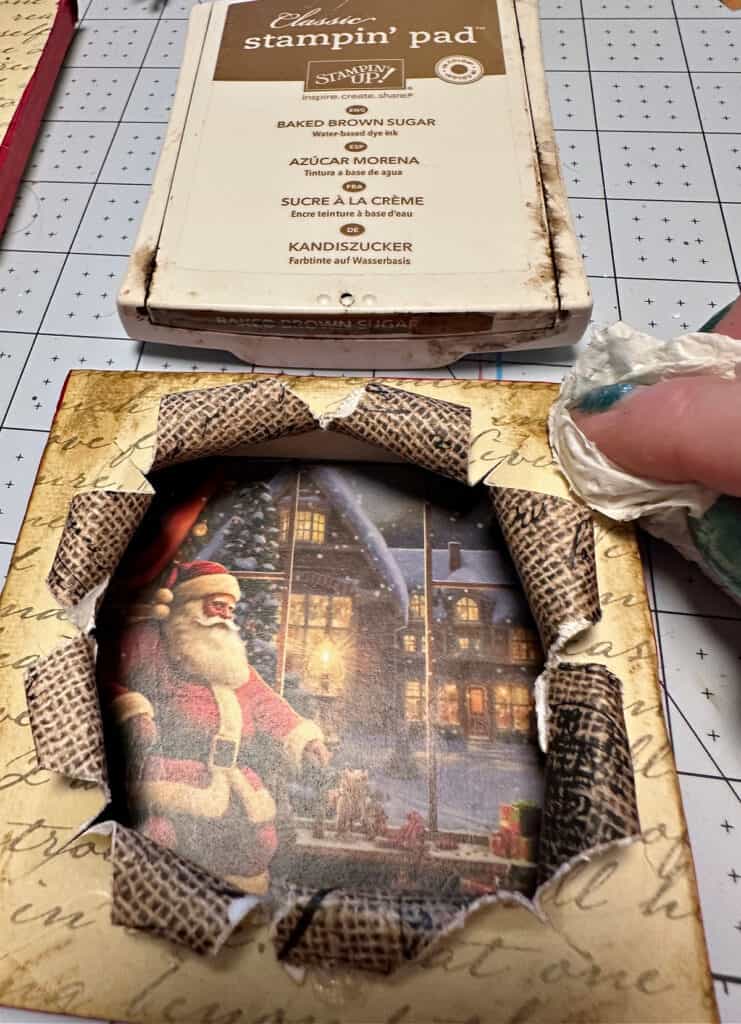

Decorate your Christmas ornaments however you like. I used a brown ink from a stamp pad to go with the vintage theme of the paper.
You can get creative and use things you already have in your craft stash like ribbon, buttons, paper flowers, glitter or any embellishments.
I’m not sure which of the 3 is my favorite, but I do love the little bottle brush tree on this one:


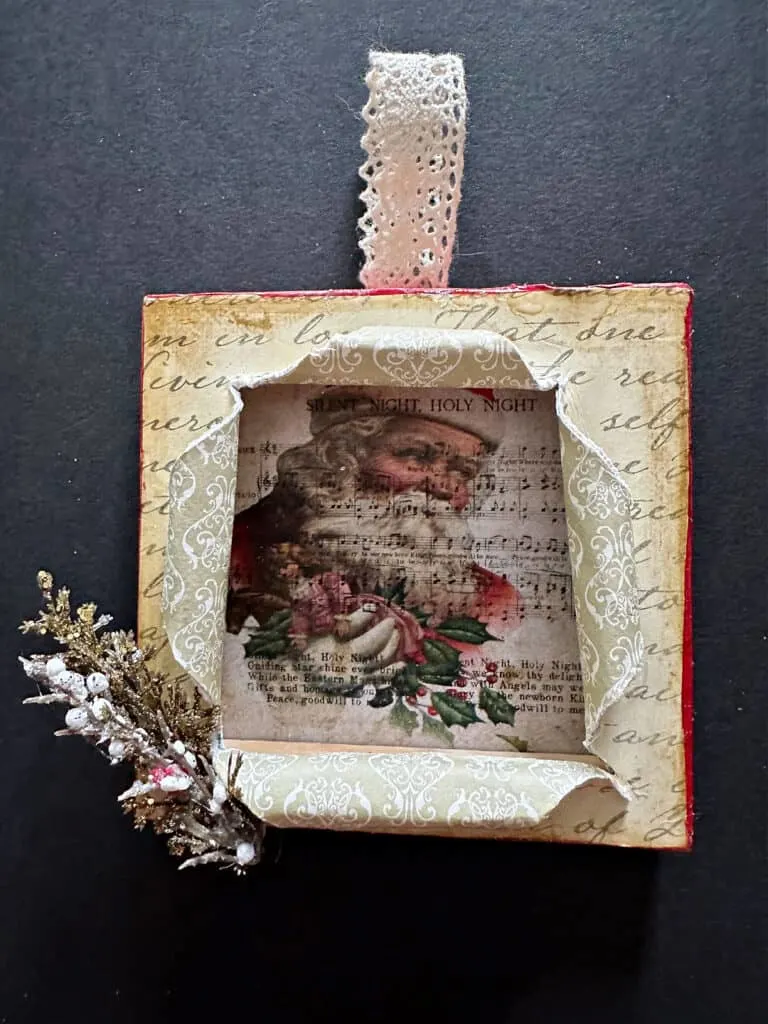
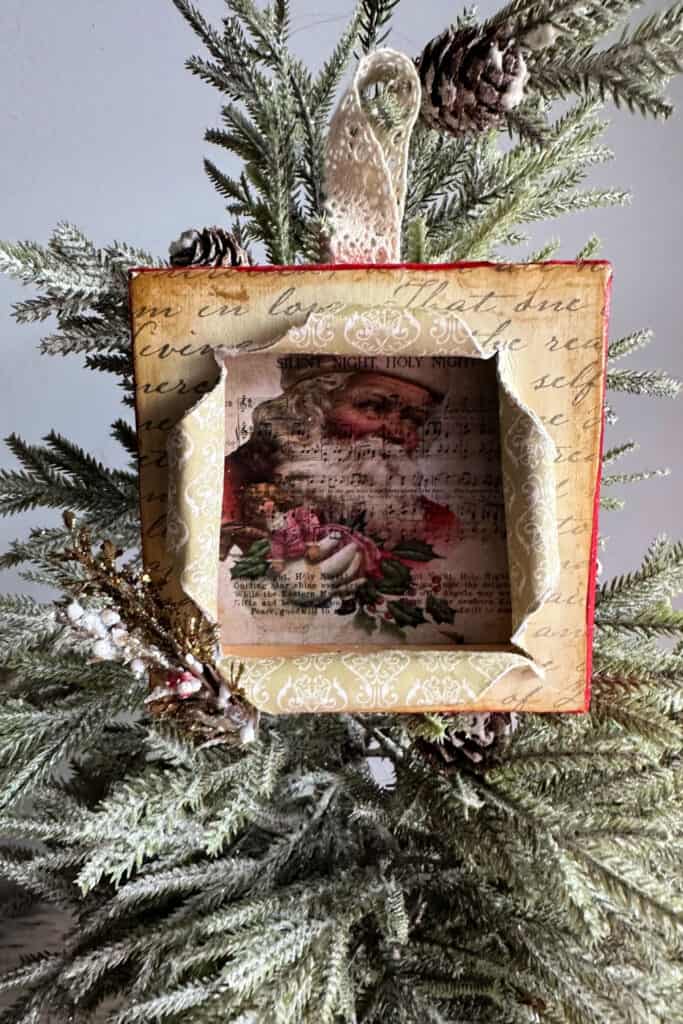
Here is the 3rd vintage Santa ornament:

Which one is your favorite?


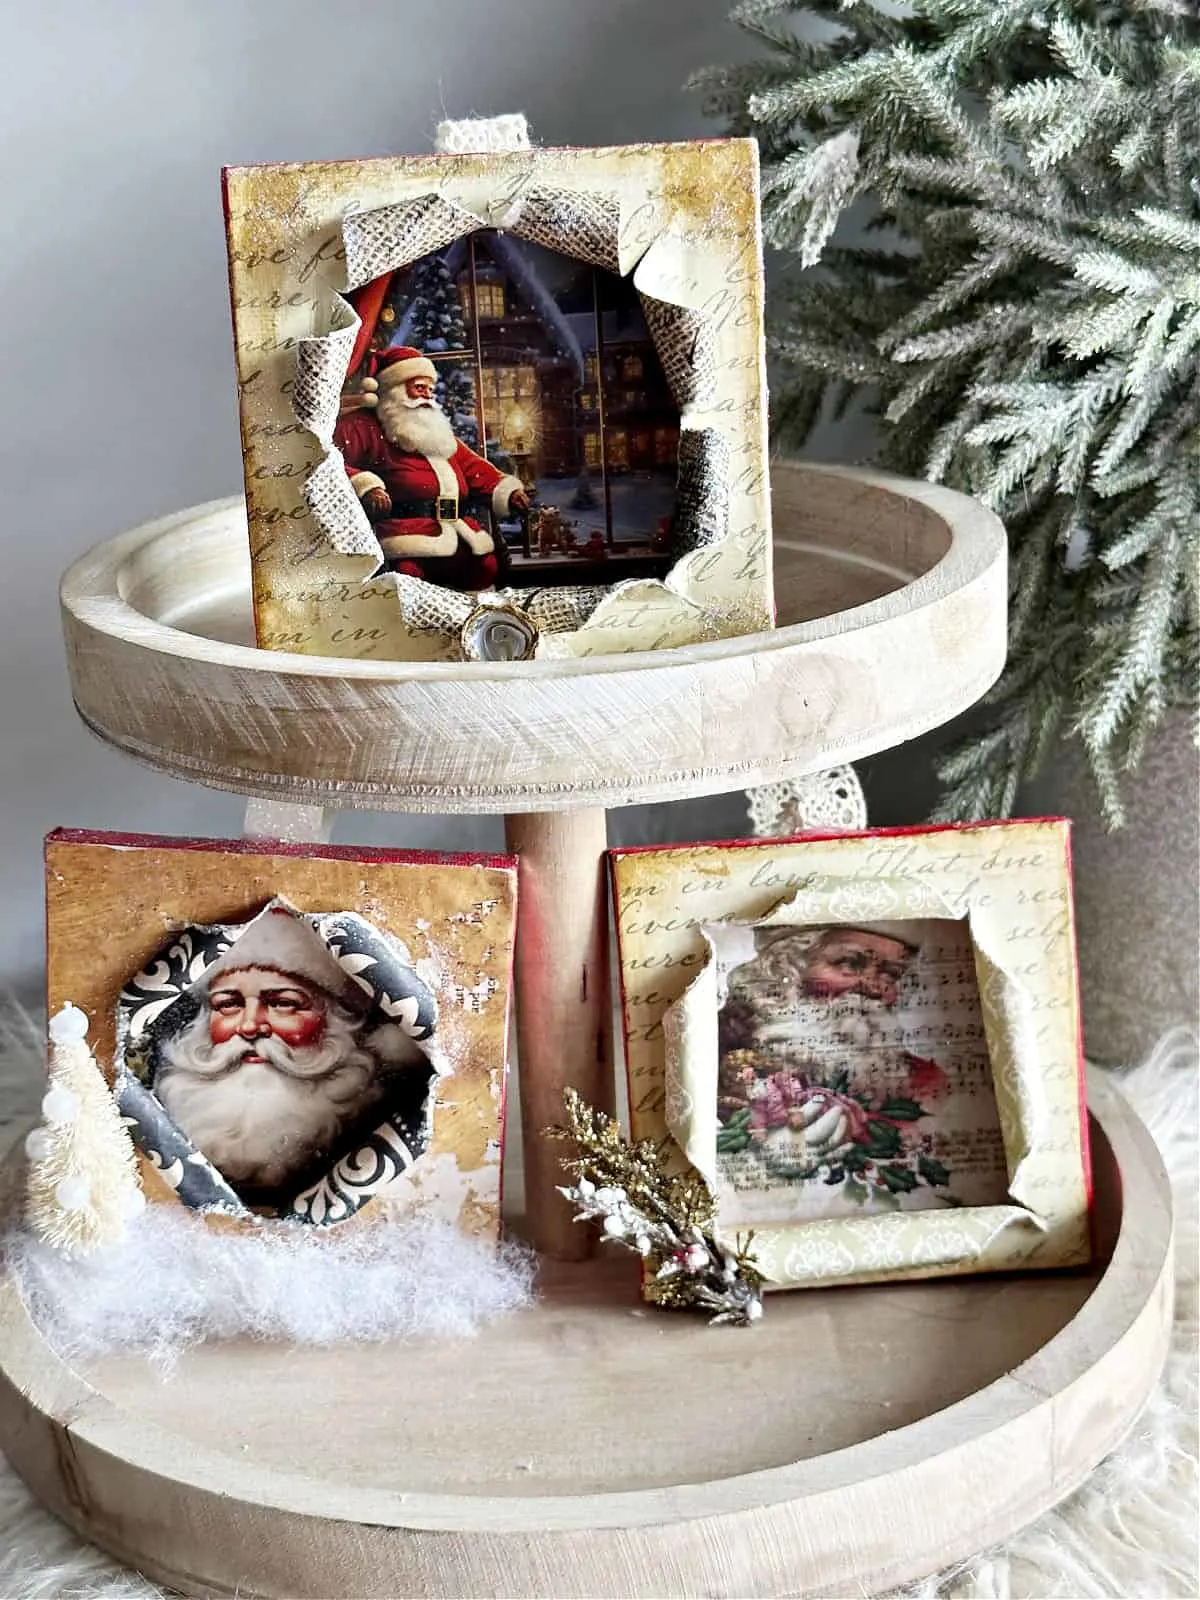
These are also just the right size to use in your tiered tray decor.

I’d love it if you would share this article with your friends on Pinterest by pinning the below image.
It helps my blog to grow and doesn’t cost a thing! 🙂
Are you ready to make your own vintage Santa ornaments?
Let me know if you are inspired to make your own mini busted canvas by sharing it with me on Facebook or Instagram.
Just tag @ourcraftymom. It totally makes my day!
Download your free vintage Santa printables
Remember I mentioned sharing the free Santa Christmas printables?
Here you go. Simply click the download button below the image, or right click on the image and save it to your computer for printing.
It is sized to fit a standard 8.5×11″ copy paper. You may want to print it out on a light cardstock so it is a bit thicker.

Thanks so much for stopping by. Happy crafting!


For even more budget-friendly ideas, you don’t want to miss this amazing collection of 51 Dollar Tree Christmas Crafts.
Follow me on social media below: