Create a one of a kind broken plate mosaic table top using china pieces! I’ll show you how in this detailed step by step tutorial.
If you read my recent post on Facebook you know how excited I am about my FIRST mosaic table top DIY!
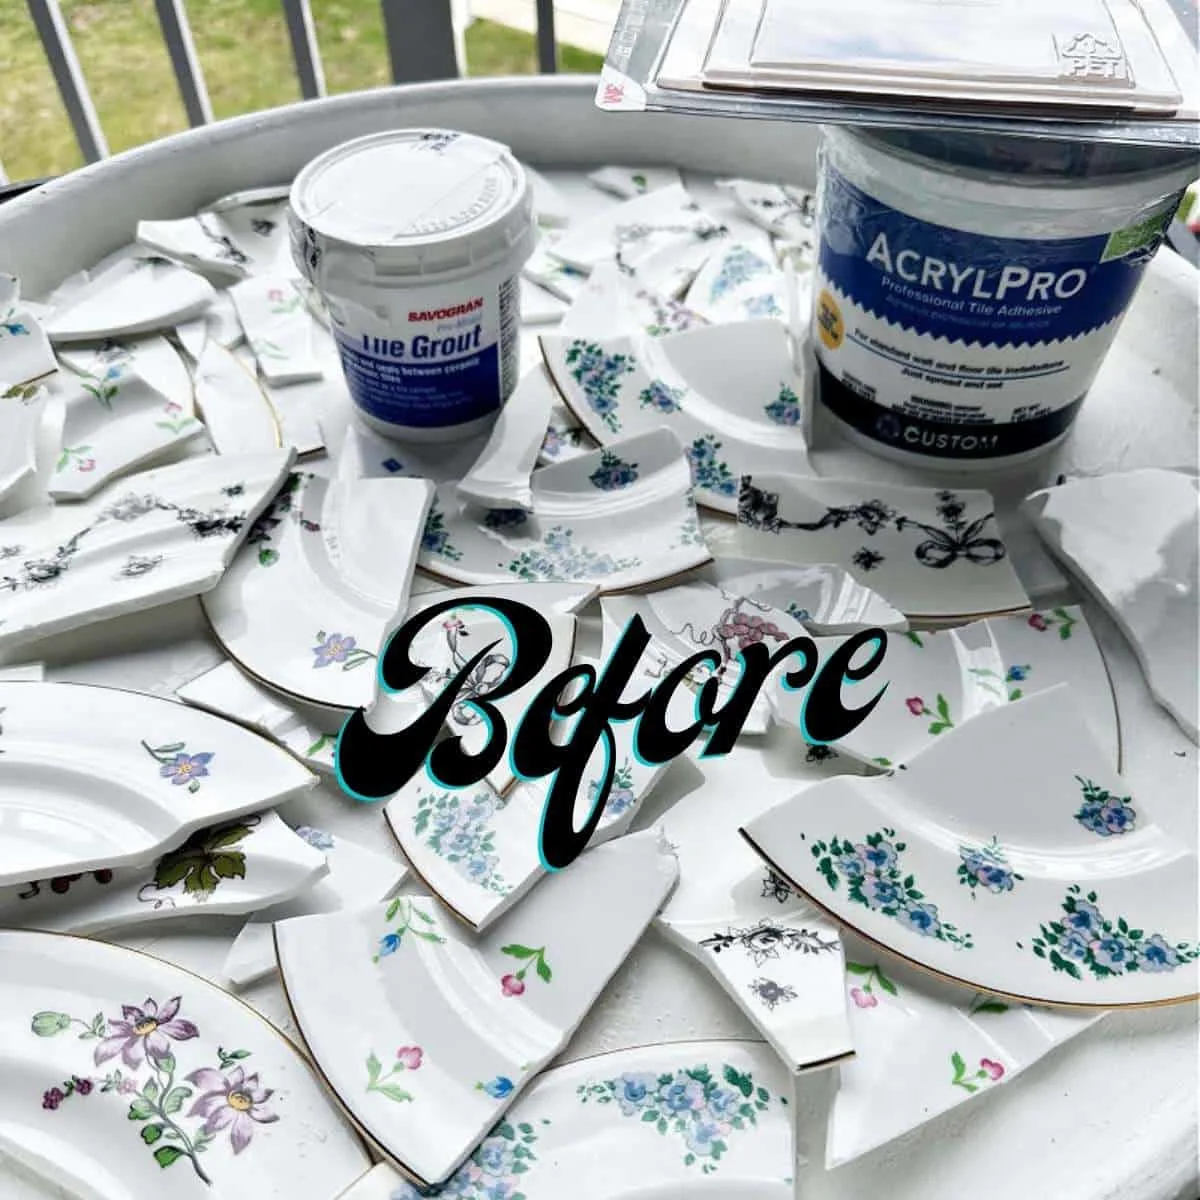
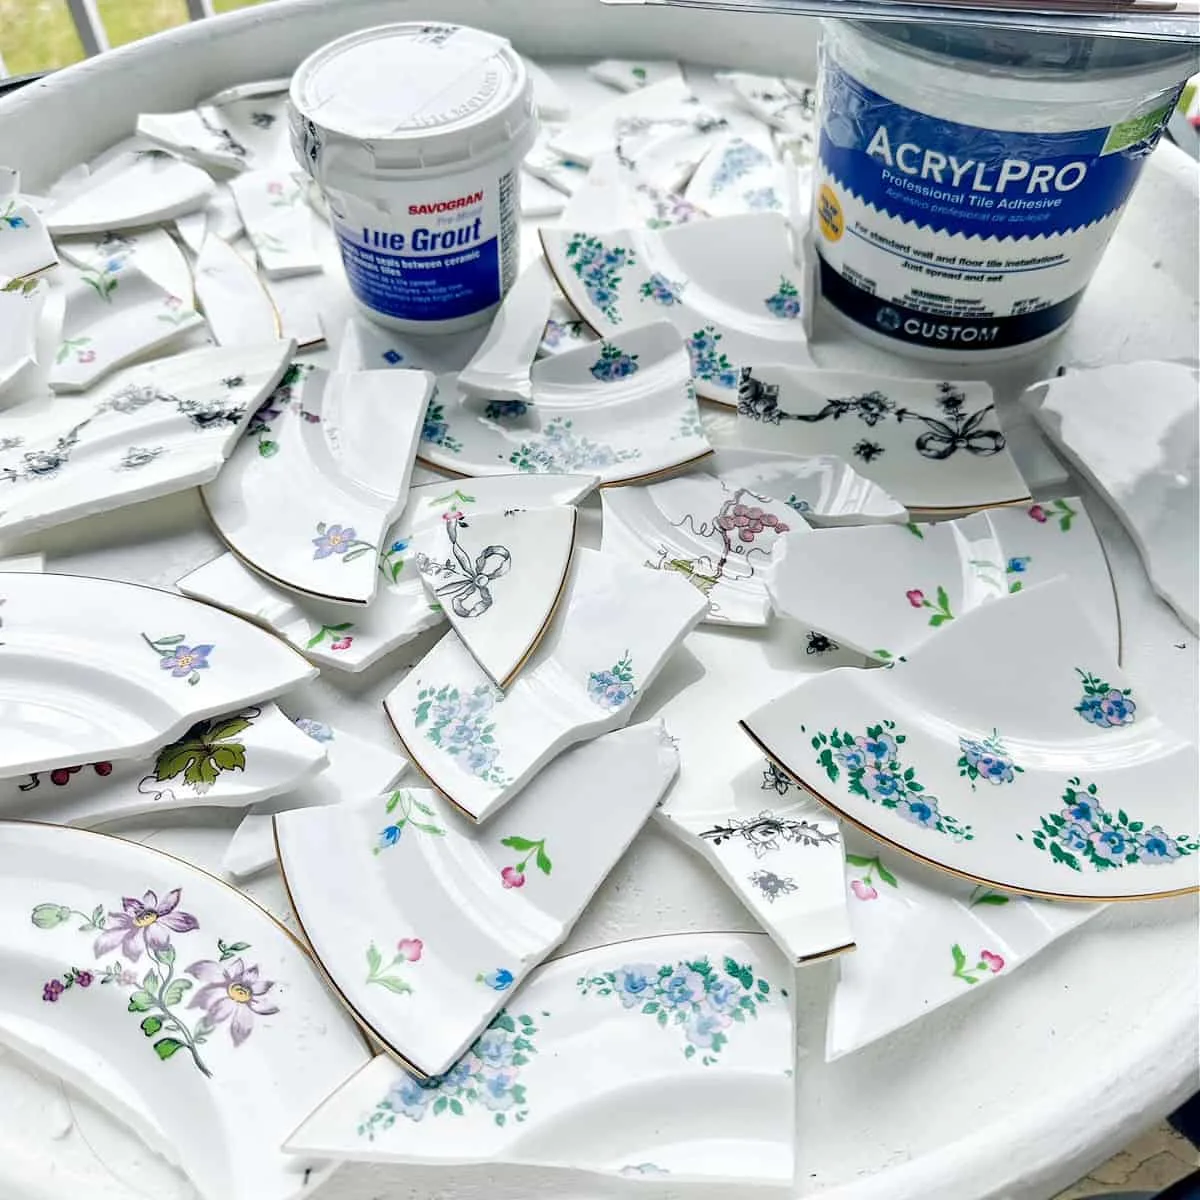
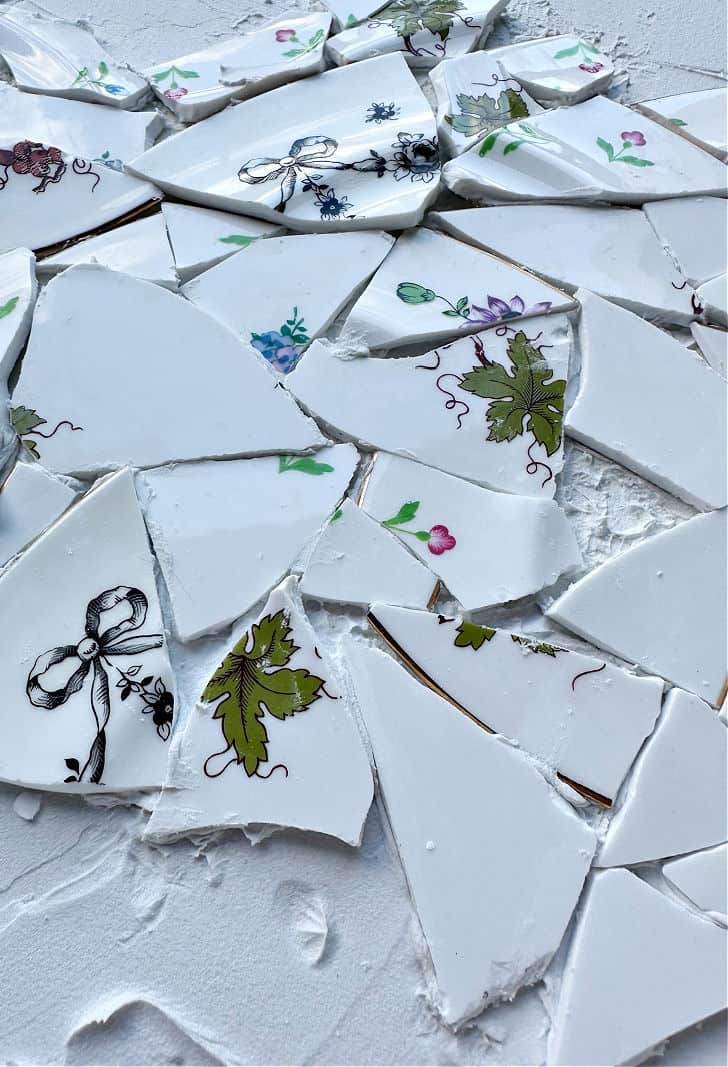
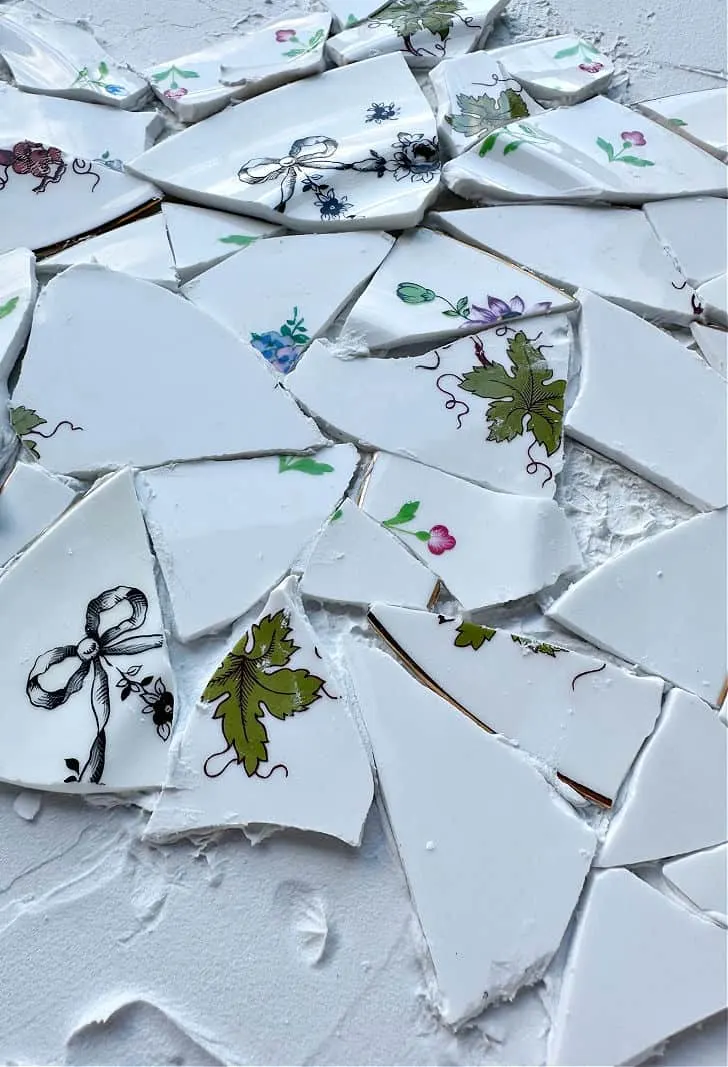
I shared the before picture of several broken china pieces.
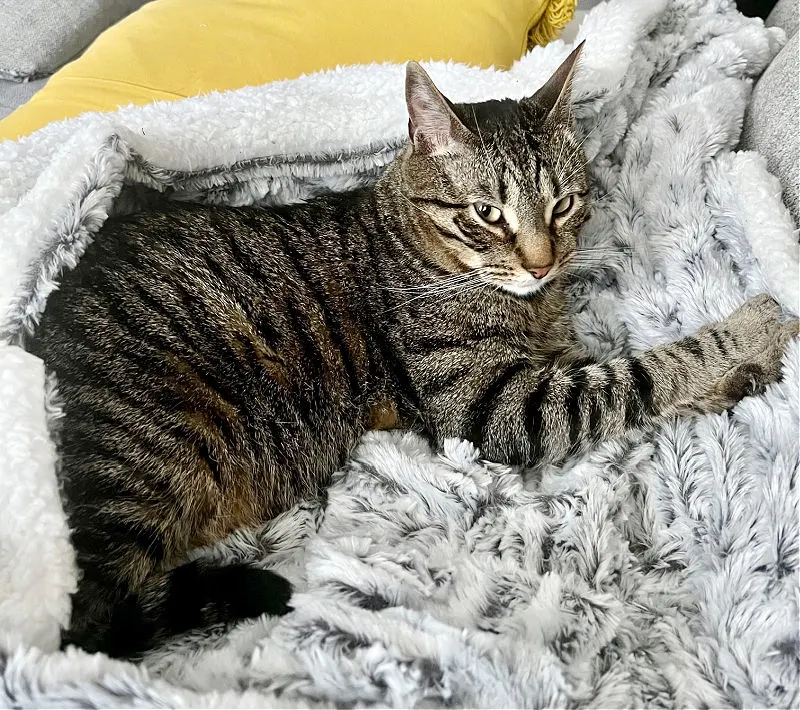
We have a very curious cat who likes to explore at night.
Unfortunately, he jumped up onto the table and knocked over a bag with thrift store china plates.
That is not a sound you want to hear at 3 am. 🙂
Here is a pic of the little rascal angel:

Rather than throw out the broken dishes, I decided to use them in a mosaic table top.
I’ve been wanting to try a mosaic project for years, so this was the perfect opportunity.
When life gives you lemons make lemonade, right?

This post contains affiliate links at no extra cost to you. Please see my full disclosure here.
There are a few things you need to invest in to start making DIY mosaic projects.
The good news is, once you get the main tools, you can use them for future projects.
Because this was my first time with this broken plate technique, I did a lot of research for beginner mosaic art.
It was surprisingly easier than I thought it would be, but I did learn a few things that I would like to share with you.
Hopefully, these tips will help you if you want to try your hand at creating your own work of art.
It really is a rewarding process!
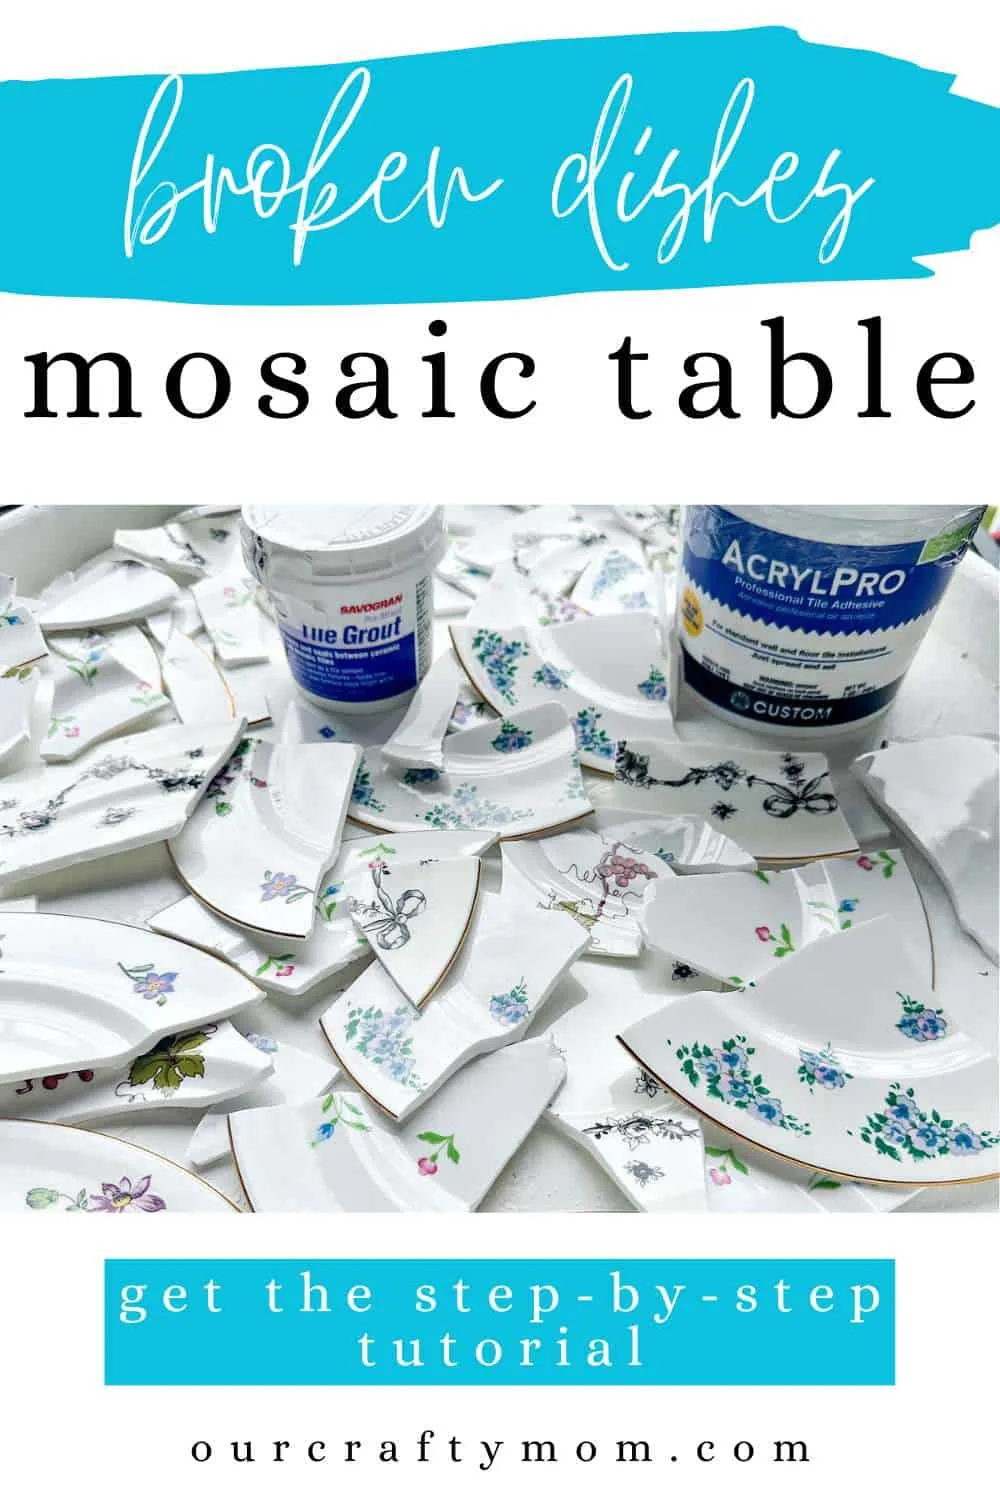
Supplies Needed for Broken Plate Mosaic Tabletop
- Pieces of Broken China Plates– if you don’t have a cat to help you out, this set is stunning in blue and white!
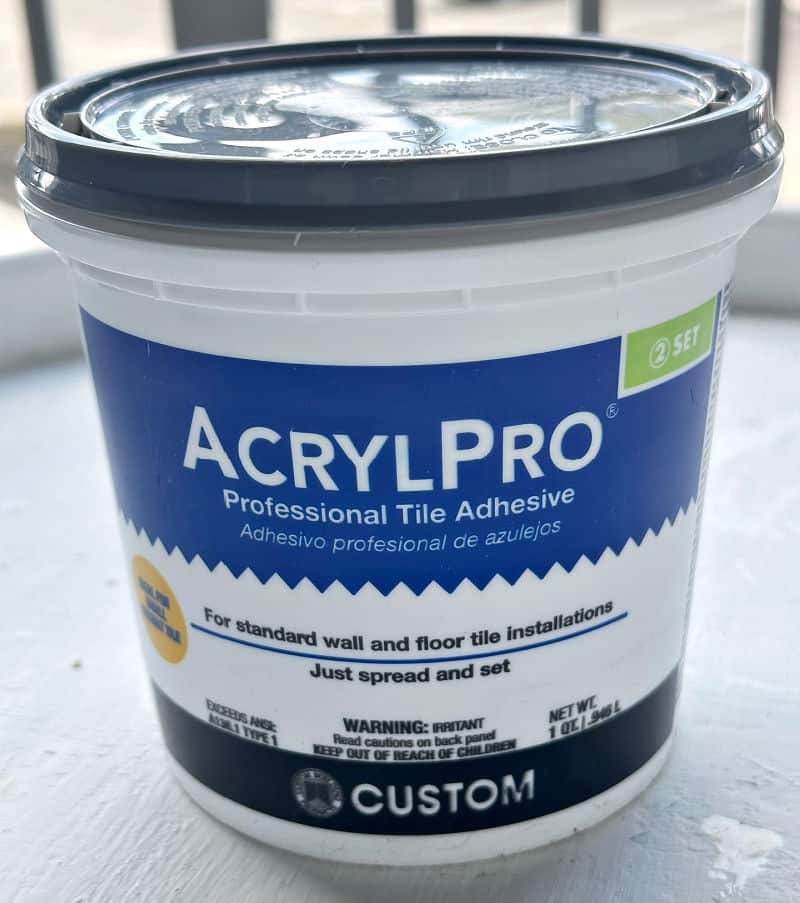
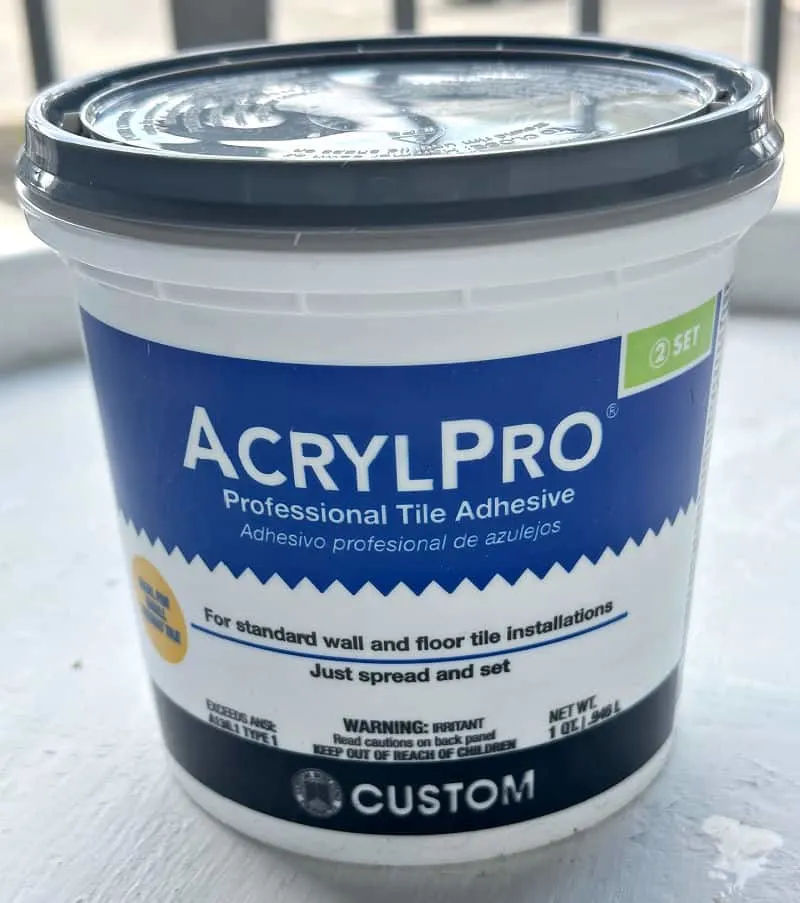
- Ceramic Tile Adhesive– this worked great and is reasonably priced.
- Tile Nippers– if you need to trim broken dishes or cut your own.
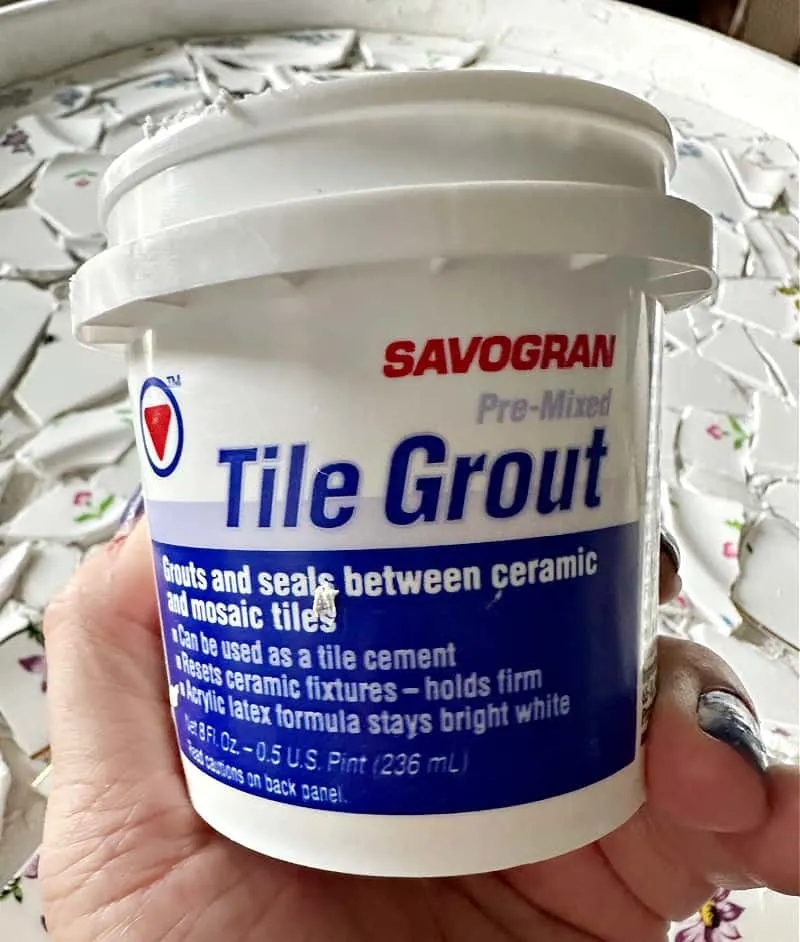
- Tile Grout– I used this ready-mix. The 1/2 pint size was just enough for this size table.
- Spreader-needed to spread adhesive and grout.
- Work Gloves– these cut resistant gloves are great! Some of the china plate pieces can be sharp. You want to protect your hands.
- Damp Sponge– to remove the excess grout
- Tile and Grout Sealer or Clear Acrylic Spray– if you are keeping your mosaic design inside, you can probably get away with not using a sealer. But, if your table is going outside as mine is, I highly recommend a protective sealer.

Step by Step Guide: How to Make a Mosaic Table with Broken Plates
Step 1. Prepare Your Table Top
The first thing you want to do is find a table top that has an edge.
This will make it easier for the edges of the plates, especially if you are just starting with mosaic art.
Check out local thrift stores, flea markets and yard sales for something that will work.
I lucked out by finding a large round wood serving tray at Goodwill for $10.
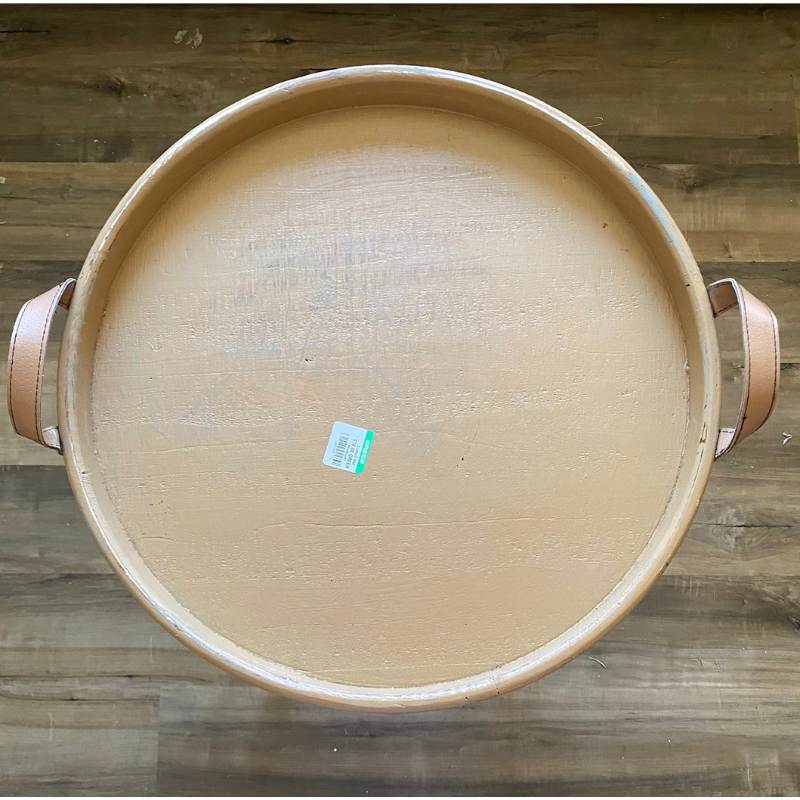
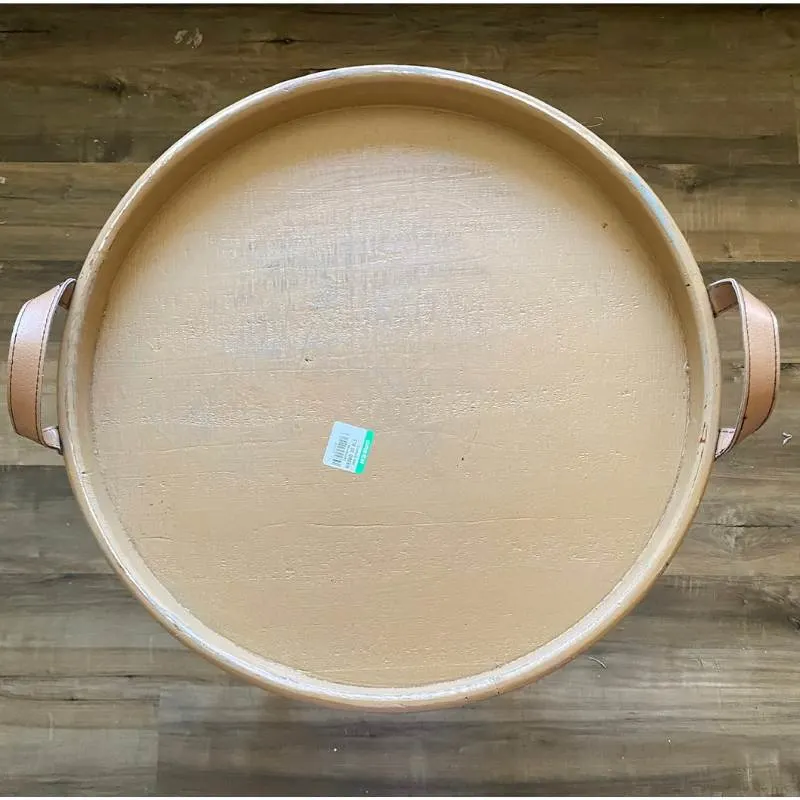
I’ve been wanting to create some type of design on it for several months.
It’s the perfect size for this project!
Don’t you love when things come together like that?
The first thing I did was give it a good cleaning using warm water and Dawn dish detergent.
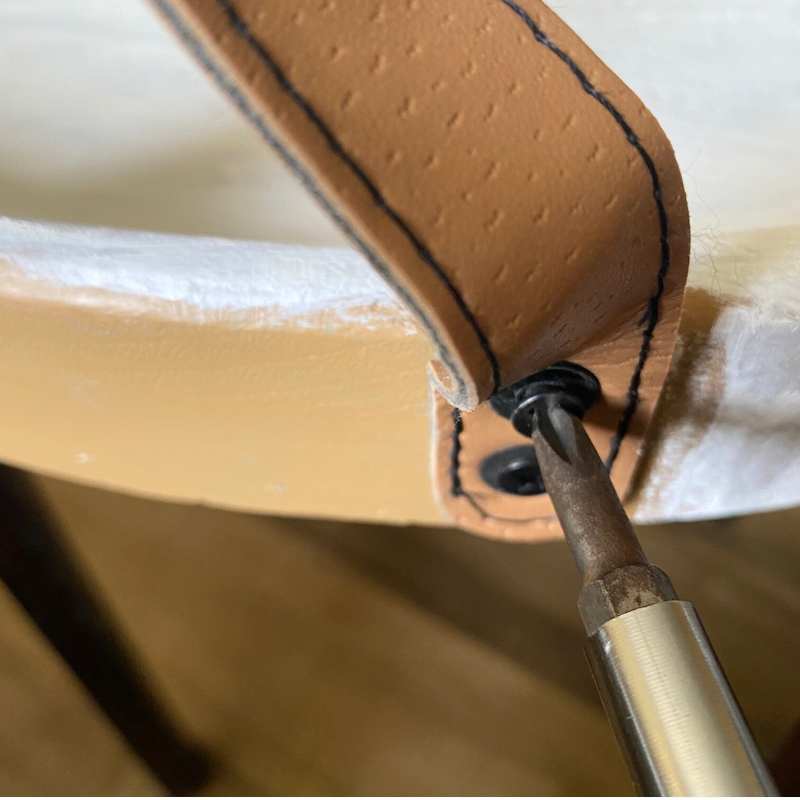
Next, remove the leather handles and fill in the holes with wood filler.

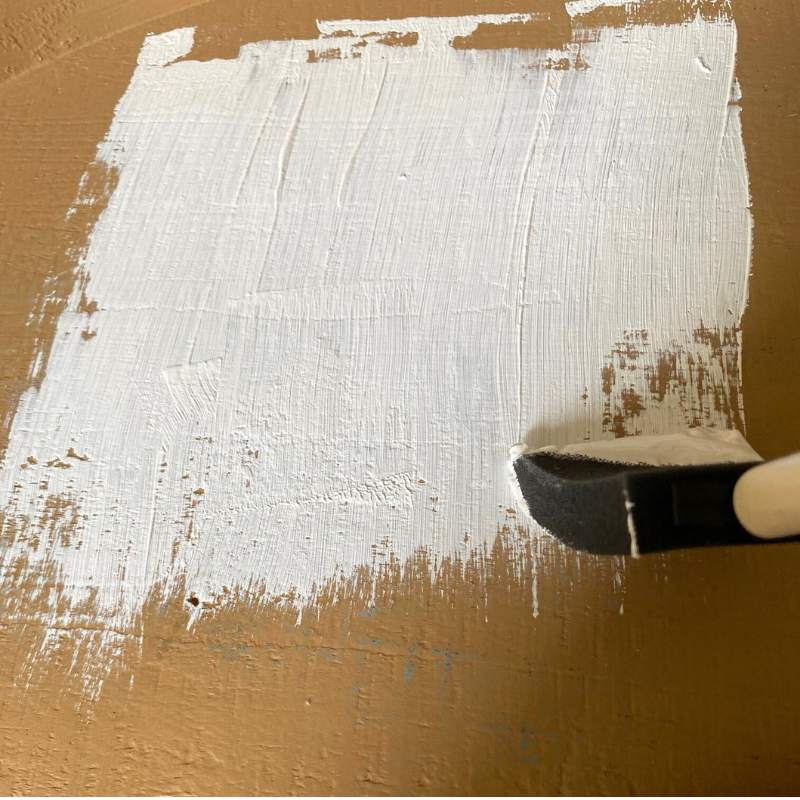
Lightly sand then paint a couple of coats of white chalk paint.

Let completely dry then you are ready for tile and grout!
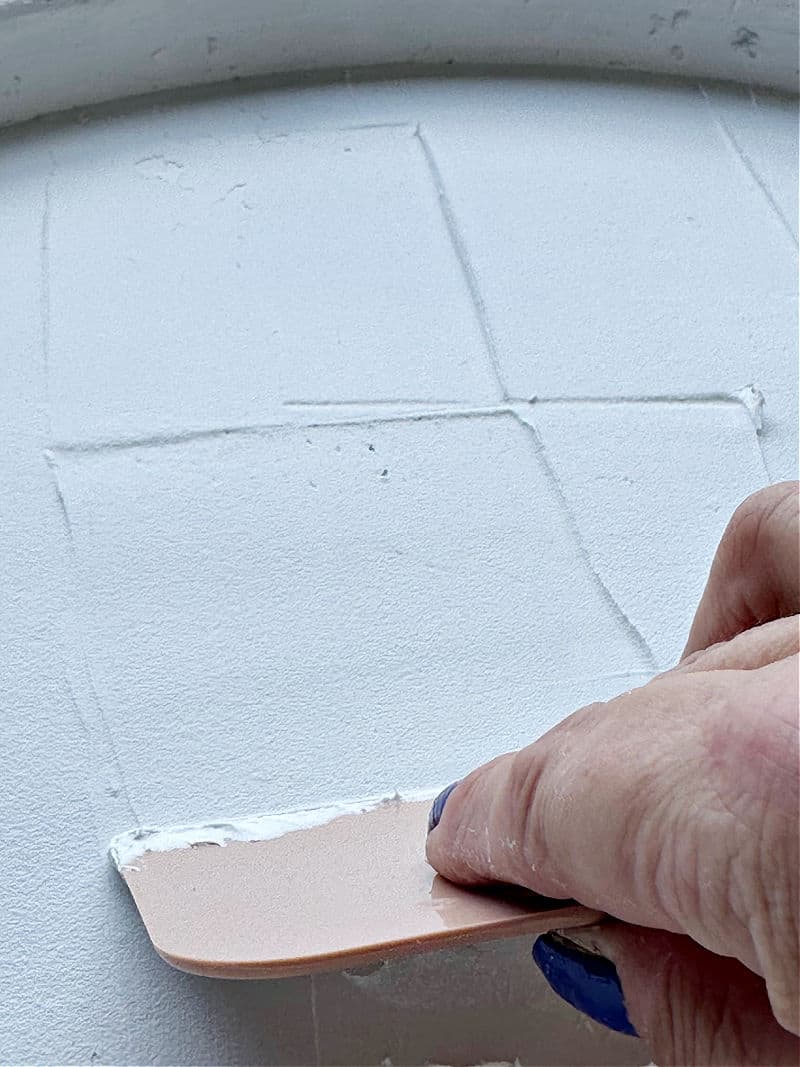
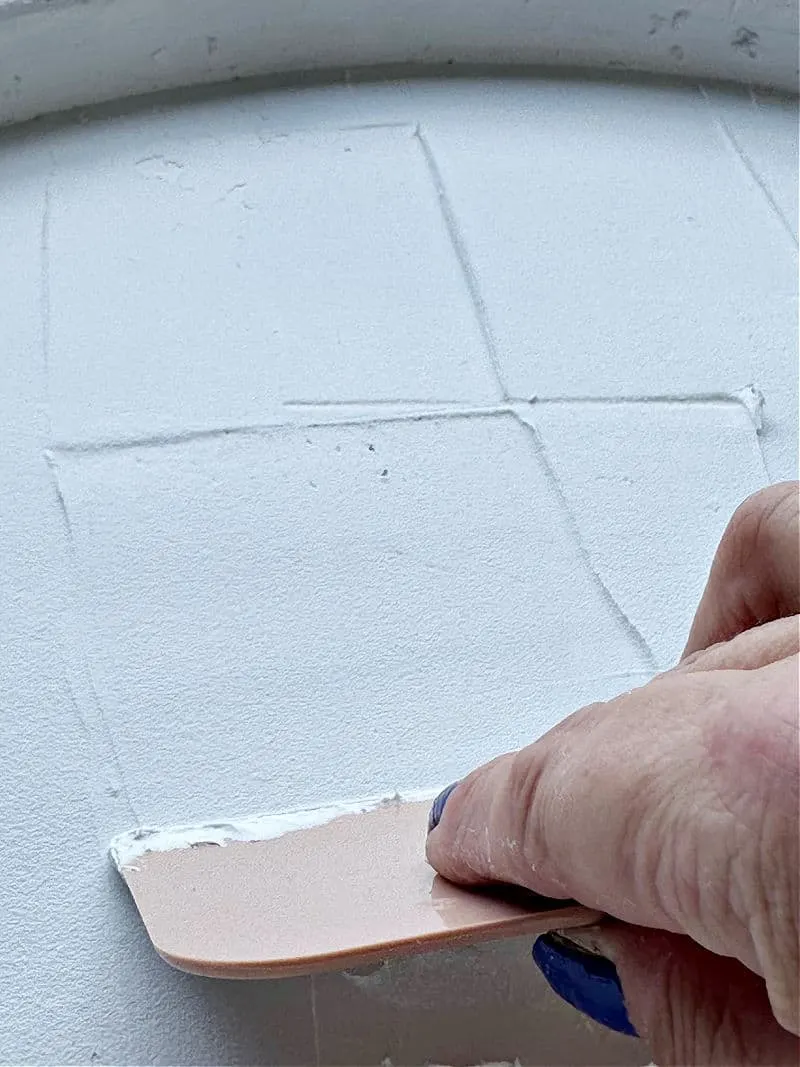
Step 2. Add a layer of tile adhesive
Start by spreading on a thin layer of tile adhesive.
It begins to dry pretty quickly-within about 15 minutes or so.
I recommend working in sections to make it easier.
Step 3. Begin laying broken china
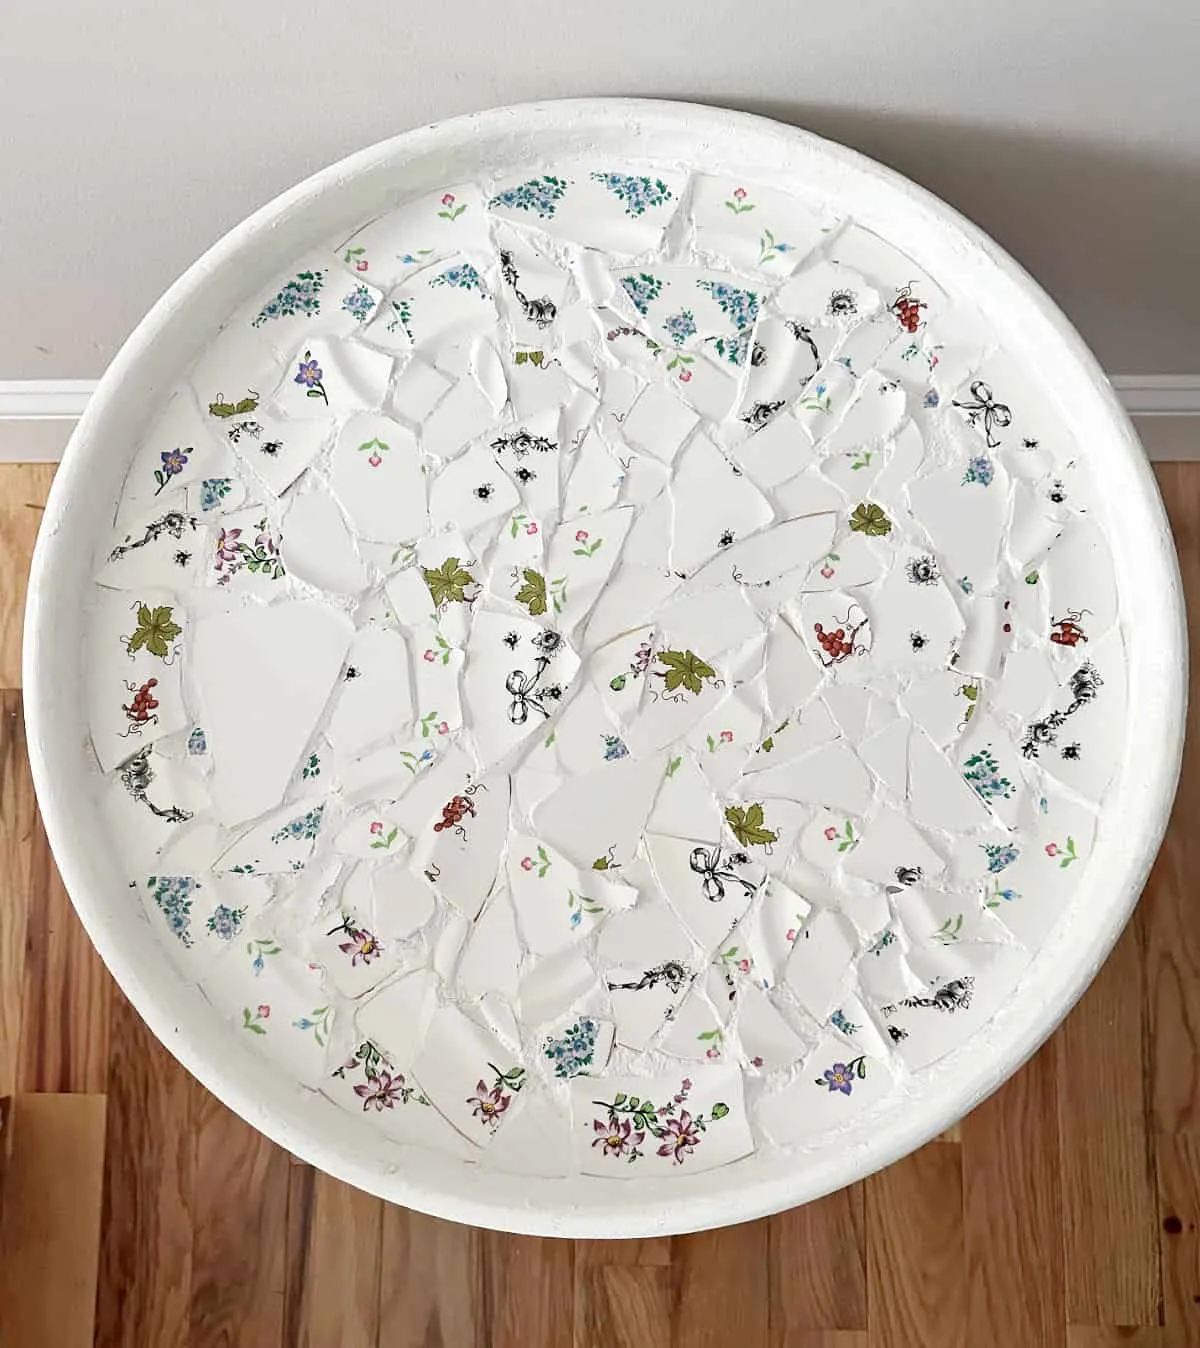
Start laying your broken pieces in the center of the table working your way out.
It helps to have a rough idea of where you want the pieces to go before you secure them.
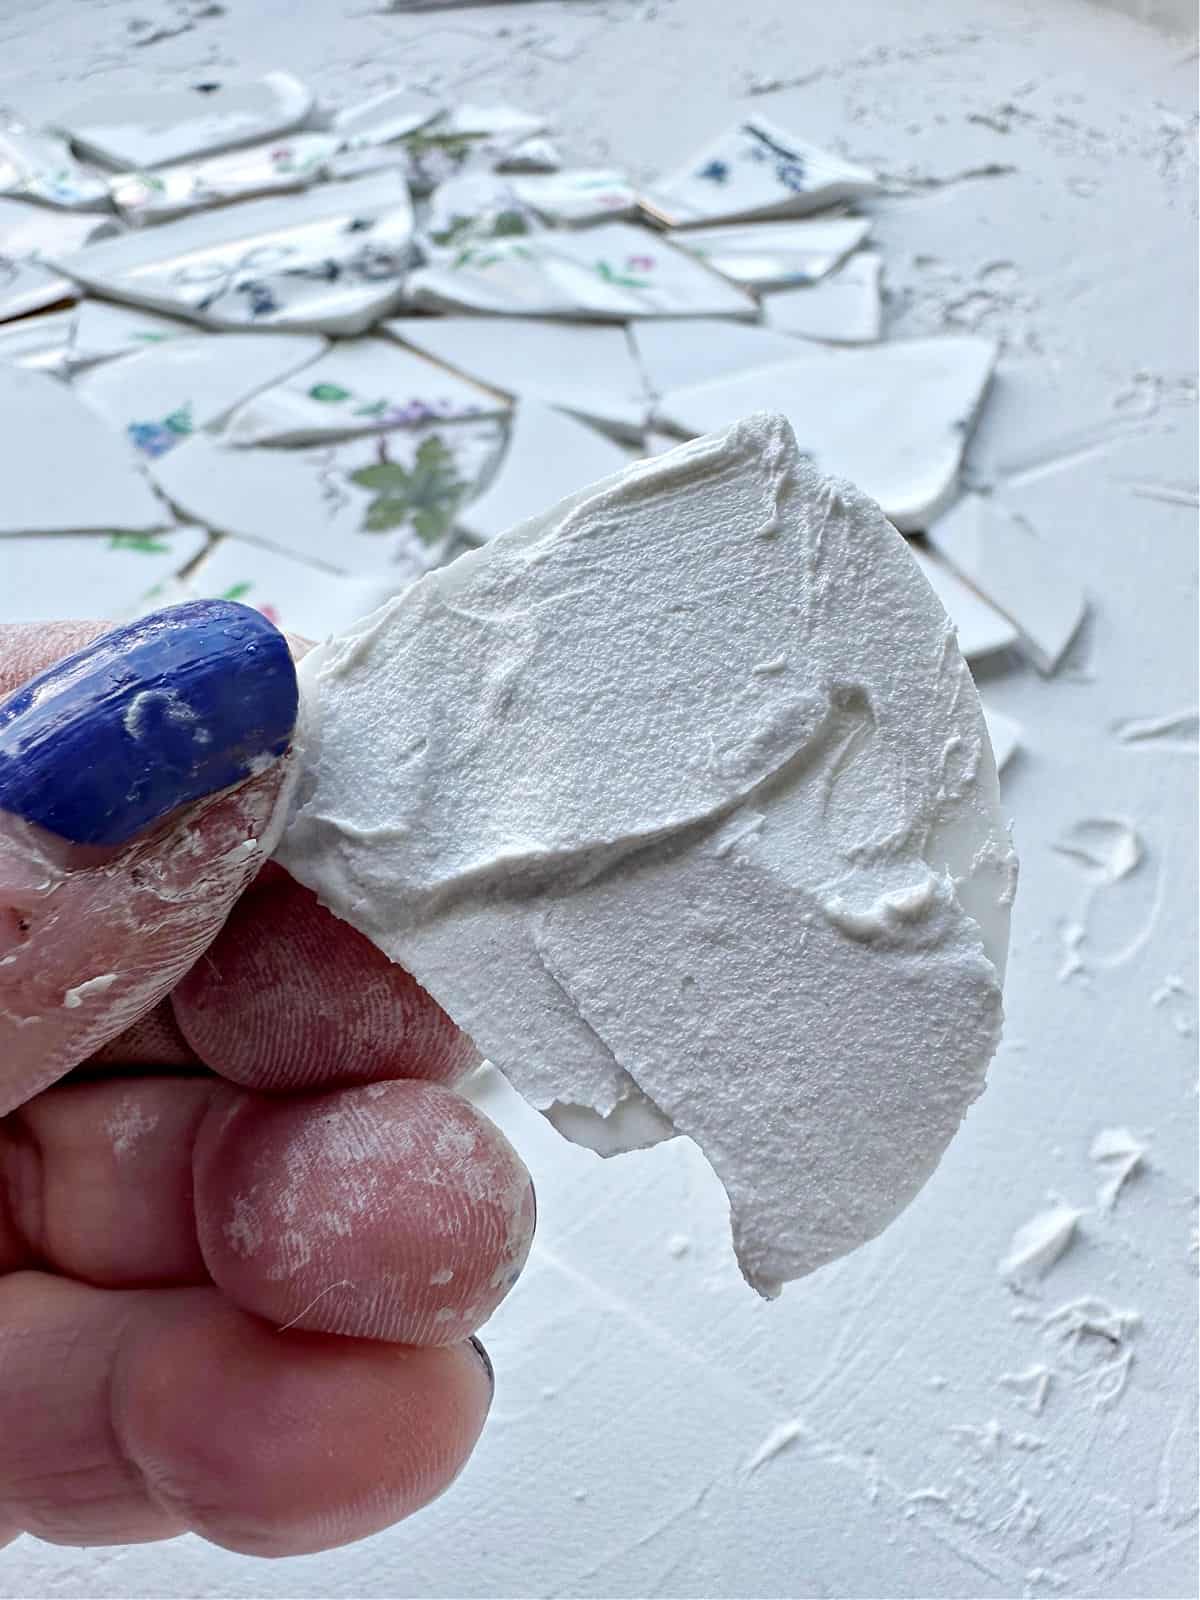

Spread the adhesive on the back of the piece as well.
When you place it on the table press it down to secure placement.
Step 4. Continue adding pieces of broken dishes
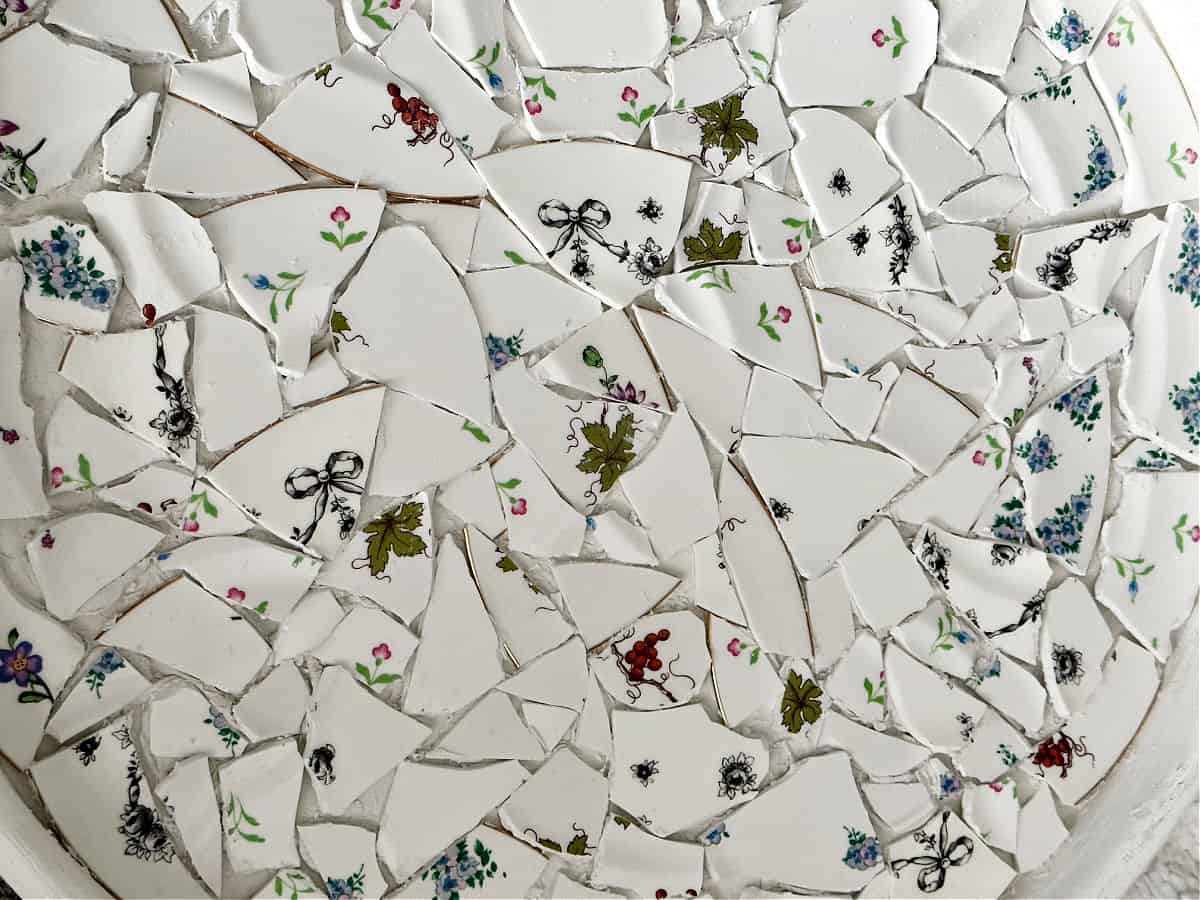
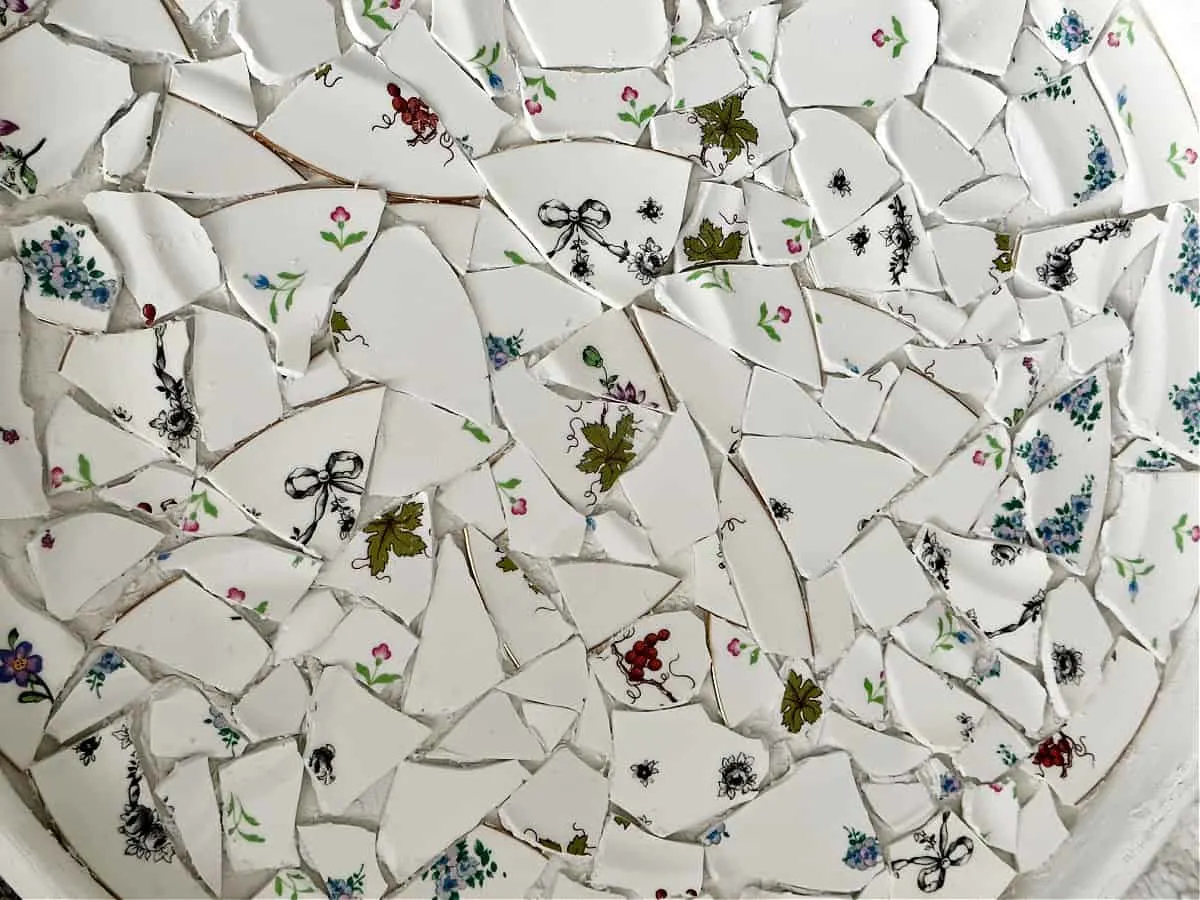
Repeat this process of adding the broken dishes to cover the entire table top.
It really is like putting a puzzle together.
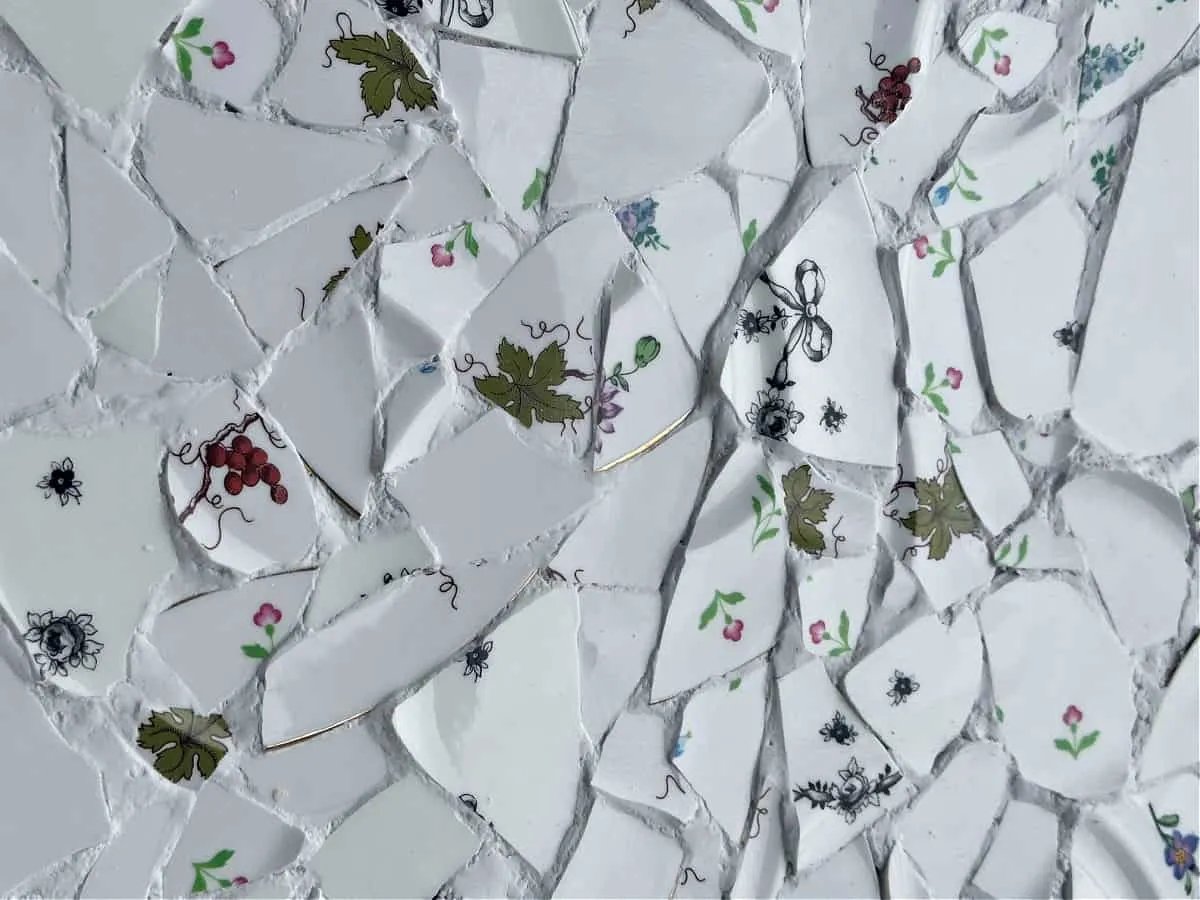
Because my dishes were broken and not cut to size, I had a little bit of trouble getting all the pieces to fit.
To help with that, I used tile nippers to trim a few pieces.
If you have china plates that you want to cut yourself, you can cut them to fit ahead of time.
It does get easier the more you use the tile nippers.
This process is time-consuming because the table top is fairly large.
I just put my favorite Stevie Nicks music on and sat outside on my balcony with a glass of wine. 🙂
It was surprisingly relaxing.
Step 5. Let dry
Once all your pieces are added, let the tile adhesive dry for 24 hours.
You can probably start after a few hours, but I decided to wait.
You don’t want all your hard work to go to waste.
How to Add Grout to Mosaic
Step 1. Add grout
Use a small spreader to fill in between the dishes with grout.
Be sure to wear gloves and use your fingers to get into all the tiny grooves.

Take your time and be sure to cover all the gaps.
Again, this is time consuming but the end result is so worth it!
Be sure to let the grout dry for 24 hours.
It will be set to touch after about 2 hours, but you definitely want to give it a full 24 hours.
Step 2. Smooth the grout
I used pre-mixed grout to make it easier.
It does crumble a bit, but I was able to smooth it pretty easily using a wet sponge.

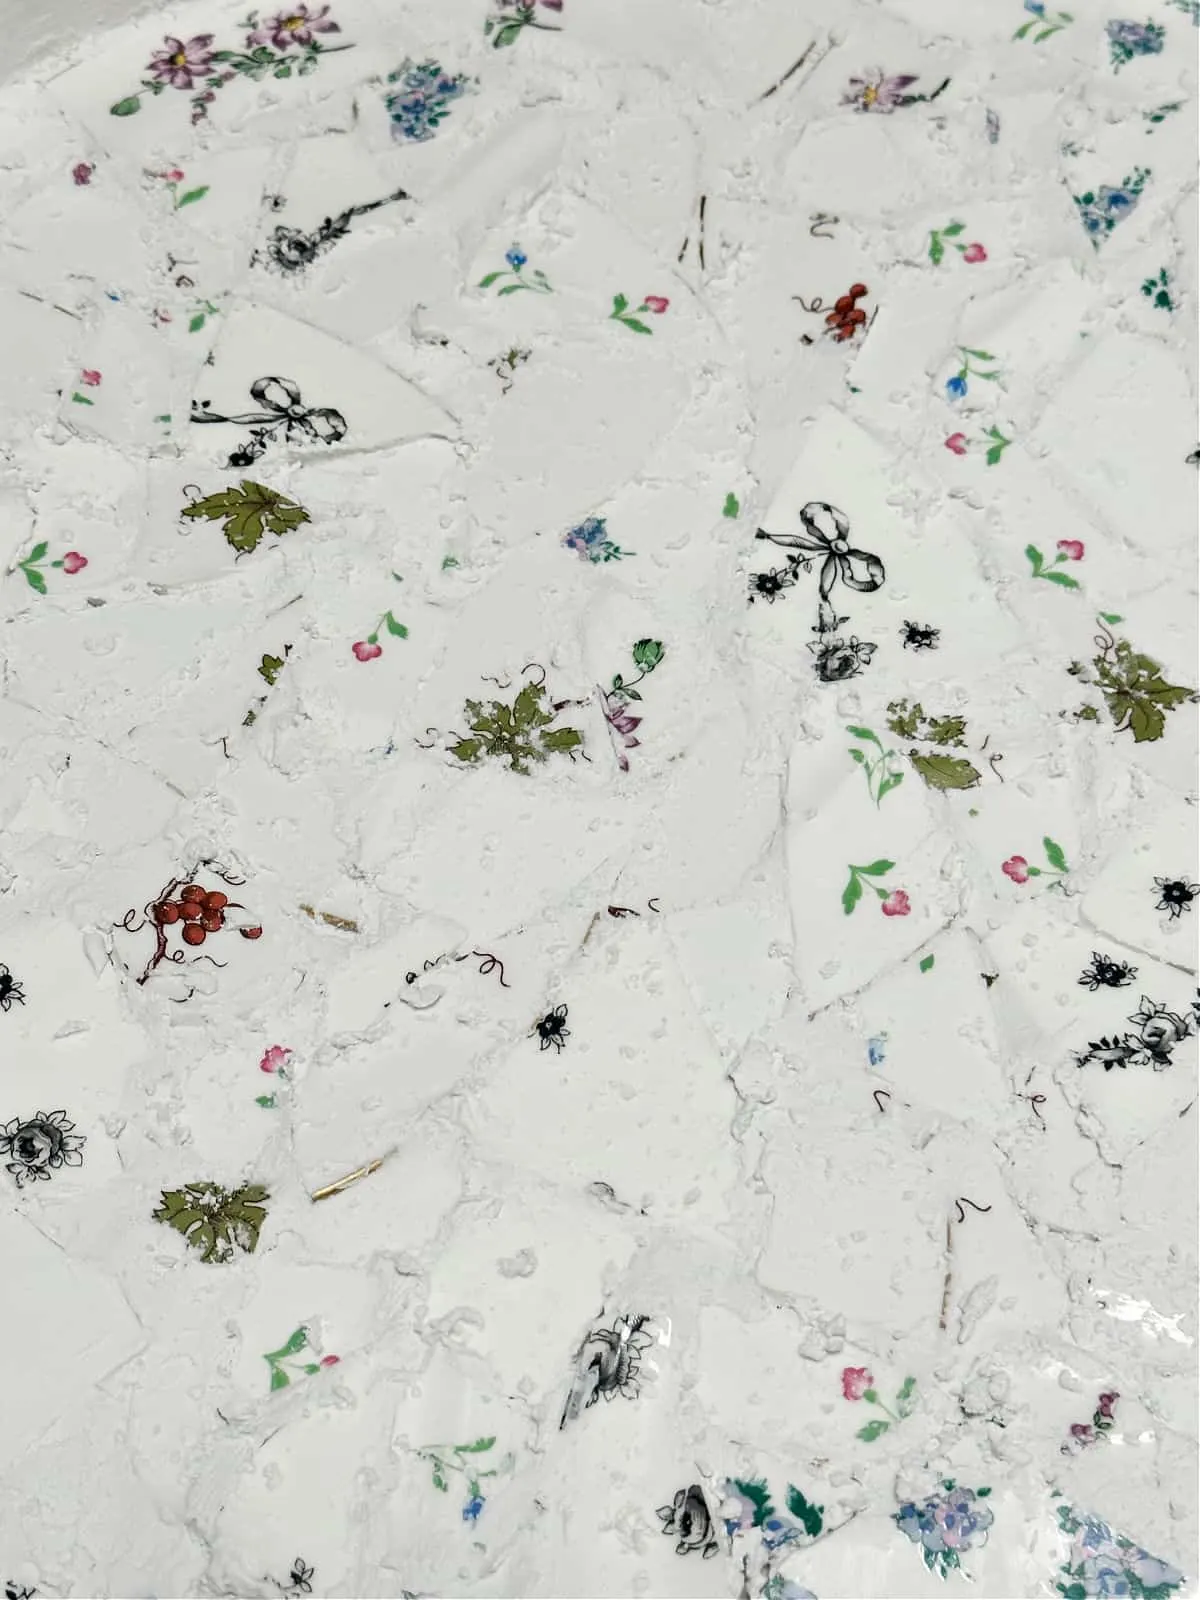
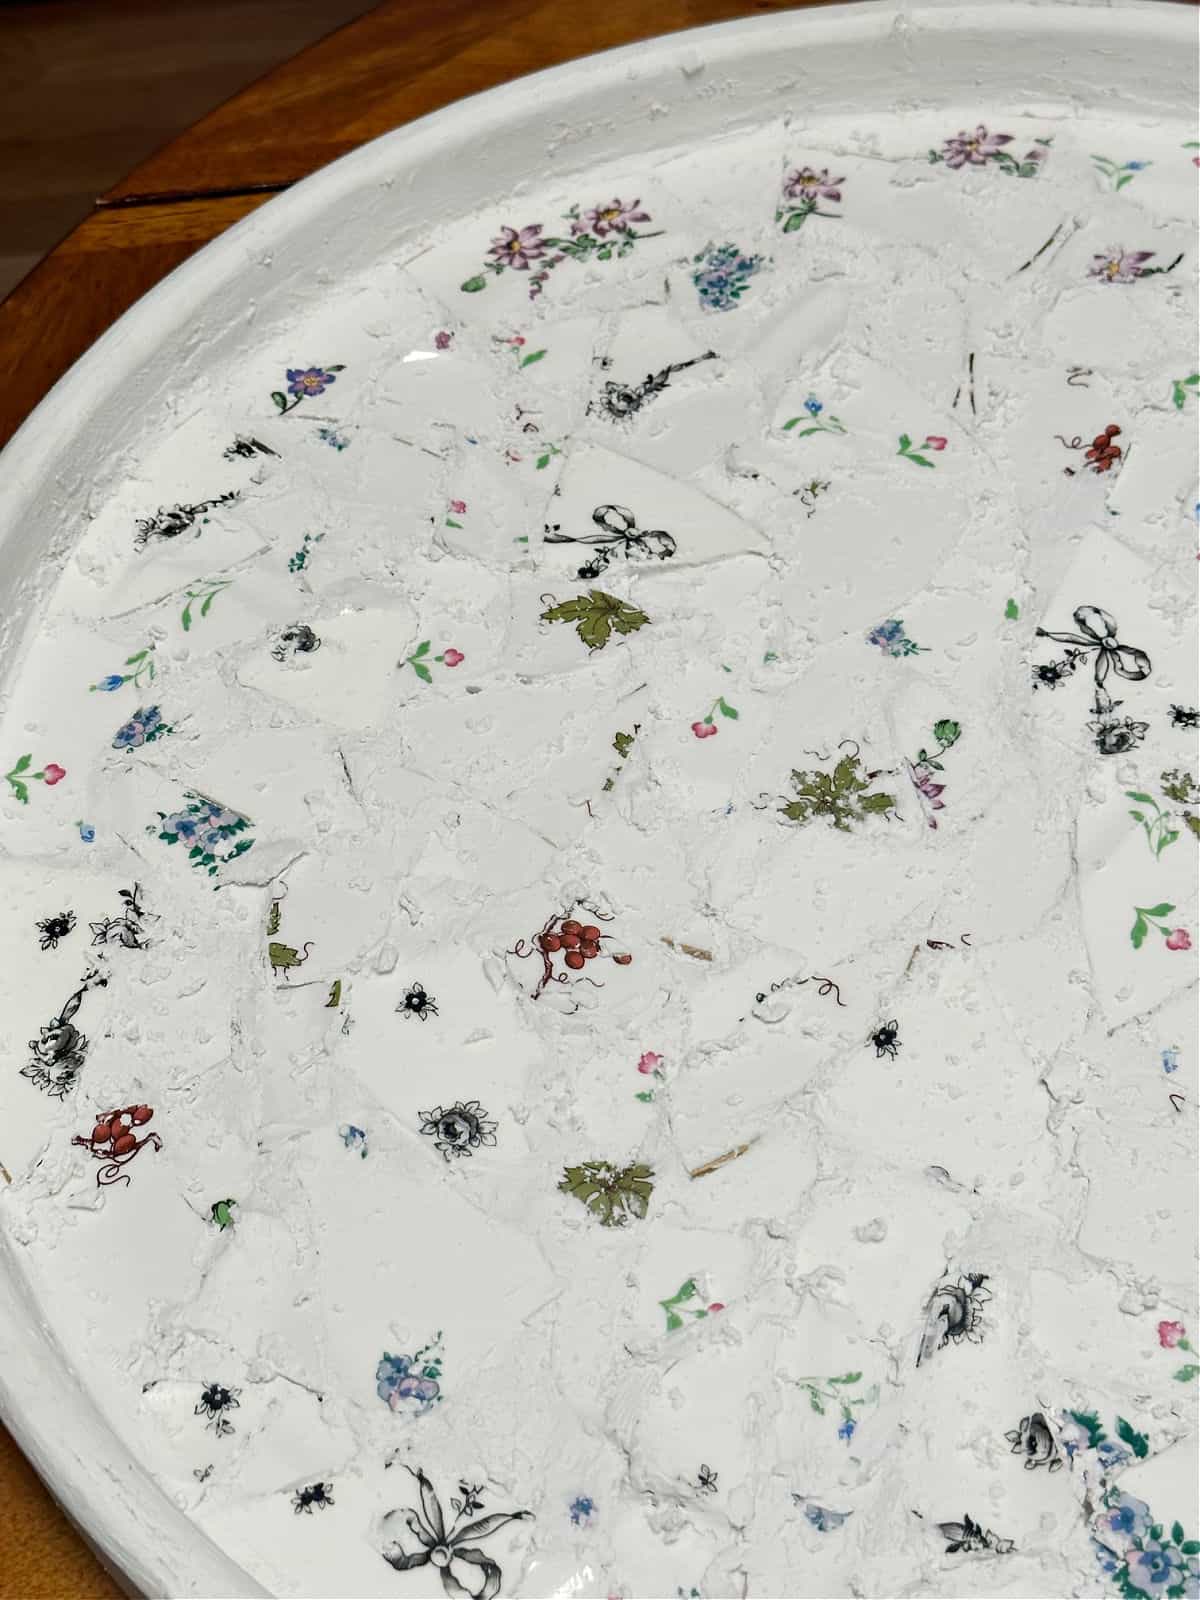
Step 3. Shine the table top
I did spend quite a bit of time removing the excess grout and cleaning the pieces of china.

Step 4. Touch up as needed
I did need to touch up the paint around the sides of the table top.
A small foam brush works great for this.

Then I shined up the beautiful china with a clean cloth.
It may take 30 days for the tile and grout to fully set.
You can still use the table, but handle it with extra care during this time.
Step 5. Seal the table top
The instructions on the grout I used say not to seal it for 30 days.
Be sure to check the instructions on your specific grout before sealing.


I do plan to seal it once 30 days has passed.
I’ll be sure to share an updated photo once that is complete.
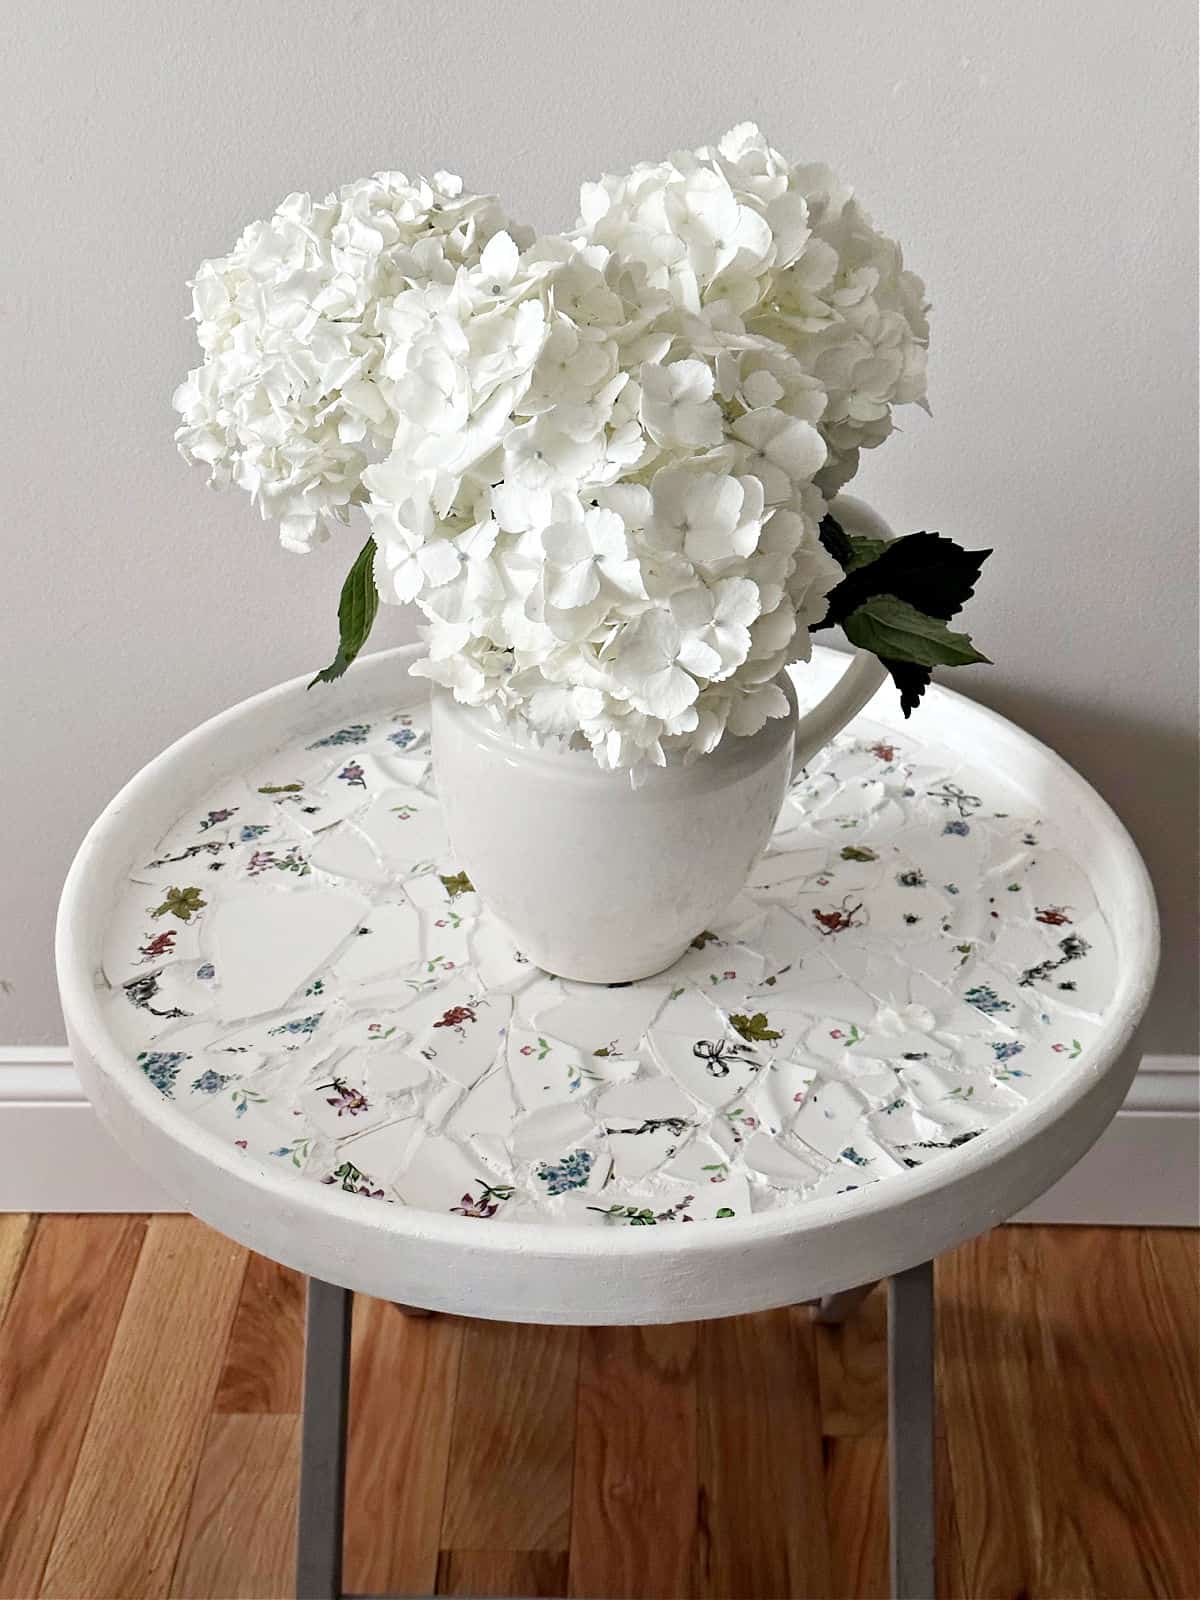
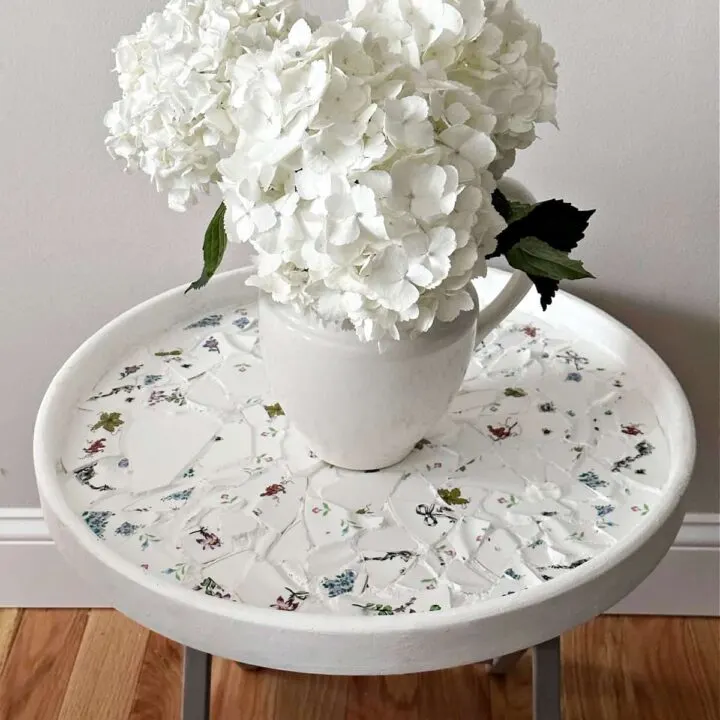
I’m so thrilled with how this beauty turned out.
There will be more mosaic projects in my future.
Because I took a ton of pictures, here are a few favorites.
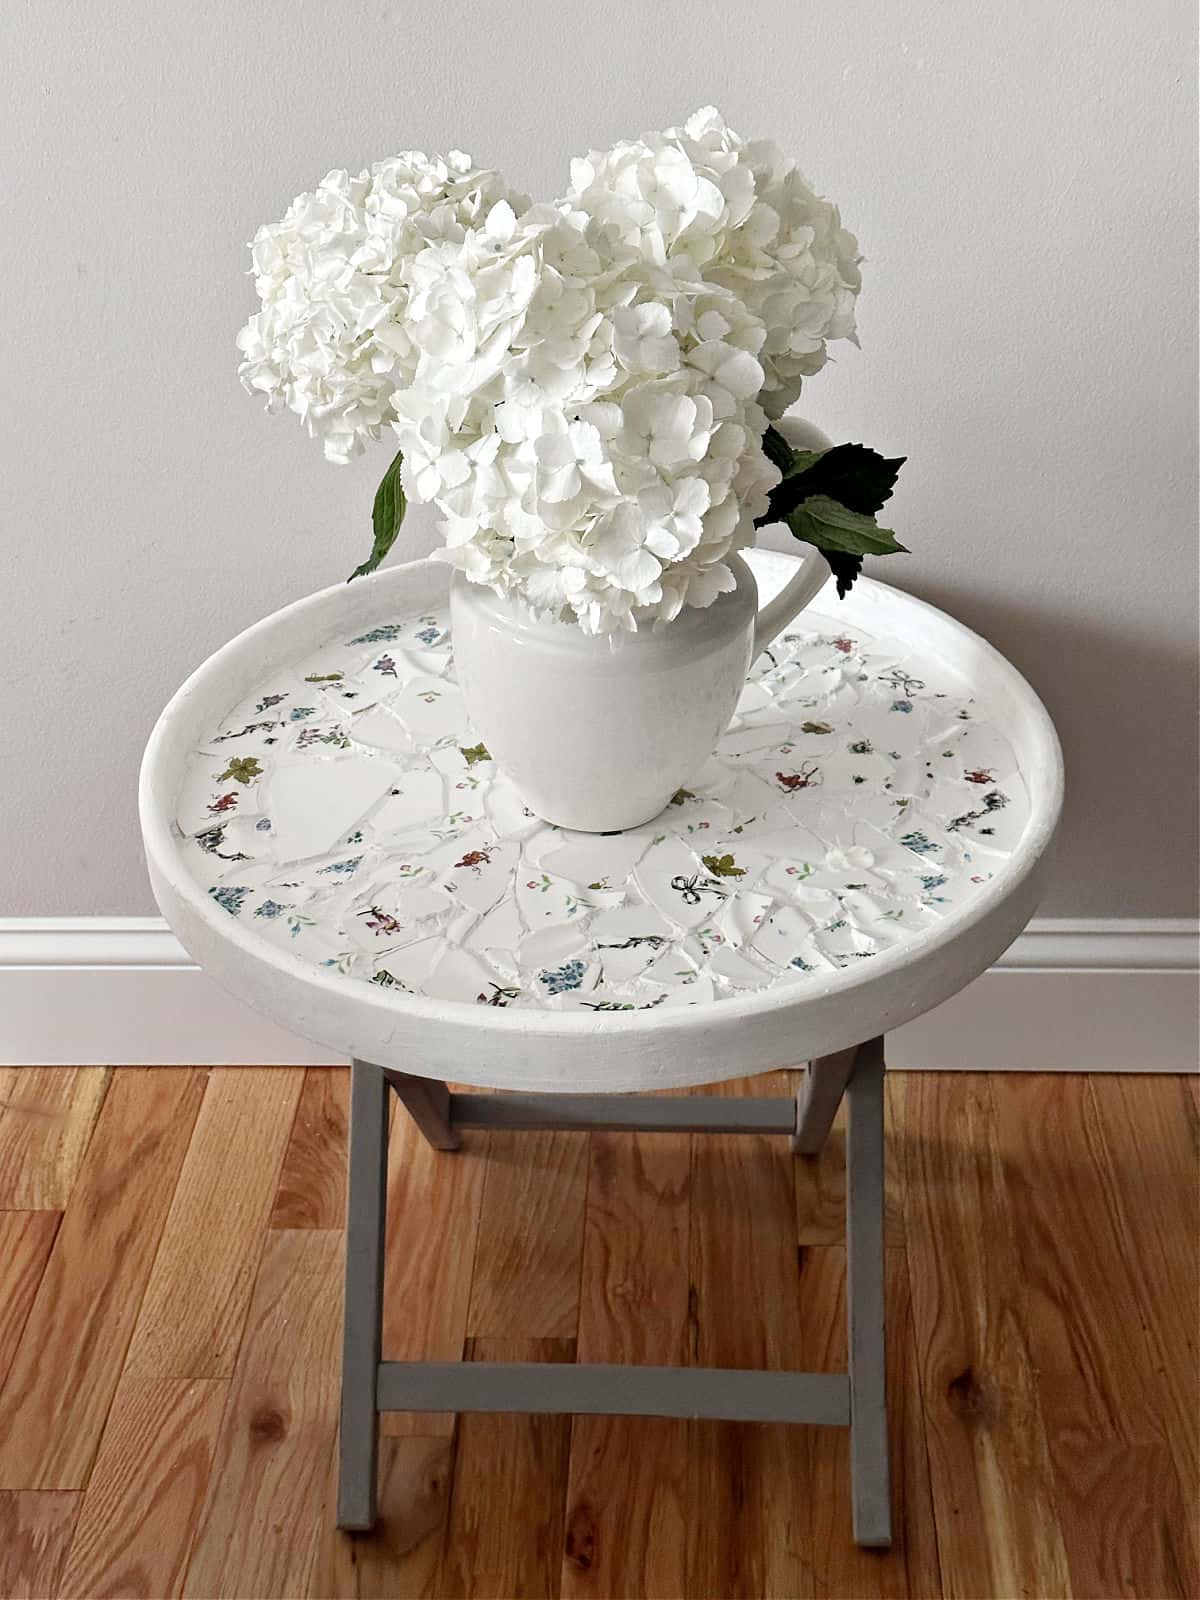
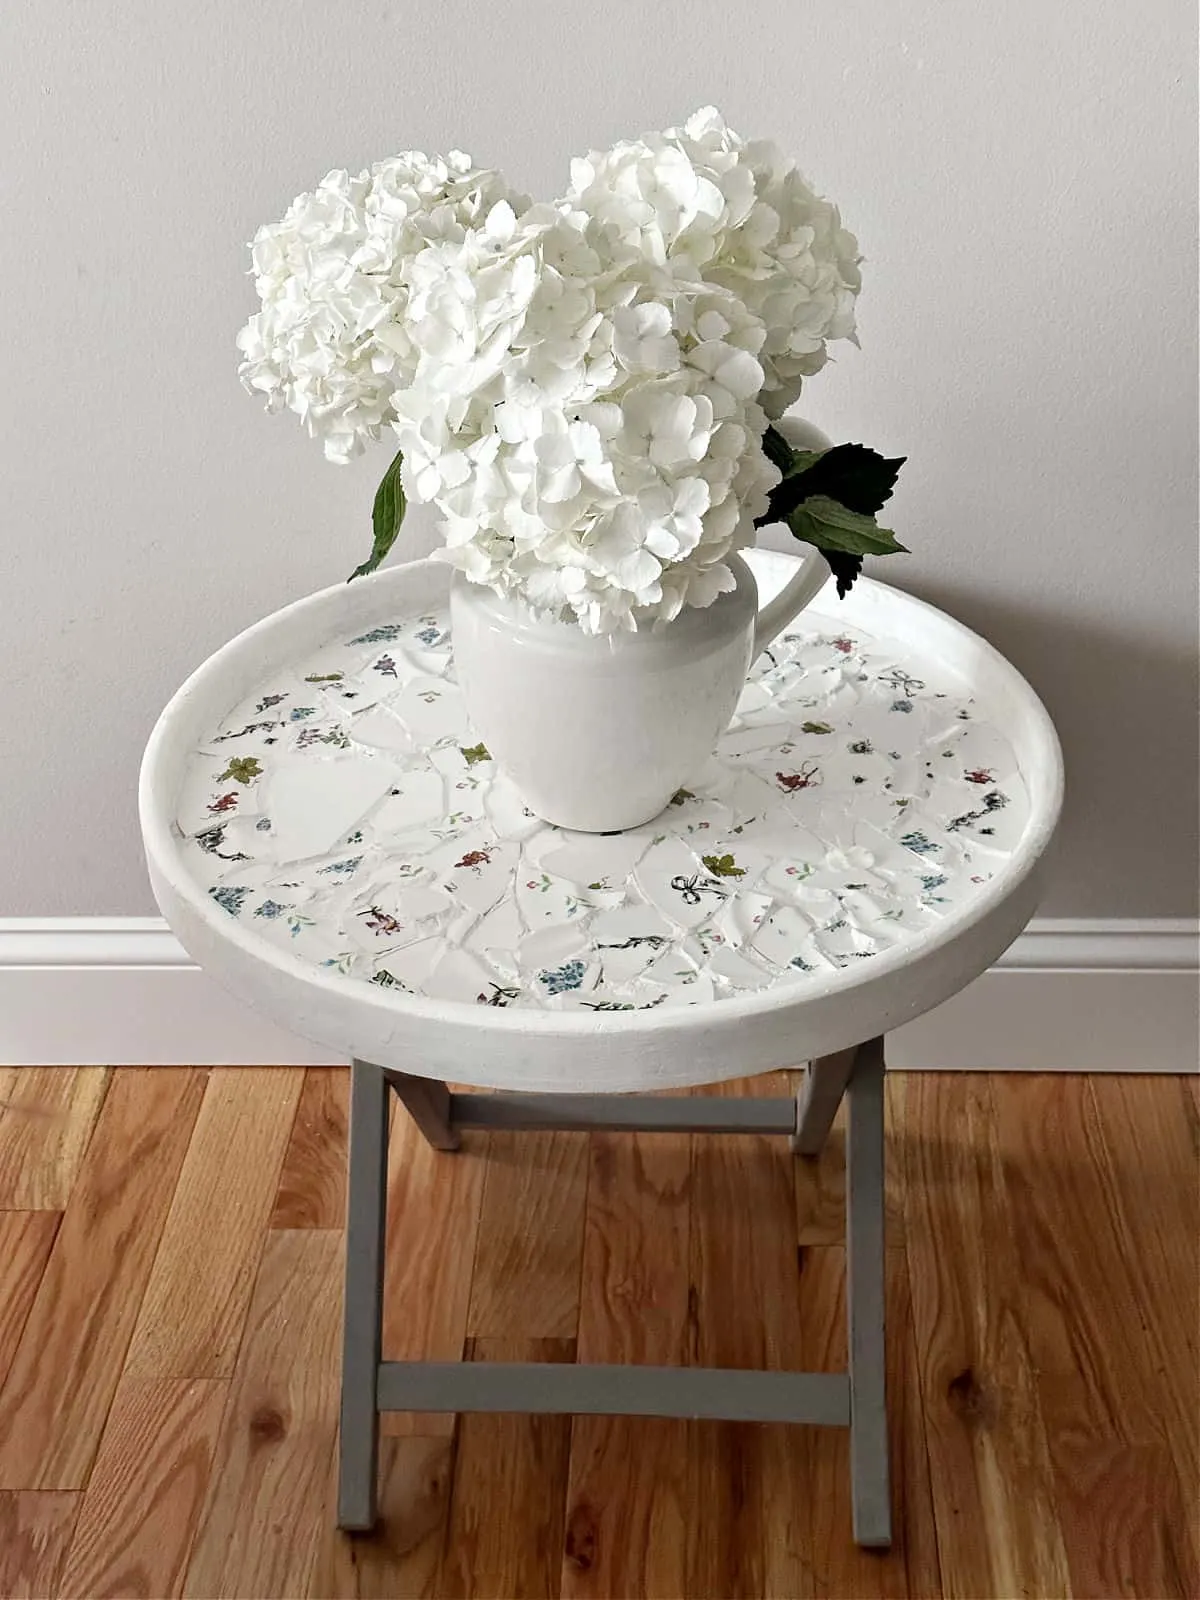
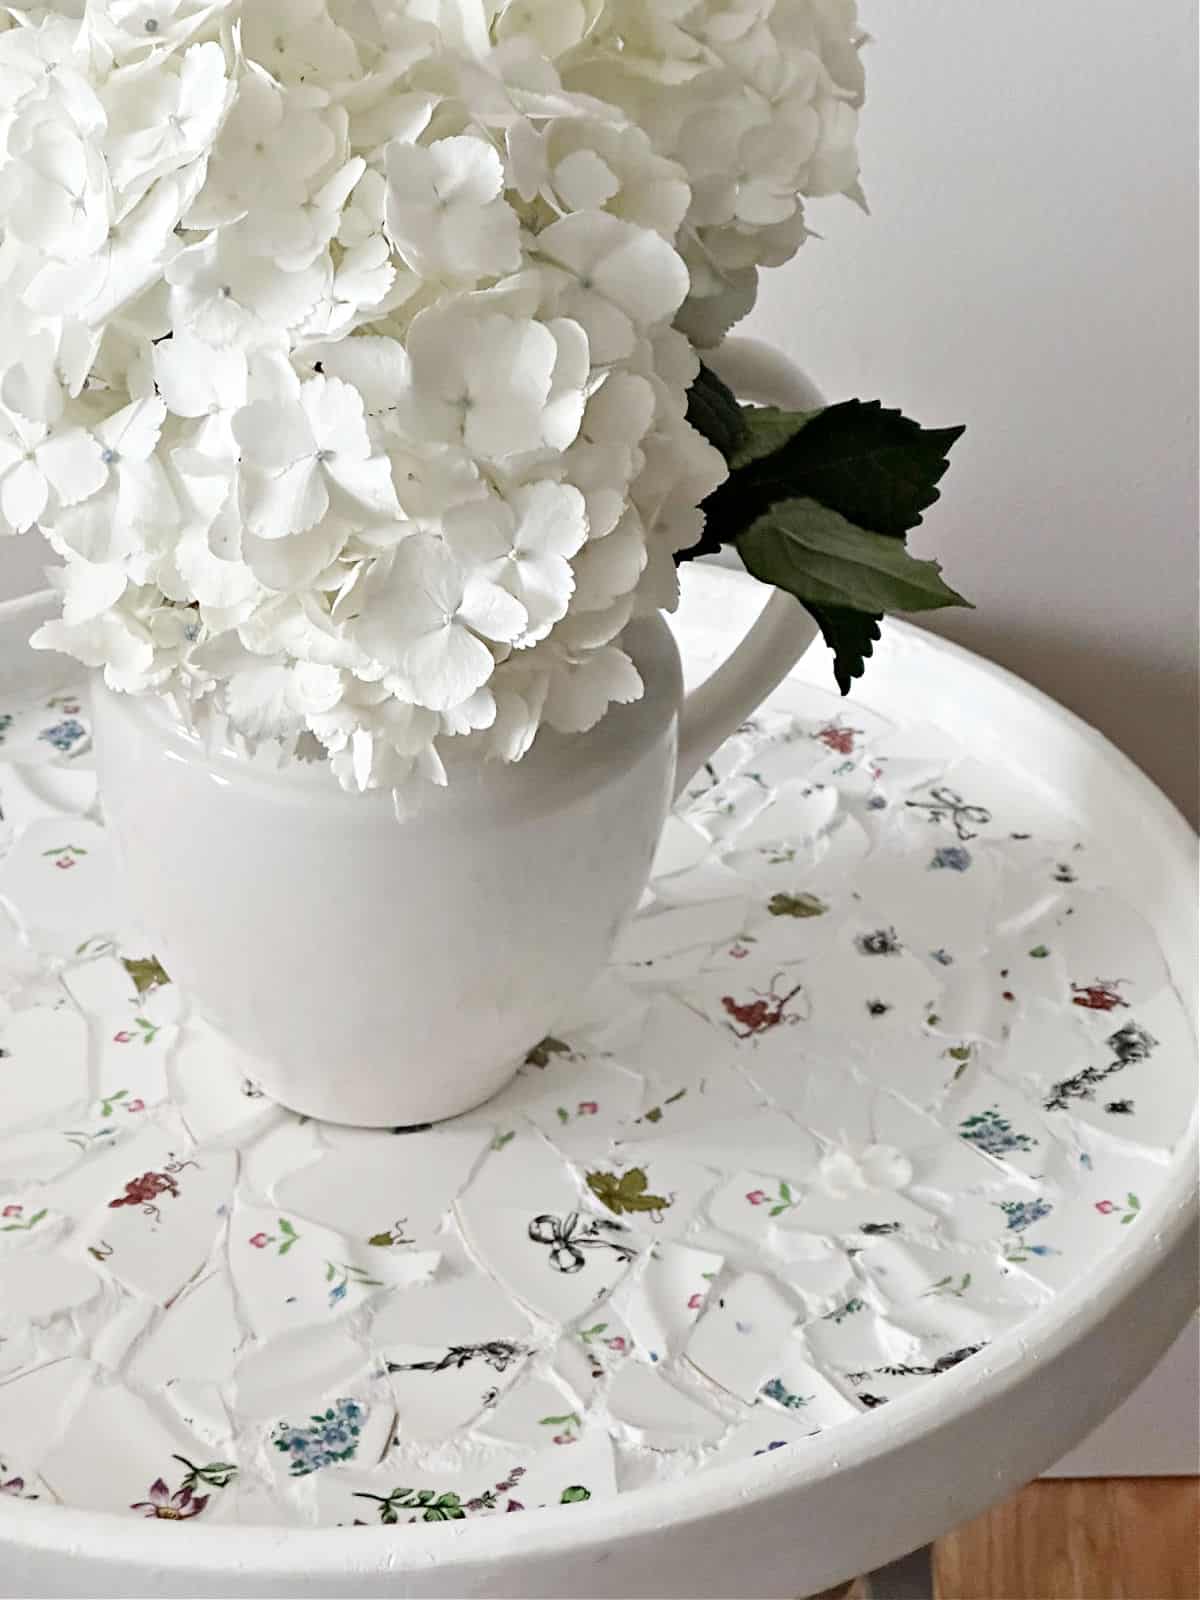
A white ironstone pitcher with hydrangeas looks so pretty on this little table.
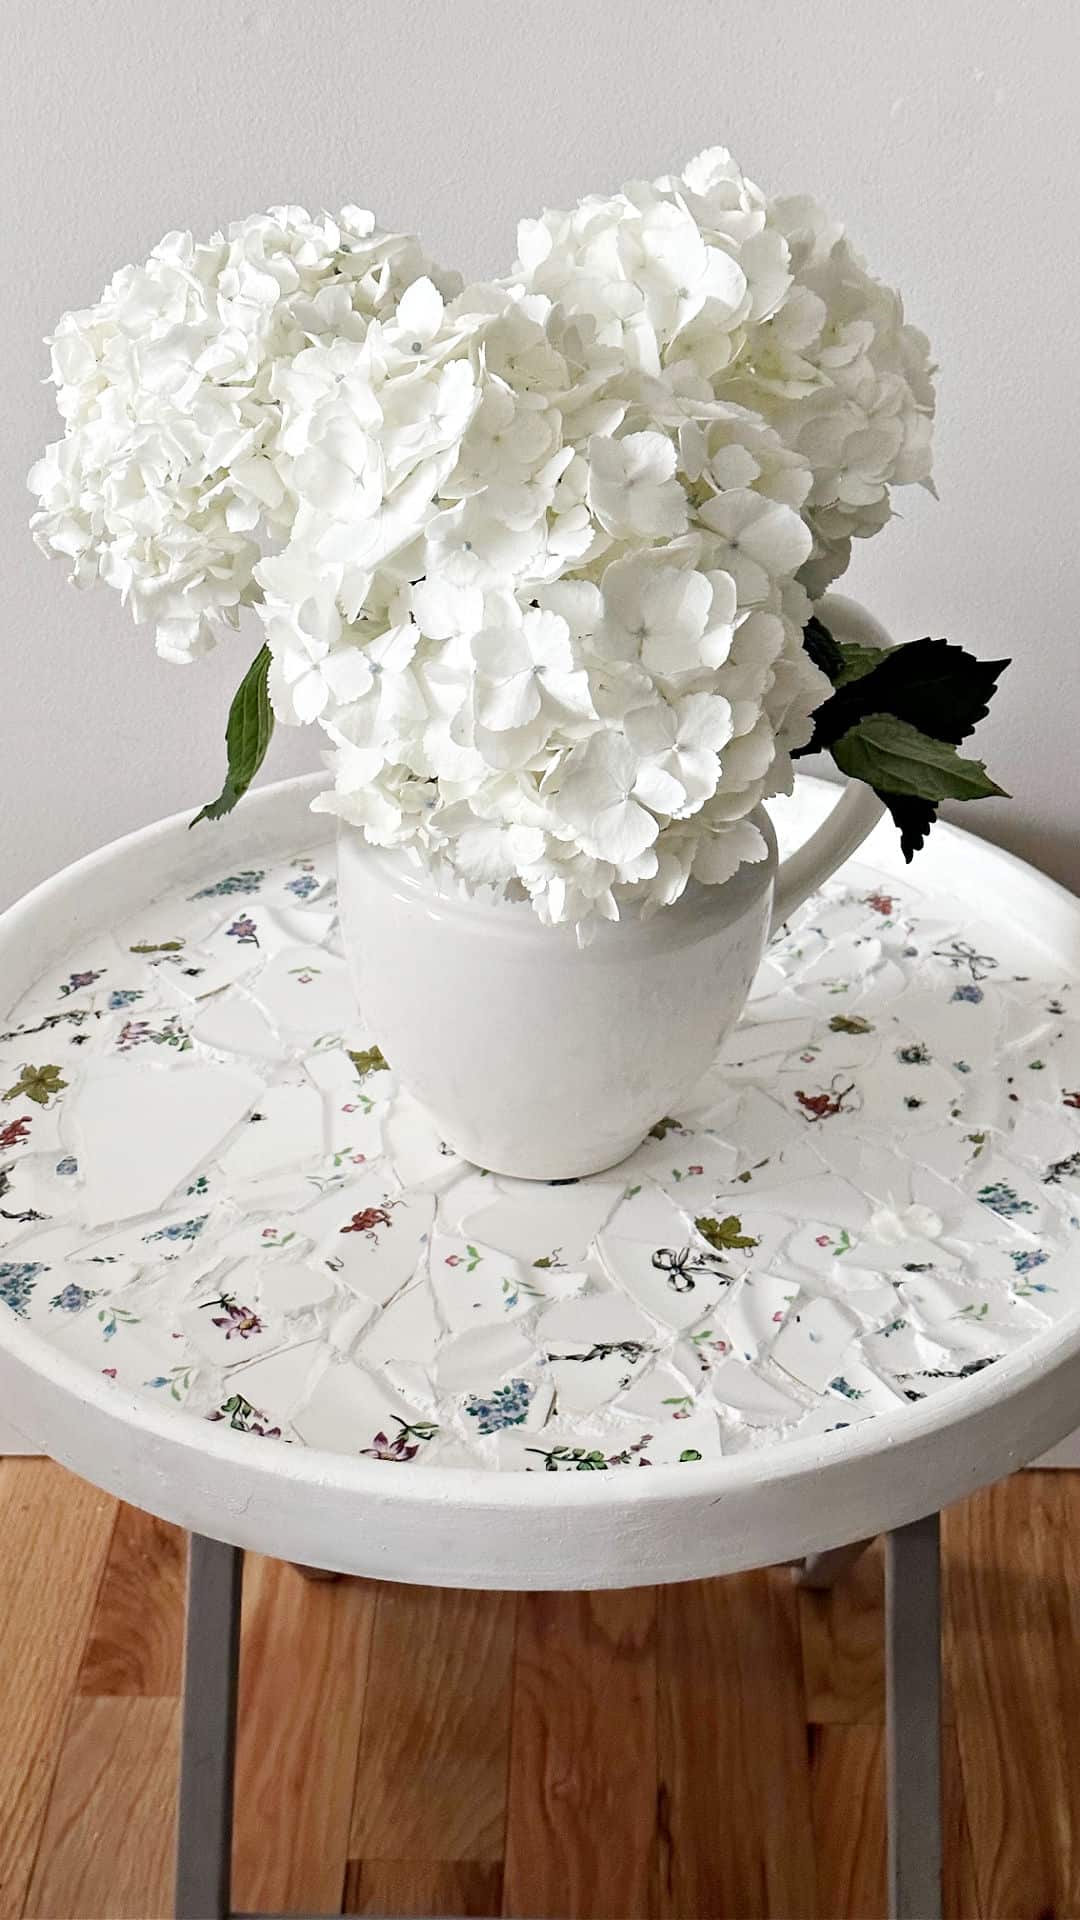
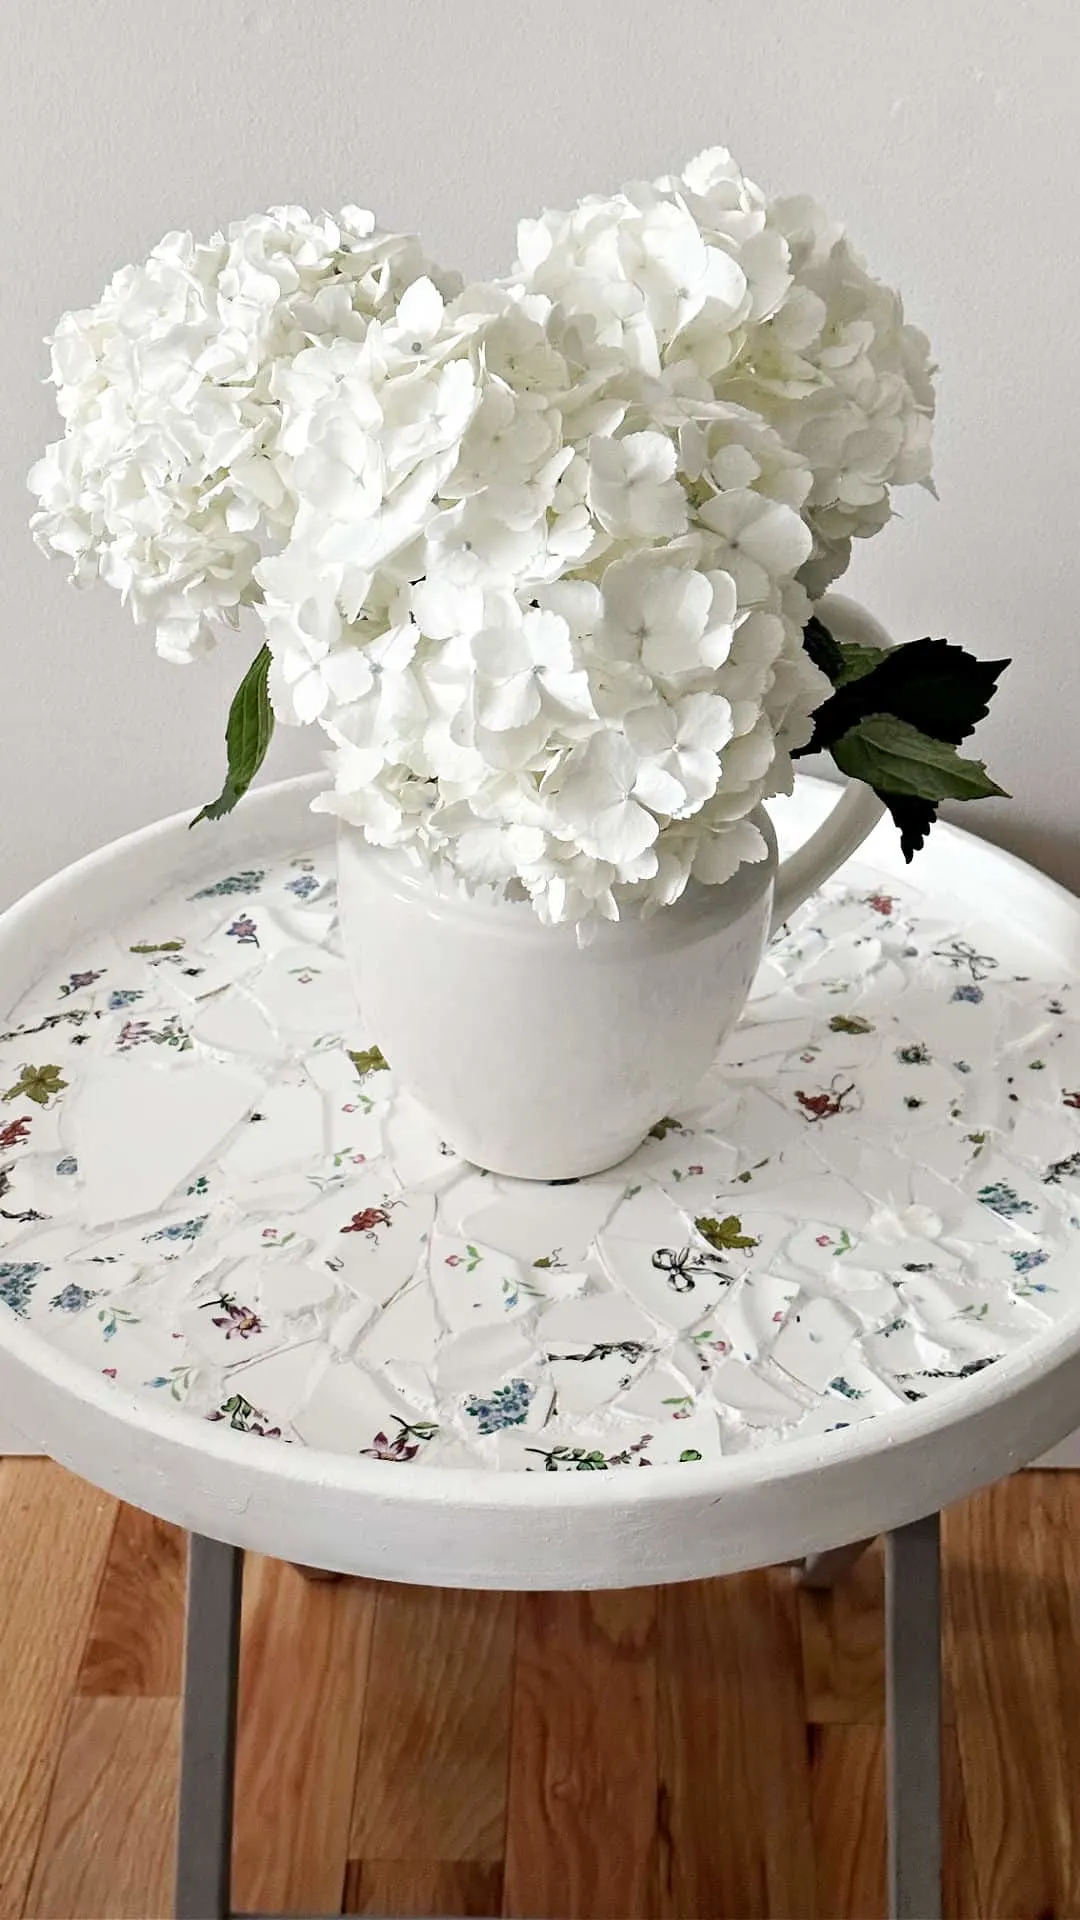
Here’s a close up:

Love this one!

Please let me know if you make your own broken dish mosaic. If so, please let me know in the comments below.

Sharing is caring…please PIN the below image:

Happy crafting!

How To Turn Broken Plates into a Beautiful Mosaic Table Top
Let me show you how to make a stunning work of art with this mosaic table top using broken china.
Materials
- Pieces of Broken Plates
- Tile Adhesive
- Tile Grout
- Work Gloves
- Damp Sponge
- Tile and Grout Sealer
Tools
- Tile Nippers
- Spreader
Instructions
- Prepare Your Table Top
- Add a layer of tile adhesive
- Begin laying broken china
- Continue adding pieces of broken dishes
- Let dry
- Add grout
- Smooth the grout
- Shine the table top
- Touch up as needed
- Seal the table top after 30 days
Recommended Products
As an Amazon Associate and member of other affiliate programs, I earn from qualifying purchases.
-

 FQing 500g Ceramics Mosaic Tiles Irregular Shapes for Mosaic Crafts Blue and White Porcelain Vases Picture Frames Flowerpots Tiny Mosaic Pieces for DIY Home Decoration Art ( Color : 01 )
 -
 Savogran 12860 Ready-To-Use Tile Grout 8 Fl. Oz
 -
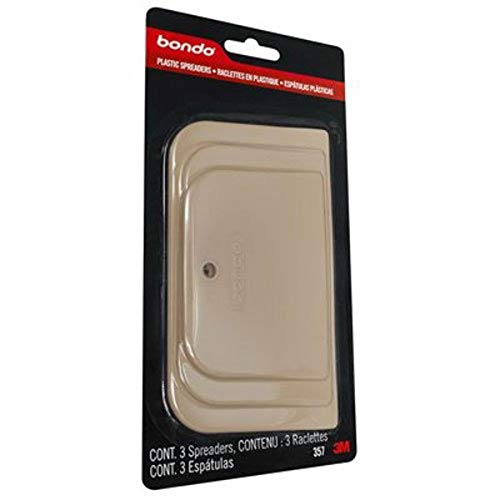 Bondo Spreader 3-Pack, 00357, 3 Sizes Per Pack
 -
 Custom Building Products ARL4000QT 1 Quart AcrylPro Ceramic Tile Mastic, White

You may also like these DIY table projects
- Restoration Hardware Weathered Oak Table DIY
- Sea Shell Shadow Box Table
- Decoupage Table DIY
- Thrift Store Cane Top Table Makeover
- Live Edge Wood Console Table
- DIY Resin Wood Table
- Indian Inlay Stenciled Table
- Wooden Cable Spool Table
You can find me on social media below:
Donna via Funky Junk Interiors
Friday 3rd of July 2026
Boy, talk about "Thanks for breaking this, naughty kitty!" Your broken plate table is amazing, Michelle! I love the white floral mix, it's so pretty! I've always wanted to try this too... I just may have to go find a cute plate my cat can break!
DeeDee
Tuesday 23rd of April 2024
I have a set of plates and mugs of the black and white ones like yours with the bow. I want to do this someday. We inherited a set of white Limoges china from my husband's great grandmother. Included were many pieces that were chipped. I took all of those and set them aside to eventually make something like yours - either a tabletop or tray.
Joanne
Wednesday 3rd of May 2023
That is beautiful!