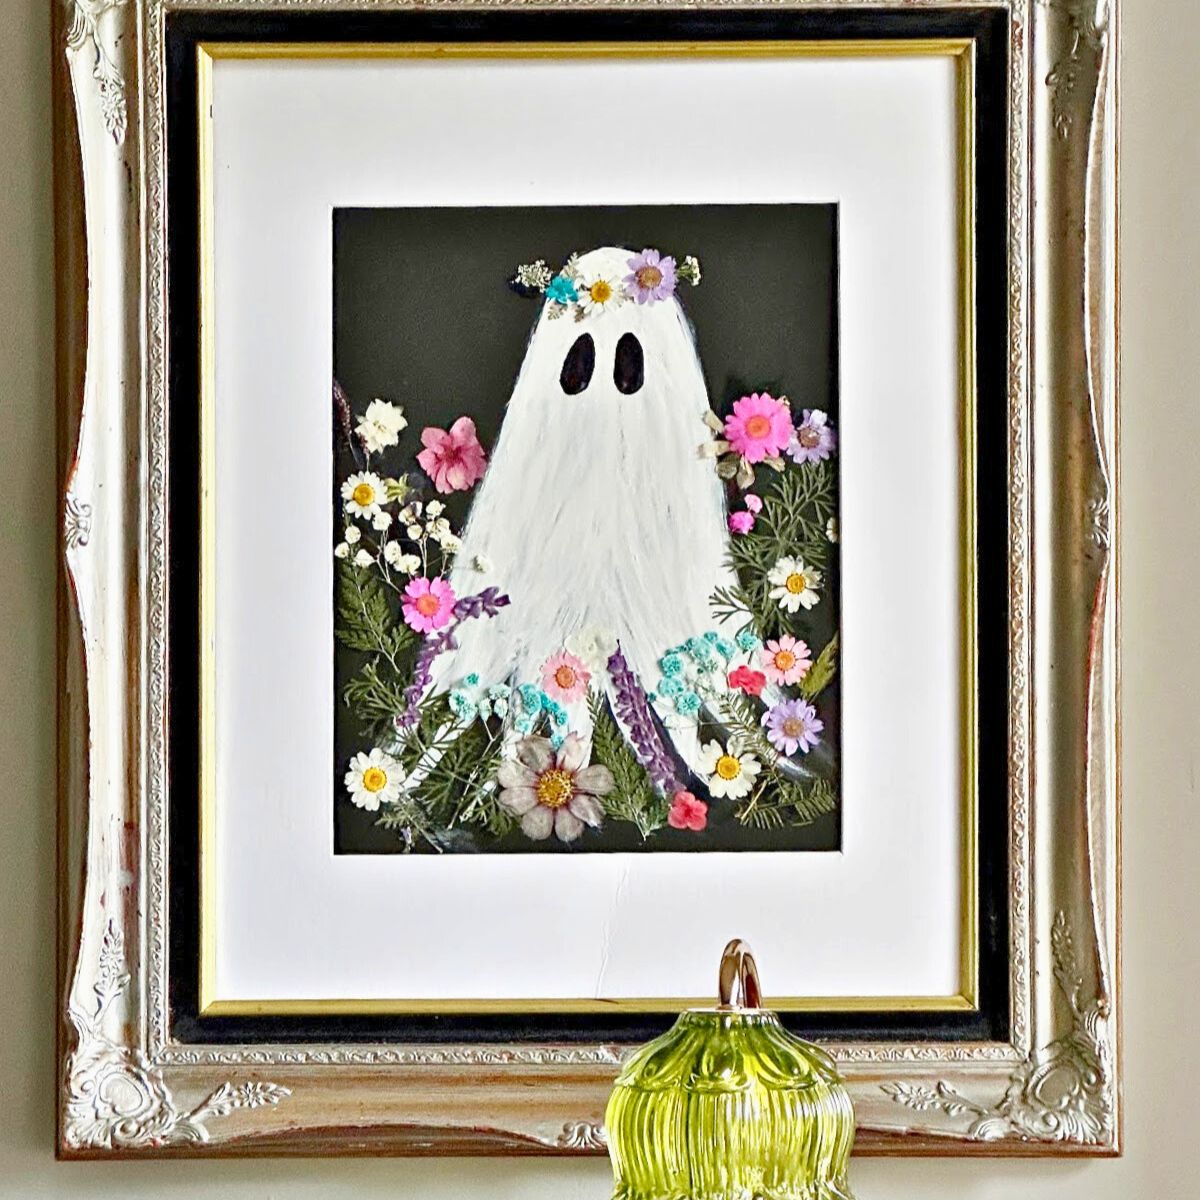
Create a cute ghost painting with pressed flowers using a Dollar Tree foam board! Perfect for Summerween or Halloween and so easy to make!
This post contains affiliate links at no extra cost to you. Please see my full disclosure here.
Ghost Painting Trend
I’m super excited to share this sweet little ghost drawing with you. I know it’s early in the season, but I’m jumping on the Summerween trend, although I will keep this up for the entire Halloween season.
Who am I kidding; I just wanted an excuse to craft! 🙂

There are tons of cute ghost paintings all over social media. Be sure to check out the tutorial for the thrift store ghost art that I made last Halloween.
You may also like the air dry clay ghosts I shared last week. They will blend perfectly with this ghost painting thanks to the blue and white chinoiserie flowers.
Supplies Needed for Cute Ghost Painting
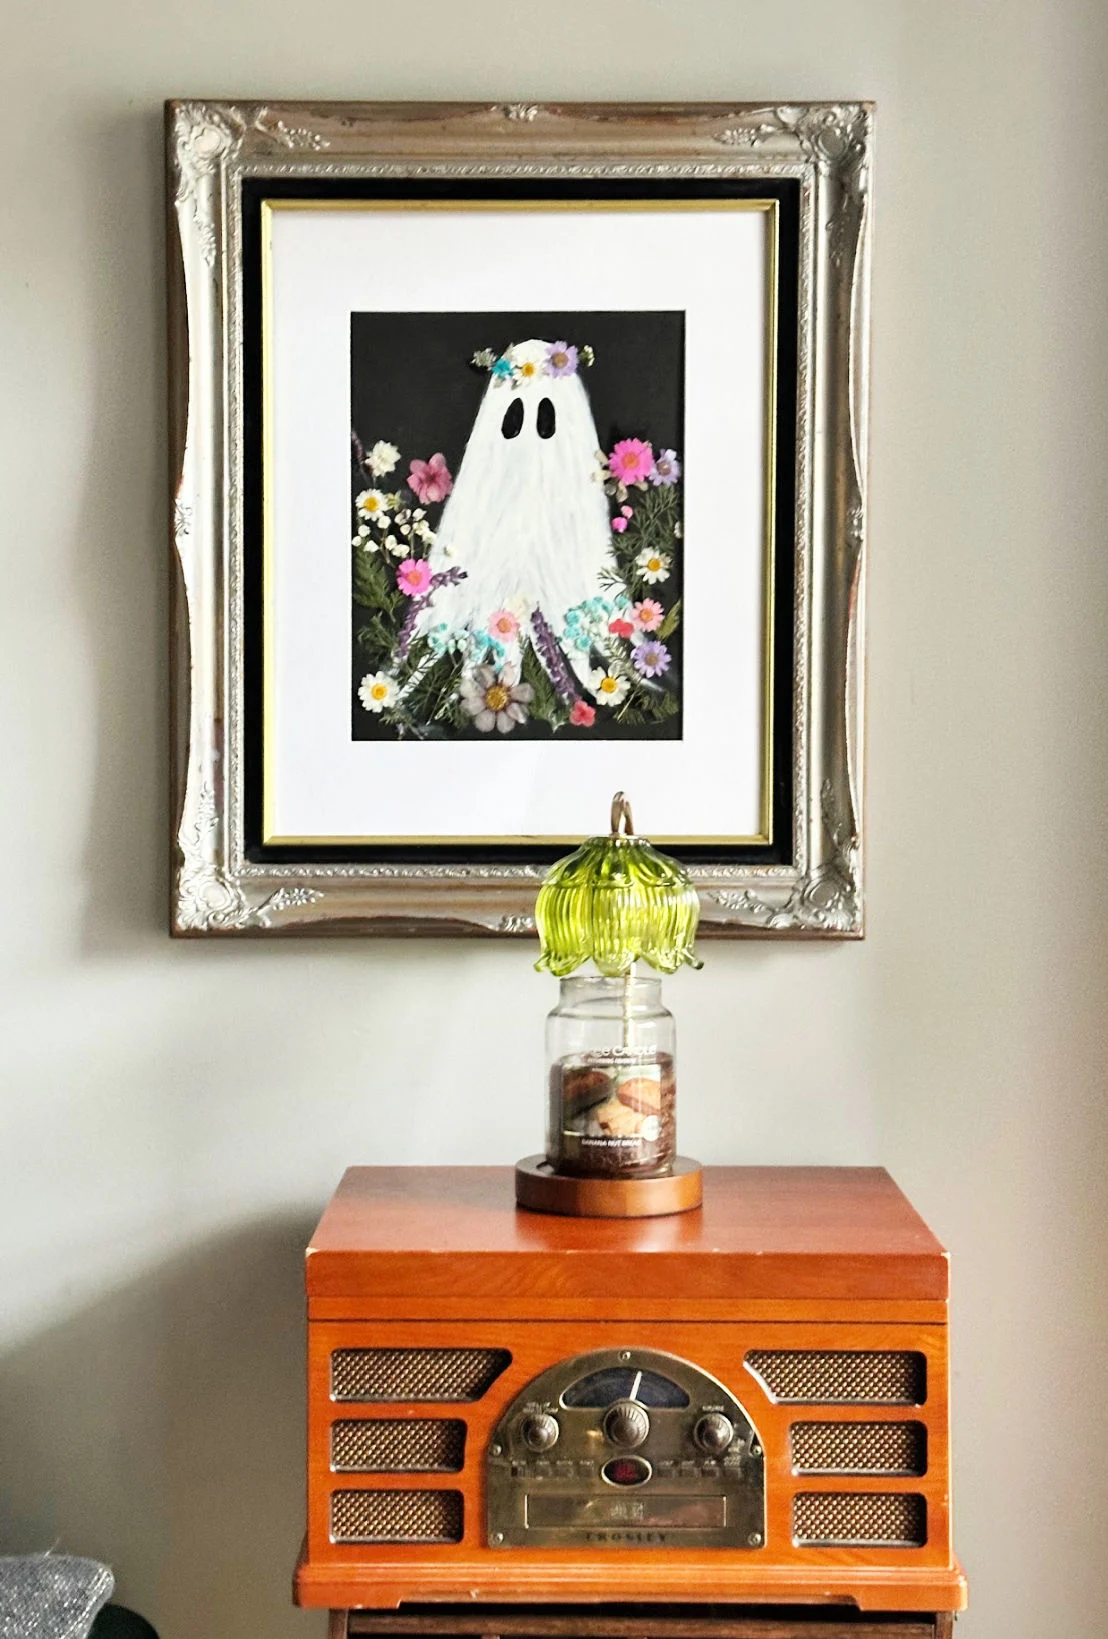
This year I wanted to use a black foam board from Dollar Tree to as the base for my wall art. You can’t beat the price.
This is the same process I used to make the pressed flower wall art and the same frame!
To save room, I keep the old art inside the frame and place the new one on top. It not only saves on storage, but is also an affordable way to create art for each season.
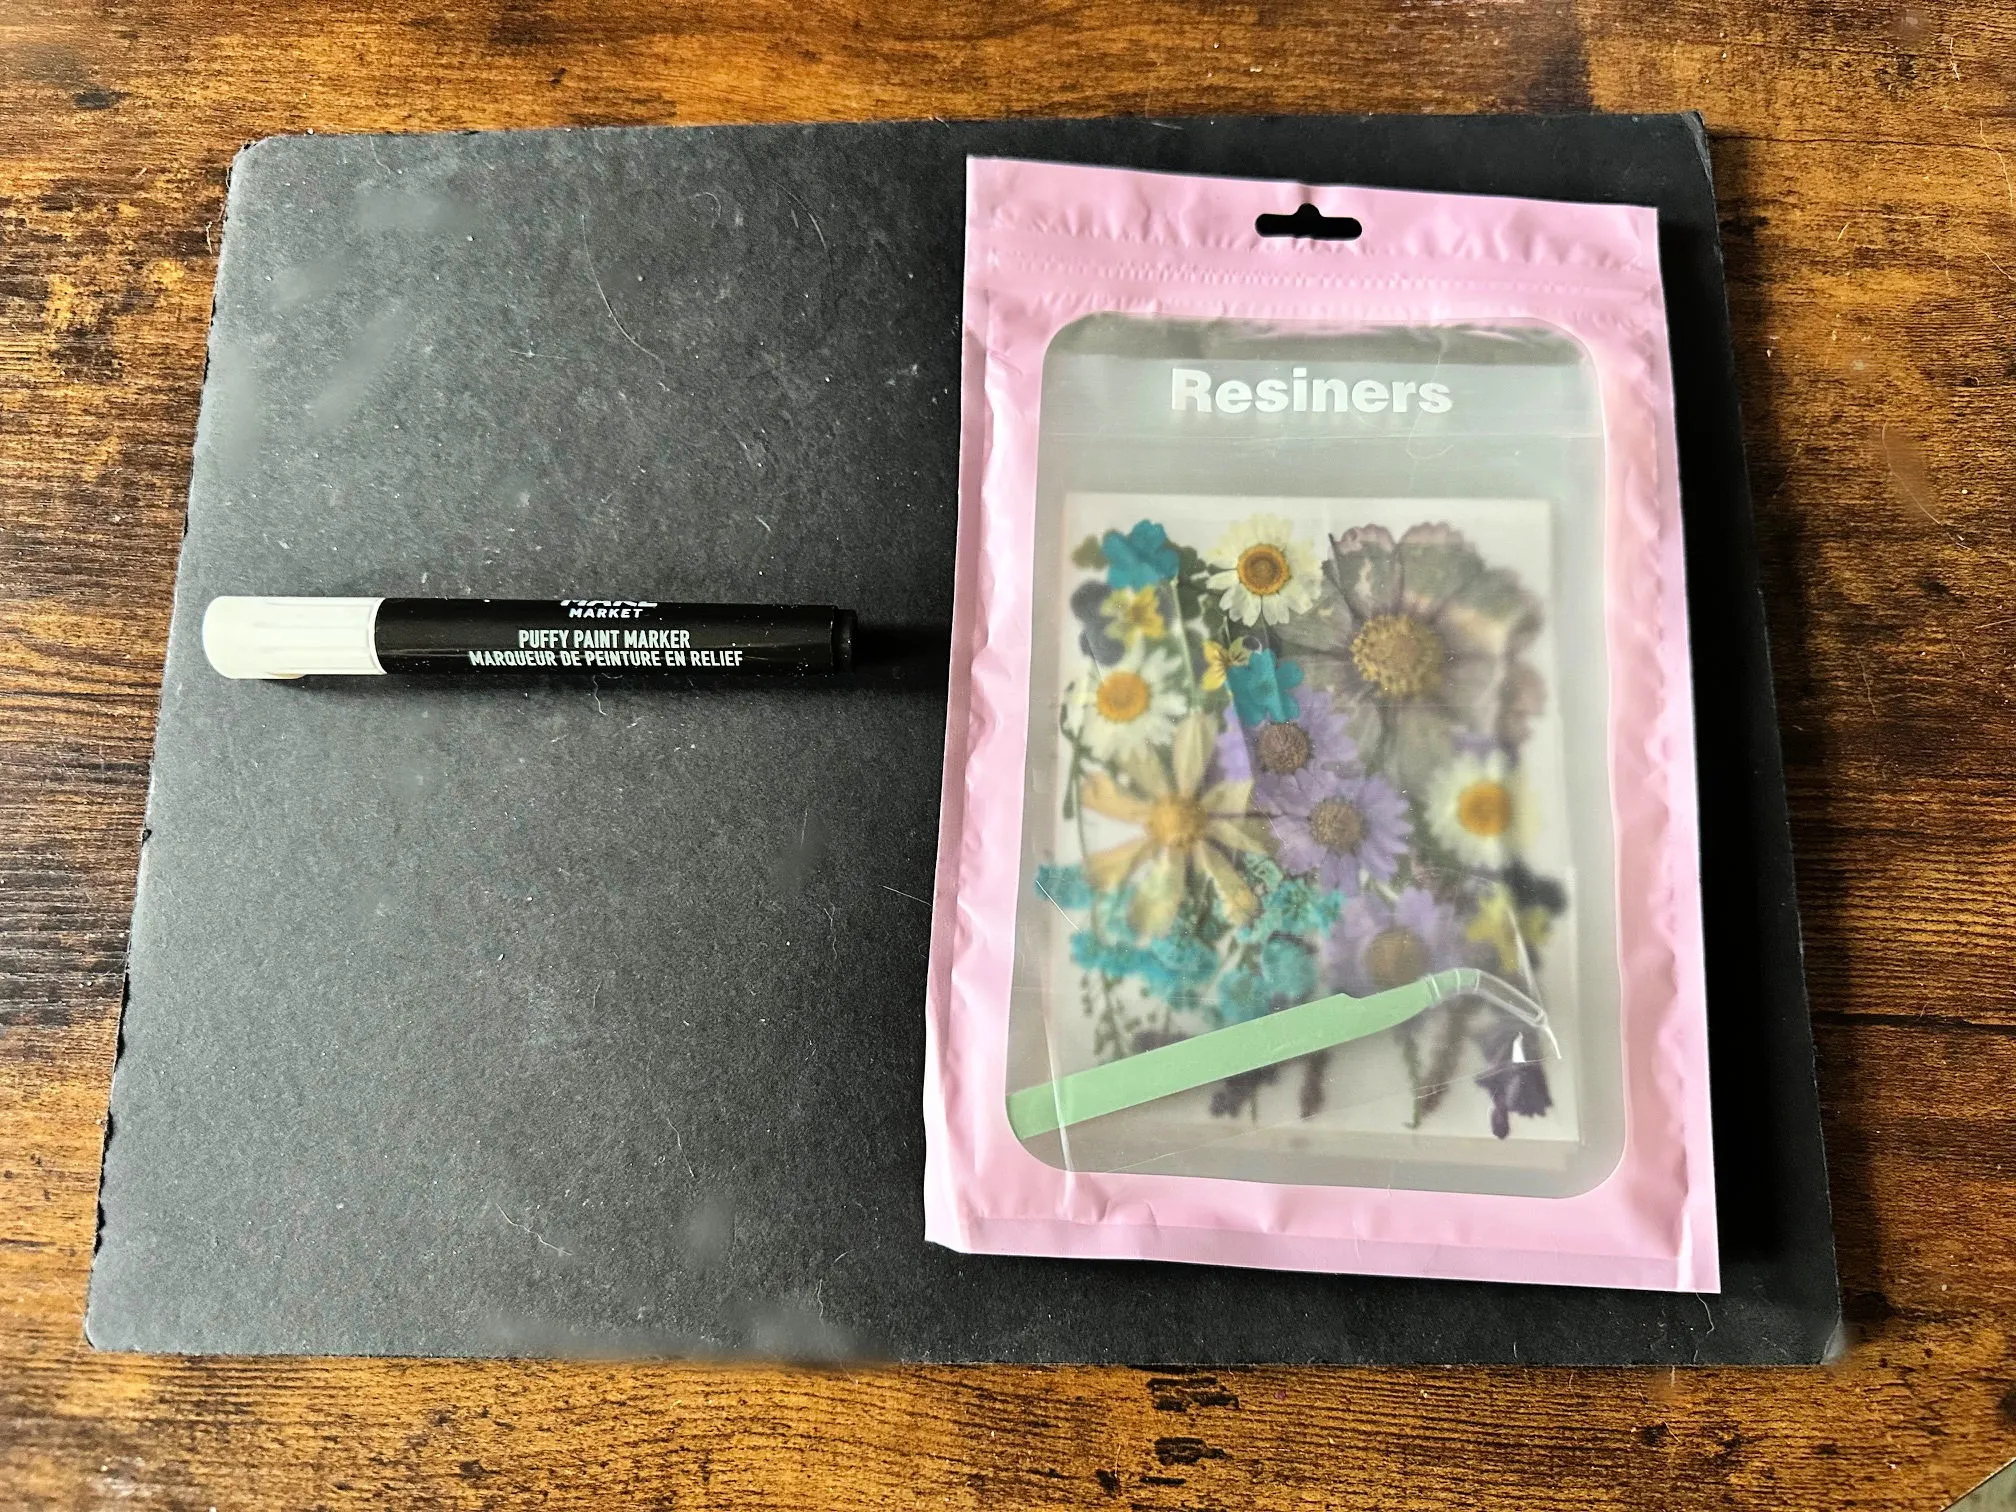
- Black Foam Board – the Dollar Tree size is 20×30 so I cut it in half and it just fits in the 11×14 matte.
- Pressed Flowers – this is the exact set I used, with plenty left over.
- White Acrylic Paint
- White Paint Pen – I had this in my stash, so used it to outline the ghost, but you can also use chalk or a pencil.
- Mod Podge – I used matte, but you can use gloss if you prefer.
- Craft Scissors – or an x-acto knife to cut the foam board.
- Small Craft Brush
- Picture Frame – be sure to check thrift stores, as you can find pretty ornate frames for a great price. I’ve had this antique frame for about 35 years and change it out often.

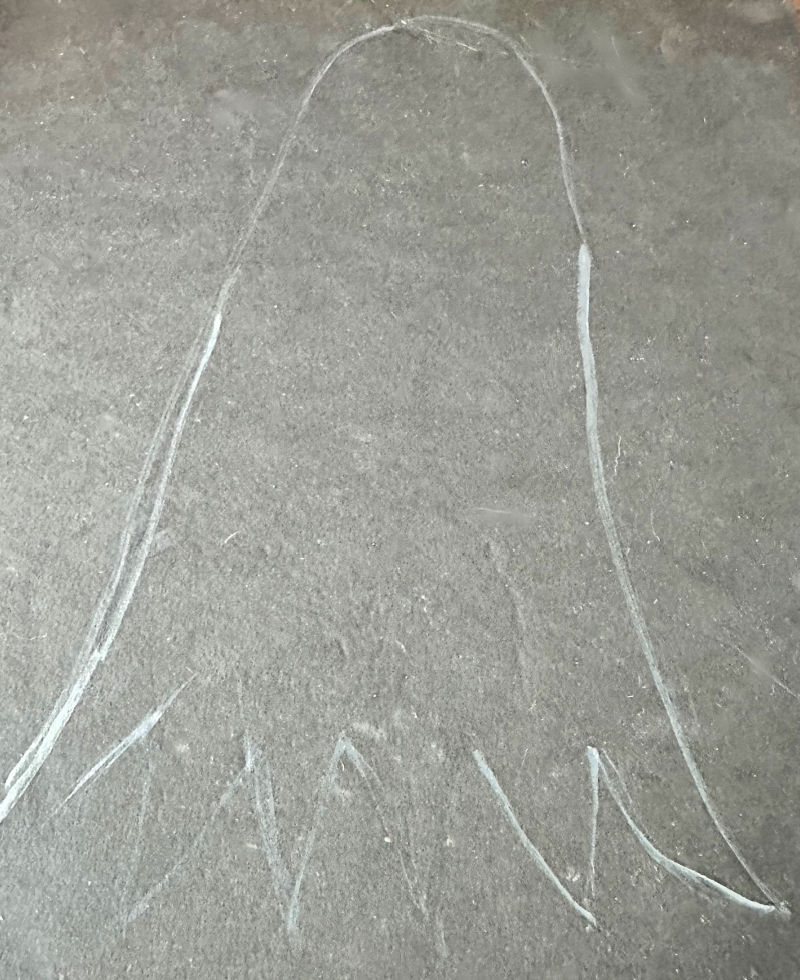
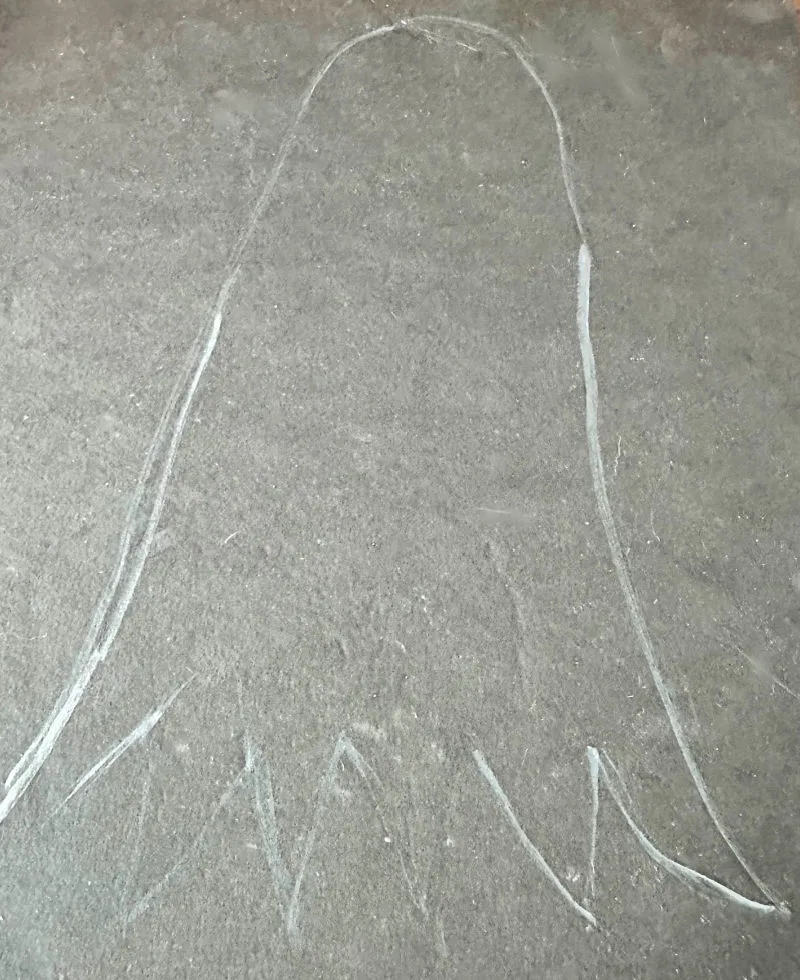
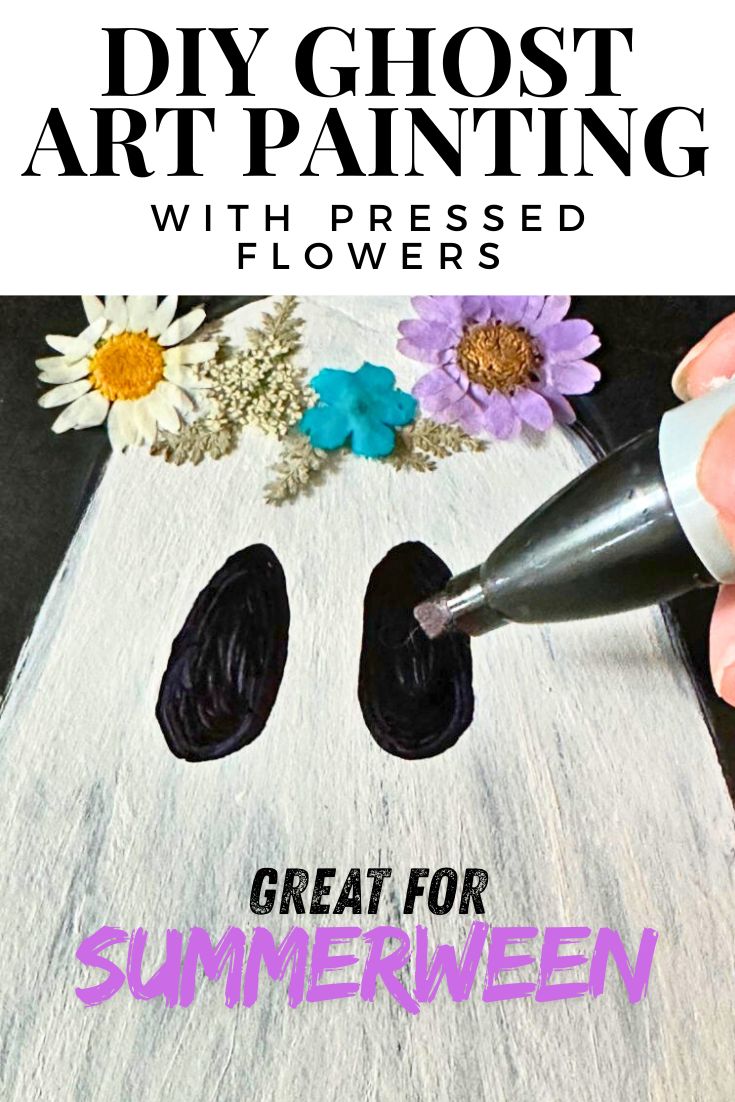
Draw the Ghost Body
The first thing you want to do is search Pinterest for ghost art drawing ideas. You can go with a spooky ghost if you prefer, but I kept mine simple.
It is best to sketch your ghost first using your paint pen, chalk or a pencil. Paint the ghost body with white acrylic paint or chalk paint.

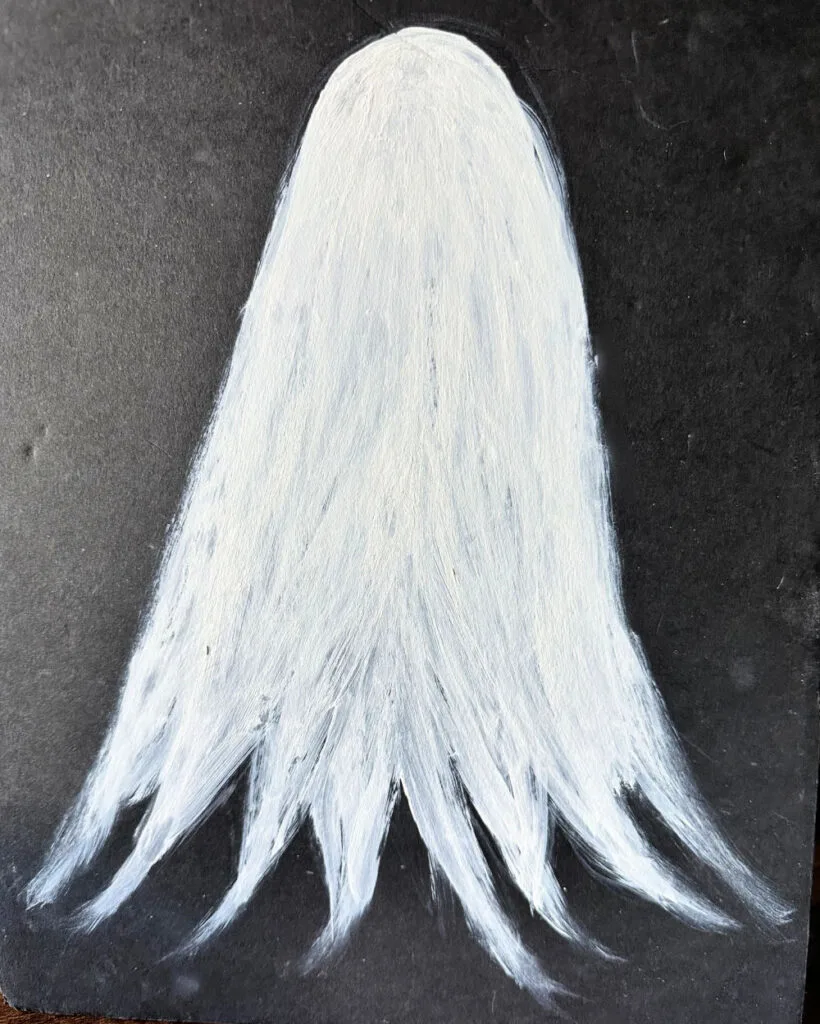
I wanted the ghost to be a bit translucent, not solid, so I only painted one coat. Be sure to let the paint fully dry before proceeding to the next step.
Add the Pressed Flowers
The next step is to add the pressed flowers to the ghost. The best way to do this is to place the flowers where you want them before securing them.
To make the ghost perfect for Summerween, I added a crown of flowers and love how it looks. The pressed flowers that I ordered included tweezers.
Because the flowers are very fragile, it is important to use them when handling the flowers.

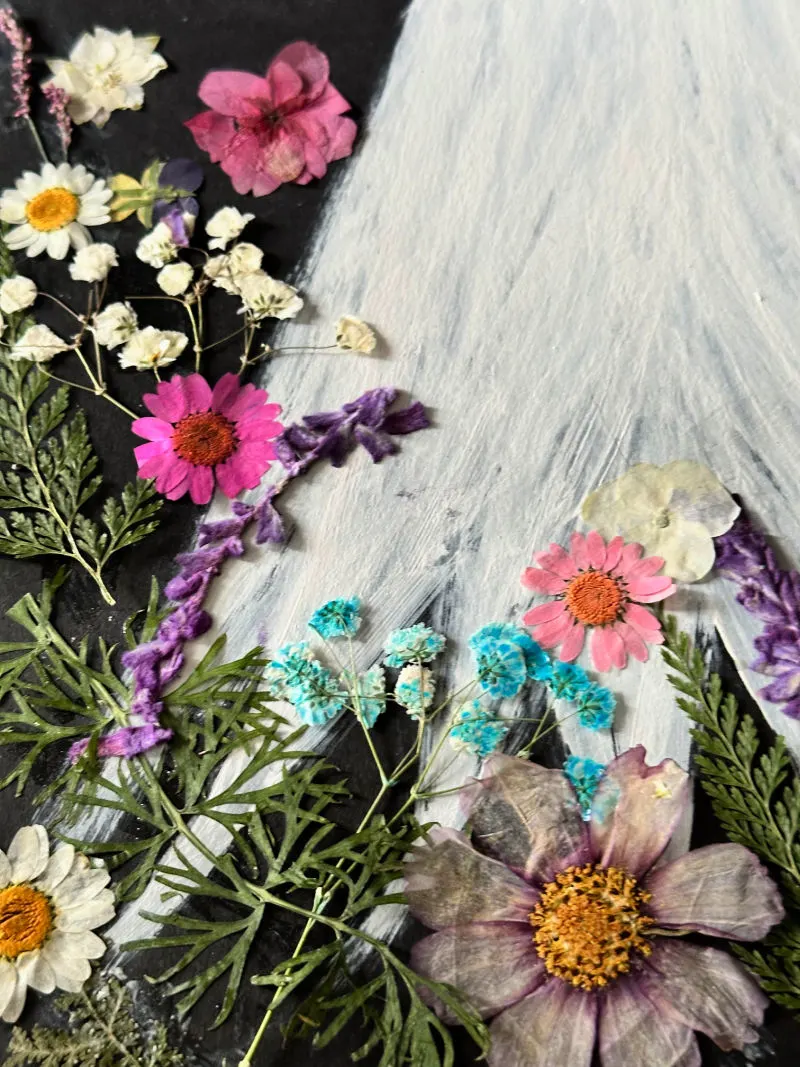

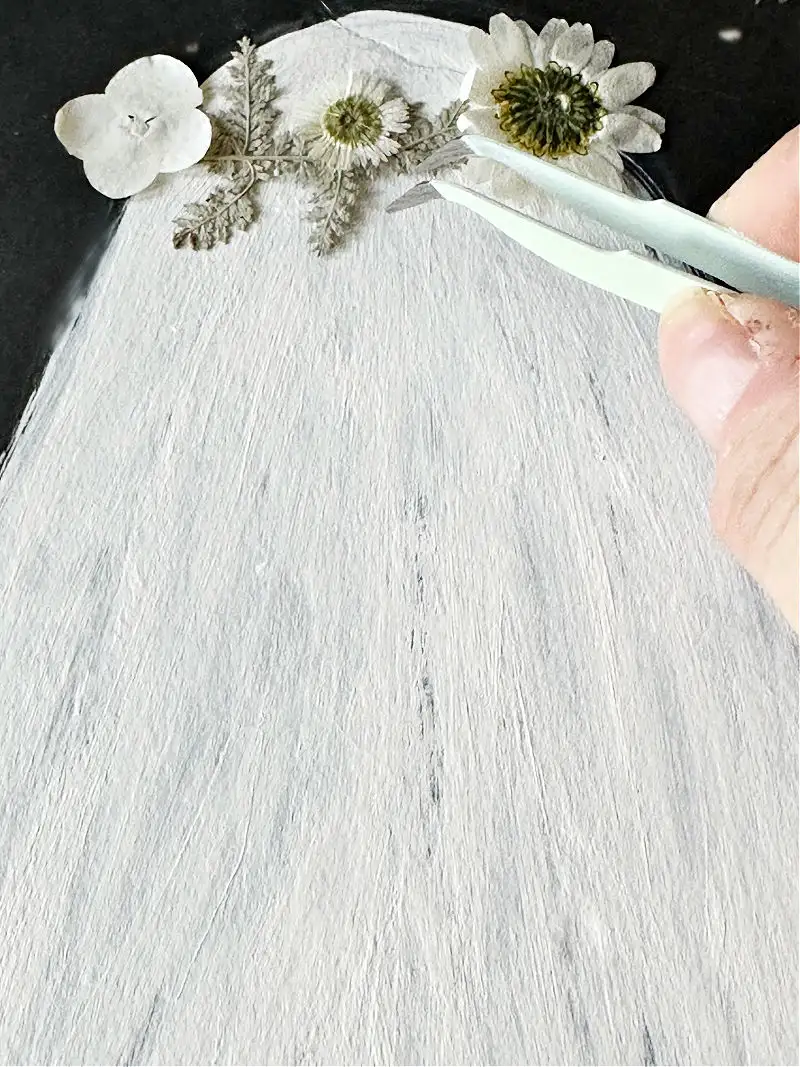
Once you are happy with the placement, use mod podge to secure the flowers to the foam board. I wanted it to look like a field of flowers, so added them to the bottom and up the sides.
Make it your own and have fun with it!
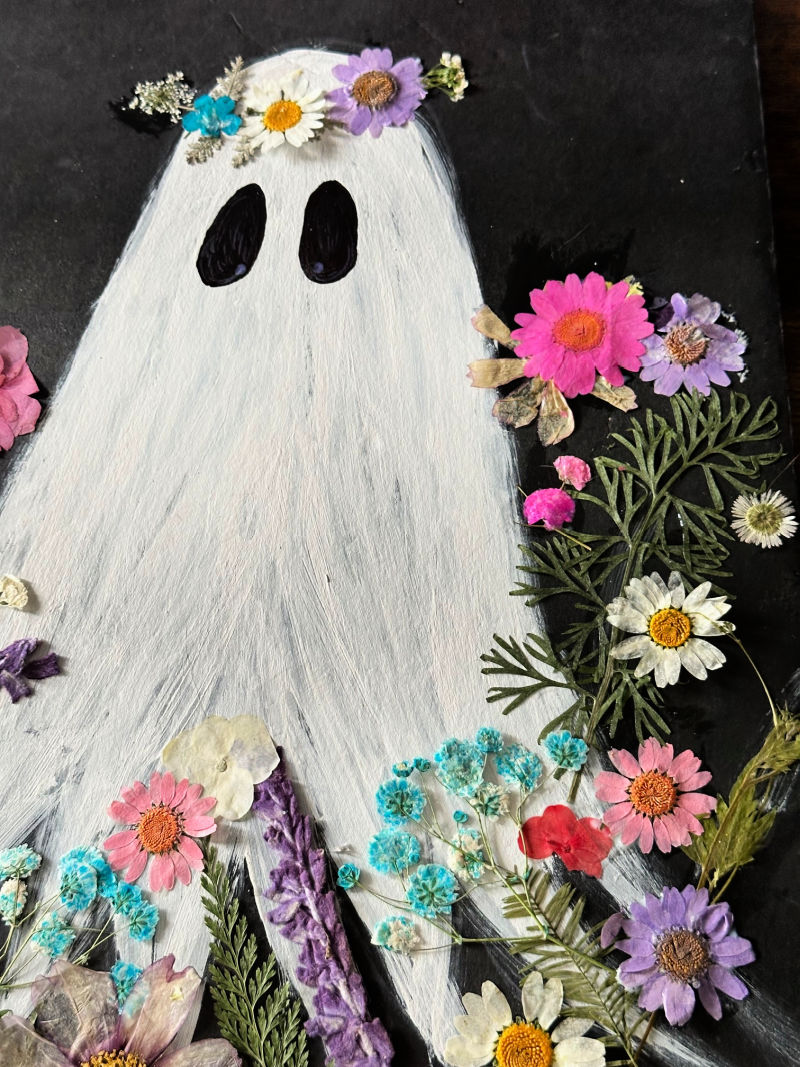
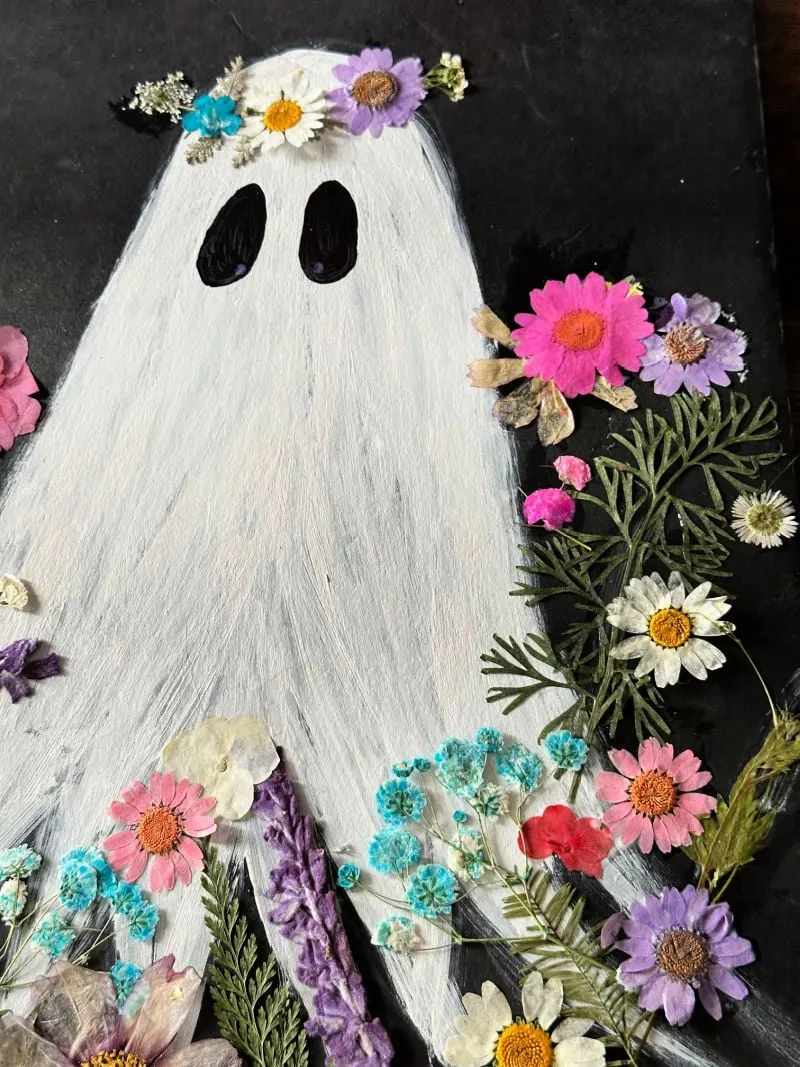
Draw the Ghost Face
The final step is to draw the ghost face. I chose to add oval eyes and no mouth. A dot of white added to the bottom of the eyes gives it a bit of dimension.


Again, you can draw whatever type of ghost face that you like. Make it extra cute by adding eyelashes like I did on my ghost vase.
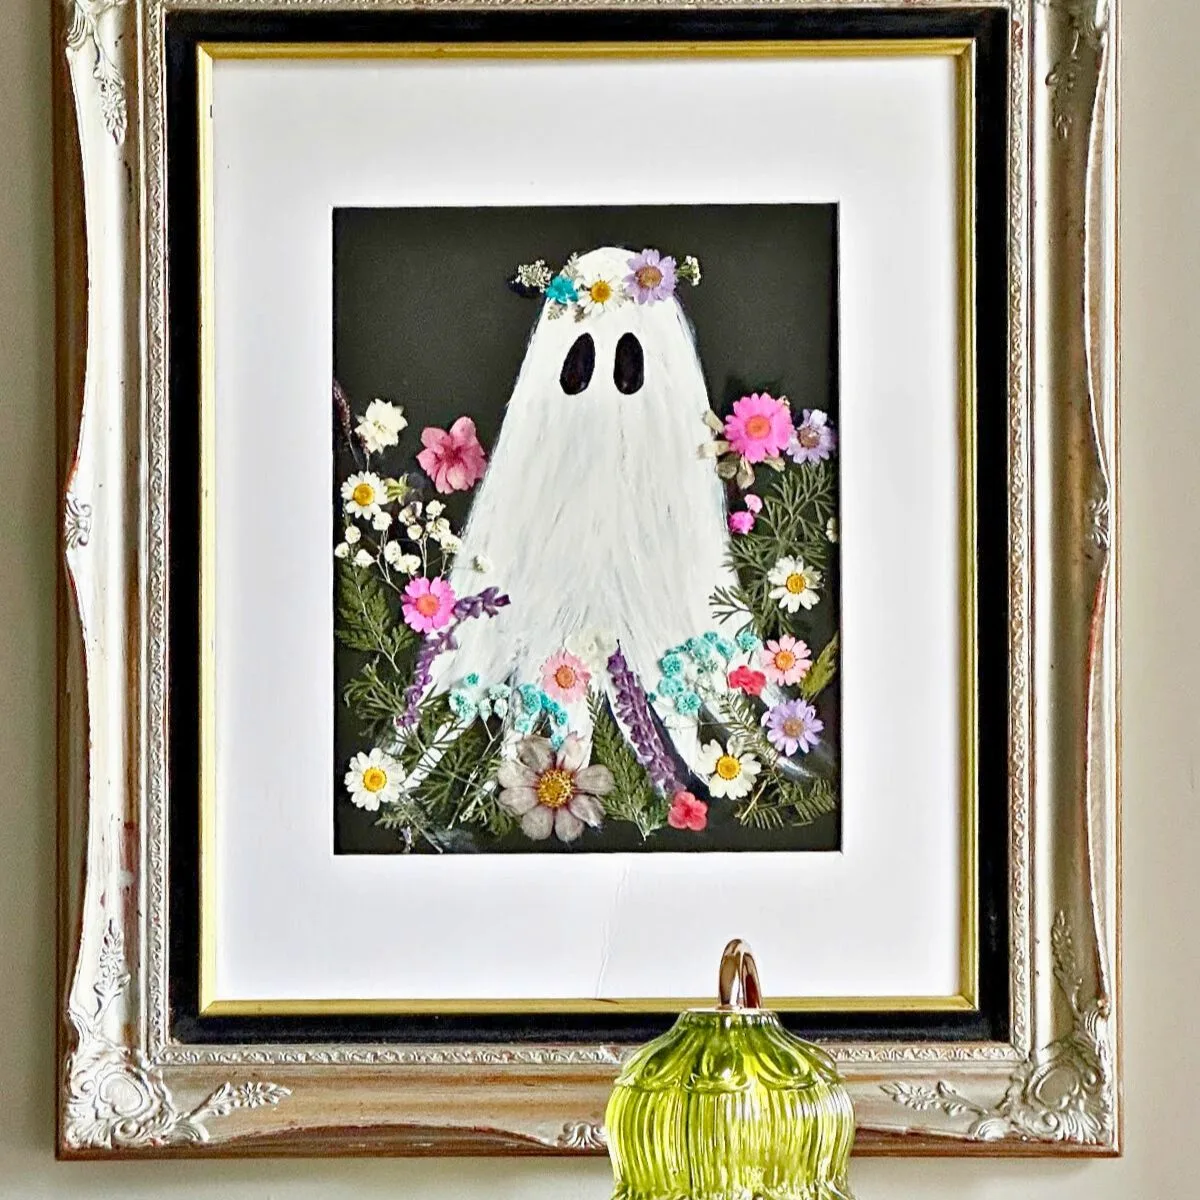
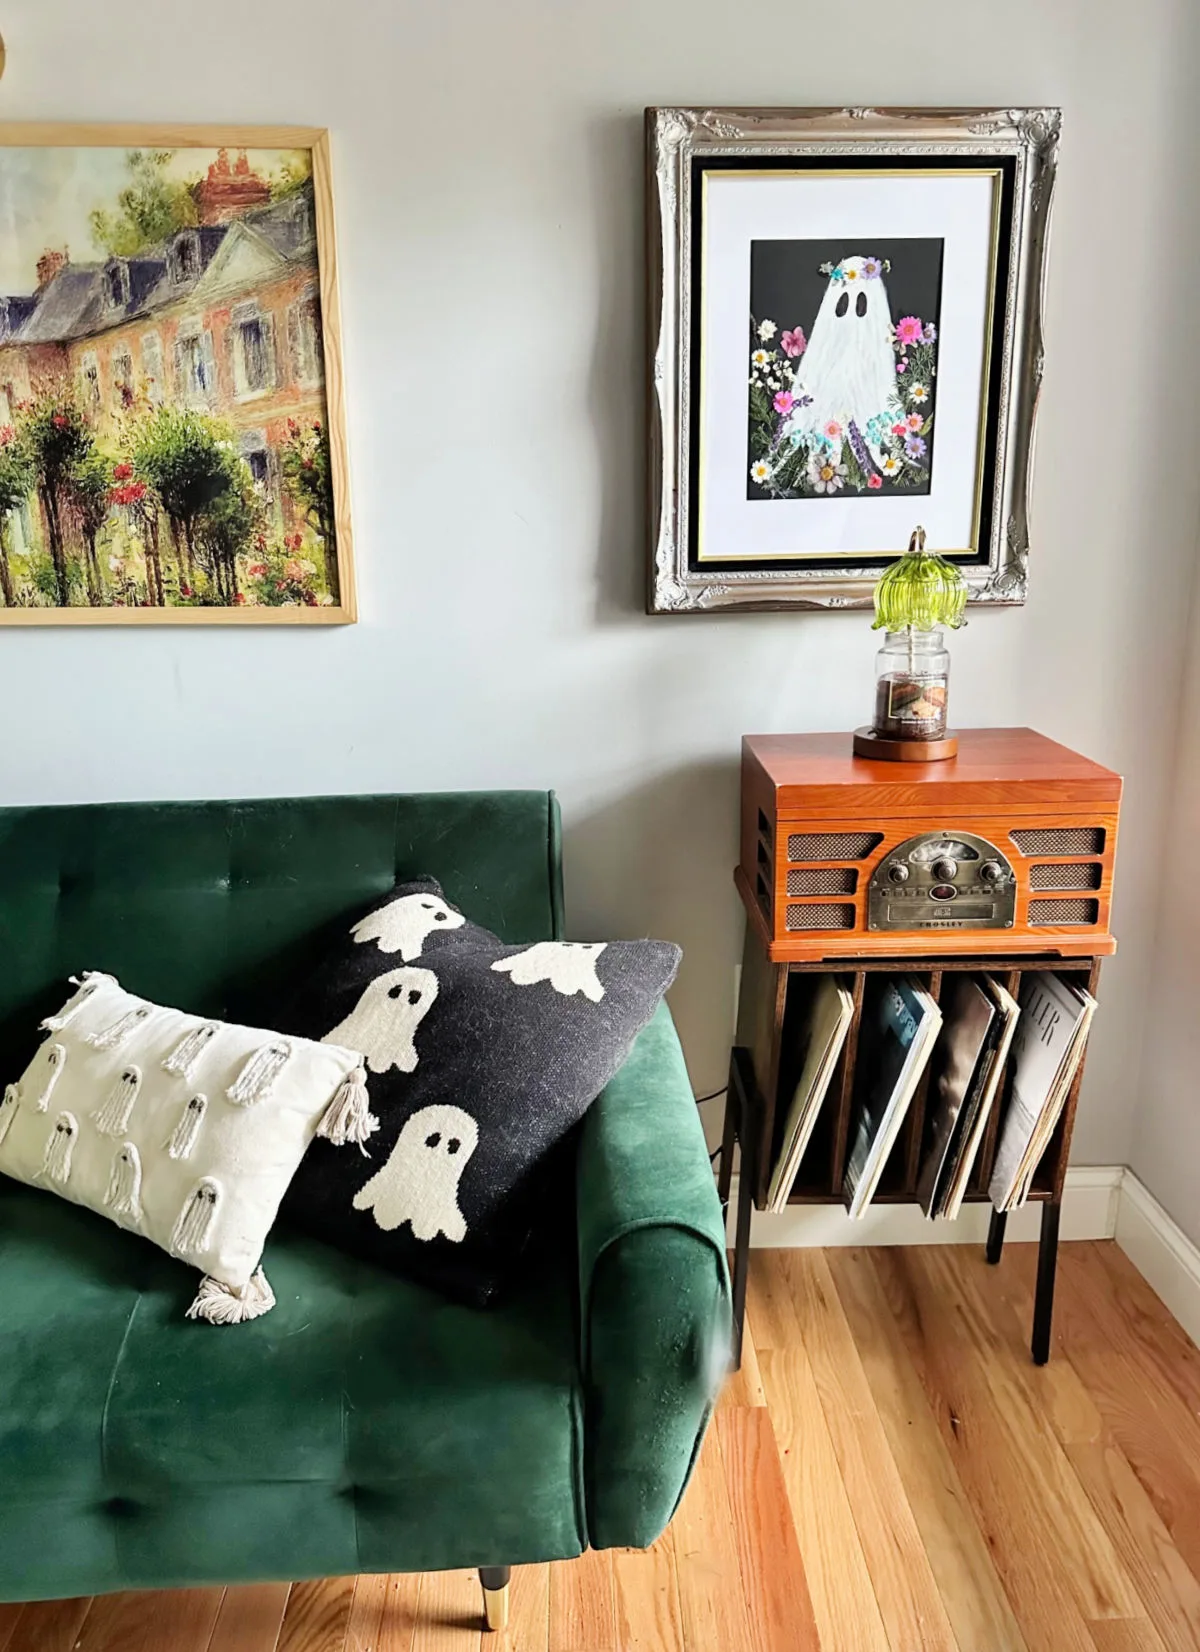
That’s all there is to it; a cute ghost painting made with a Dollar Tree foam board. I’m so happy with how this little ghostie turned out.
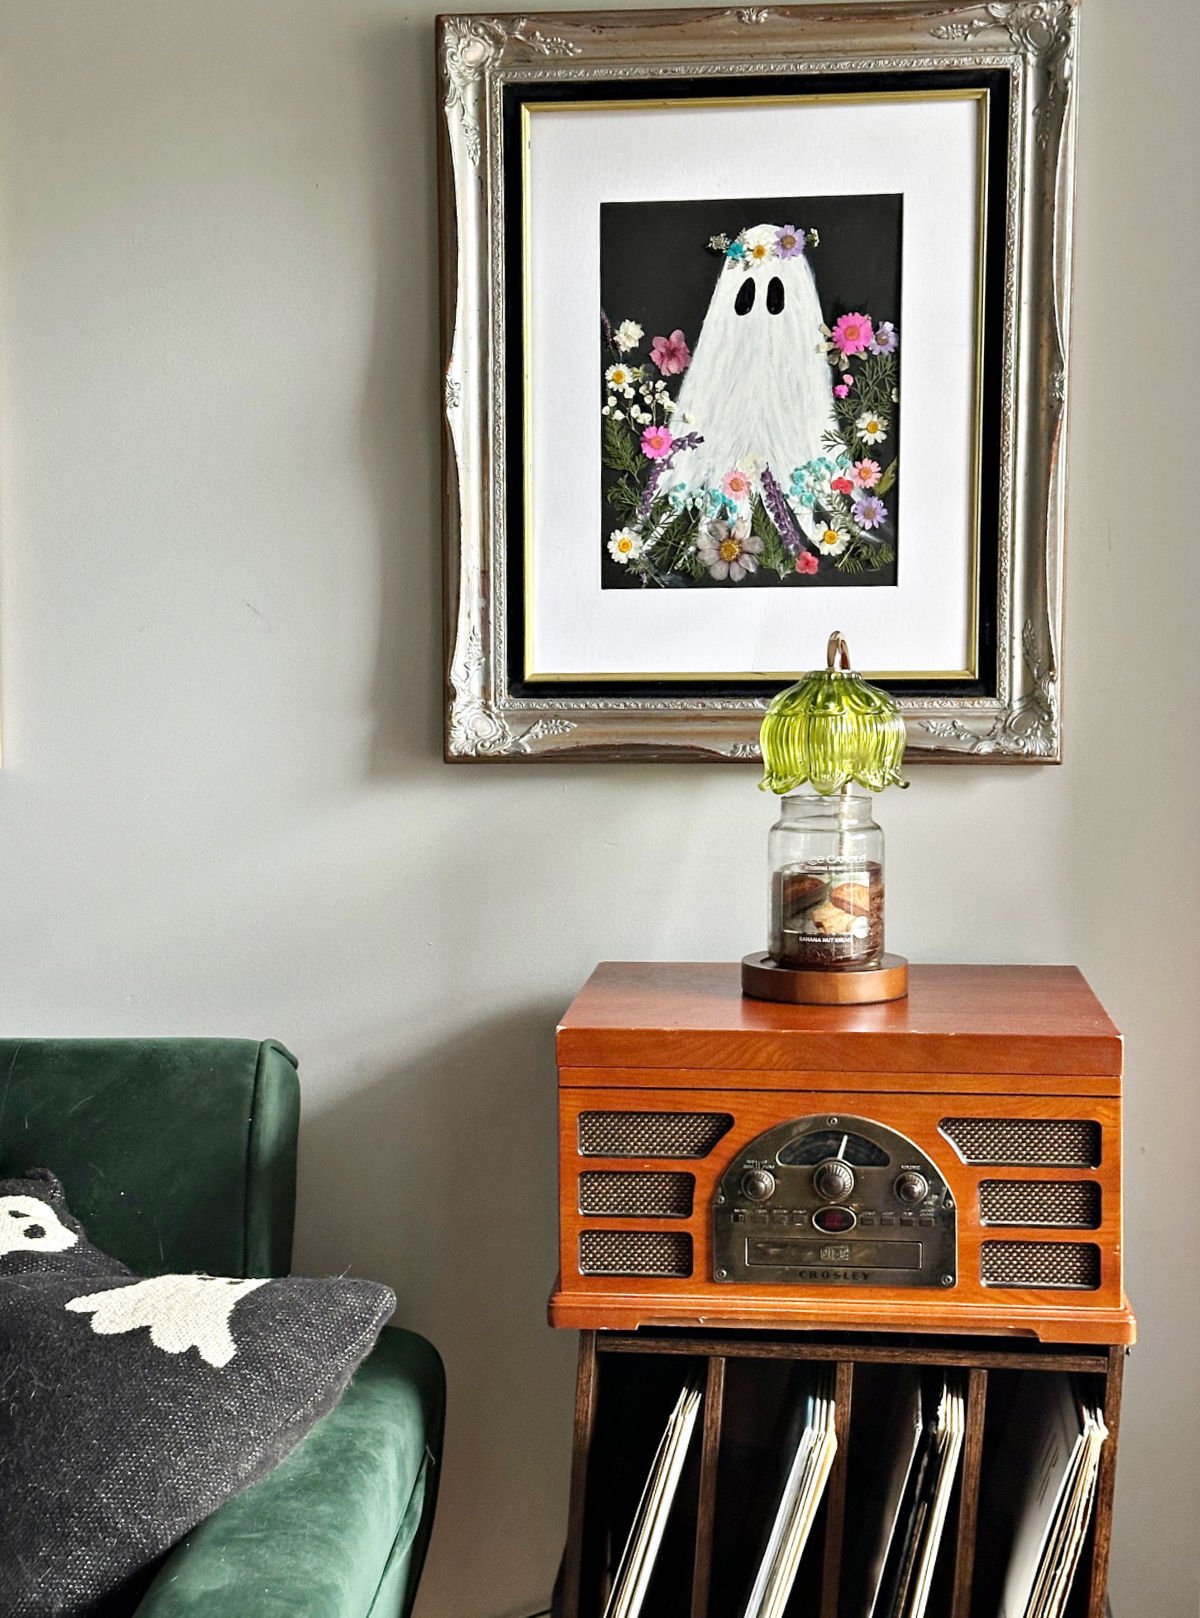
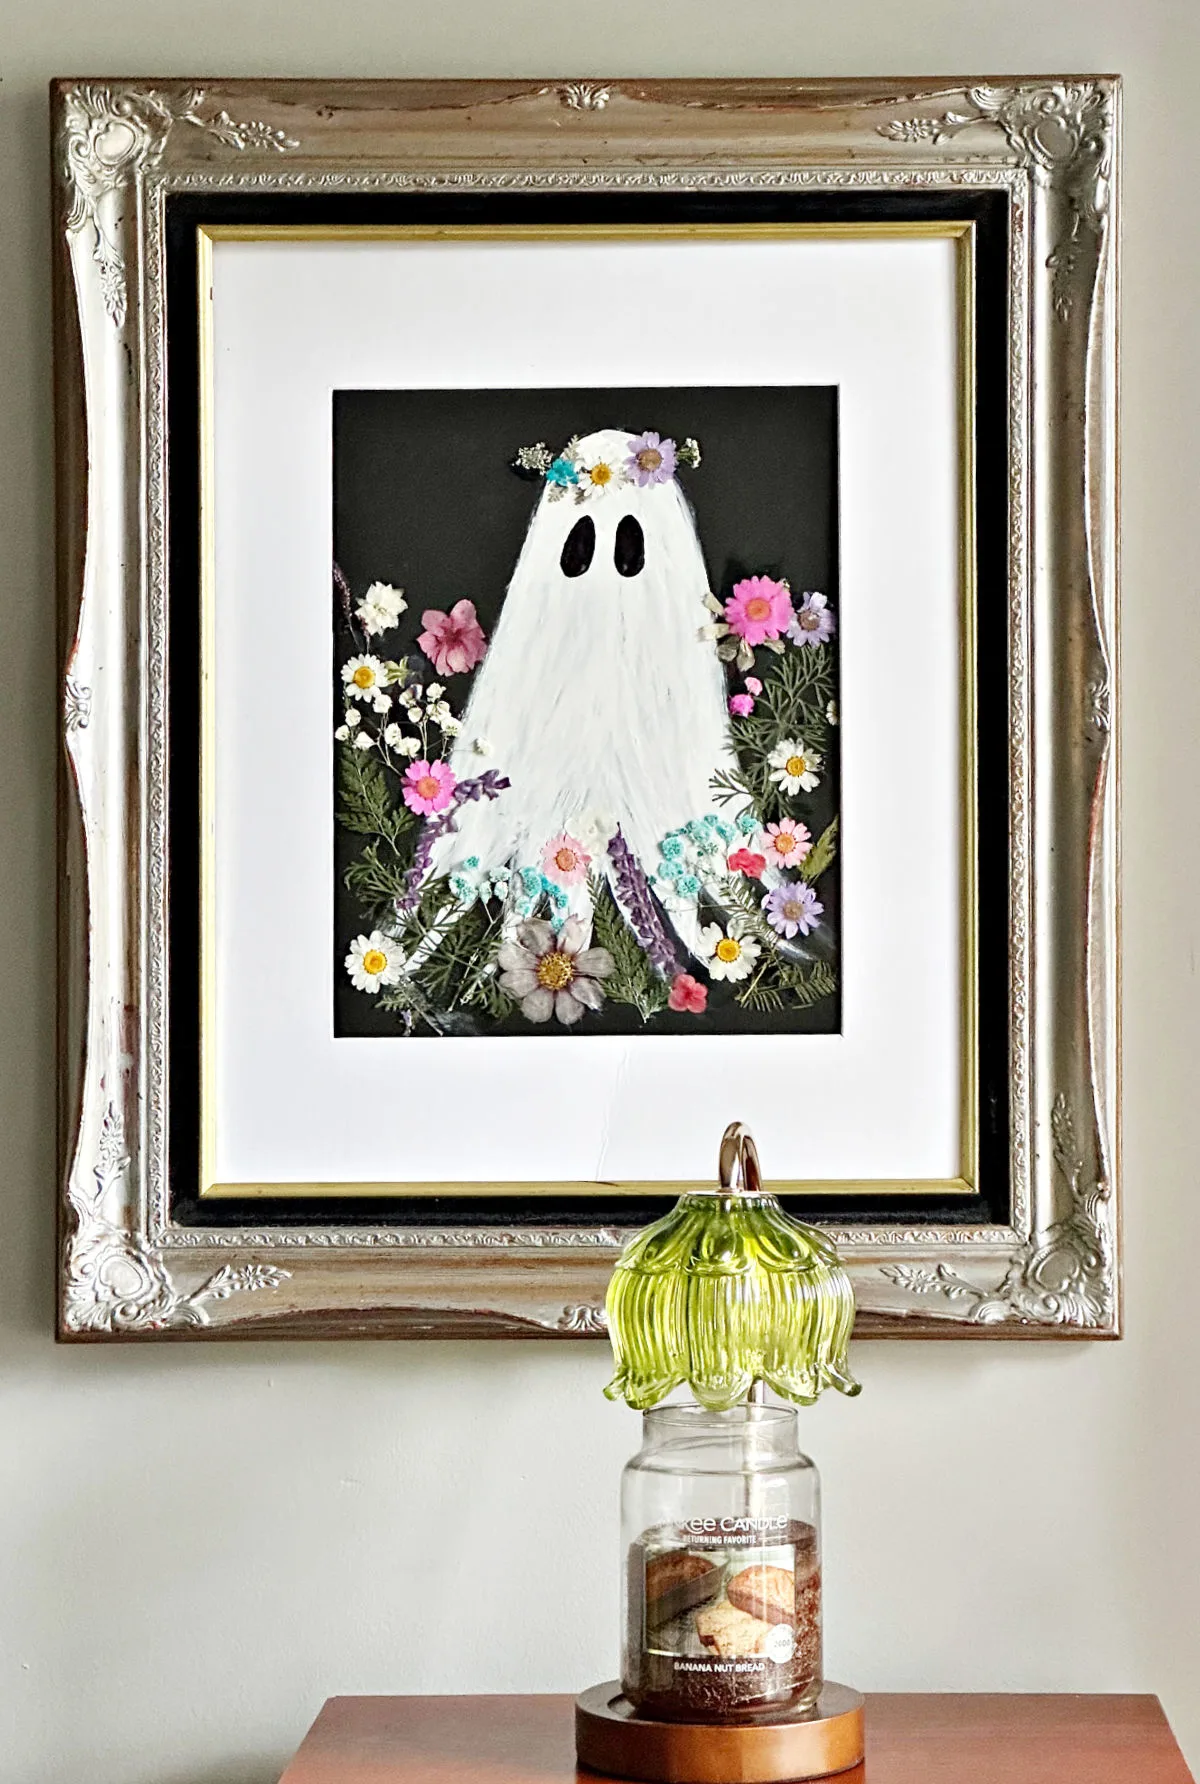
Simply frame and hang it and add a touch of summerween or Halloween to your home. Mine is hung in my living room and it makes me smile when I see it.

What do you think? Is this something you can see yourself making? If you do make your own, be sure to share it with me on Facebook. Tag @ourcraftymom so I see it.

I hope you enjoyed this ghost drawing tutorial and are inspired to make your own. Check out all of my ghost crafts and DIY ideas here.

Pin For Later
Share this article with your friends on Pinterest by pinning the below image.
It helps my blog grow and doesn’t cost a thing! 🙂
Thanks so much for stopping by. Happy Summerween!


You may also enjoy these DIY Halloween crafts and home decor:
- Thrift Store Dollhouse Makeover for Halloween
- Thrift Store Upcycled Halloween Art
- Halloween Bat Pillow Pottery Barn Dupe
- Halloween Pumpkin Diorama
- 20 Cricut Halloween Project Ideas
- Day of the Dead Pumpkin
- Black and White Halloween Mantel Decor
- Ghost Mugs Tutorial
- FREE Hocus Pocus printables
Follow me on social media below: