Pressed dried flower art is an easy DIY project that becomes a focal point in any room. Create your own with this step-by-step tutorial.

This post contains affiliate links at no extra cost to you. Please see my full disclosure here.
Pressed Dried Flower Art
I’ve been wanting to create dried flower wall art for a long time. I’m not sure why I waited so long to make it, because it is really easy.
Plus, there is something about designing the placement of the pressed flowers that is super relaxing.
I’m including a printable DIY card at the bottom of this post, so be sure to read to the end to get all of the details.
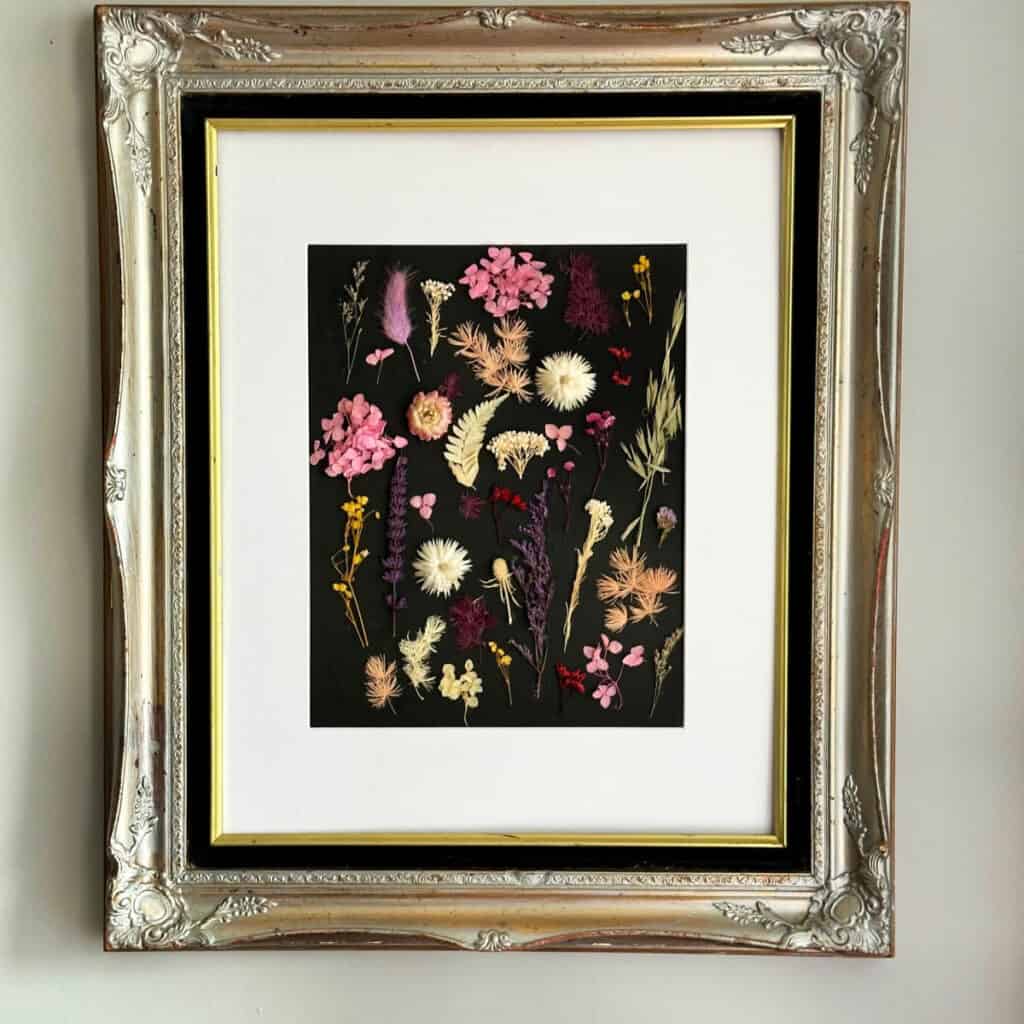
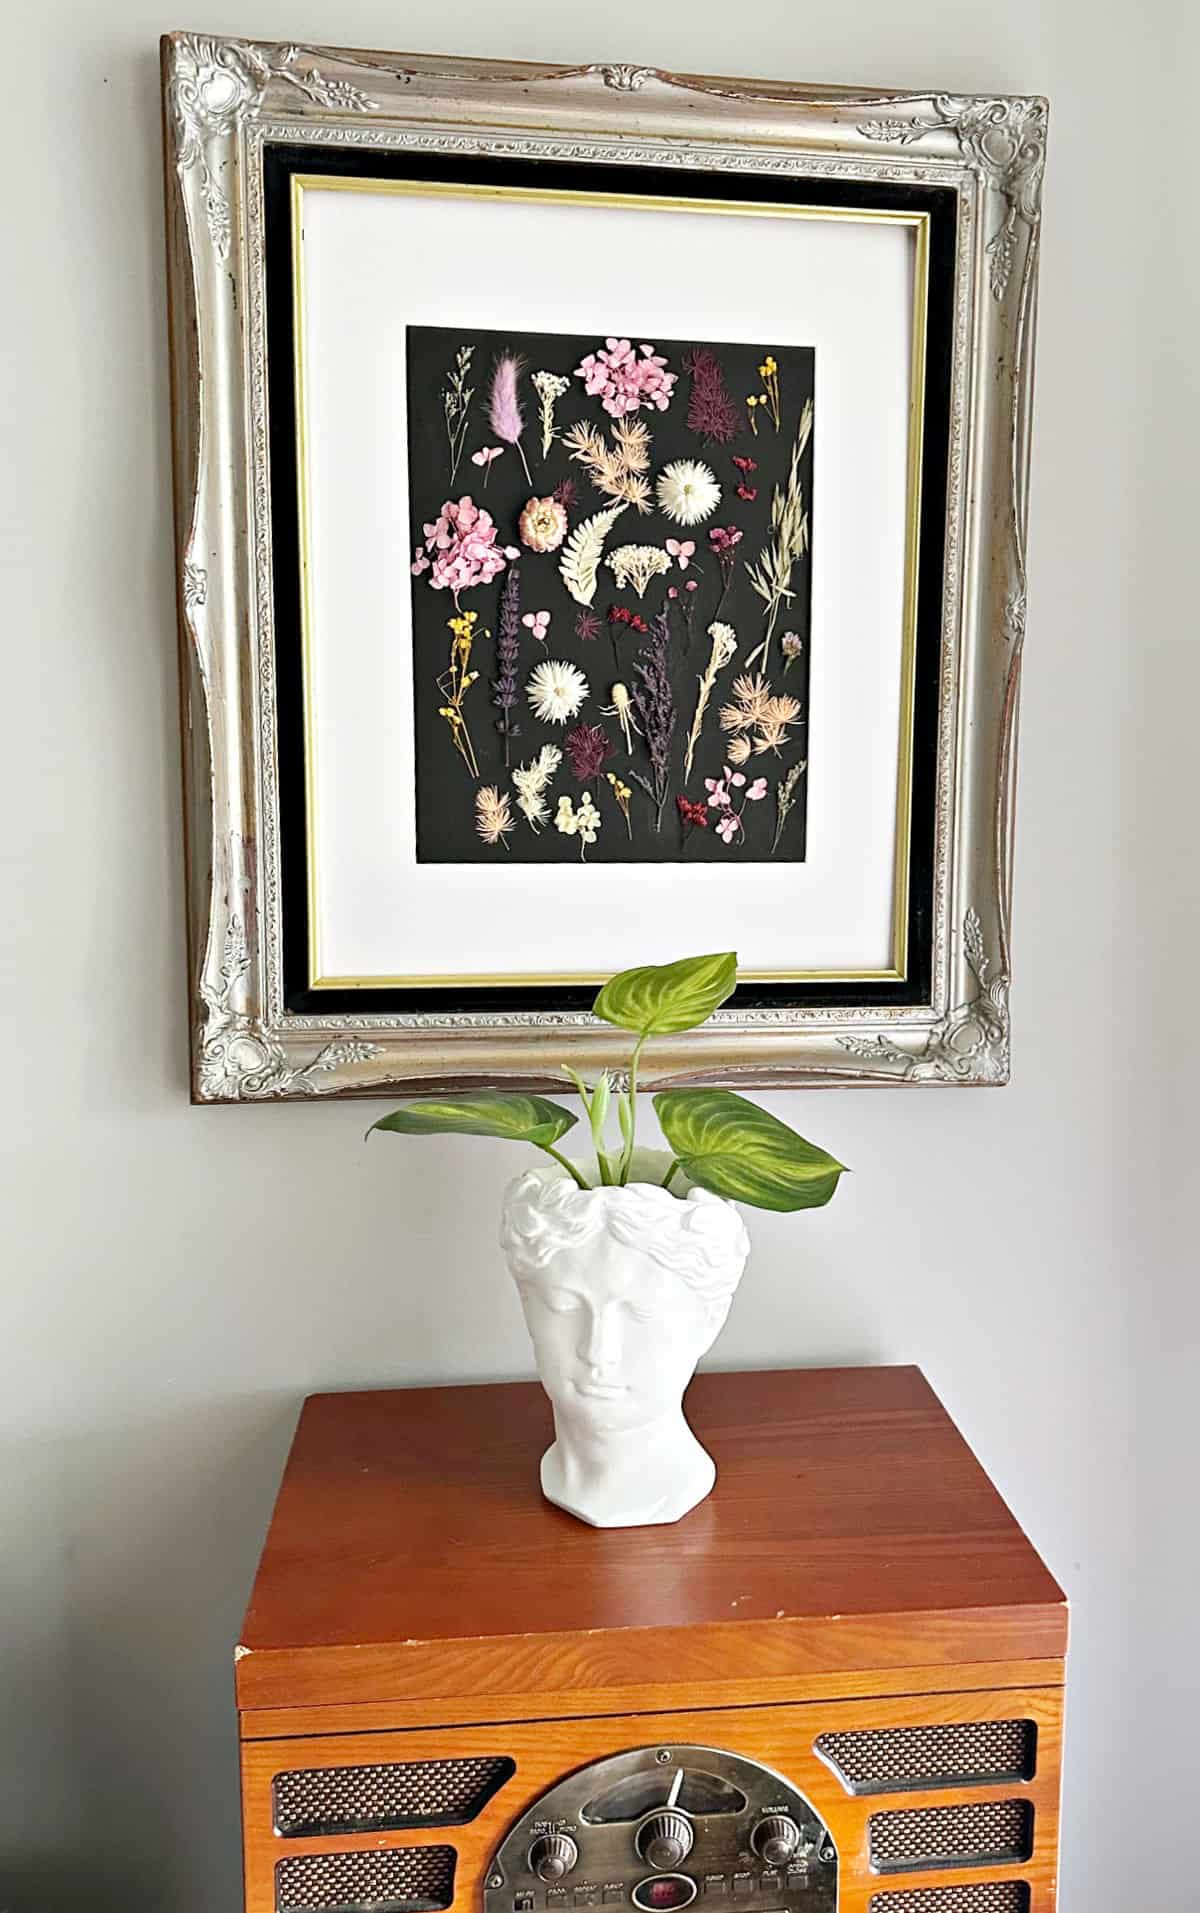
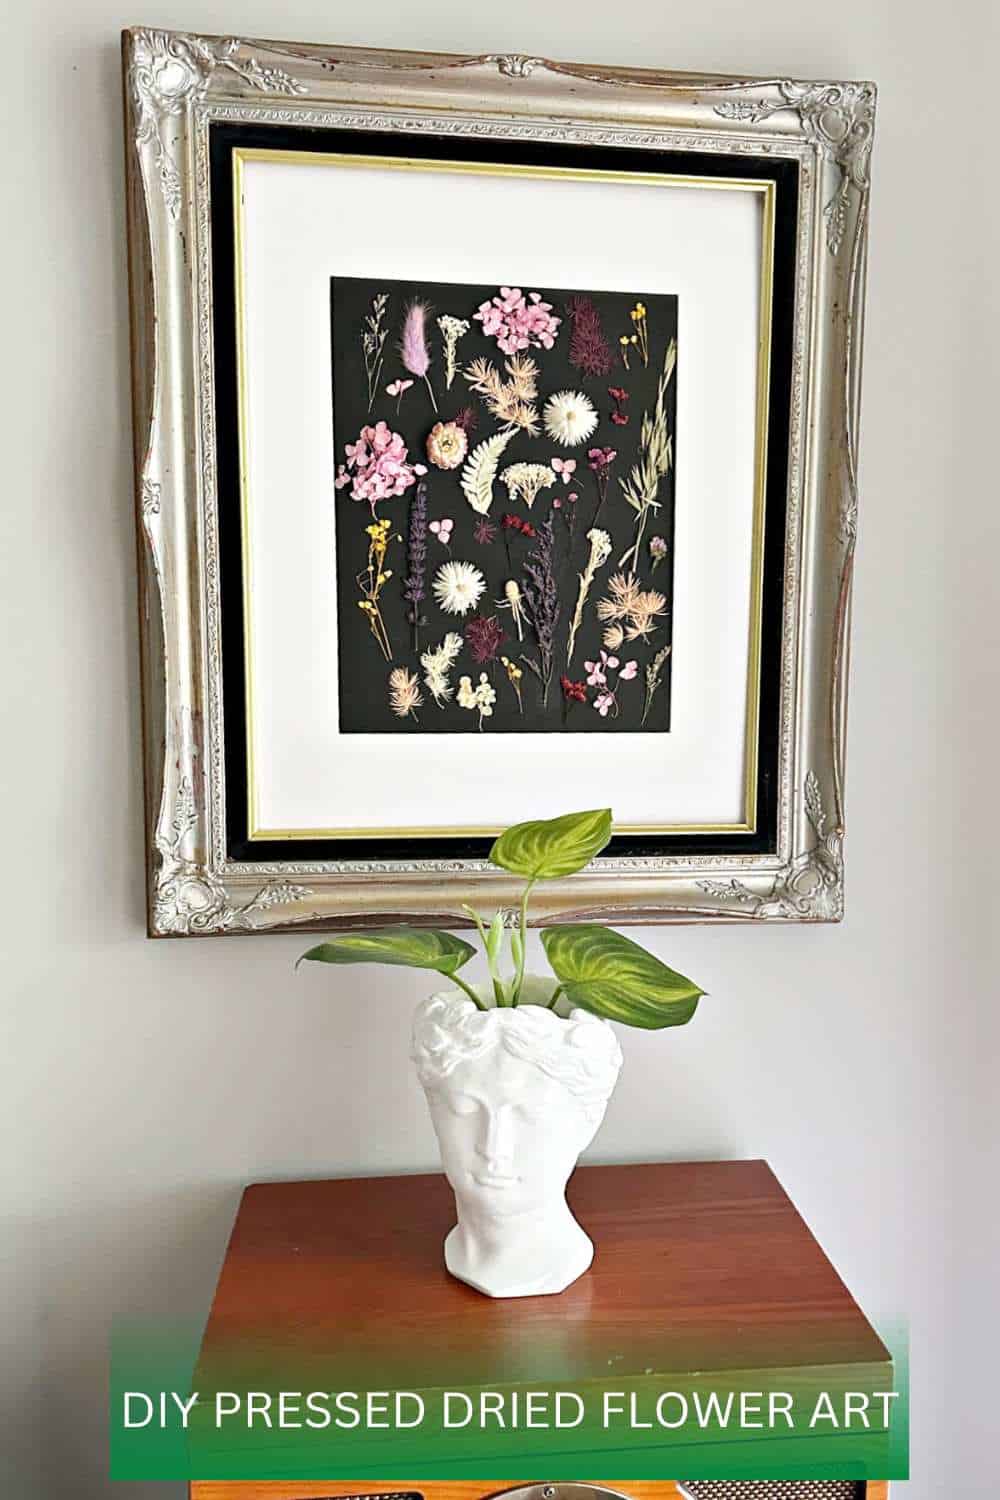
Look at how stunning this beauty is:

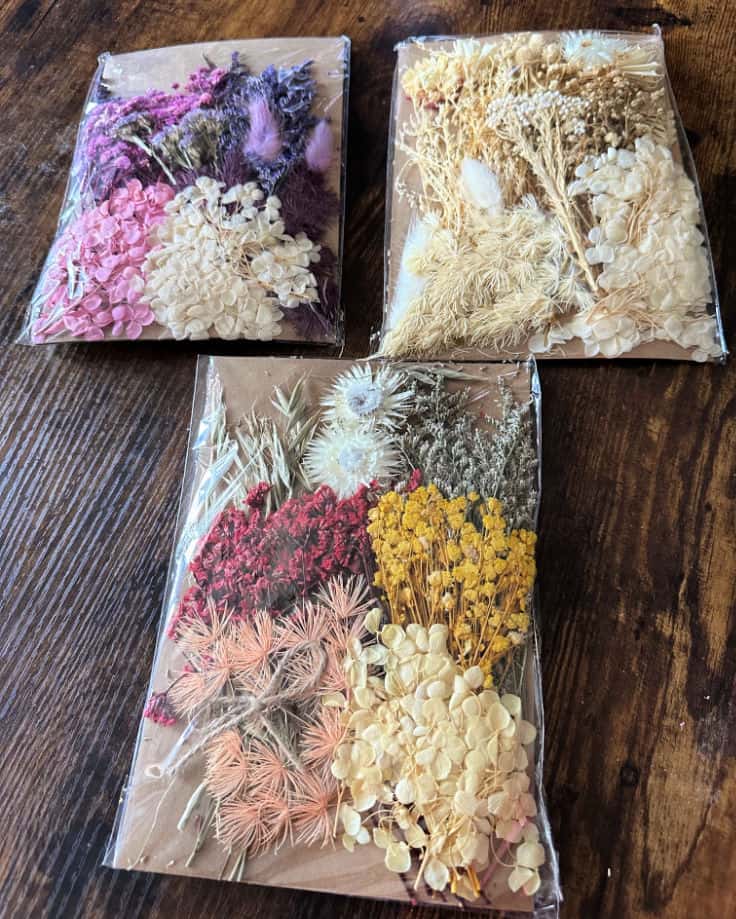
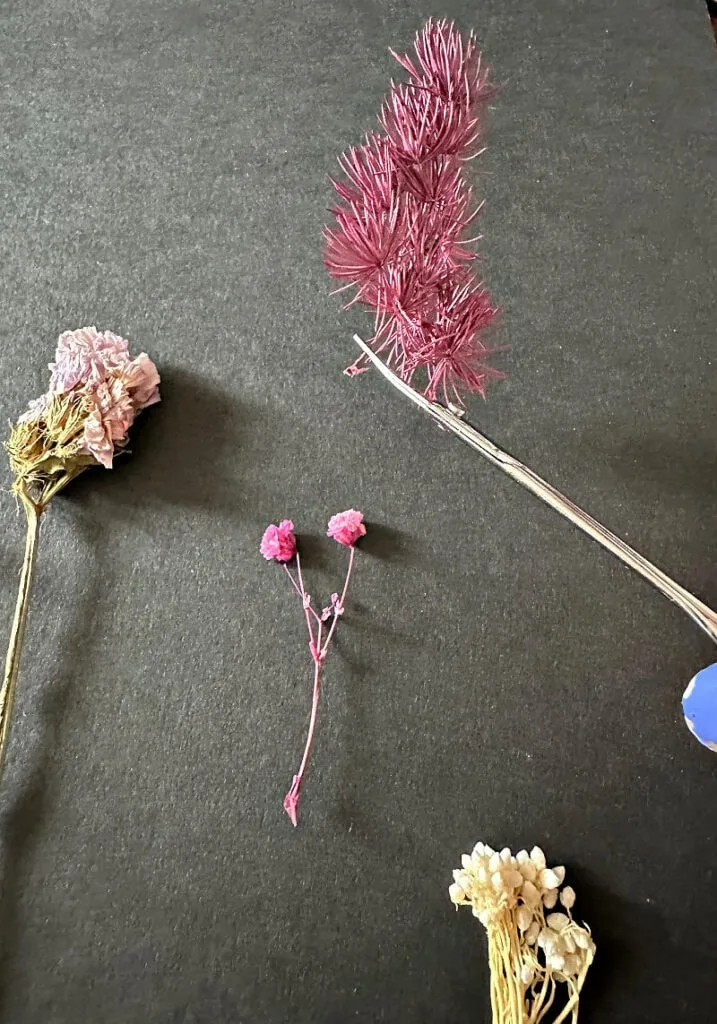
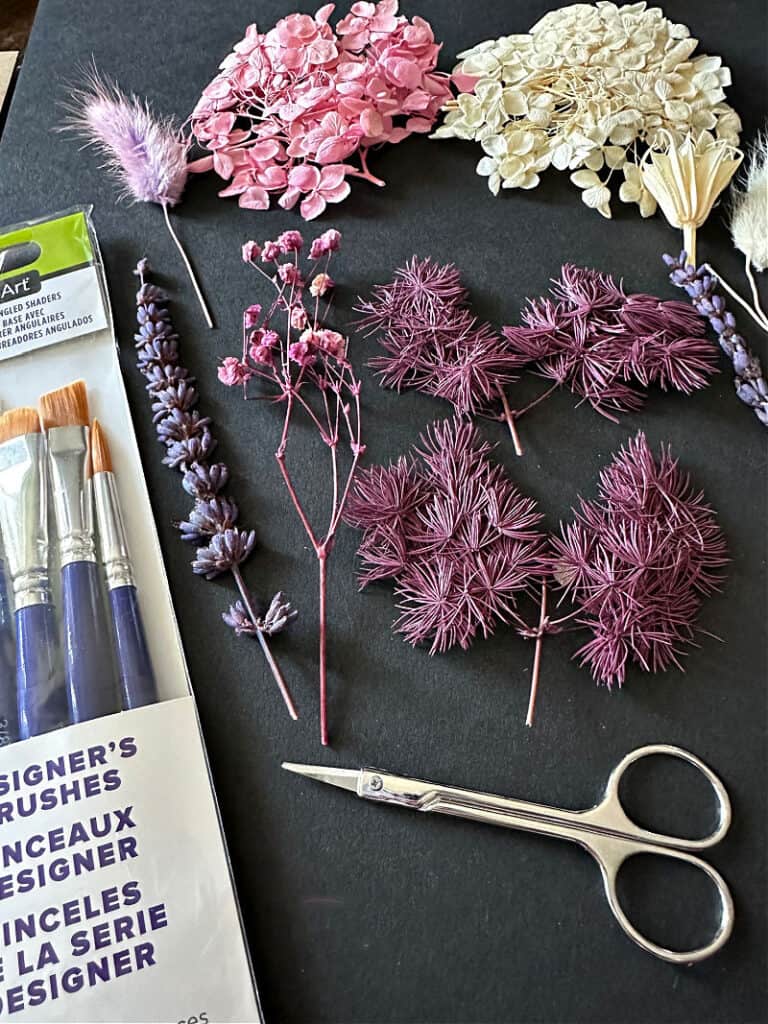
While I took a short cut and purchased dried flowers, you can certainly dry your own. It was a little to early in the season for this New England girl!
However, you can see the quick tutorial I shared for drying ferns if you want to dry your own.
The most common way is probably the large book method. They also sell a really nifty flower press if you want to save some time.
Supplies for Pressed Flower Art

Tips for Creating Dried Flower Art
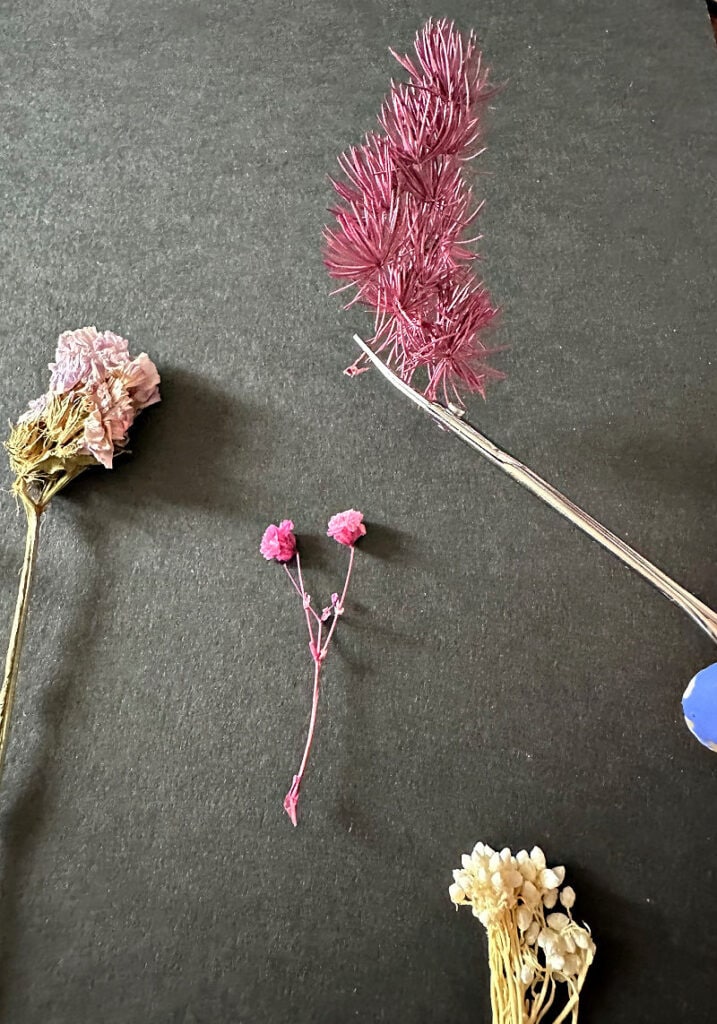
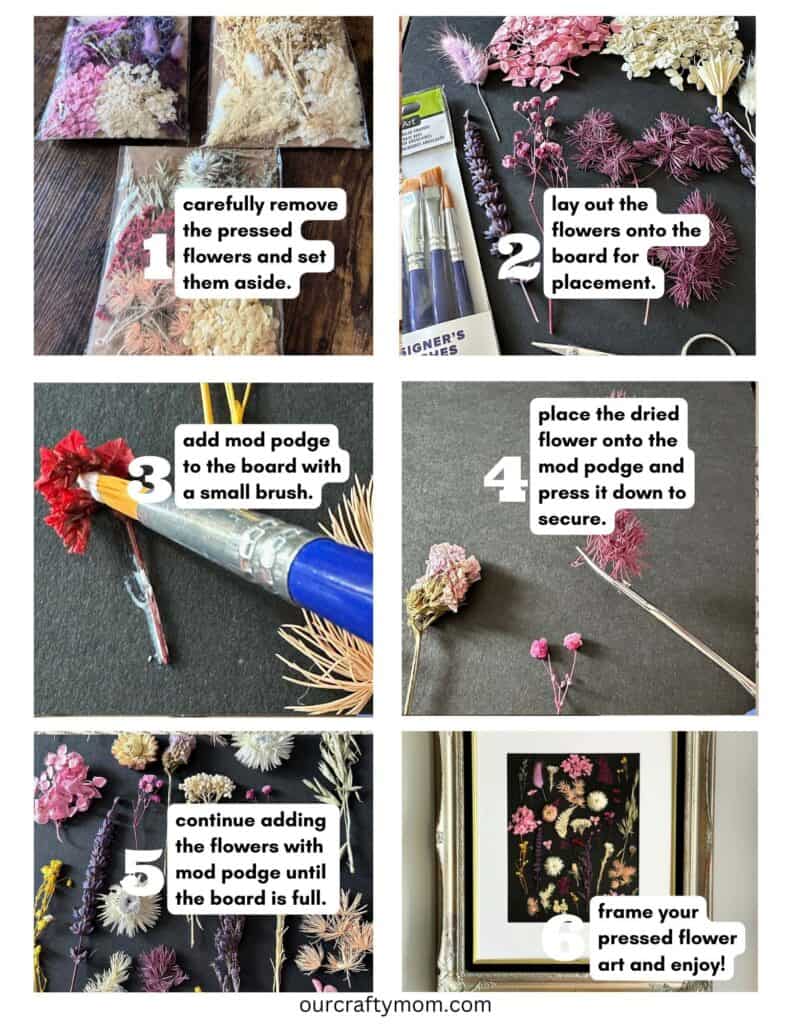
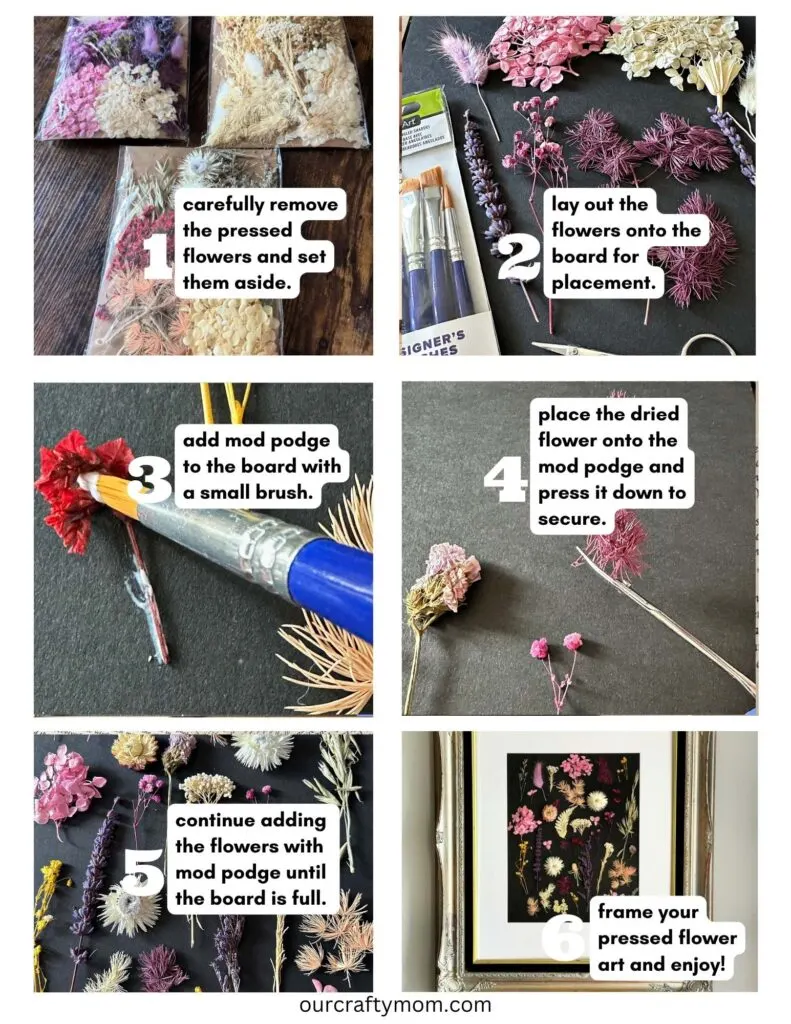
The most important thing to remember is the dried flowers are very fragile, so it is best to use tweezers when picking them up and placing them on the board.
It also helps to use a small brush to add mod podge directly to the board, then place the flower on top.

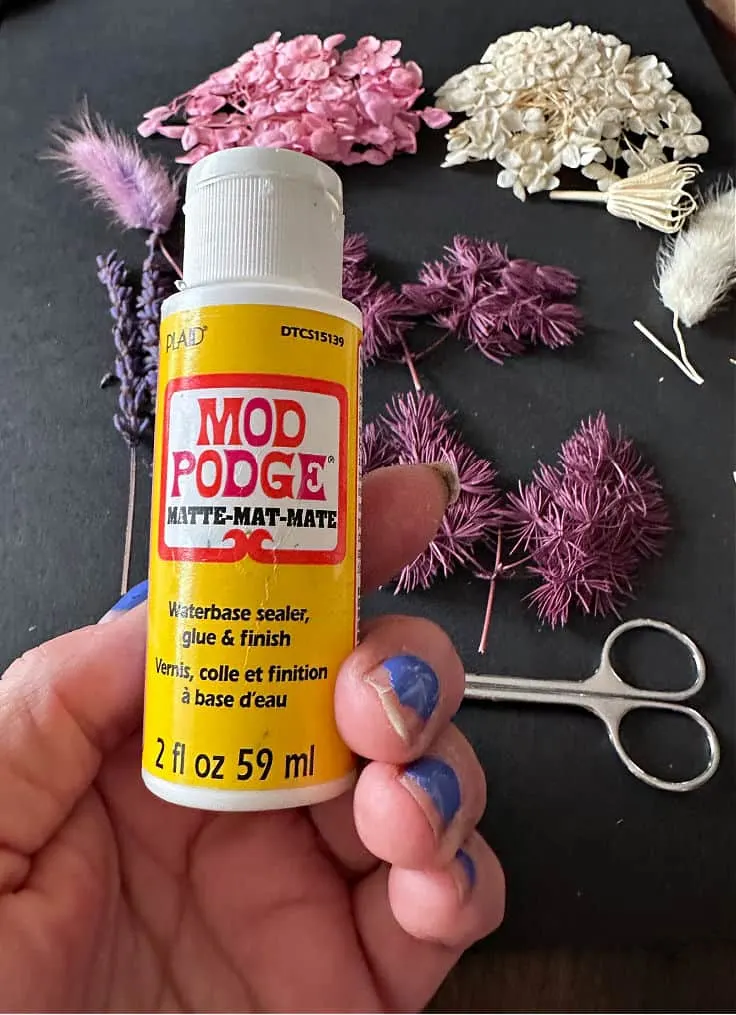
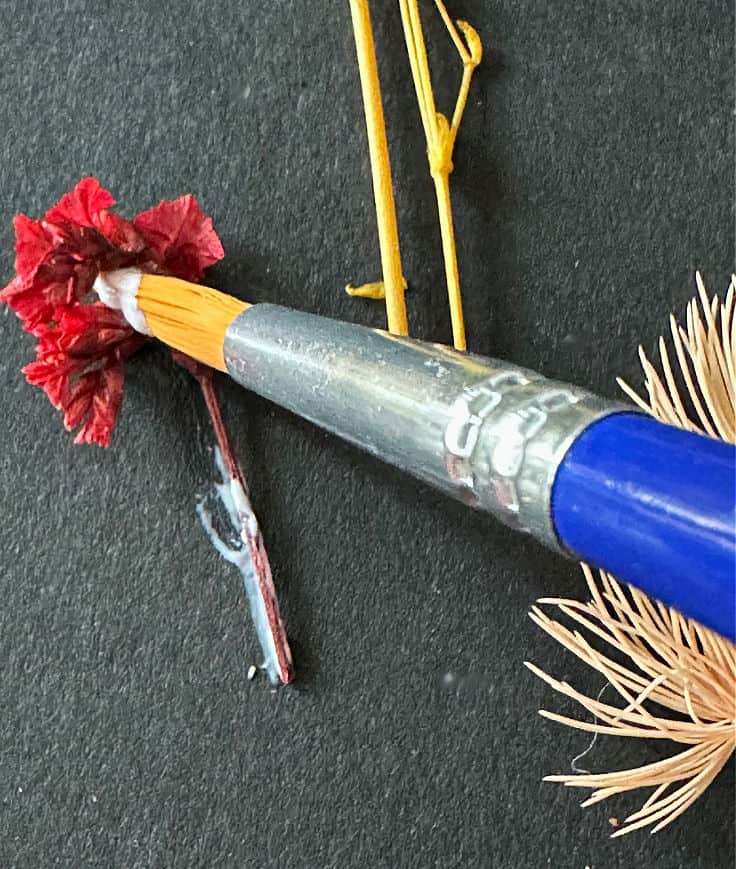
Because the finished art work will be framed you don’t have to use a heavy hand to add mod podge. Less is more in this project!
You want to lay your flowers out onto the board before gluing them down.

It helps to take a photo of the placement to ensure you are happy with the look.
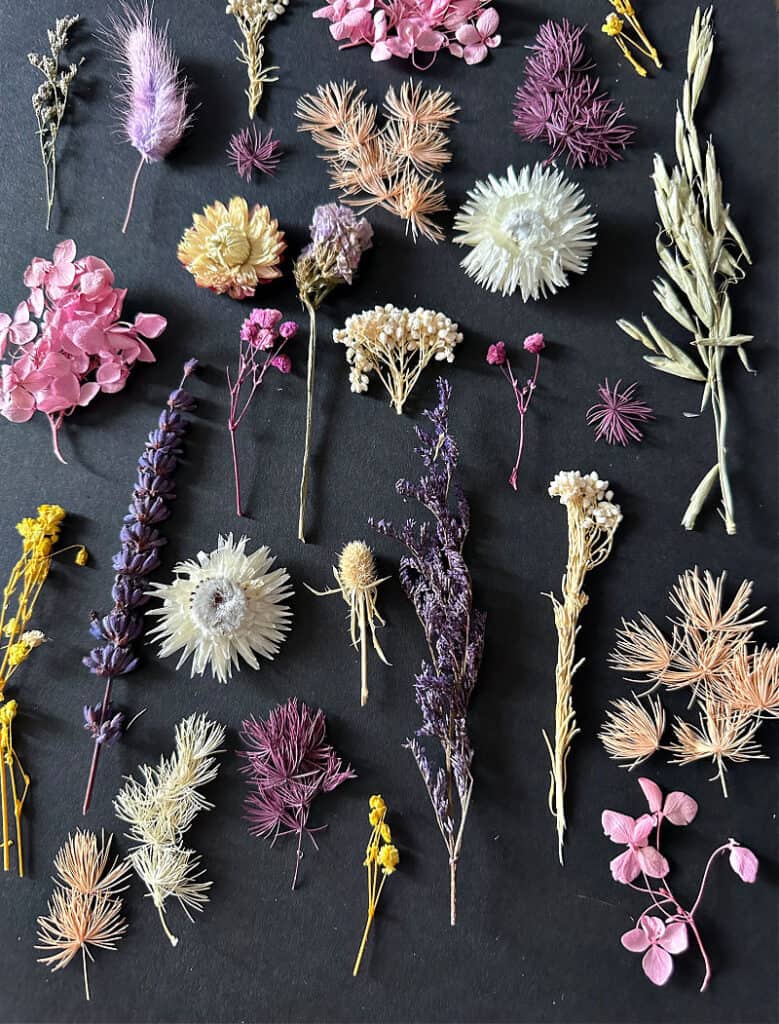

Once you are happy with the look go ahead and glue it down. It’s best not to rush. This is where you put some of your favorite music on and enjoy the process!
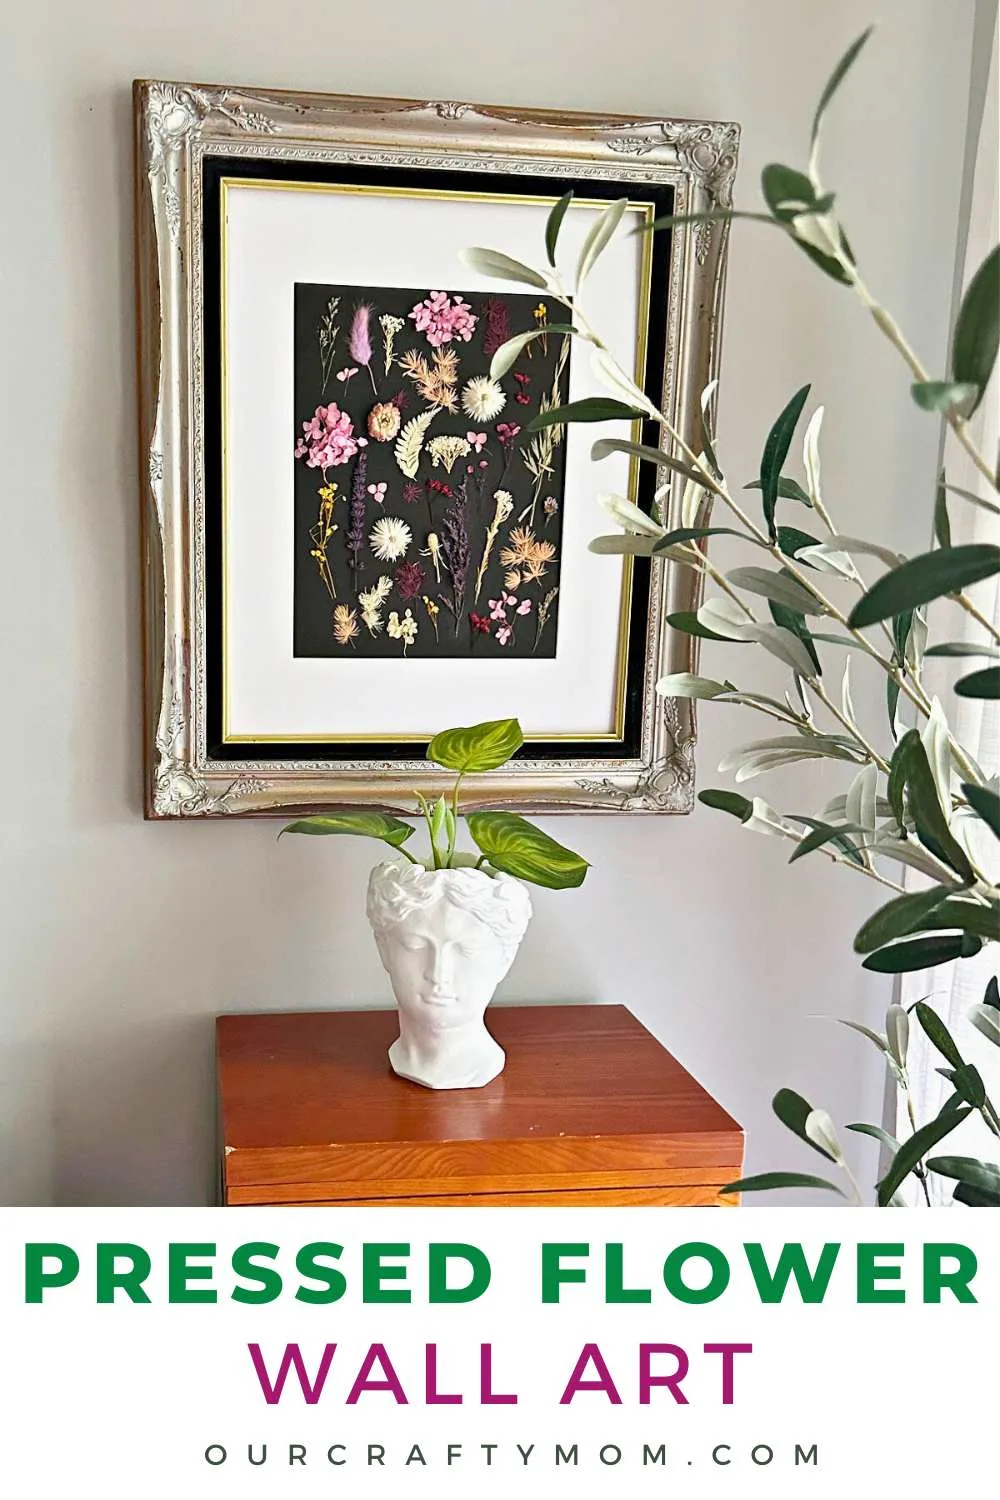
The last step is to frame the art work. Choose a frame that compliments the flowers. I chose to go with a 16×20 ornate gold frame that is my favorite vintage piece.
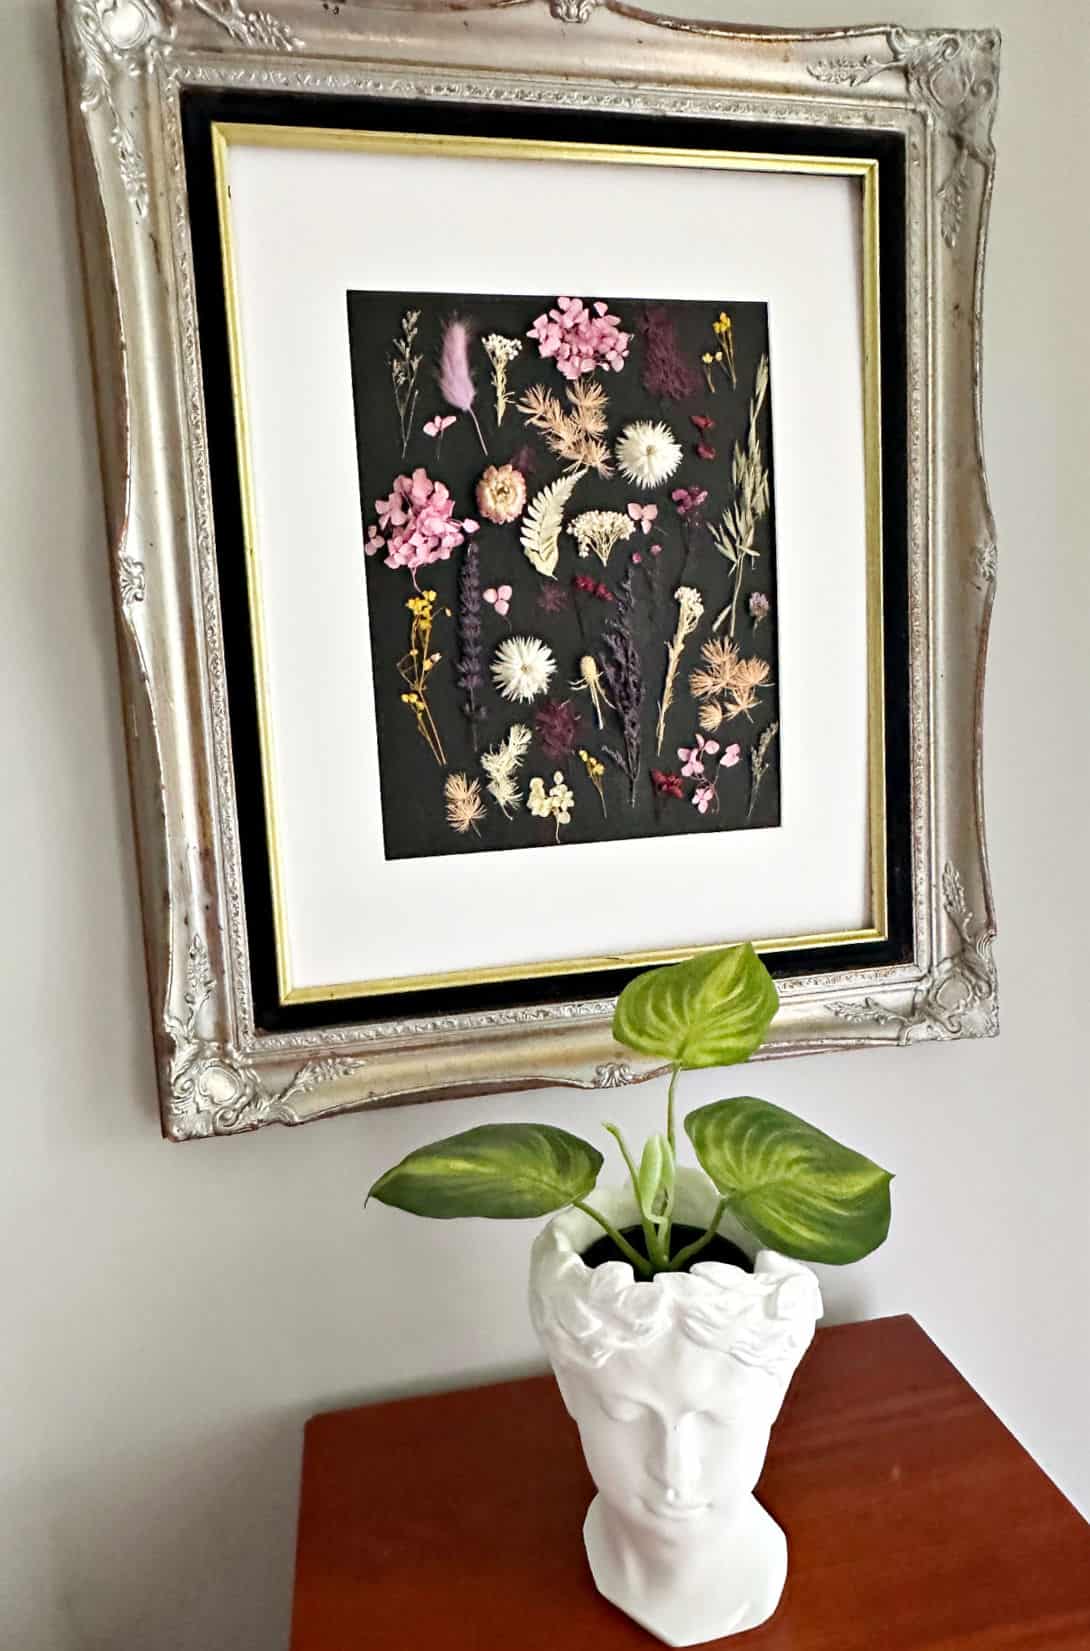

This is something I change out often. Because the foam board is 11×14 I used a mat.
You can see the Christmas Santa wall art I made using a larger board. Foam board is so convenient because it is fairly thick, sturdy and affordable.
Plus, it comes in different colors. The black really showcases the various flower colors.
You may also want to see the vintage tile wall pocket hung on this same frame.
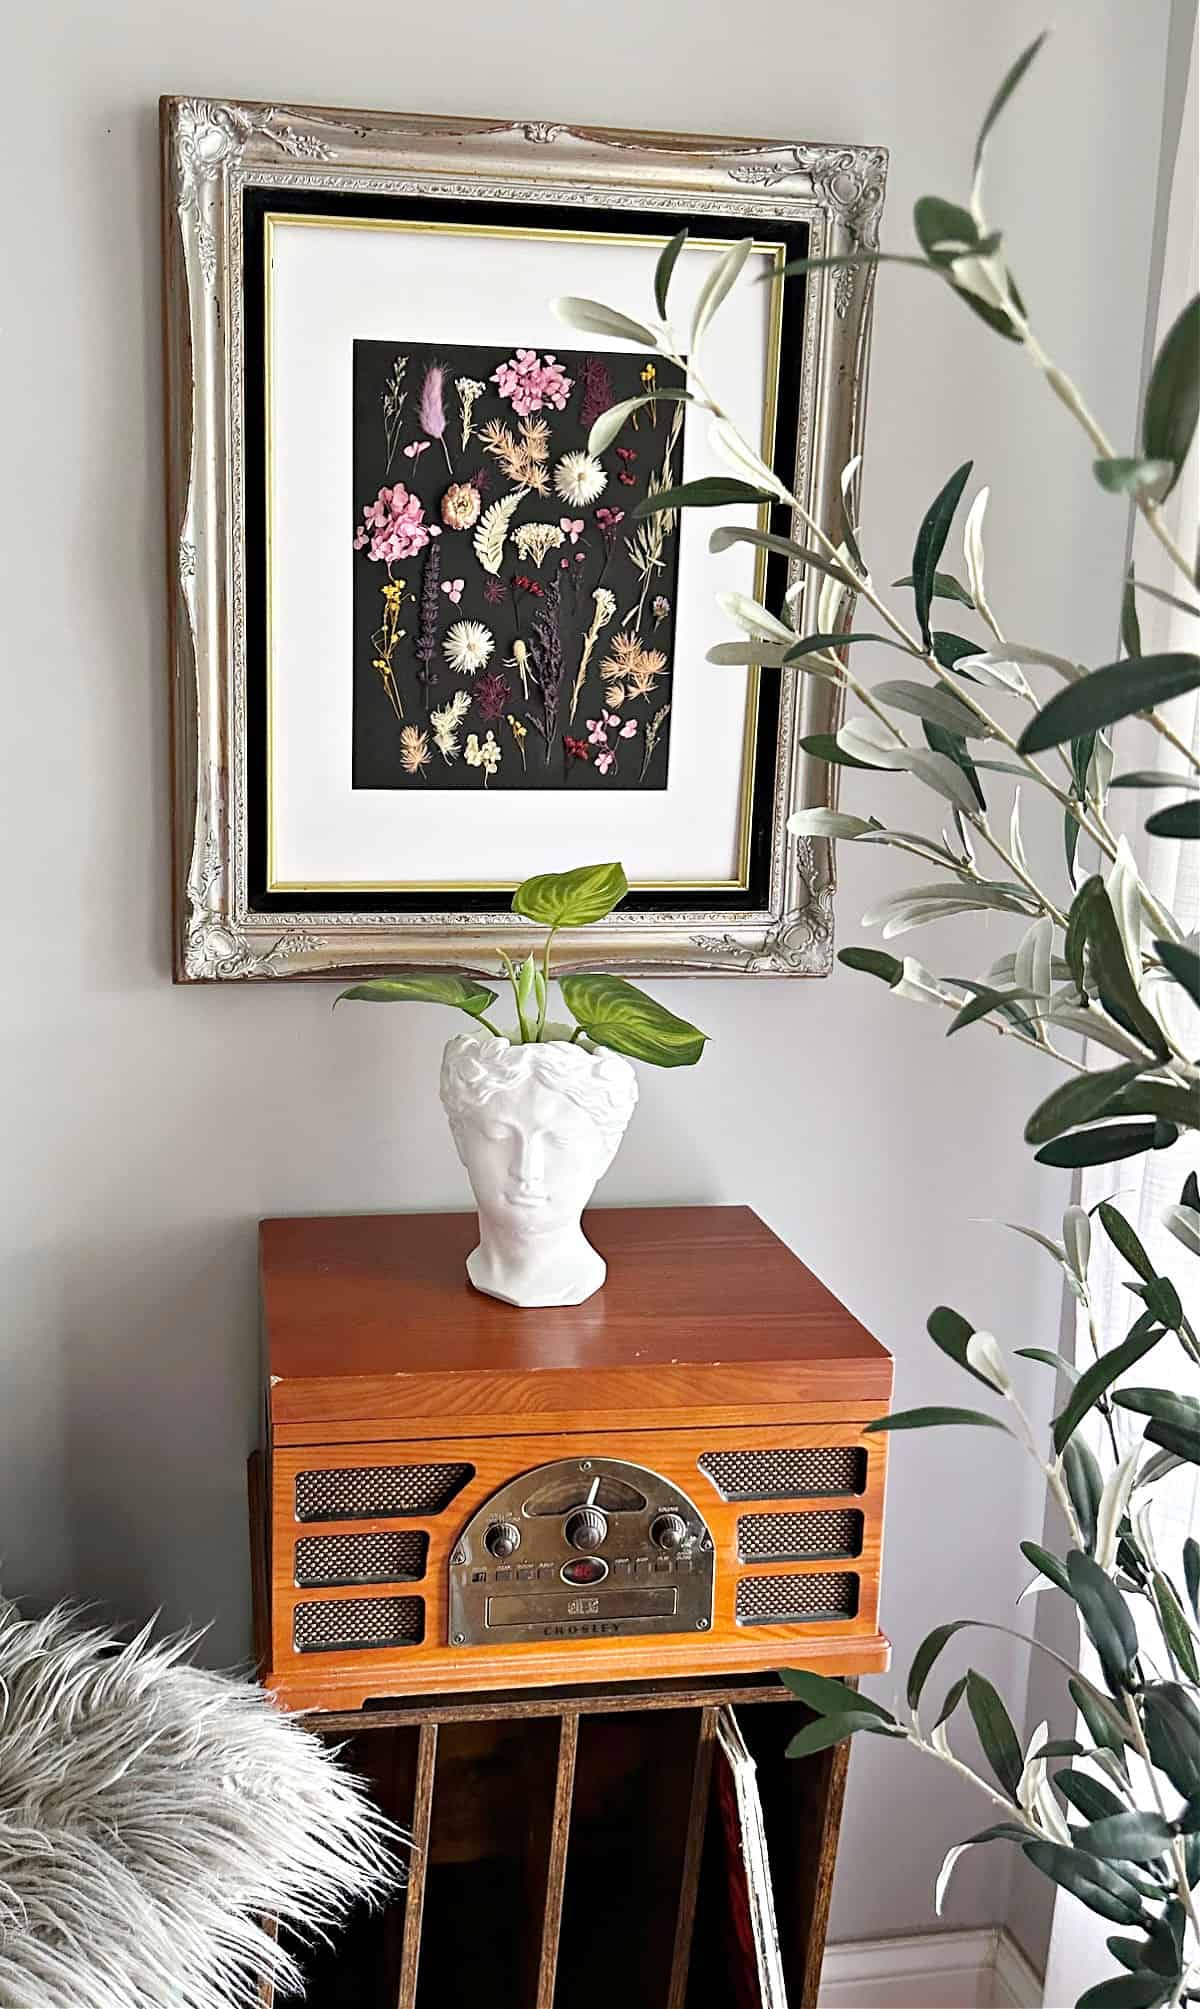
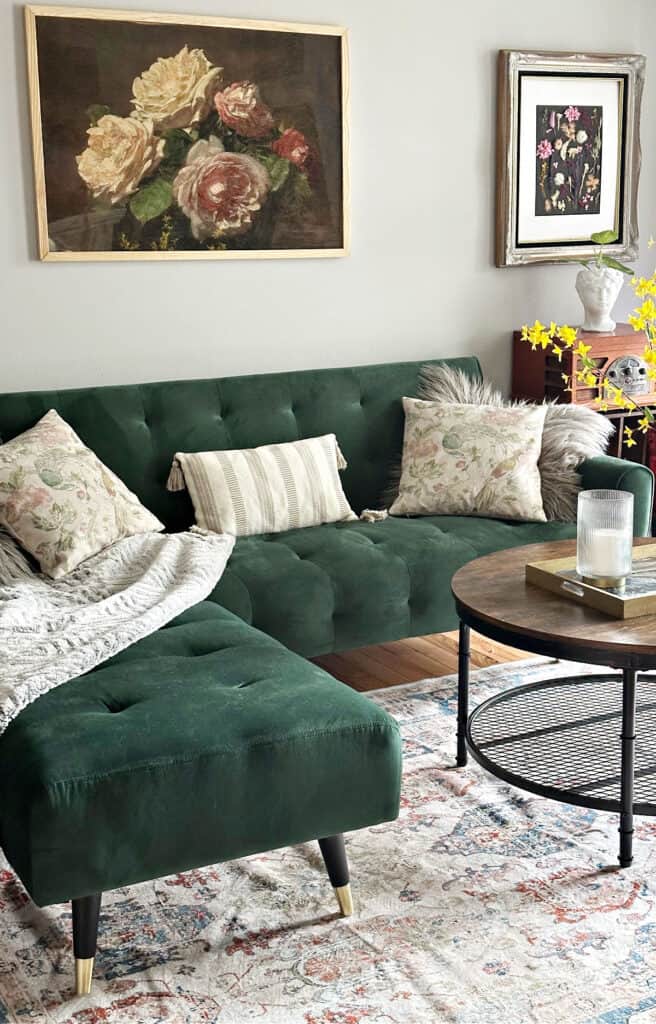
I’m thrilled with how this turned out. It blends in perfectly with my mid-century modern living room.
This would make a great gift idea for Mother’s Day, birthdays, housewarming gifts or even a wedding gift.

If this project inspires you to create your own pressed flower art, please share it with us on Facebook or Instagram by tagging @ourcraftymom.
You never know who YOU might inspire!!

Thankfully, I have quite a few pressed flowers left so I will be sharing resin and wood coasters along with a cutting board next week.
Share this with your friends on Pinterest by pinning the below image.
It helps my blog grow and doesn’t cost a thing! 🙂
**PIN FOR LATER**

For more inspiration, be sure to visit Patti from Hearth and Vine. She has several beautiful dried flower crafts, including pressed flower candles!
Thanks so much for stopping by. Happy crafting!


Here are even more DIY wall art ideas:
- Chinoiserie Wall Art Printables
- Old Window Decor Ideas
- Best Upcycled Wall Art Ideas
- Moss Garden Wall Art
- TikTok Viral Ghost Art
You can find me on social media below: