Transform your space this holiday season! Learn how to make large Christmas wall art that’s stunning yet budget-friendly.
I’m thrilled to share this beautiful Santa Claus art that you can easily recreate for your own home. I’ll show you how.


This post contains affiliate links at no extra cost to you. Please see my full disclosure here.
Extra Large Christmas Wall Art
If you follow me on Facebook you know how much I enjoy decoupage crafts. This oversized Christmas sign is the perfect example of why.
With a decoupage technique you can make all kinds of wall art, home accessories like vases, and even updated furniture.
When I was decorating for the Bloggers’ Best Christmas Home Tour I knew I wanted a statement piece of art for my living room.
There was a viral Santa sign at Dollar General that I have been trying to find all season without any luck.
So, I did a little brainstorming and decided to make my own.
Let’s get to the super simple step-by-step tutorial so you can add a beautiful piece of handmade Christmas art to your home.
Supplies for Christmas Wall Art
- Black Foam Board – check your local dollar store
- Santa image – or any art prints of your choice
- Mod Podge – I used matte
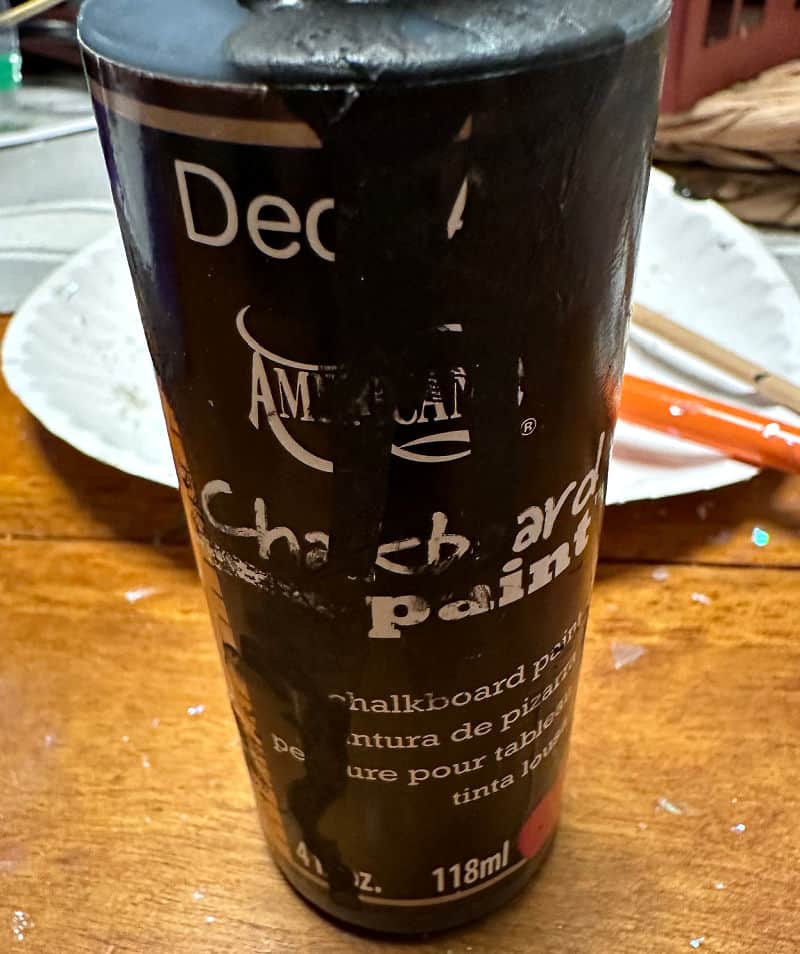
- Black Paint – I used chalkboard paint
- Cordless Hot Glue Gun – this is my favorite
- Box Cutter
- White Glitter Snow
- Snow-Tex
- DecoArt Glamour Dust
- Foam Brush
- Picture Frame – mine is an old thrift store find
- Cricut EasyPress or Iron
Where to Find Free Art
The first thing you want to do is find an image for your artwork.
You can find tons of pictures to download online for free.
After you’ve found the image you’d like to print, it’s important to check the copyrights of that image to ensure it complies with the copyright laws.
Here are some of my favorite places to find beautiful art.
- Unsplash
- Pixabay
- National Gallery of Art
- Raw Pixel
- Harvard Art Museums
- Smithsonian Open Access
- New York Public Library
- Canva
- The Graphics Fairy
Once you find the image you want to use, download it and save it to your computer.
Be sure to name it something that you will be able to find easily.
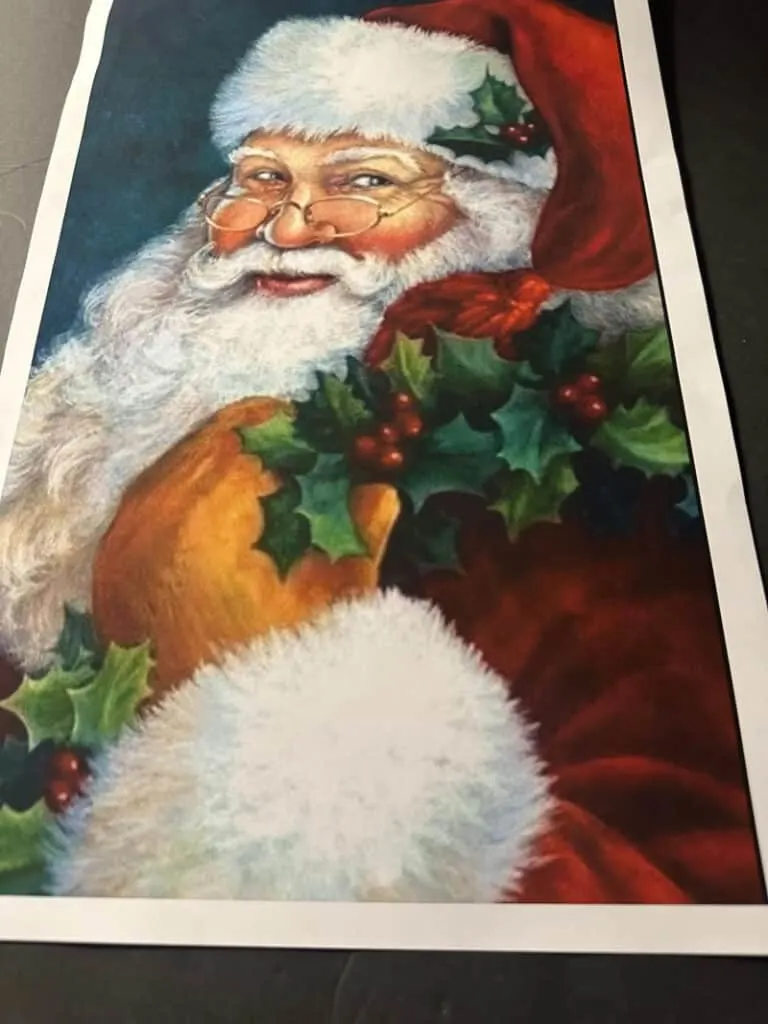
This is the Santa image I used.
How to Make Oversized Art
For my wall art I uploaded the image to Staples. An 11×17 print is only 98 cents!
Because you are using a decoupage technique copy paper works just fine.
If you are planning to just frame the print I would have it printed on cardstock.

My frame was 16×20 so I went with a 12X18 poster print. I believe it was just under $8.
Cut Foam to Size
Start by cutting your black foam board to size to fit into your frame. A box cutter or craft knife works great.
You can also use a white foam board if you like, but I wanted the colors of the image to pop against the black.
Add Mod Podge
Use a foam brush to apply a layer of mod podge to the foam board. Let it sit for a minute so it gets a little tacky.

Don’t apply the mod podge to the image. It works better to place it directly on the board.
Apply the Image
Place your image face up on the foam board. Be sure to lay it so it is centered.
My favorite way to decoupage is to use an iron-on method. It leaves no wrinkles!
If you haven’t tried this method yet, I highly recommend it.

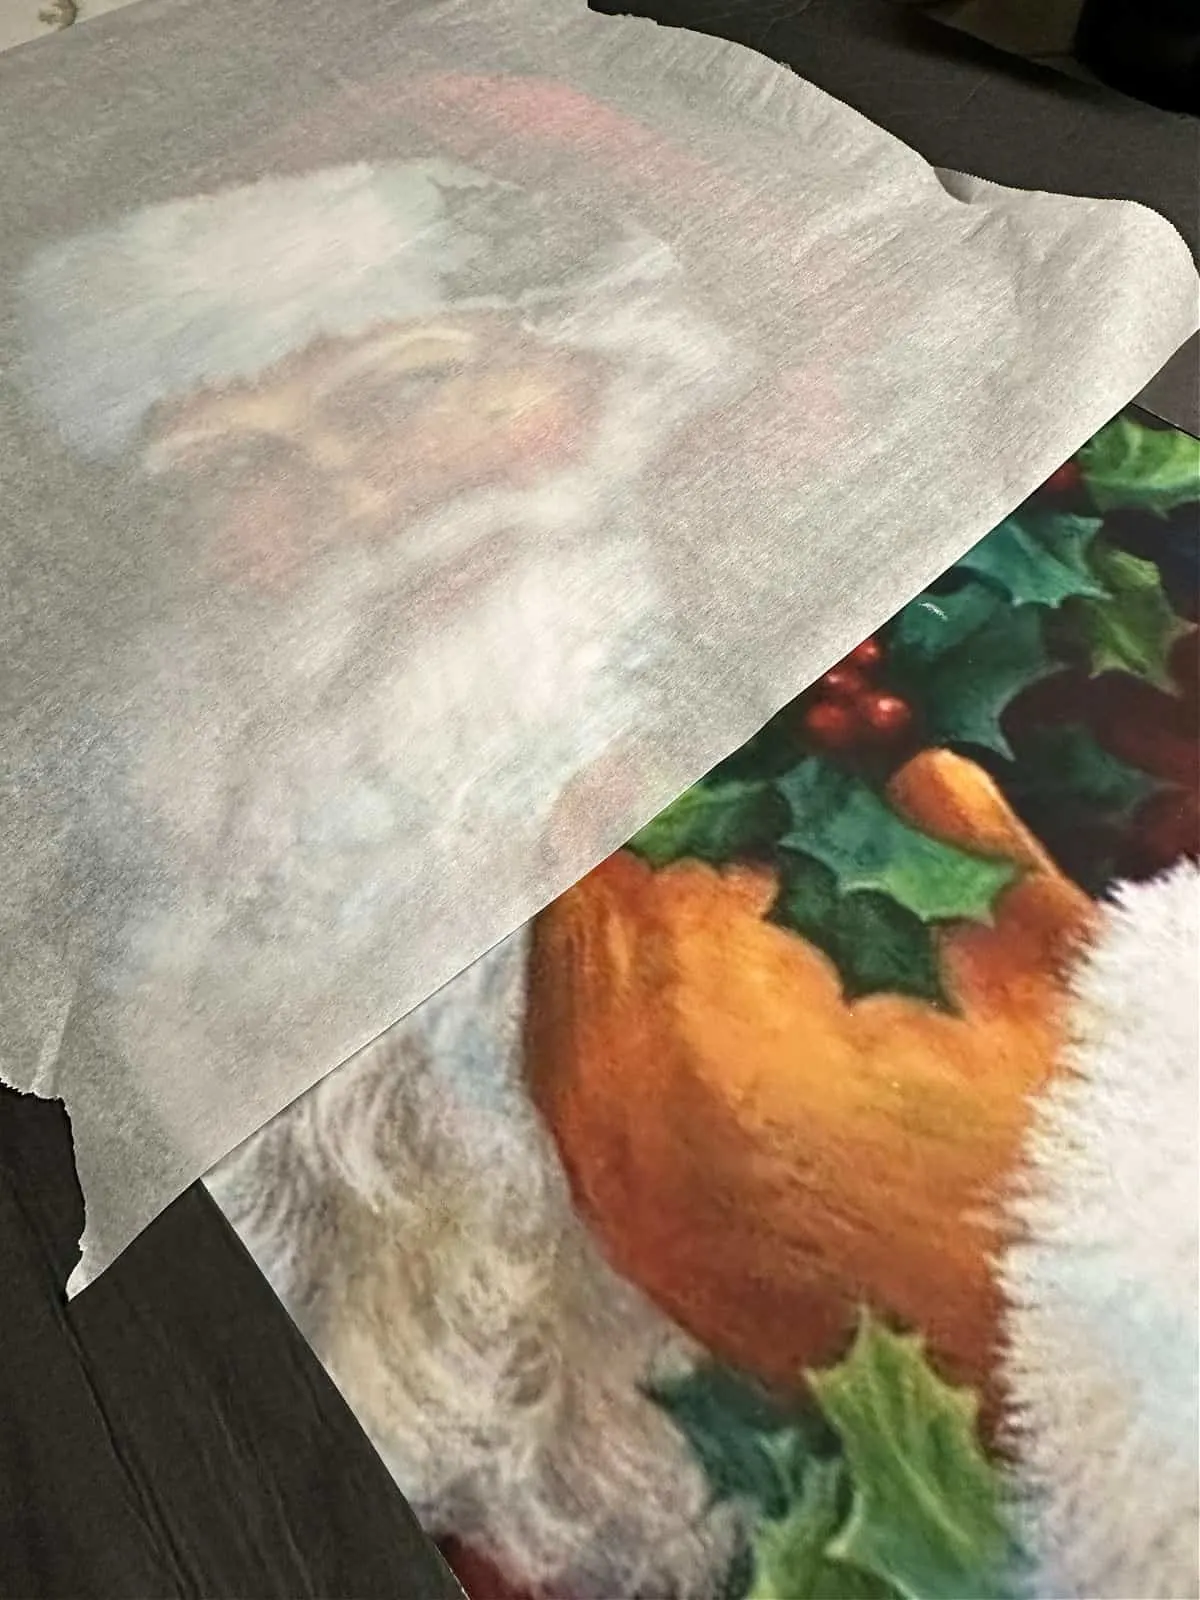
Place a piece of parchment paper over the image and use a Cricut EasyPress to transfer the image.

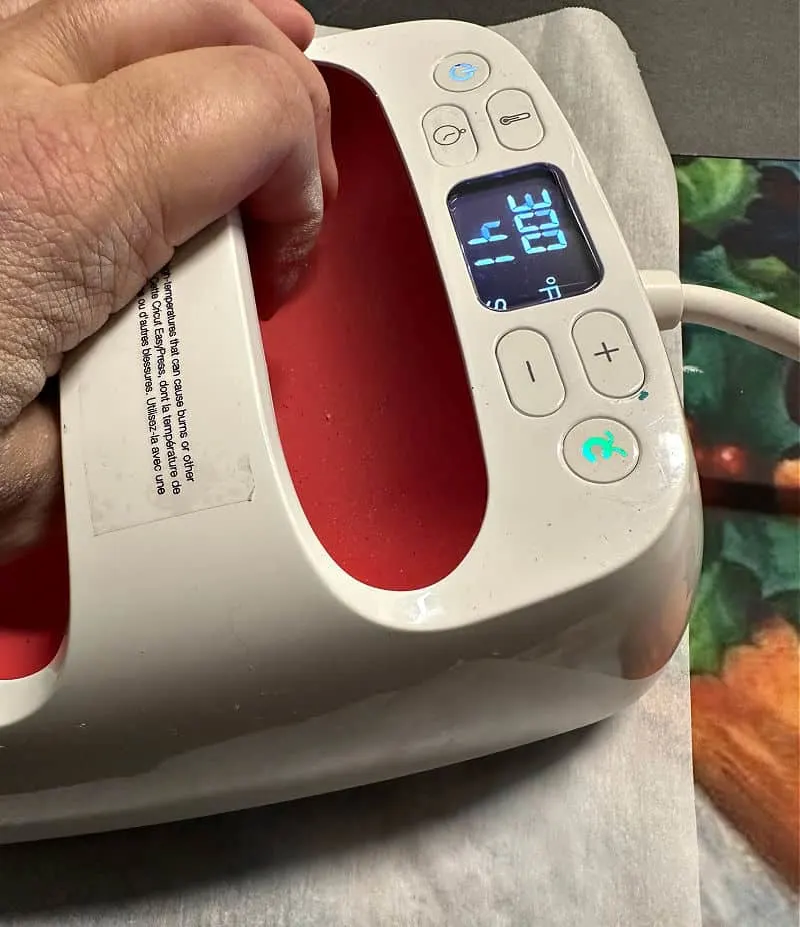
It needs to be set to 300 degrees for about 40 seconds. You can use a regular iron if you don’t have an EasyPress.
Remove the parchment paper and ensure the image is transferred. You may need to go over the edges again so they don’t curl up.
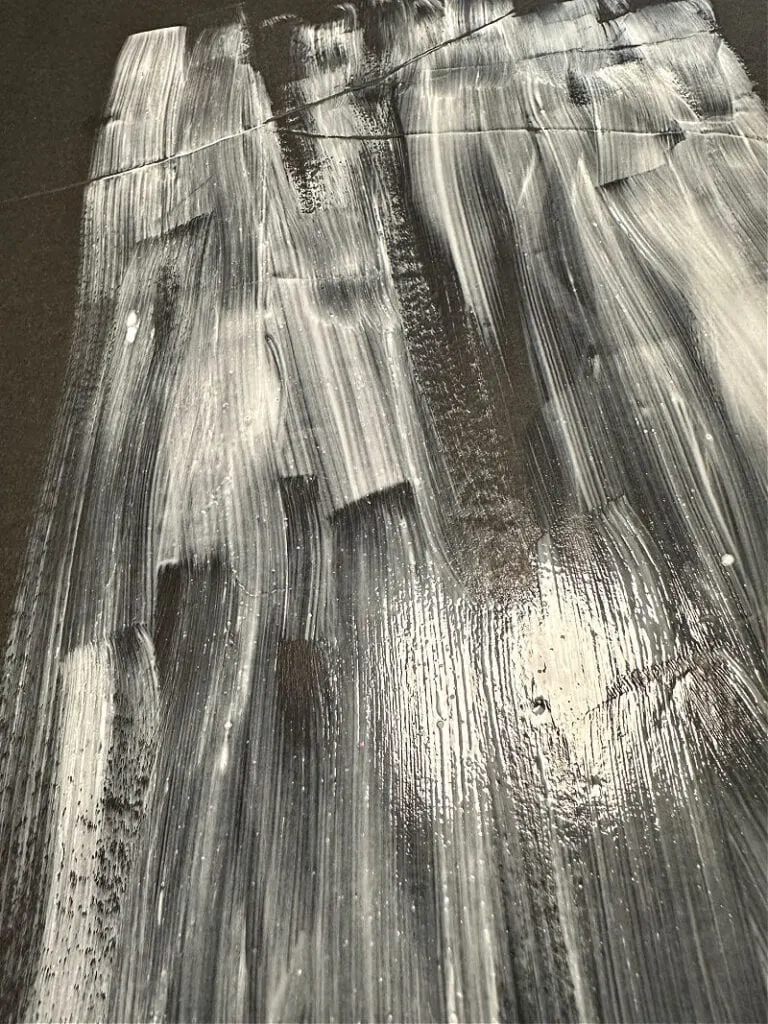
Paint the Board
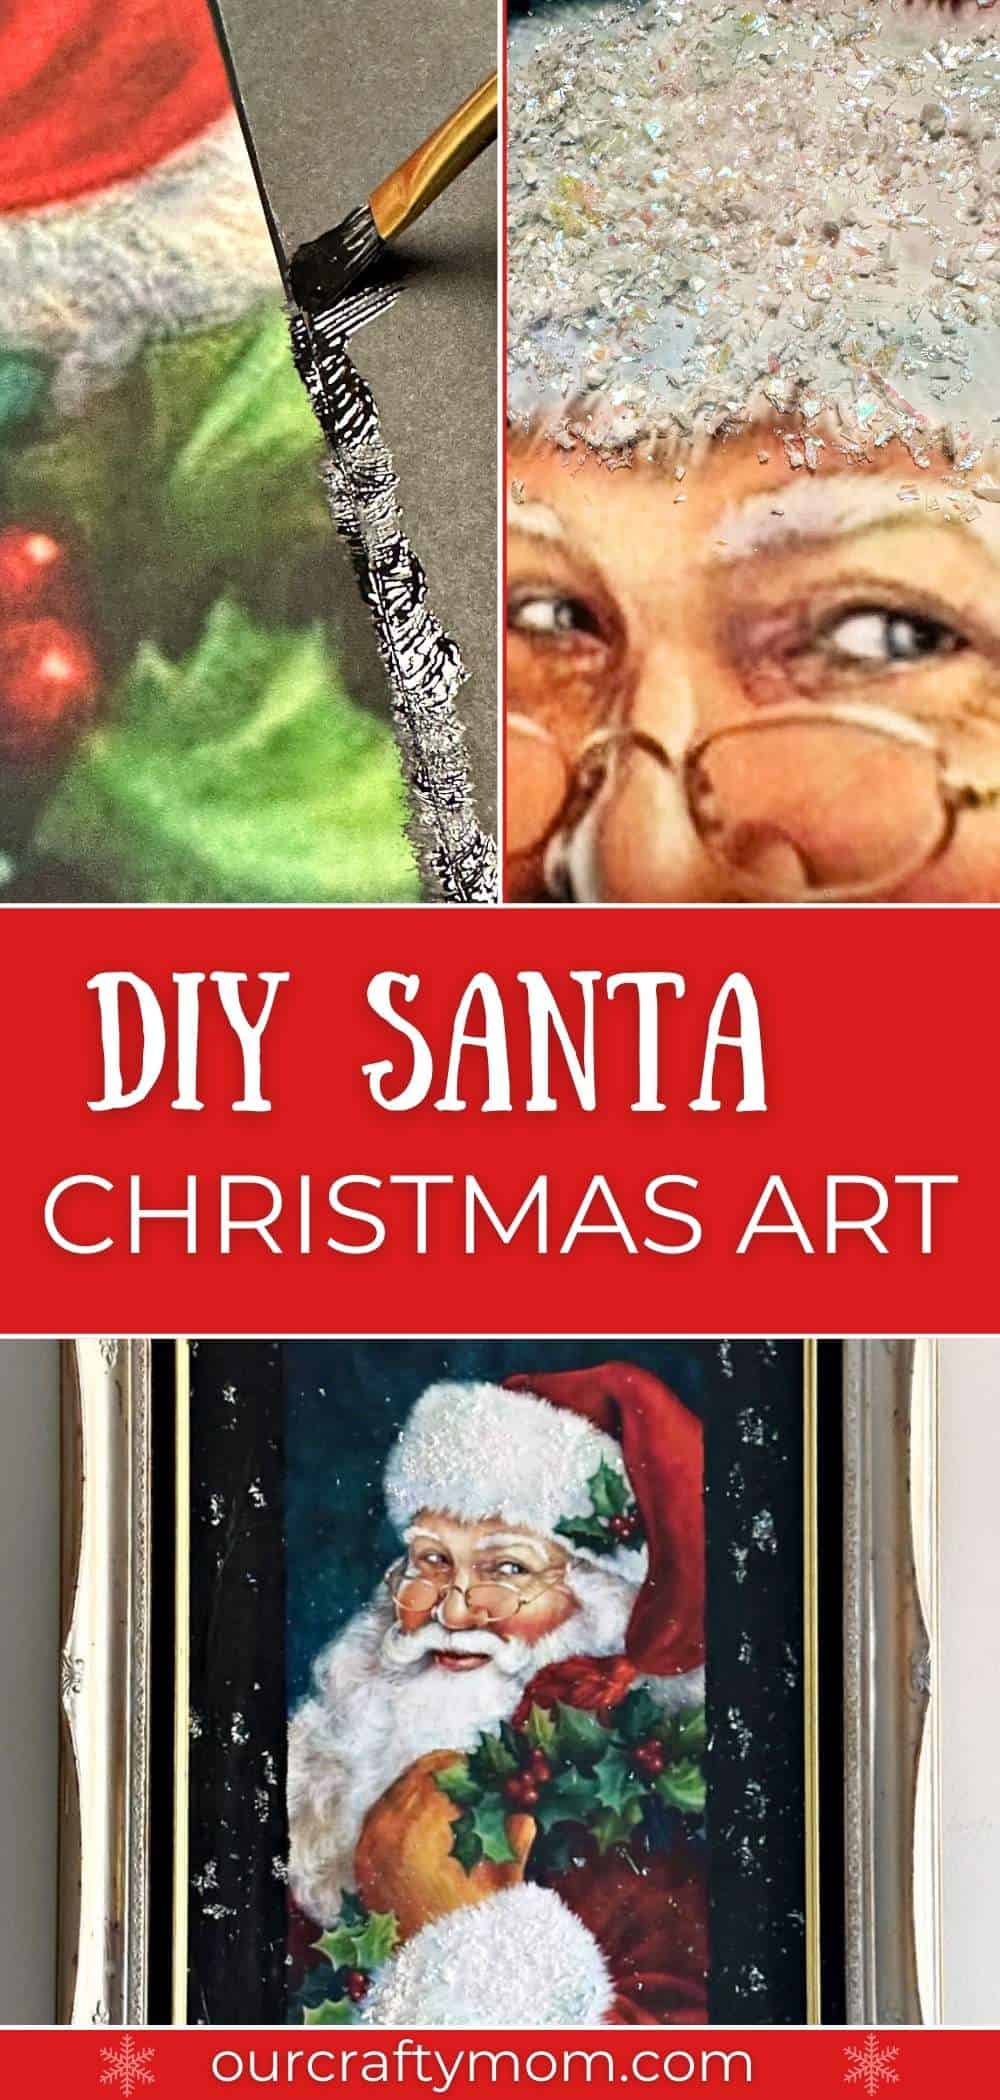
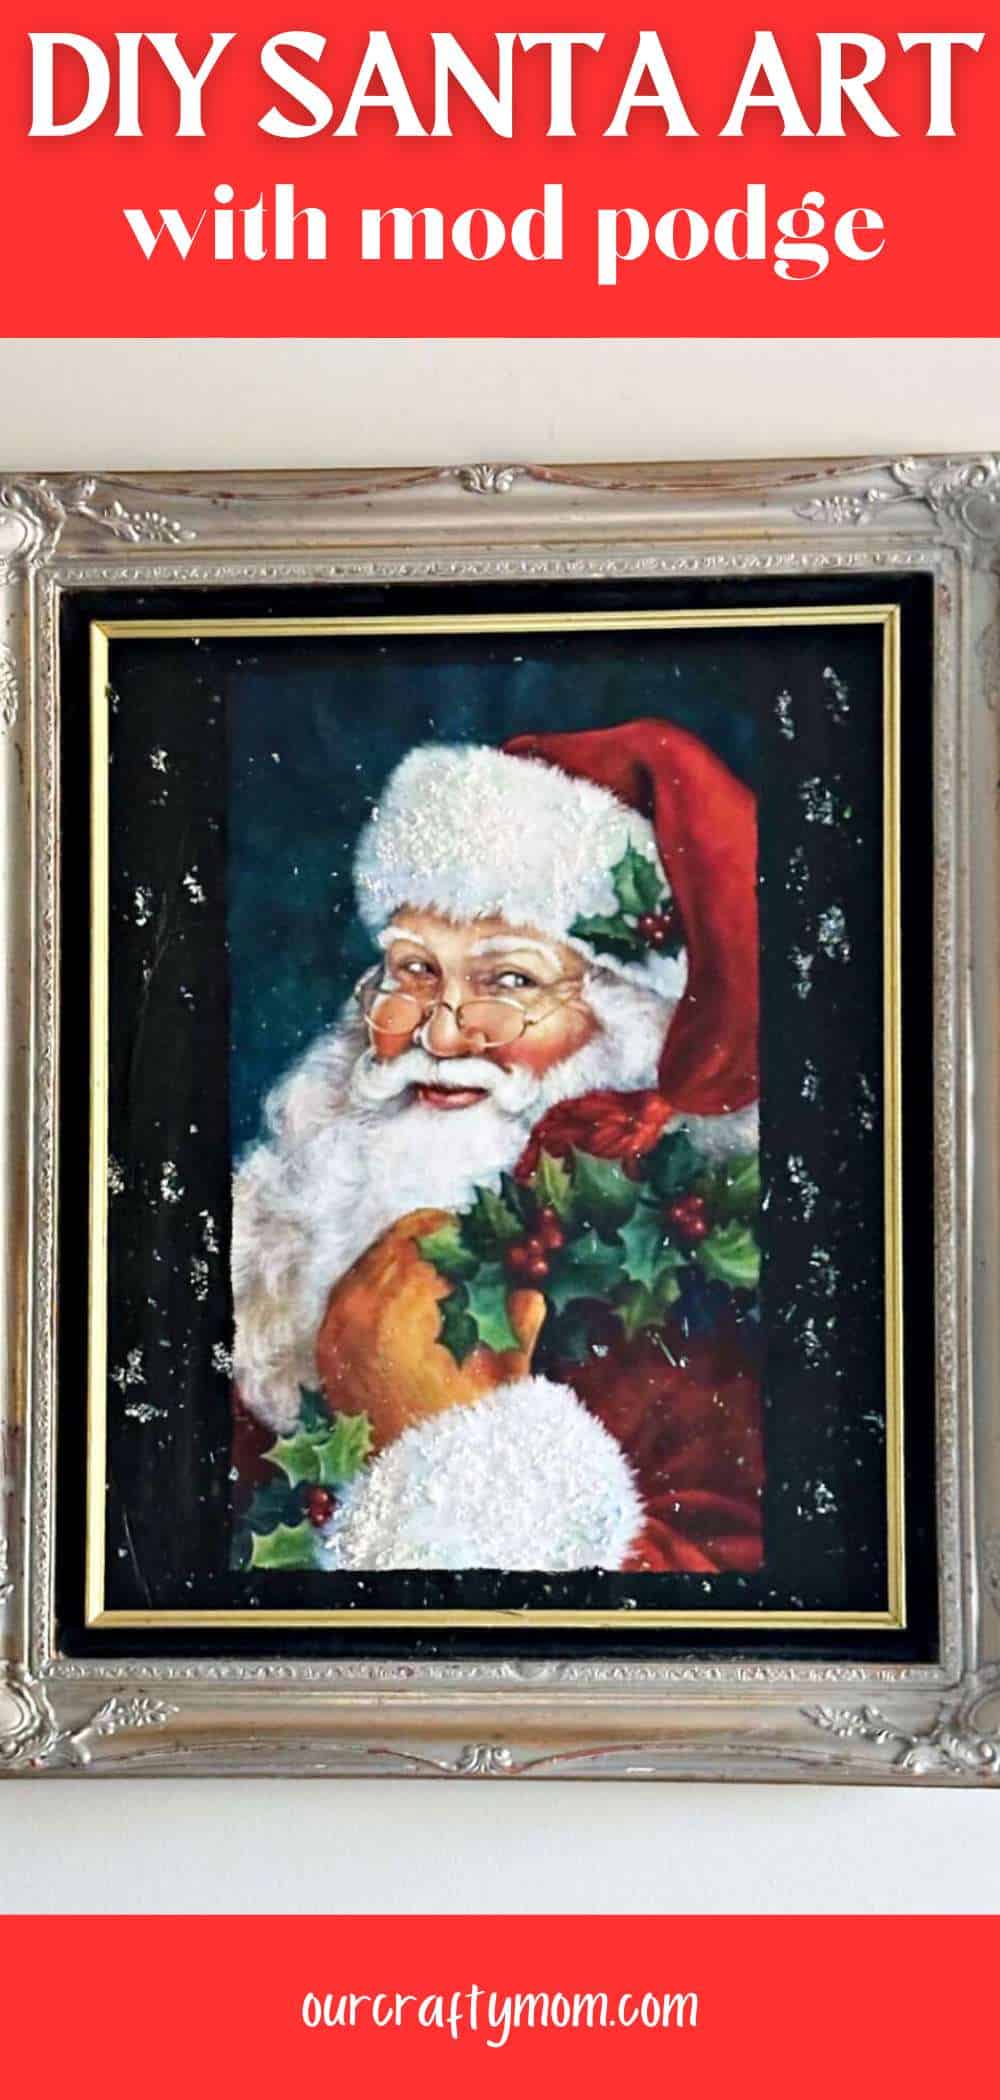
I decided to paint the edges of the image and the board with chalkboard paint so it would blend better.
You can also use acrylic paint. This is completely up to you.
Just give it a nice, even coat lightly pouncing the brush on the edges so it looks cohesive.

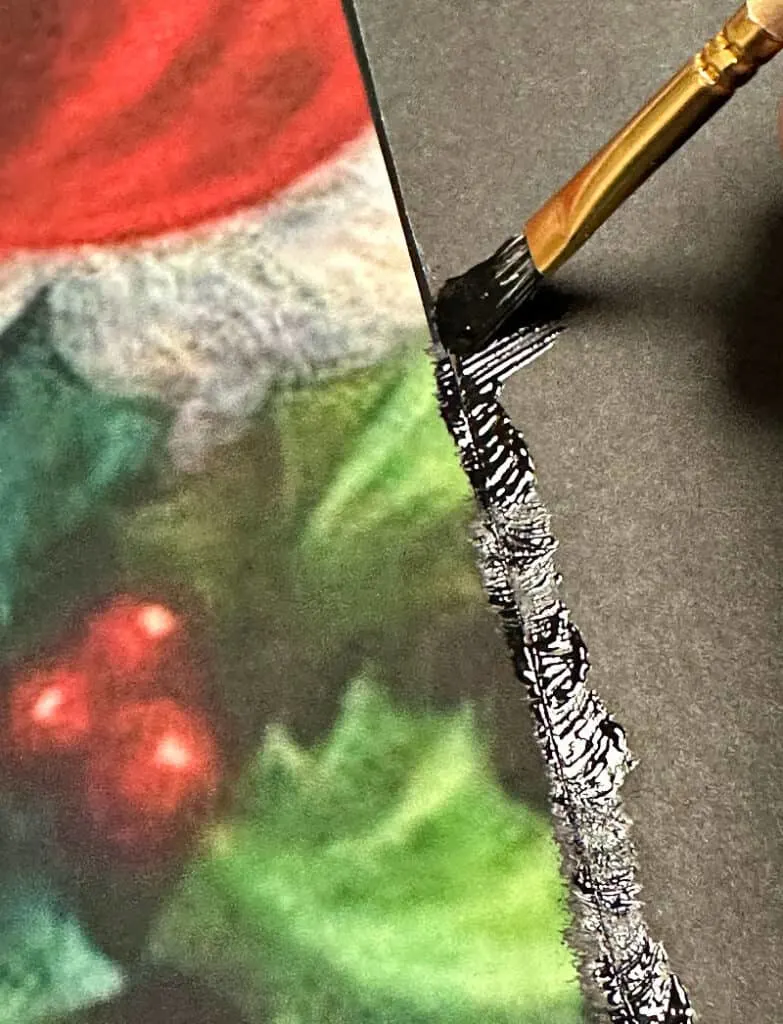
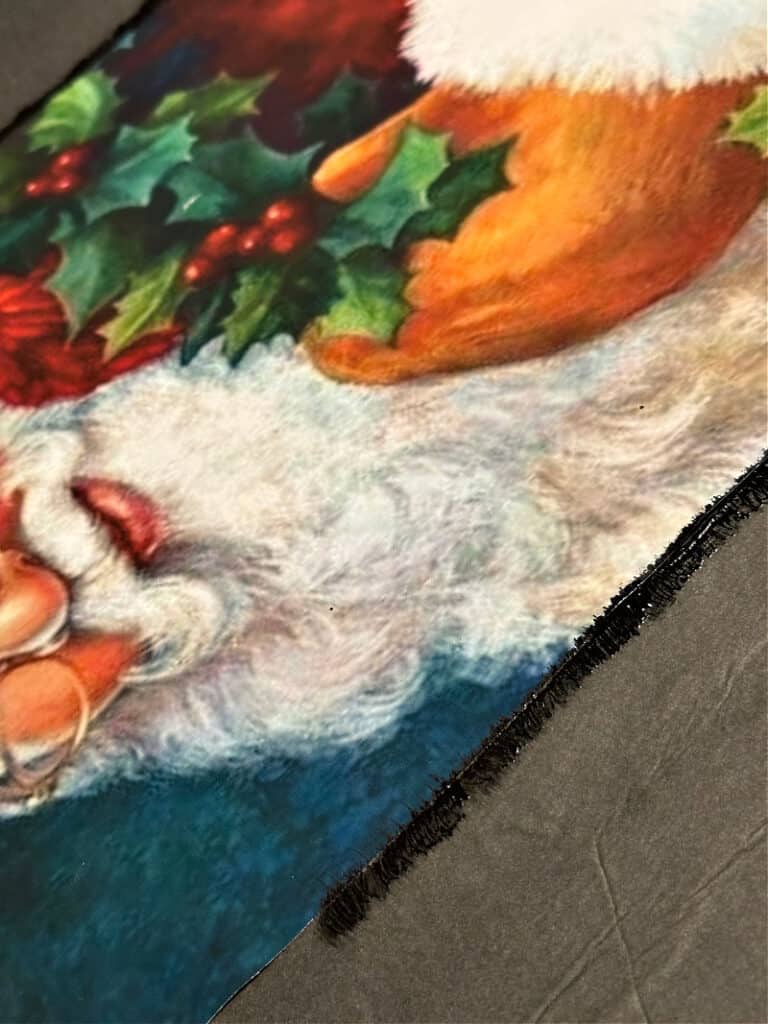

The board looks much better once painted.
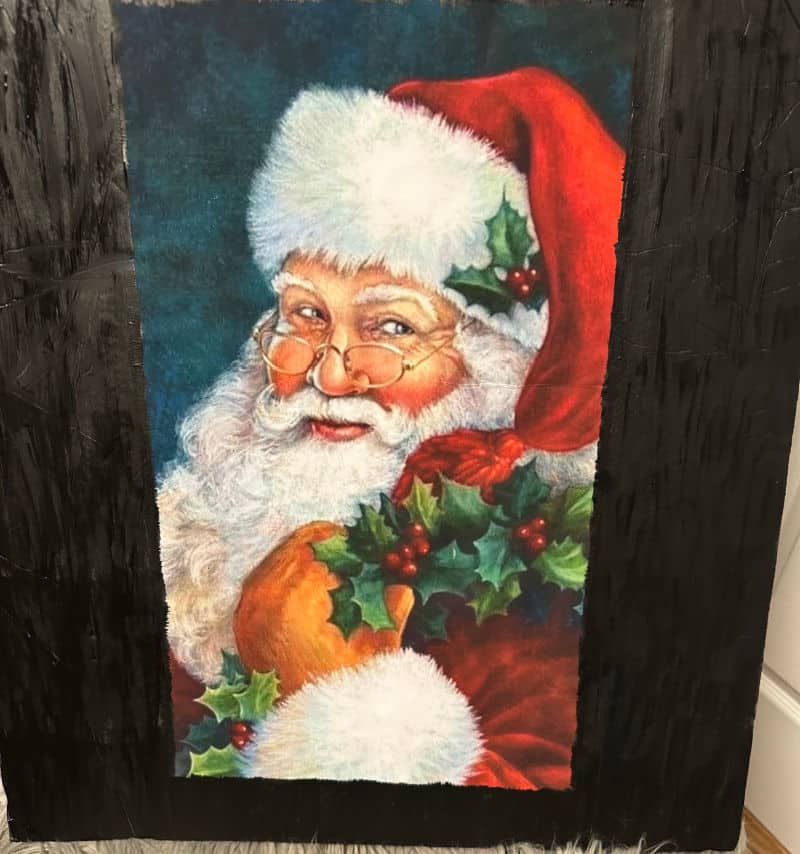

Another option is to print your image to cover the entire board, but I wanted to experiment a bit and also wanted to keep the cost to under $10.
Add Glitter
To give Santa a bit of sparkle, I added glamour dust to Santa’s hat and cuffs. What a difference this made!
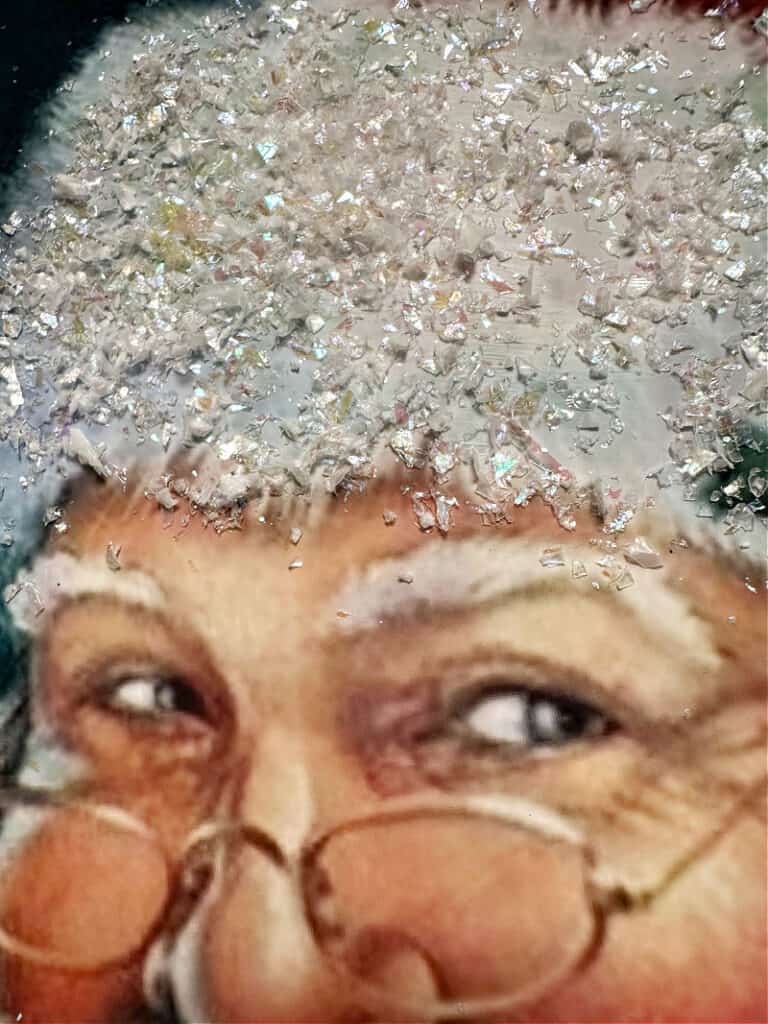
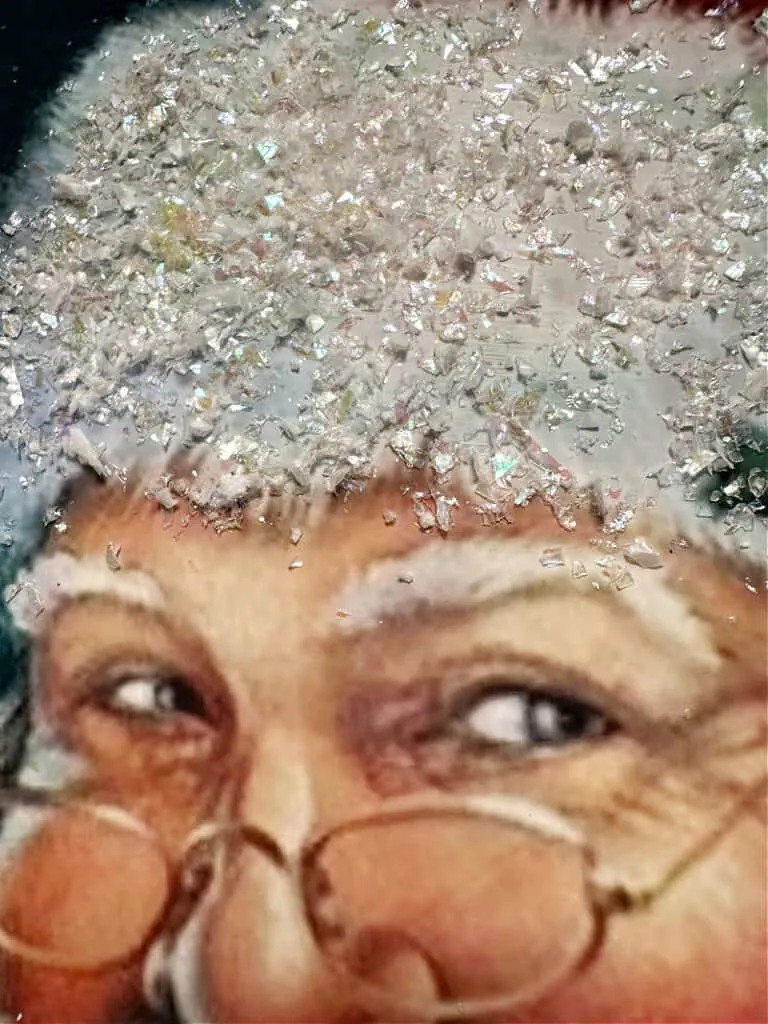
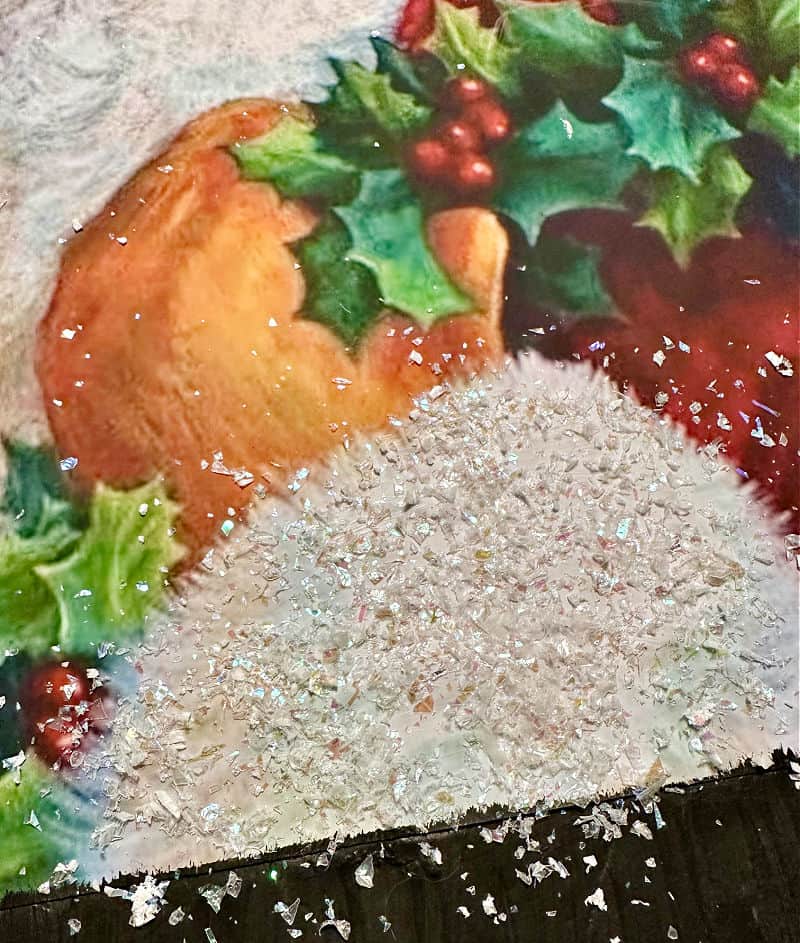

Simply add a bit of mod podge to the area and sprinkle the glamour dust.
At the last minute I decided to add a bit of a snowy look to the image. It gives it more texture and dimension.
Frame Your Christmas Art
The final step is to frame your beautiful art work. One of my favorite places to look for antique frames is Goodwill, or other thrift stores.
It is amazing to see what kind of frames you can find for cheap.

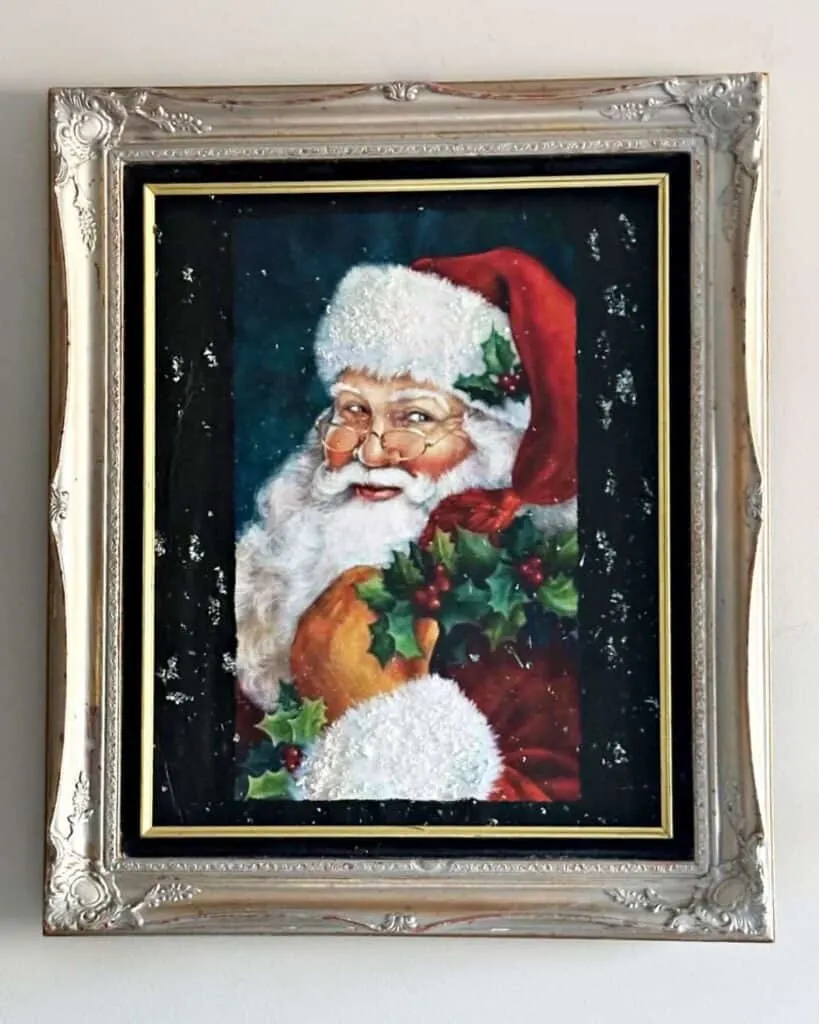
Look for ornate, detailed frames to match the vintage style of your print.
I’m thrilled with how this beautiful DIY Santa art looks in my living room next to my letters to Santa station.
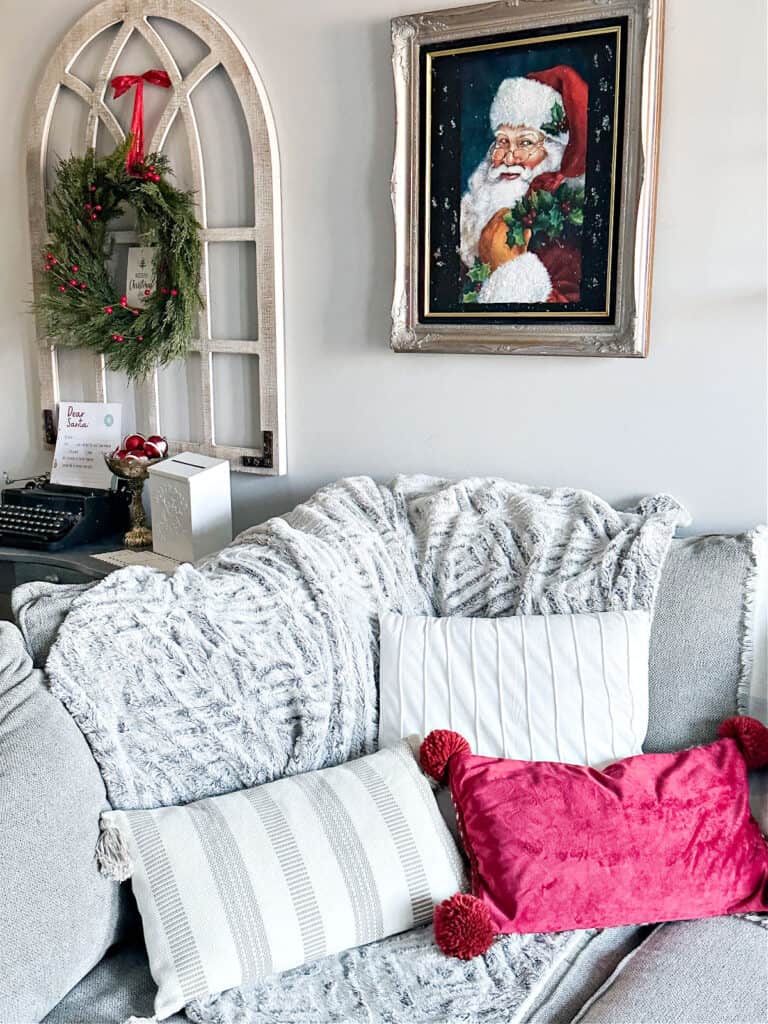

It definitely helps you get into the holiday spirit!
Doesn’t it look like a piece of Christmas decor you would find at a vintage market or boutique?


Please share this with your friends on Pinterest by pinning the below image. It helps my blog to grow and doesn’t cost a thing! 🙂

Let me know if you give this beautiful Christmas wall decor a try.
Share it with me on Facebook or Instagram by tagging @ourcraftymom.
It totally makes my day!
For even more budget-friendly ideas, you don’t want to miss this amazing collection of 51 Dollar Tree Christmas Crafts.
Thanks so much for visiting. Happy holidays.
You can find me on social media below:
Ruth
Monday 12th of January 2026
If you don't have the ability to get large prints of images (as prices have gone up a lot over the years) a cheap & easy way to get a nice xmas picture is to use 1 of the sides off xmas gift bags. There are always lots of different images available on gift bags, & most years you'll find some lovely old fashioned/retro father xmas images.. especially in cheaper stores. And they'll come in a range of sizes, so you can make smaller &/or large xmas pictures (if you choose XL gift bags). Carefully cut off the good side of the gift bag, that DOESN'T have that crease mark across the lower part (where the store has folded up the bottom). Then you can frame the image either as is, or with card mounts, or place on card to create a large mount (like you have), & place it in a larger frame, to make the whole thing look more impressive. (You can often find some great frames in charity or thrift shops, & paint the frames of you don't like the colour.) The punch holes where the handles were.. Ideally cut the image below the handle holes, or cover the holes with the picture mount. Or if you need the entire side of the gift bag image, then think of ways to hide the punch holes, like maybe with a ribbon. You can even choose not to hide the holes, & just tie a ribbon through both holes & create a nice bow at the front. Or maybe add glitter or embellishments over the holes (& some extra around them & a few more around the image, to draw less attention to the 1's hiding the handle holes.). If you don't want any embellishments, you can cut off a bit that matches from the narrow side or off the creased side of the gift bag, & either stick it BEHIND the handle holes, or try punching a couple of cirles from the bit you've cut off, & use the punched cirles to FILL-IN the handle holes, using strips of tape on the back of the image to hold them in place. Just try to choose an area the same or similar in colour to where the holes are. It's usually easy enough to hide the punch holes, or at least make them less obvious, & once framed, you'll rarely notice those areas, especially if you've slightly embellished with a little glitter, or even added a ribbon or bow to the top of your frame & draped it over the front. I've used ornate & plane frames to create some great xmas pictures, halloween, mother's day, valentines day, father's day, & bithdays, too.. Some have no mounts, others have white mounts that came with the plane black or white frames. In some, I reused the frames & just switch out the images depending on the season or event. I've also created larger frames made up of collages of lots of small images & old xmas cards (mother's day or birthday cards, or cards from friends too), & put them together, either overlapping, or with nice wrapping paper/s as the background, which worked really well with birthday & xmas cards. I've used left over bits of wrapping papers I really loved, & pieces of wrapping paper from gifts off my sister & best friend, which give added meaning when I look at the collaged frames.. You can add ribbons, or embellishments, hang a bauble/s too, to make it more kitsch. Vintage/retro images & cards work well in reused, retro frames. But can also look great in a simple white or black frame. Really, the world is your oyster.. experiment. I find that the different seasonal events, & the many events we can celebrate throughout the year, can allow us to be creative & include items in our decor, especially those that have meaning to us, that we might not want to display all year round as we don't have enough display space, or they don't fit our taste or decor style, but we can put them out on display at specific times of the year.. It's a nice we to reconnect with memories & the people who may not see often, or that may not be with us any longer. Those little tacky ornaments, cheap reindeer statue, the old cards & letters, the 1 unbroken glass from childhood, kitsch xmas linens, & even that chipped faded old plate, can create wonderful memories of my deceased mum & happier times gone by, when added into my xmas decor..
Michelle James
Monday 12th of January 2026
Thank you so much for your wonderful ideas! I also look for gift bags to use in my decor, especially after the holidays when you can get them cheap. The frames with collages and memorable photos that you make sound just lovely. It is always nice to include loved ones and wonderful memories in our home decor. Wishing you a very Happy New Year!