In today’s post: Make a beautiful DIY loop yarn wreath with velvet pumpkins from Dollar Tree.
This super simple fall craft can be made in under an hour for about $15! I’ll show you how with this step-by-step tutorial.

How to Make a Loop Yarn Wreath
This loop yarn wreath is so easy to make! You can use whatever embellishments you want to decorate the wreath for any holiday or season.
It would look just as lovely alone as a cozy and fluffy yarn wreath.
If you are not familiar with loop yarn, I’ll share some frequently asked questions and tips for working with it at the end of this post.
So be sure to read to the end.
There will also be a printable card to make this project even easier for you!
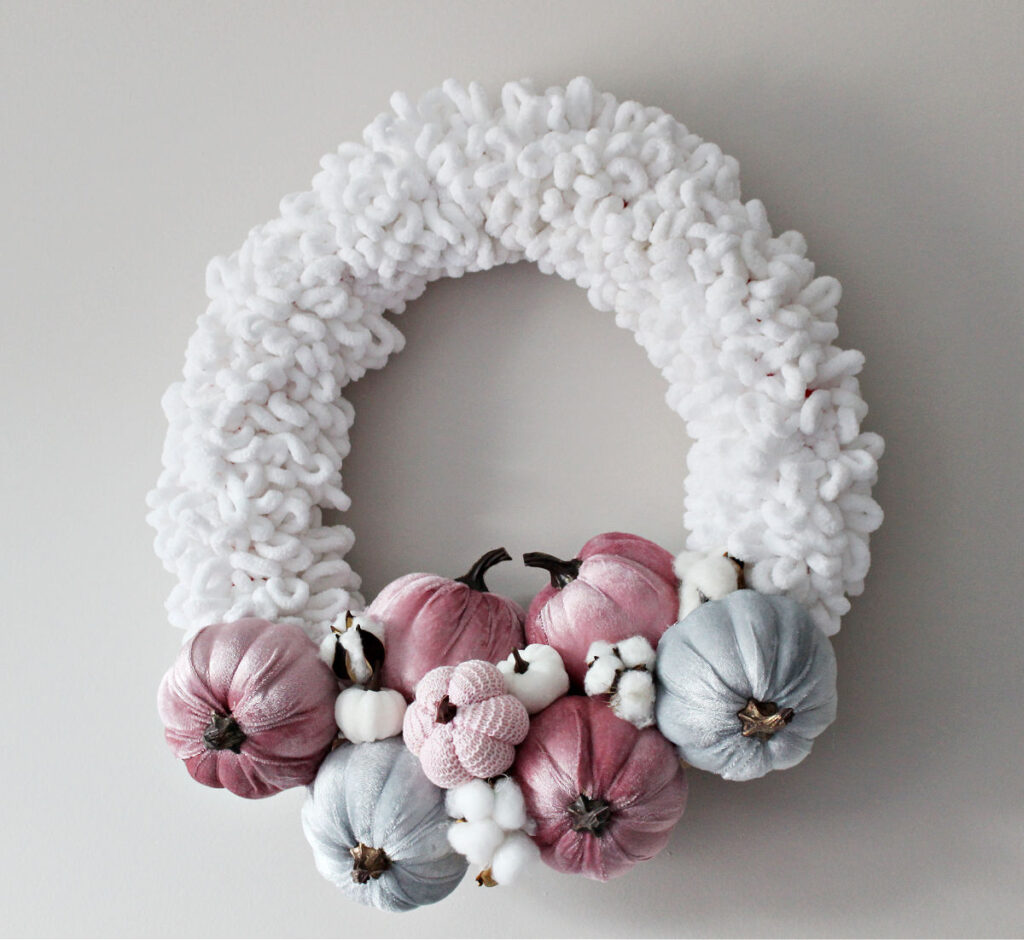
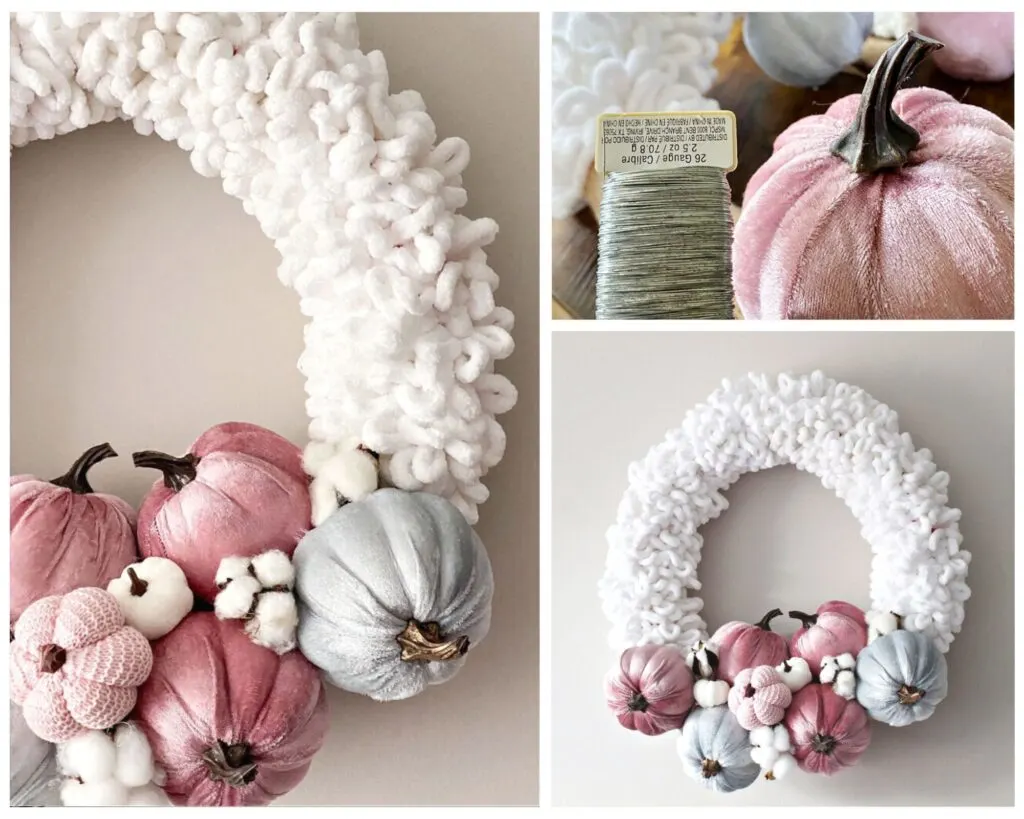
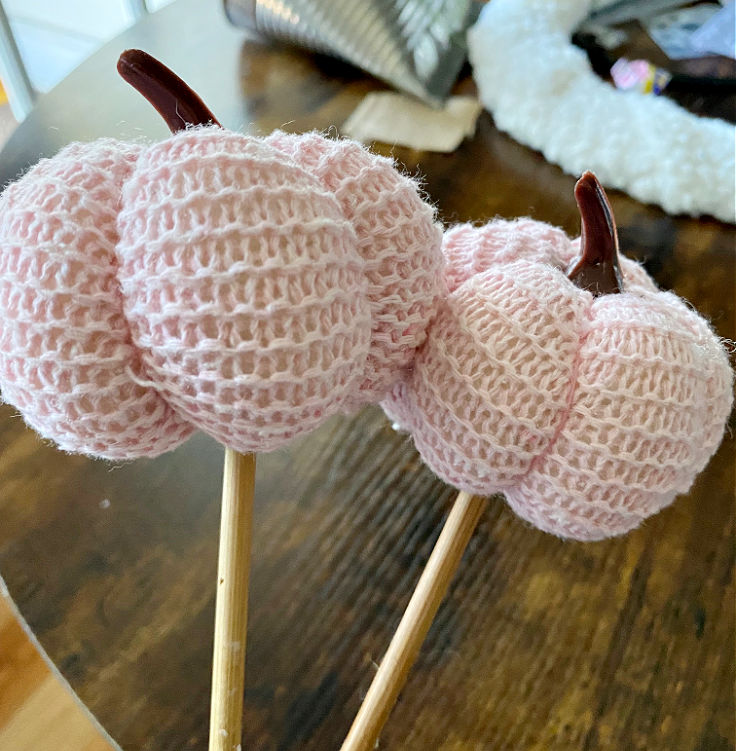
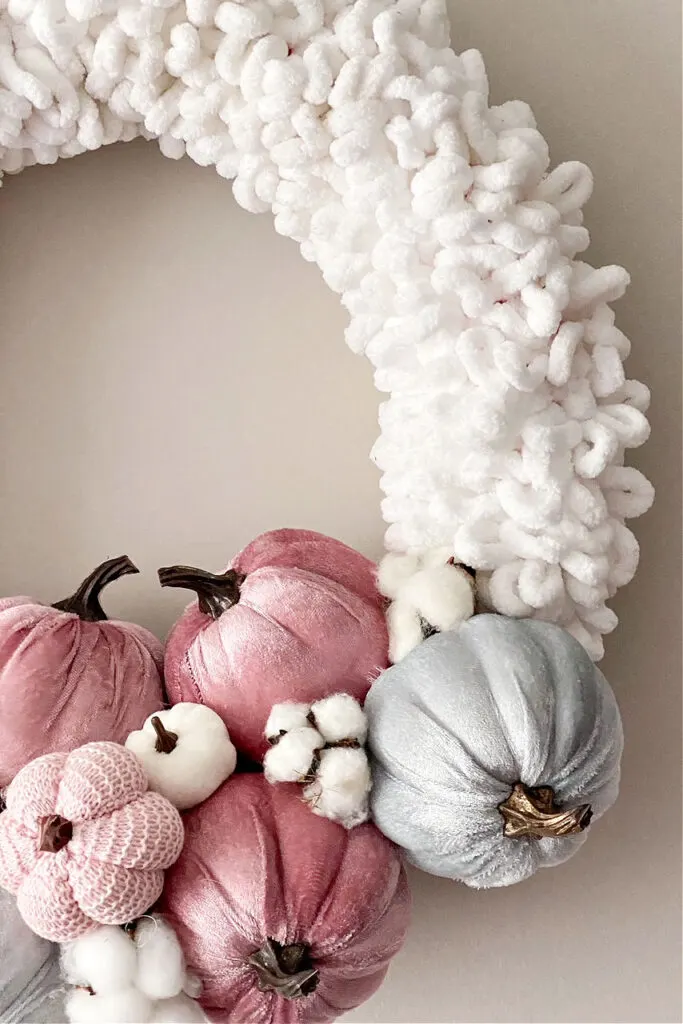
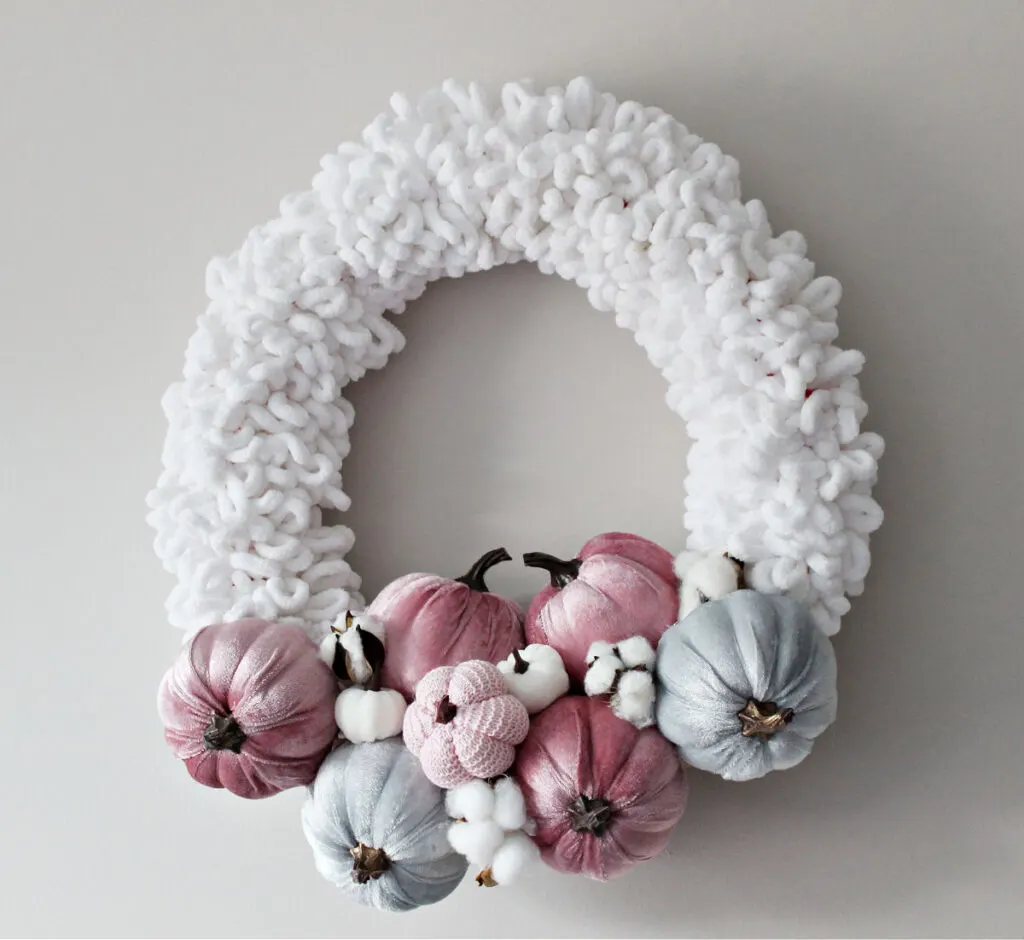
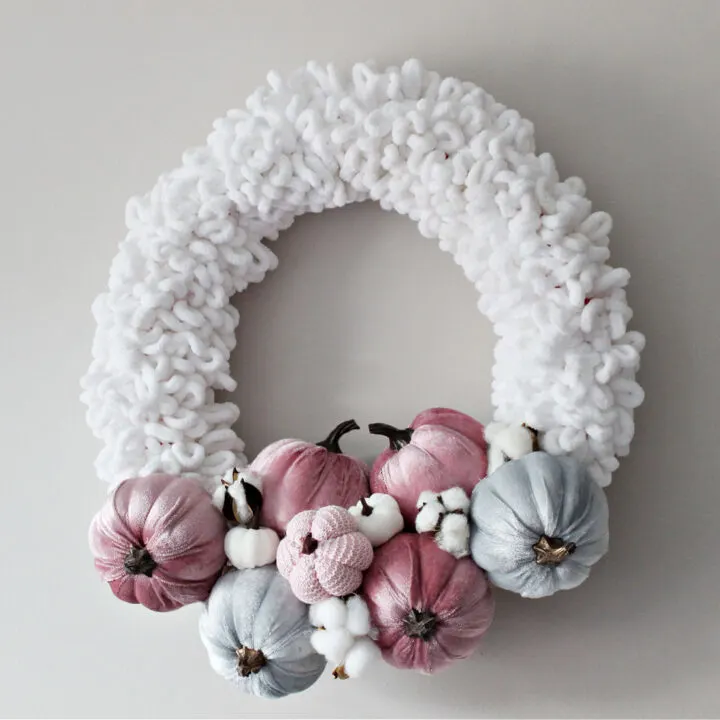
No one said pumpkins had to be orange! 🙂 I found the most beautiful Dollar Tree velvet pumpkins in soft shades of pink and silver.
I knew they would be perfect against the white yarn.
You can follow this same step-by-step tutorial and change out the pumpkins with classic autumn shades of oranges, gold, and burgundy if you like.
If you haven’t checked out the Dollar Tree fall and Halloween crafts yet, you are in for a surprise!
They really knocked it out of the park with their seasonal products this year.
This would be a fun fall wreath to make with friends at a craft night.
Because most of the supplies come from the dollar store, it’s a very budget-friendly craft.
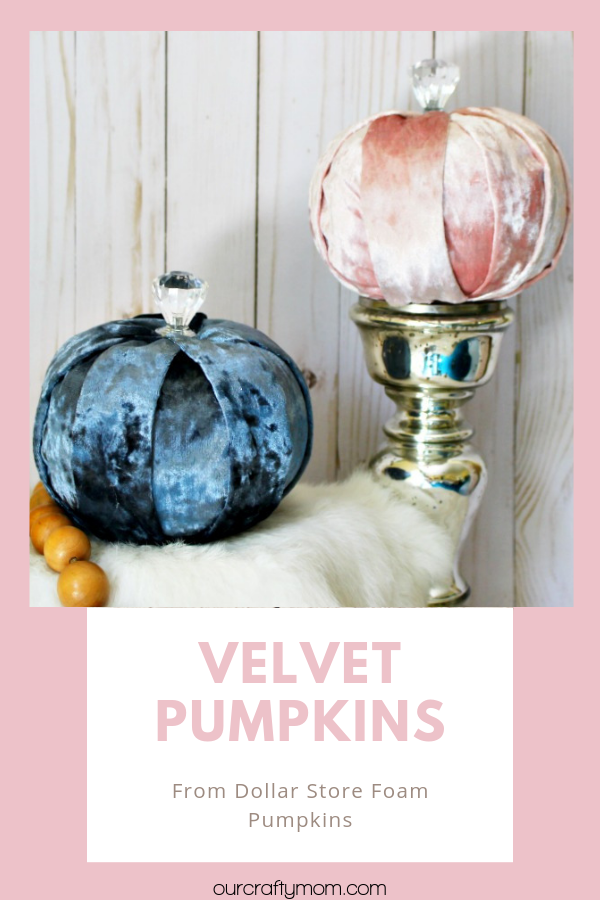
If you want to make your own velvet pumpkins, be sure to check out my easy DIY velvet pumpkin tutorial.
For another fall wreath idea check out my friend Sarah from Creative Ramblings beautiful Dollar Tree fall wreath.

What Size is the Loop Yarn Wreath?
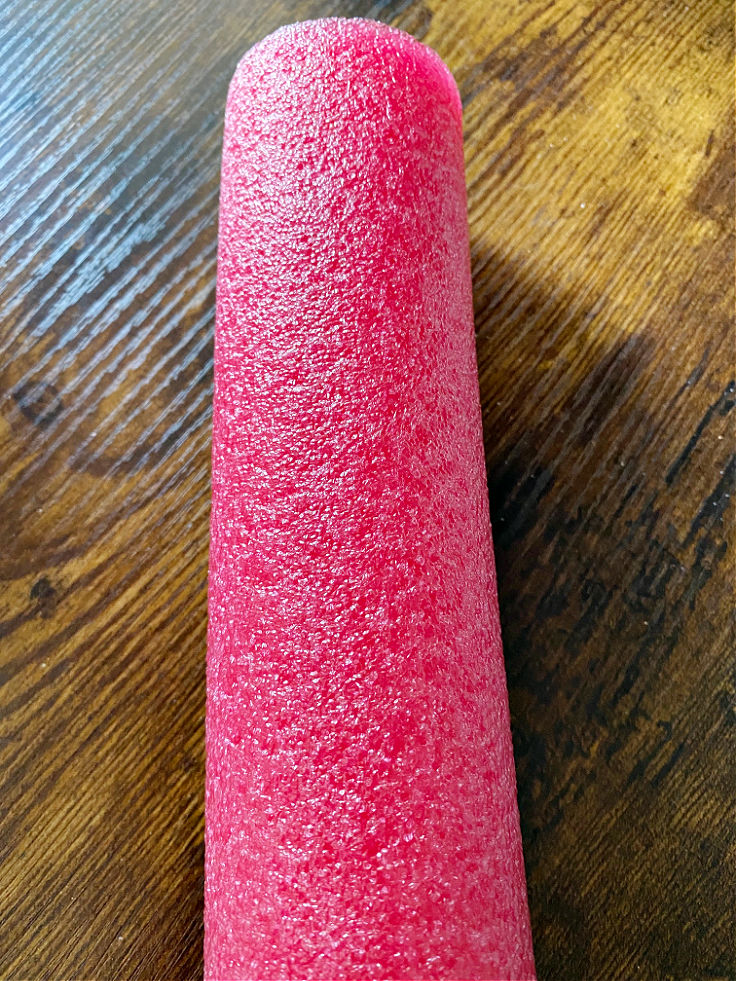
Because I wanted this fall wreath to be in a larger size, I decided to use a pool noodle for my wreath form.
Large forms can be expensive, so this is one of my easy tips for saving a few bucks.
Just bend the noodle in half and use duct tape or even packing tape to secure it.
It will give you an overall wreath size of about 20″. For $1.25 that’s a bargain!

Supplies
You only need a few inexpensive supplies for this simple DIY wreath:
- Duct Tape or Packing Tape
- Pool Noodle – this is a great way to save money on a wreath form!
- Loop Yarn – I used 2 skeins. Check out the craft store and buy when it is on sale. I bought 2 for under $10!
- Floral Wire
- Wire Cutters – I just ordered these!
- Cordless Hot Glue Gun – this is my favorite one!
- Decorations – you can decorate the wreath however you like. Mine is decorated for the fall and autumn season using dollar store supplies shown below:
- Fall Cotton Stems – from Dollar Tree
- Pumpkin Picks – love these pumpkin picks – and they have several colors at Dollar Tree.
- Velvet Pumpkins – I used 6

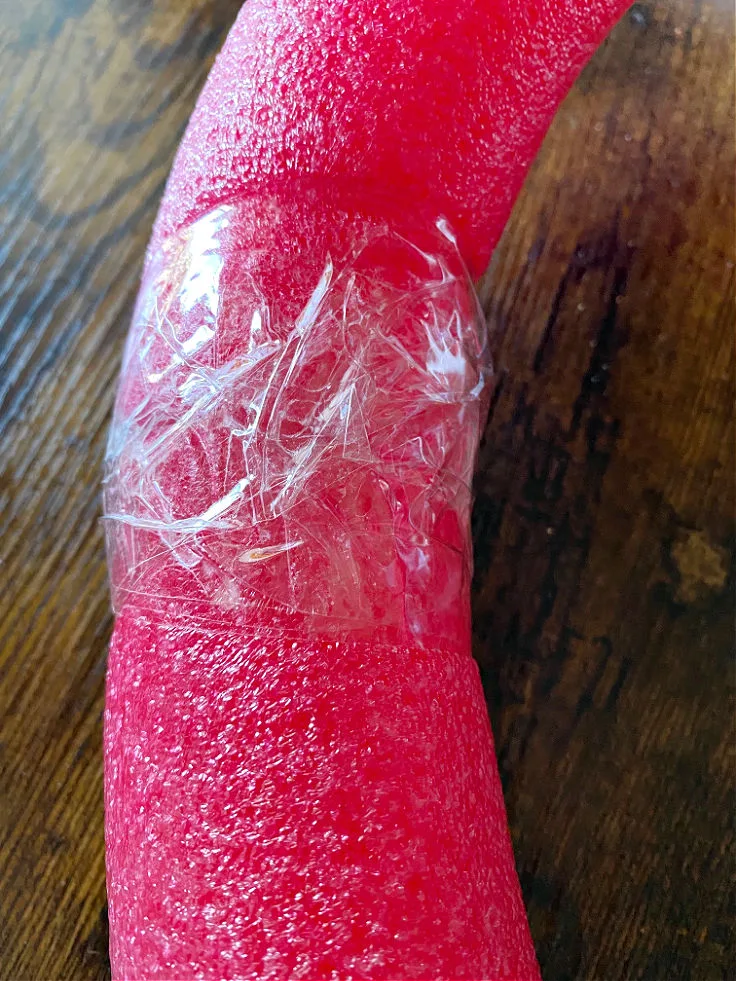
Step 1. Secure the pool noodle
Bend the pool noodle in half. Use strong tape like packing tape, or duct tape to secure it.
You really only need a couple of pieces. I may have gone a little heavy on the tape!

Step 2. Secure the loop yarn
Unwrap your skein of yarn and hot glue the end to your wreath form. The great thing about this project is you don’t need much glue at all.

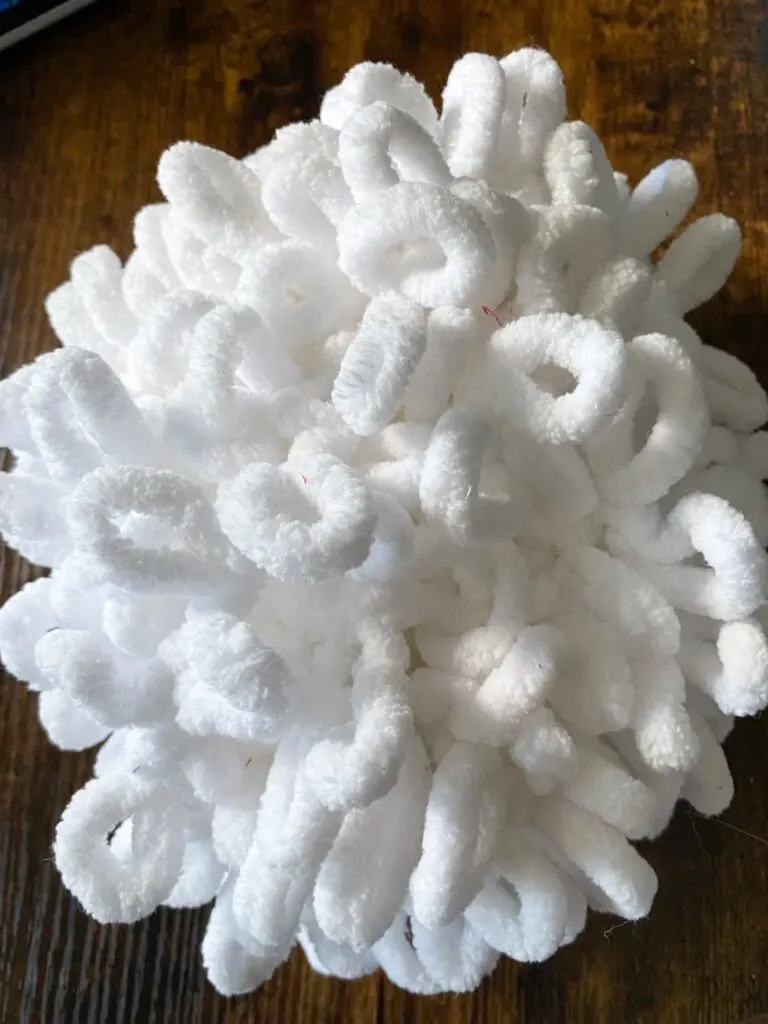
Simply place a dab of hot glue at the beginning and the end. You can’t get much easier than that!


Step 3. Continue to wrap the yarn
Continue to wrap the loop yarn around the wreath. It helps to keep it together in a pile and just wind it around and around until the wreath is covered.

To keep any of the pink from showing, push the yarn together so it is fairly snug.
You can also wrap the wreath with white scrap fabric first as I show in this vintage wreath tutorial.

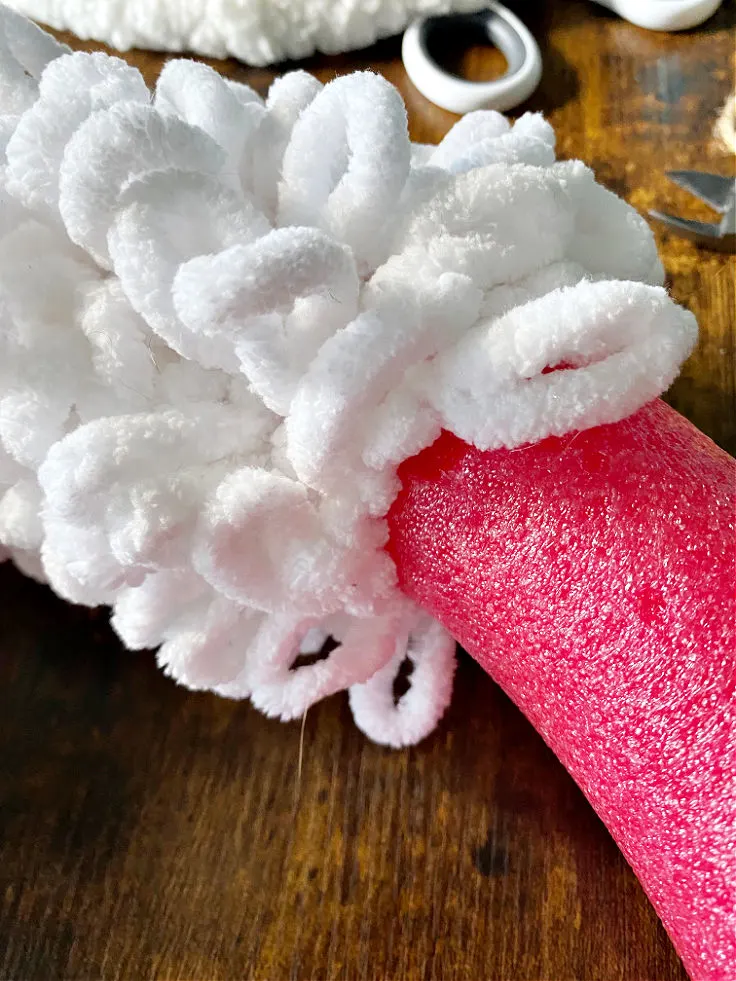
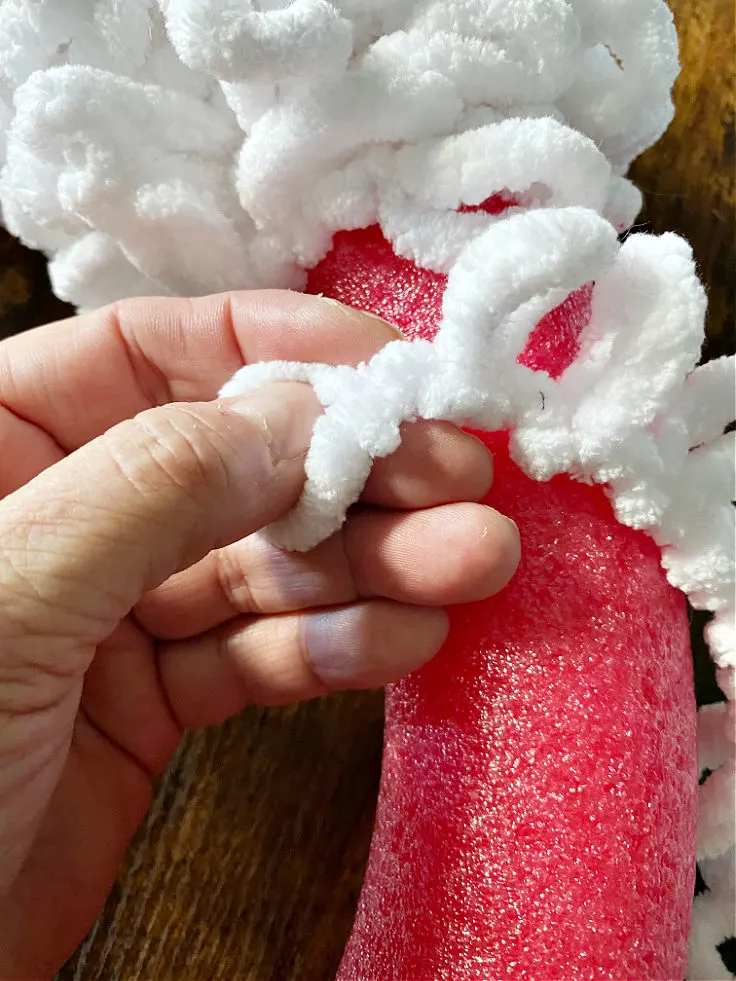
Step 4. Cover bottom of a pool noodle
To save on yarn and keep the velvet pumpkins more secure, I wrapped the wreath with a piece of burlap for the bottom 1/4 section.


You can use any fabric that you like as it won’t show. You can hot glue this directly to the pool noodle.
Step 5. Add your wreath decorations
Once the wreath is completely covered you can add your decorations. The floral wire makes it so easy to secure larger pumpkins.

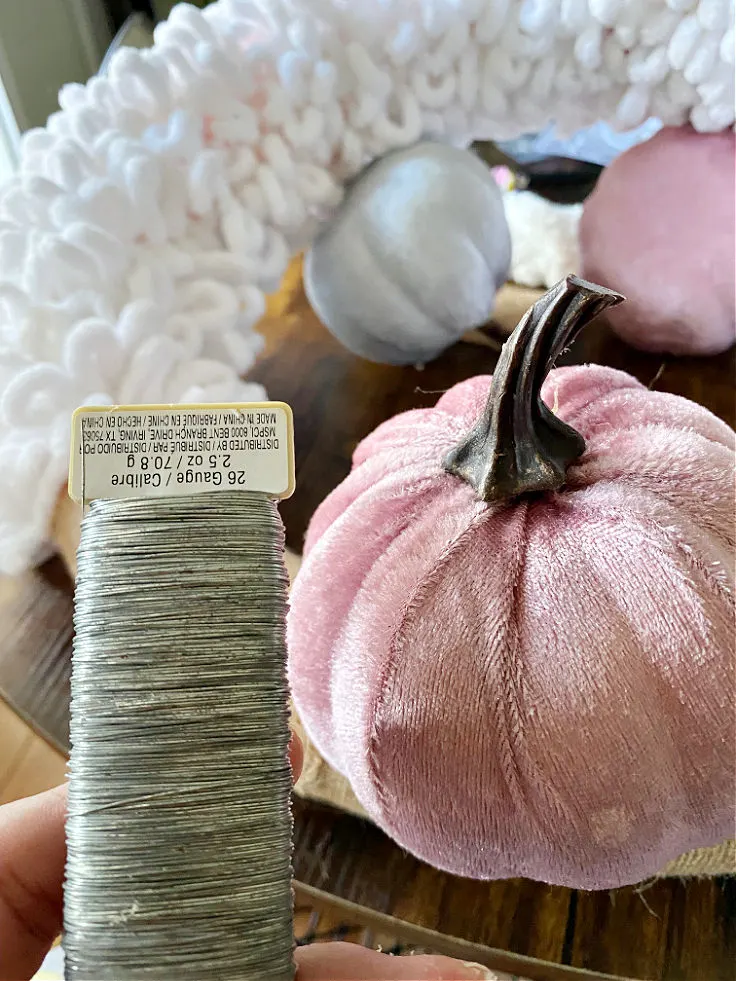
Snip a piece about 6″ or so and hot glue the bottom into the pumpkin.
Use scissors to snip a small piece of the burlap fabric so you can push the floral wire into the wreath base.

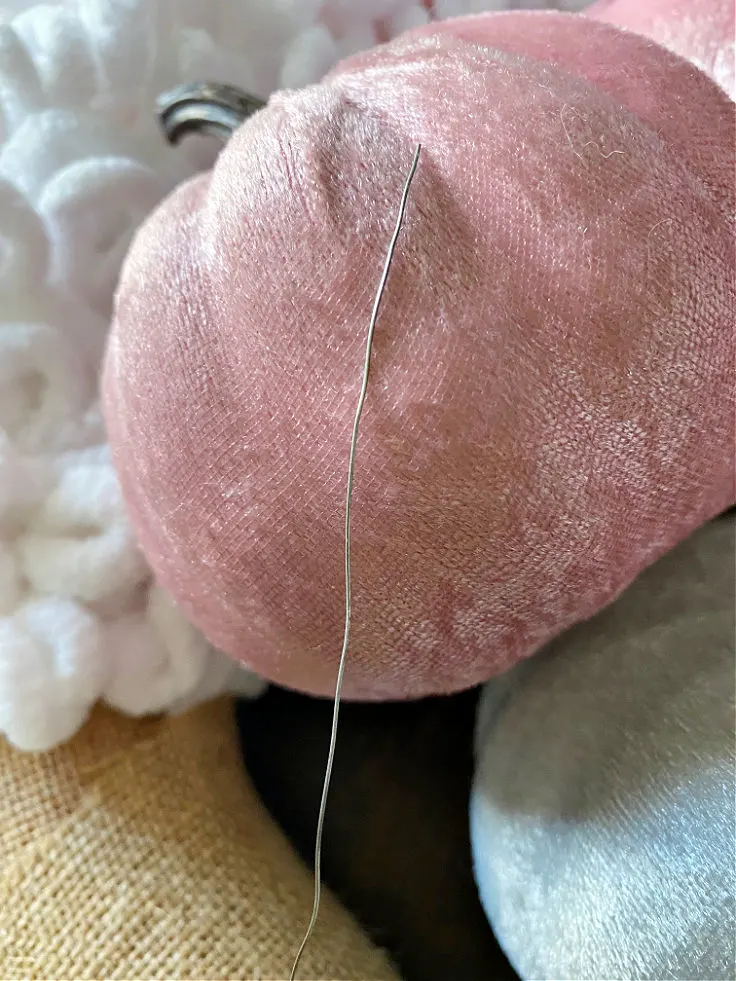
Add a dab of glue to the bottom of the pumpkin as well and hold it to the wreath base for a minute or so until it is secure.
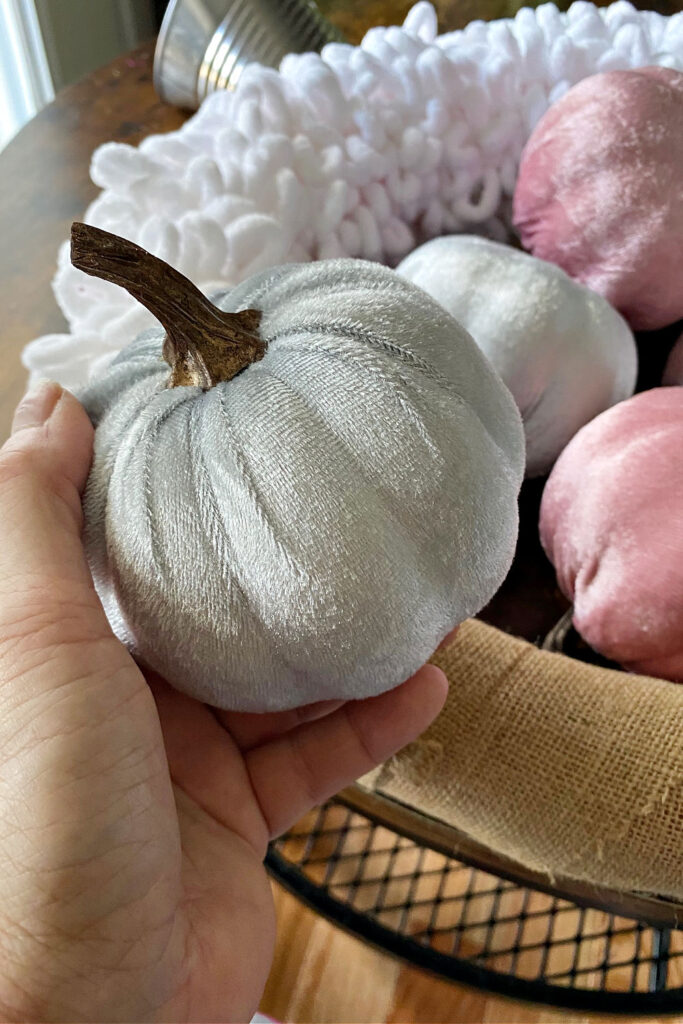

Step 6. Continue adding pumpkins
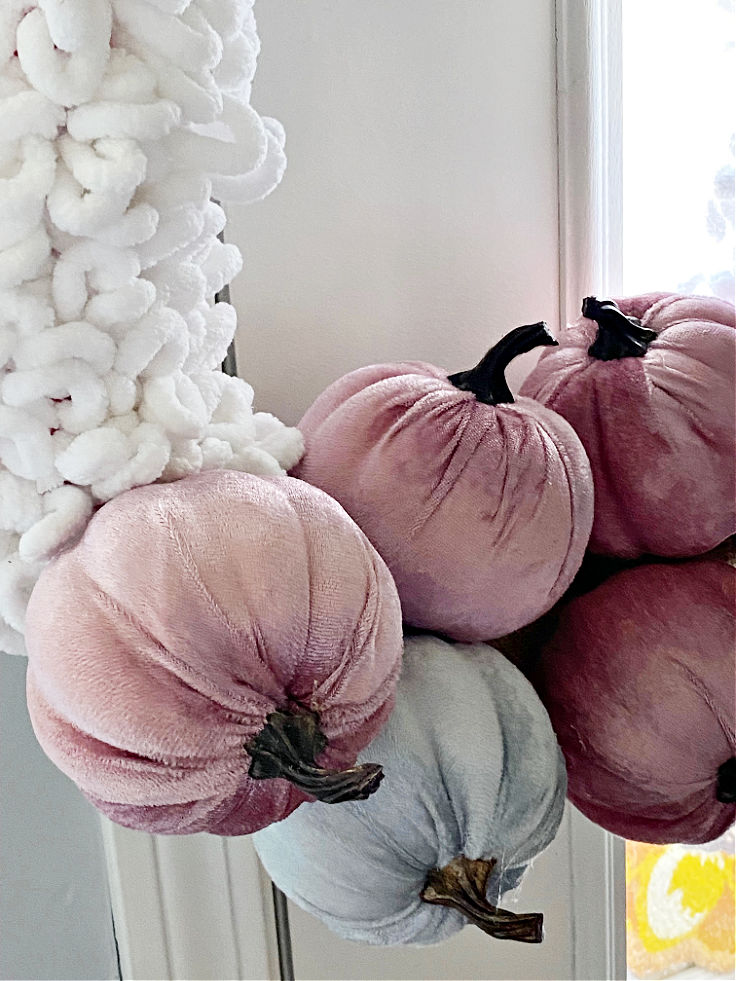
Repeat this process until you are happy with the placement of the pumpkins. I used 6 velvet pumpkins in total.

Add more hot glue if necessary. The silver velvet pumpkins are so pretty!

Step 7. Add smaller embellishments
To fill in the smaller areas around the velvet pumpkins I used mini pumpkin stems including a pink sweater pumpkin and white pumpkins. So cute!
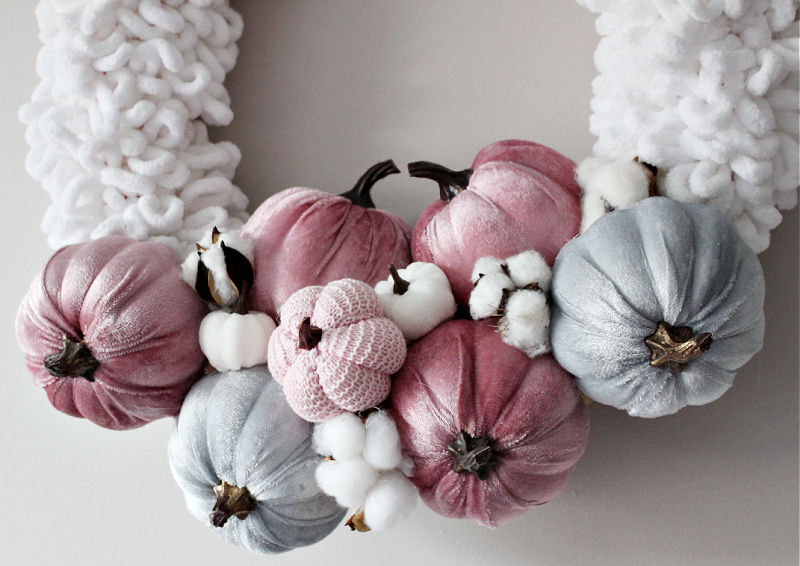
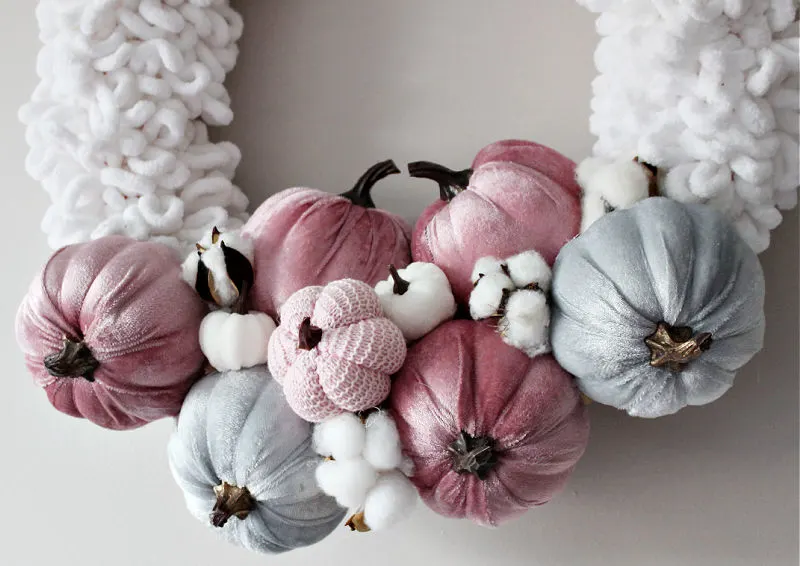
A few cotton stems complete this beautiful fall pumpkin wreath!

I’m so in love with how cozy and fluffy this wreath looks. It’s even prettier in person.
If you are a fan of traditional fall colors, you can absolutely use those instead.
Let me know if you give this loop yarn wreath a try. Share it with me on Facebook or Instagram.
I’ve been going with a more modern color scheme this year to go with my new apartment style.
Did you see the neutral fall door hanger I shared HERE?
It was also made with Dollar Tree supplies. If you have visited here before, you know I am a huge fan of fall crafts.
You can see all of my fall projects HERE. I have so many incredible things coming up this holiday season.
The best way to keep up with “all the things” is to subscribe to my email.
And, just for subscribing you will have access to my Free Printables Library.


Click HERE to join today.
Frequently Asked Questions
What is loop yarn?
If you haven’t worked with loop yarn yet, it is a type of yarn that already has loops pre-sewn into it.
This makes it incredibly easy to use in hand-knit crafts. It is also great to use in finger knitting.
Because of how fluffy and textured the yarn is, it makes it a great choice for creating wreaths.
Simply wrap the yarn around your wreath base and in no time at all, you will have a gorgeous fluffy wreath that will look like it took hours to create!
Where can you find loop yarn?
Loop yarn is sold at just about all craft stores in a couple of different sizes.
I’ve also seen it at Walmart and you can always order it on Amazon.
Lion Brand and Red Heart are 2 popular brands.
To make this size yarn wreath, you will need two skeins of loop yarn.
Sharing is caring…please PIN this for later!

Have a great day!
FOLLOW ALONG
Pinterest ~ Facebook ~ Instagram ~ Twitter ~ YouTube ~ TikTok
Google Web Story: DIY Loop Yarn Wreath with Velvet Pumpkins

Beautiful Loop Yarn Wreath with Velvet Pumpkins for Fall
Materials
- Duct Tape or Packing Tape
- Pool Noodle
- Loop Yarn - I used 2 skeins.
- Floral Wire
- Decorations
- Fall Cotton Stems
- Pumpkin Picks
- Velvet Pumpkins
Tools
- Cordless Hot Glue Gun
- Wire Cutters
Instructions
- Fold the pool noodle in half and secure with strong tape.
- Hot glue the loop yarn onto the pool noodle.
- Continue wrapping the loop yarn around and around the pool noodle until it is 2/3 of the way covered.
- Cover the remaining pool noodle with fabric of your choice.
- Add your decorations. I went with velvet pumpkins and cotton stems.
- Secure with floral wire and hot glue.
- Hang and enjoy!
Recommended Products
As an Amazon Associate and member of other affiliate programs, I earn from qualifying purchases.
-

 WXJ13 2 Roll Finger Blanket Yarns, Chunky Blanket Yarn Chenille Finger Loop Yarn Polyester Loop Yarn White Puffy Yarn for Crochet Knit Clothes Knitting, Weaving DIY Craft (100g×2)
 -
 Surebonder Cordless Hot Glue Gun, High Temperature, Full Size, 60W, 50% More Power - Sturdily Bonds Metal, Wood, Ceramics, Leather & Other Strong Materials (Specialty Series CL-800F)
 -
 FloraCraft 26 Gauge Floral Wire 270 Feet Bright Silver
 -
 BOOSDEN Wire Cutter,6.5 inch Side Cutters,Wire Cutters for Crafting,Flush Cutter,Ultra Sharp Spring Loaded Wire Cutters for Jewelry Making,Flush Cut Pliers,Dikes Wire Cutters,Floral Wire Cutter,Snips
debbie-dabble
Thursday 1st of September 2022
Michelle, I love this!! The colors are so pretty!! Love that looped yarn! Thanks for sharing!! Hugs, Deb