
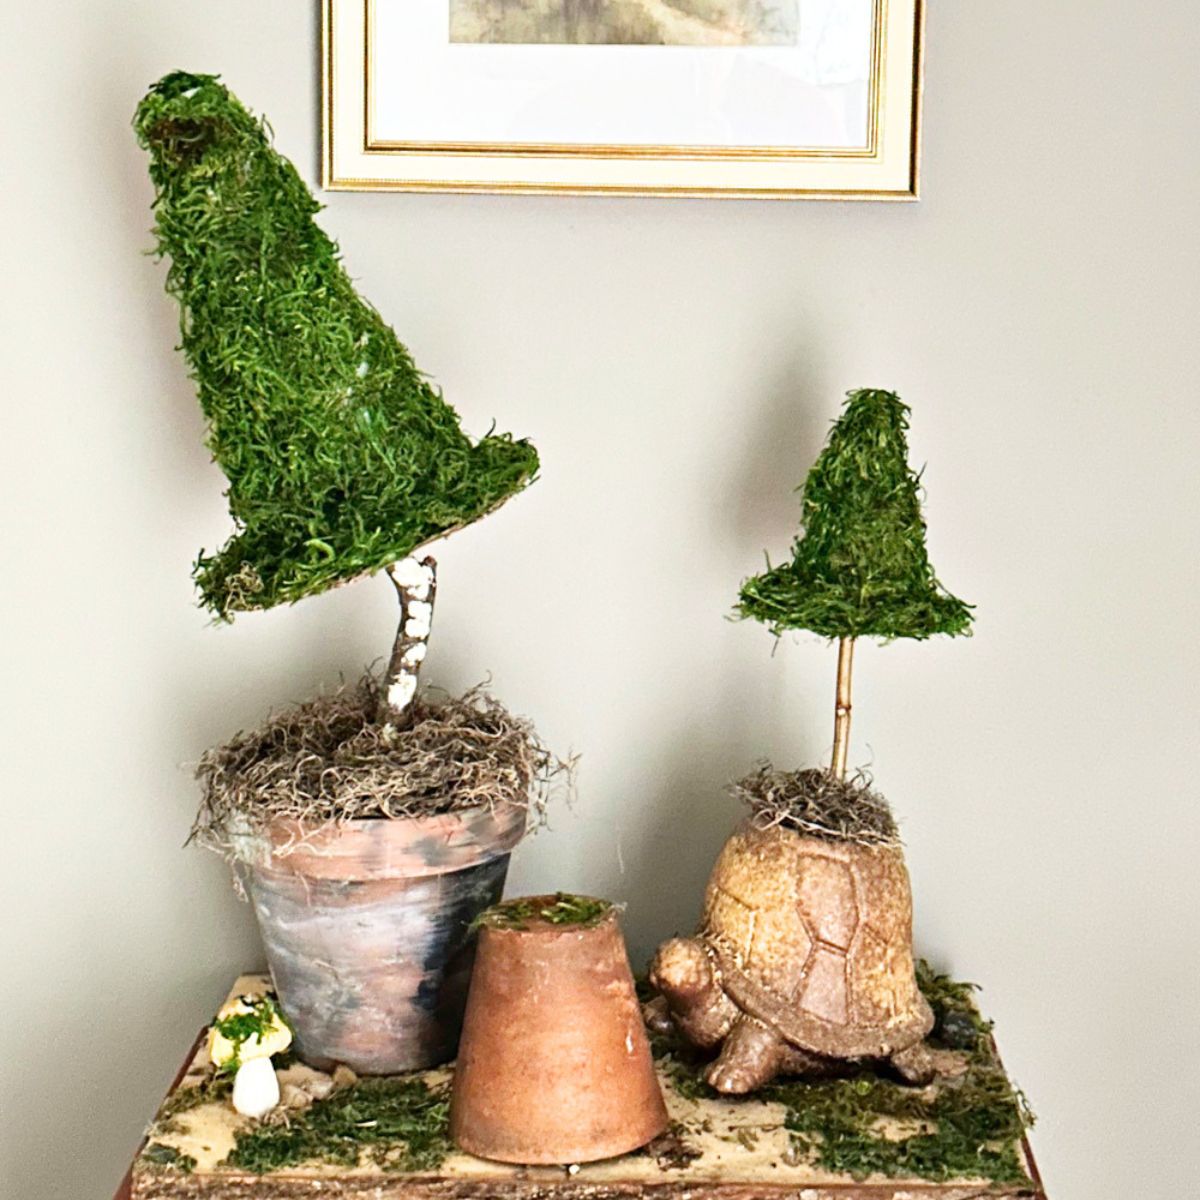
Craft a spooky-cute DIY moss witch hat topiary from cardboard! Easy Halloween decor, big witchy vibes, budget-friendly & fun.
This post contains affiliate links at no extra cost to you. Please read my full disclosure here.
DIY Moss Witch Hat Topiary
Table of Contents
If you’ve watched a certain beloved witchy movie and immediately wanted to move into that dreamy, herb-garden-meets-Victorian-cottage aesthetic, you’re going to love this one.
This DIY Moss Witch Hat Topiary is inspired by that same natural, earthy witch vibe — think moss, texture, and a little bit of magic, minus the special effects budget.
And the best part? It’s made from cardboard, so it’s easy on your wallet and even easier to customize.
Let’s turn some scraps into a little bit of Halloween magic.
Watch the tutorial video, then follow along below!
- What you’re making: A spooky-cute moss witch hat topiary — perfect Halloween DIY decor
- Skill level: Beginner-friendly
- Time needed: 30–45 minutes
- Materials: Cardboard, moss, hot glue, foam cone, clay pot
- Cost: Budget-friendly (under $15!)
- Best for: Porch displays, mantel decor, tablescapes, or a witchy centerpiece
💡 Pro tip: Save this post so you can reference the full materials list and step-by-step photos while you craft!
Video Preview
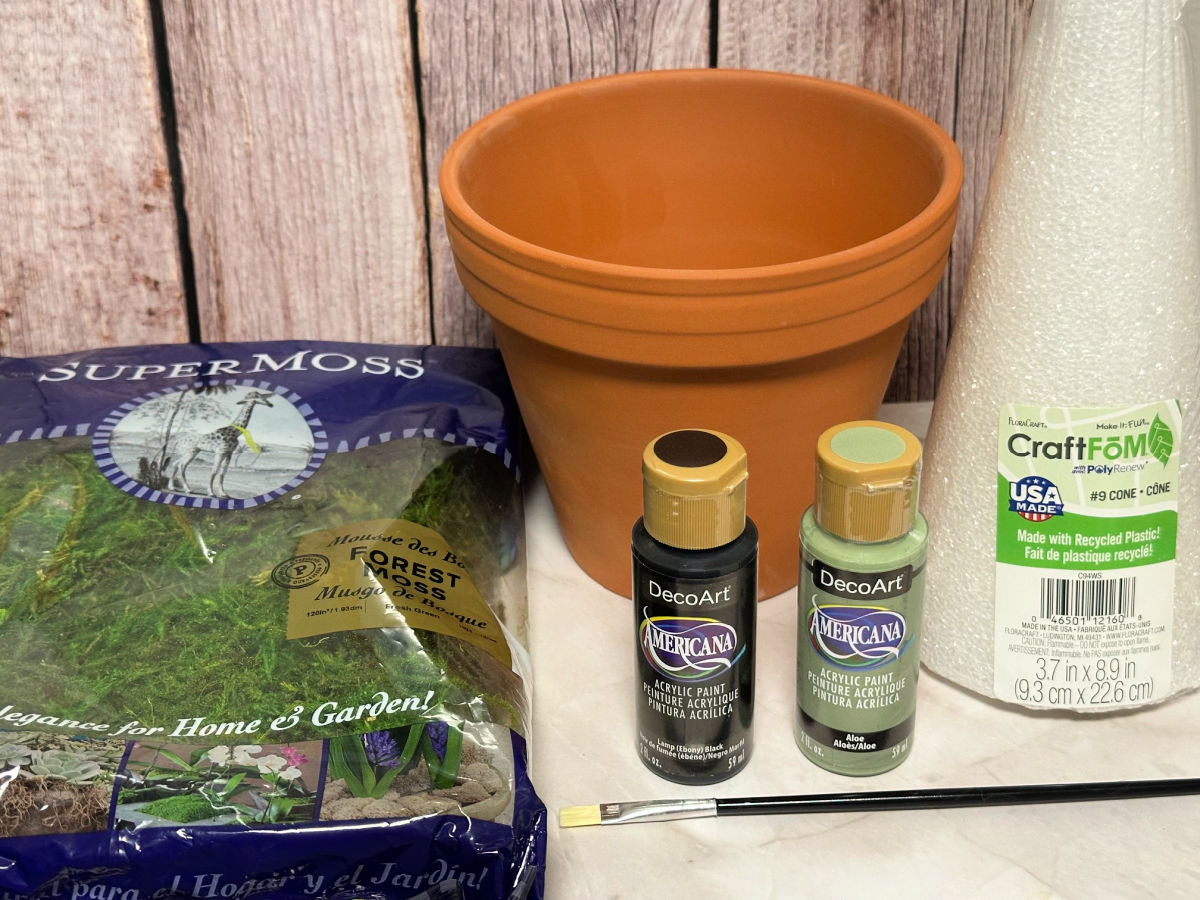
Halloween Topiary Craft Supplies
Here is what you need to make this budget-friendly Halloween DIY:
- Scrap Cardboard – great way to use up some of those Amazon boxes!
- Box Cutter – scissors or craft knife
- Super Moss – the 20 oz size makes 2 topiaries.
- Spanish Moss – to cover the top of the planters.
- Hot Glue Gun and Glue Sticks – this cordless one is my favorite!
- Clay Pots – I used a 6″ terracotta pot for the larger topiary and a turtle planter that I scored for $1 at Goodwill. Use whatever garden pots you have in your stash. I’m finishing up the tutorial on how to age a new terracotta pot and will share that soon.
- Craft Foam Cone – for the smaller topiary I used a 2″ cone that was in my stash.
- Acrylic Paint – in Aloe, Snow and Lamp Black
- Small Paint Brushes – makeup wedges, or paper towels to apply paint.
- Sticks – for the topiary
How to Make a Moss Witch Hat
Here are the simple steps to make your own Halloween topiary.
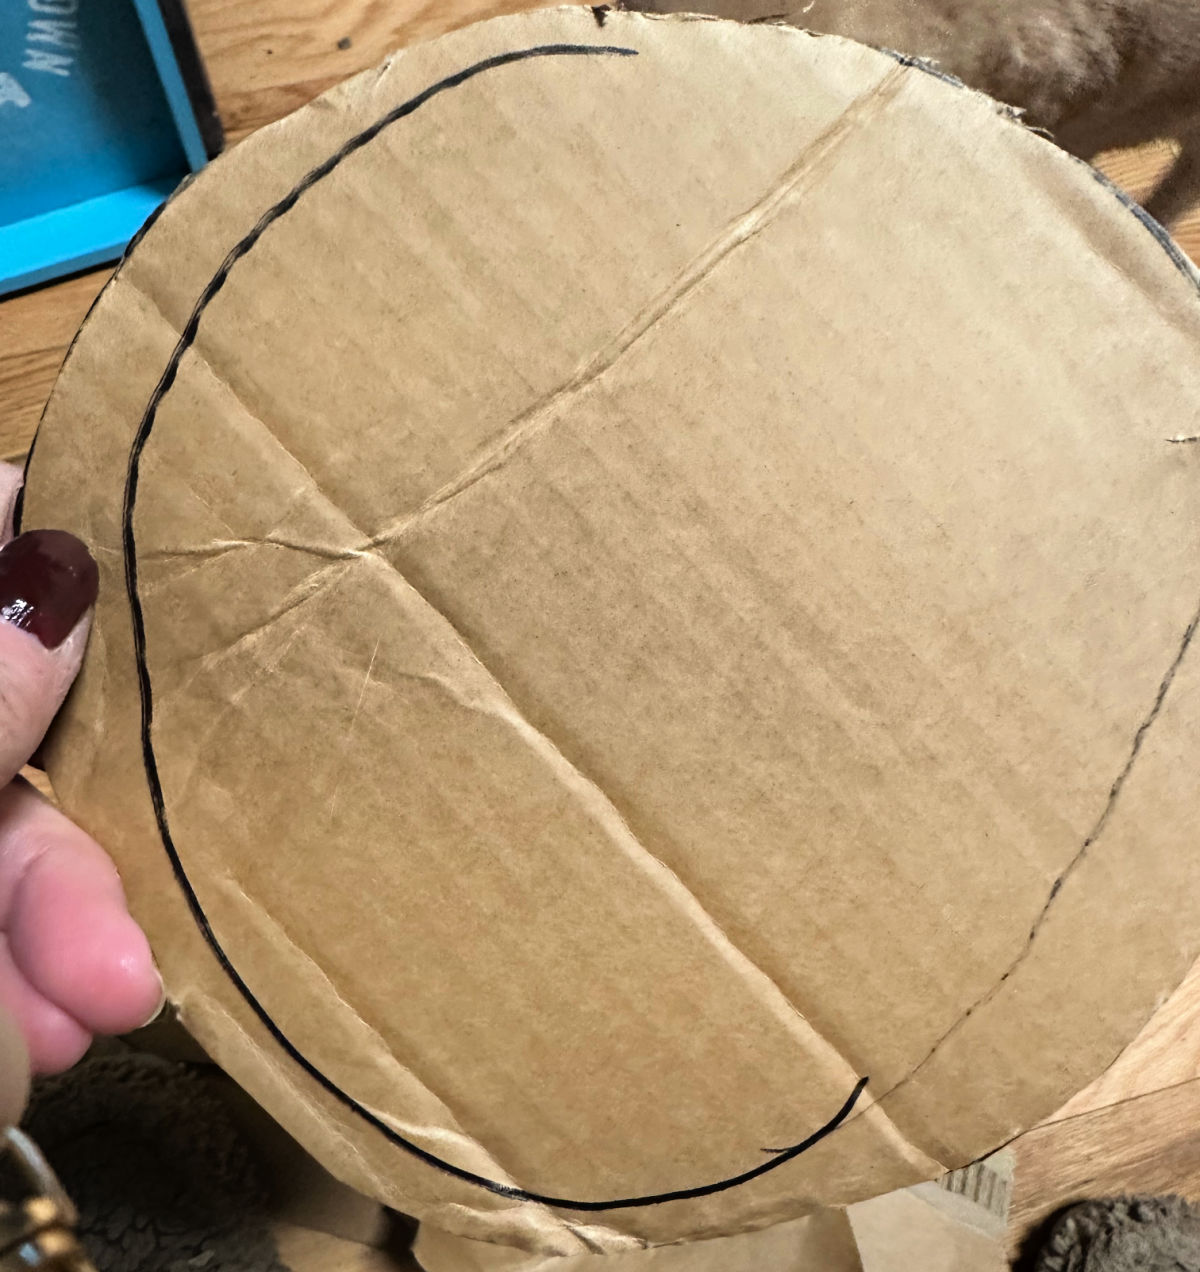
Step 1. Cut Cardboard
Use a box cutter or craft knife to cut a circle for the brim of the witch hat. Use a plate as a guide and ensure the size fits the size foam cone that you are using.
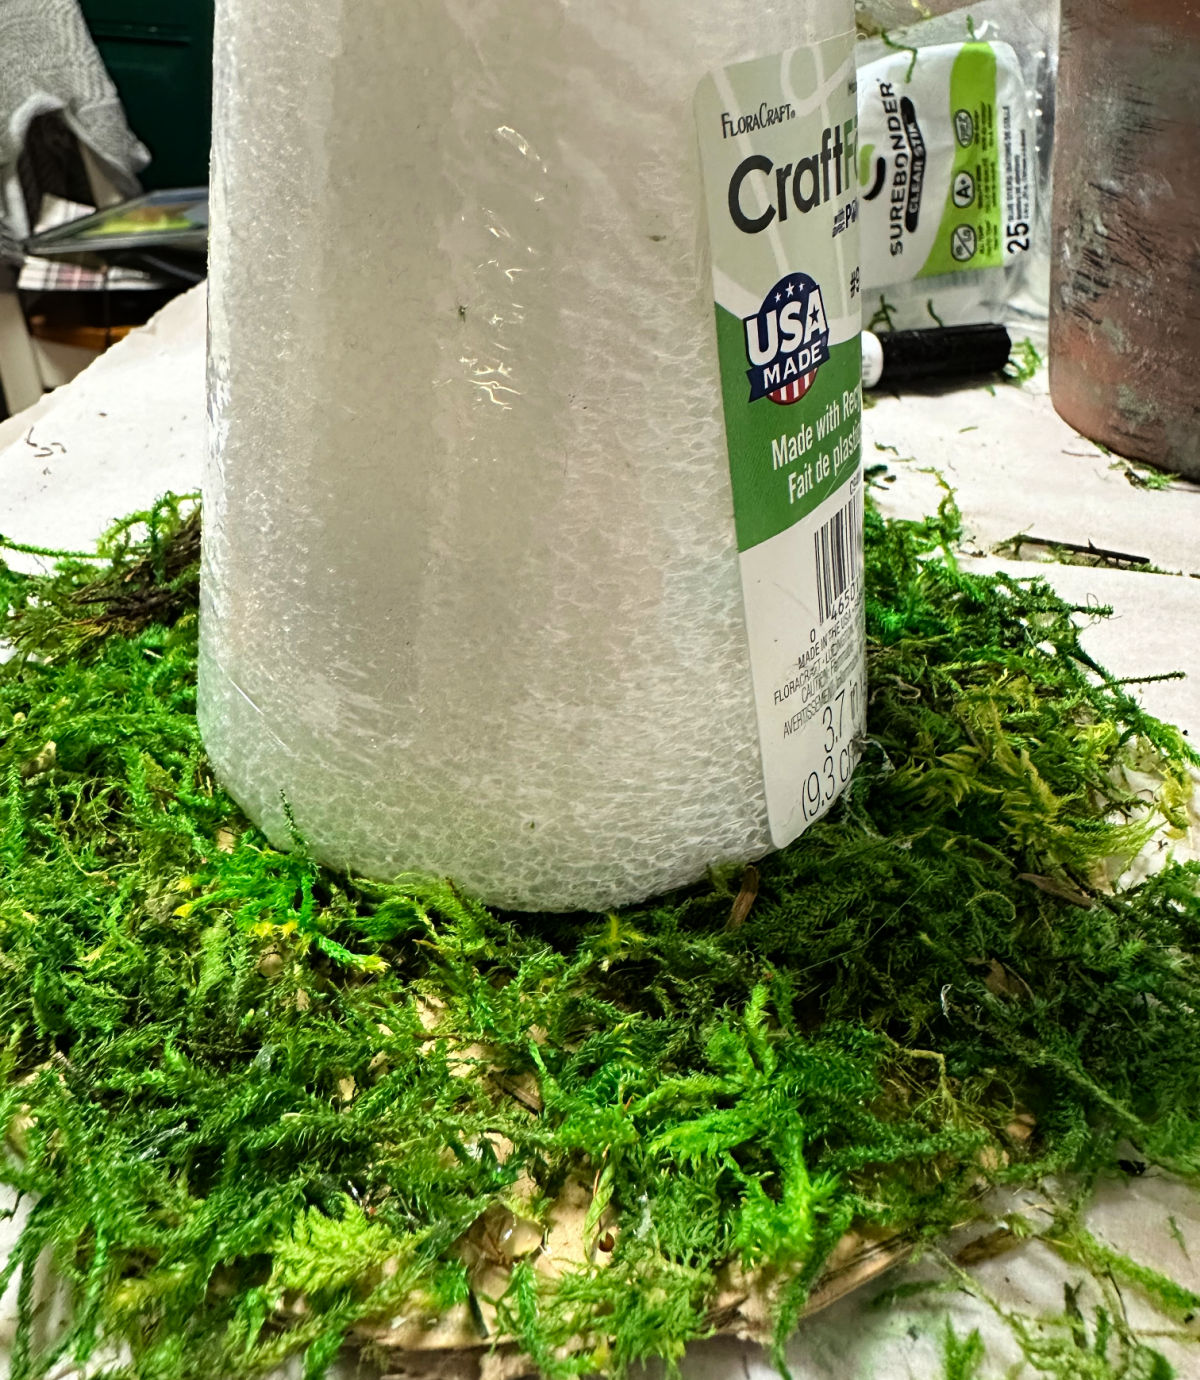
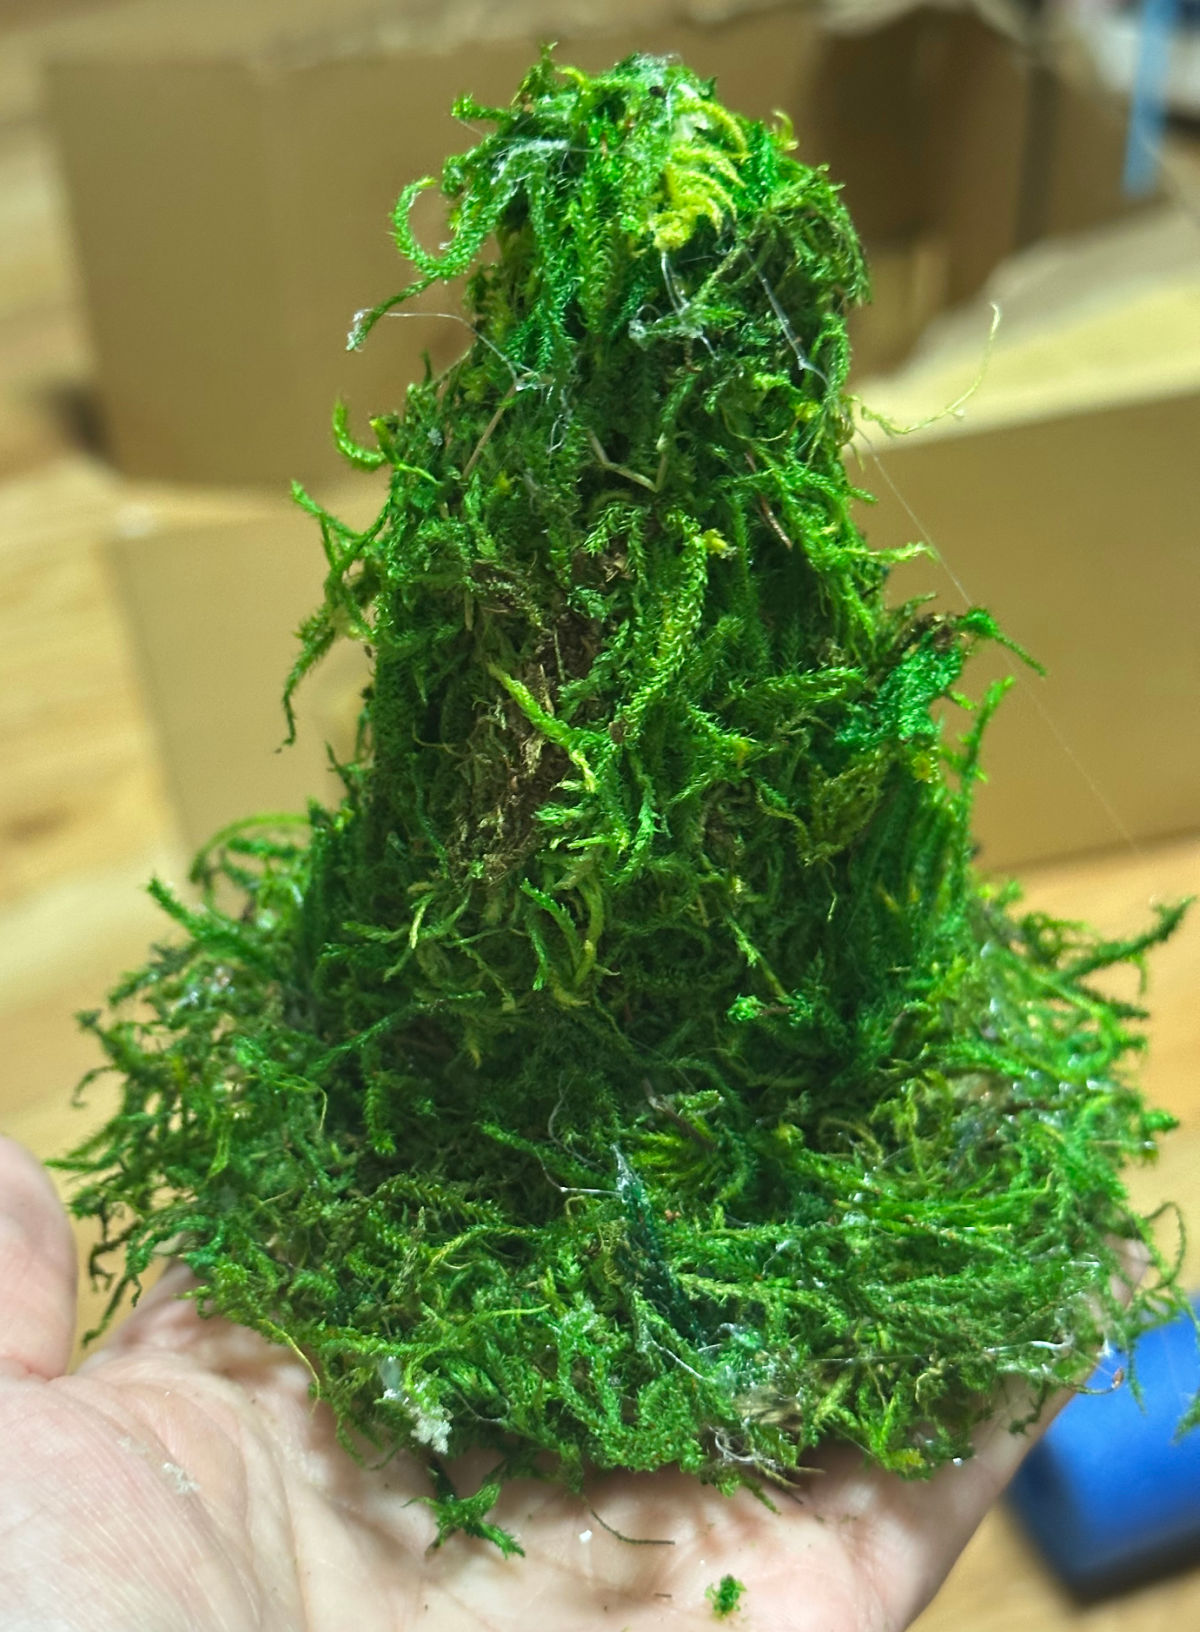
Place a generous amount of hot glue onto the outer area of the cardboard and cover with moss. Wear fingertip protectors to reduce those hot glue burns!
Step 2. Cover Foam Cone
Once the cardboard brim is covered in moss, repeat the same process to cover the foam cone. Secure the covered cone to the cardboard brim with hot glue.
Step 3. Attach Witch Hat to Stick
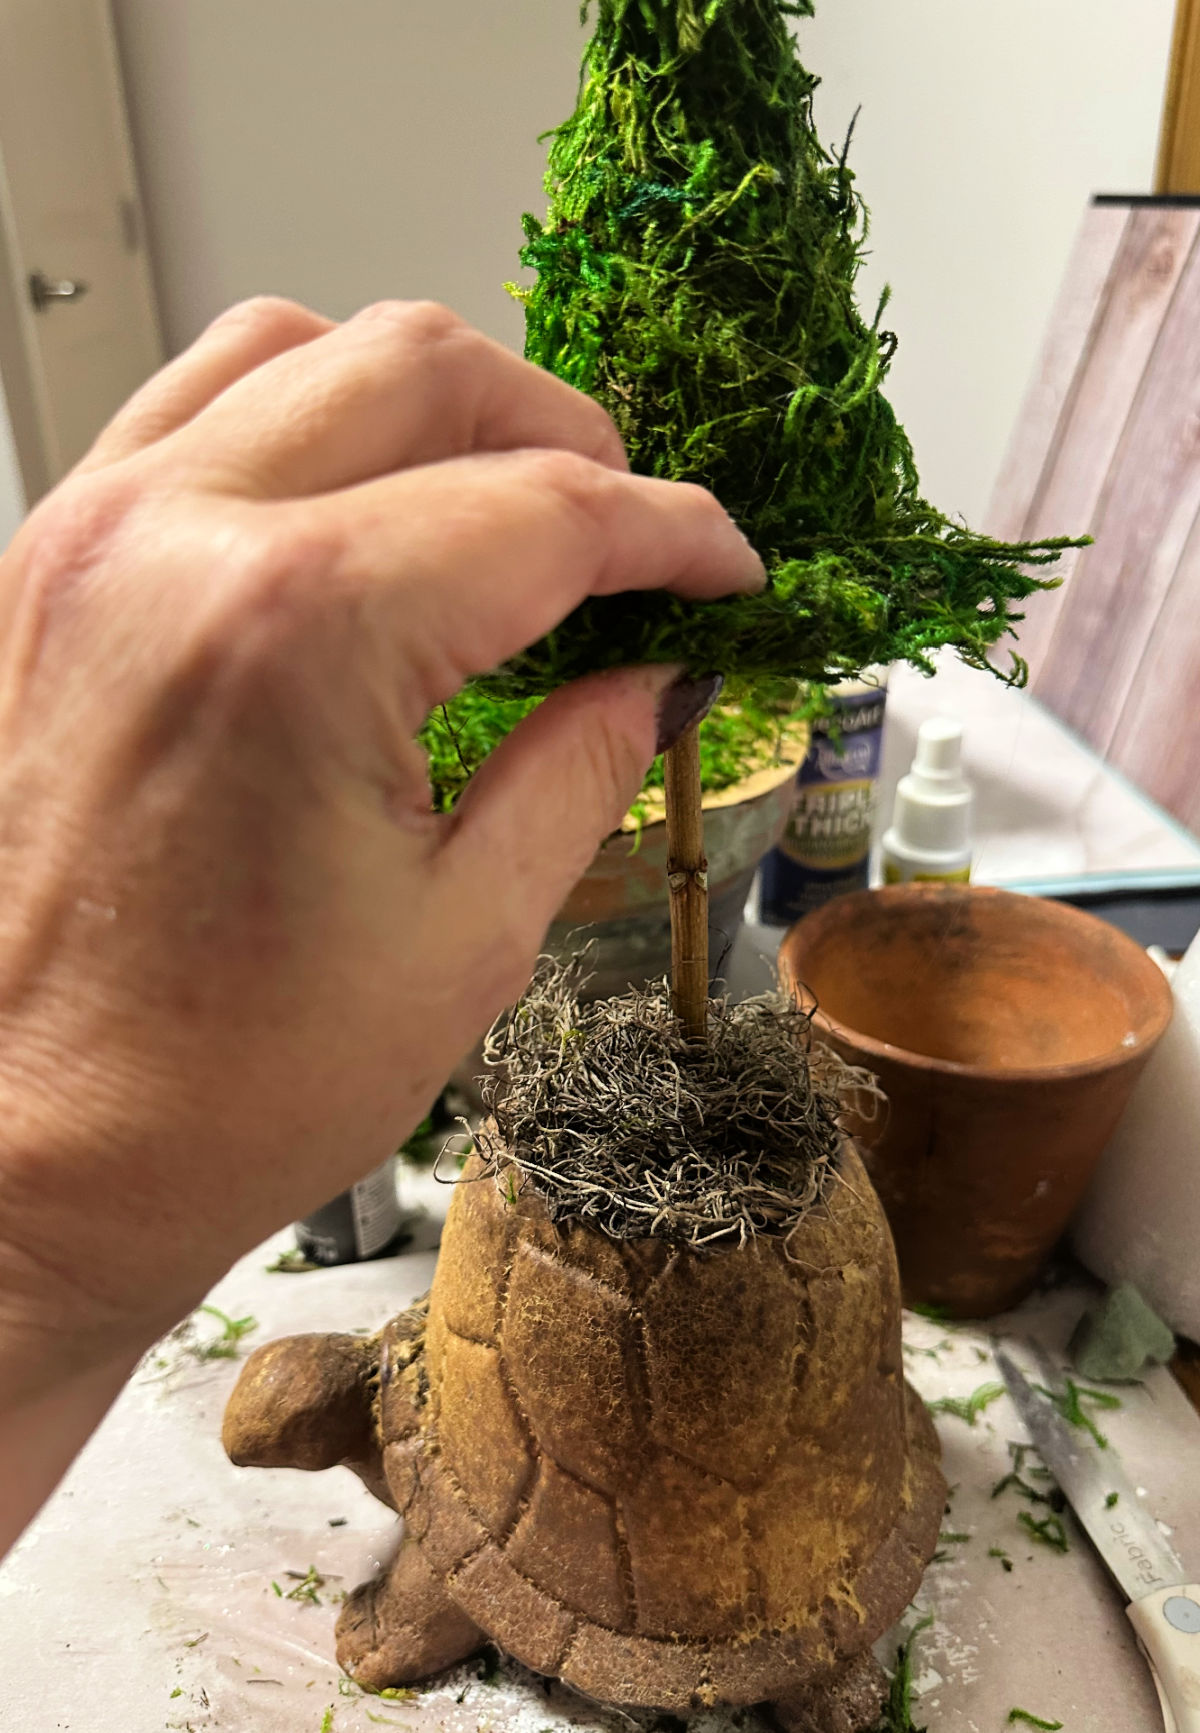
Place a hole into the bottom of the witch hat and secure the stick with a bit of hot glue to ensure it is stable.
Fill your planter with additional craft foam and secure the topiary. Cover with spanish moss.
Look at how pretty these moss witch hats turned out! I wanted a quirky look with the larger topiary and found a perfectly bent stick to use. It gives it that witchcore aesthetic I was going for.
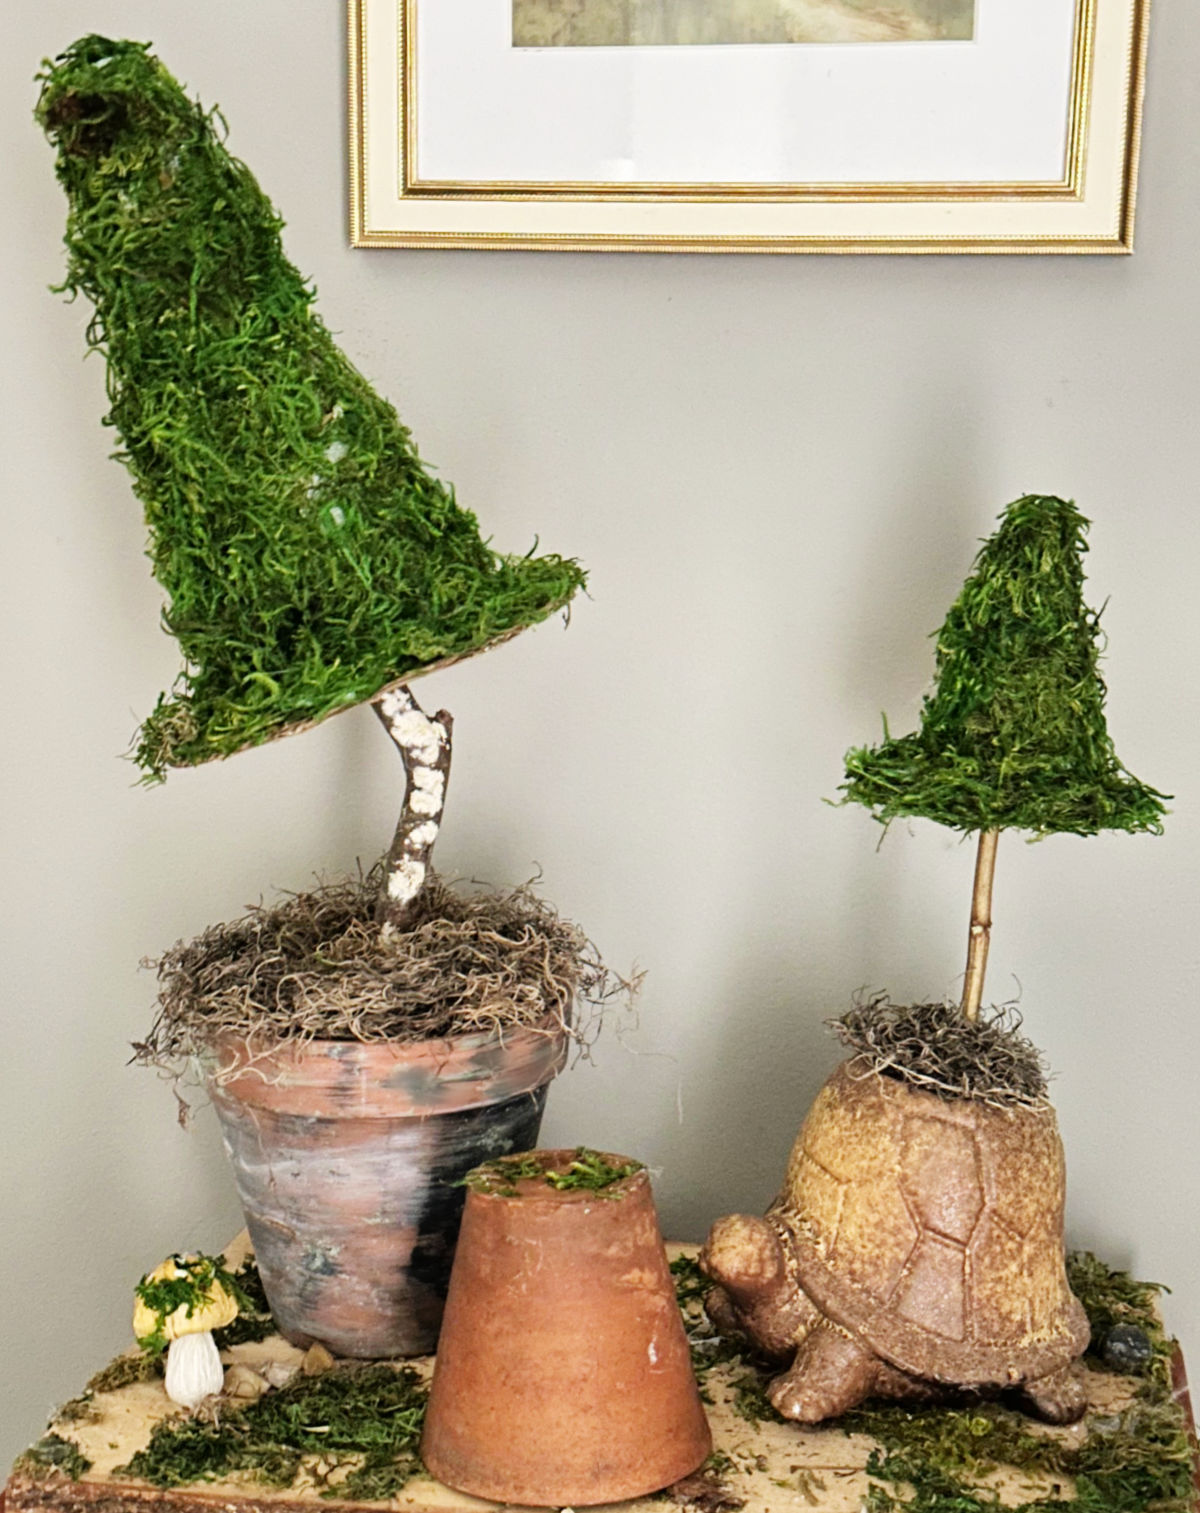
I hope you enjoyed this tutorial on how to make an easy Halloween craft with cardboard. Let me know if you make your own.
I’m super happy with how these turned out and look forward to including them with some Practical Magic inspired witchy cottage core finds.
Pin For Later
Share this article with your friends on Pinterest by pinning the below image.
It helps my blog grow and doesn’t cost a thing! 🙂
Even More Halloween DIY Decor and Crafts
You may also like this dollar store pumpkin topiary, this Pottery Barn inspired terracotta pumpkin tutorial, and these vintage witch hat printables.
Thanks so much for stopping by. Happy crafting!
Follow me on social media below: