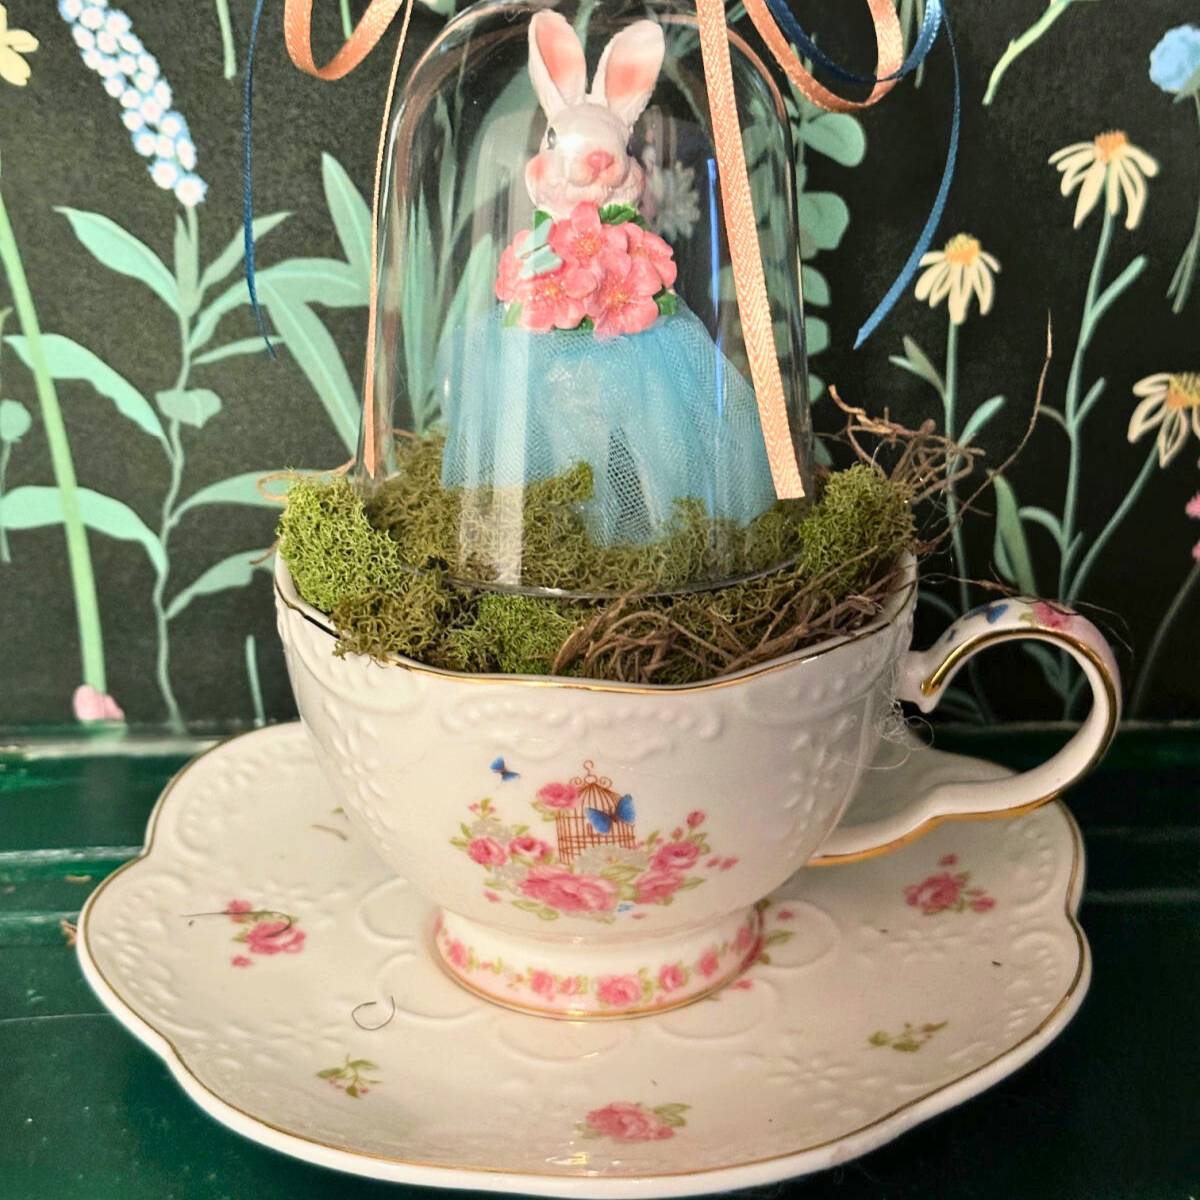
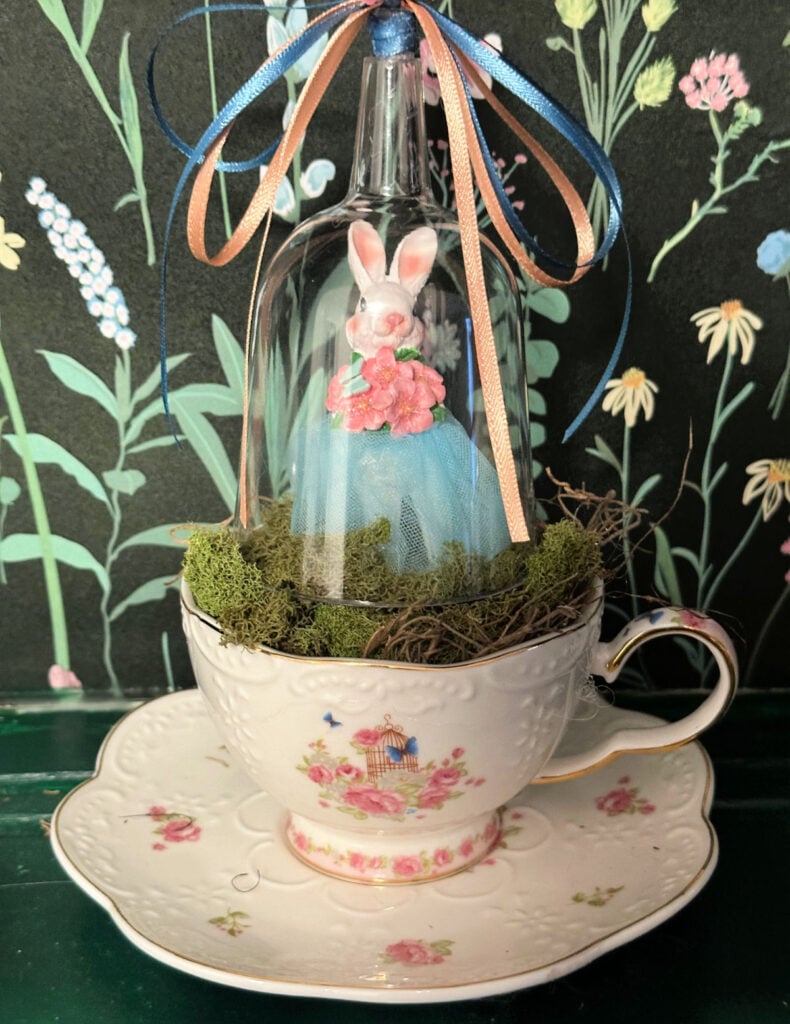
Welcome spring with an adorable teacup bunny cloche complete with the cutest little bunny all decked out in a tutu!

This post contains affiliate links. If you click the link and buy something, I may receive a percentage of sales at no extra cost to you. Please see my full disclosure here.
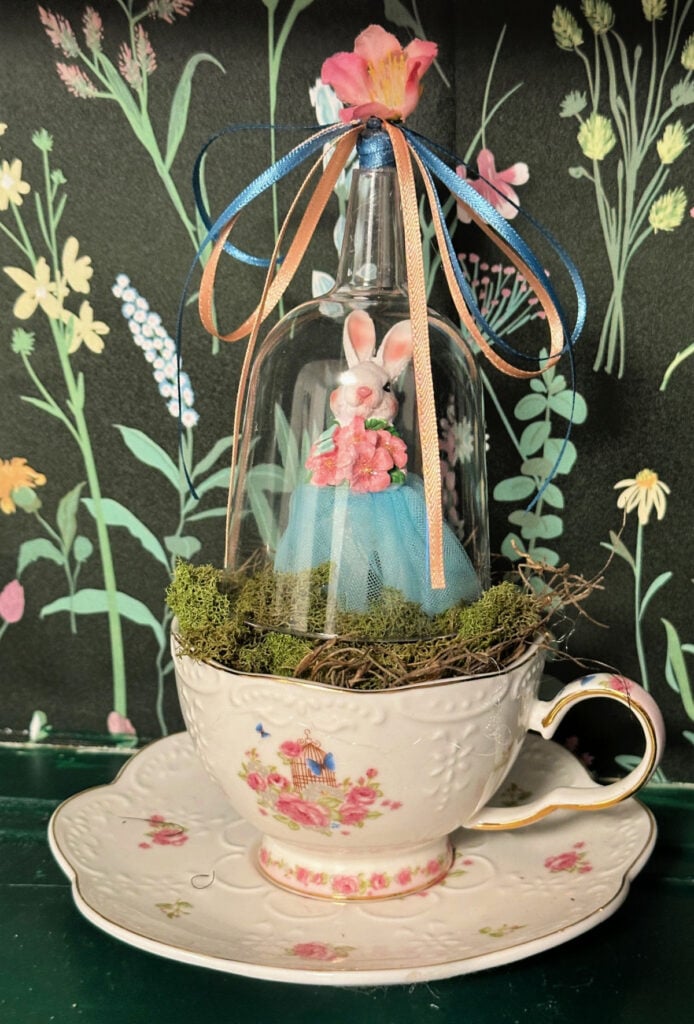
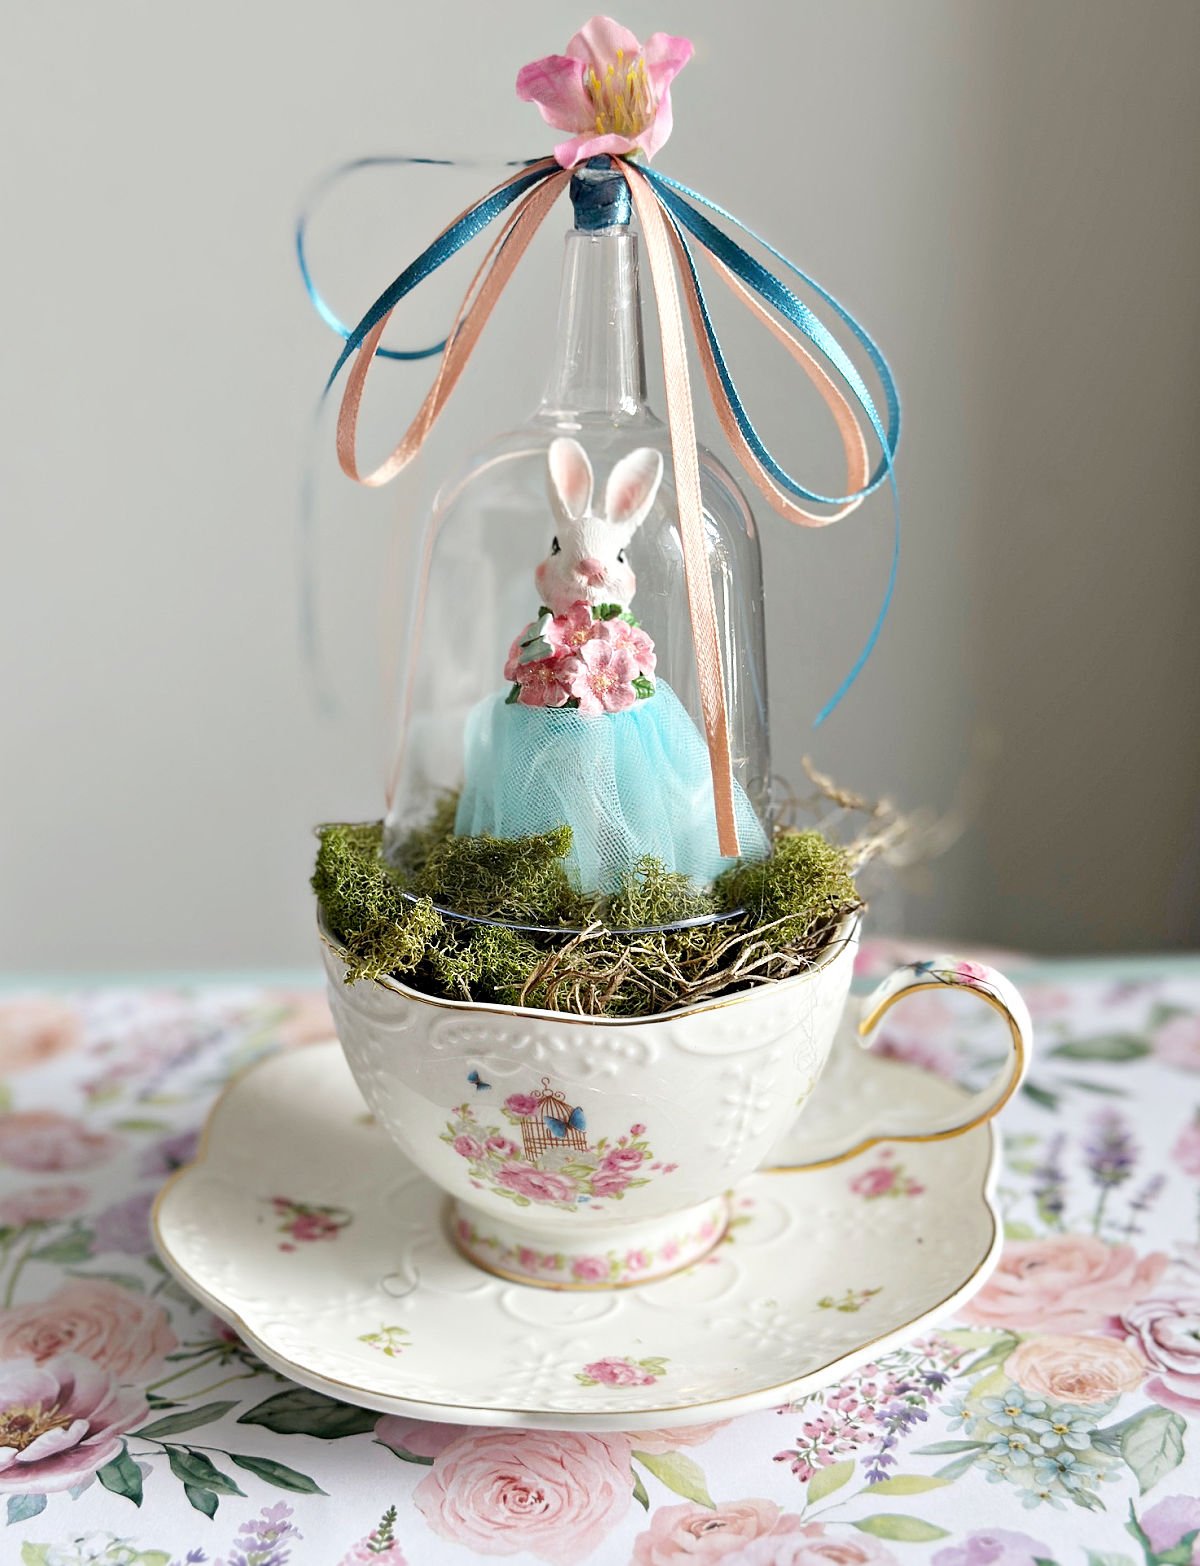
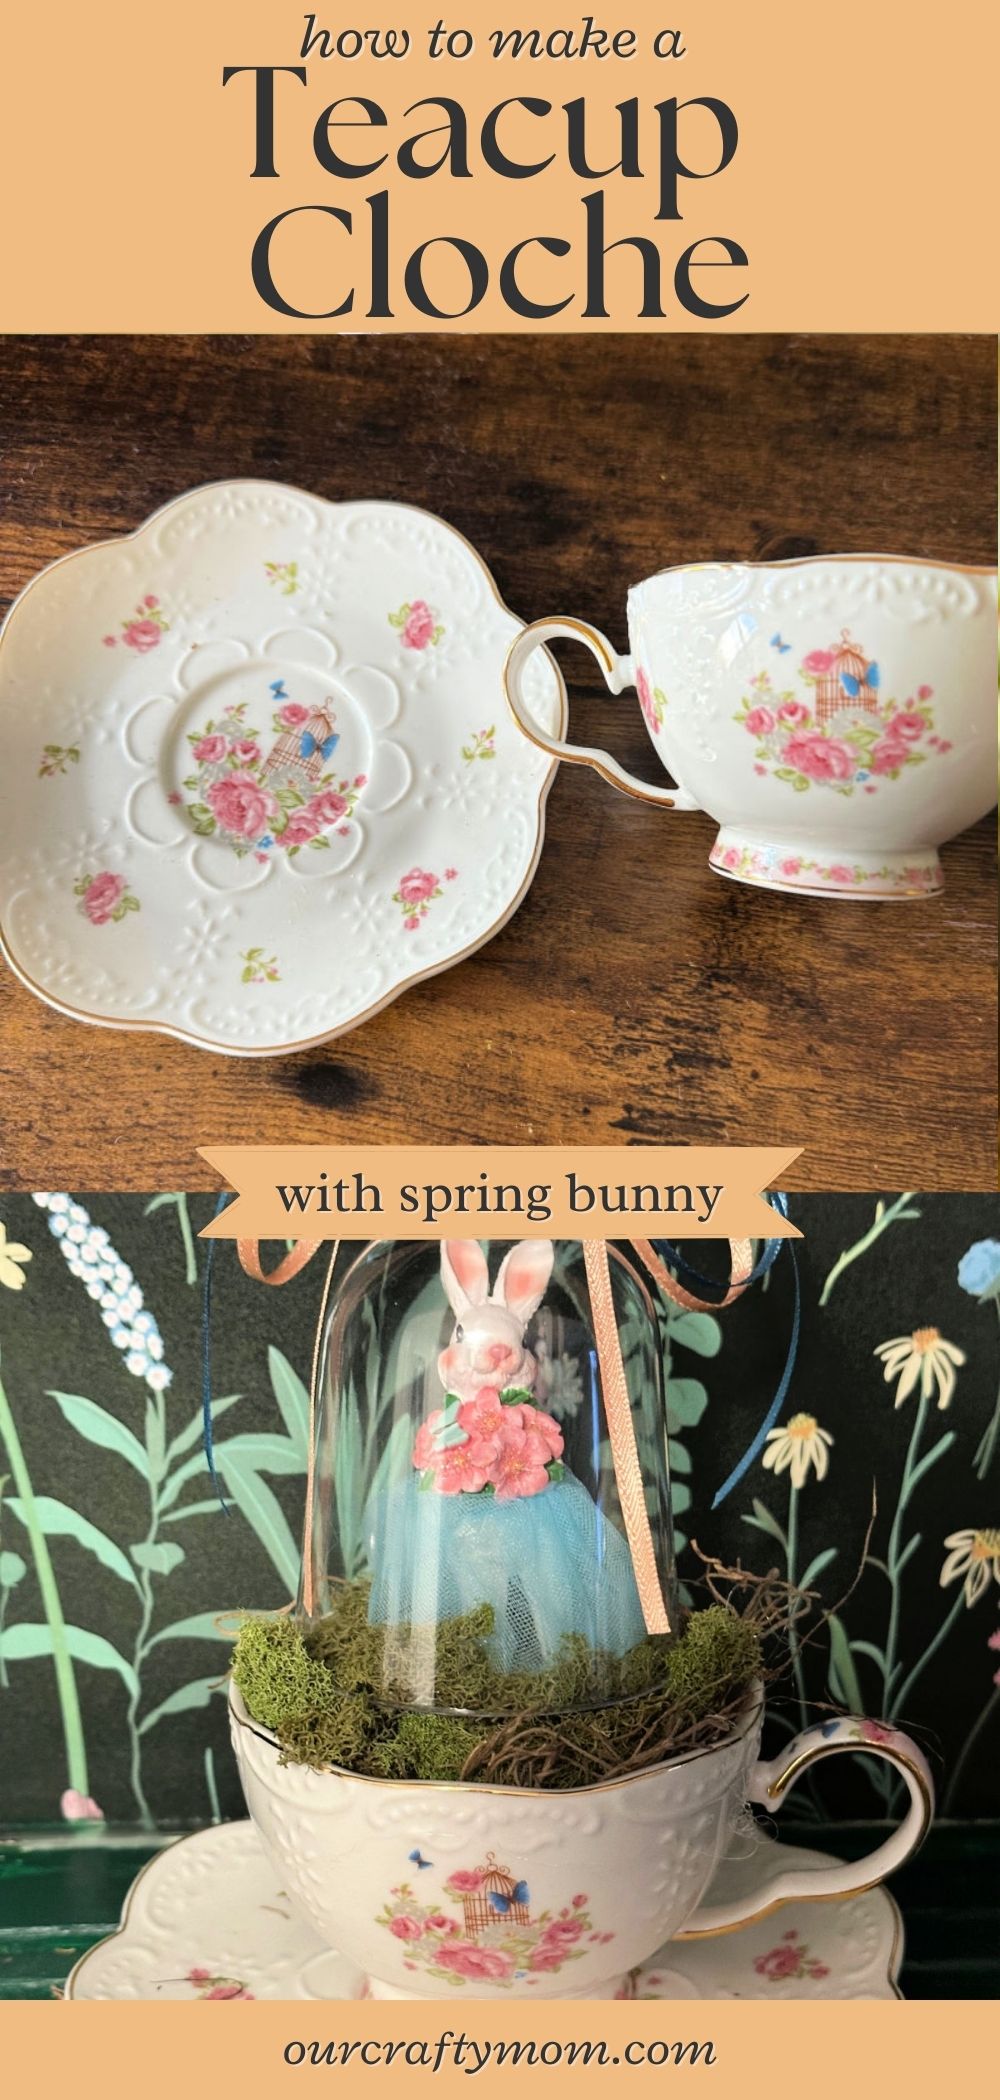
Teacup Bunny Cloche
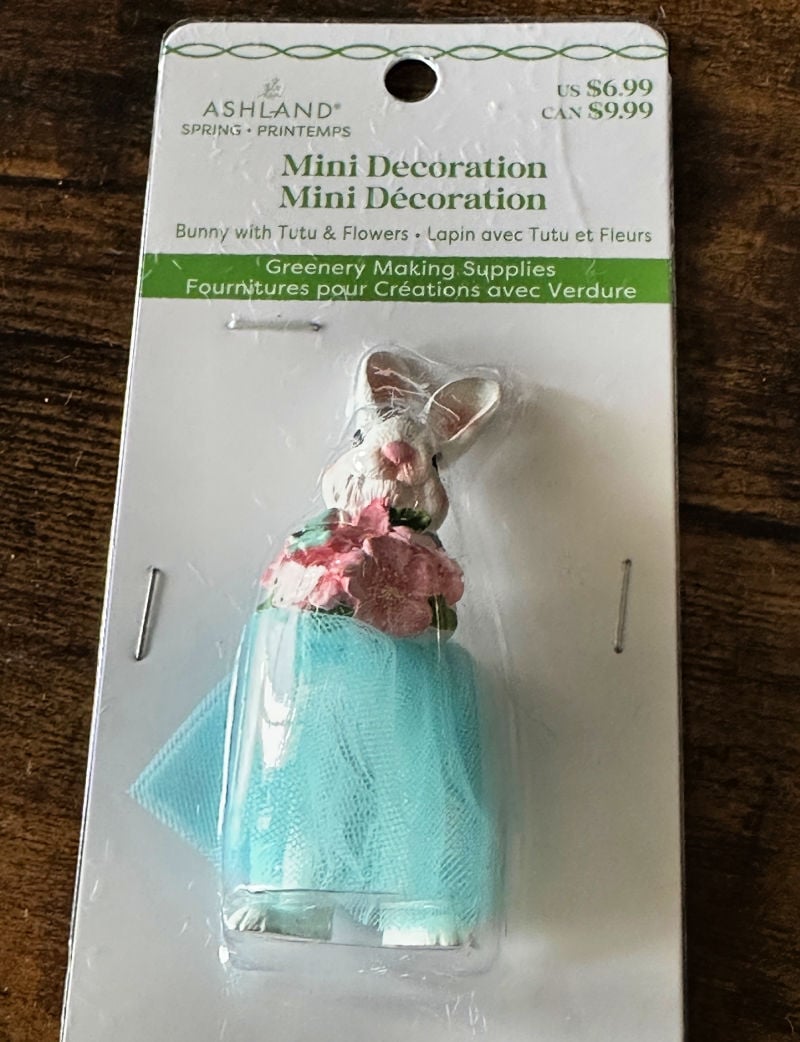
There is something about bunny crafts that I just love for spring and Easter. So, the minute I spotted this darling mini bunny figurine at Michaels, I had to have it.

I had no clue what I was going to do with it, but after a quick trip to the thrift store inspiration struck.
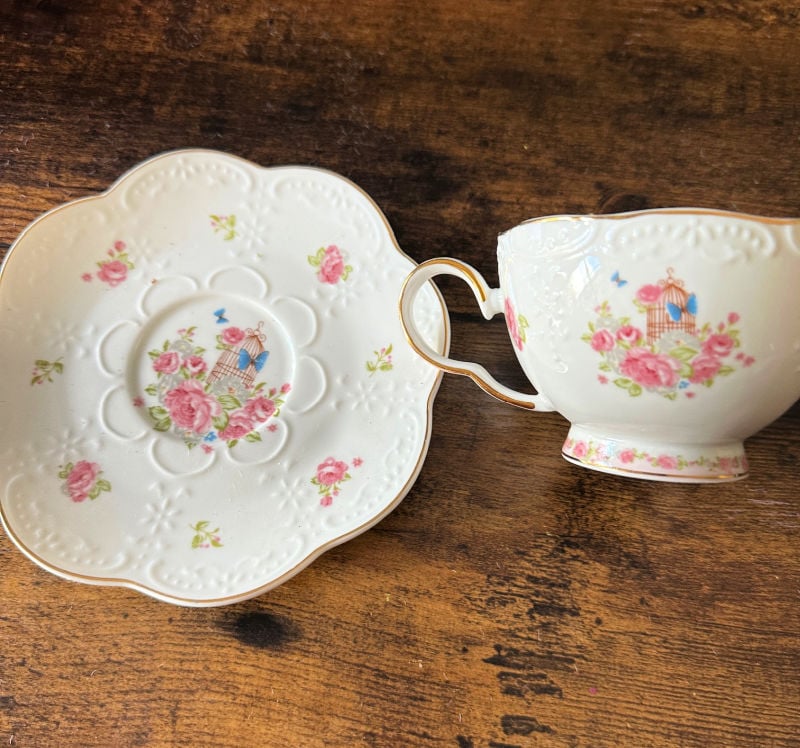
This pretty teacup spoke to me and I knew it would be the perfect vessel for the little bunny.

That is one of the things I love about crafting. You don’t always need a plan. Sometimes things just come together.
So, the next time you are out thrifting, keep an open mind when you spot something that speaks to you.
You never know when inspiration will strike!
Supplies
- Mini Bunny Figurine
- Plastic Wine Glasses
- Floral Foam
- Moss
- Teacup and Saucer
- Ribbon
How to Make a Teacup Cloche
This seriously comes together in just a few minutes. The great thing is no hot glue is needed, so you can change out the figurine if you want. Wouldn’t this be pretty with a vintage bottle brush tree?
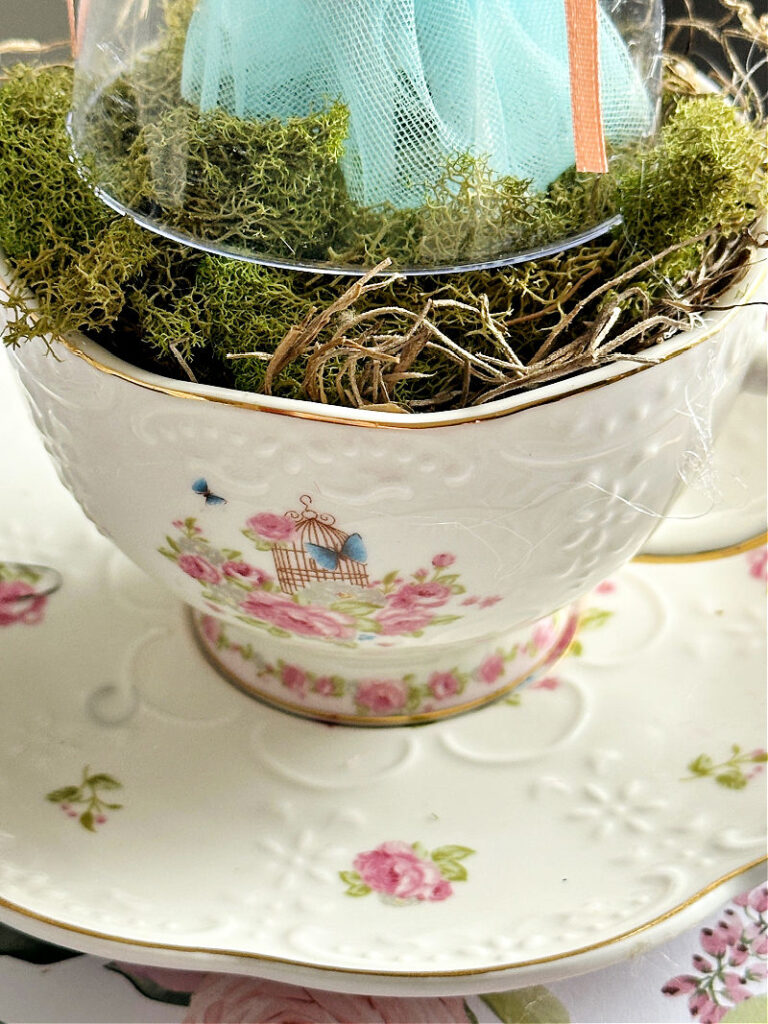
Step 1. Add Floral Foam
Start by adding floral foam to the teacup. Check out the dollar store for this, as it can be pricey at craft stores.
Step 2. Cover Foam with Moss
The next step is to cover the foam with moss. Push it down around the foam so it is nice and secure.
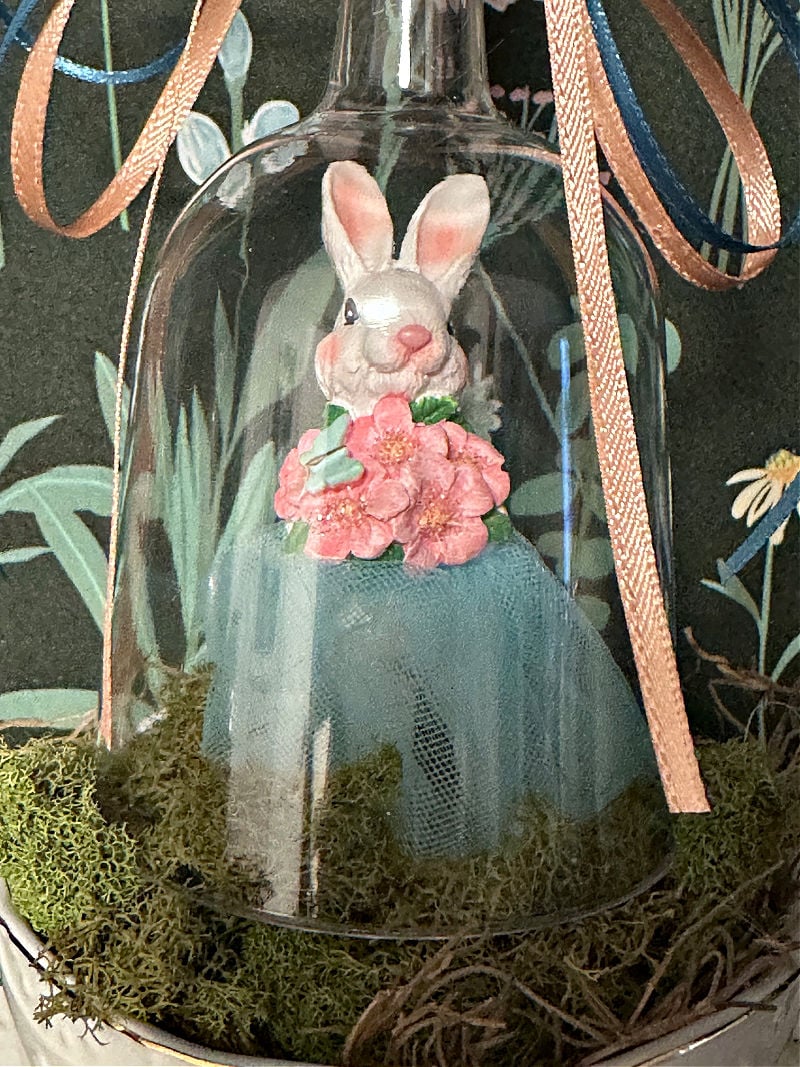
Step 3. Add the Bunny
Place the bunny figurine in the center of the teacup. You can absolutely add a bit of hot glue if you want, but I like to change things out, so I left it off.
Step 4. Place the Cloche Over Bunny
I had a few plastic wine glasses left over from the snow globe ornaments I made last Christmas. Turns out it was the perfect size to use for this teacup cloche. Love when that happens!
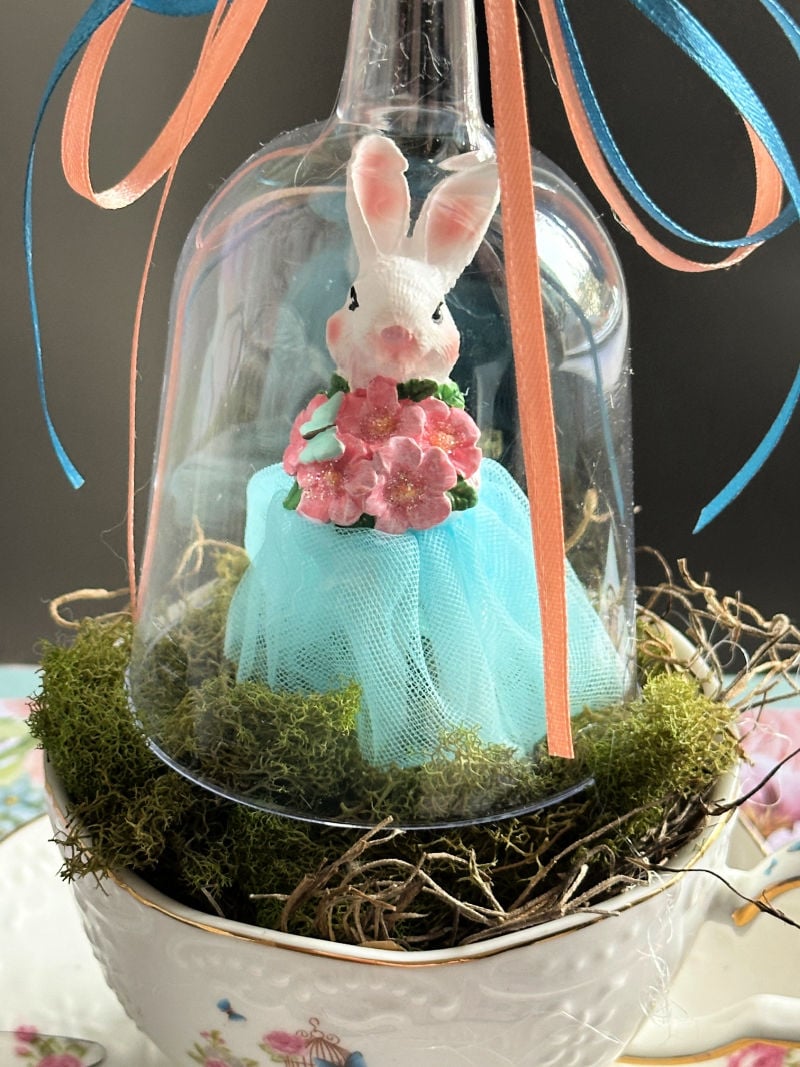

Simply place the cloche (plastic wine glass) over the bunny. The base of the wine glass can be removed and used for another craft if you like.
Step 5. Top with Ribbon
The final step is to add a ribbon bow on top of the cloche. I wanted to keep it light, so I used narrow ribbon in 2 complimentary colors.
A small flower was secured to the top of the cloche. This was the only dab of glue I used.

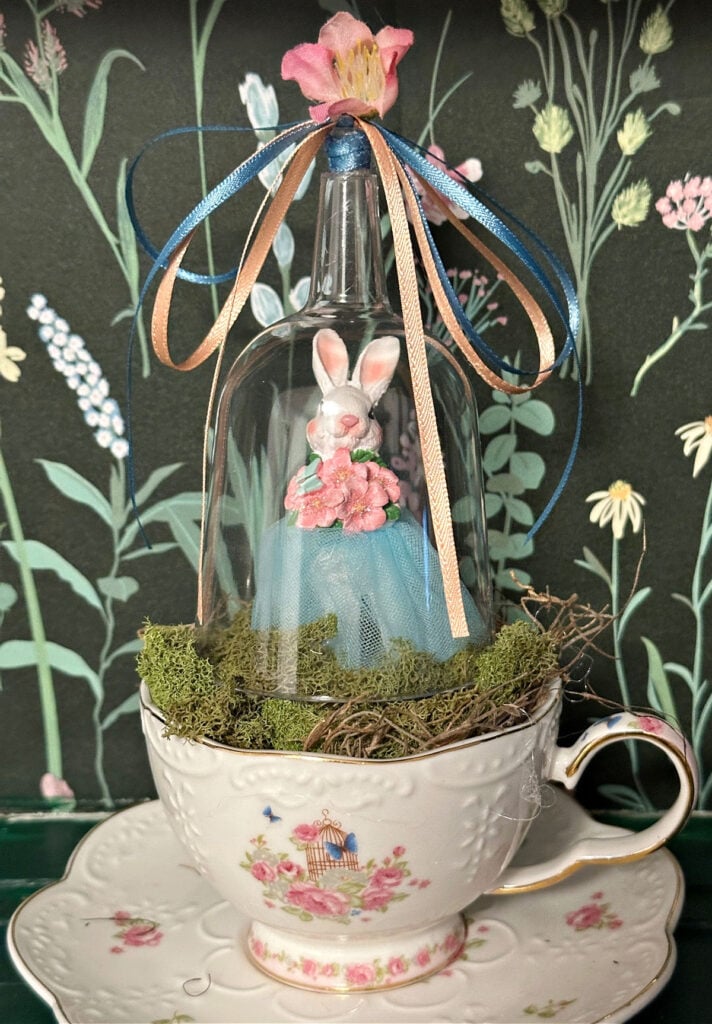

The detail in this cup is so pretty. I try to use supplies that I have in my craft stash, but if I happen to come across a small butterfly, I may add that to the top in place of the flower.

That’s all there is to it! A sweet and simple teacup cloche perfect for Easter. The bunny was 40% off and the teacup was $2, so all in this was about $6.
It reminds me of something you would find at a boutique or gift shop.

It can be displayed on a hutch, or bookshelf, or anywhere you want a little bit of spring decor.

Is this something you can see yourself making? If you do make one, be sure to share it with us on Facebook or Instagram.
Just tag @ourcraftymom. You never know who you may inspire.

Please share this article with your friends on Pinterest by pinning the below image.
It helps my blog grow and doesn’t cost a thing! 🙂

Thanks so much for stopping by. Happy decorating!


For even more budget-friendly spring ideas, you don’t want to miss this amazing collection of 101 DIY Easter Decorations and these 19 DIY Spring Gnomes.
Follow me on social media below:
Mary
Wednesday 5th of March 2025
So very cute. I was thinking how sweet it would be to leave the base on and put a tea light on it.