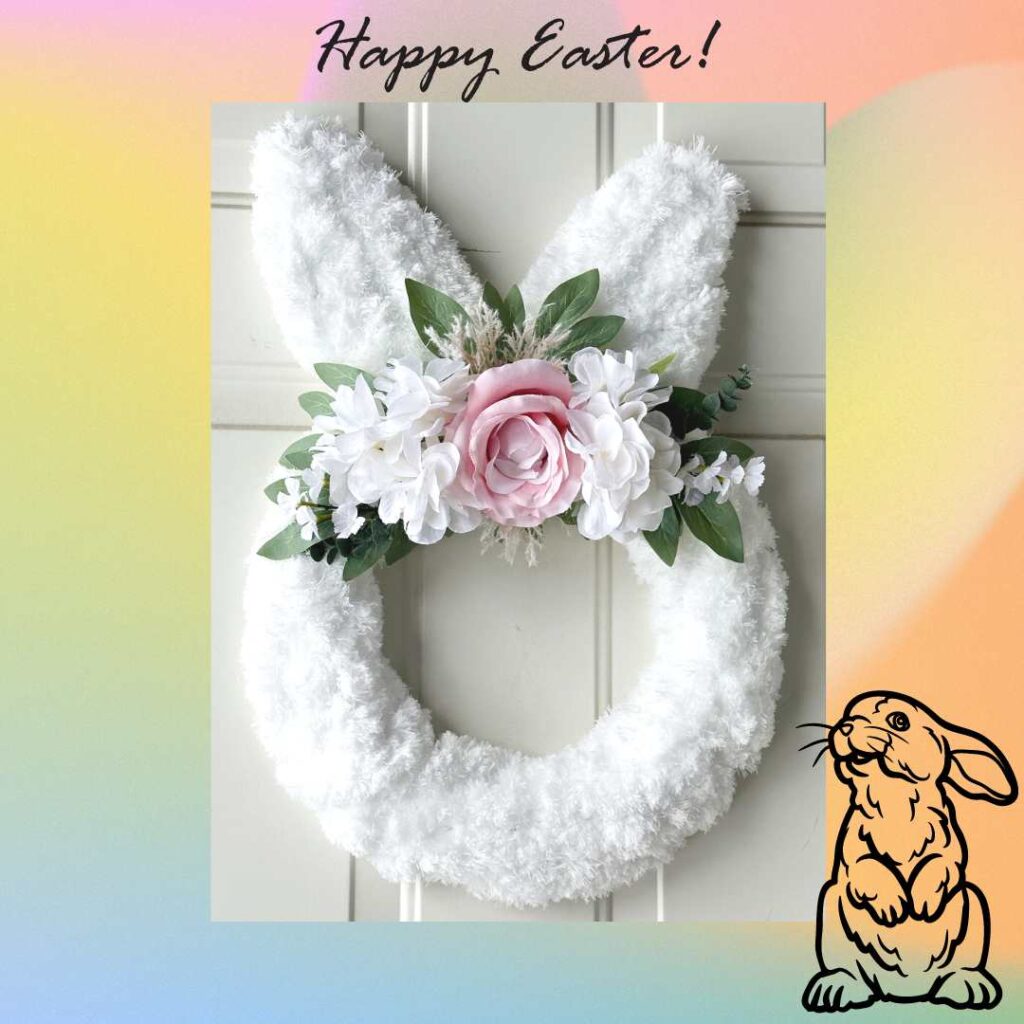
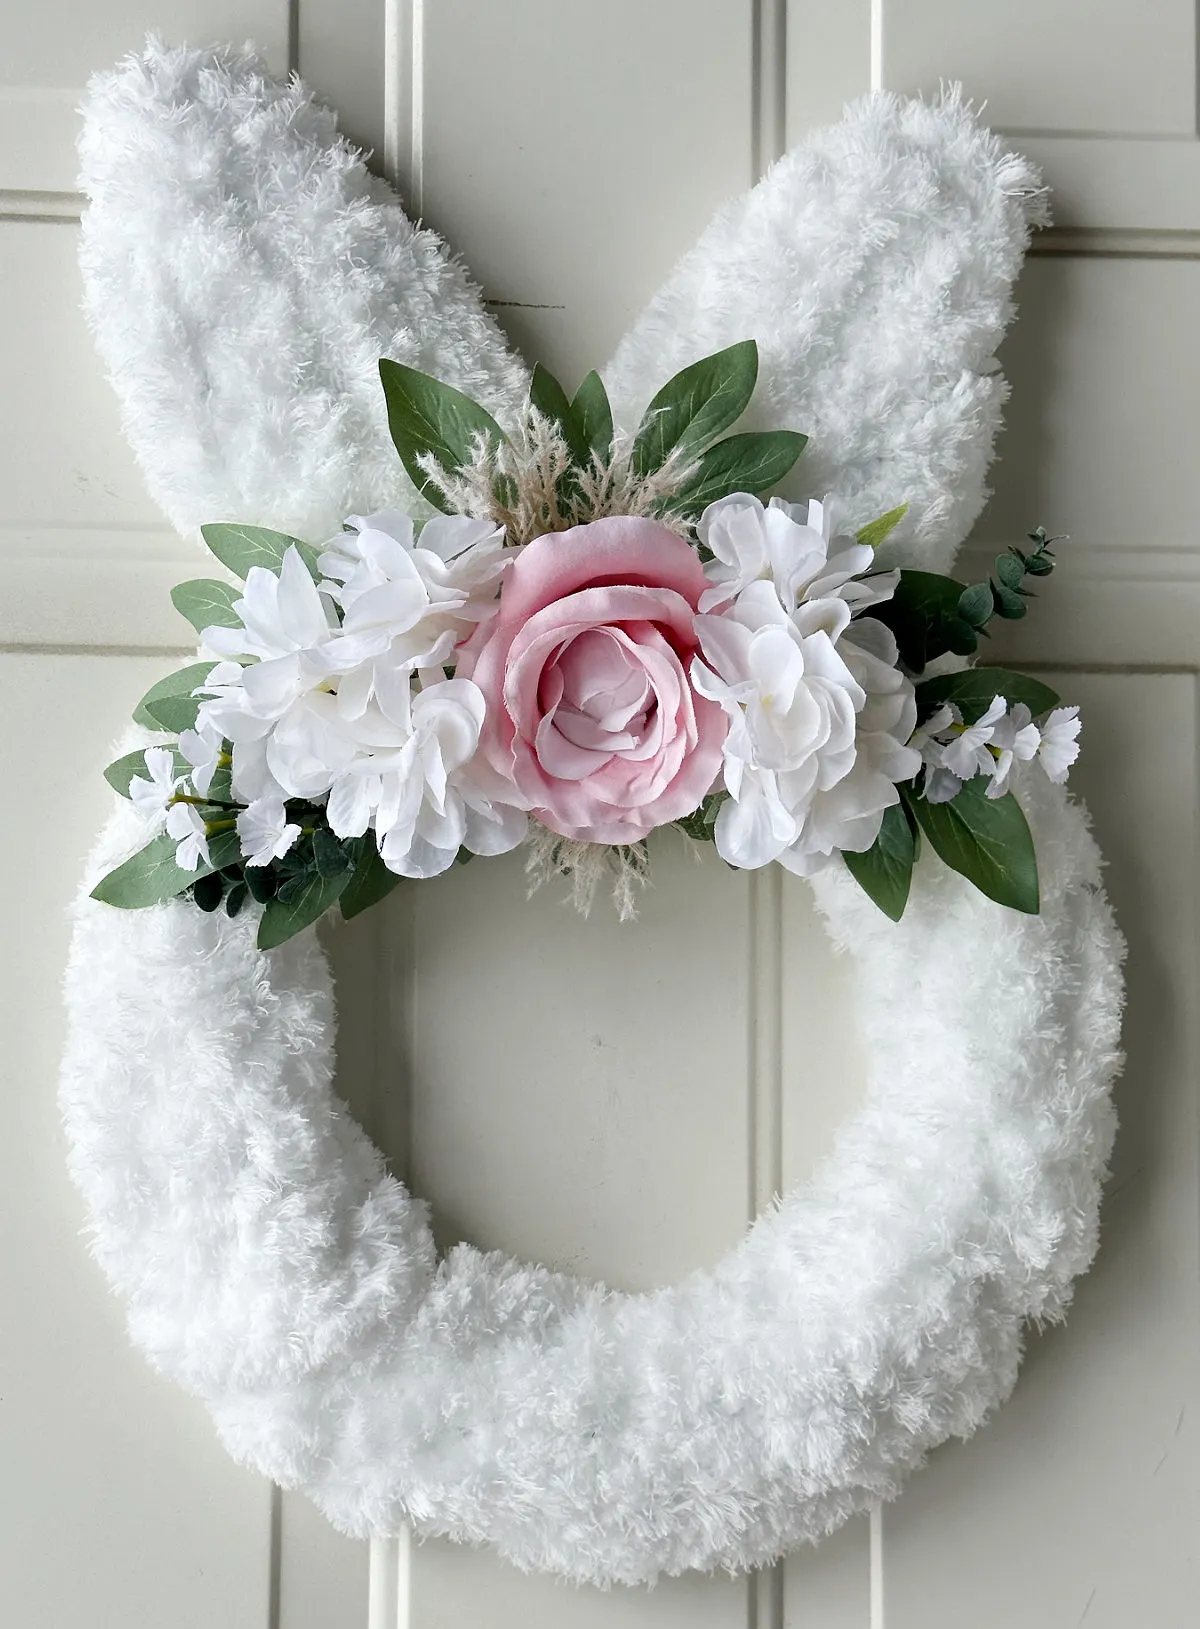
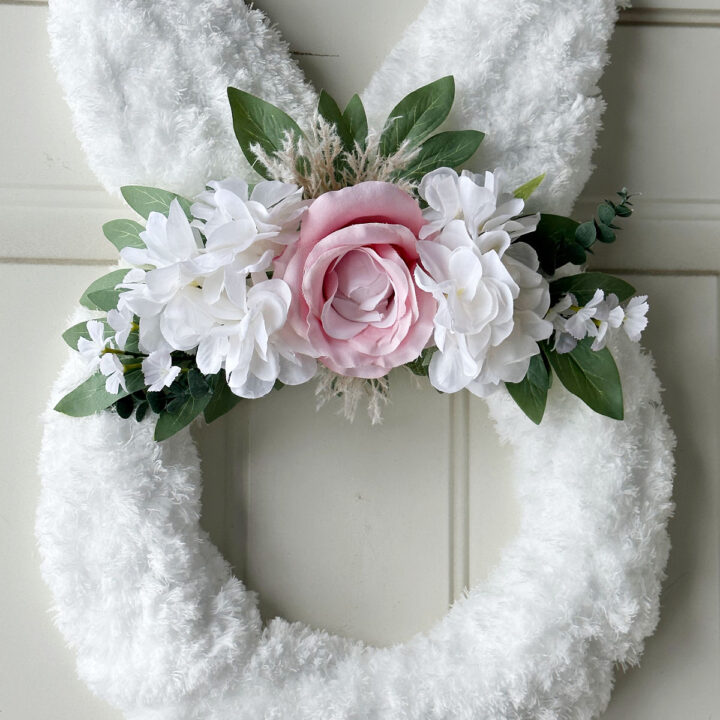
Make the cutest Easter bunny wreath using Dollar Tree feather mop heads! It’s a budget-friendly spring craft that will look perfect on a front door.
This springtime door hanger can be made in less than an hour for about $10.
I’m all about quick and easy crafts and it doesn’t get much easier than this DIY Easter wreath!

I’ve been having some fun the past week creating new Easter crafts, recipes and spring decorations to share with you.
In case you missed it here are the newest must-see projects:
- Pressed glass cloche for spring
- Chocolate bunny martini
- 21 DIY Easter bunny crafts
- Cadbury mini eggs bark
If you follow me on Facebook or Instagram you know how much I LOVE wreath making.
The first thing I do with any new season or holiday is change out the wreath on my front door.
It really is a nice way to greet friends and family. Plus, it gives me an excuse to create! 🙂
Here are several spring and Easter wreaths I’ve made over the years that you may enjoy:
- Book Page Easter Egg Wreath
- Handmade Grapevine Floral Wreath for Spring
- Easter Door Decor Tobacco Basket Wreath
Now let’s get to this adorable wreath that will make the perfect addition to your Easter decor.
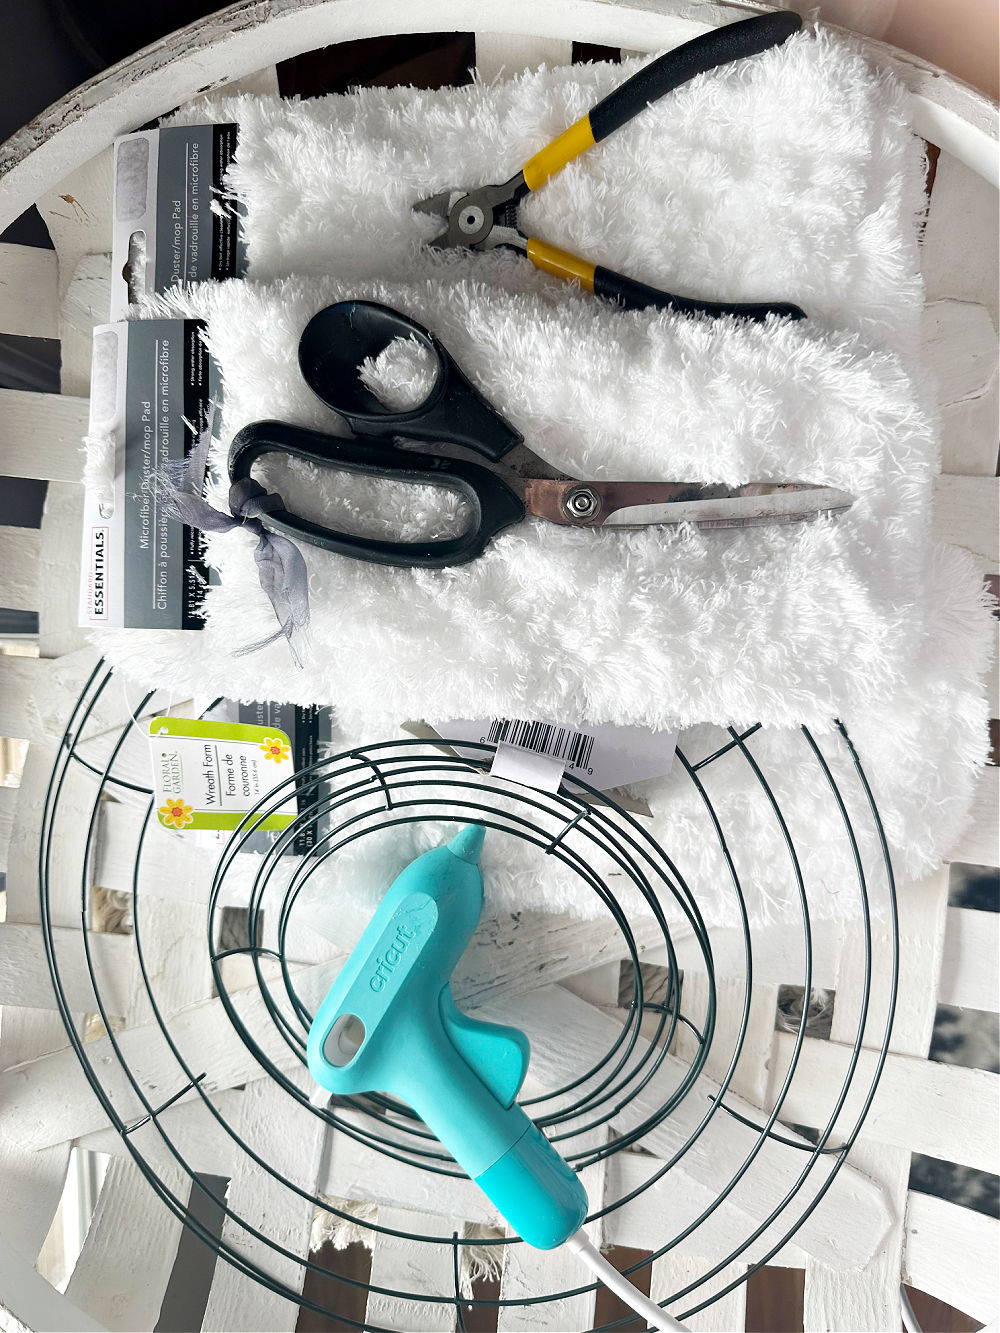
Dollar Tree Easter Bunny Wreath Supplies
- Dollar Tree Bunny Wreath Form – if you can’t find this one you can use a standard round wire wreath form and add bunny ears as I show in this tutorial
- Wire and Cardboard for each bunny ear – not needed if you use the bunny wreath form
- Assorted Spring Flowers
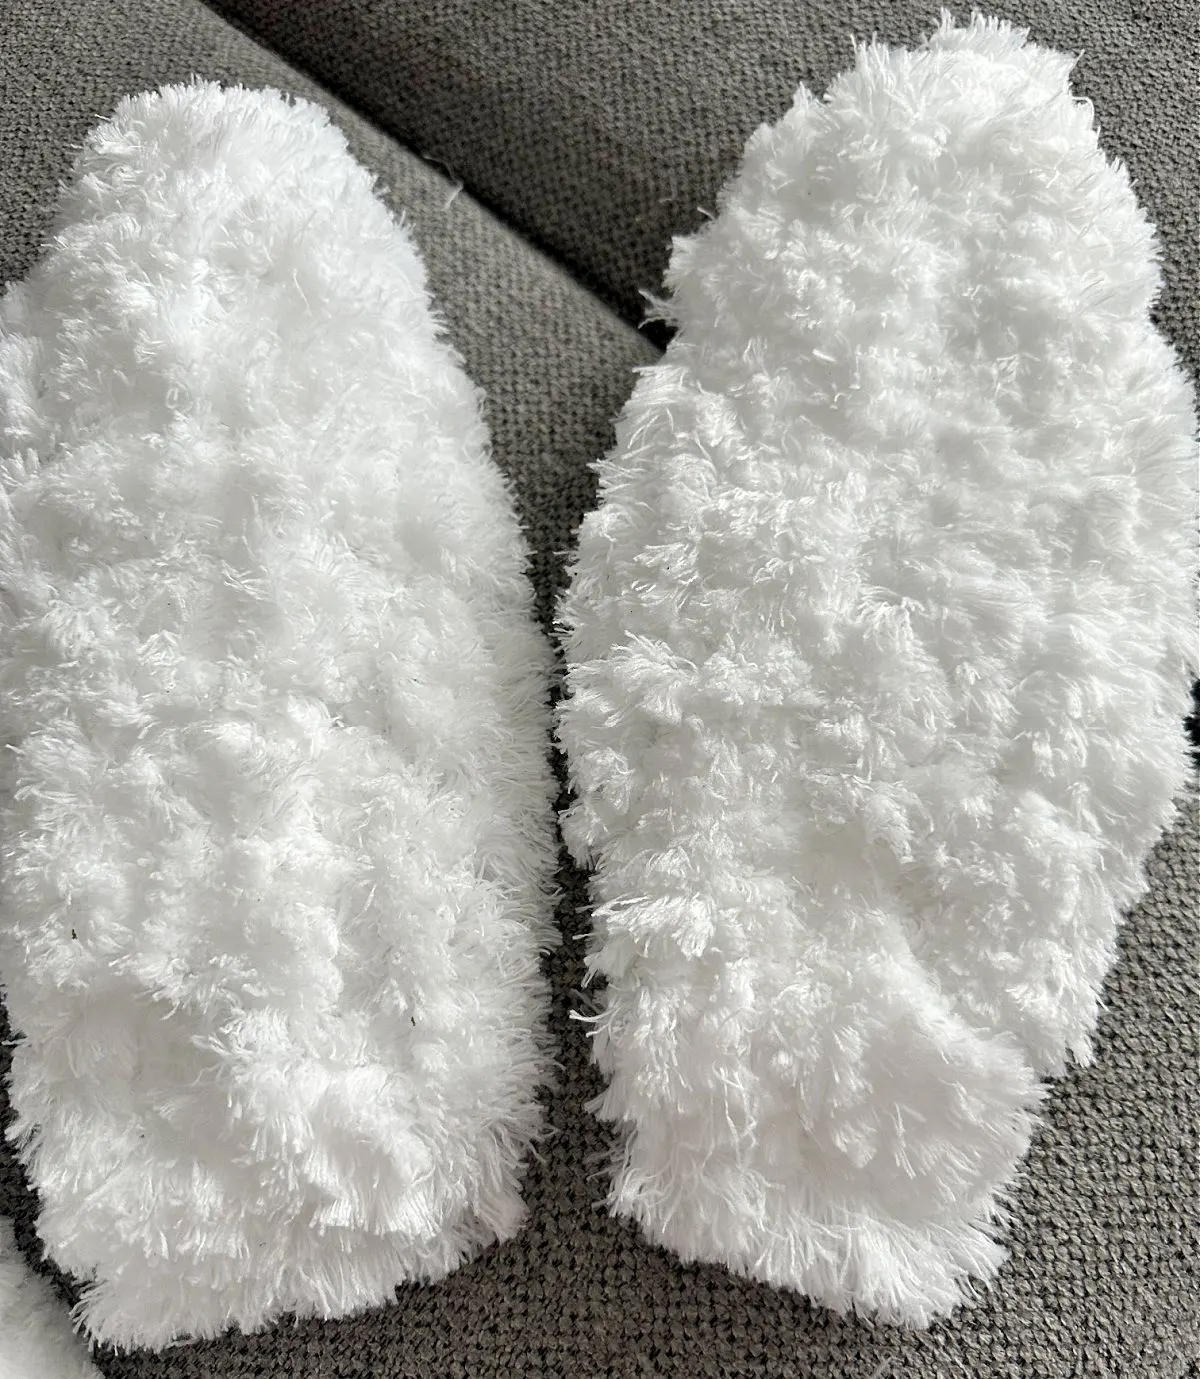
- Dollar Tree Mop Heads 6 – use the duster style not the rope style so you get the fluffy bunny look!
- Hot Glue Gun and Glue Sticks
- Wire Cutters
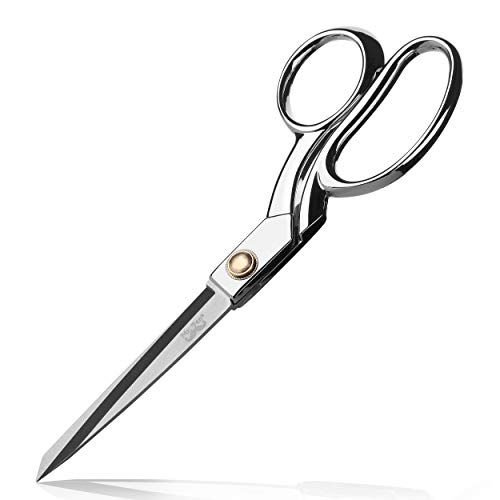
- Fabric Scissors
How to Make a Bunny Wreath
Here are the step-by-step instructions to make this DIY wreath, but I’ve also included a printable craft card at the end of this post to make it even easier!
Step 1. Glue the mop heads
Start by using your hot glue gun to secure the mop heads to the wire wreath form.
The 12″ form uses 4 mops with 2 left to cover the bunny ears.
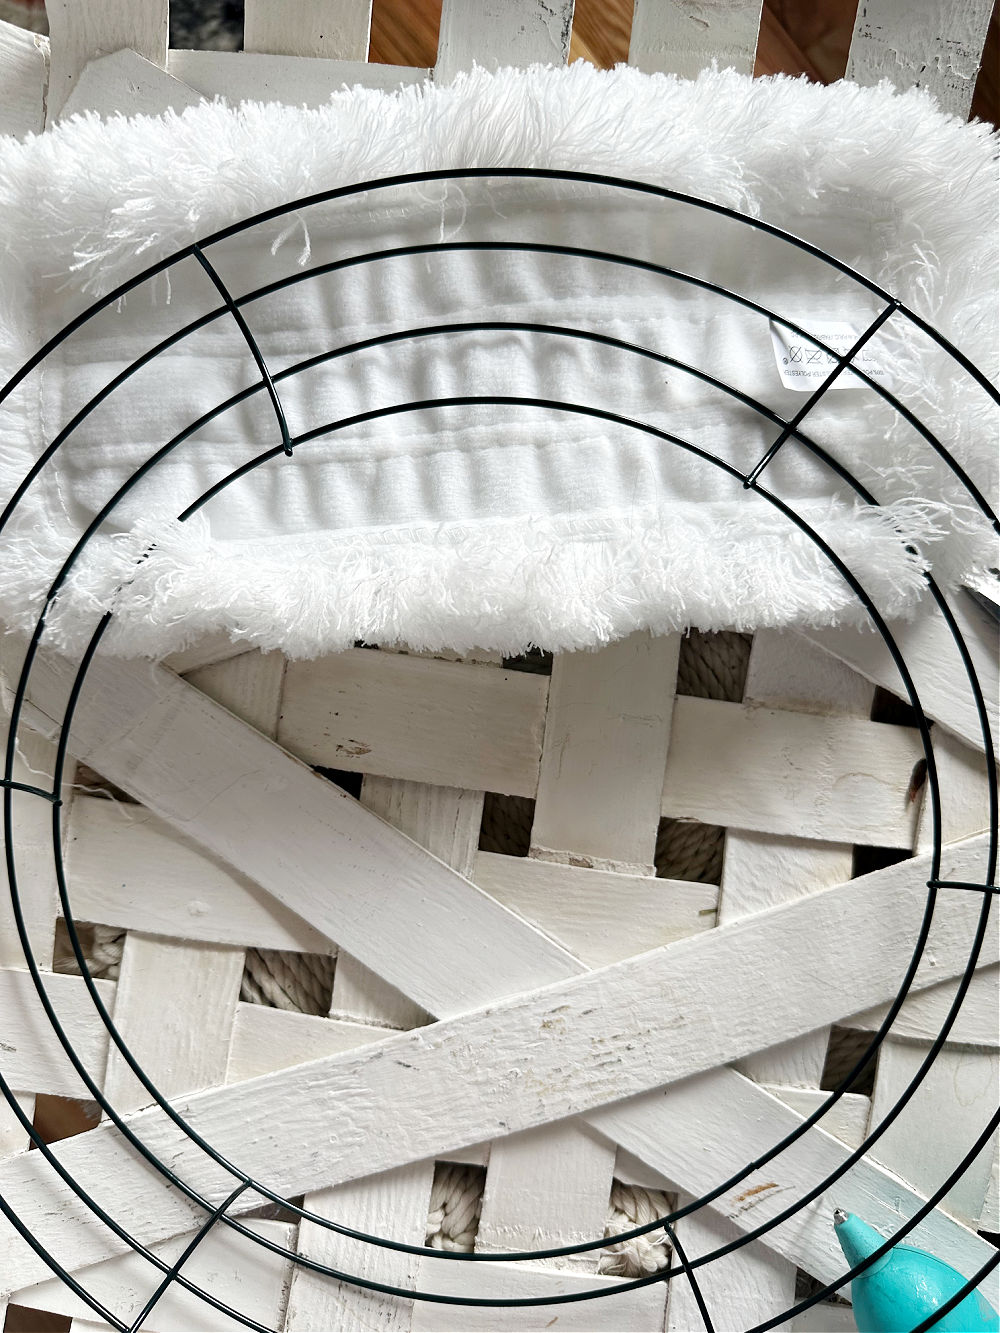

It is easier to lay the mop heads on a flat surface then place the wreath form on top.
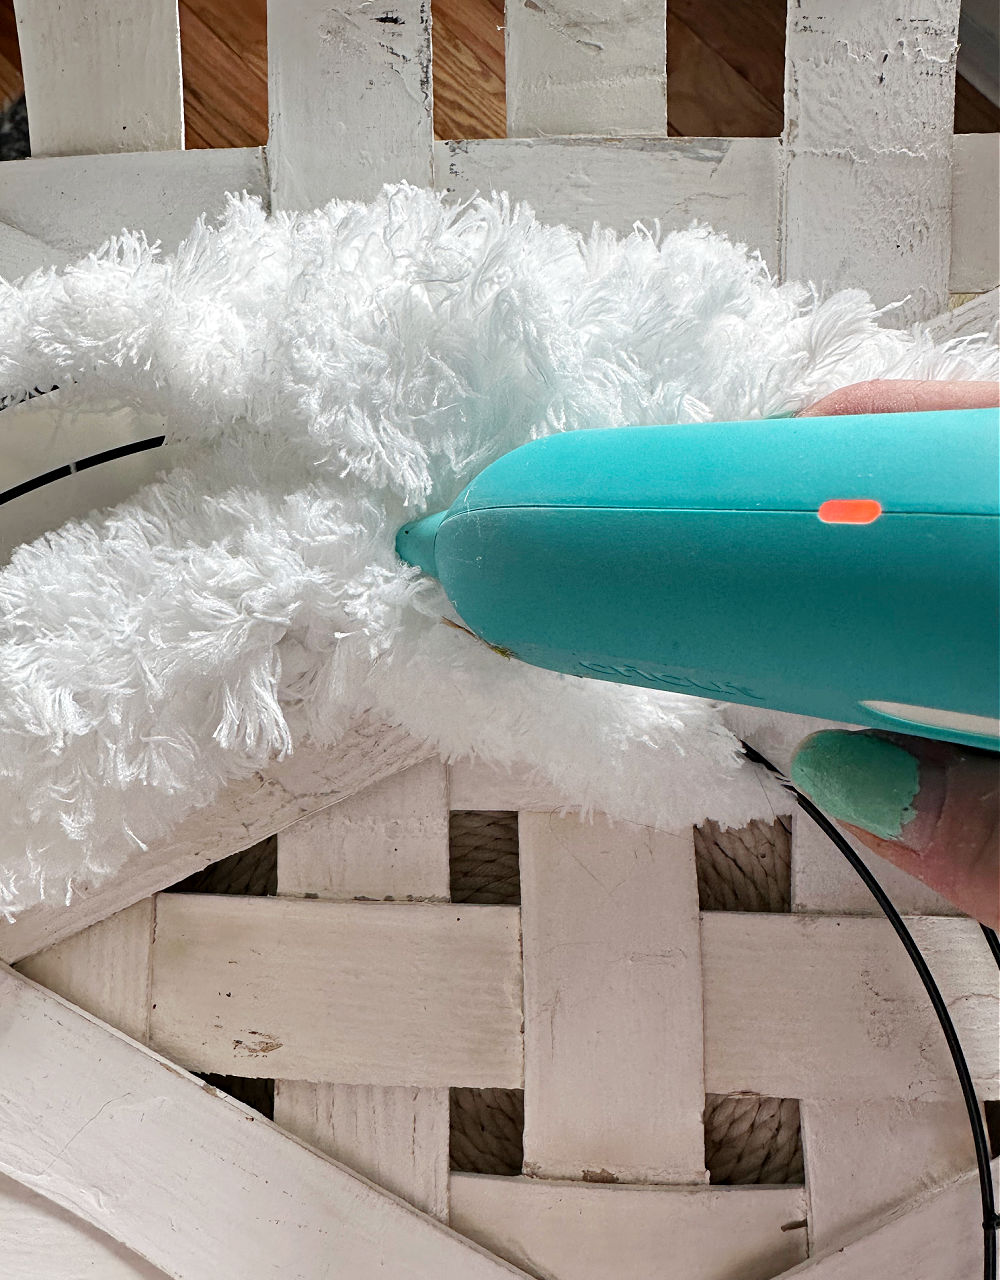

Simply fold the mops up and over the wire and hot glue. Pull it snug so there is no wire left showing on the sides.
The back of the wreath will not be covered. This doesn’t bother me as it will be hanging on a door or wall.
If you want to cover it, you can use felt or fabric.
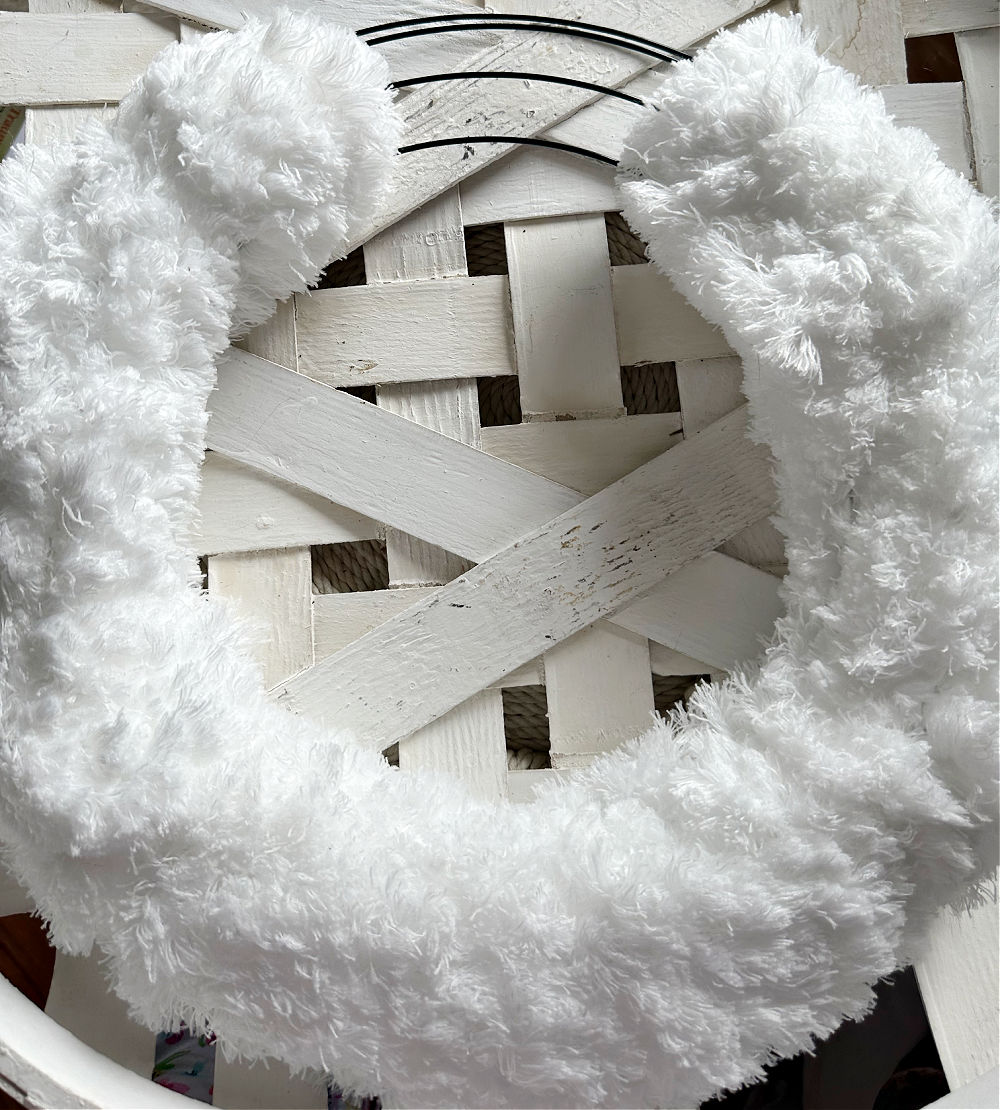

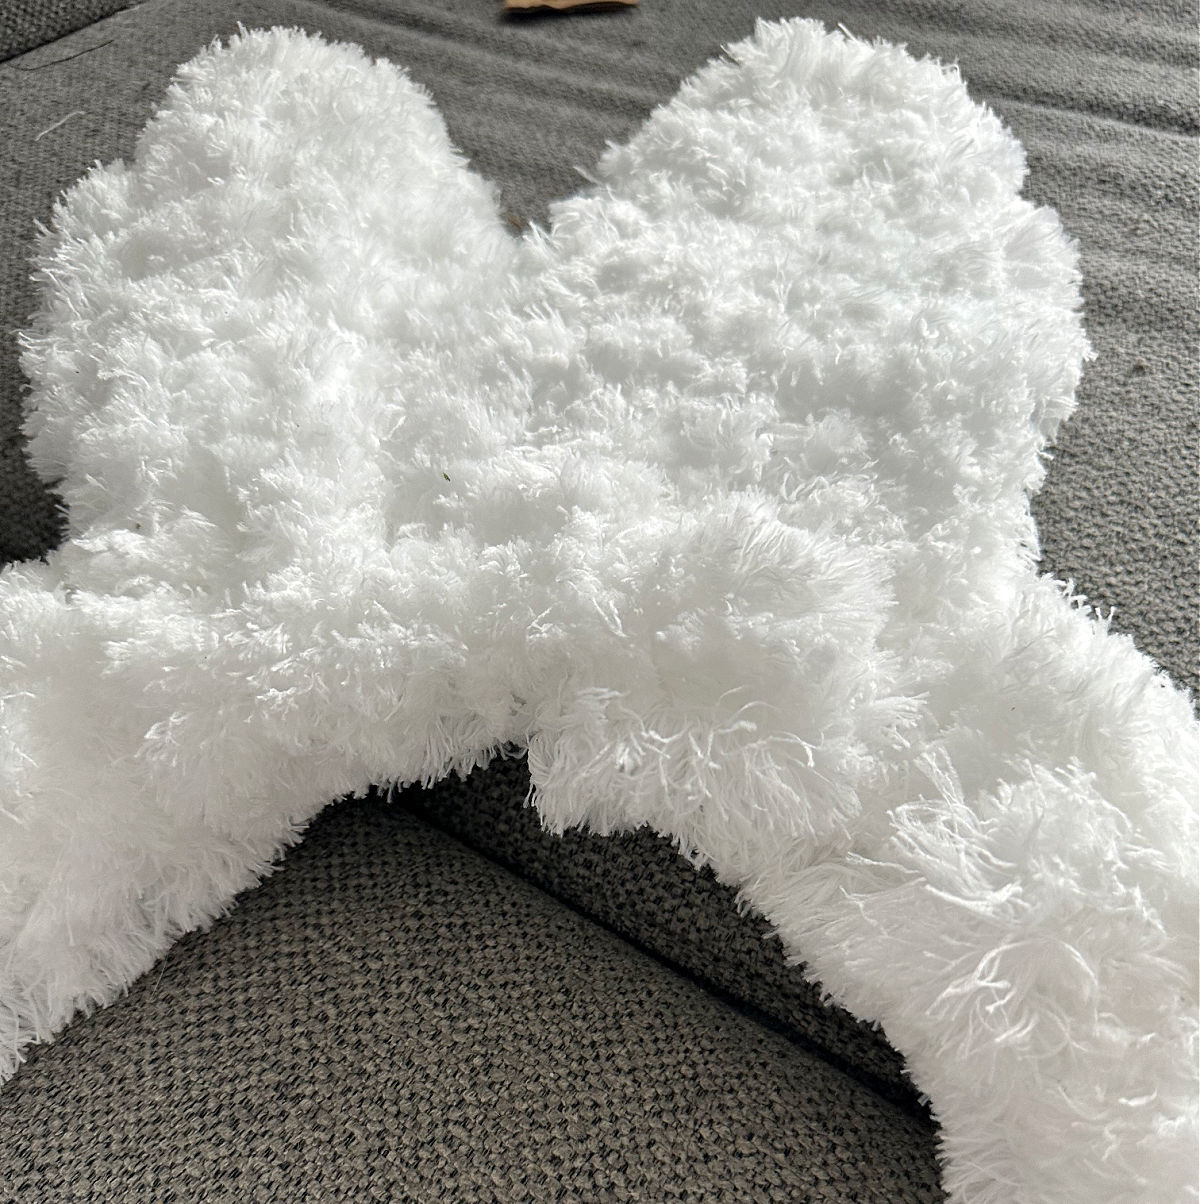
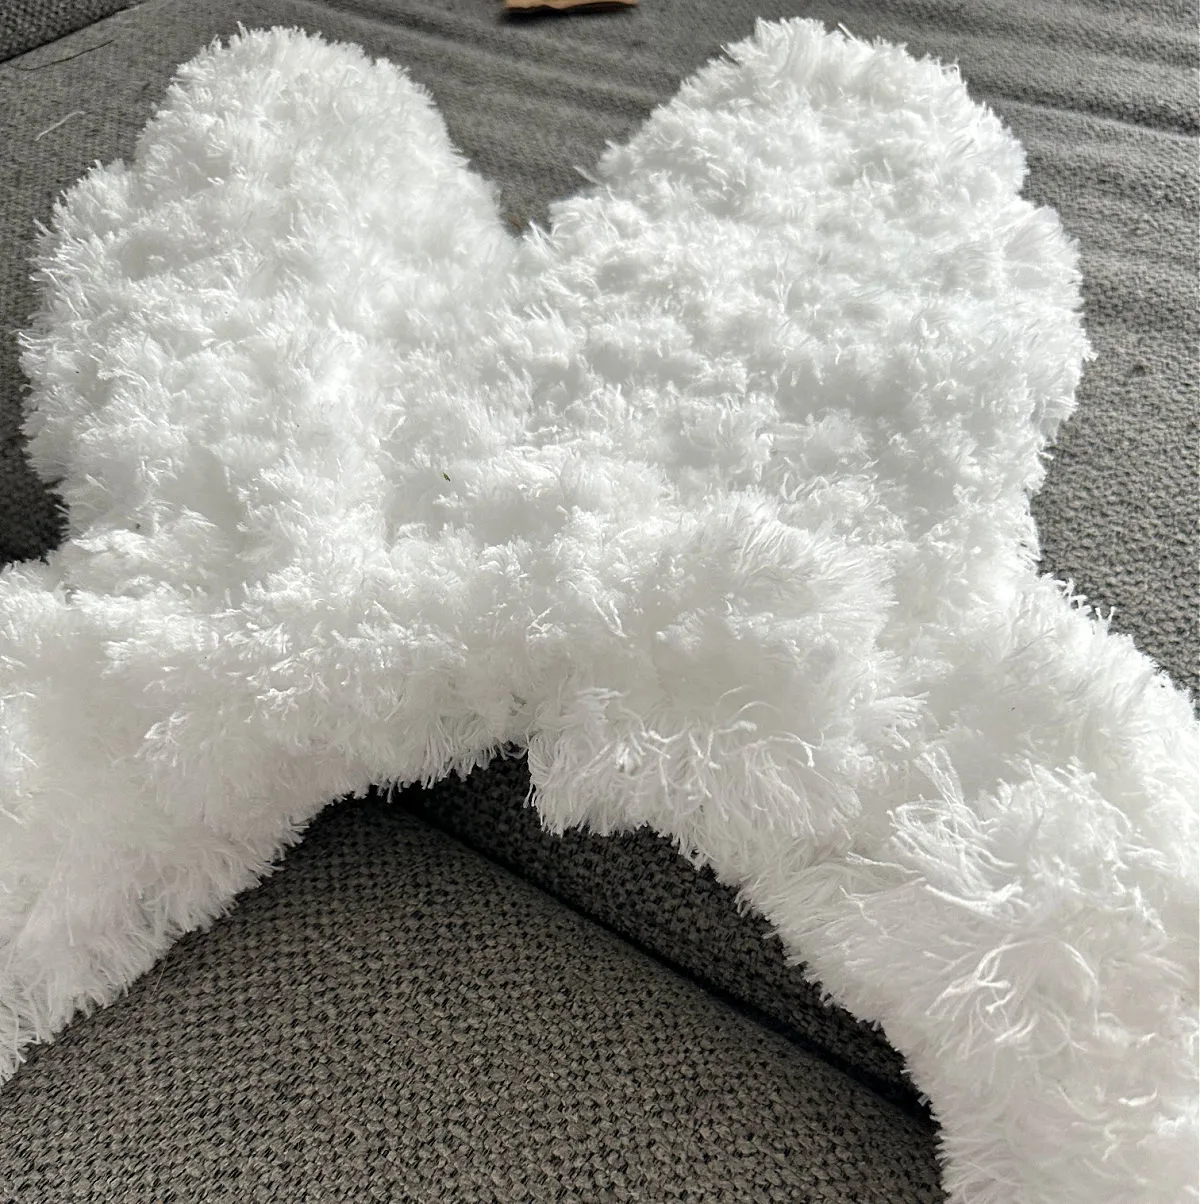
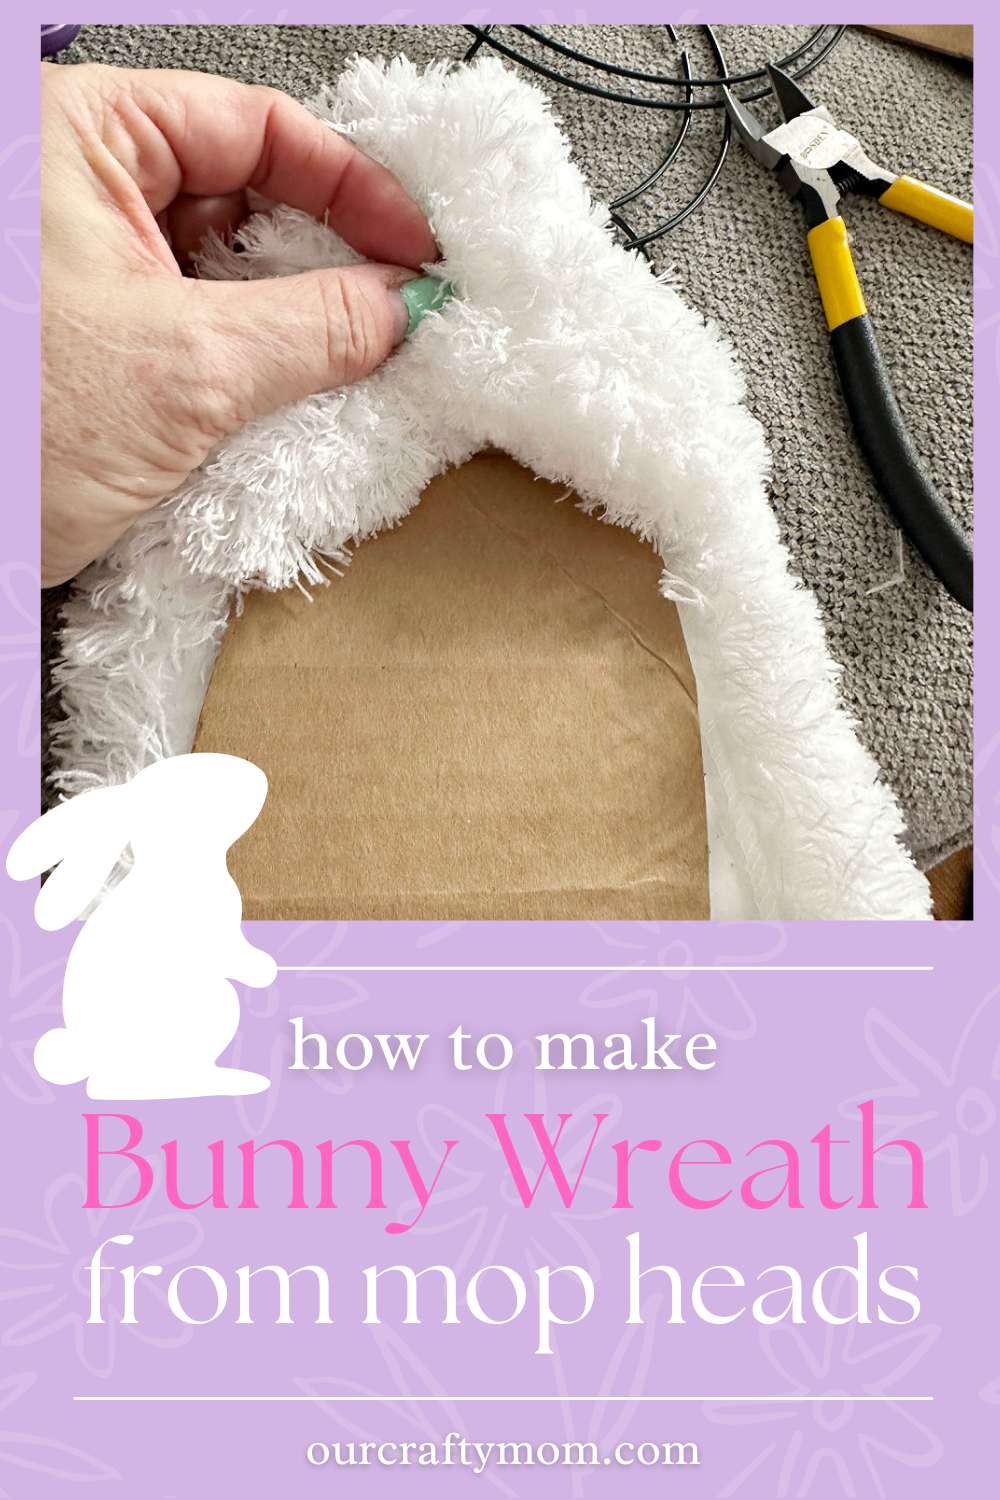
Step 2. Create the Bunny Ears
If you are using the wreath form with the bunny ears all you need to do is hot glue a mop head to each bunny ear the same way you covered the wreath.
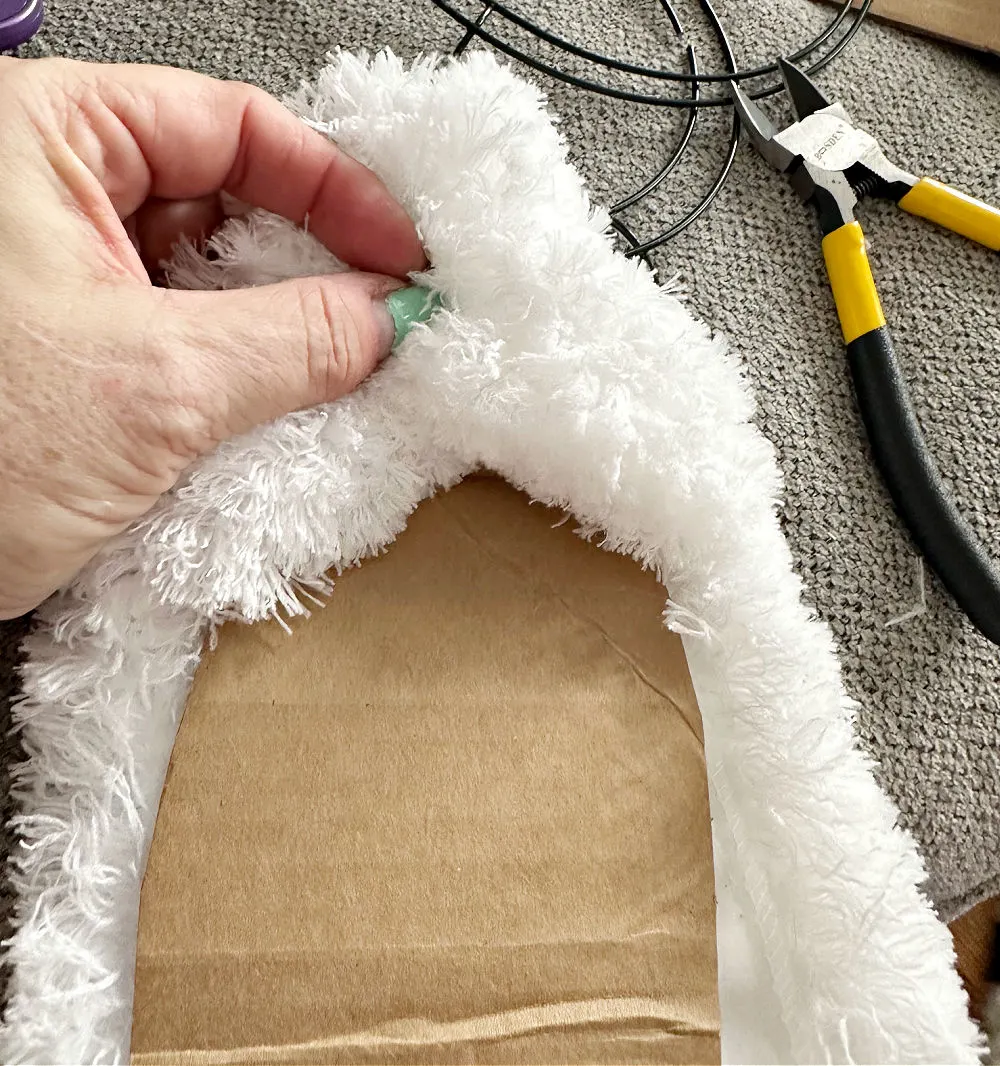
I didn’t have the bunny form so I had to get a bit creative with my bunny ears.
Once your ears are covered, skip this step and proceed to step 3.
To create bunny ears I used scrap cardboard. Don’t be too concerned with it being perfect as the fluffy mops will cover it.
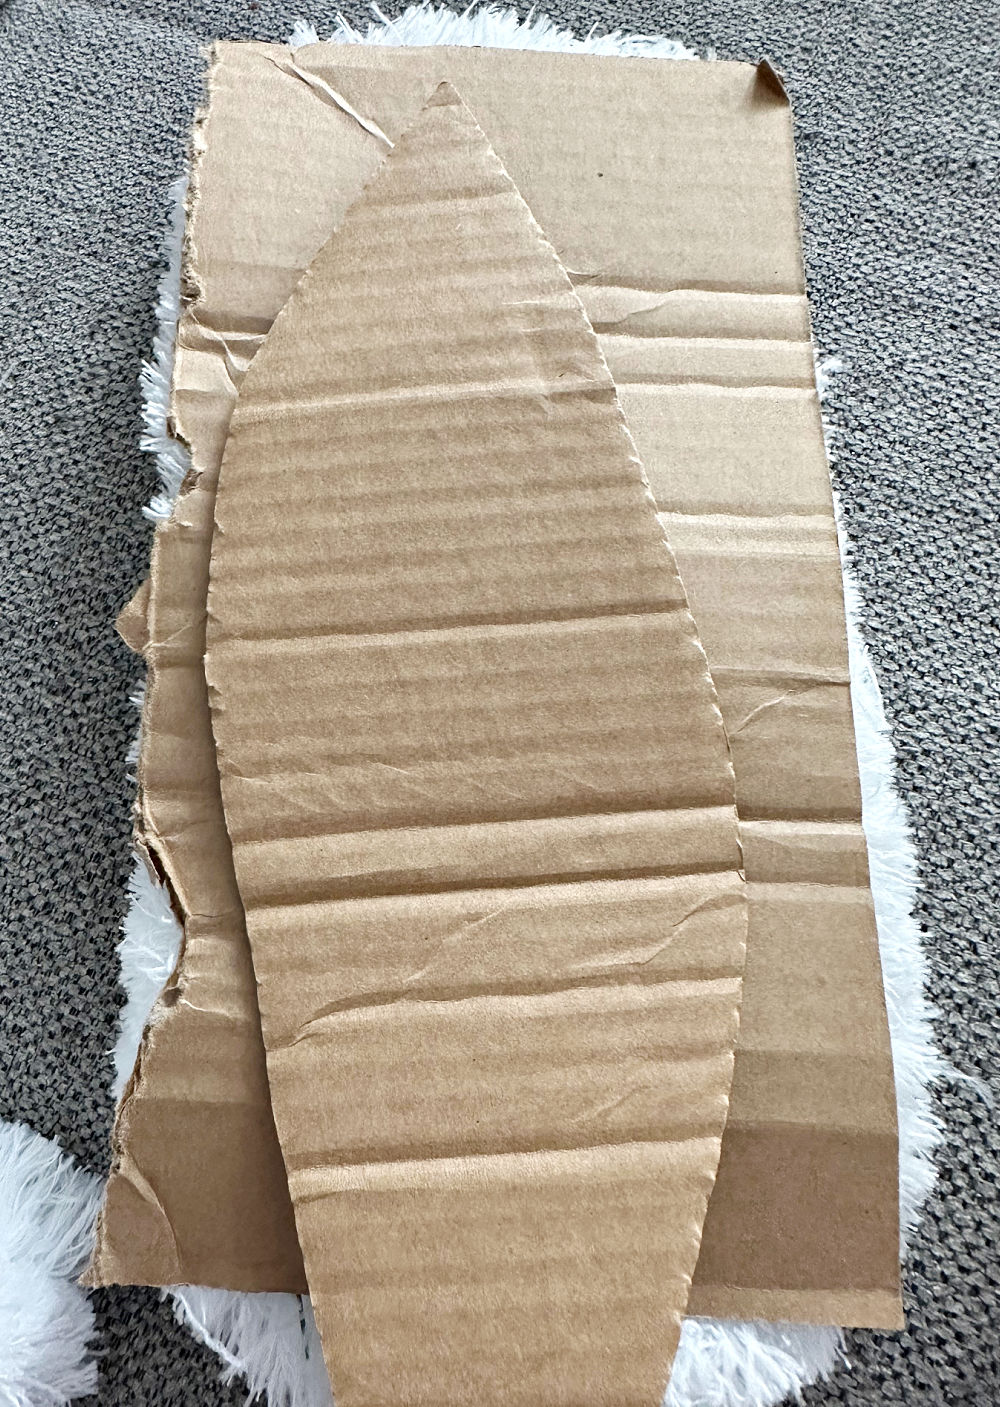
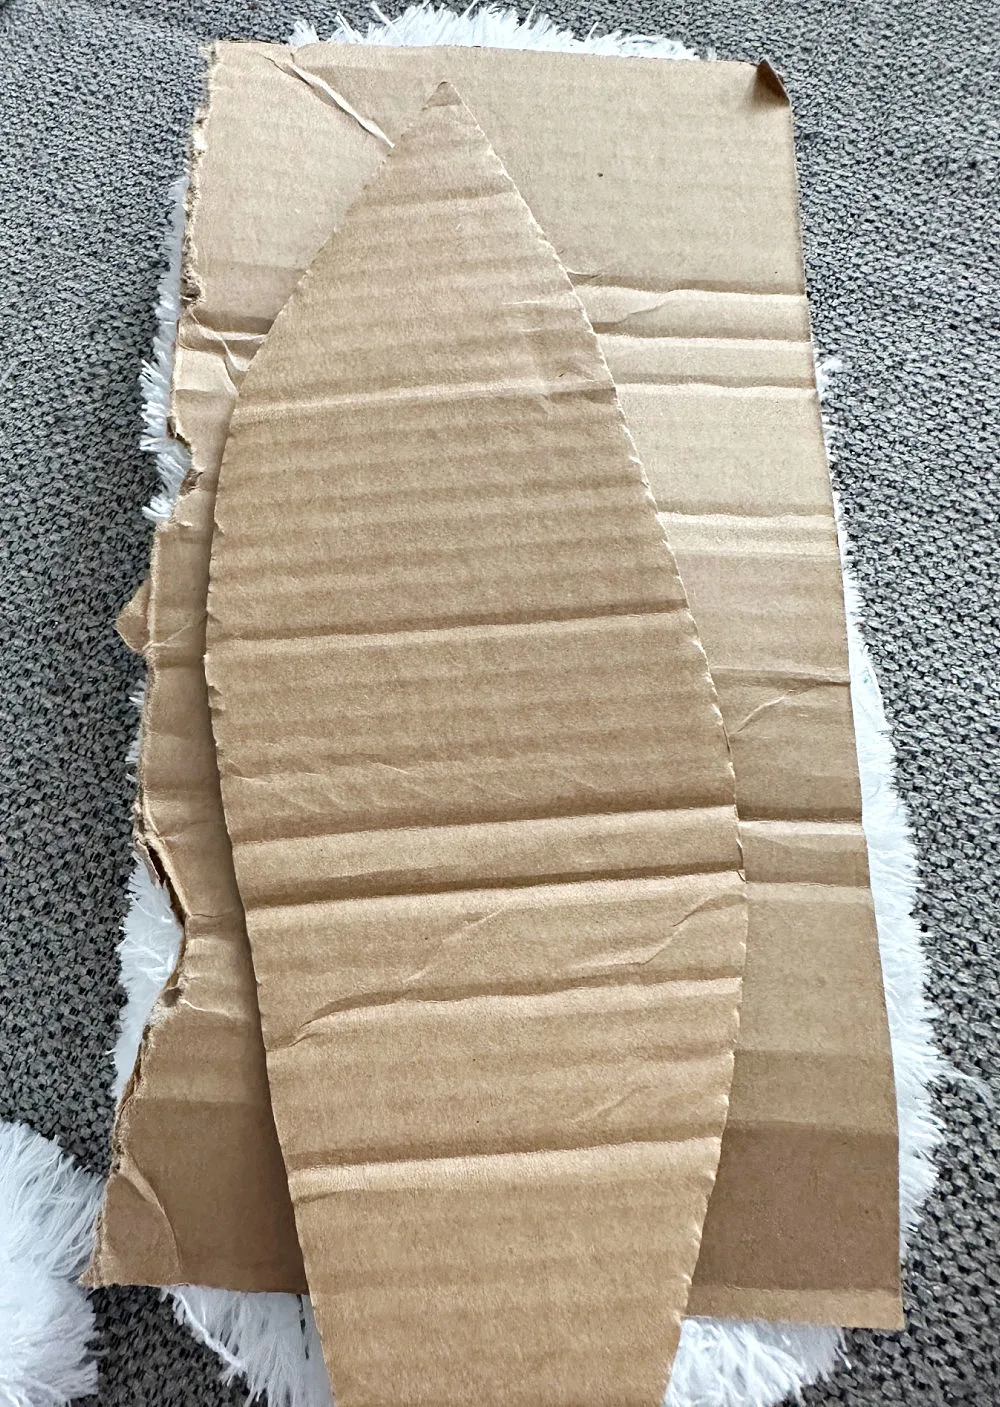
Just make sure you have the correct size for your bunny body and include a pointy top.
Fold the mop head over the cardboard and use your hot glue gun to secure it.

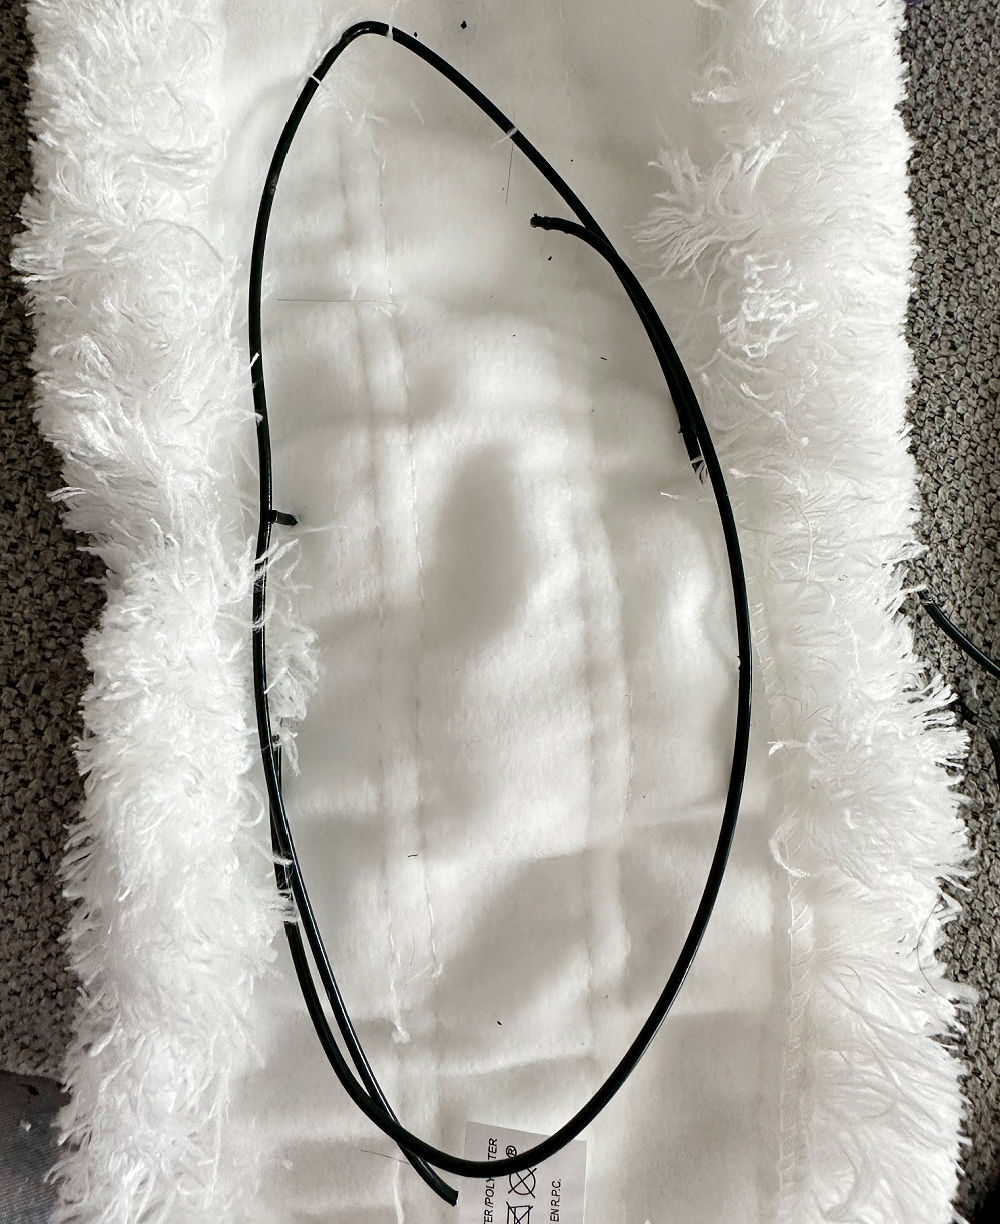
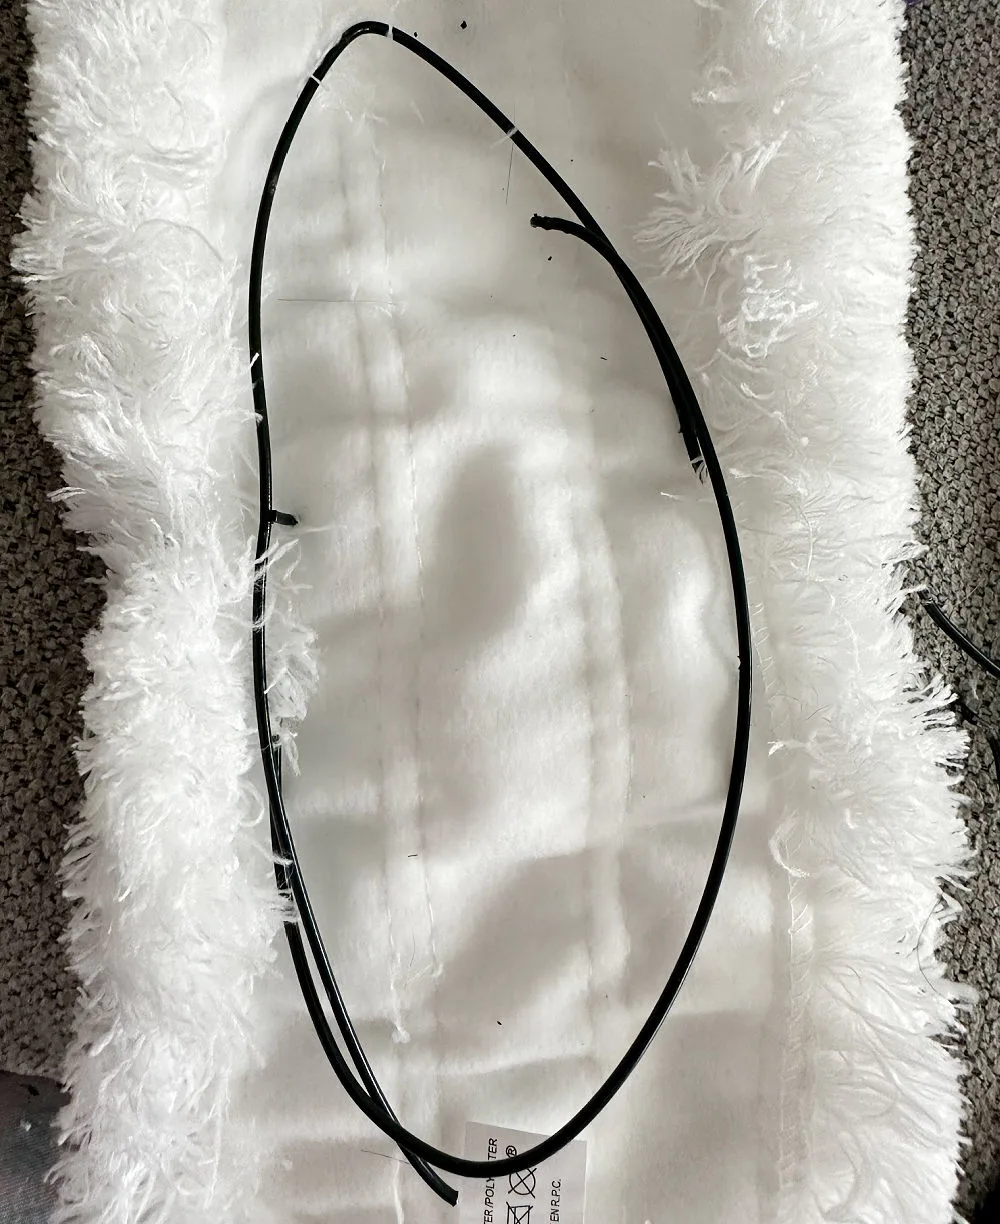
Before you close up the bunny ear, add floral wire to the ear. (I cut an old wreath form with wire cutters)
This will allow you to bend the ear if you like and it will give it more stability.
Continue gluing until it is covered. Repeat for the second bunny ear. So cute!
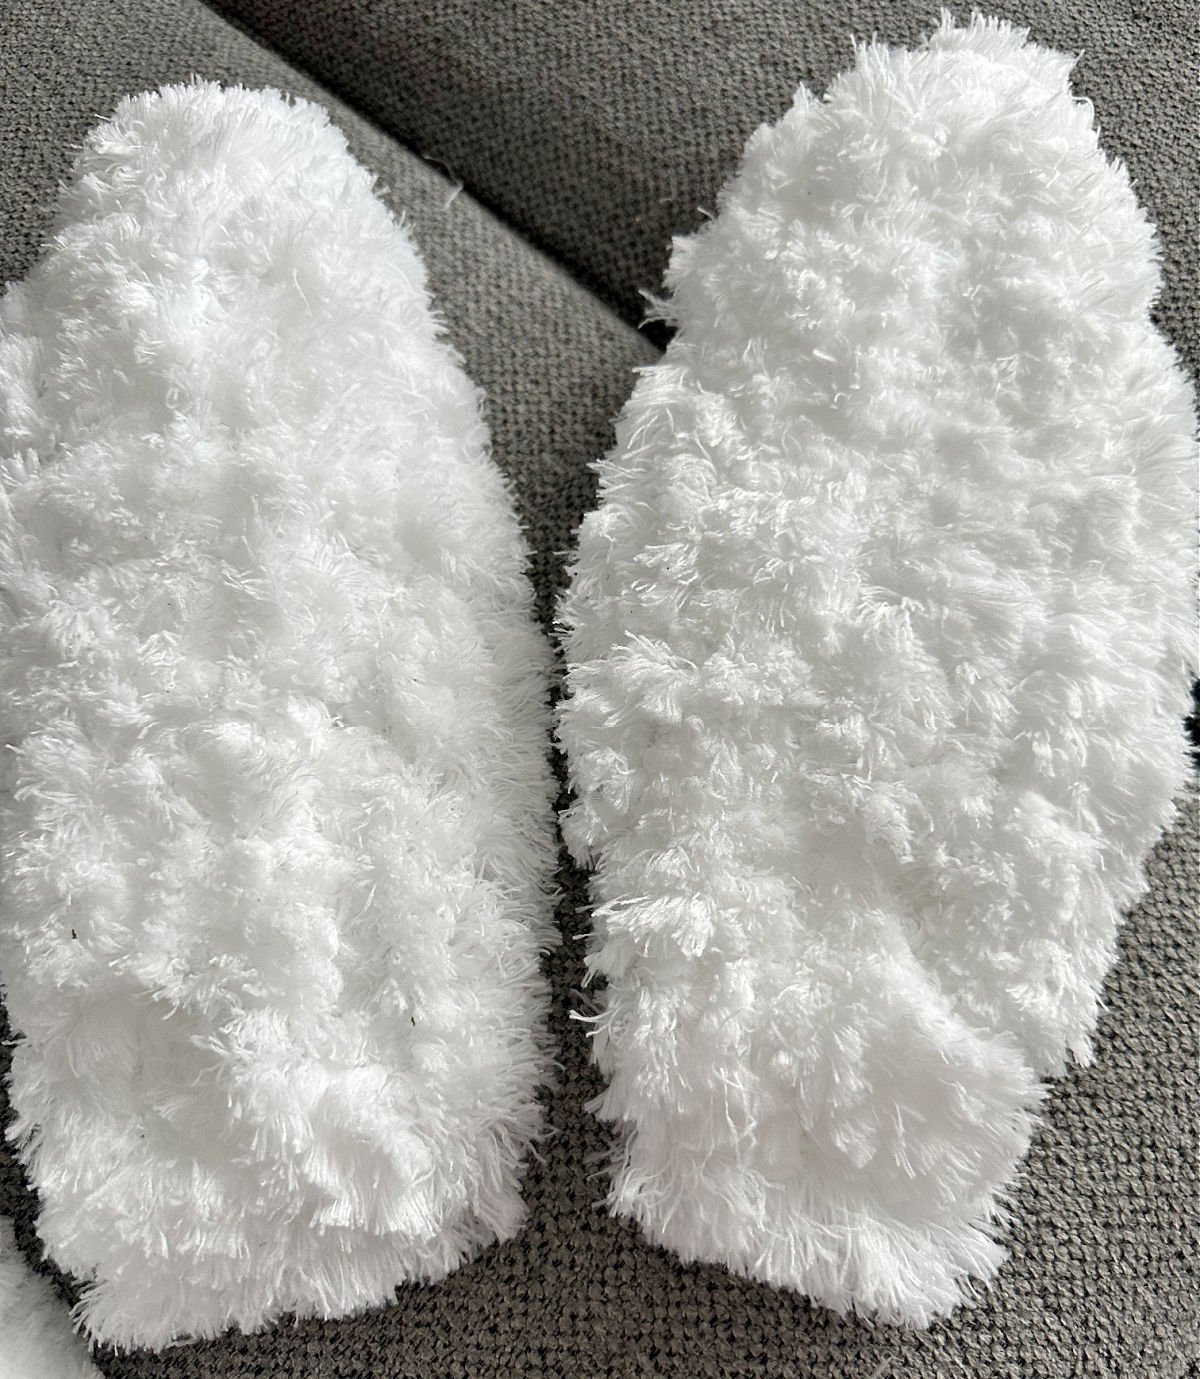
Place the bunny ears where you like them on the body and glue, glue glue!
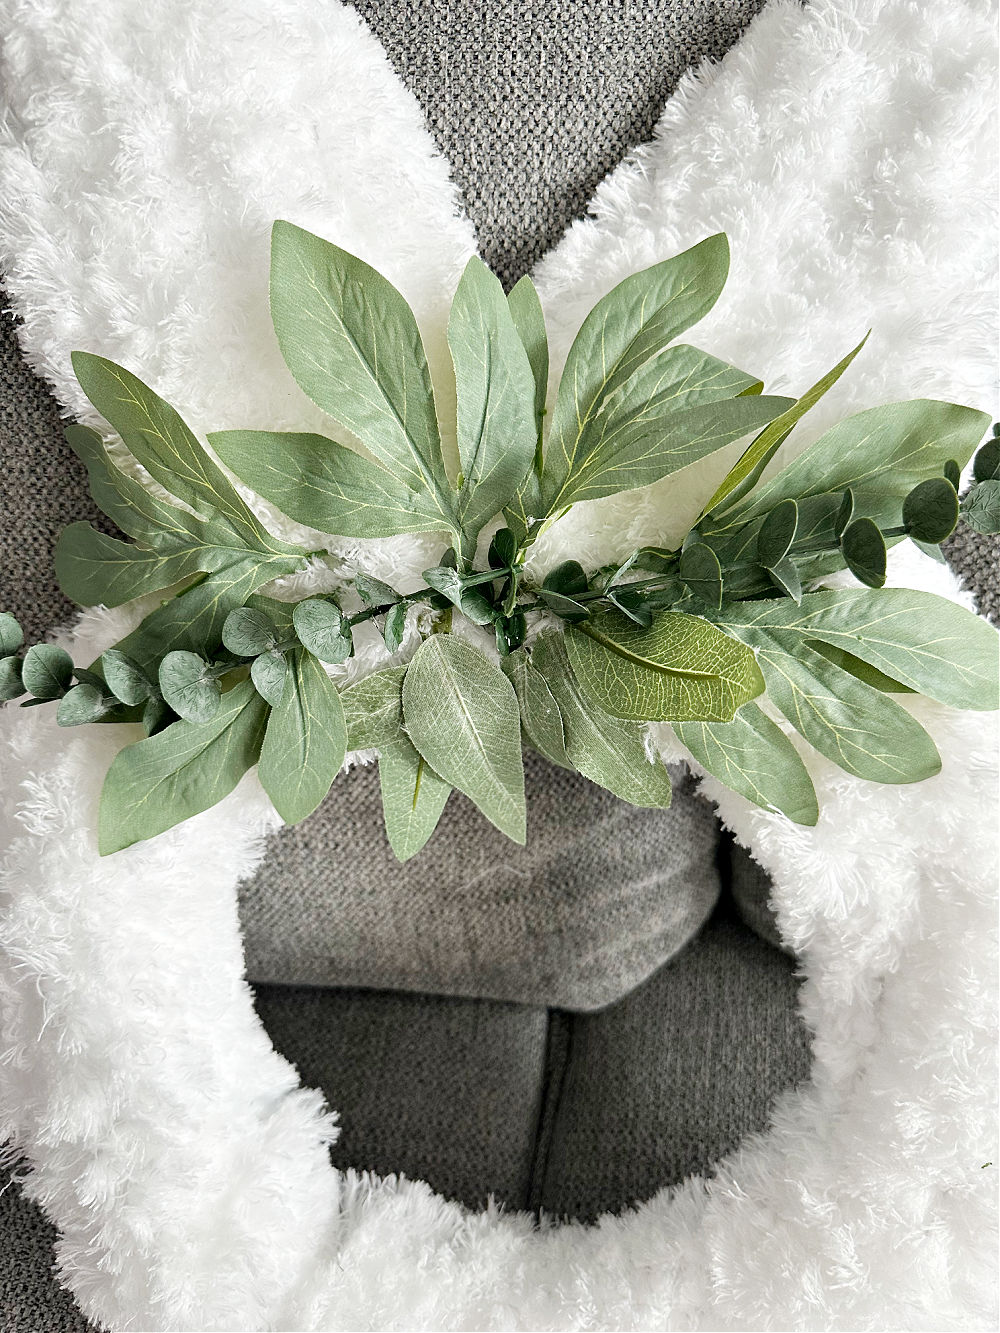
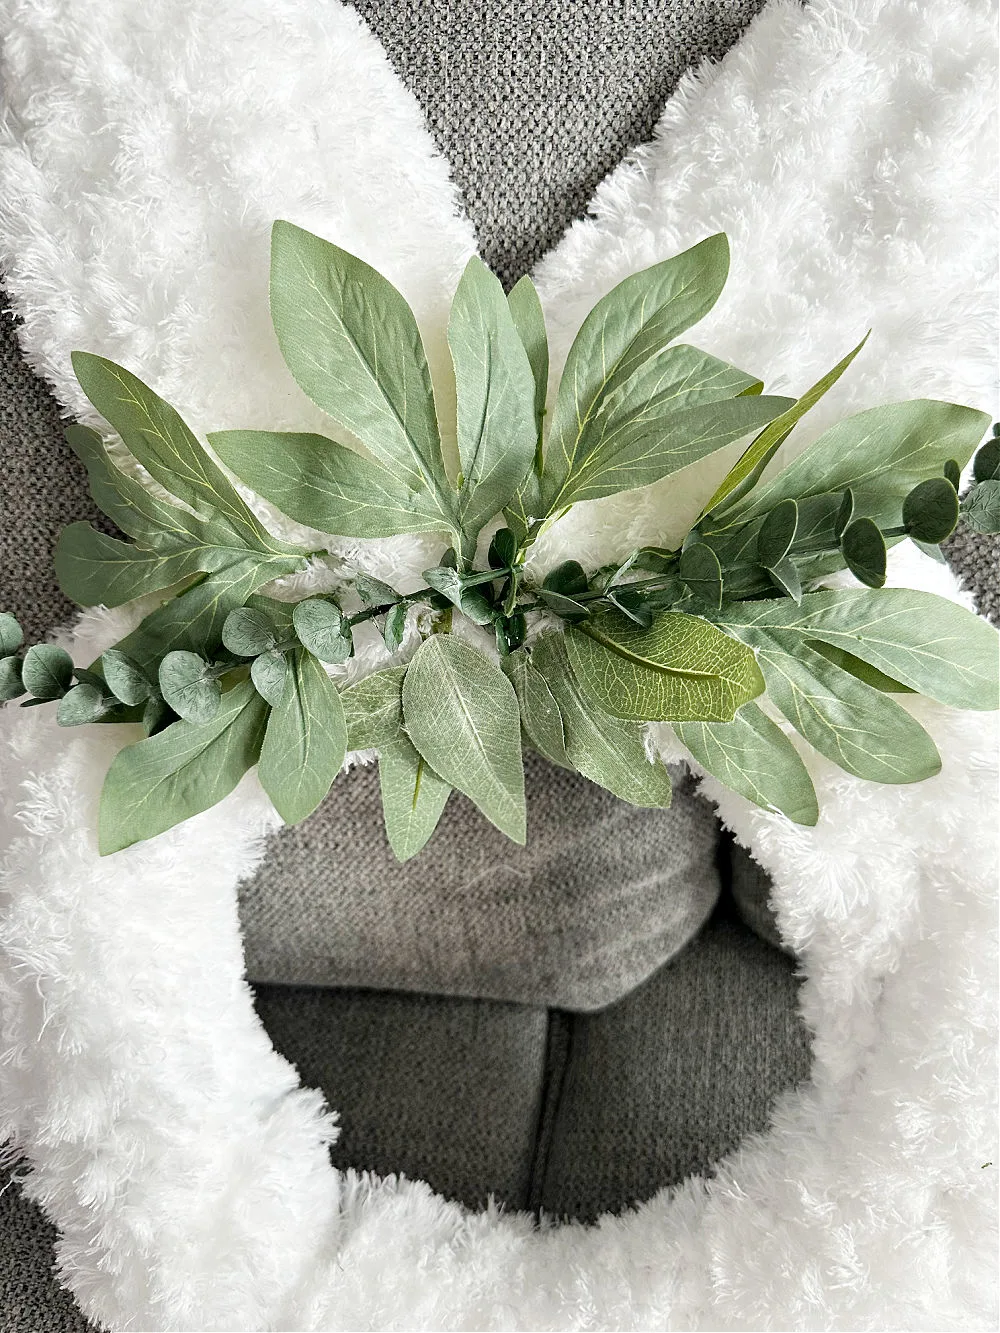
Step 3. Decorate with spring flowers
You can find beautiful (and cheap) spring flowers at Dollar Tree.
I’m so thankful to live within 30 minutes of Hobby Lobby, Michaels and JoAnn Fabric and Crafts so I always check out the sales.
With coupons and sales you can easily find gorgeous fake flowers at a really great price.
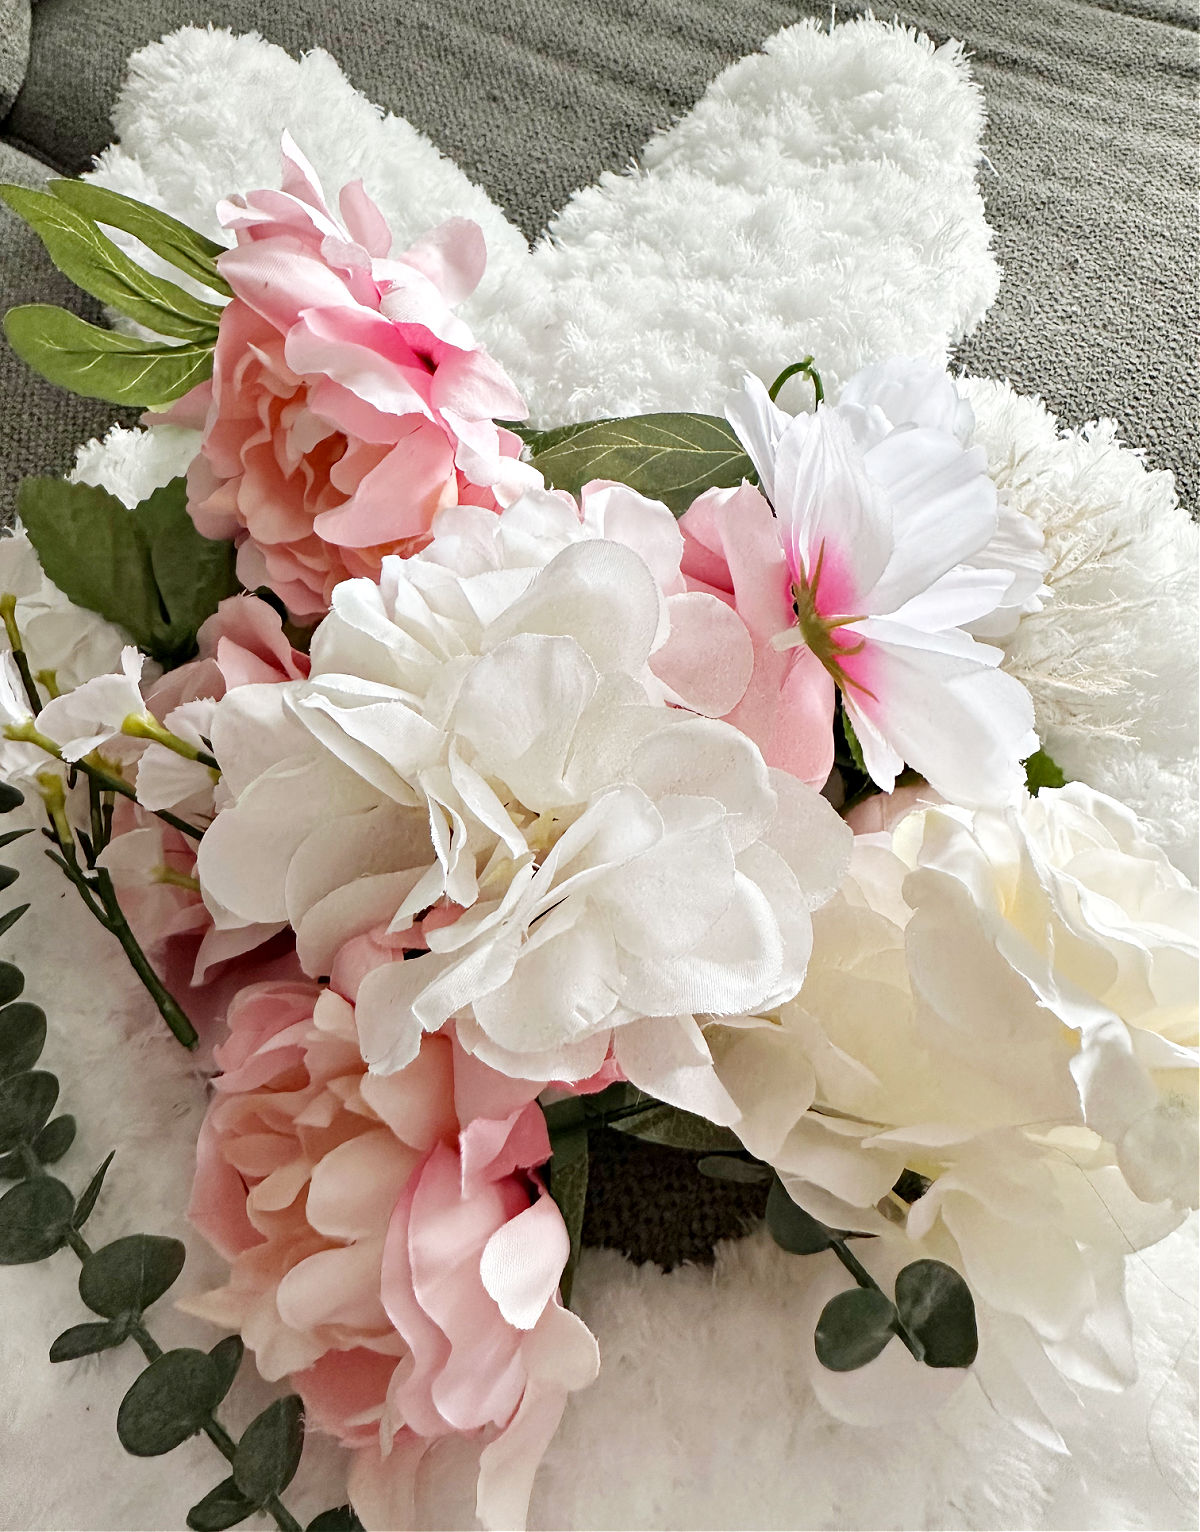

Start by laying out your greenery to get an idea of the placement. Once you are happy with it, add a bit of hot glue.
QUICK TIP: to get rid of those pesky hot glue strings, run a hair dryer over your craft and they will disappear!
Once you have your greenery secured, start adding spring flowers.


Add your largest piece to the center, then fill in around it with smaller accent flowers.
It’s always best to hang the wreath up, take a step back and see if the flowers are placed evenly, or if you need to add any more.

As a crafter it is hard not to “overdue” it.
This bunny wreath is really meant to be about the soft and fluffy white wreath. The flowers are just an accent.
Too many flowers will take away from the look, so less is more here. Another option in place of mop heads is to use loop yarn.
It is more expensive, but also gives a similar look.
Here is a fall loop yarn wreath so you can see what it looks like.
Step 4. Add twine for hanging
To hang the wreath, secure a piece of twine, ribbon, or even a zip tie through the wire on the back.
I was able to just hang it on my door using the wire base.
There is a large command hook on my door which makes it super easy to switch out my wreaths.
Sharing is caring…please PIN the below image:


What do you think of this fuzzy bunny wreath? Is this something you could see yourself making?
It would also look just as lovely inside your home over a mantel or buffet.
If you are hanging it on your front door, make sure it has some protection, otherwise you will have a very soggy bunny. 🙂

Thank you so much for stopping by. Happy crafting!
For more bunny wreath inspiration, be sure to check out my friend Heather’s cute DIY Easter Bunny Wreath here and this super sweet Easter Bunny Peeps Wreath from Heathered Nest! 🐰
Google Web Story: Dollar Tree Bunny Wreath
See more Easter decorations below:
- Free Printables Easter Wall Art
- DIY Easter Gnomes
- Decoupage Plastic Easter Eggs
- Gorgeous Glitter Easter Eggs
- Dollar Store Spring Arrangement
Here are even more spring home decorating ideas:
- 12 Gorgeous Spring Home Decorating Ideas
- Spring Home Decor with Decocrated
- Spring Mantel Decorating Ideas
- Spring Bumble Bee Craft
- 5 Simple Tips for a Beautiful Spring Mantel
You can find me on social media below:

Easter Bunny Wreath with Dollar Tree Mop Heads
Add a fluffy Easter bunny wreath to your front door with this super cute wreath idea. It's made with all Dollar Tree supplies so it's affordable too!
Materials
- Dollar Tree Bunny Wreath Form
- Wire and Cardboard for each bunny ear
- Assorted Spring Flowers
- 6 Dollar Tree Mop Heads
Tools
- Hot Glue Gun and Glue Sticks
- Wire Cutters
- Fabric Scissors
Instructions
- Hot glue 4 mop heads to the wire wreath base.
- Cover each bunny ear with a mop head and glue.
- Attach spring flowers to the top of the bunny and secure with hot glue.
- Attach ribbon or twine for hanging.
Recommended Products
As an Amazon Associate and member of other affiliate programs, I earn from qualifying purchases.
-
 Mr. Pen- Fabric Scissors, Sewing Scissors, 8 inch Premium Tailor Scissors, Heavy Duty Scissors, Sharp Scissors, Fabric Shears, Heavy Duty Scissor, Sharp Scissors, Sewing Shears, Utility Scissors
 -
 Surebonder Cordless Hot Glue Gun, High Temperature, Full Size, 60W, 50% More Power - Sturdily Bonds Metal, Wood, Ceramics, Leather & Other Strong Materials (Specialty Series CL-800F)
Jeanette S.
Saturday 5th of April 2025
Love this! So adorable and easy, but I must let you know they are making the bunny frames smaller this year. Mine only took 4 1/4 mop heads. The body is smaller. I had to cut one (what a mess) and piece it. Wish I could add a picture, but there’s nowhere to do that.
debbie
Tuesday 21st of March 2023
Michelle, LOVE this!! So darn cute!! Thanks so much for sharing!! Hugs, Deb
ourcraftymom
Tuesday 21st of March 2023
Aww thanks so much Debbie! I'm loving seeing all your decorations too!! Happy Spring!