Pick up a Dollar Tree lantern, plastic chopping mats and your favorite flowers to create lovely decor that you can change out for each season.
This post contains affiliate links. If you shop the links in this post there is no additional cost to you, but I may earn a small commission. Please see my full disclosure here.
I’ve talked many times about how I want to share easy, affordable, and beautiful home decor and crafts on this blog.
Let’s face it, decorating your home for every season and holiday can get expensive. It’s wonderful when you can splurge now and then on unique pieces you can’t make yourself.
But if it’s not in the budget, there are plenty of great knock-off tutorials you can try instead. I’ll share a gallery of some of my favorites at the bottom of this post.
If there is something you want to see, please let me know. I love a good challenge!
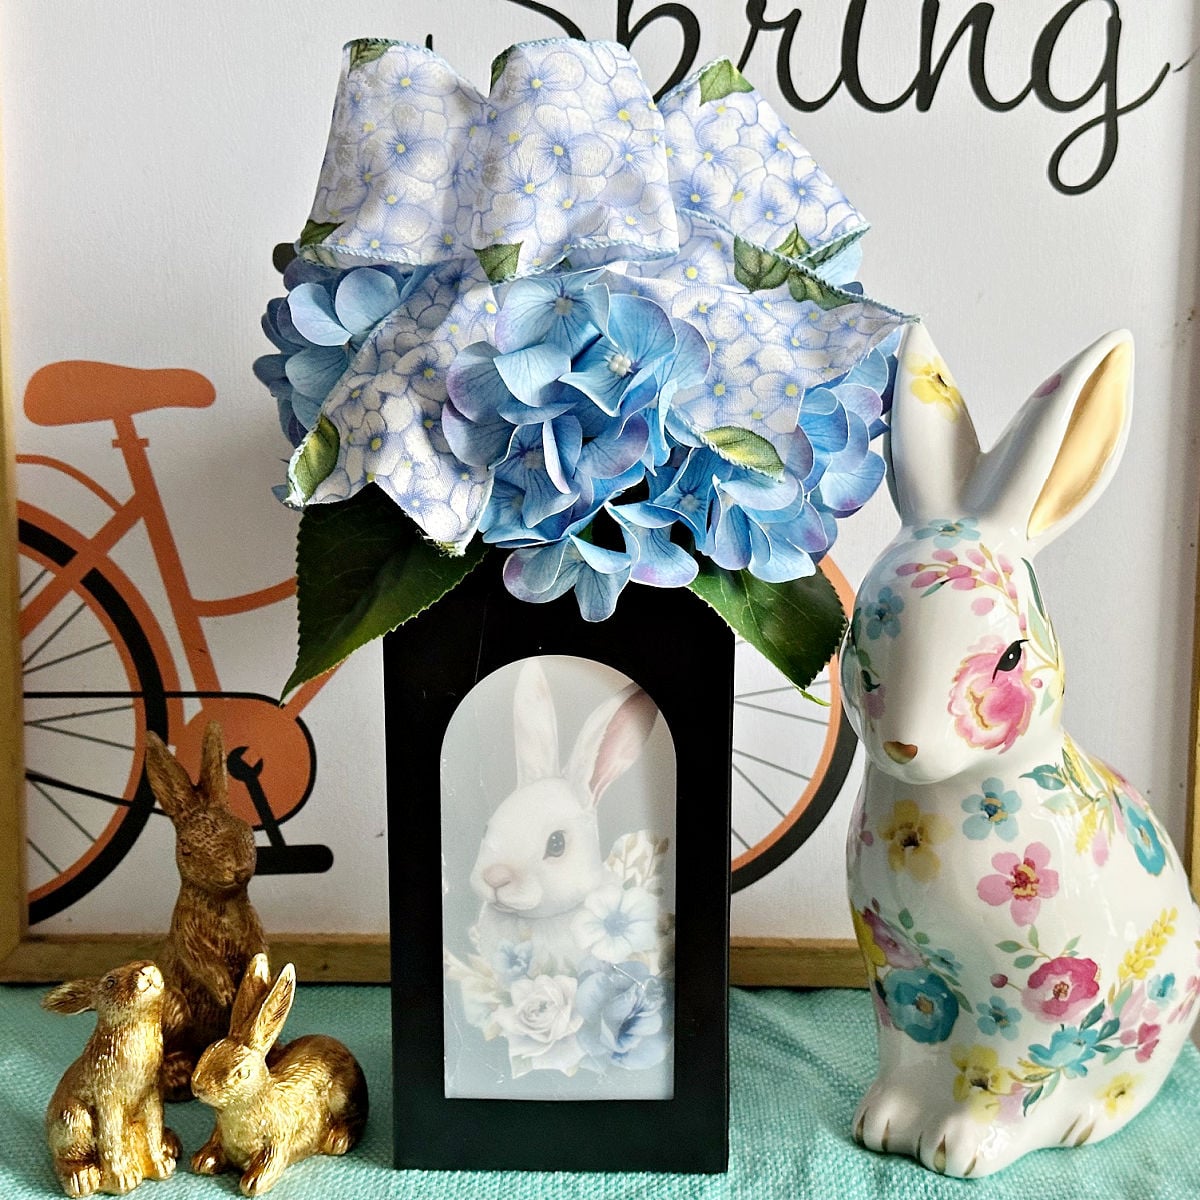
Dollar Tree Lantern
Today’s craft project checks all the boxes. I’ll show you how I took a $3 lantern and plastic chopping mats from Dollar Tree to make a beautiful lantern decorated for spring.
The great thing is you can use this beauty for Christmas, Easter, Thanksgiving or any season, simply by changing out the image and florals.
They make great centerpieces and can be used outdoors will solar lights perfect for a farmhouse style porch or patio.
For another lantern idea, check out this Dollar Tree picture frame lantern. You can use this same idea to add pictures.
Supplies Needed for Dollar Tree Lantern DIY
- Plastic Chopping Mats – Dollar Tree carries these 2 in a pack.
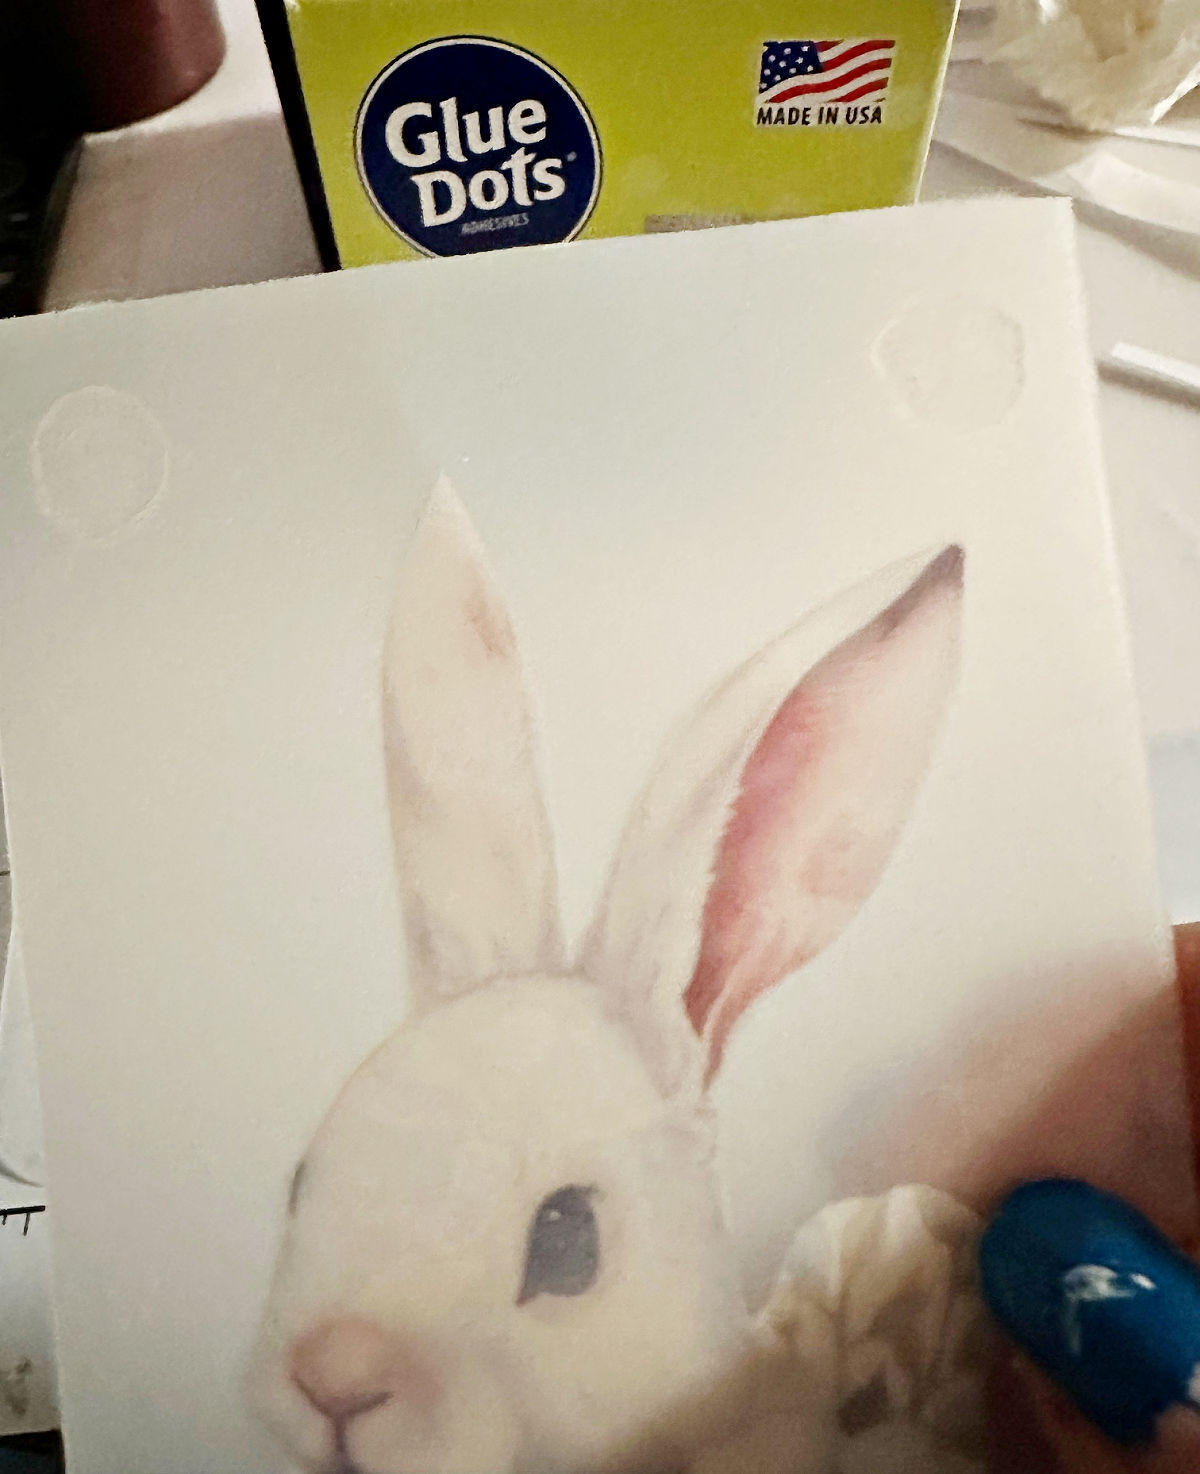
- Spring Bunny Printable – download your free bunny image, or use a design of your choice.
- Black Metal Lantern – Mine was purchased at Dollar Tree before Christmas for $3.
- Paper Cutter or Craft Scissors
- Mod Podge
- Assorted Flowers
- Ribbon
- Glue Dots
- Hot Glue Gun and Glue Sticks – this is my favorite and it’s cordless!
- String Lights or Battery Operated Candle
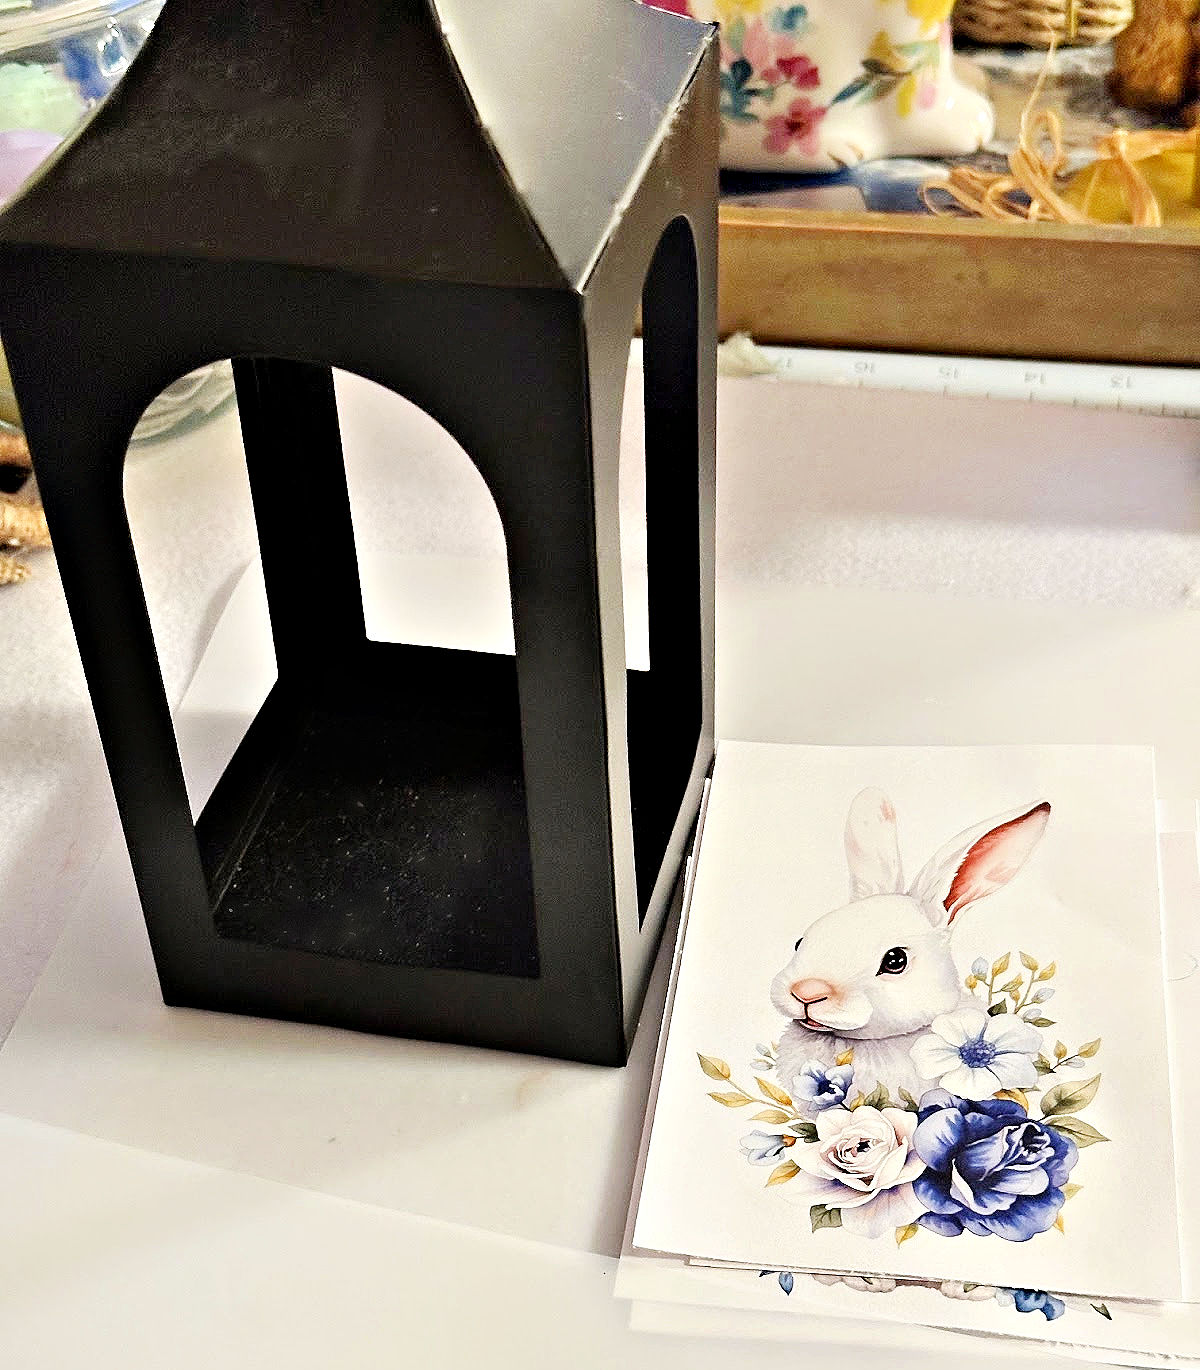
These are the chopping mats. You can find them with the wood cutting boards, can openers and other kitchen utensils.

DIY Dollar Tree Lantern Tutorial
Here are the simple steps to updating a lantern with chopping mats.
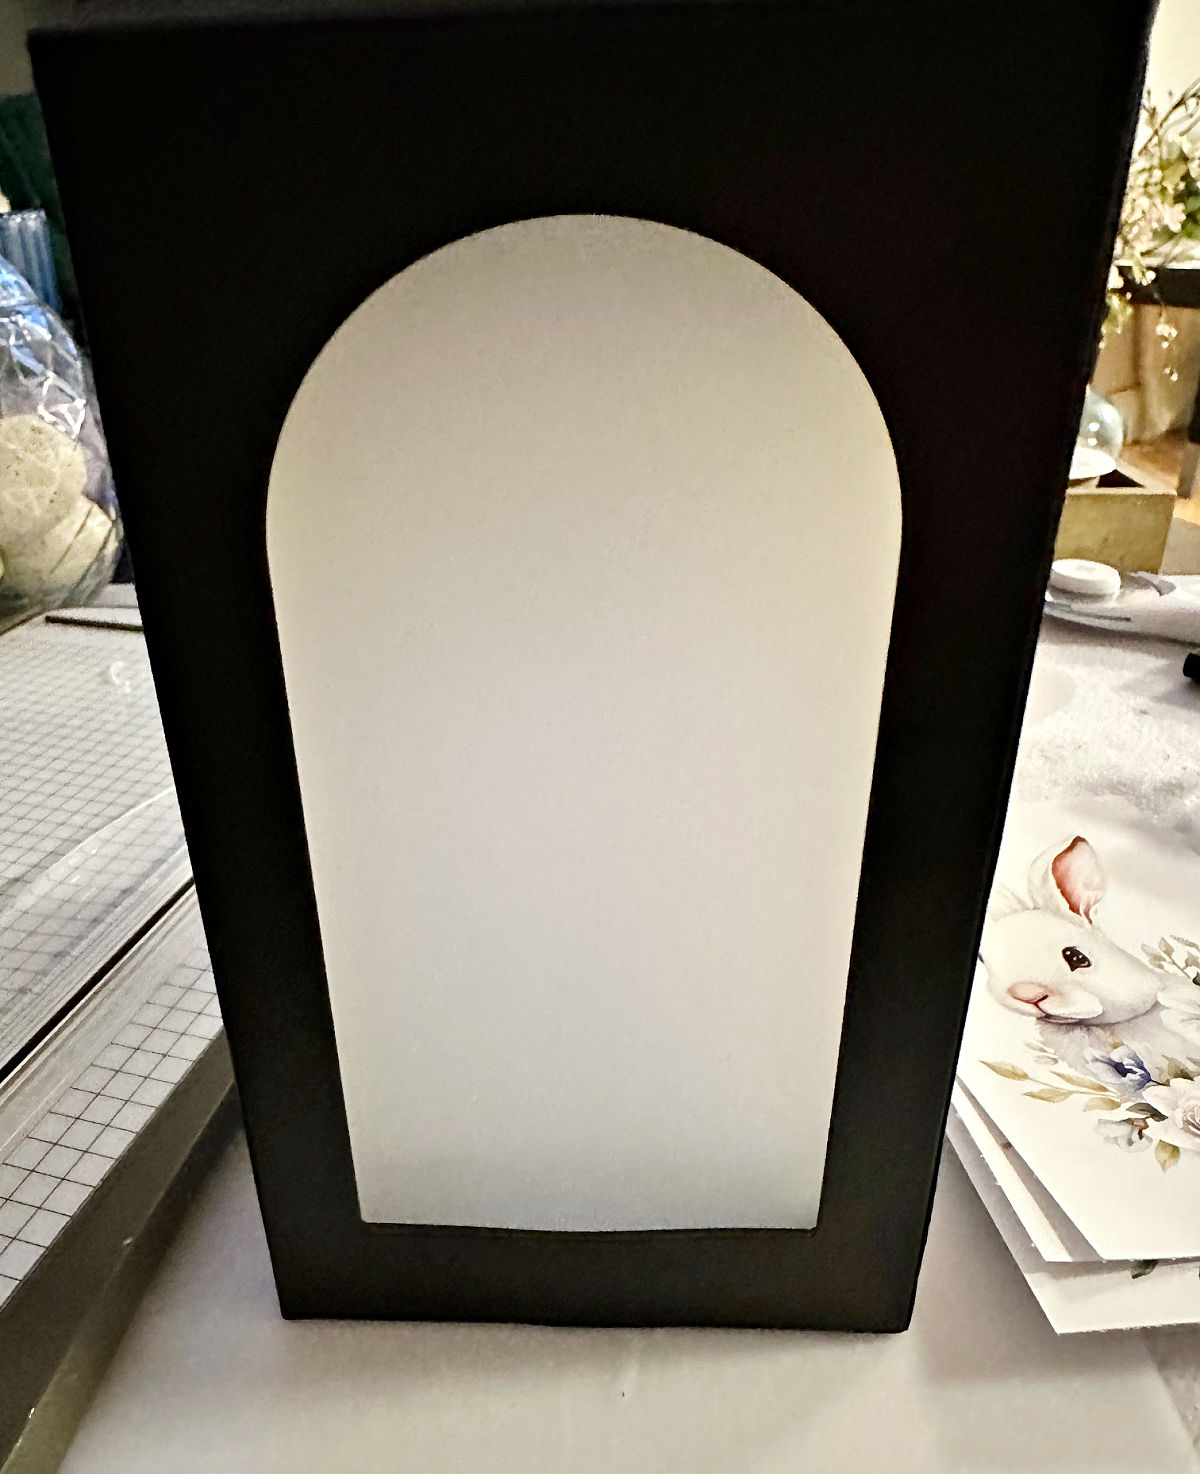
Step 1. Trim The Mats
Start by trimming the plastic mats to size. I just place it on the lantern and mark where it needs to be trimmed.


Use scissors, or a paper cutter to cut them.
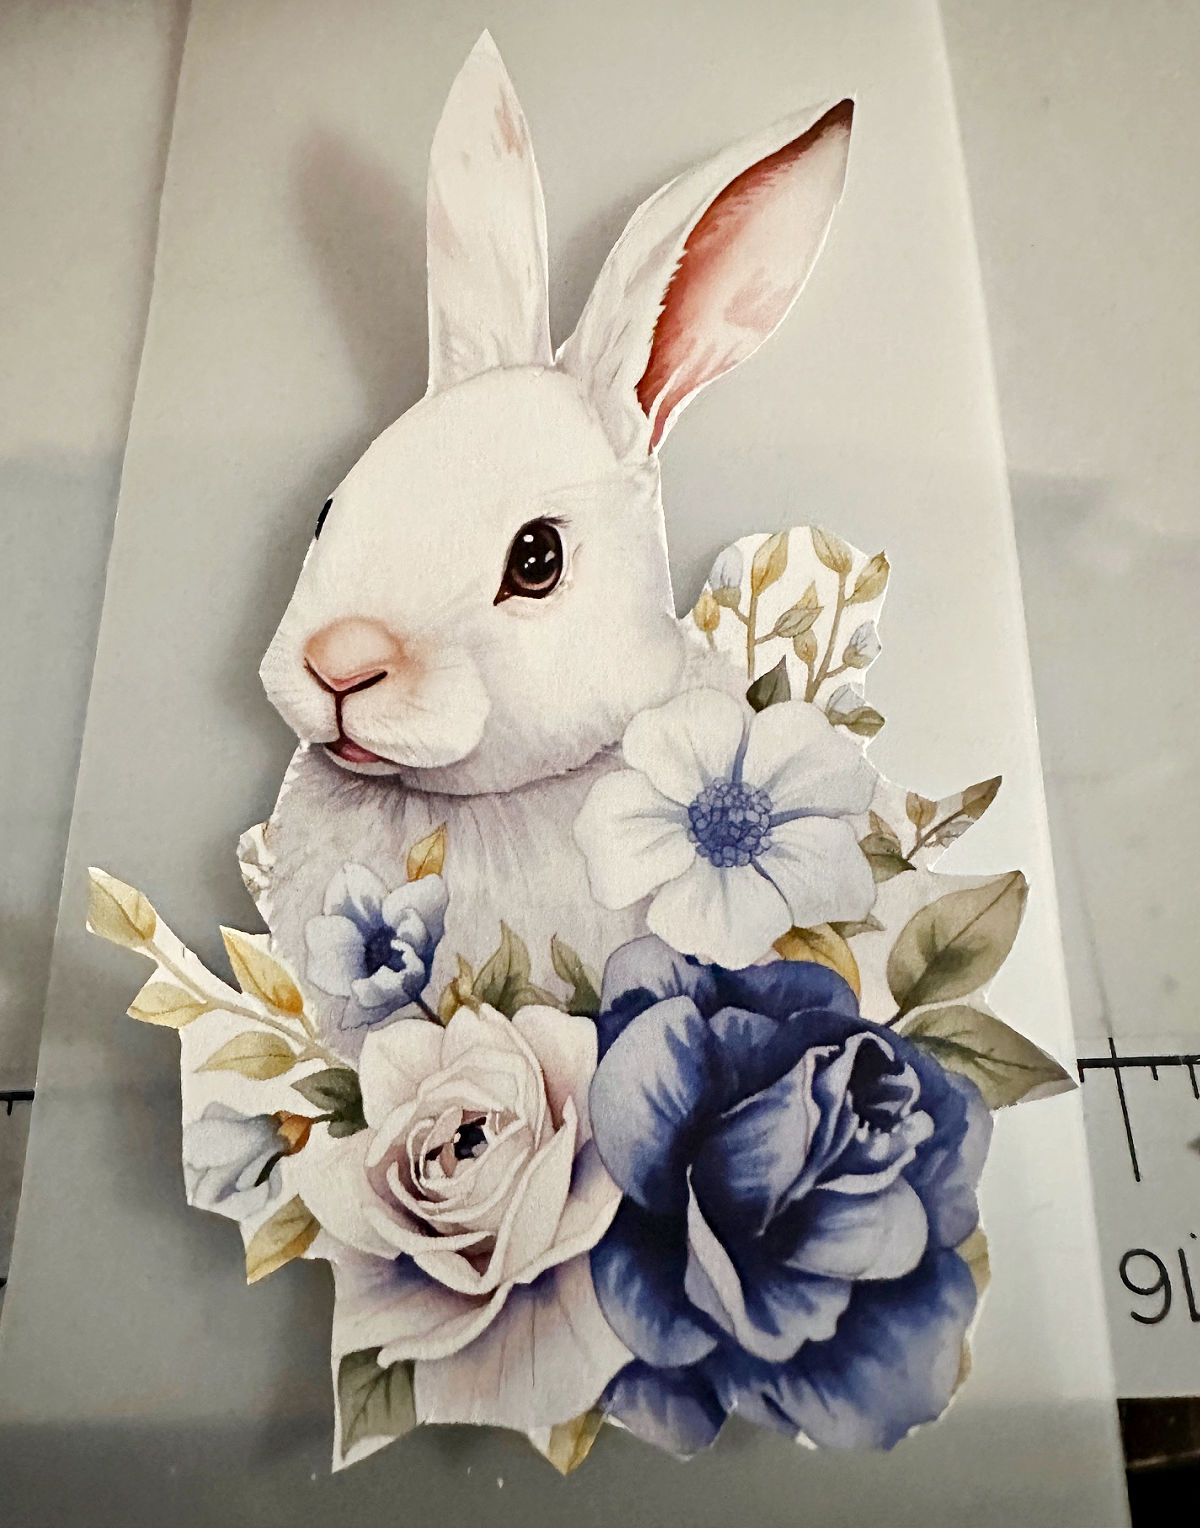
Step 2. Cut Your Image
Cut your chosen image as close to the design as possible. This is called a fussy cut. You want to remove as much of the blank white paper as possible. It helps to use small paper snips for this.
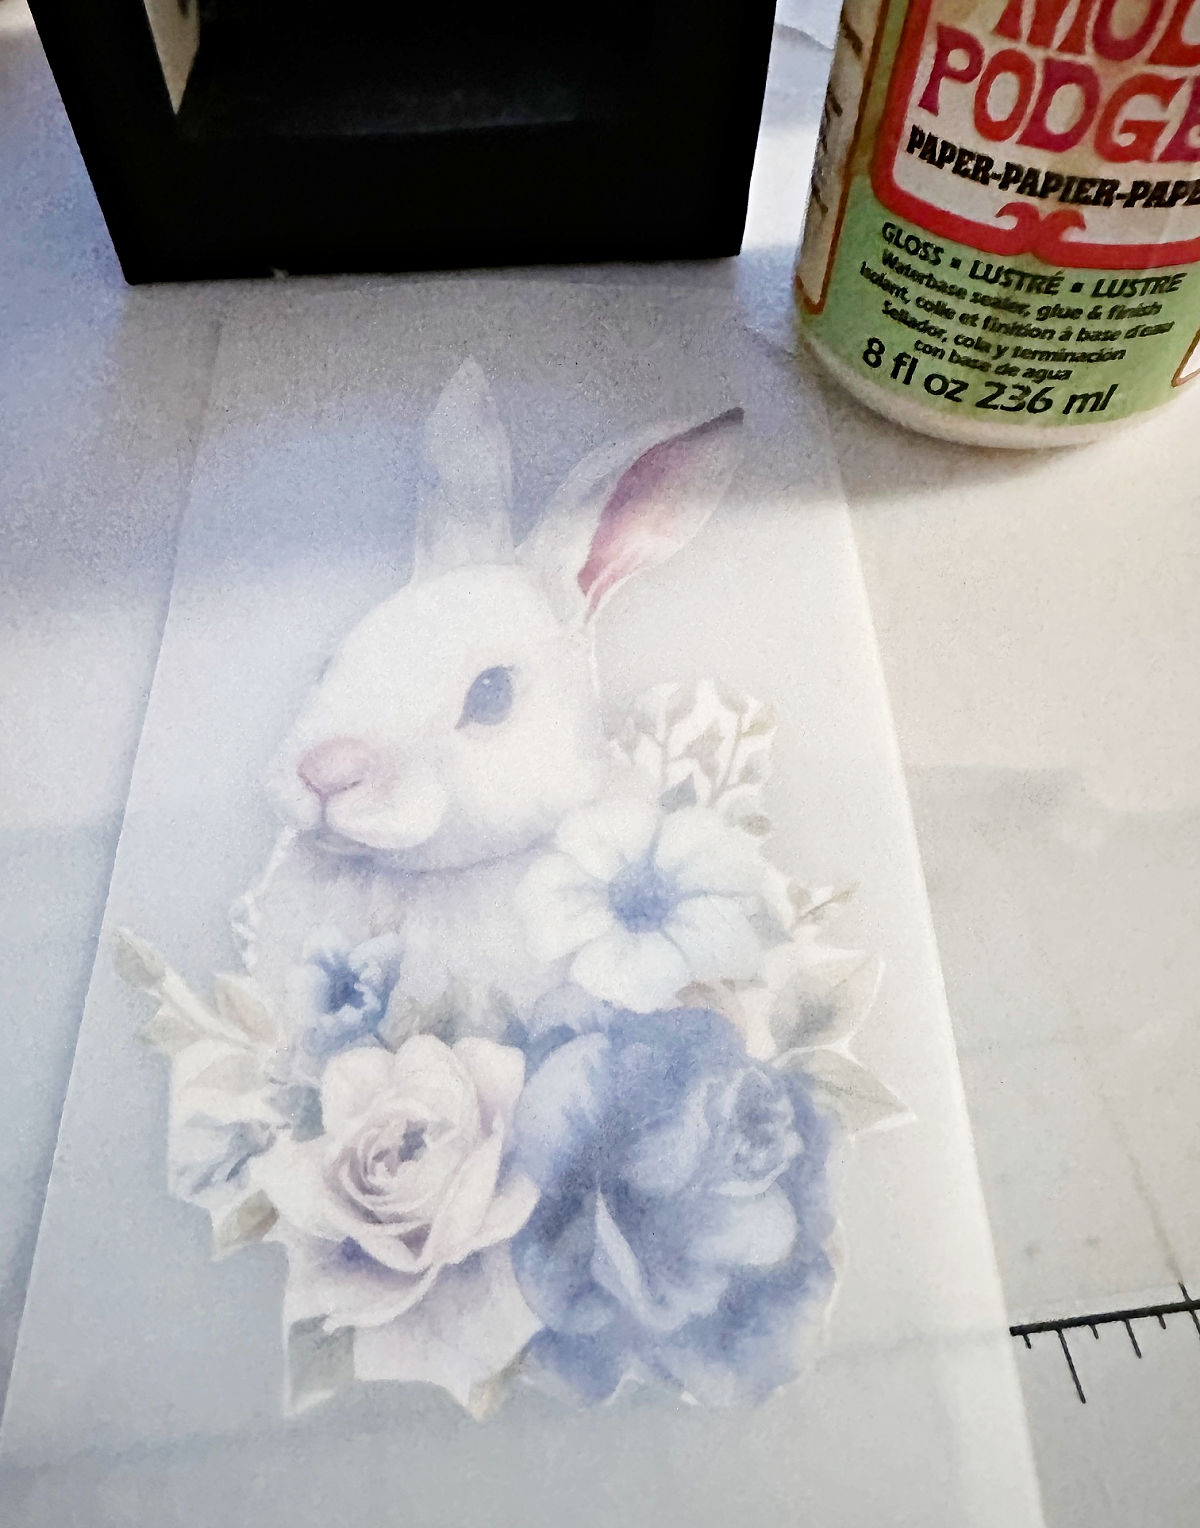
Step 3. Add Mod Podge
Secure the image to the inside of the chopping mat with mod podge. You want to add it to the inside so it will have an opaque look, especially when lights are added.
Step 4. Secure Mats to Lantern
To secure the mats to the inside of the lantern, I used glue dots. The reason I chose this instead of hot glue, is I want to be able to change out the front panel for different seasons and holidays.
If you will not be changing it out, you can use hot glue.
Step 5. Decorate Lantern
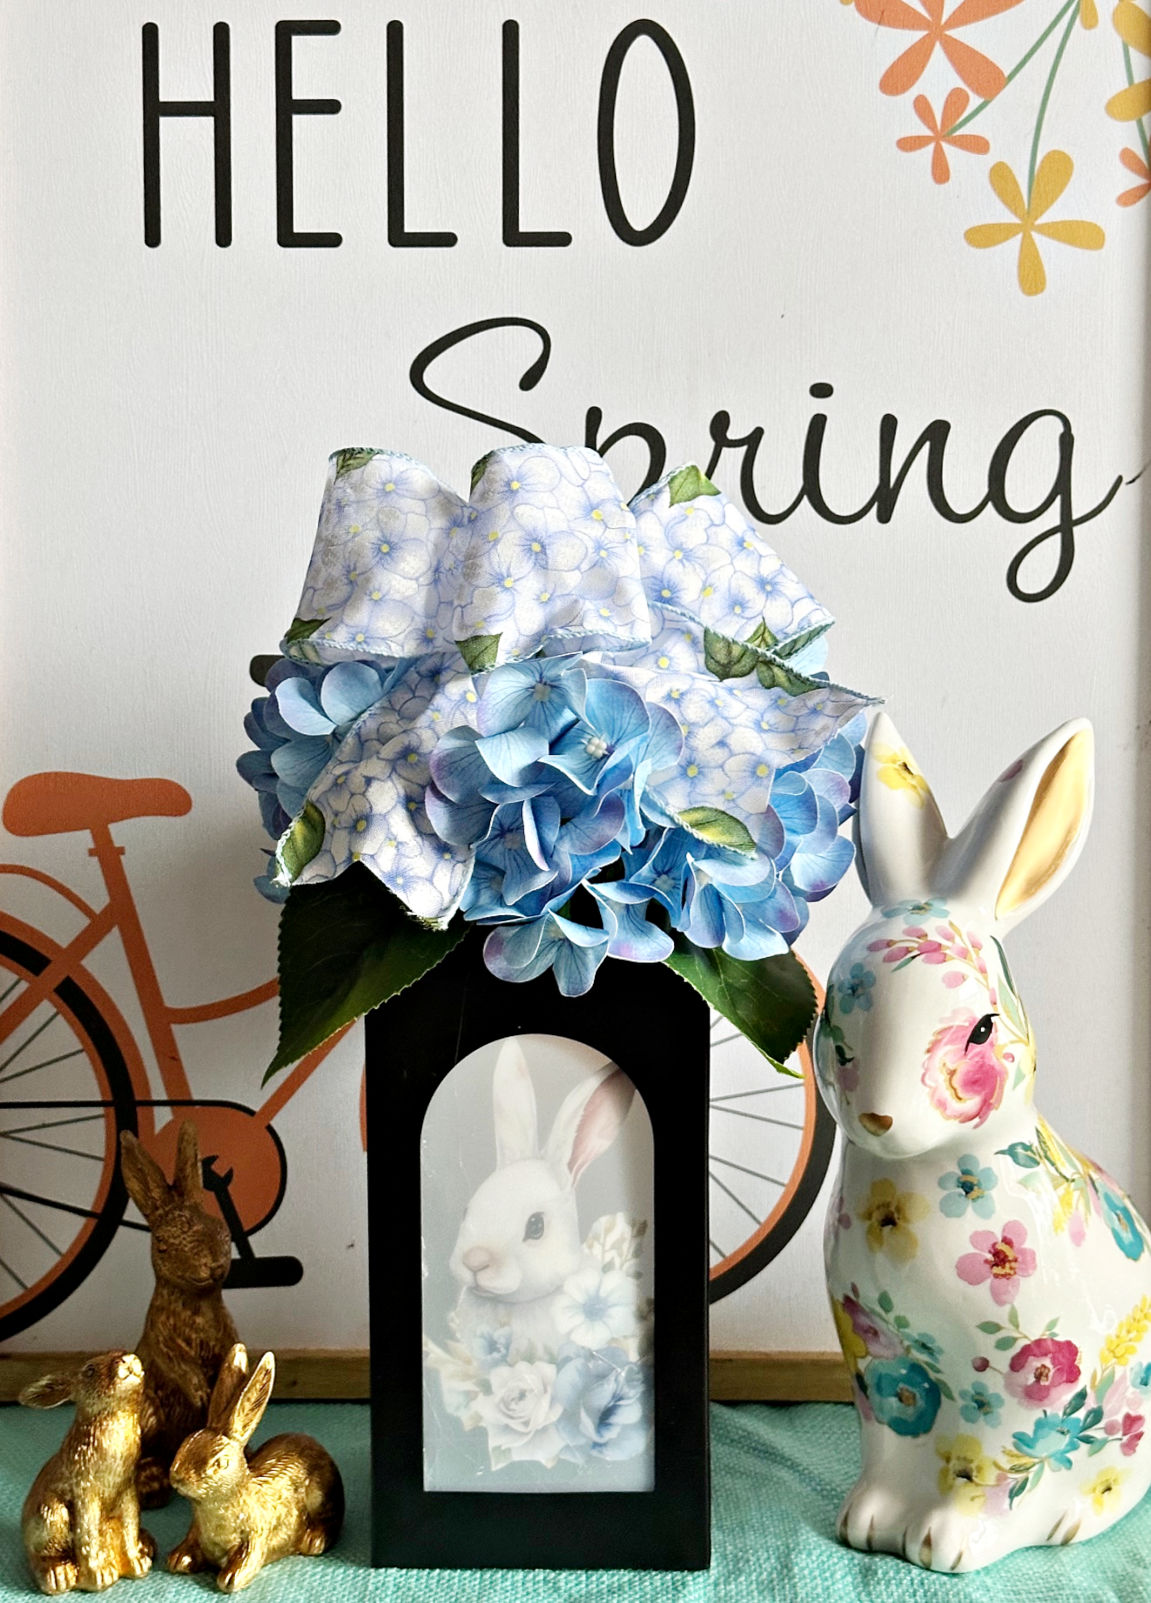
Add a battery-operated pillar candle to the inside of the lantern for a beautiful glow.

You can also embellish the top of the lantern however you like. I went with pretty hydrangeas with a matching hydrangea themed ribbon.

The lantern looks great in spring vignettes on a hutch, mantel or book case. It can be used outside on a covered porch.
This is such an easy and versatile project. I can absolutely see myself making one for Christmas, possible with a cardinal image. How would you decorate your lantern?
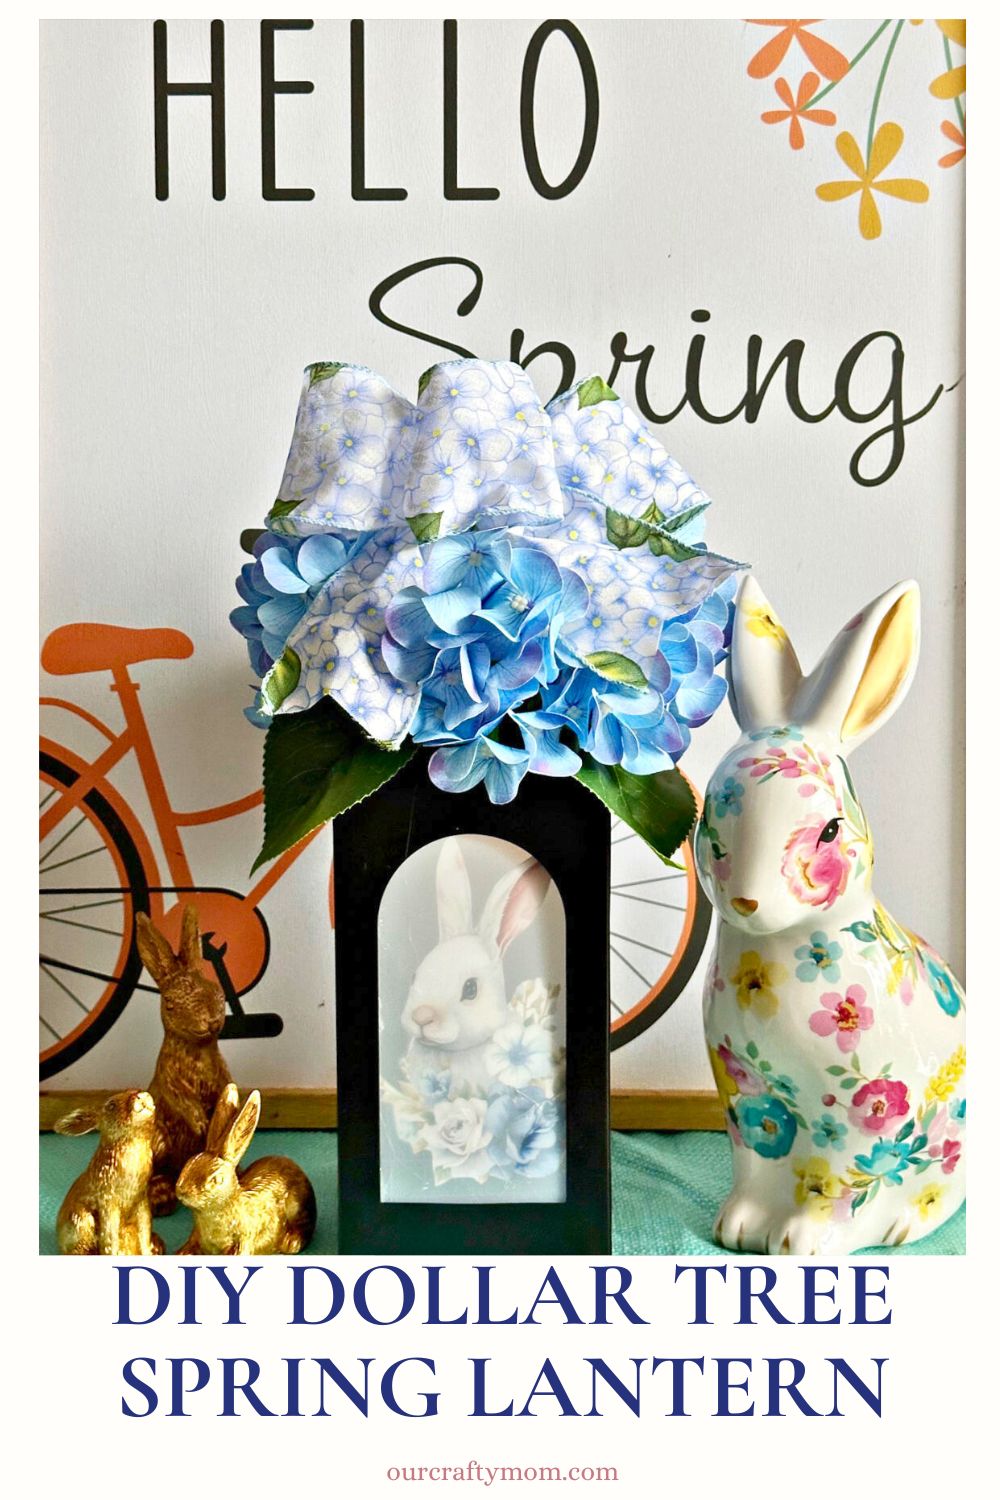
PIN FOR LATER
I’d love it if you would share this article with your friends on Pinterest by pinning the below image.
It helps my blog grow and doesn’t cost a thing! 🙂
Thanks so much for stopping by. Happy crafting!


You may also enjoy these spring home decor and craft ideas:
- Dollar Tree Easter Crafts
- Dollar Tree Bunny Craft
- Decoupage Candles with Chinoiserie Bunny Napkins
- Bunny Bathroom Printable Wall Art
- Free Printables Easter Wall Art
- 101 DIY Easter Decorations
- Fluffy Bunny Wreath
- Martha Stewart Inspired Floral Easter Basket
Follow me on social media below: