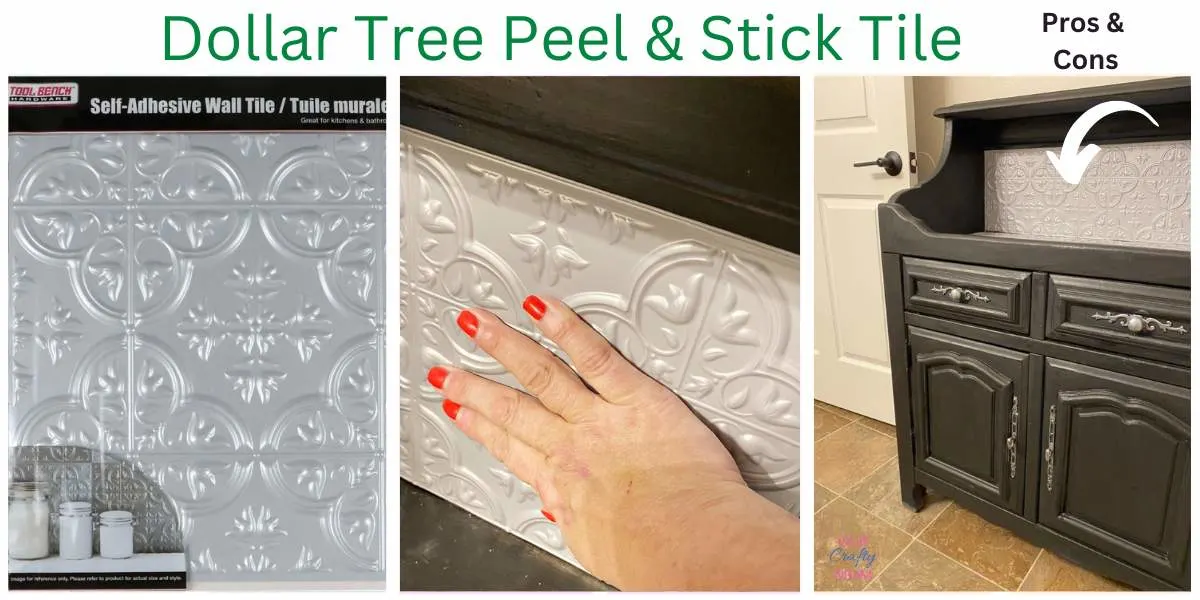
Follow this easy guide on how to install Dollar Tree peel and stick tile. Learn if these wall tiles really work and read the pros and cons.
I’m super excited to share this DIY dollar store project with you.
If you follow me on Pinterest or Facebook you know I love “all things dollar store”.
So we started a free Facebook community sharing All Things Dollar Store, DIY, Crafts and Home Decor (JOIN HERE).
There are over 17,000 members as of this writing.
We don’t allow any negativity-definitely no trolls!
It’s a creative group sharing and inspiring each other.
Stop by for a visit and leave feeling ready to craft your next masterpiece!
You can also view my gallery of dollar store crafts and home decorating ideas HERE.

This post contains affiliate links at no extra cost to you. Please see my full disclosure here.
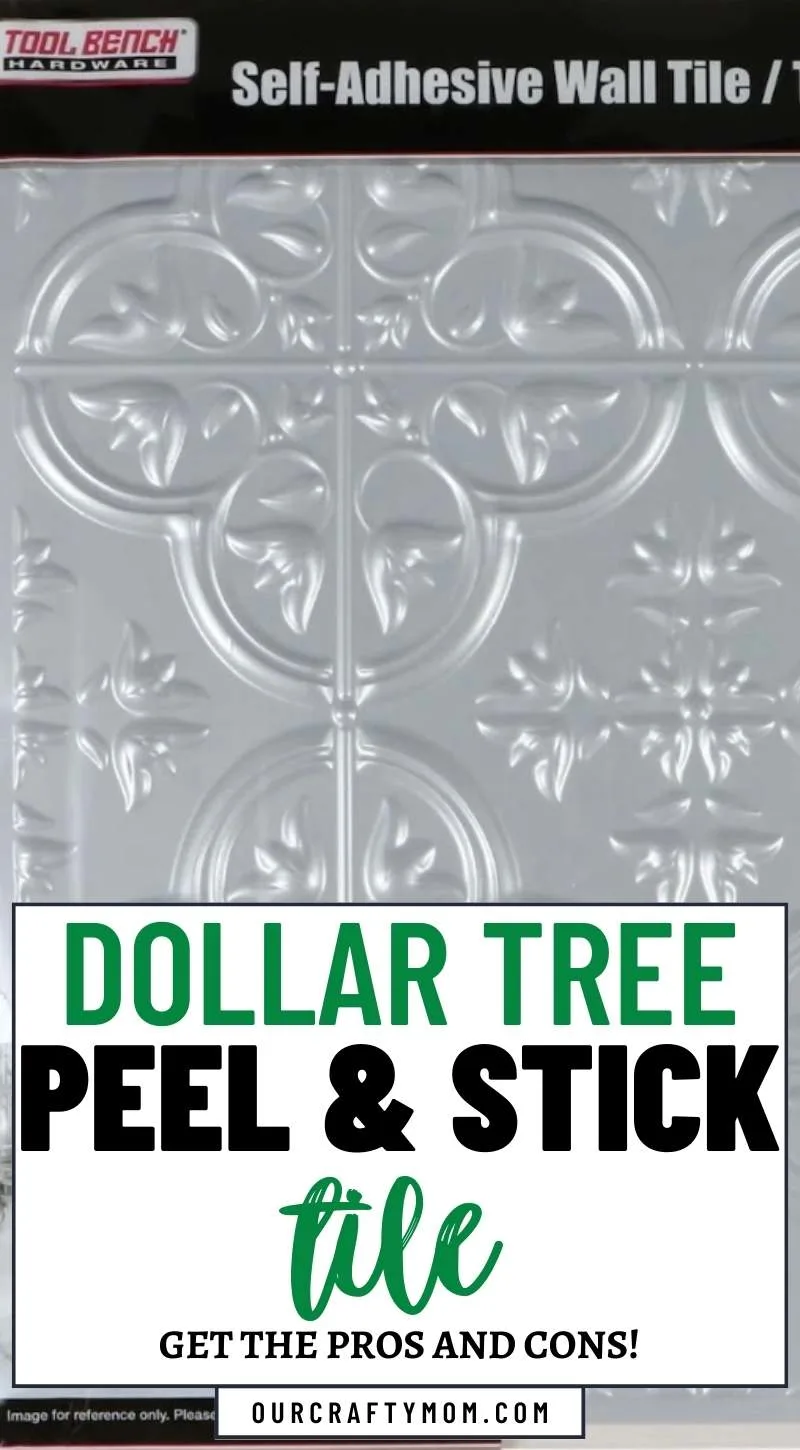
The Lowdown on Peel and Stick Tiles from Dollar Tree
With so many people looking for ways to spruce up their living space on a budget, DIY projects are more popular then ever!
One of the items making the rounds lately are peel and stick tiles from Dollar Tree. But do they really work?
This is my first time using their wall tiles., but I have used their contact paper before on a wall in my small craft closet.
I’ve also worked with peel and stick wallpaper.
Here are a few projects I’ve completed:
- Feature Wall with Peel and Stick Wallpaper
- Peel and Stick Subway Tile
- Create an Accent Wall with Removable Wallpaper

What are Peel and Stick Tiles?
Peel and stick tiles are just what they sound like – tiles that have adhesive backing.
The best part is that they don’t require any adhesive or grout — just peel off the backing and stick them on your wall or furniture piece.
They come in a variety of styles, including faux wood, marble, stone, metal, flowers, diamond shapes and more.
They are sold on Amazon and at most home and craft stores, but you will pay quite a bit more than $1.25!
First, let’s start by reviewing how to apply the wall tiles and then I’ll share the pros and cons and an honest review.
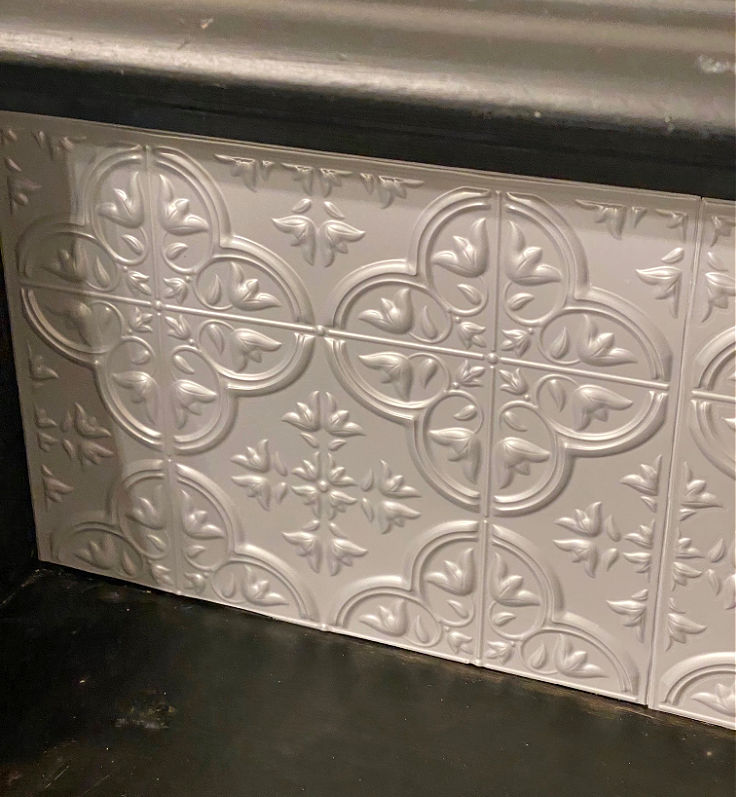
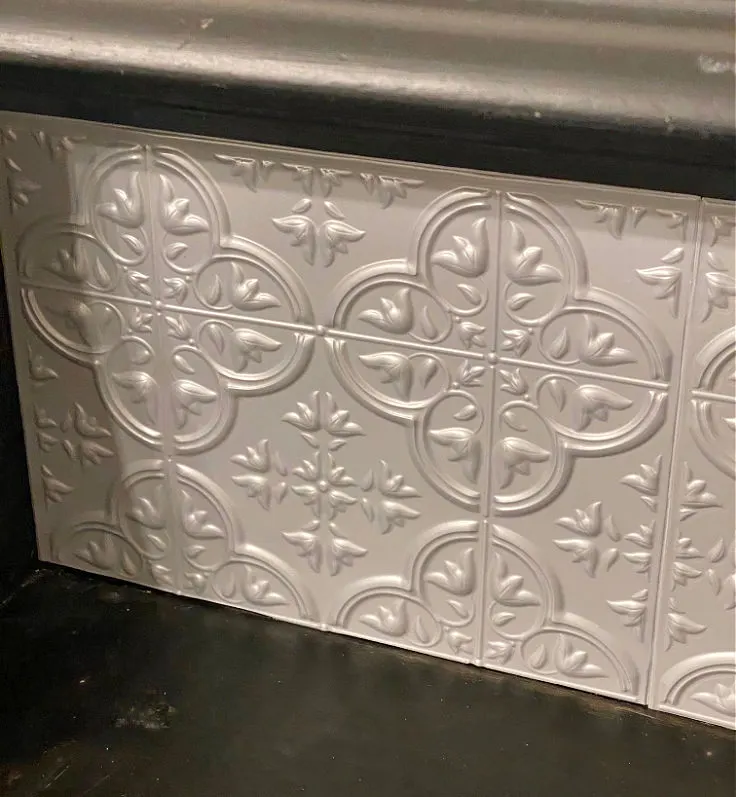
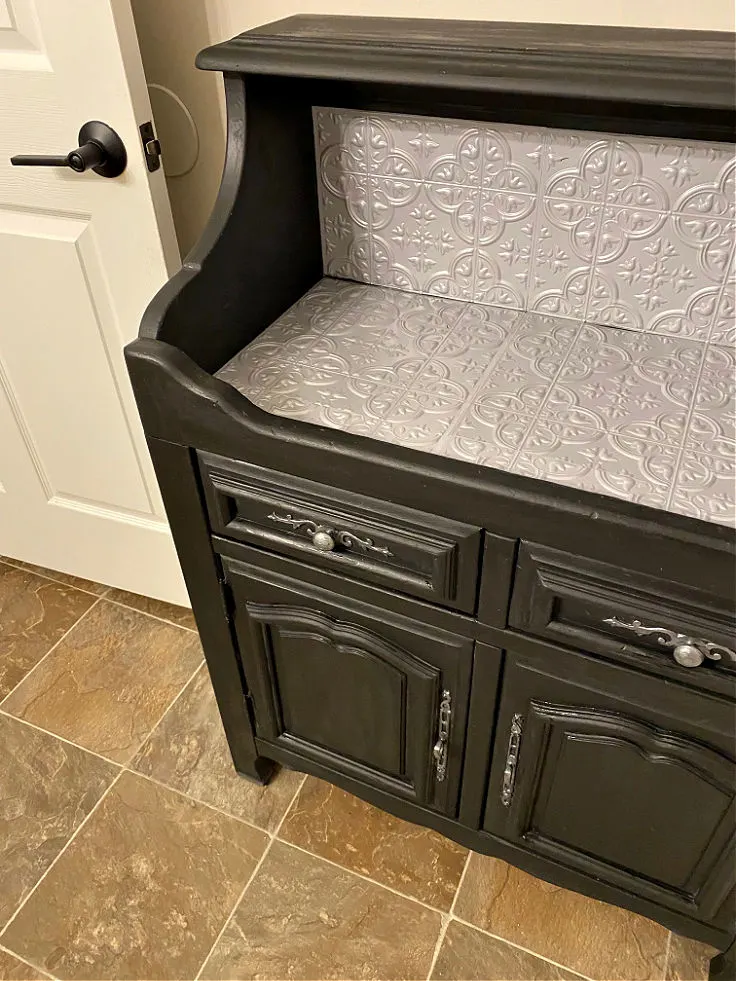
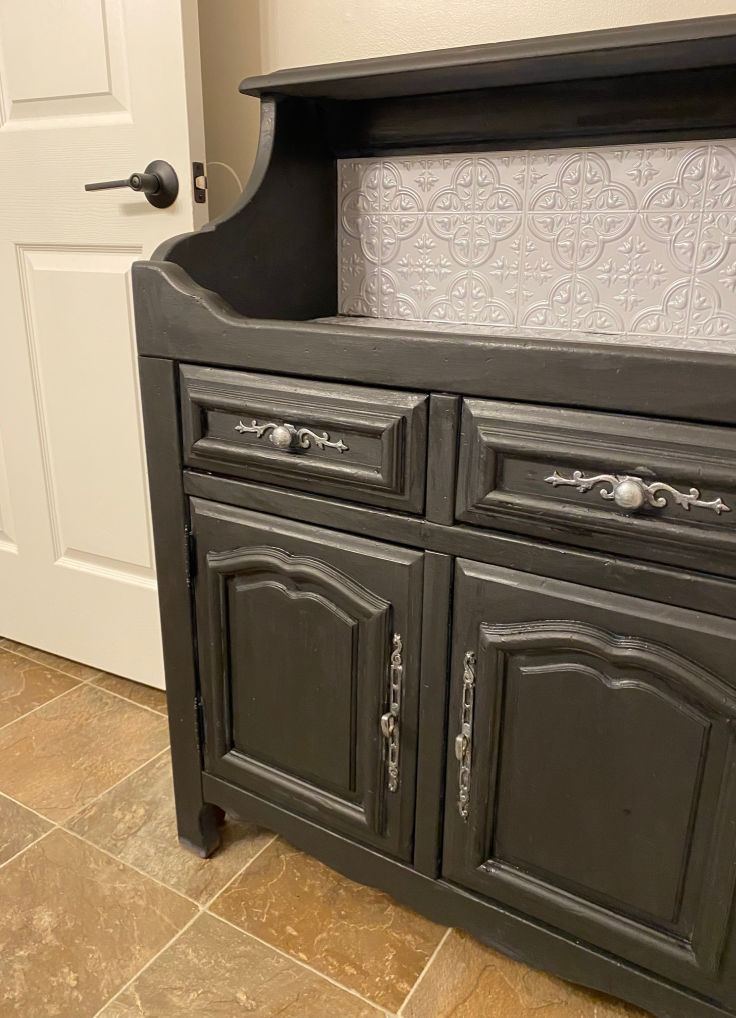
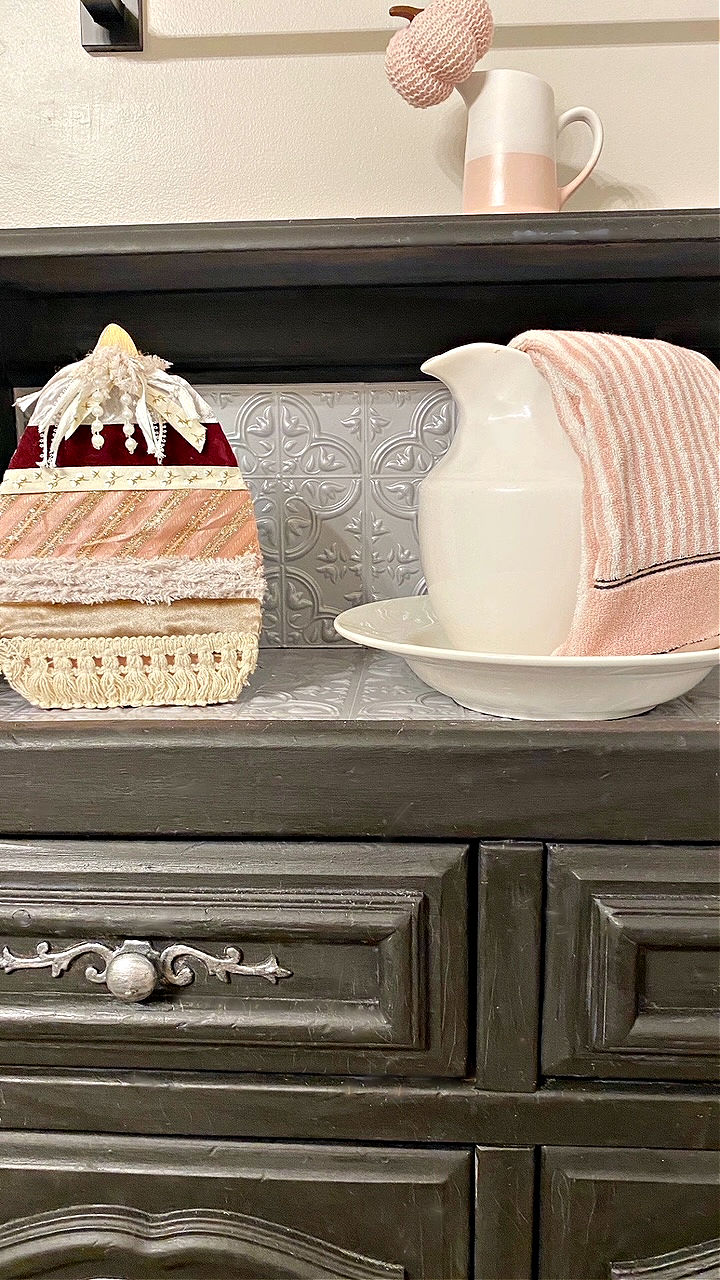
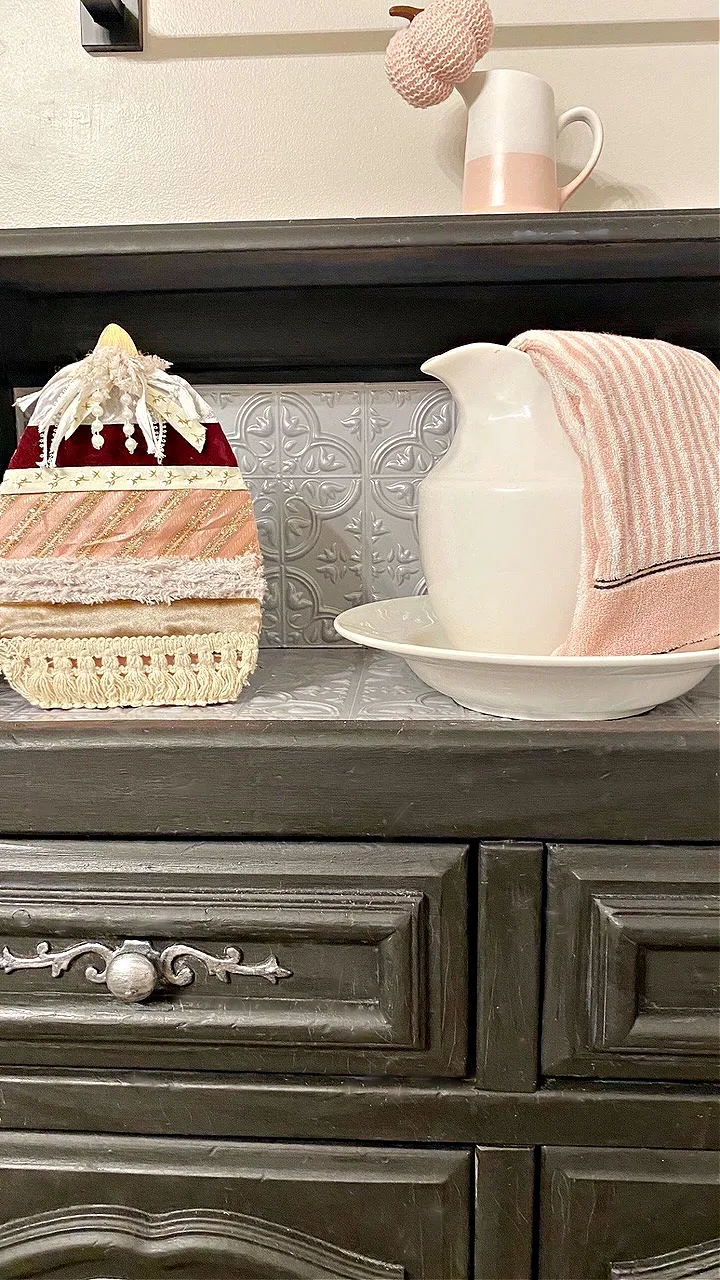
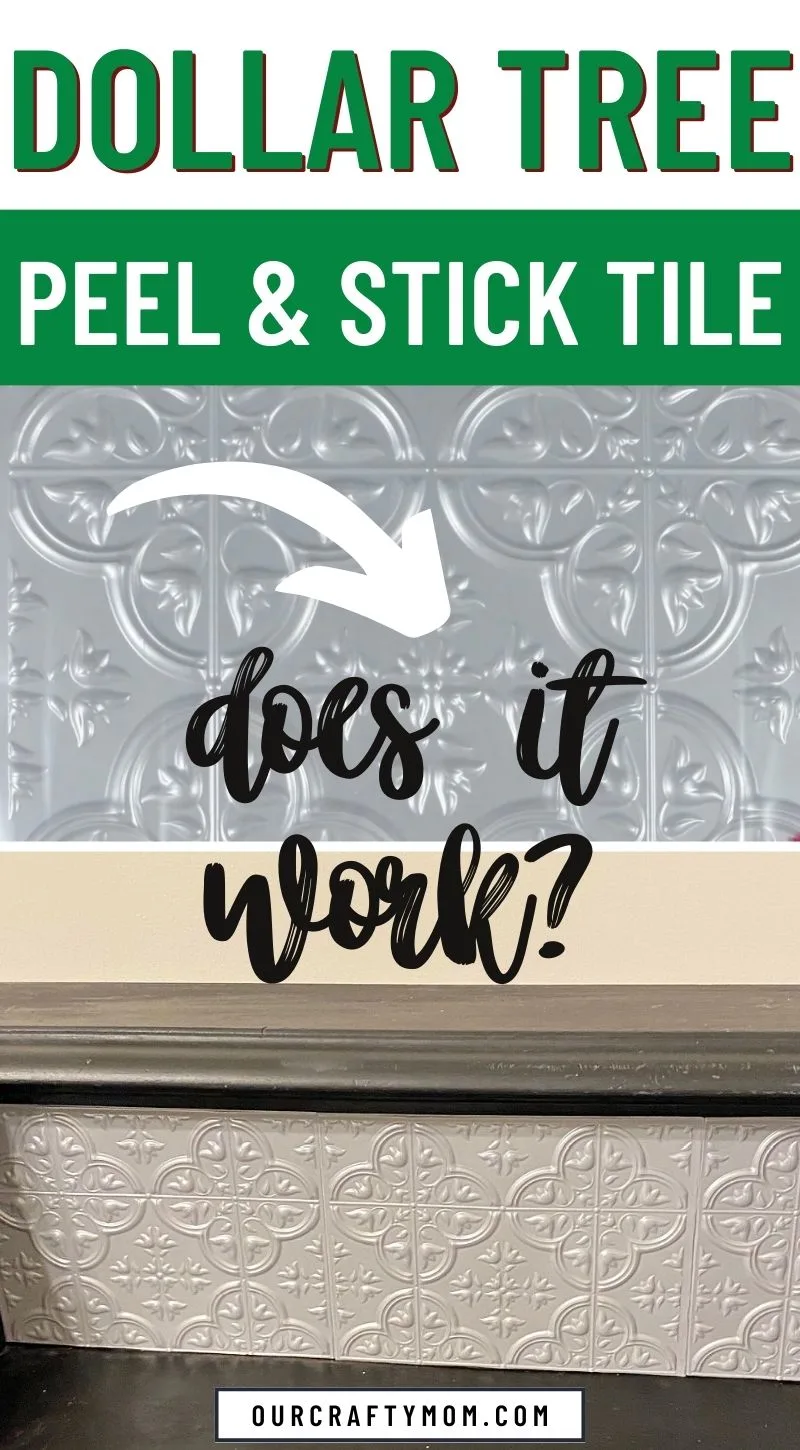
Let’s take a closer look at this easy DIY project and see how I used peel stick tiles to create a backsplash on my painted dry sink.
Our primary bathroom does not have a linen closet so I decided to move my dry sink into the bathroom for storage.
It fit perfectly in the space. The only thing I had to do was paint it black so it went better with the color scheme.
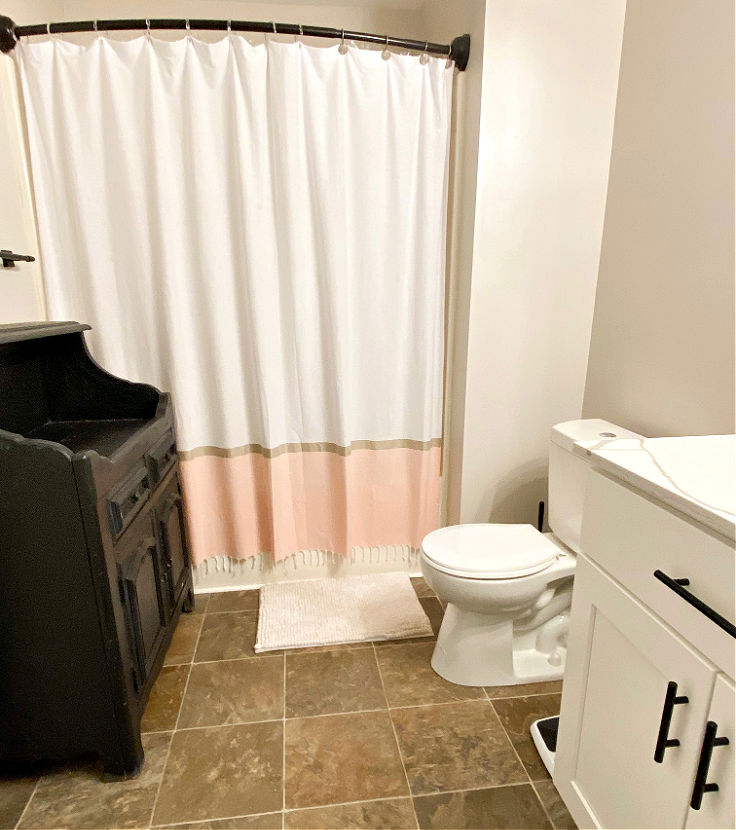
Doesn’t it have a vintage feel to it? It’s brand new and for some reason I’m obsessed with the push button on top of the toilet.
Hey, it’s the little things in life! 🙂
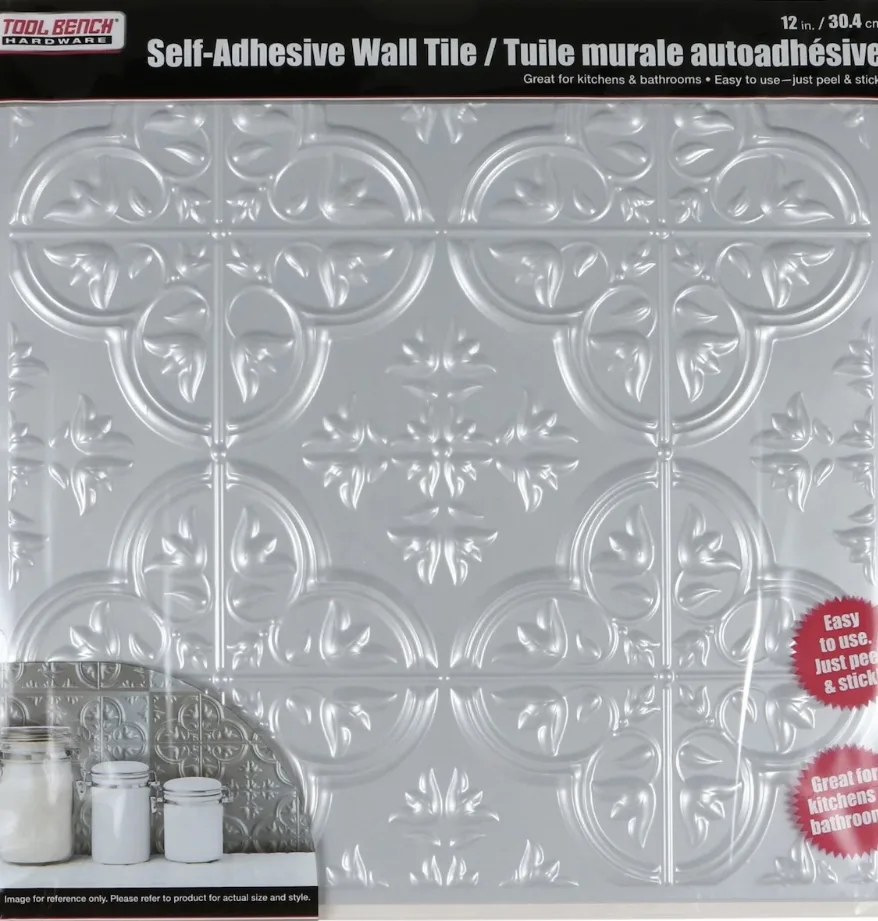
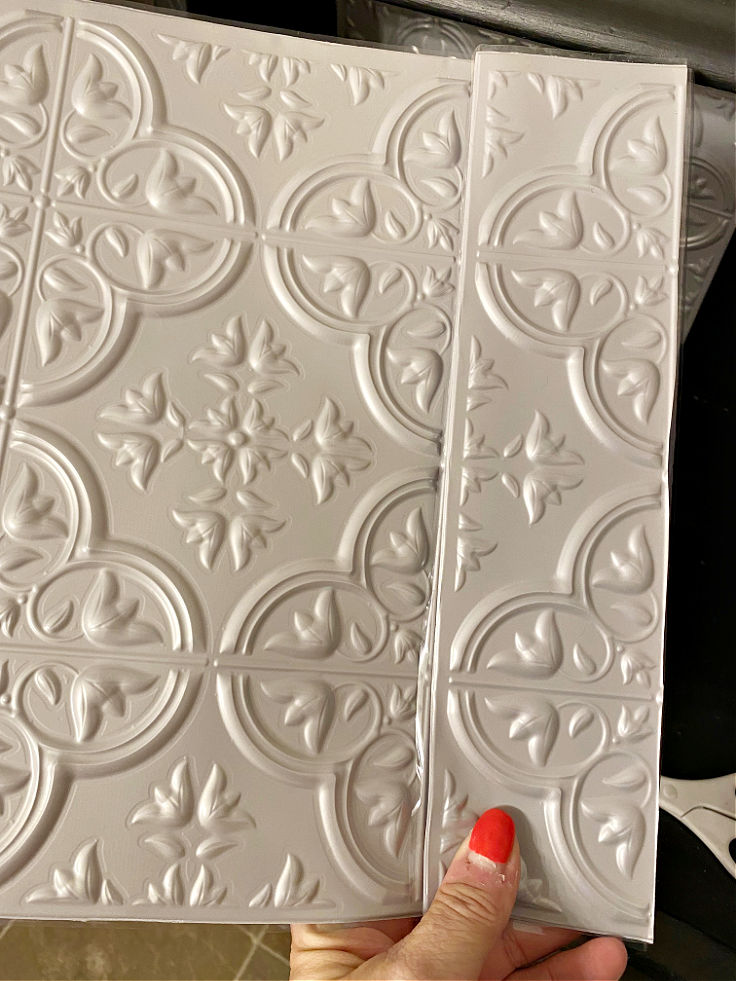
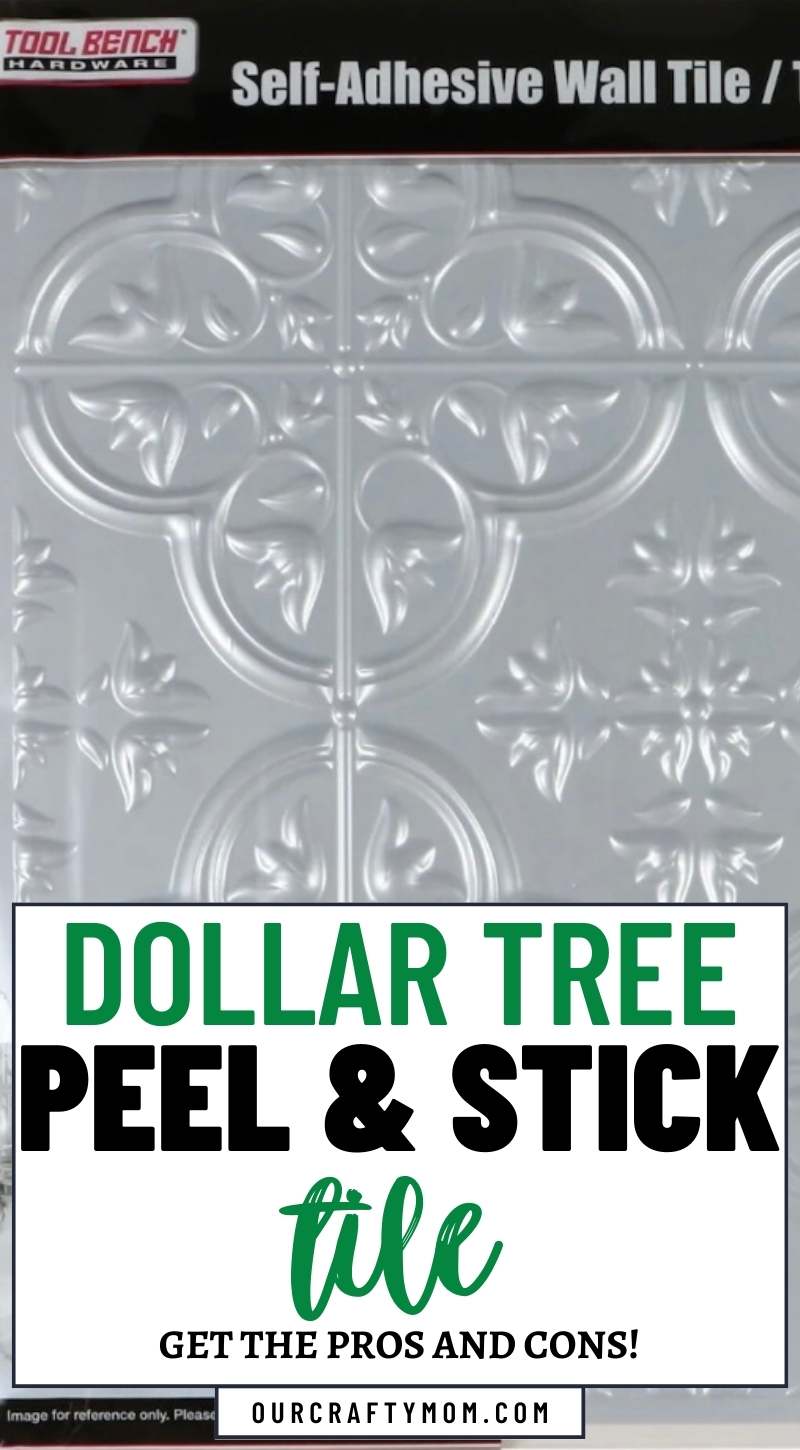
Dollar Tree Peel and Stick Wall Tile
I purchased 8 of the faux silver vintage wall tiles, but only ended up using about 6.
Supplies Needed for Self-Adhesive Wall Tiles
That is pretty much all you need.
Applying Dollar Tree Peel and Stick
Be sure to clean the area where you are applying the tile. You want it to be clean and dry.
The wall tile does come with picture instructions showing the 3 simple steps.
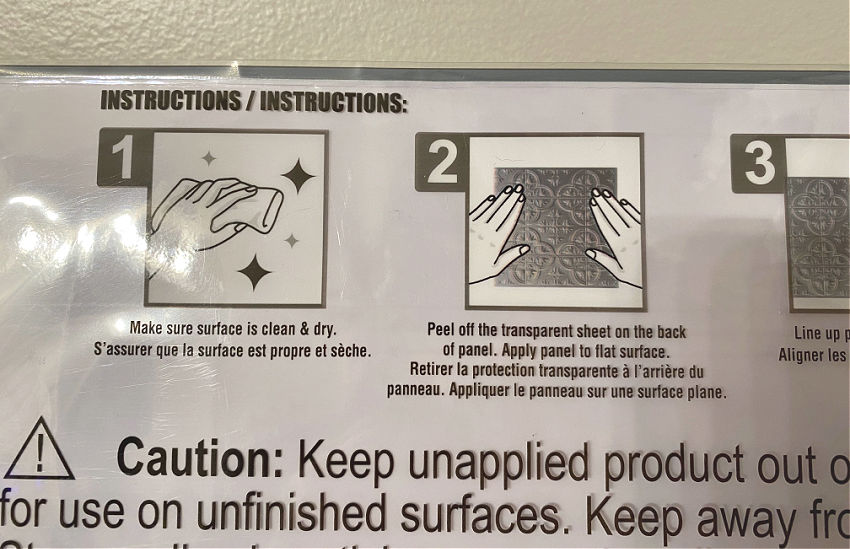
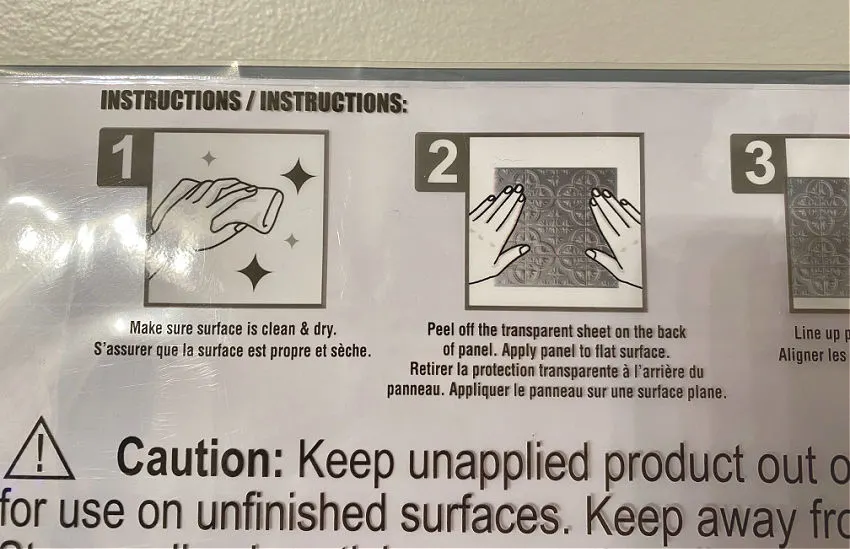
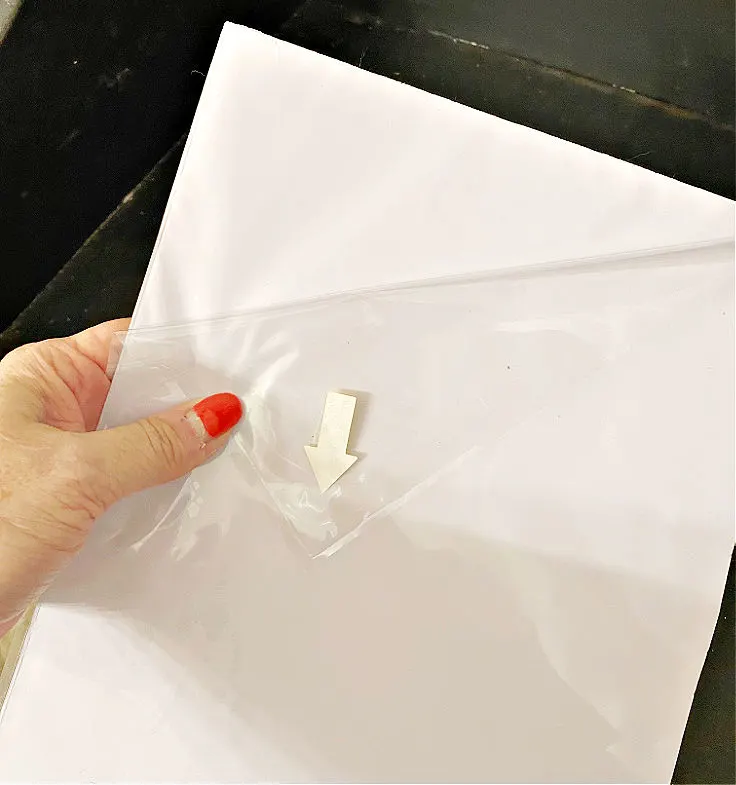
Step 1. Remove the Backing
Start by removing the backing on each wall tile. It even has a helpful arrow to show you which way to place it!

Step 2. Secure the Tile
Next you want to secure the tile. I simply placed one piece of wall tile against the backsplash of the dry sink and pressed with firm pressure.
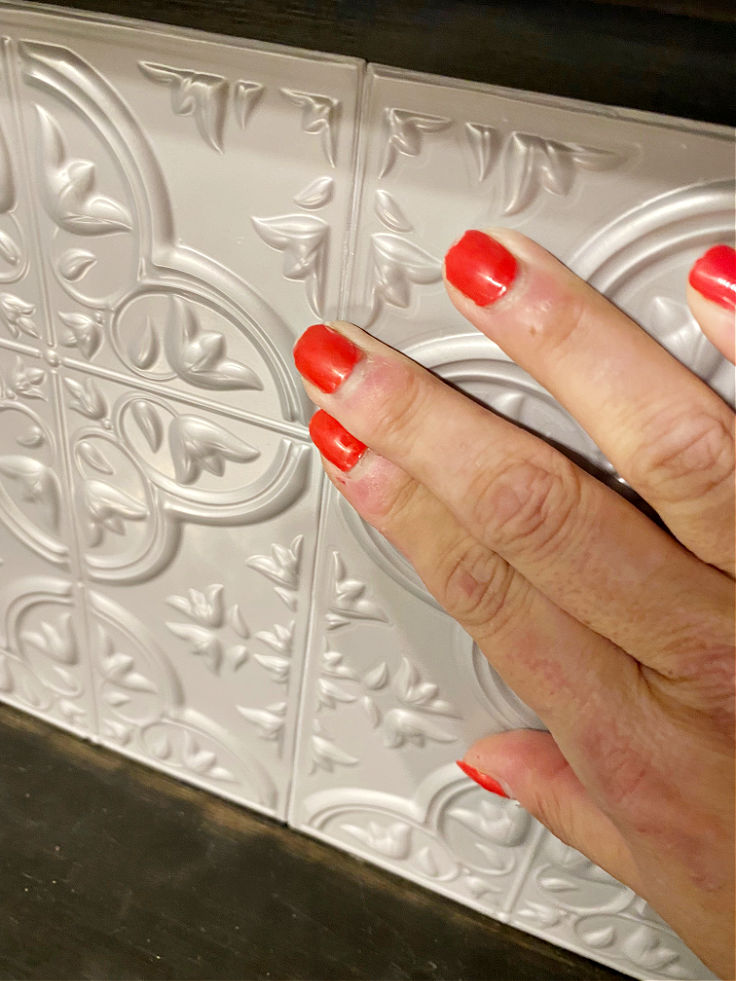

Smooth and press it all across. Looking good! It felt nice and secure and I loved how it looked.
Step 3. Cut Smaller Pieces if Needed
Unfortunately, my backsplash needed cut pieces to complete it, so I used regular scissors to cut the right size.

This is where the problem happened. Once you cut the tile, the adhesive backing comes off, making it impossible to stick without a little help.

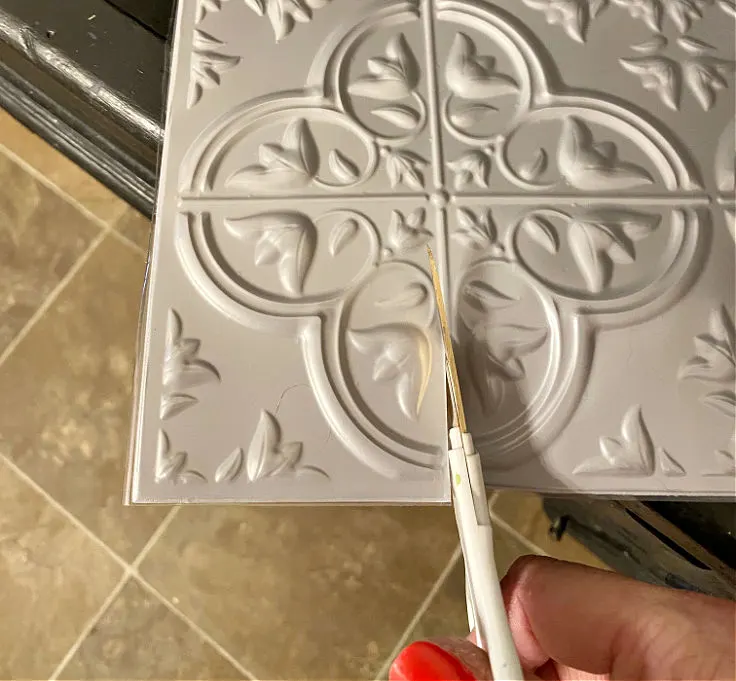
I contemplated what type of glue to use. As someone who changes their mind a lot, I knew I didn’t want this backsplash to be permanent, or damage the dry sink.
So I did a little research and went with Gorilla glue spray adhesive.
Step 4. Spray Cut Pieces with Adhesive
Just spray the smaller pieces with the sticky adhesive and place them the same way you did the first piece.
Hold it to the backsplash and press with firm pressure.
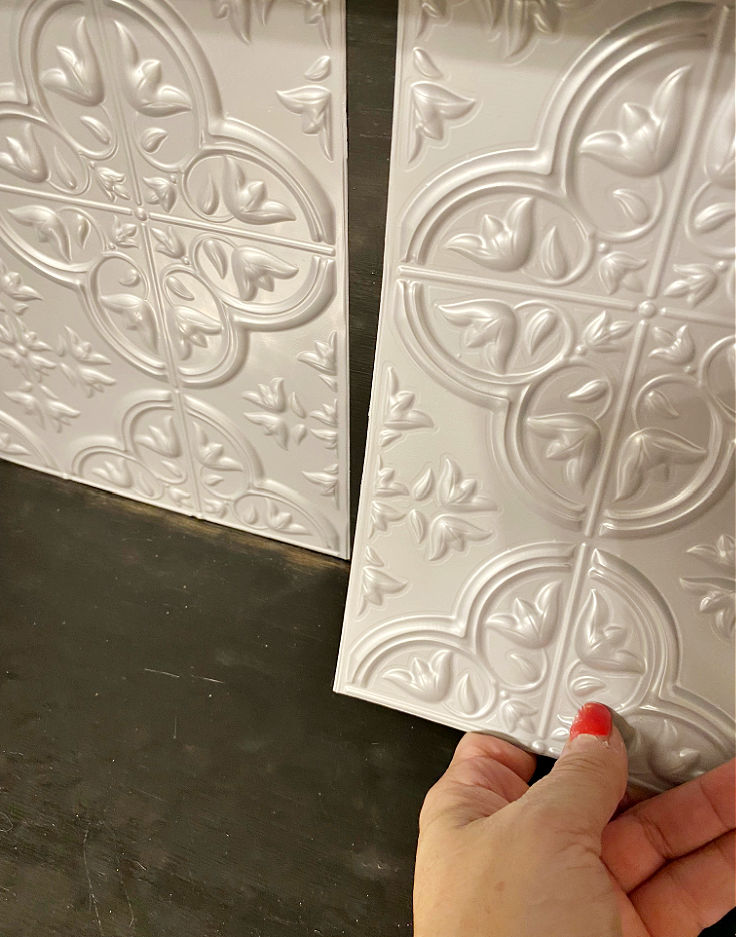
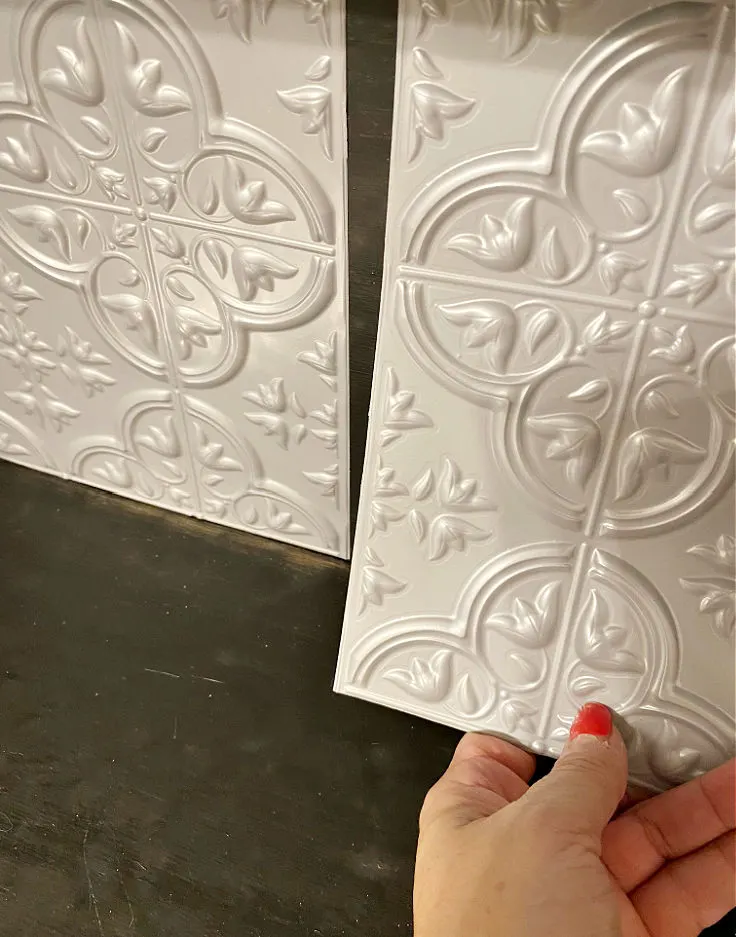
Continue to repeat these steps until your backsplash is complete.
Step 5. Continue to Cover Area
Once I stepped back and saw how pretty the wall tile looked, and because I had enough leftover, I decided to add the tile to the top of the dry sink as well.

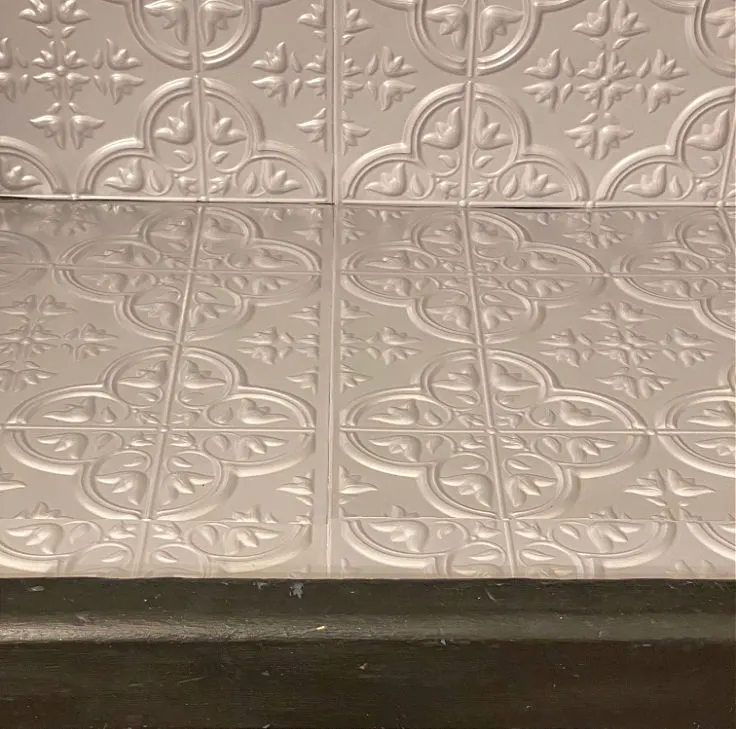
This was an old furniture piece that I refinished but it still had quite a few dings and was worn in some areas, so the tile covered it up nicely.
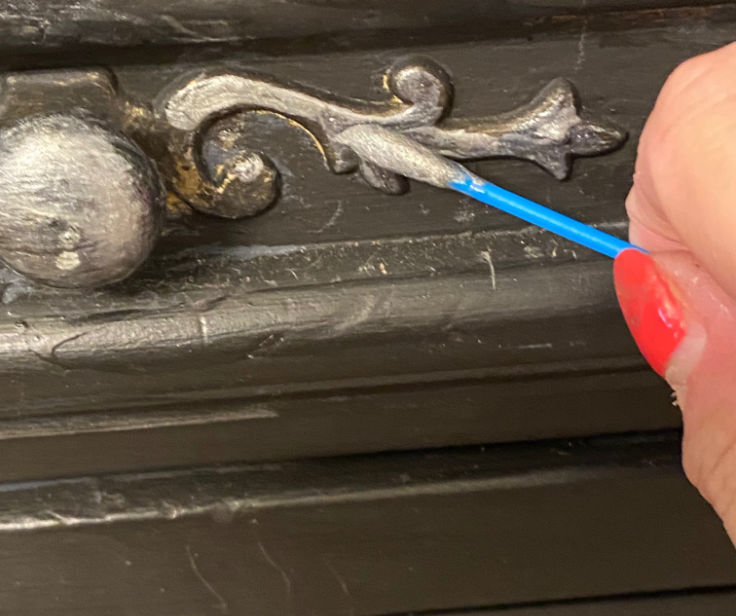
As a last minute touch, I decided to update the hardware with DecoArt silver metallic paint.
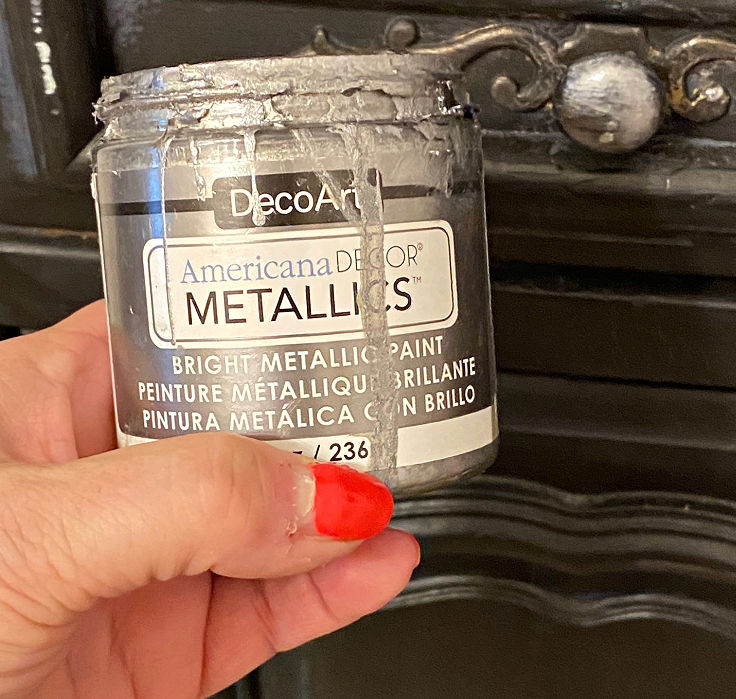

Quick tip: use q-tips to touch-up small areas or corners of furniture. They work great and are cheap!

It really took this piece to the next level and gave it that vintage vibe I was going for along with the faux tin tile.
Look at how lovely it is:


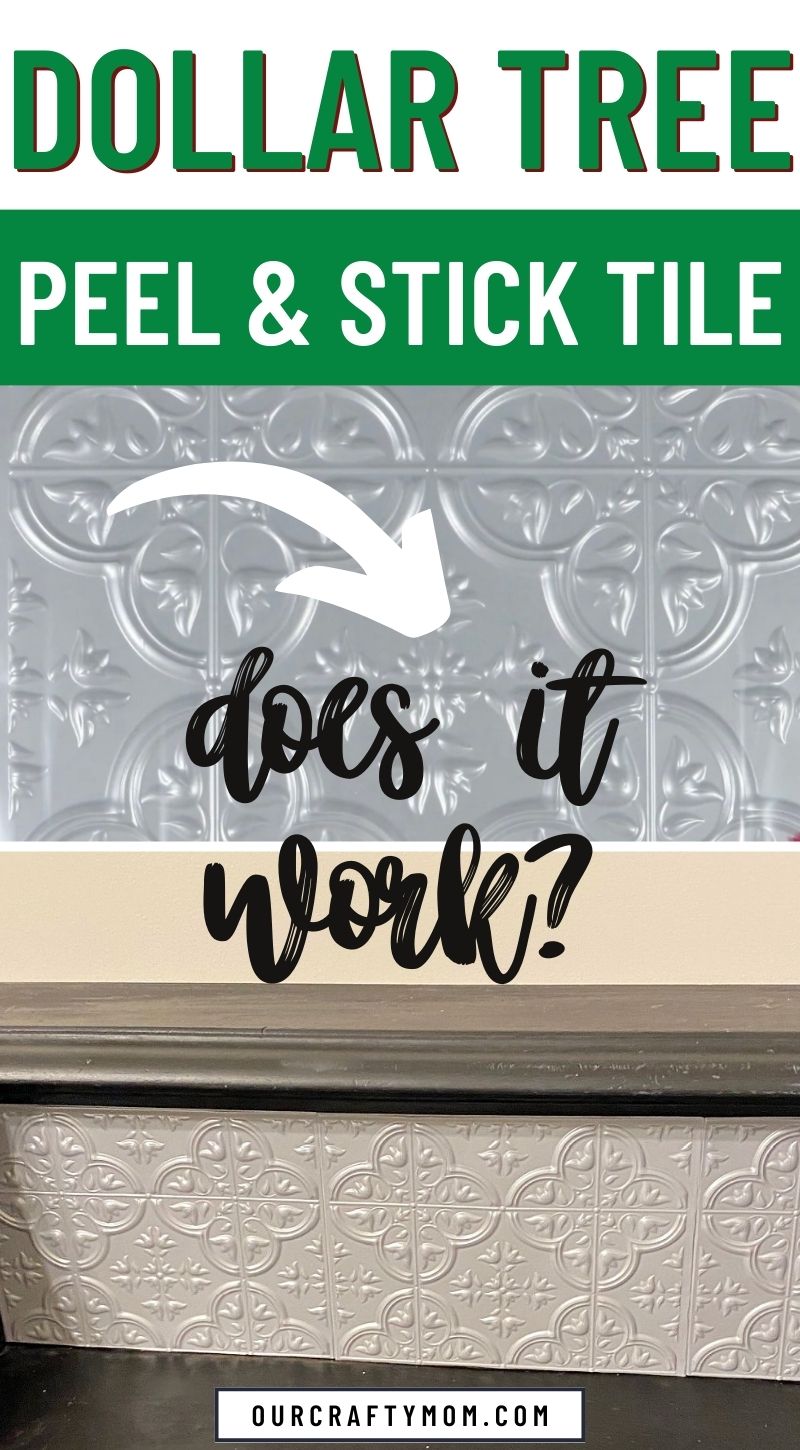
I’d love it if you would PIN the below image:
Now that you’ve seen how incredibly easy these sticky wall tiles are to apply, let’s get to the nitty gritty.
Are They Durable Enough For Everyday Use?
One of the biggest questions about these tiles is whether or not they are durable enough for everyday use.
If it is used as a backsplash where you don’t have to cut the tiles, I would say yes.
For any cut pieces the only way it is durable is if you use adhesive on any pieces that you cut.
This project was completed in September as shown in this photo decorated with a wooden pumpkin:


I wanted to make sure it held up for a few months before sharing a full review.
Three months later I have had no issues with the tiles coming off or peeling.
Even with moisture that is common in a bathroom from the shower, etc., the backsplash looks just as good as it did on the first day! Yay!
Where Can I Use Them?
These tiles are great for small accent walls.
They help create an eye-catching design while concealing minor imperfections in your walls at the same time.
However, I would not recommend they be used on a large wall.
For that you might want to go with more expensive wall tiles as mentioned above.
They can also be used in other places like a closet feature wall, or on the backs of bookcases or other small furniture surfaces similar to my dry sink.
Plus, they come in so many different colors and patterns that you can really get creative when using them around your home or office space.
Pros of Peel and Stick Tiles from Dollar Tree
The biggest advantage of these types of tiles is that they are very inexpensive compared to traditional tile options.
If you don’t want to spend a lot of money on your project, these may be a good choice for you.
Another benefit is that they are easy to install – anyone can do it with no prior experience!
They are easily found at most dollar stores and come in several varieties.
They are great for covering up minor imperfections on walls or furniture.
Cons of Dollar Store Wall Tiles
The downside is that because they are so inexpensive, the quality may not be as good as more expensive options.
If you have to cut the tile, the adhesive backing will come off. They will not stick without an adhesive.
The bottom line is if you are looking for a budget-friendly wall tile option, these tiles could provide an affordable solution.
For about $8 I am thrilled with how this backsplash turned out and would definitely use Dollar Tree peel and stick tiles on another small furniture project in the future.
However, I would not recommend completing a kitchen remodel with these wall tiles.
If you have any questions please let me know in the comments below and I will help as much as I can.
Thanks for stopping by!
See even more DIY furniture projects below:
- 15 Amazing Whitewsh Furniture Projects
- 19 DIY Decoupage Furniture Makeovers
- 10 Must-See DIY Furniture Makeovers
- 5 Vintage Style Furniture Makeovers
- Tips and Tricks for Painting Furniture
- Side Table Makeover with Country Chic Paint
You can find me on social media below:
Cathy-
Wednesday 29th of May 2024
Are they waterproof? Could you put them around a tub?
Michelle James
Thursday 30th of May 2024
Hi Cathy. Unfortunately they are not waterproof. They are like a thick cardboard paper. They are meant for small accent pieces and while they have held up well, I don't think they would hold up around a tub. Hope that helps!
Dessi
Sunday 18th of February 2024
Is there something I could do to make them durable enough for full kitchen wall??? Like hard glaze or something I’m super new at this kinda thing!
Michelle James
Sunday 18th of February 2024
Hmmm. Let me think and do a little research. 😀
Laura
Sunday 6th of August 2023
Do you think these would be paintable?
ourcraftymom
Friday 11th of August 2023
Yes! I painted them a few times. You can see one painted in this post https://ourcraftymom.com/vintage-wall-pockets/. Have a great weekend!