In this tutorial, I’ll show you how to take plain dollar store clay pots and turn them into beautiful fabric covered flower pots that will brighten up any space.

Decoupage Flower Pots
Looking for a fun and easy way to add some personality to your flower pots?
With a few materials from Dollar Tree, you can easily create beautiful fabric covered flower pots on a budget!

If you follow me on Facebook or Instagram you may have seen my napkin covered flower pots.
I LOVED how they turned out so I thought I would decorate a few more flower pots this time using fabric.
The fabric was much easier to work with as it is thicker so you don’t have to be as careful. Plus, there is less cutting involved.
So if you haven’t tried to decoupage with fabric yet, give it a try. There are so many things you can use it on.
Now let’s get to this simple tutorial so you can make your own fabulous decoupage flower pots!
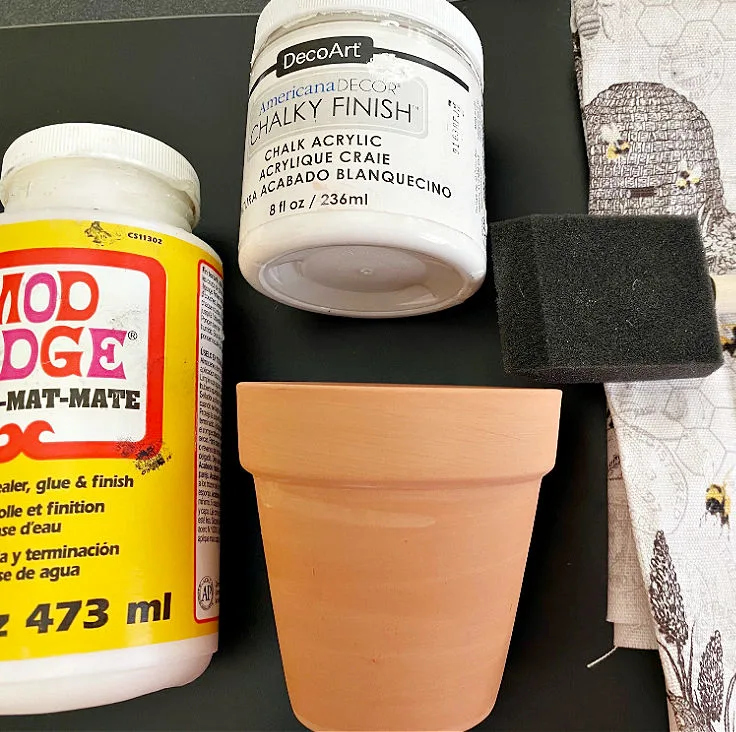
Supplies Needed To Make Fabric Covered Flower Pots
- Small Terra Cotta Flower Pots
- Mod Podge
- Foam Brushes
- Fabric Scissors
- Craft Knife
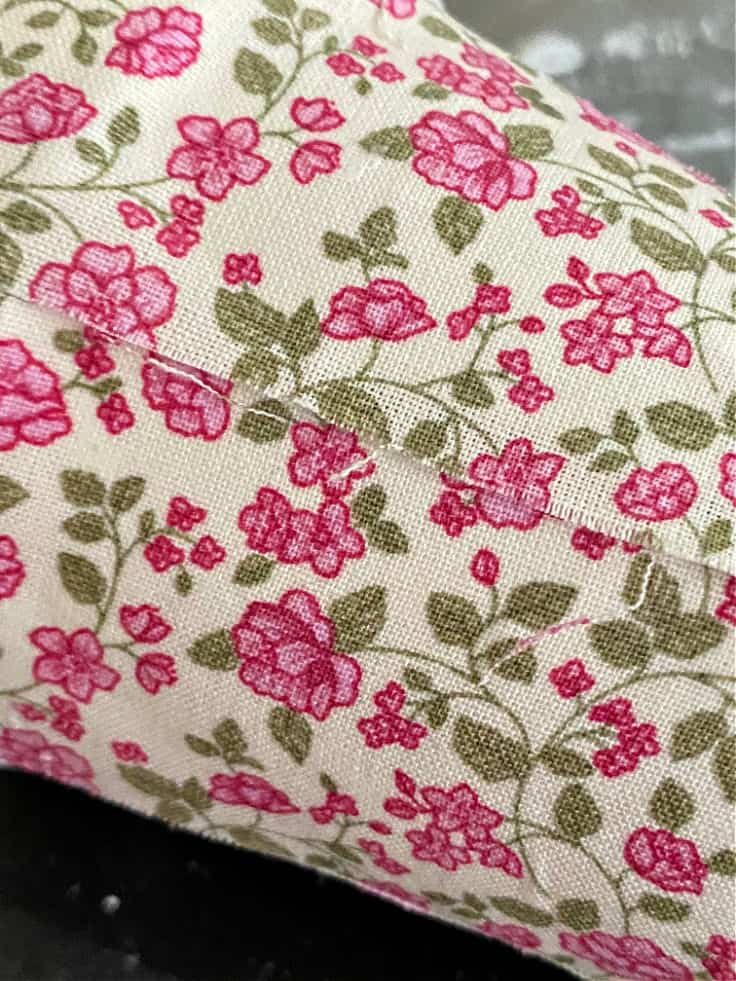
- Fabric
- Clear Sealer
- DecoArt White Chalk Paint

Why You’ll Love Making Fabric Covered Flower Pots
- They are so versatile – with endless fabric options and colors.
- A budget-friendly (and fun) craft!
- They make great gifts – just add flowers or a plant.

How to Decoupage Flower Pots with Fabric
Step 1. Trace the Flower Pots
Start by placing the flower pot on top of your fabric. Mark where you want to cut it ensuring you leave enough room for the top and bottom.

Step 2. Cut the Fabric
Use fabric scissors or a rotary cutter to cut the fabric where you marked it. The great thing about using thin fabric is you can actually tear it once you have a small cut.

Step 3. Apply Mod Podge
Use your foam brush to apply mod podge directly to the flower pot. Give it a nice even coat and let it dry for a minute or so. It will become tacky and make it easy to apply the fabric.
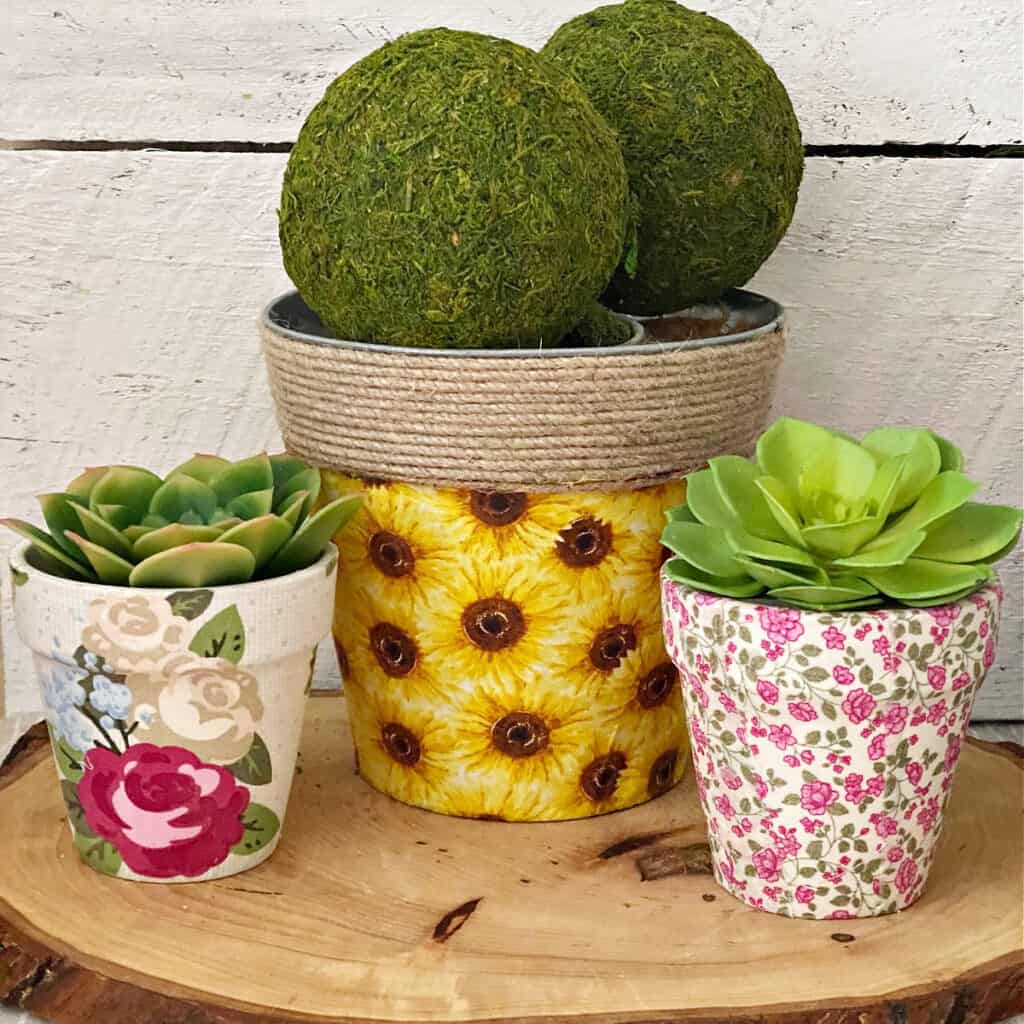
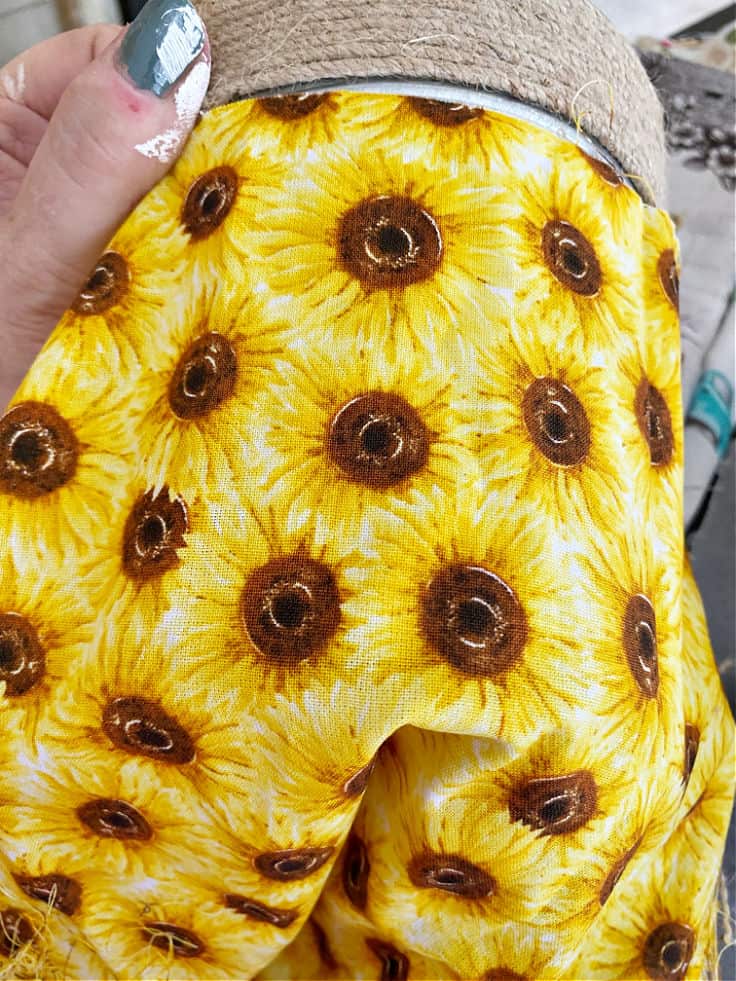
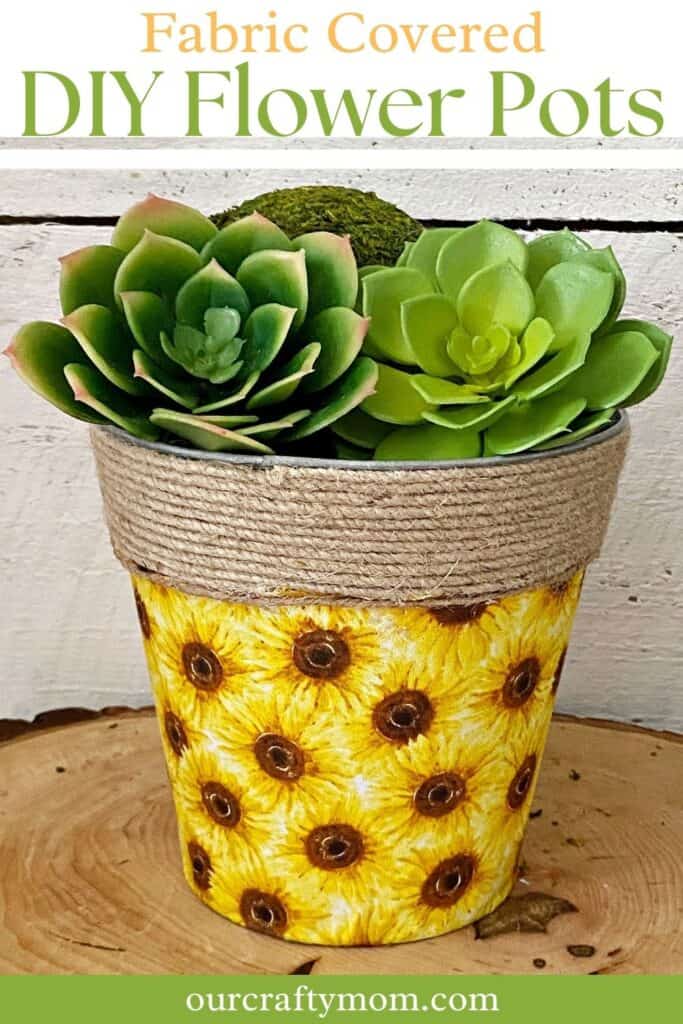
I used a tin flower pot from Dollar Tree for the sunflower fabric, but you follow these same steps for the terra cotta pots as well.
Step 4. Apply the Fabric
Place the fabric onto the flower pot and press it down to smooth out any wrinkles.
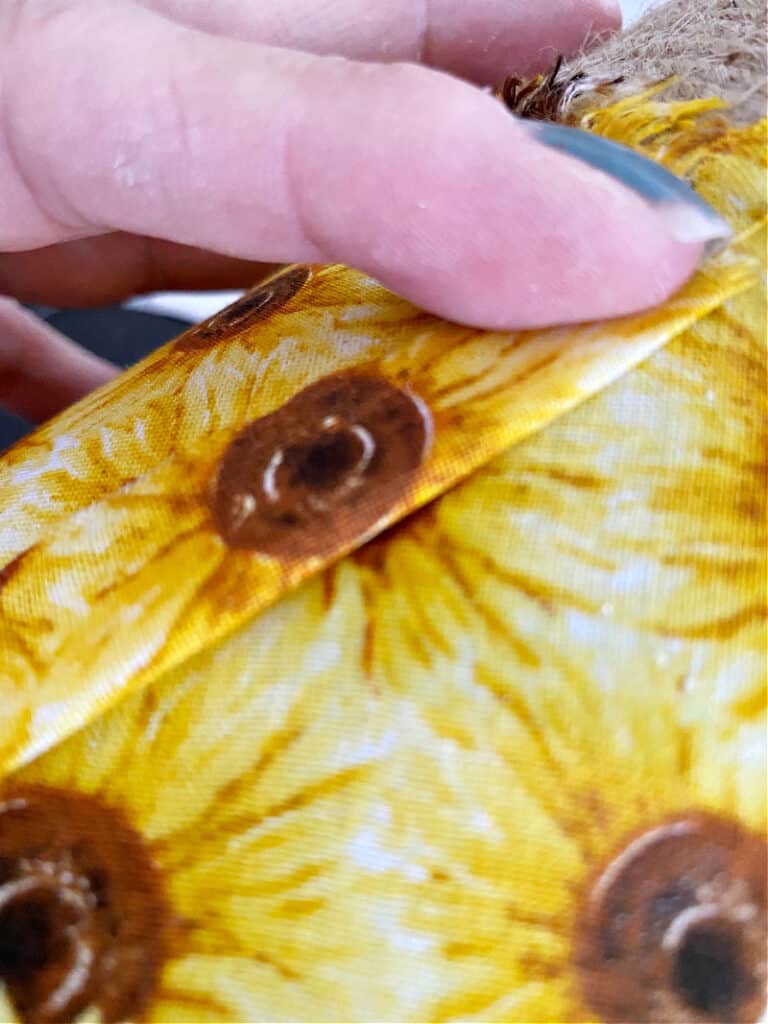

When you get to the end of the covered flower pot fold the end piece under to give it a nice finished look.
That way the covered flower pot will look great on all sides!
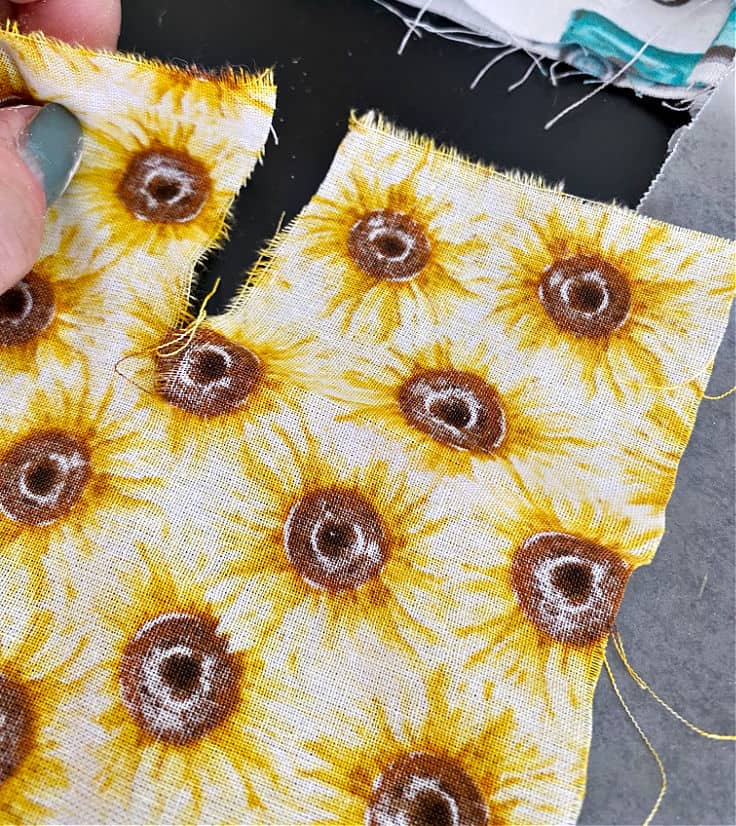
Step 5. Trim any Excess Fabric
If there are any loose pieces or strings of fabric use a craft knife or fabric scissors to remove them.

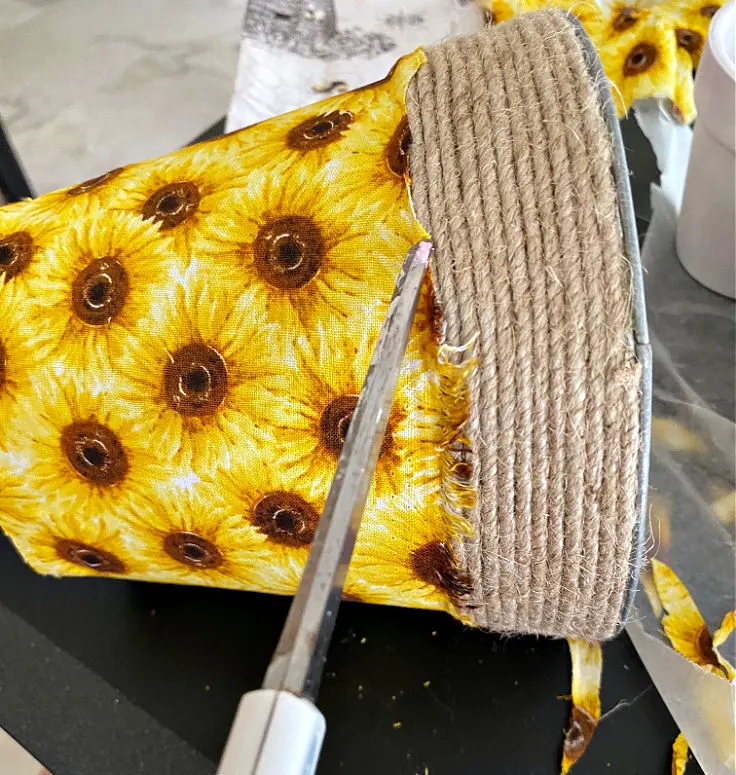
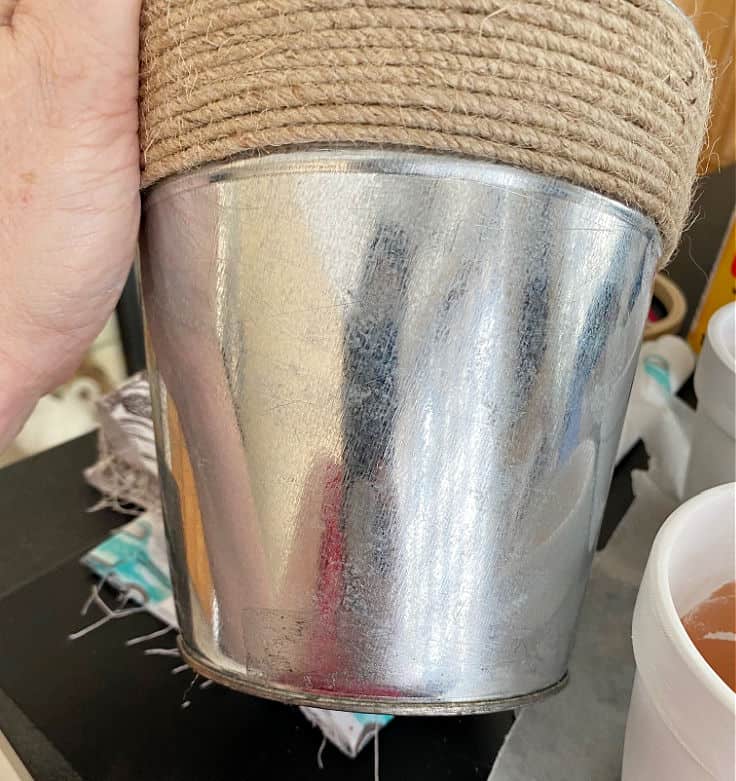
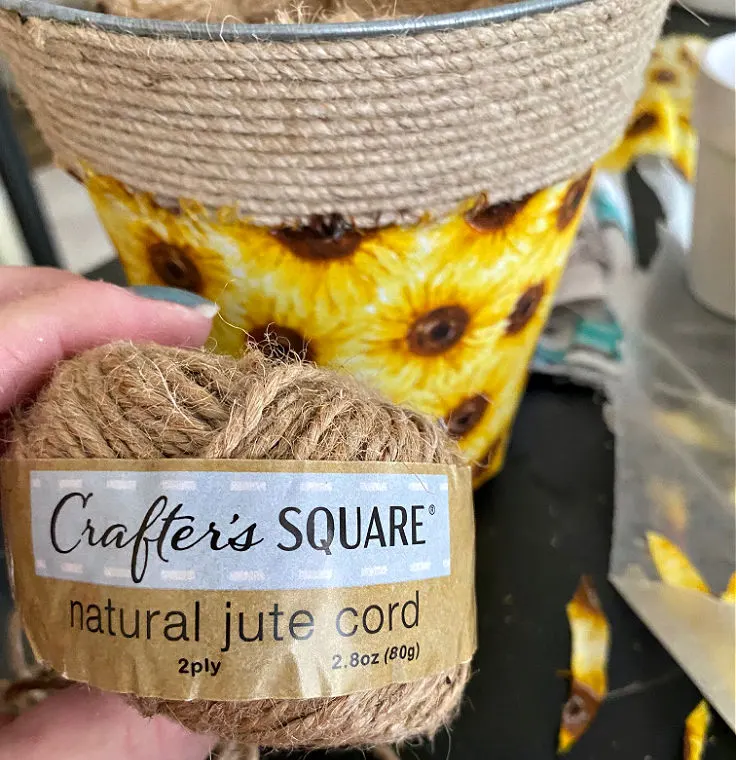
Step 6. Cover the Edge with Twine
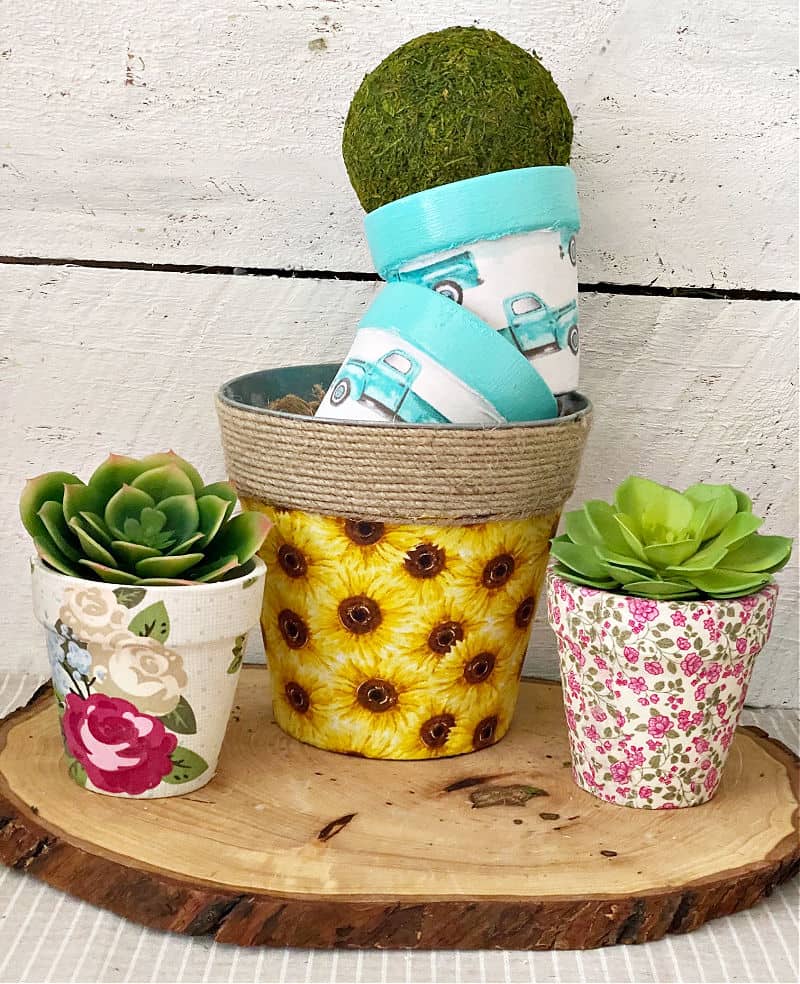
For the large tin flower pot, I covered the edge with an extra piece of twine. The twine really looked pretty against the sunflowers.

Step 7. Cover with Another Coat of Mod Podge
In order to protect the fabric from the elements, you want to add another coat or two of mod podge. You should also spray it with a clear sealer.
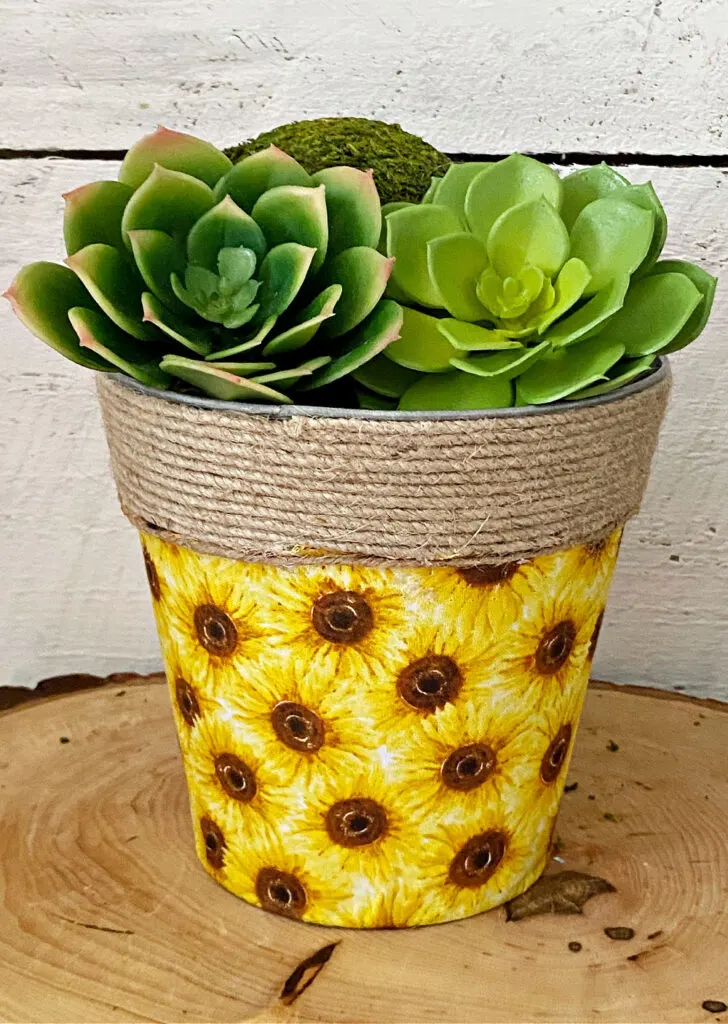
For the tin flower pot, you will need to add a couple of holes on the bottom for drainage. You can also add small rocks for drainage.
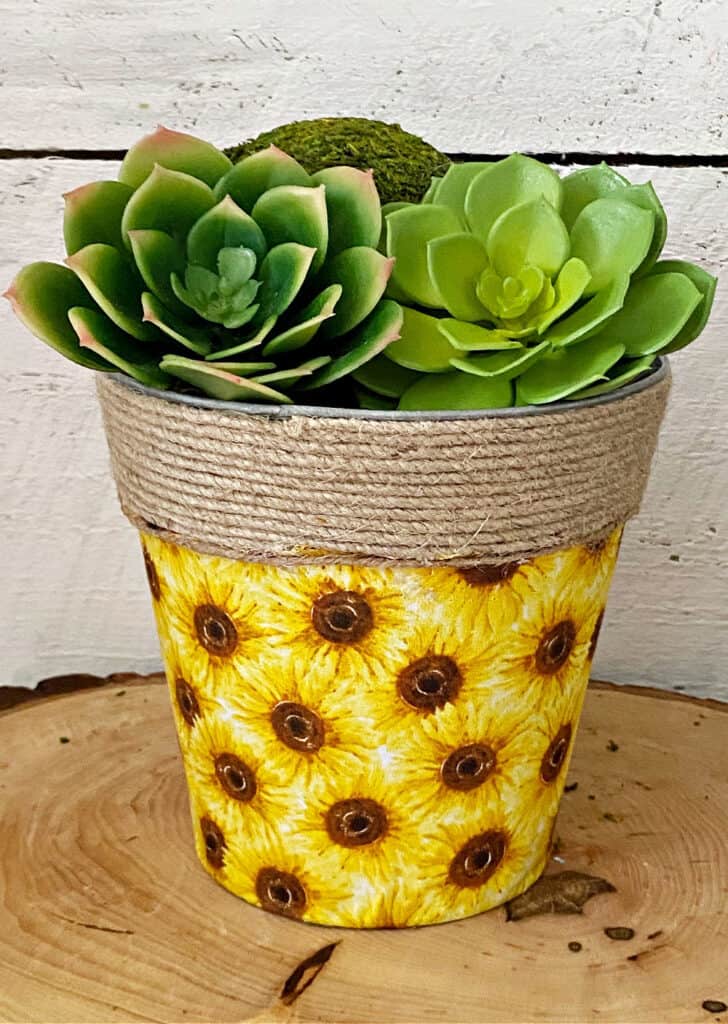
It is still a little too early for real flowers in New England but I plan to add small flowering plants like petunias or pansies.
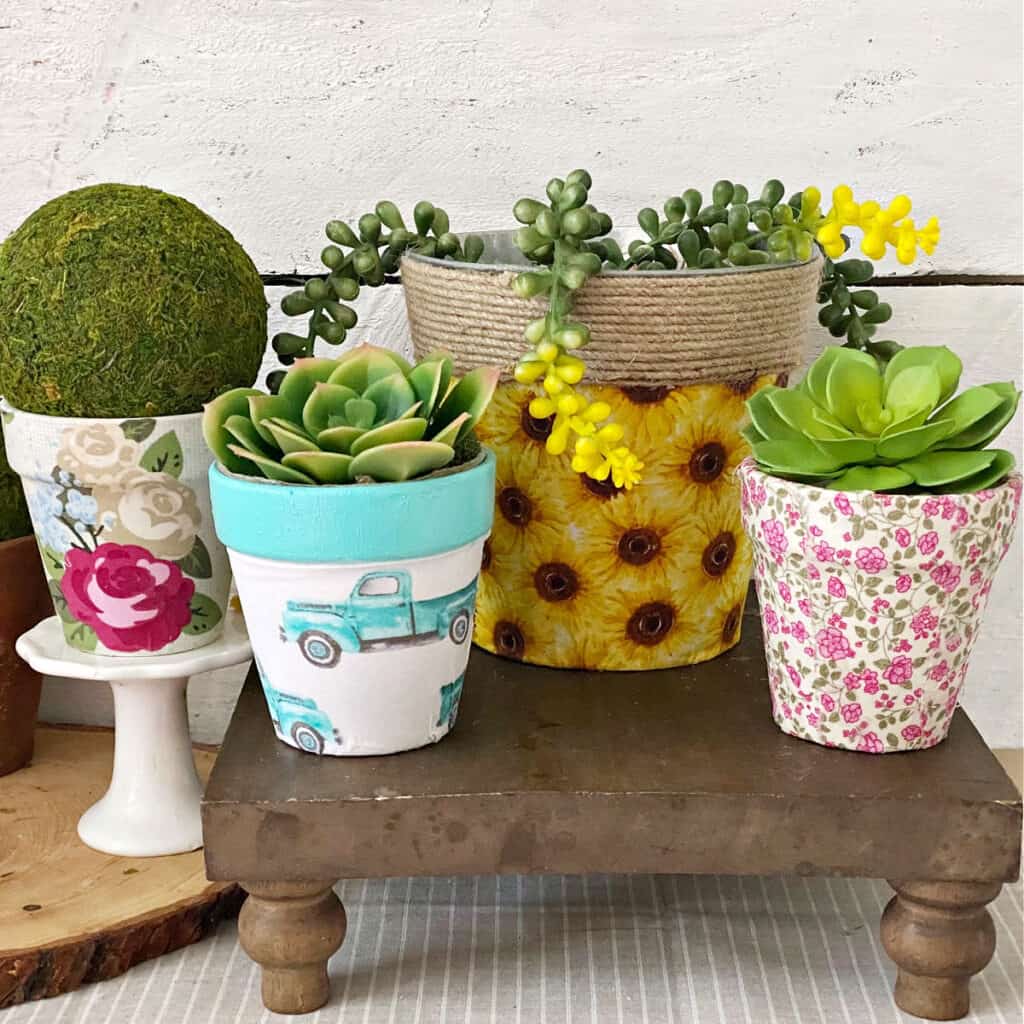
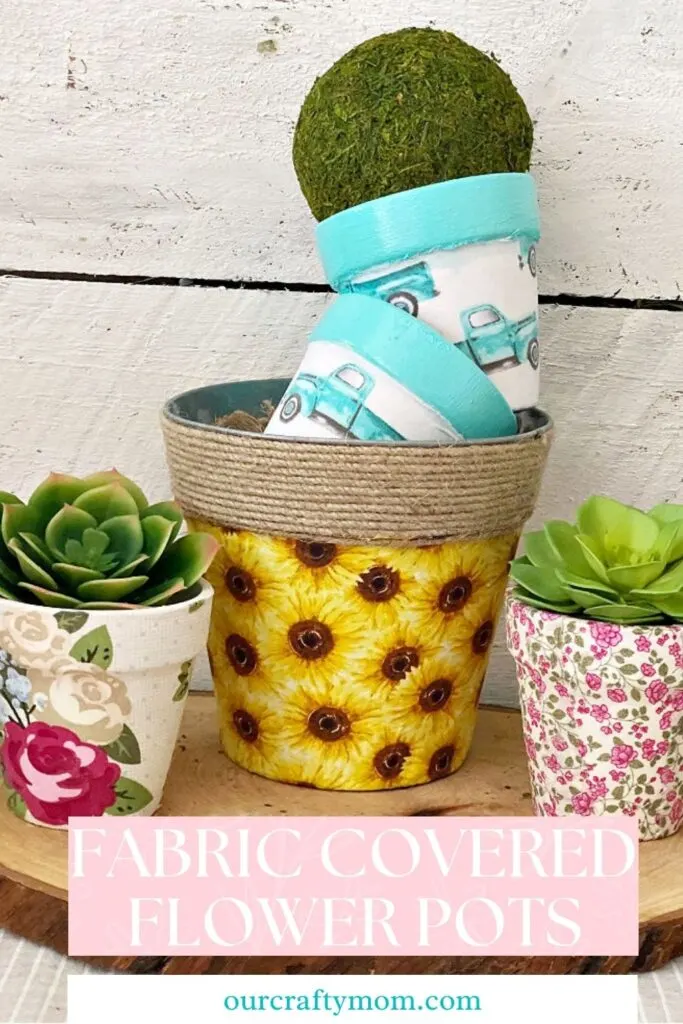
Little Blue Truck Fabric Covered Flower Pots
I picked up 2 sets of terra cotta pots from Dollar Tree. They are about 3″ which is a bargain for $1.25 for two!
The sunflower fabric and little blue truck fabric are also from Dollar Tree.
Look how cute the truck covered flower pots are:
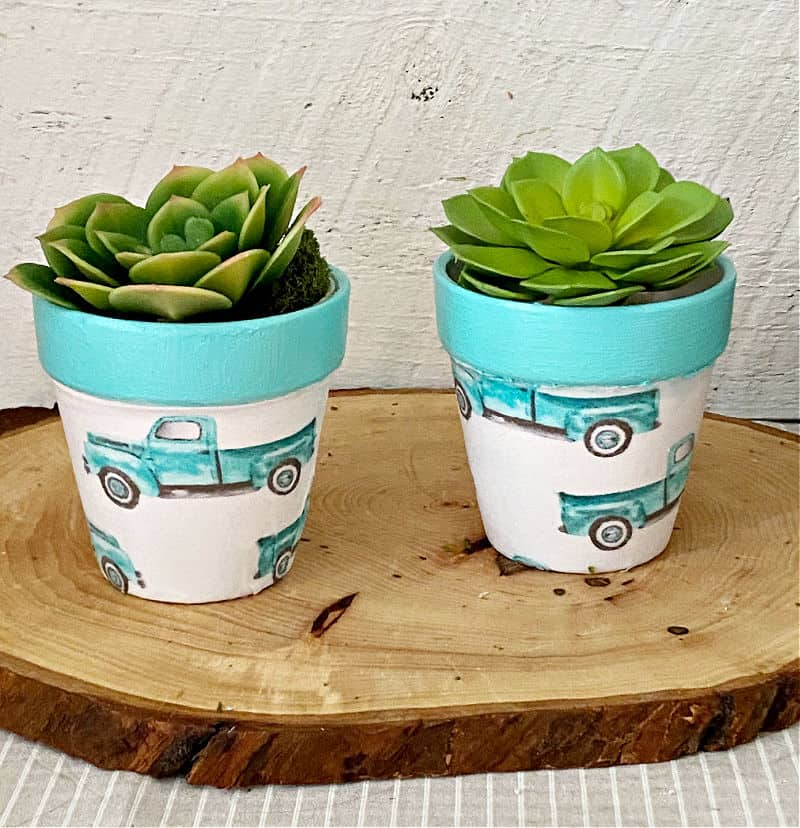

They are the perfect size to hold a small succulent. The clay pots have a drainage hole already.
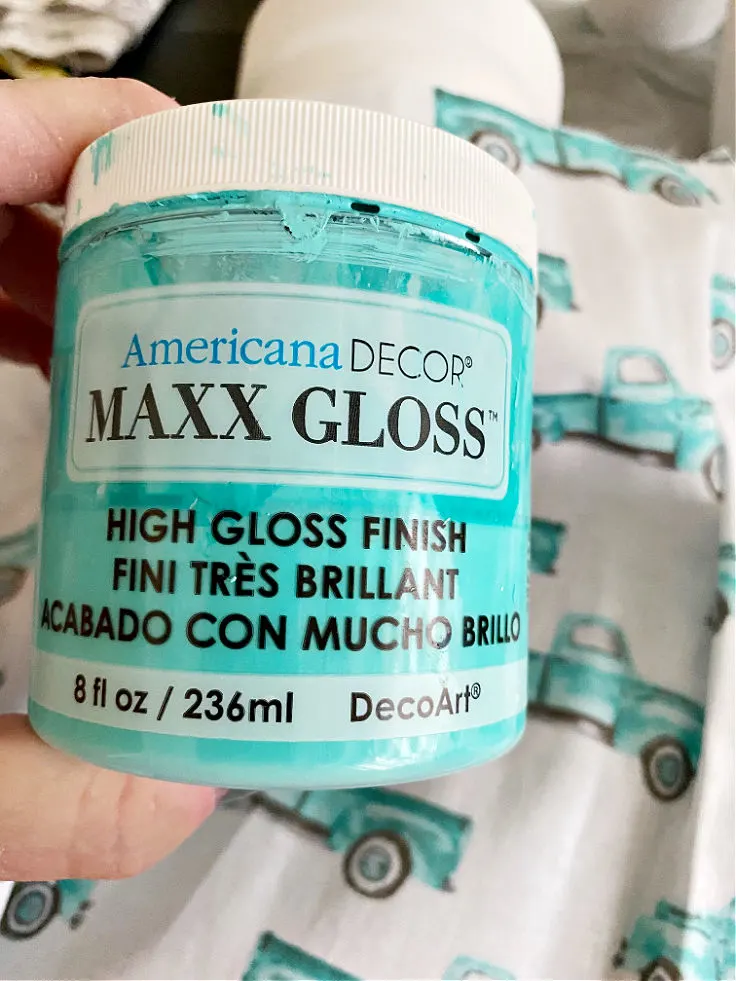
I wanted to give the pot an extra pot of color so painted the lip with gorgeous high gloss paint that matched the blue truck perfectly!

The pretty floral fabric is from my craft stash leftover from my Stampin’ Up days. They have a cottage core look that I love!
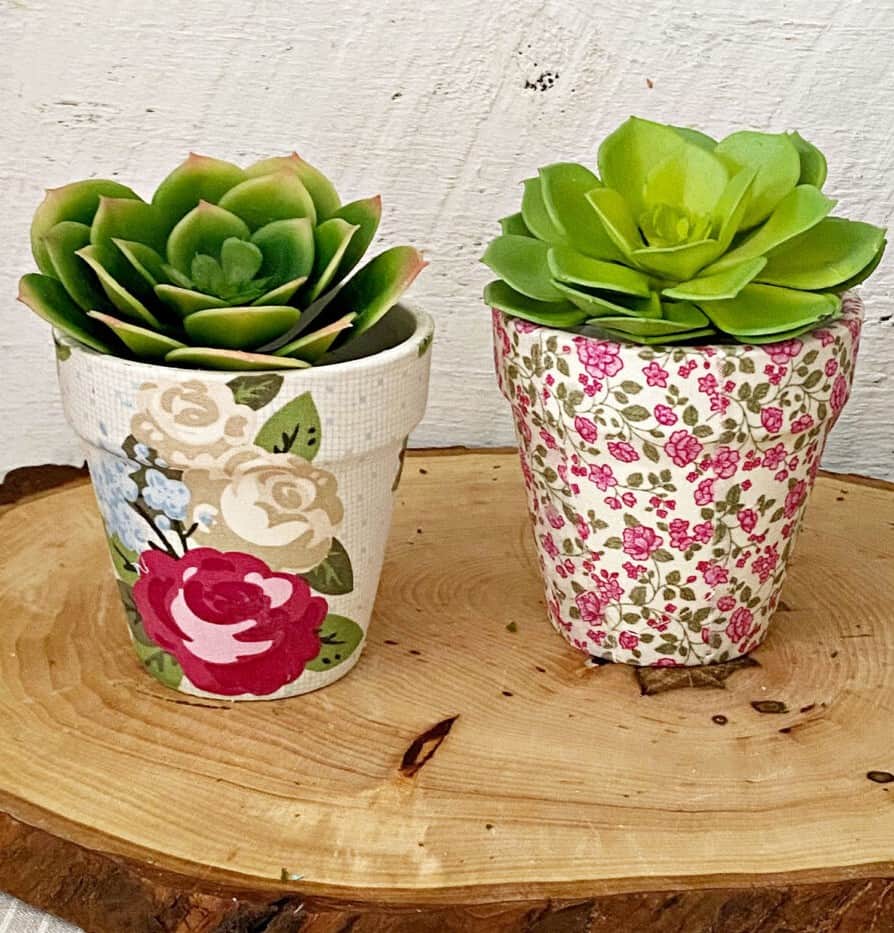
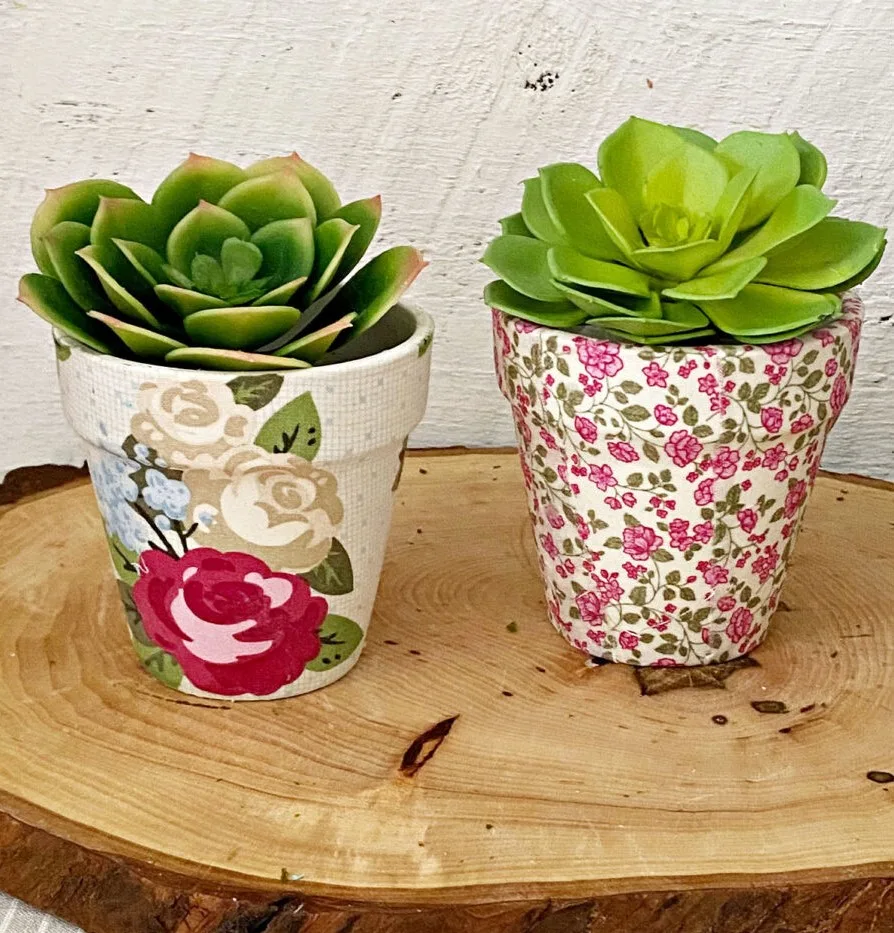
For the small floral pot, I didn’t have enough fabric to wrap around the clay pot so I cut it into small strips.


If you are working with fabric scraps it’s a super simple way to decoupage.

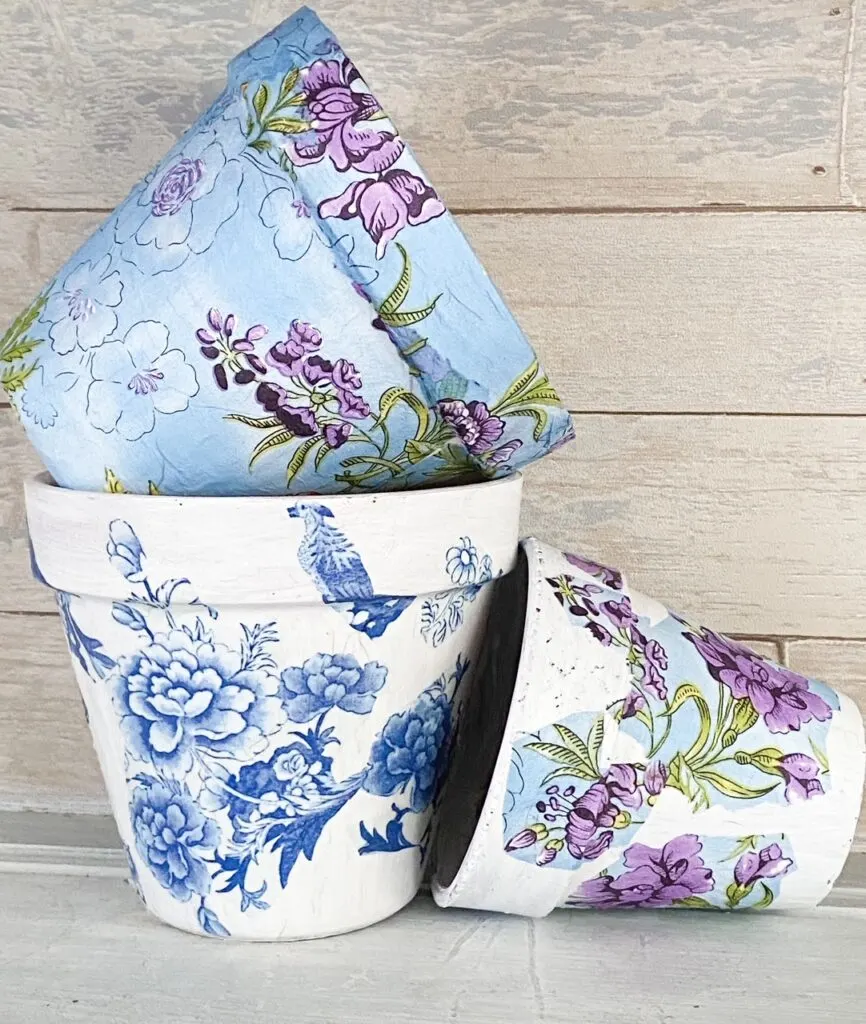
Because I took about a hundred photos, here are some beauty shots of all four flower pots. 🙂
So which flower pot is your favorite? Leave me a comment below and let me know.
My daughter is a huge fan of sunflowers, so I plan to give her that one once I pick add a plant.
Common Types of Mod Podge Decoupage Glue
- Gloss
- Matte – I used matte for this project
- Satin
- Dishwasher Safe
You can find me on social media below:
If you are a fan of no-sew projects make sure to check these ideas out as well!
- No-Sew Patriotic Tablecloth from Bandanas
- No-Sew Burlap Curtain Valance
- No-Sew Buffalo Check Curtains
- No-Sew Rope Bowls
I hope you enjoyed this easy craft project. If so, please PIN the below image:

Happy crafting!


Fabric Covered Flower Pots
Dollar Tree is a great place to find craft supplies, and I'm going to show you how to make fabric covered flower pots from some of those supplies.
These are really easy to make, and they would be perfect for Mother's Day or any other special occasion. Let's get started!
Materials
- Small Terra Cotta Flower Pots
- Mod Podge
- Foam Brushes
- Fabric
- Clear Sealer
- DecoArt White Chalk Paint
Tools
- Hot Glue Gun
- Fabric Scissors
- Craft Knife
Instructions
- Start by giving the flower pots a couple of coats of white chalk paint. Let dry.
- Place your flower pot on top of the fabric and mark where to cut it.
- Cut your template with fabric scissors or a rotary cutter.
- Place Mod Podge on a paper plate and use a foam brush to apply it to the flower pot.
- Adhere the fabric to the flower pot by pressing down on it to smooth out any wrinkles with your fingertips.
- Continue adding the cut fabric until the pot is covered.
- Cover the entire flower pot with another layer of mod podge.
- Trim off any excess fabric.
- Spray with 2 coats of clear sealer.
- Add drainage holes to the flower pots if needed.
- Plant your favorite flowers or plants and enjoy!
Recommended Products
As an Amazon Associate and member of other affiliate programs, I earn from qualifying purchases.
-

 Yexixsr Foam Brush, 27 Pcs Sponge Paint Brush, Foam Paint Brushes, Foam Brushes for Painting, Sponge Brush for Staining, Foam Brushes for Polyurethane, Sponge Brushes for Painting
 -
 Americana Décor Acrylic Chalky Finish Paint: Everlasting White, 8 oz
 -
 Juvale 10 Pack Terra Cotta Pots with Drainage Holes - 1.5 inches Mini Clay Flower Pots Perfect for Succulent Display, Cactus Nursery Planter, Indoor and Outdoor Plant
 -
 24pcs Terra Cotta Saucer, 3.2-inch Small Mini Clay Pots Tray, Suitable for 4inch, 3inch, 2.5inch, 2inch Succulents Nursery Pots
 -
 Surebonder Cordless Hot Glue Gun, High Temperature, Full Size, 60W, 50% More Power - Sturdily Bonds Metal, Wood, Ceramics, Leather & Other Strong Materials (Specialty Series CL-800F)
 -
 Mod Podge CS11302 Waterbase Sealer, Glue and Finish, 16 oz, Matte, 16 Fl Oz
Google Web Story: Upcycled Flower Pots for Spring
Nancy
Monday 9th of June 2025
can the fabric flower pots be used outside or is there a specific type of mod podge for that purpose i love your small pink floral pot
Michelle James
Tuesday 10th of June 2025
Hi Nancy! Yes, they can be used outside. They make an outdoor mod podge specifically for outside, or you can spray a clear sealer over it. I've had them on my balcony, although it is covered, it does get rain and other elements. They have held up well. The pink one is my favorite too!
Veldene
Friday 29th of April 2022
So cool! Those pots are lovely. ❤️ https://happymidlifecouple.com/
Anita Holland
Tuesday 26th of April 2022
Very nice idea and handy as you can decorate them to suit your decor. The sunflower one is my favourite.