
Make this easy glass block craft in about 45 minutes. Get glass block craft ideas for any season, plus a free fall truck printable to use.

Glass Block Crafting
Table of Contents
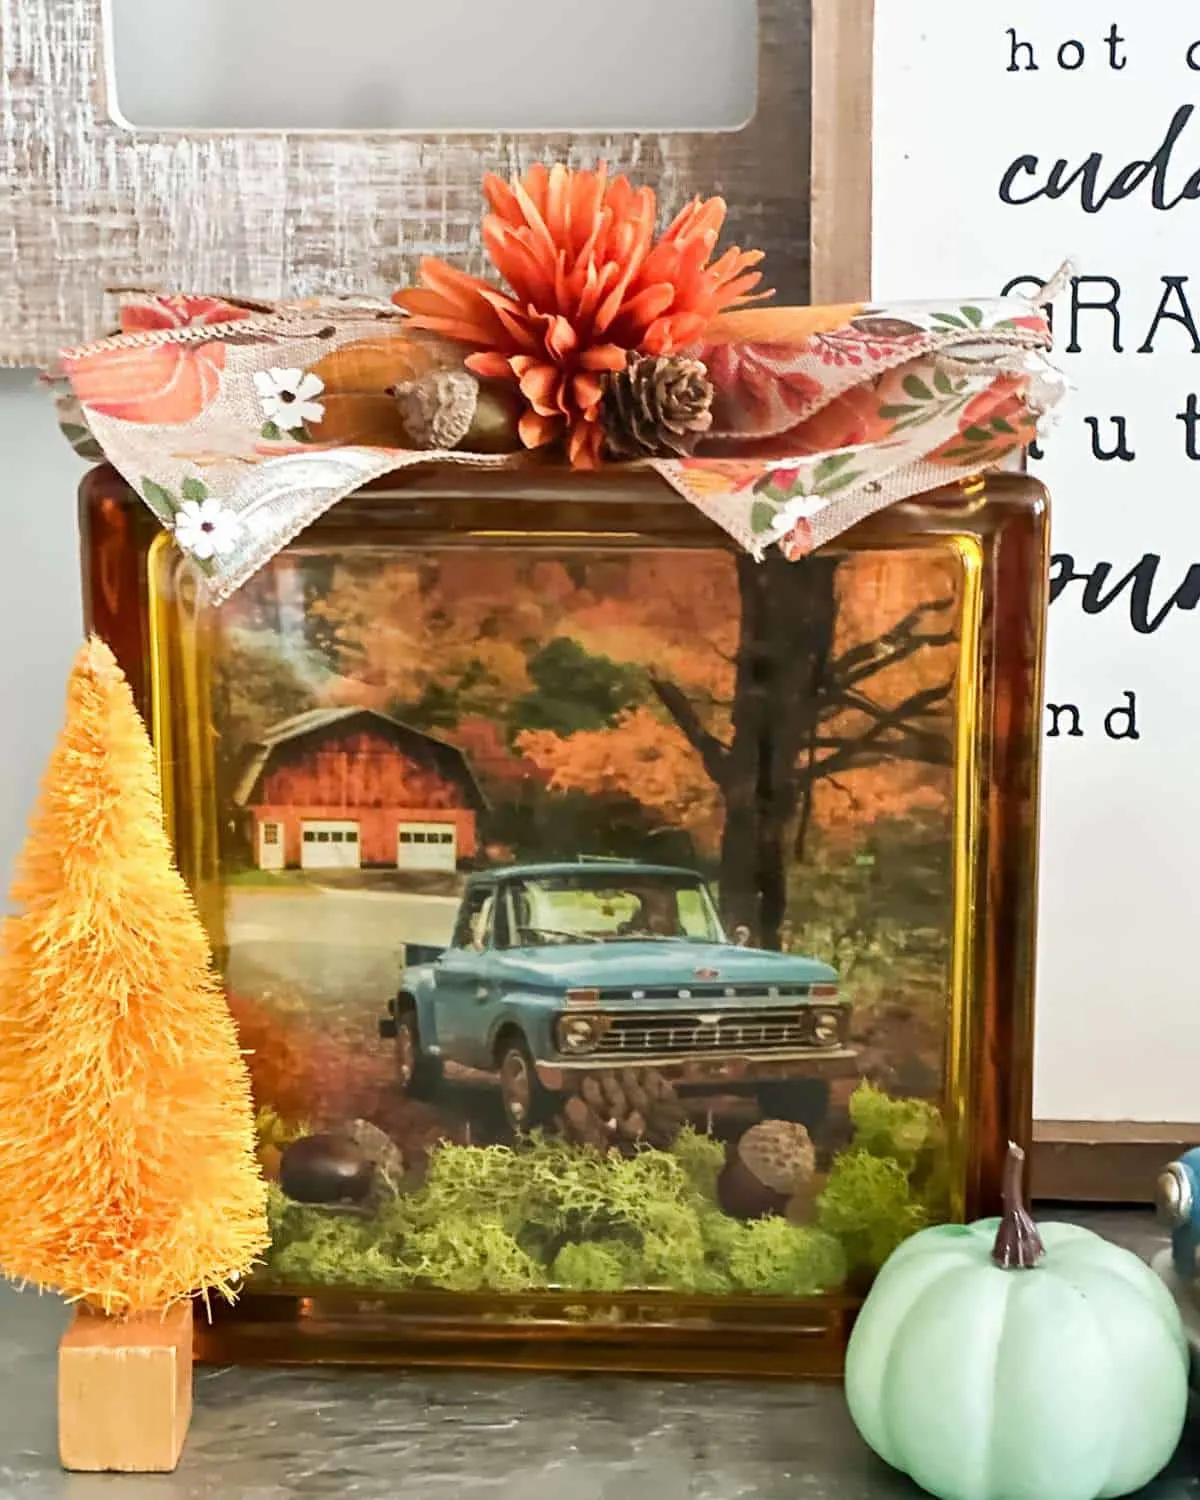
Glass block crafts are a quick and easy DIY that you can customize for any season. This fall version uses reverse decoupage and a free farmhouse truck printable, and it takes about 45 minutes from start to finish.
Whether you’re looking to create a festive centerpiece for Thanksgiving or spruce up your living room with a unique decoration, this decorative glass block idea is perfect.
Plus, with my handy free fall truck printable, you can transform ordinary glass blocks into stunning works of art in no time.
So keep reading for the step-by-step tutorial. Happy crafting!
This post contains affiliate links at no extra cost to you. Please see my full disclosure here. Thanks for supporting Our Crafty Mom.
What you’ll get in this post
- Make a fall glass block craft with reverse decoupage in about 45 minutes for roughly $10-15.
- Download a free fall truck printable and learn why cardstock works better than copy paper.
- Build a 3-D scene with moss, acorns and a ribbon bow.
- Get answers to common glass block craft questions, plus ideas for switching it up for Christmas.
If you haven’t tried crafting with glass blocks yet, you are in for a treat!
A quick search on Pinterest will show you hundreds of ideas like this pretty fall lighted glass block craft from Leap of Faith Crafting.
Want to switch it up? Use the same truck printable for a busted canvas beautiful busted canvas fall truck decor, or swap in a Christmas image and ribbon for a holiday version.
They make thoughtful gifts, but keep one for yourself to add to your own seasonal decor.
The great thing about this craft is you can find glass blocks at your local craft store like Michaels, Hobby Lobby, or Walmart. I scored mine for 60% off at Hobby Lobby.
You will find a printable how-to card at the bottom of this post to make it easy for you, but I will share some tips.
Supplies for This Glass Block Craft
- Glass Block – check Walmart, Lowe’s, Home Depot or any craft stores
- Free Fall Printable – print on scrapbook paper or cardstock
- Mod Podge
- Foam Brush
- Paper Cutter
- Fall Ribbon
- Moss
- Fall Leaves and Acorns (or any fall embellishments)
- Rubbing alcohol
- Credit card or squeegee tool
- Hot glue gun and glue sticks
- Zip tie
When looking for a glass block, be sure to buy one that has an opening to add lights or other decorations.
If you’re shopping online, search for “craft glass block with hole and cap.”
This one is perfect because it has an amber color that suits fall and it has a large rectangular opening.


Clean the glass block
Start by wiping the glass block down with a bit of rubbing alcohol to remove any fingerprints, dust or grime. Let it dry before you start.


Print the image
Print out the fall truck printable on scrapbook paper or cardstock. Simply right click on the below photo and save to your computer for printing.
Copy paper will be a little too thin for this project. We are going to be using mod podge to decoupage the image onto the glass block.


If you follow me on Facebook you know I love decoupage crafts, like this lighted Christmas jar.


Cut to size
Carefully cut the image to fit the back of the glass block. You can use scissors, but a paper cutter is the best way to get an even cut.


Cover glass block with mod podge
Use your foam brush to cover the back of the glass block with mod podge. Let it sit for about a minute or so.
Be sure that the hole opening is on the bottom.


Add a very light coat of mod podge directly to the image and secure it to the glass block.
Make sure the photo is upright with the glass hole on the bottom.
Smooth the image with a credit card or squeegee tool to work out any bubbles.


I chose to add the image to the back of the glass, a technique called “reverse decoupage”. Let dry.
The image looks more realistic and you can create a 3-D scene with fall acorns and moss as you’ll see in the next step.


Add fall embellishments to glass block
Remove the plastic cover for the hole and begin hot gluing moss to the top of the cover.


Once the moss is done, add pinecones, acorns, fall leaves or other embellishments.


I tried adding lights, but it covered the pretty image, so I left them out.
However, if you want lights, now is the time to add them. Secure the cover back on the craft block.
Make a pretty bow
Use wired ribbon to create a bow for the top of the glass block. Mine is a 2.5″ fall pumpkin ribbon.


A simple bow can be made by cutting ribbon pieces to about 6″ and layering them in a crisscross pattern.


Secure them in the middle with a zip tie. Easy peasy! Attach to the top with a dab of hot glue.
You can also hot glue a few fall flowers to cover the center and give it a bit more texture and dimension.


I’m so happy with how it turned out and it took only about 45 minutes to make.
It looks so pretty in a fall vignette on an entryway table, or on shelves.


Glass Block Craft FAQs
Craft glass blocks are hollow blocks that work well for lighted decor, seasonal scenes, printable displays and gifts. This project uses reverse decoupage and a few embellishments for a fall look. Swap the printable and ribbon to make it for Christmas or any other season.
Check craft stores like Michaels or Hobby Lobby, plus Walmart, Lowe’s or Home Depot. Whichever you choose, make sure the block has an opening if you want to add lights or embellishments.
Not directly. Print the image on scrapbook paper or cardstock, then attach it to the back of the block with mod podge (reverse decoupage). Copy paper is too thin for this.
Yes, if your block has an opening. I left lights out of this one because they covered the image, so decide before you secure the cover back on.
I hope you enjoyed this easy glass block craft. How would you decorate with yours?
Let me know if you give this a try.
If you do, please tag me on Facebook or Instagram with #inspiredbyourcraftymom so I can see it.
It totally makes my day!
I’d love it if you would share this with your friends by saving the below image to your favorite Fall/Halloween or home decorating board on Pinterest.


Download Your Fall Truck Printable
I’ve had several questions about downloading my printables. When you click the download button below the image, it will immediately show as a full size image.
Simply right click on the image and save it to your computer. Hope this helps! 🙂


Thank you for stopping by. Happy Fall!


Glass Block Craft for Fall
Let's make a beautiful fall glass block craft with a farmhouse truck image that you can download free!
Materials
- Glass Block
- Free Fall Printable
- Mod Podge
- Foam Brush
- Fall Ribbon
- Moss
- Fall Leaves and Acorns
Tools
- Paper Cutter
- Hot Glue Gun and Glue Sticks
Instructions
- Clean the glass block.
- Print the image and cut to fit the back of the glass block.
- Use your foam brush to cover the back of the glass block with mod podge.
- Add a very light coat of mod podge directly to the image and secure it to the glass block.
- Use a credit card or squeegee tool to remove any bubbles. Let dry.
- Remove the plastic cover for the hole and begin hot gluing moss to the top of the cover.
- Add pinecones, acorns, fall leaves or other embellishments.
- Create a simple bow with wired ribbon and hot glue it to the top of the block.
- Finish with a few fall flowers.
Recommended Products
As an Amazon Associate and member of other affiliate programs, I earn from qualifying purchases.
-
 Mod Podge CS11302 Waterbase Sealer, Glue and Finish, 16 oz, Matte
-
 Surebonder Cordless/Corded High Temperature Mini Hot Glue Gun With Detail Tip, 20 Watt, Recharge With Portable Heat Stand (CL-195F)
-
 24 Pcs Foam Brush Set, Foam Paint Brushes, Wood Handle Sponge Brushes for Painting, Foam Brushes Sponge Paint Brush for Staining, Varnishes, and DIY Craft Projects (1'', 2'' and 3'')
You may also like these fall DIY wreath ideas and home decor:
- Thrift Store Fall Wreath Makeover
- Rustic Glam Fall Wreath
- Fall Watercolor Printables
- Neutral Fall Decorations
- Fall Balcony in Classic Autumn Colors
You can find me on social media below: