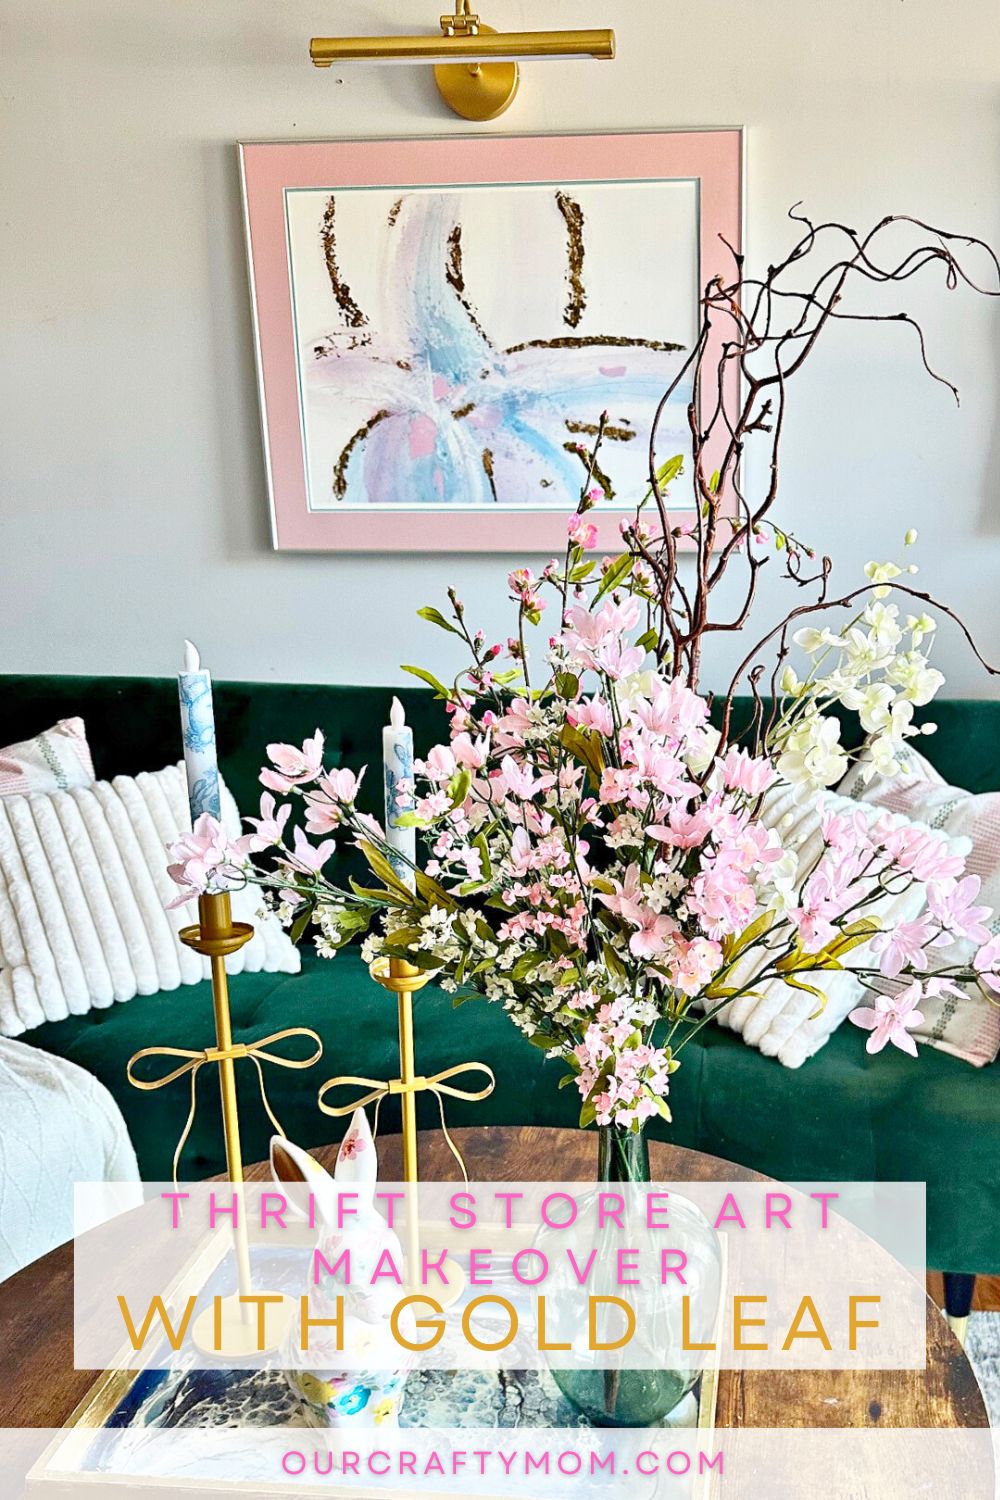
Learn how to apply gold leaf to canvas with this easy thrift store wall art makeover. Turn thrifted art into a beautiful statement piece.
This post contains affiliate links. If you shop the links in this post there is no additional cost to you, but I may earn a small commission. Please see my full disclosure here.
Thrift Store Wall Art
It’s time for this month’s Thrift Store Decor Team challenge, my favorite day of the month and hopefully yours too!
Be sure to read to the bottom of this post to check out the links for all of the DIY projects.


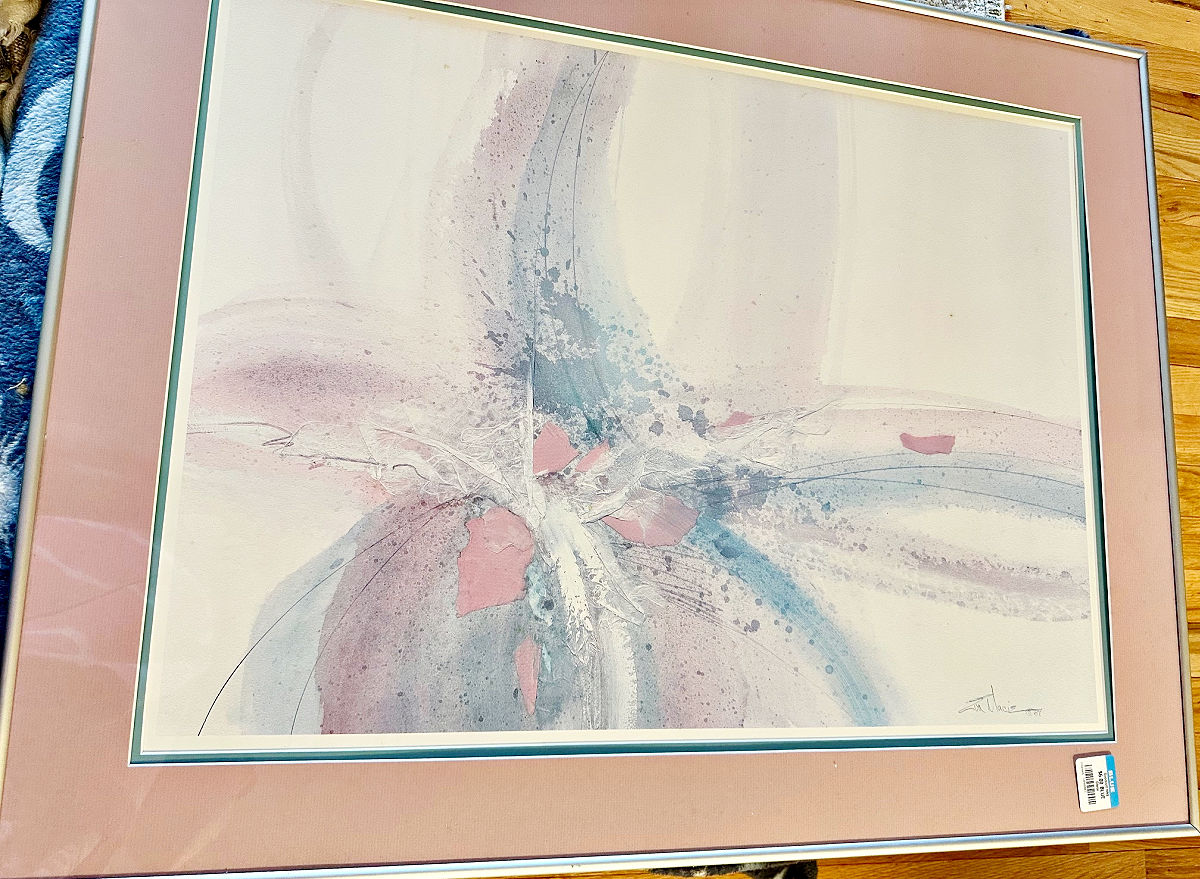
You never know what you’ll find at Goodwill, and this abstract wall art was a lucky discovery.
I was looking for something with soft spring colors for my living room, and the pink and blue pastels immediately caught my eye.
The abstract design had promise, but the $3 price tag made it impossible to pass up! I had a feeling it could really shine with a little gold leaf detail.
Supplies for Thrift Store Art Makeover
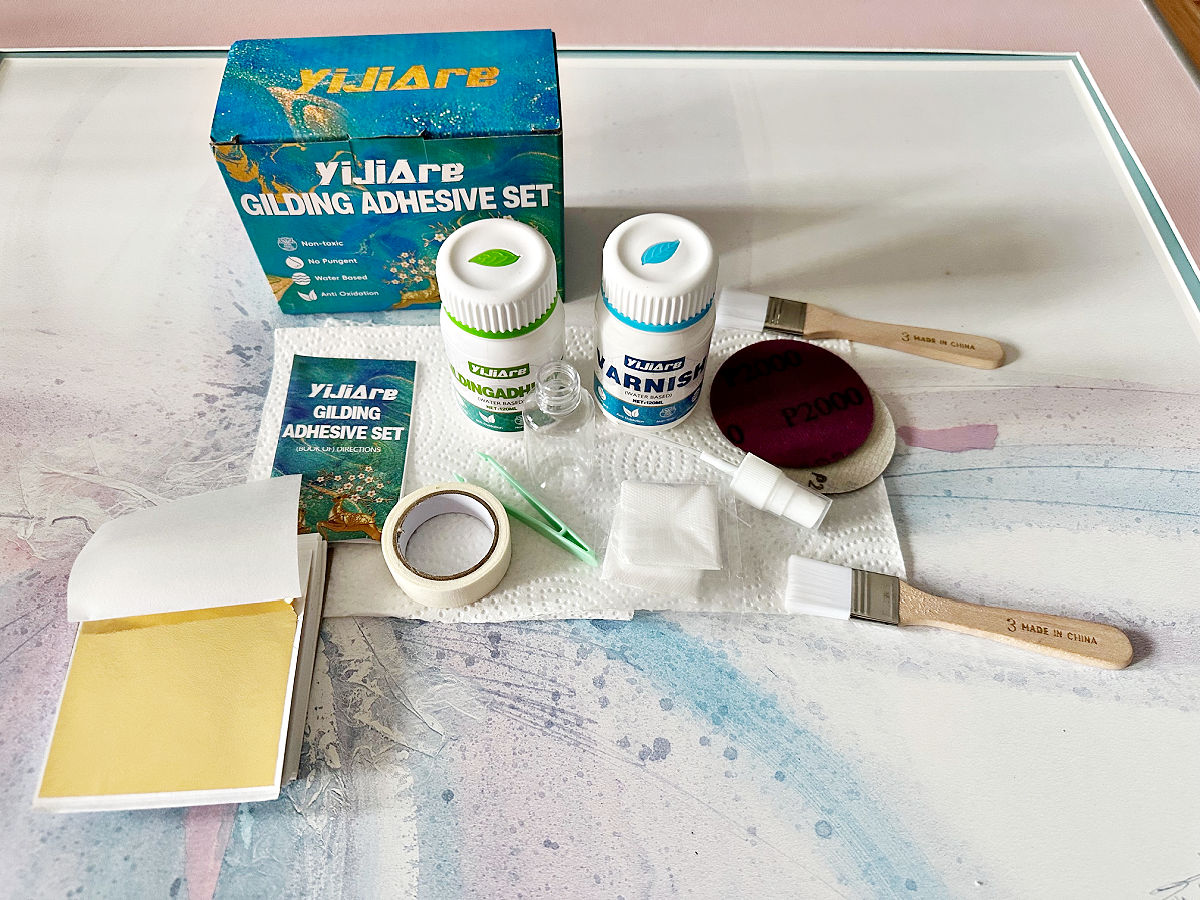
Here are the supplies I used for this canvas wall art. The good news is you only need a gold leaf kit and your choice of artwork.
- Wall Art – This gilding adhesive tutorial can be used on any canvas art. Find one that you like from thrift stores, flea markets, yard sales, or even your own home!
- Gold Leaf Gilding Adhesive Set – I love that this kit includes everything you need, the adhesive, gold leaf, brushes, varnish and even tweezers!
How to Apply Gold Leaf to Canvas
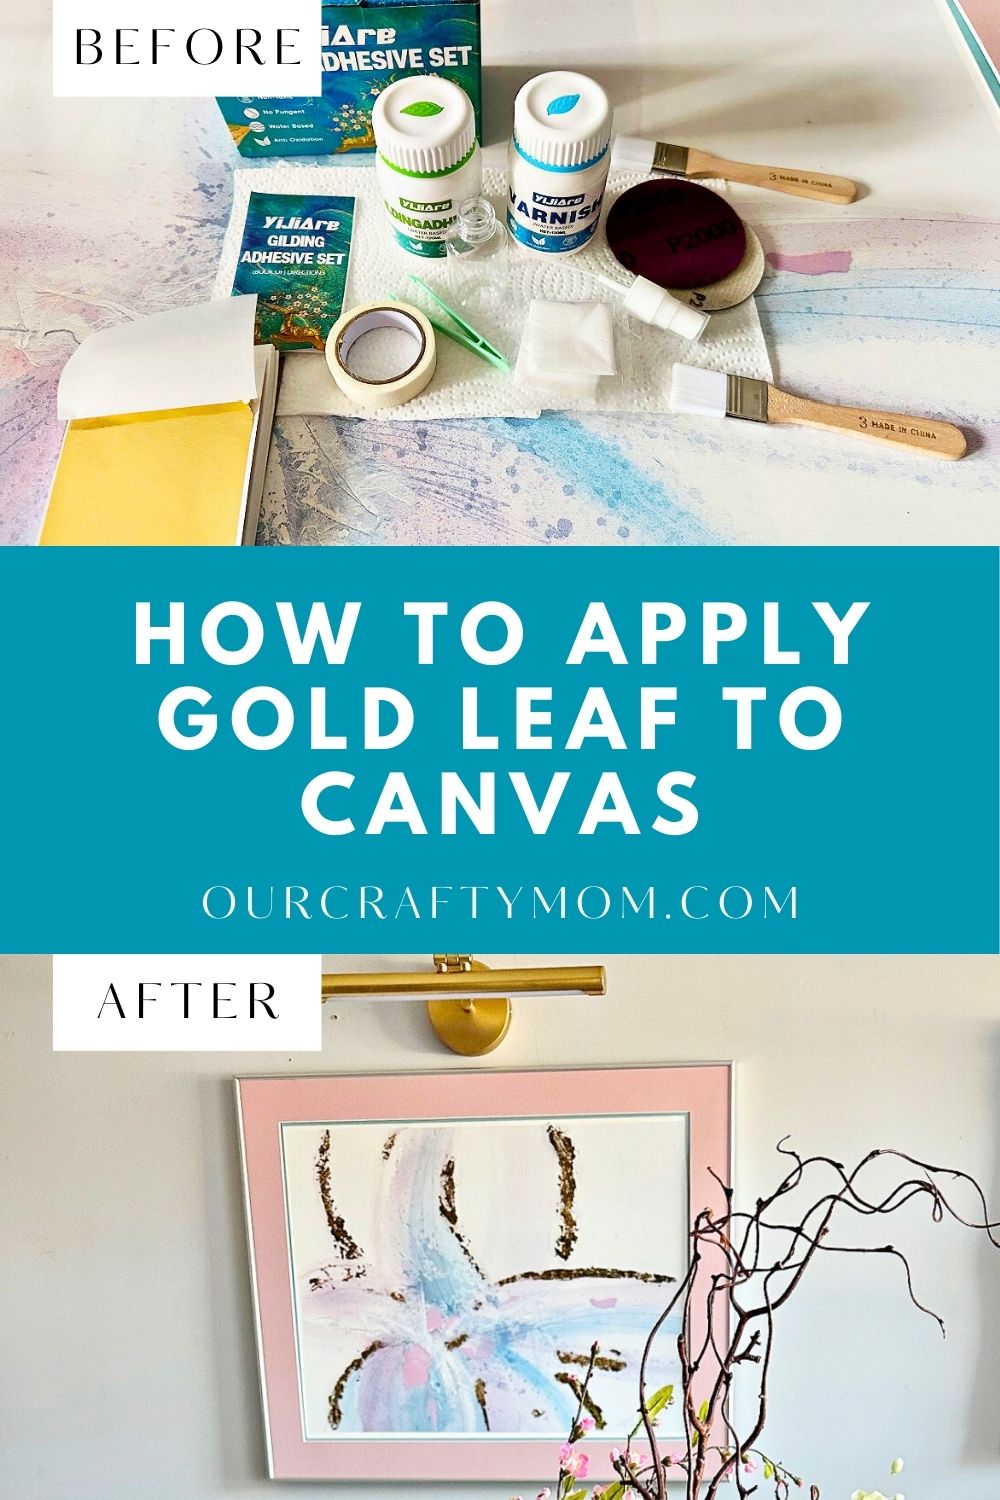
The first thing I did was remove the glass from the wall art. This was the most difficult part of the entire process.
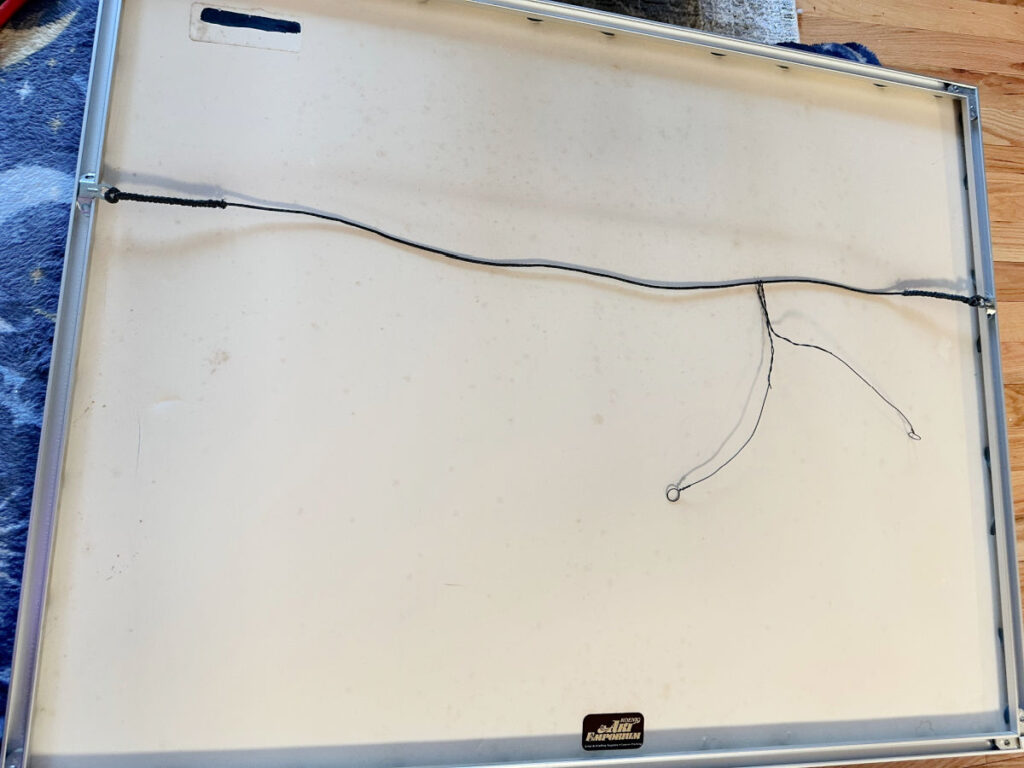
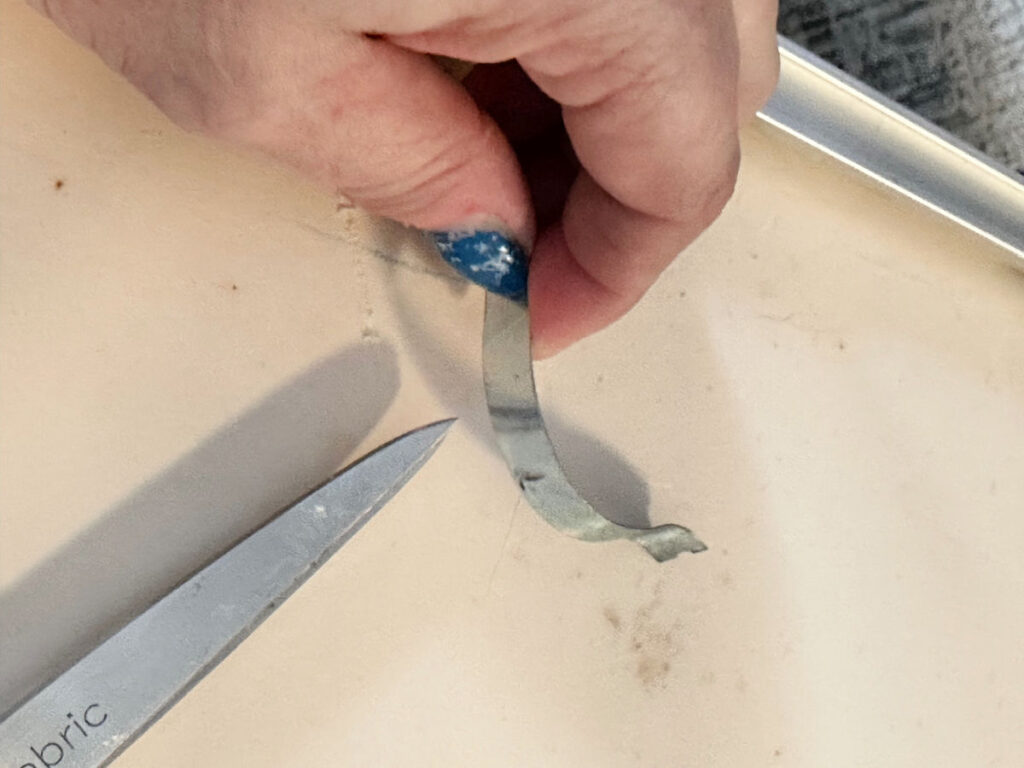
I removed the clips from the back of the canvas along with the glass. You can save yourself a step and use a canvas without glass.
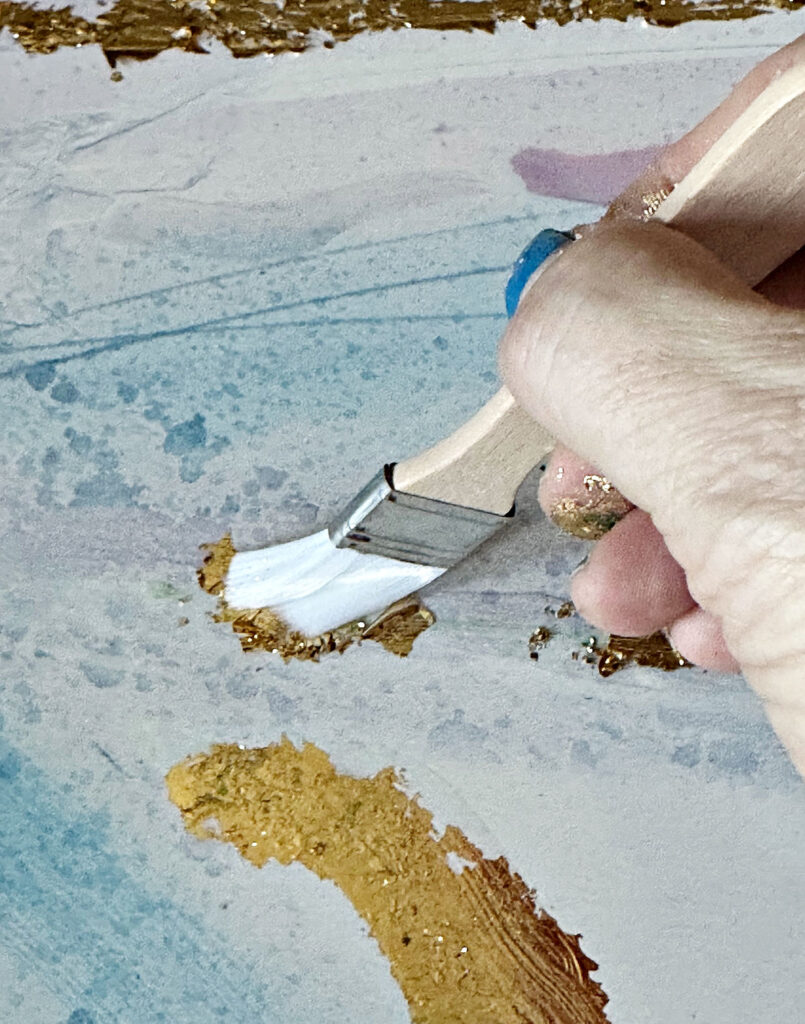
Step 1. Apply Gilding Adhesive
The first step is to apply gilding adhesive directly to the area where you want the gold leaf. The kit makes it super easy as it includes both the adhesive and a brush.

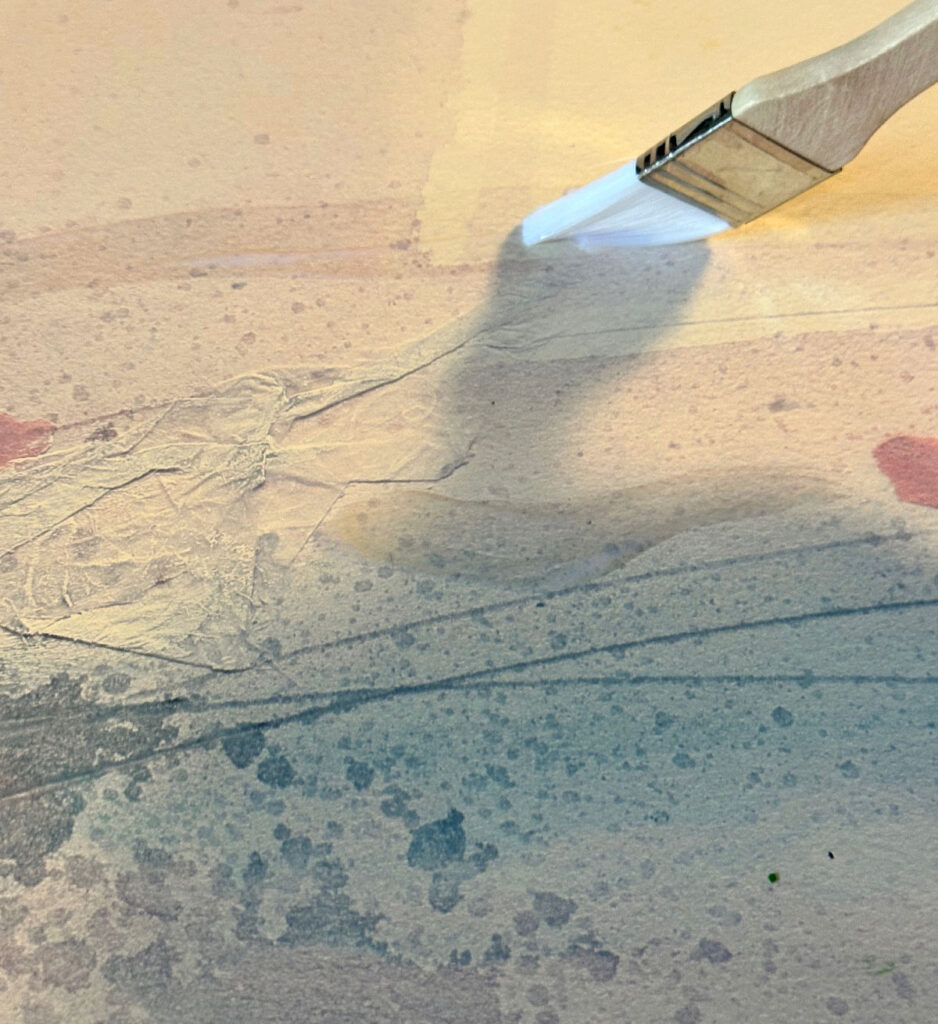
Quick tip: you can also use mod podge if you don’t purchase the kit.
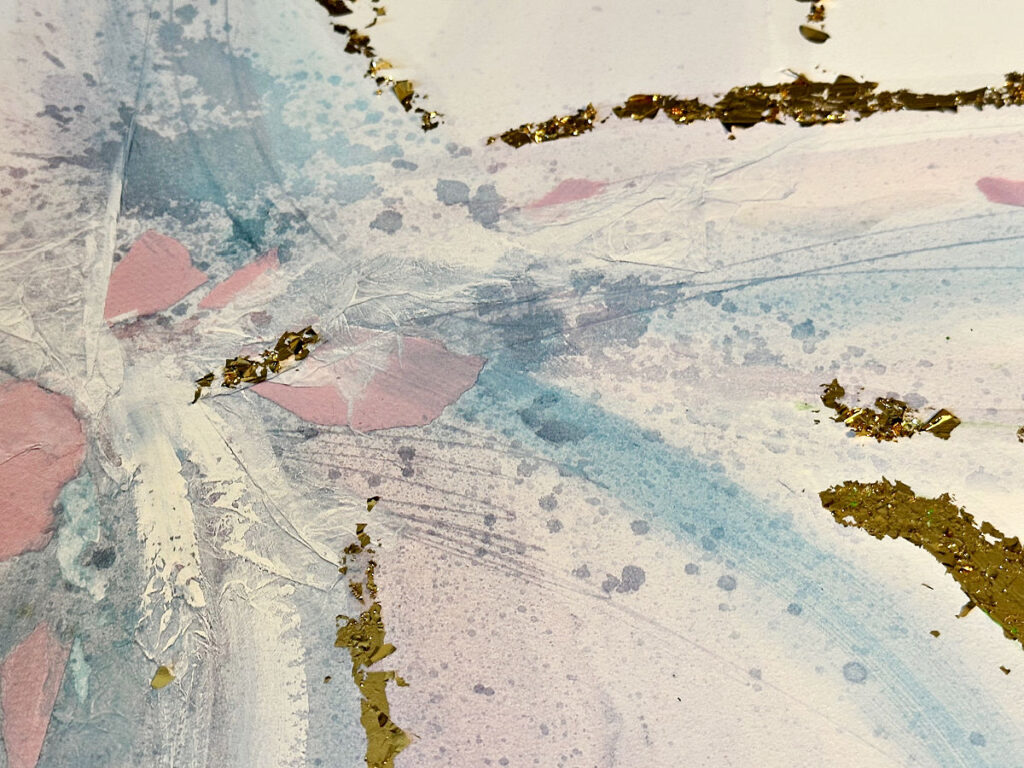
Step 2. Apply Gold Leaf
Use the included tweezers to apply gold leaf on top of the adhesive.
Repeat the process of adding the adhesive and the gold leaf to the art until you are happy with the design.
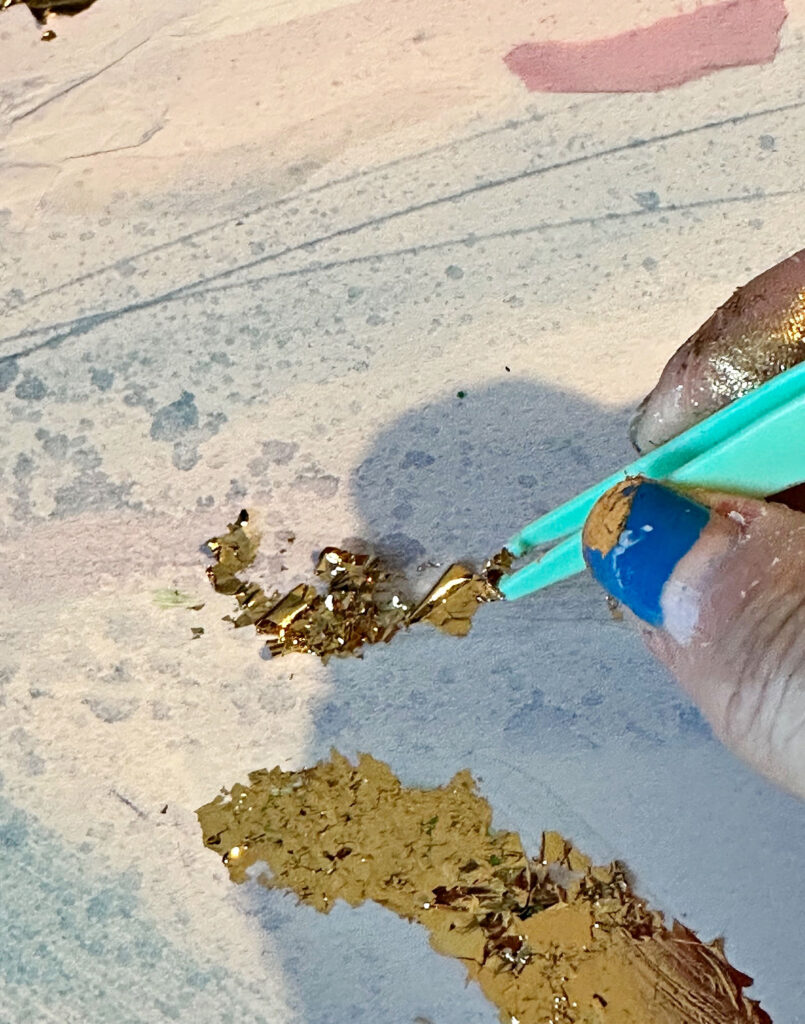
Once dry, use a brush to remove any lose particles and give the gold a beautiful shine.
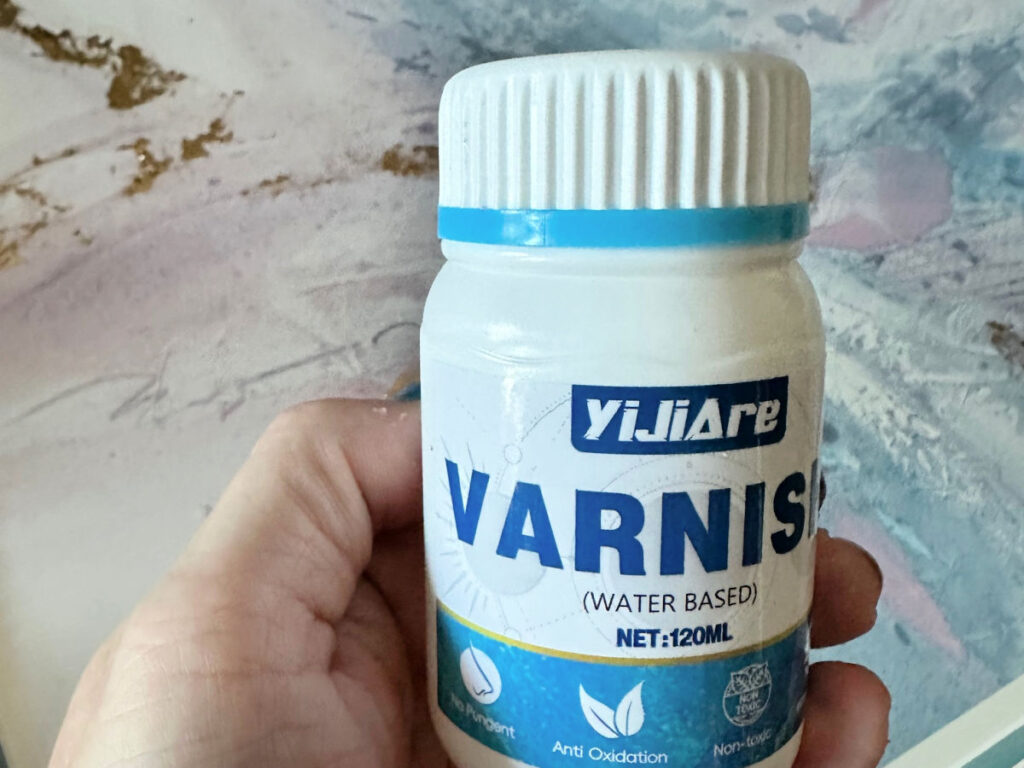
Step 3. Apply Varnish
To seal and protect the gold leaf, add a varnish over the gold leaf detail. Let completely cure overnight.
I chose to leaf the glass off, but you can add it back if you prefer that look.
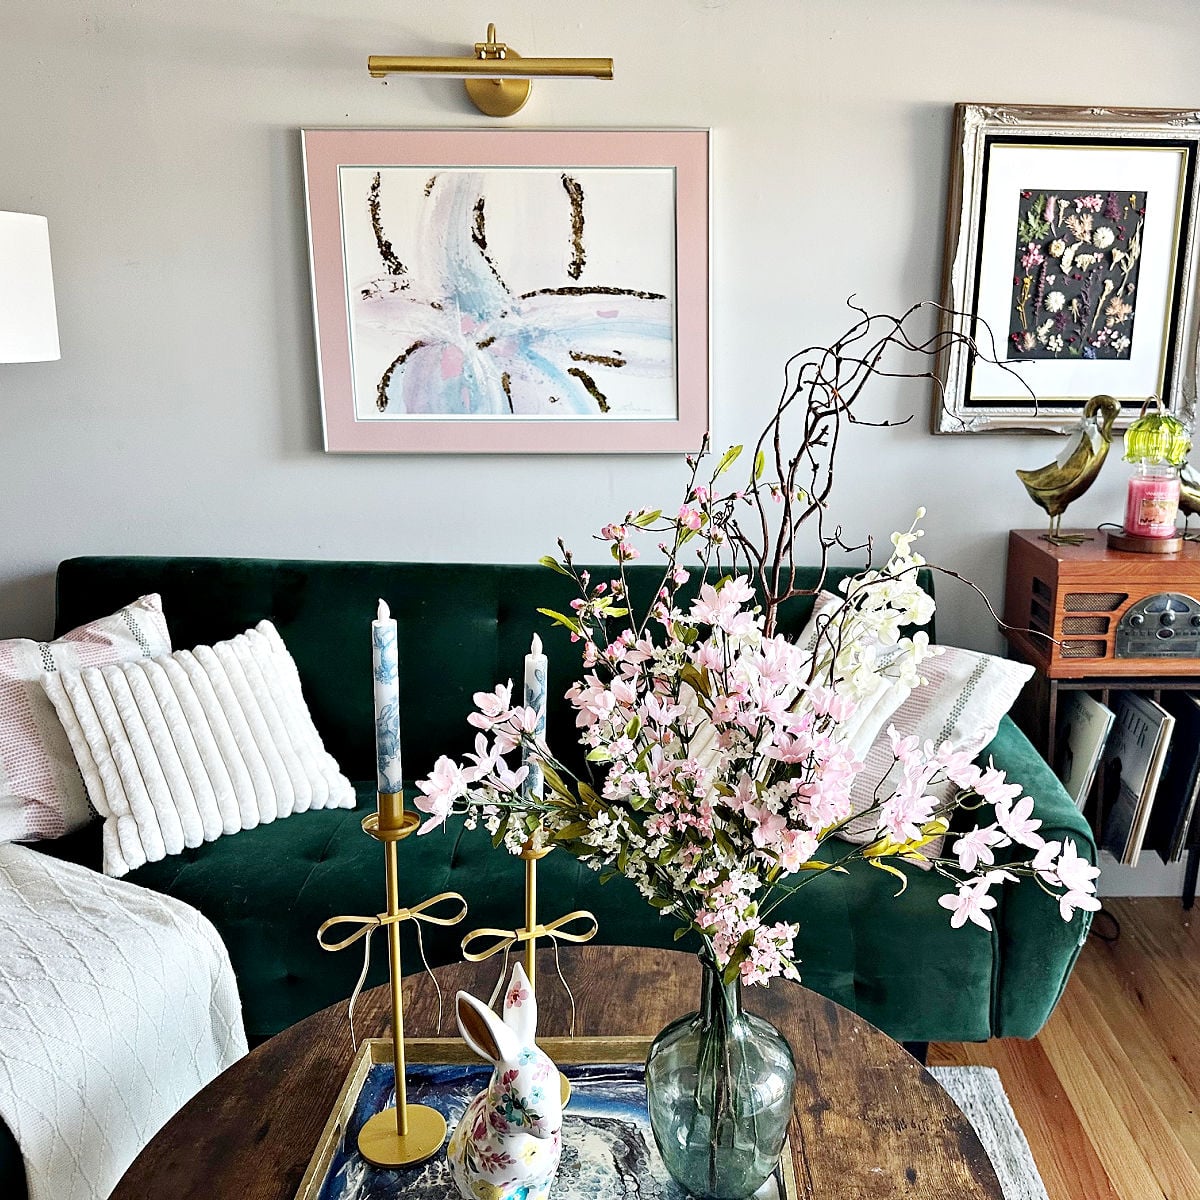
Completed Thrift Store Painting Makeover
Once it was finished, I was so happy with how my thrifted artwork makeover turned out. The gold picture light above it really makes it a feature in the room.
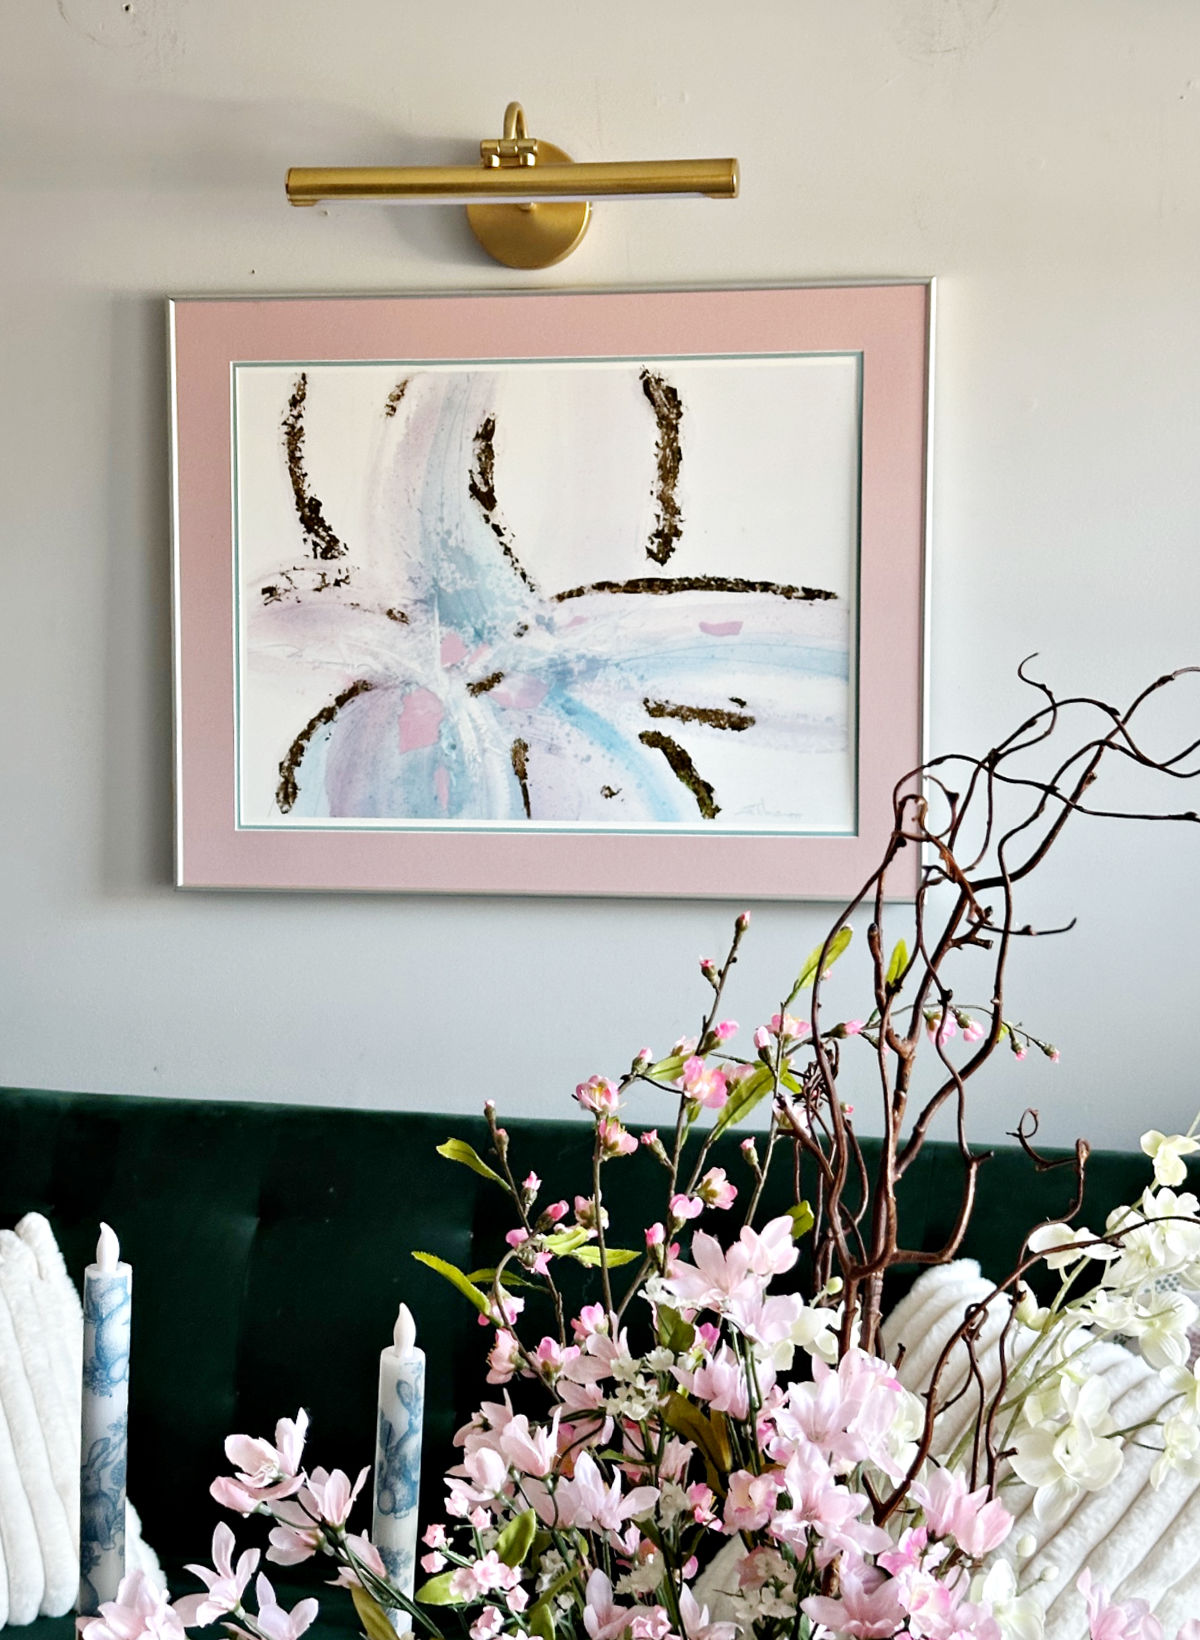
The colors add the perfect pop of spring I was looking for and blend beautifully with my new spring curtains.
And if you enjoy DIY wall art, don’t miss this beautiful pressed flower wall art tutorial.
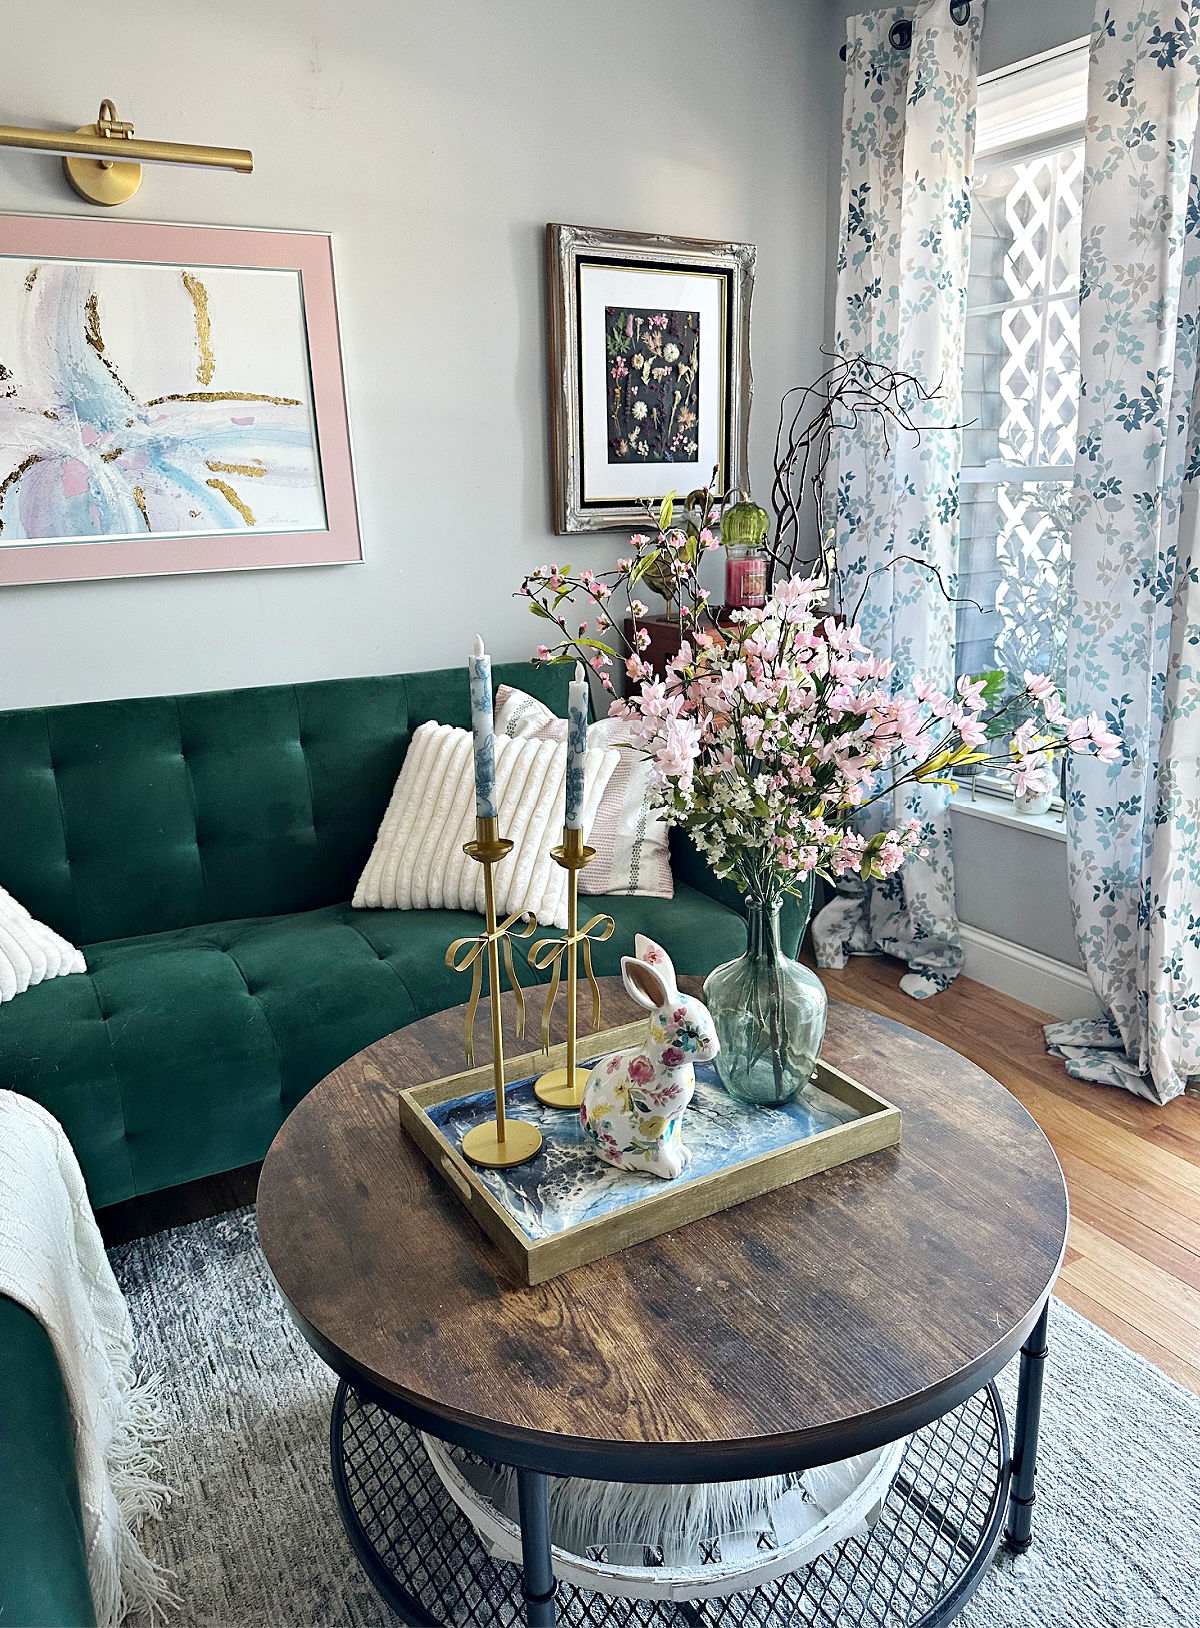
Once I finished the art, I started styling the coffee table with a few spring favorites.
My floral bunny from HomeGoods (a find from last season) made an appearance, along with pretty gold bow candlestick holders featuring my DIY chinoiserie bunny decoupage candles.
A thrifted demijohn filled with spring florals completes the living room coffee table decor.
I hope you are inspired to give gold leafing a try. It’s a great way to take inexpensive art to the next level in just a couple of simple steps.
If you have any questions about the process, please let me know in the comments.
Thanks so much for stopping by. Happy thrifting!


PIN FOR LATER
I’d love it if you would share this article with your friends on Pinterest by pinning the below image.
It helps my blog grow and doesn’t cost a thing! 🙂
Thrift Store Decor Tour
Now, it’s time to hop on over to see the rest of the Thrift Store Decor Tour. You can take the tour by clicking the links below the “before” makeovers photo collage.
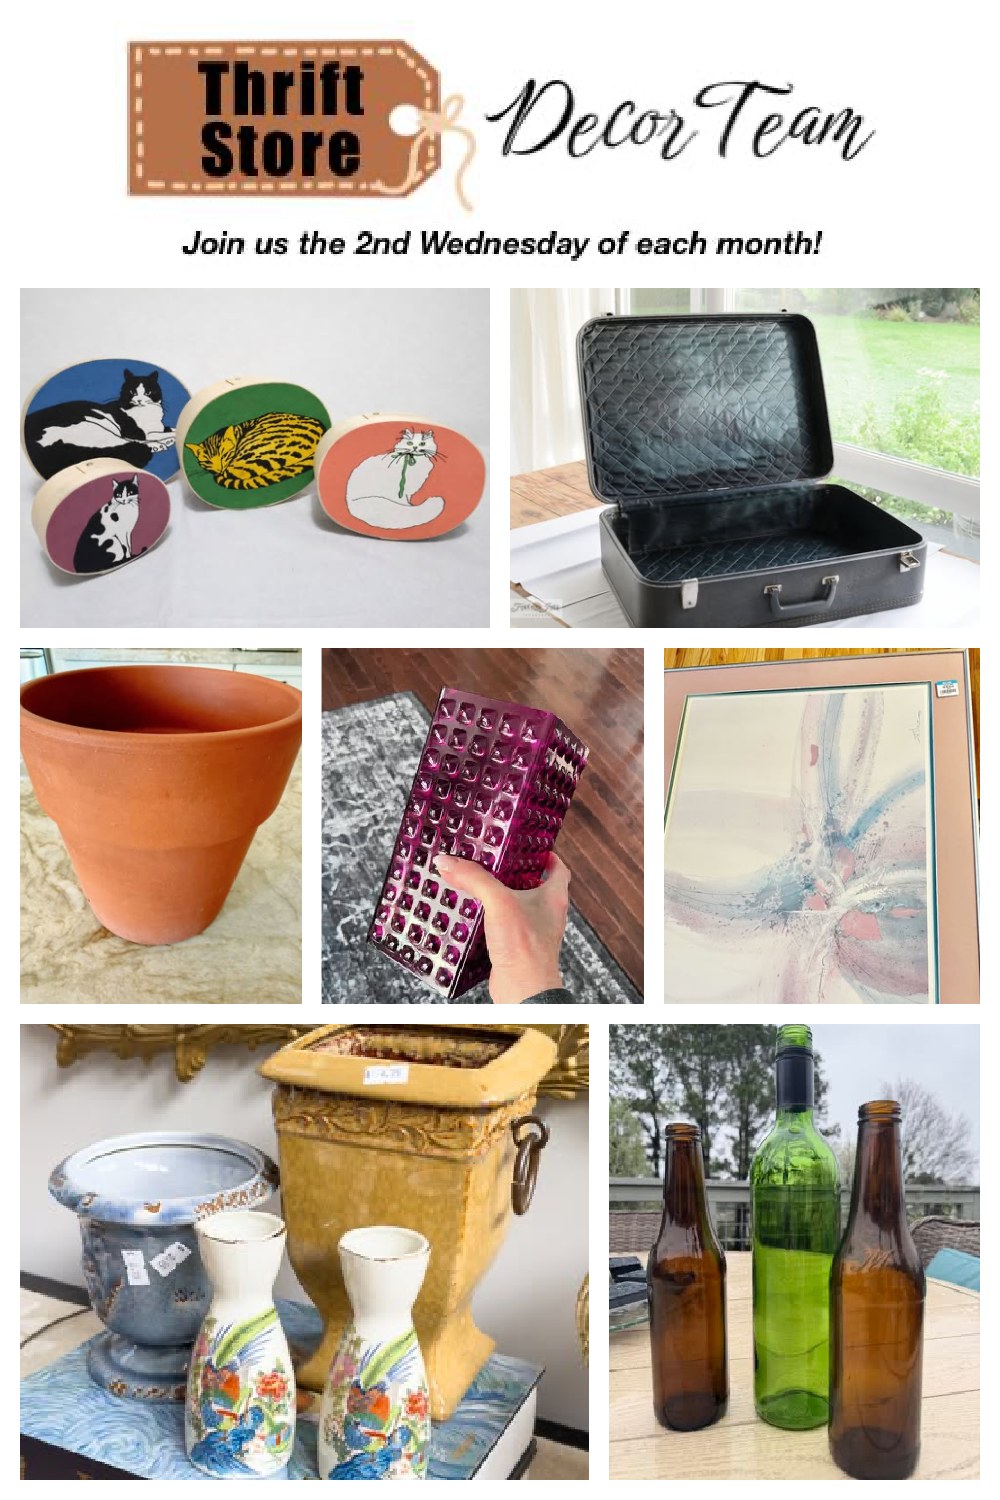
- Thrift Store Cat Boxes-Decoupage Makeover from My Repurposed Life
- Style a Classic Coffee Table with Thrifted Items from Our Southern Home
- How To Age Terracotta Pots from My Uncommon Slice of Suburbia
- Wine Bottle Centerpiece from Shop at Blu
- How to Apply Gold Leaf to Canvas from Our Crafty Mom
- Vintage Suitcase into a Wall Storage Cabinet Writing Station from Funky Junk Interiors
- DIY Outlet Cover Picture Frame from Exquisitely Unremarkable
- Free Home Decorating Ideas Using Colored Glass Vases from Redhead Can Decorate
Here are even more DIY wall art ideas:
- Chinoiserie Wall Art Printables
- Wireless Wall Sconces
- Old Window Decor Ideas
- Best Upcycled Wall Art Ideas
- Moss Garden Wall Art
- TikTok Viral Ghost Art
Follow me on social media below: