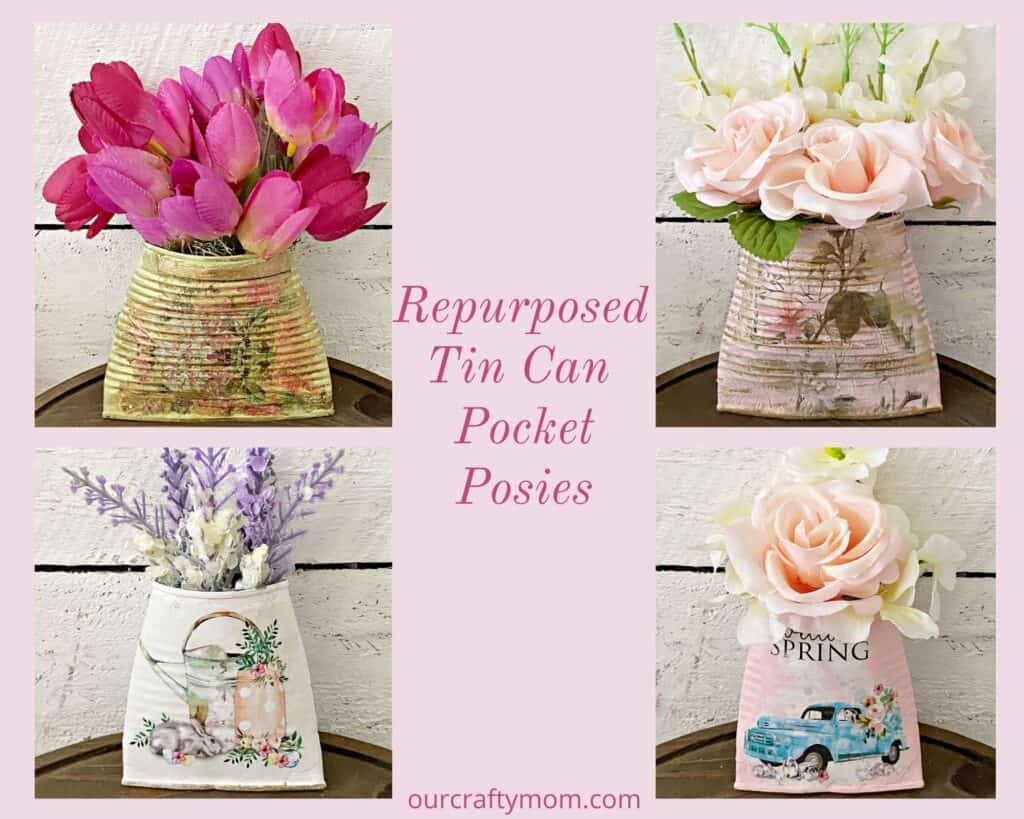
Tin can wall pocket planters are all the rage! This handcrafted tin can pocket posey is filled with beautiful faux flowers and can be hung or stood on a shelf.
I’m always looking for ways to recycle things and use them in a new way.
So when I saw these tin can wall pocket planters, I knew I had to make one!
Not only are they super cute, but they’re also really easy to make.
You just need a few inexpensive supplies and a little bit of time.
And the best part? You can customize them any way you want.
So grab some old cans and get started!

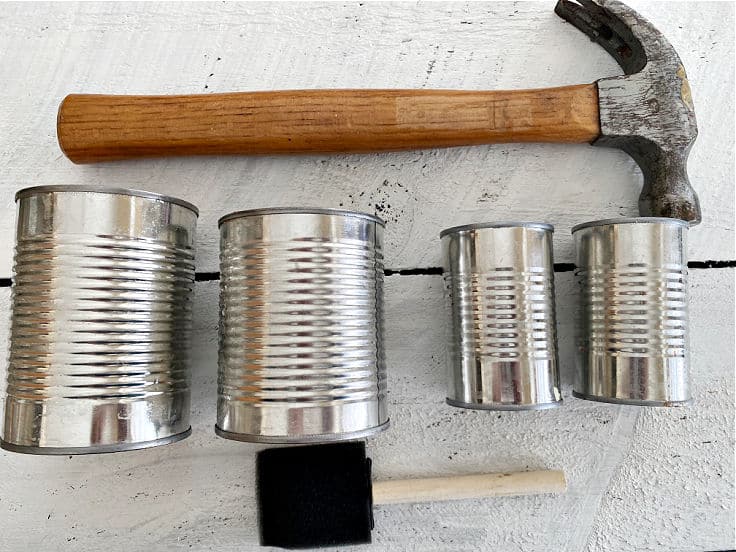
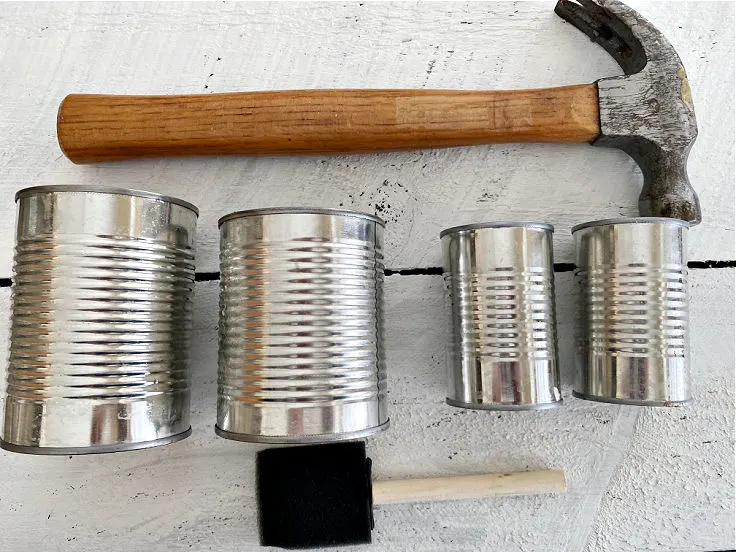
Supplies for Tin Can Wall Pocket Planters
- Empty Tin Cans
- Download Free Printables HERE – I also used napkins
- Mod Podge – I love this bundle!
- Moss
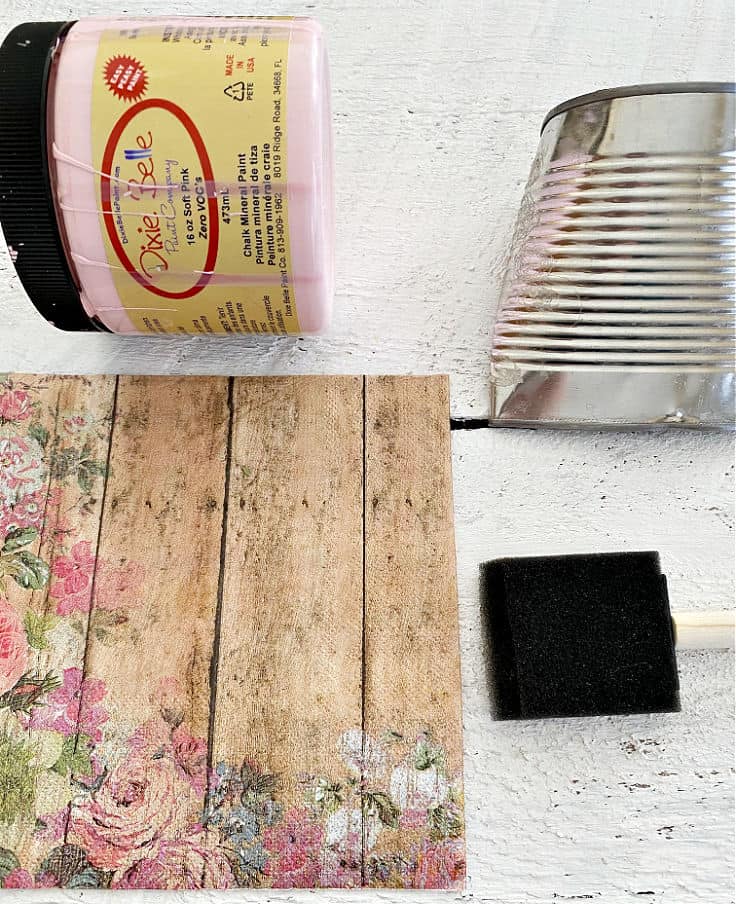
- White Chalk Paint
- Dixie Belle Soft Pink Paint
- Foam Brush
- Hammer
How to Make Tin Can Wall Pocket Planters
Step 1. Prepare the Tin Cans
The first thing you need to do is gather your tin cans and remove the labels.
If you have any glue residue left on the can you can use a little goo gone adhesive remover.
Give them a quick wash to remove any leftover food inside.
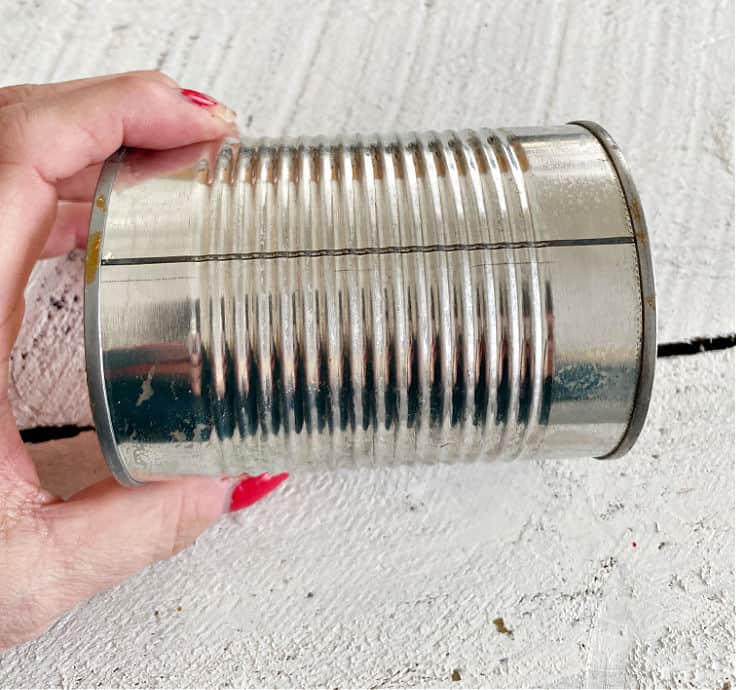
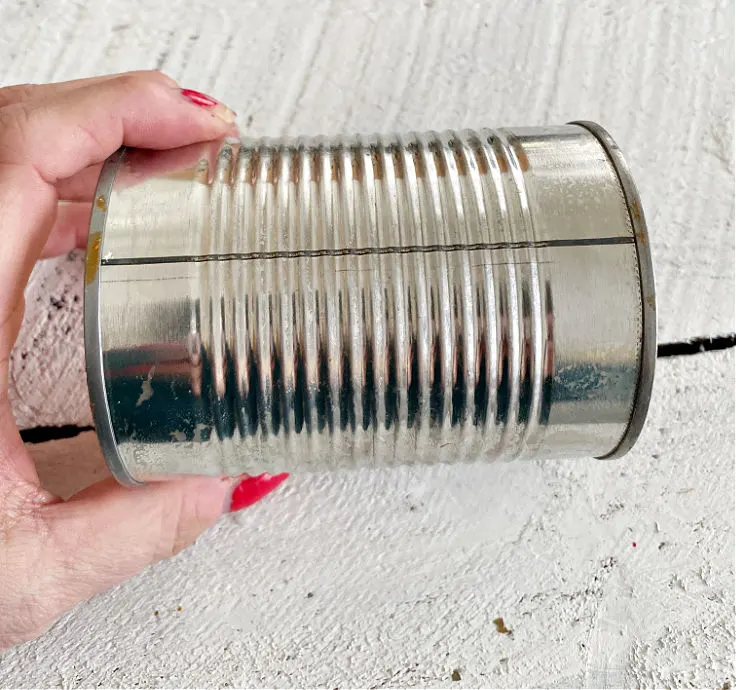
Step 2. Crush the Bottom of the Tin Cans
In order to flatten the cans, you have to use cans that have the same top and bottom.
You won’t be able to use a can opener to remove the bottom from cans with a rounded bottom.
Whenever I go to the grocery store now I’m always checking the bottoms of the cans!
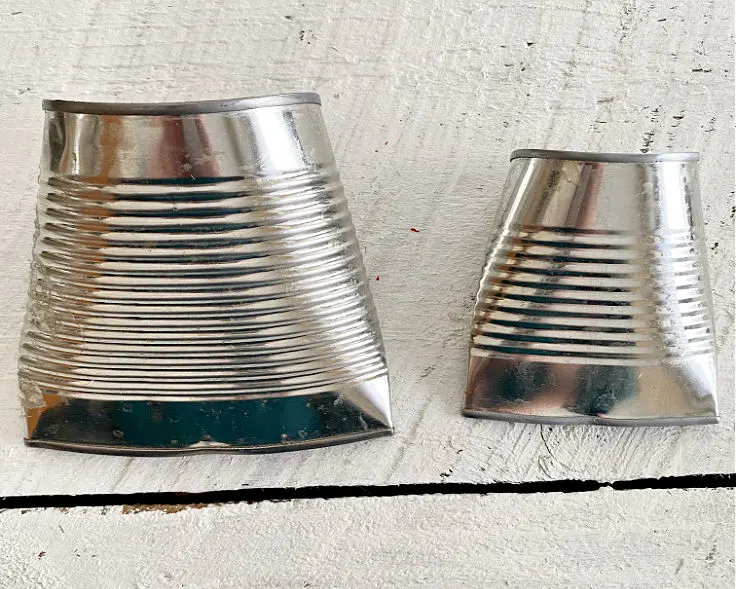
I used two different sizes for these pocket posies. Hunt’s tomato paste and spaghettios.
I’m on the hunt for the extra-large cans so I can make a planter to use outside with real flowers.
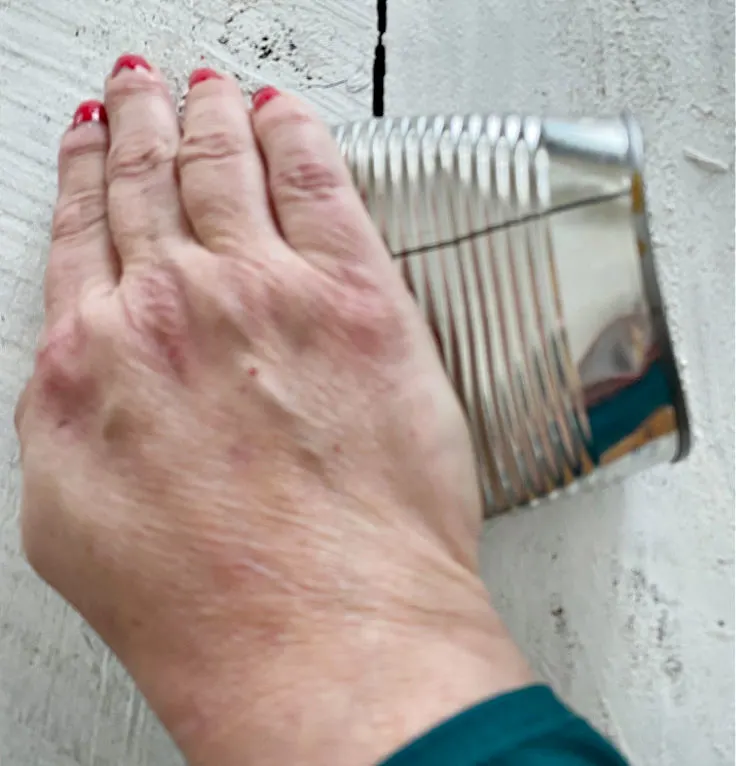
Place the tin can on its side so the seam is up. Then you can use your hand to flatten the can.
It doesn’t take much pressure at all.
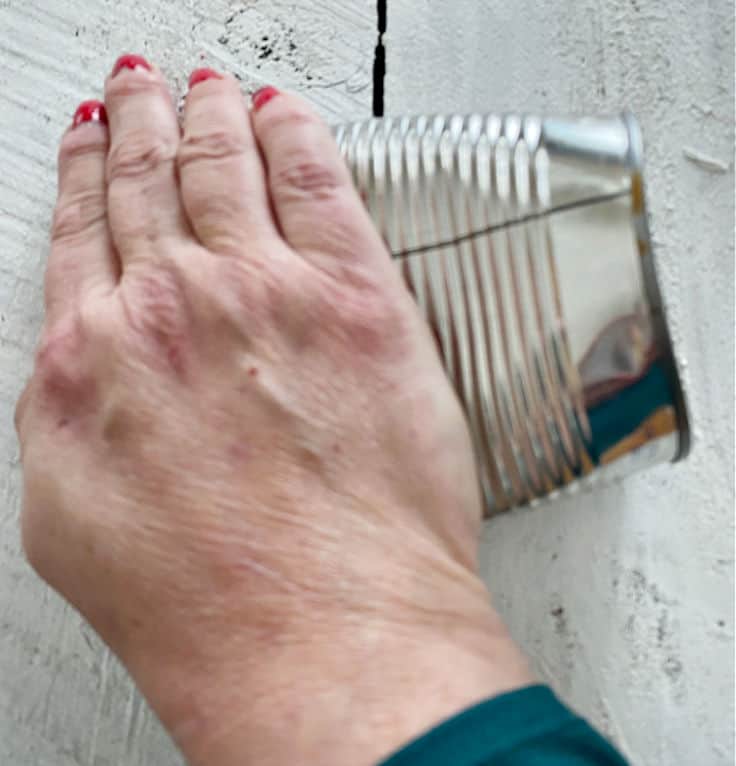
Step 3. Use a Hammer to Close the Bottom of the Tin Cans
Now it’s time to take out a little aggression on the tin cans! Trust me, this is good therapy. 🙂
Use a hammer or mallet to seal the tin can.

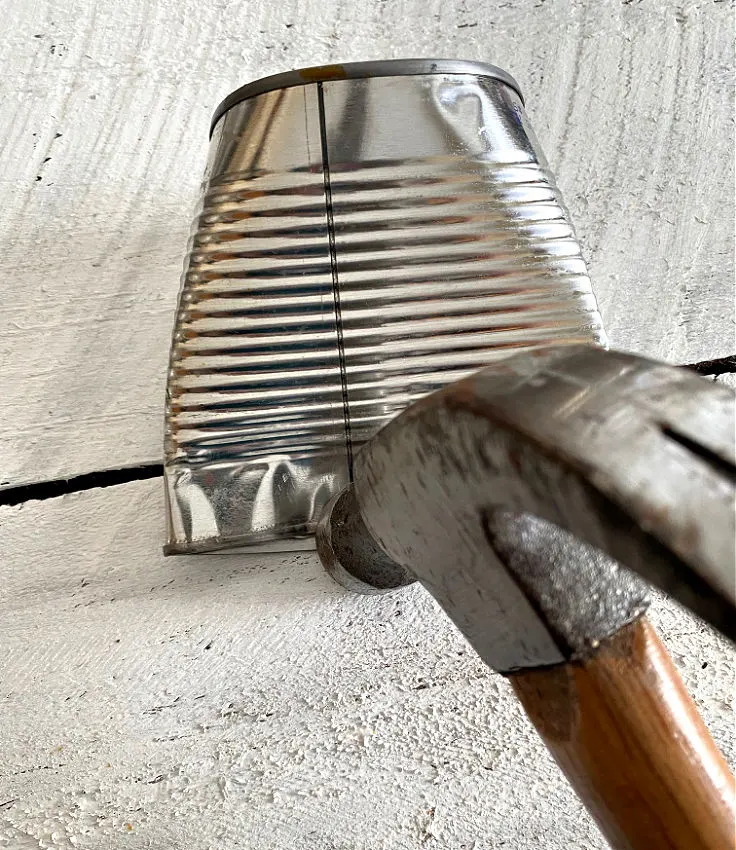
Since I am using silk flowers it doesn’t have to be completely closed, but if you are adding real flowers and soil you want to make sure it is nice and sealed.

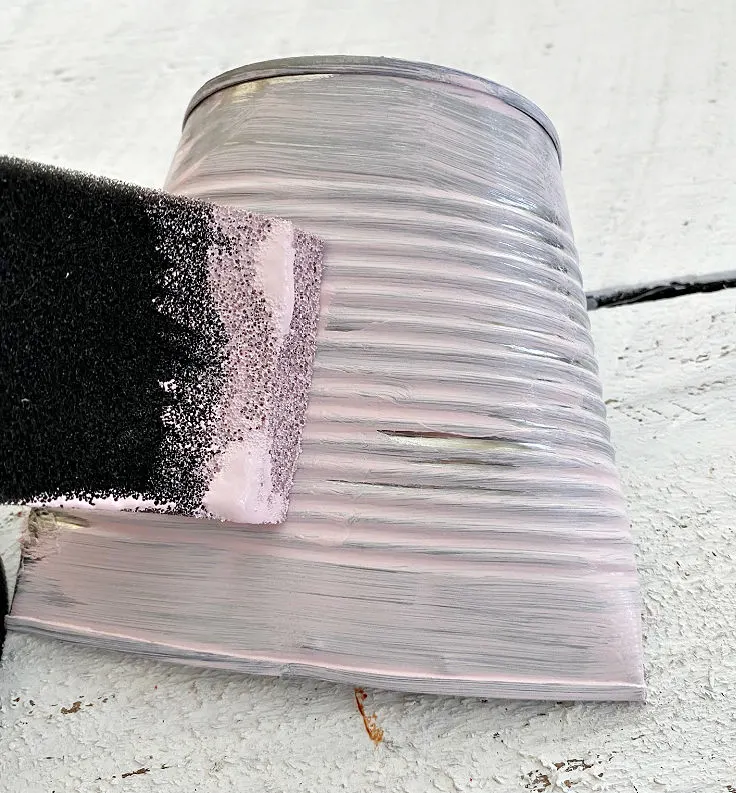
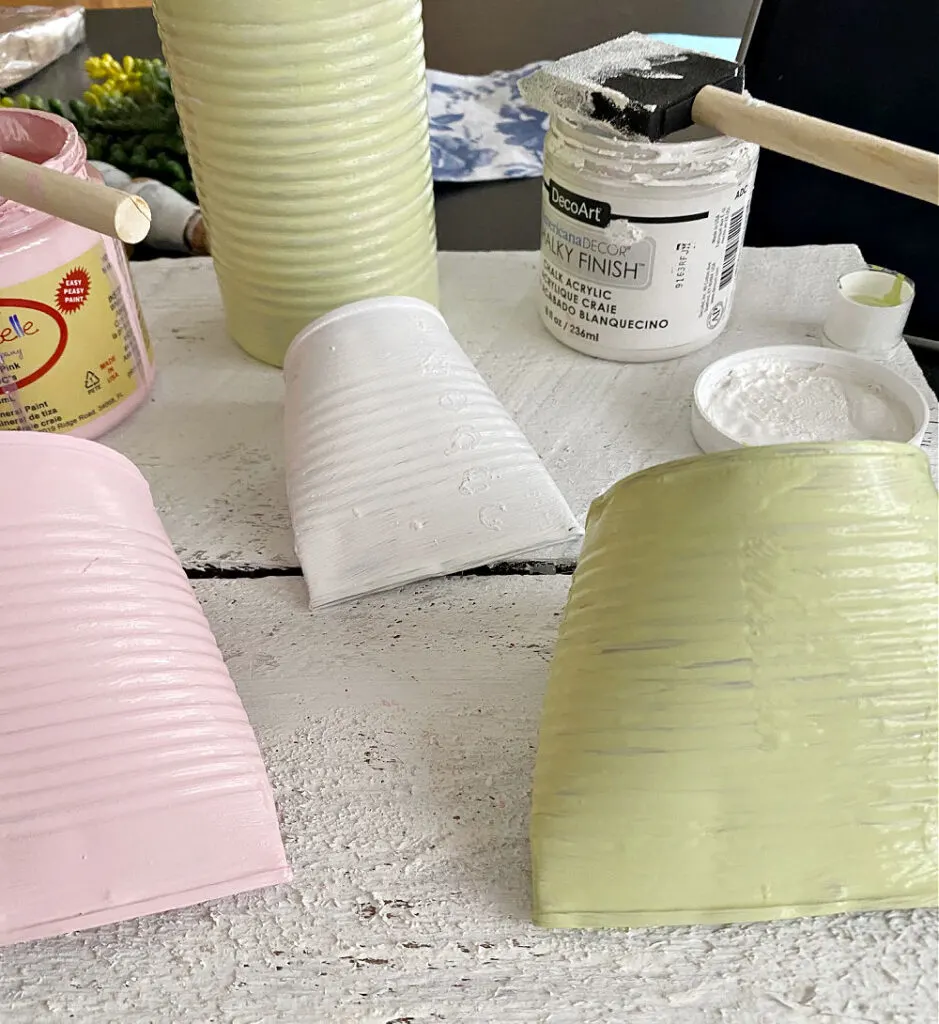
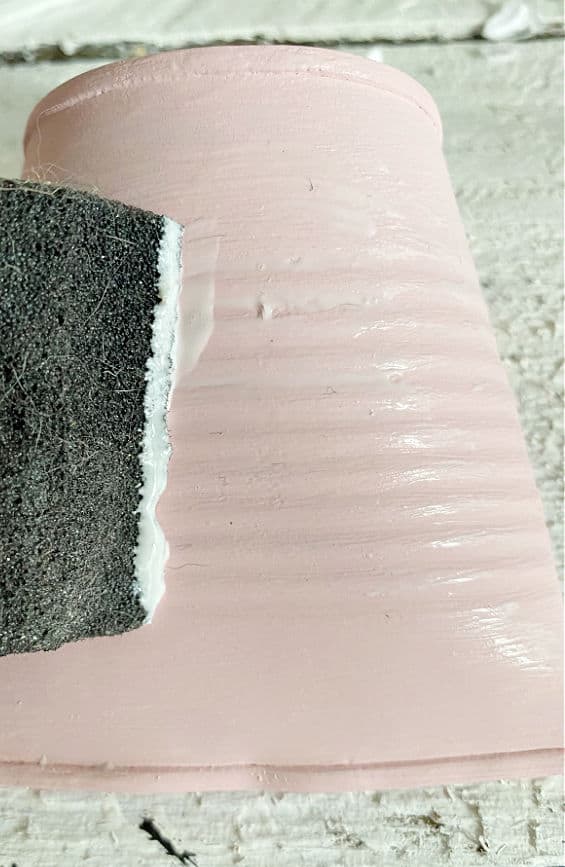
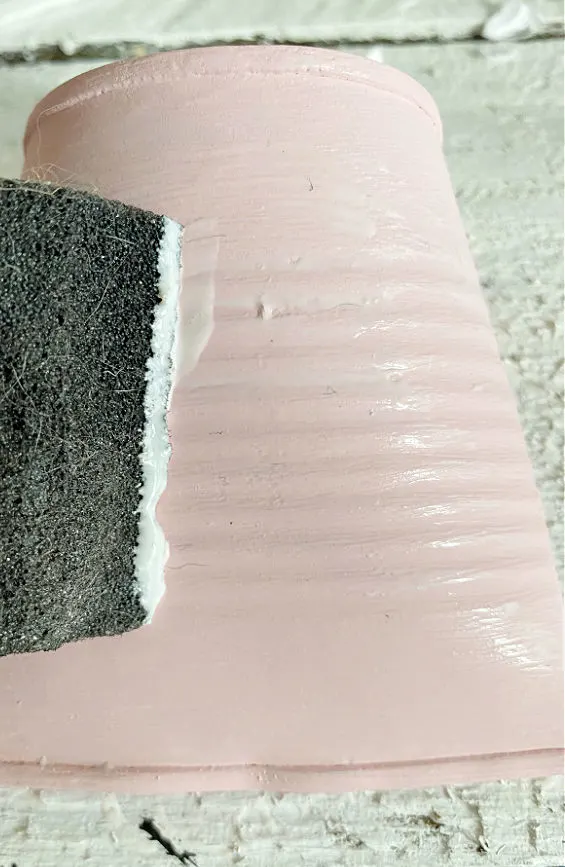
Step 4. Paint the Tin Cans
Gather your favorite paint to paint the tin cans.
I used pretty soft colors in pink and sage green, plus white chalk paint.
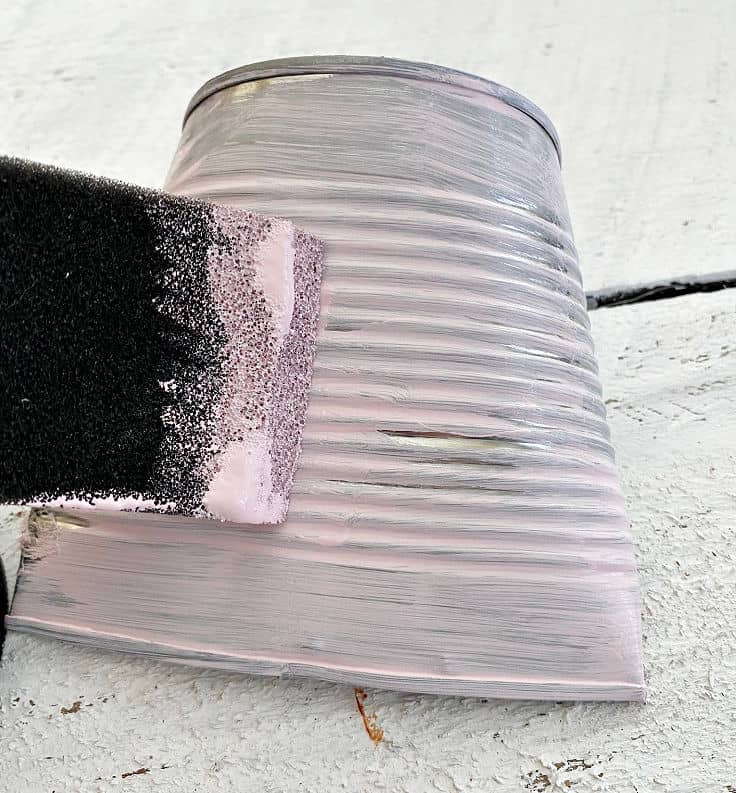
This is where you can really have fun with it and create a rainbow of colors if you want!

Warning – you will want to make “all the tin cans”.
Let the paint dry fully before moving on to the decoupage technique.
I have to say this is my favorite part and I really LOVE to decoupage.
If you are a fan too you can check out some of my popular decoupage projects with tips for decoupage below:
- How to Decoupage with Napkins
- 19 Decoupage Furniture Ideas
- How to Decoupage on Glass
- How to Make Buffalo Check Plates with Mod Podge
- How to Decoupage with Mod Podge on Soap
Step 5. Gather your Decoupage Material
You can use so many things to decoupage your cans. I gathered napkins, rice paper, and my free printables.
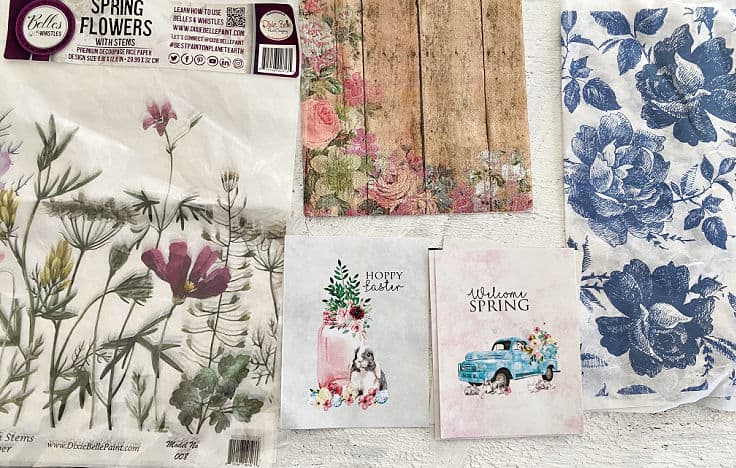
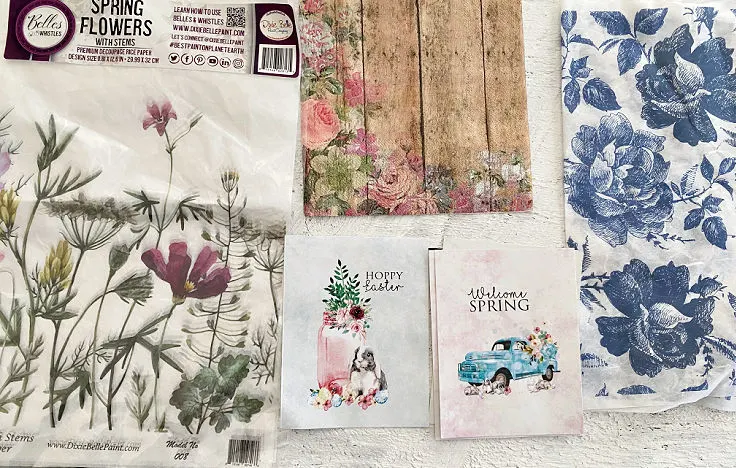
What Materials Can You Use to Decoupage?
- Fabric
- Specialty Decoupage Paper
- Laser-printed photos
- Book Pages
- Beautiful Napkins for Decoupage
- Sheet music
Step 6. Add Mod Podge
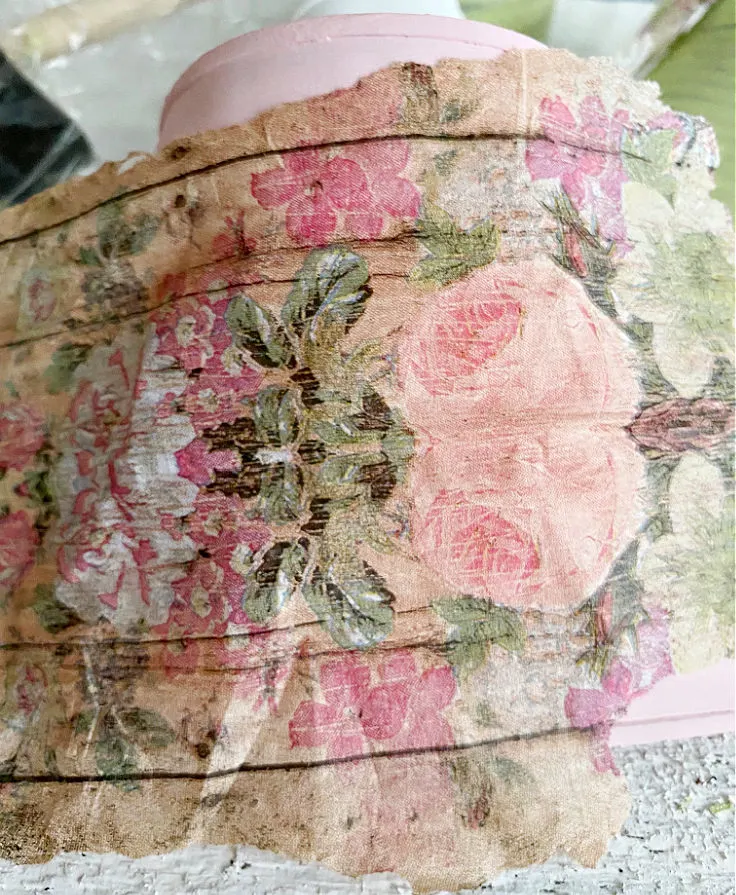
Place a layer of mod podge onto your crushed tin can. I use foam brushes for painting and adding mod podge.
Let it sit for about 30 seconds or so until it gets a little tacky then lightly place your napkin or other material onto the mod podge.
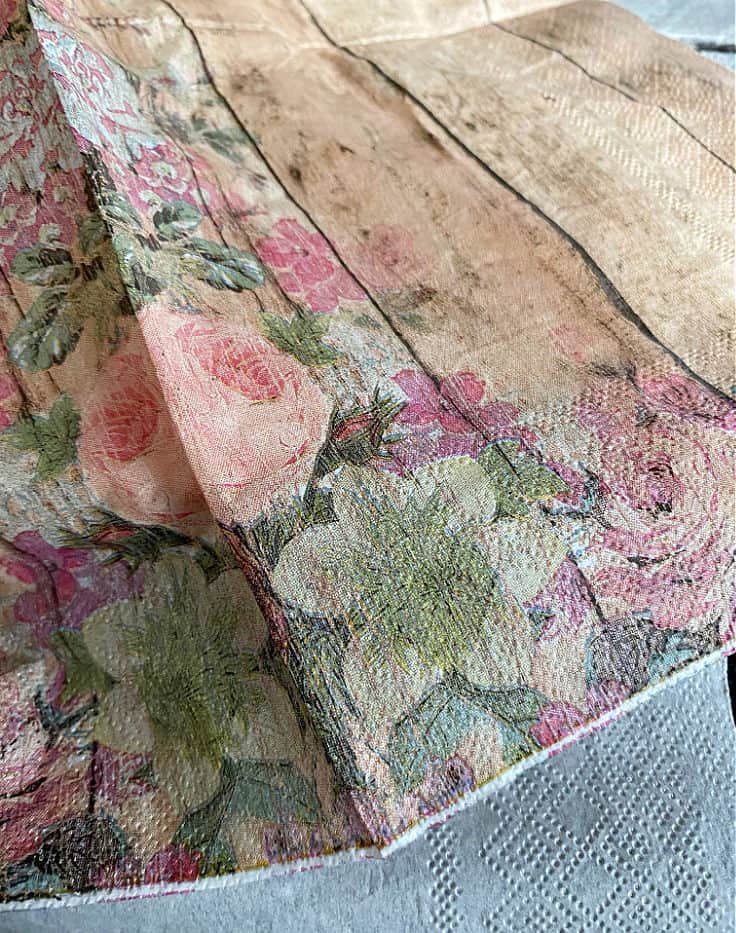

If you are using napkins, only use the top printed layer. I also find tearing your material rather than cutting it makes for a cleaner look on the tin cans.
It almost looks painted on!
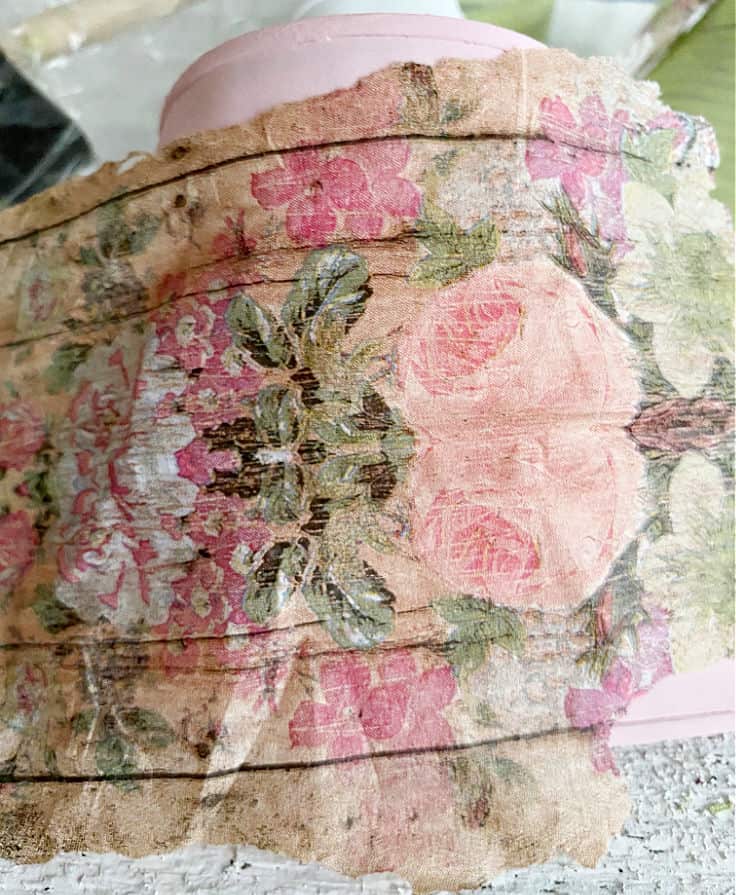
Step 7. Burnish Image with Plastic Wrap
A super helpful tip for decoupage is to use plastic wrap to “burnish” the image and remove any wrinkles.
It really helps to prevent any tearing in your material and gives it a smoother finish.

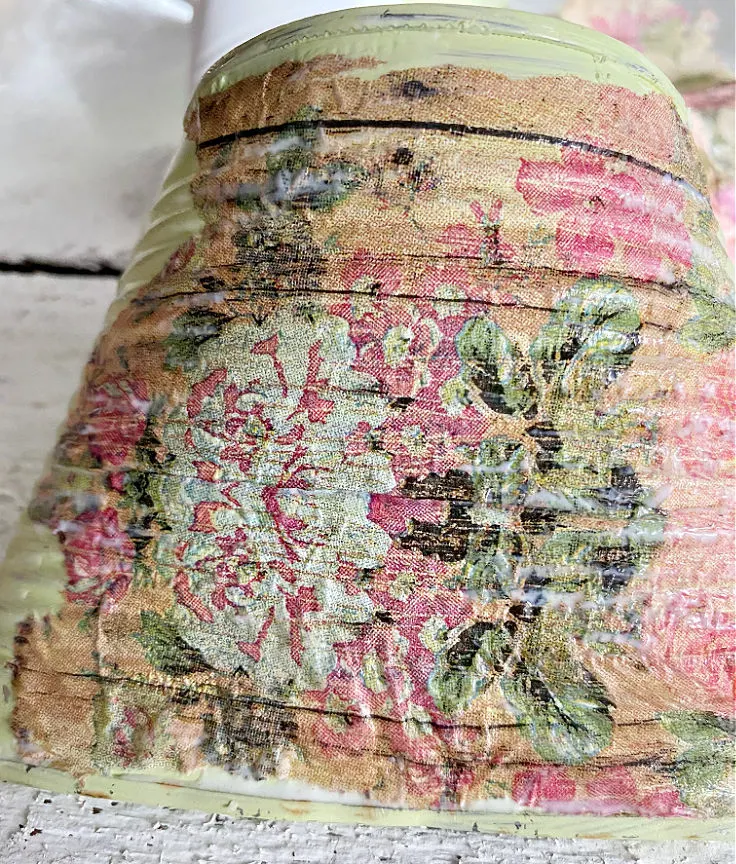
Step 8. Add a Top Layer of Mod Podge
You will need about 2-3 coats of mod podge on top of your tin cans.
You can use more if you like but I found this was enough.
But, if you are using heavier paper like brochures, you may need more.
Let the image dry for at least 30 minutes between coats.
Step 9. Seal with a Coat of Clear Sealant
You can use a clear sealer if you want to give it a shiny finish.
You will also need this if you are using these pocket posies outside.
I didn’t add a sealer to these as I like the matte finish. This is totally your personal preference.
Step 10. Fill with Flowers
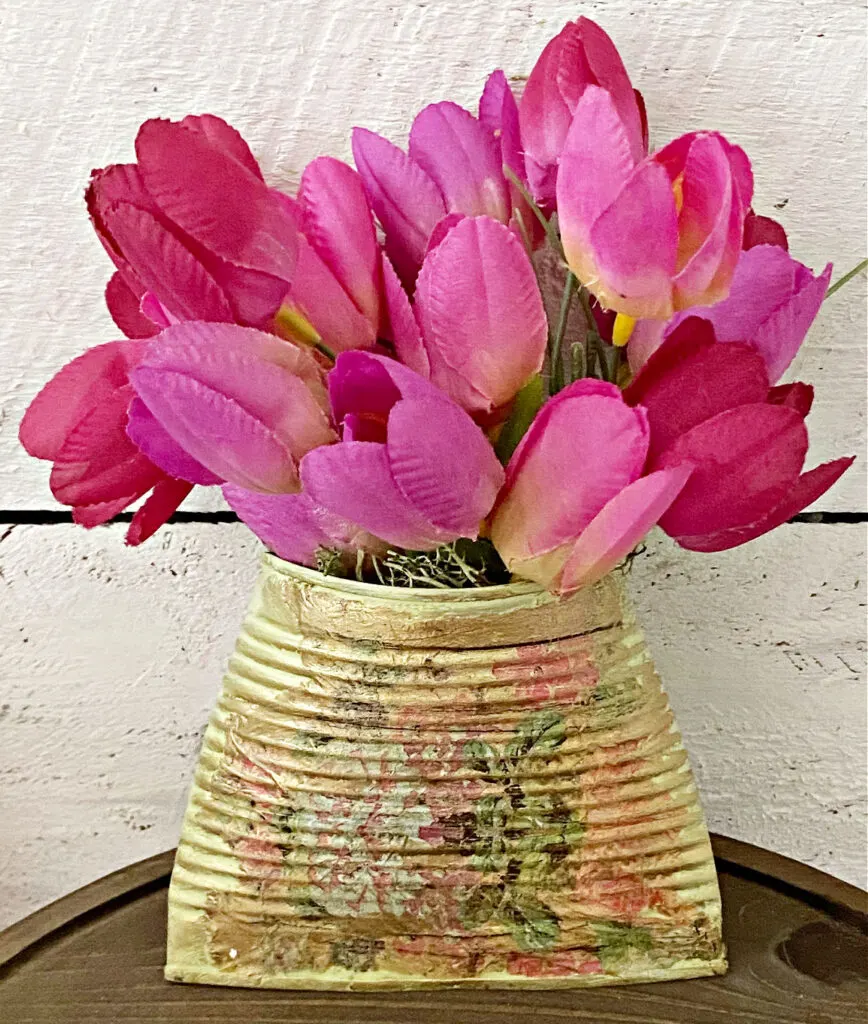
Now fill your tin wall pockets with flowers. I found all of these pretty spring flowers at the dollar store.
You don’t even need foam for the can. I just used a little bit of moss to secure it.
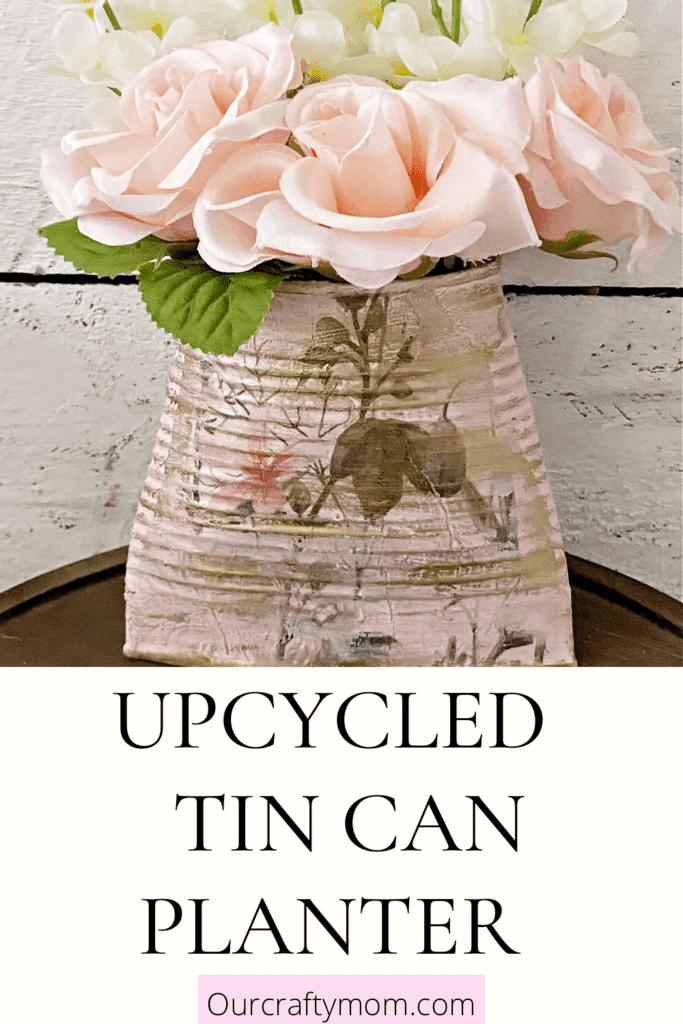
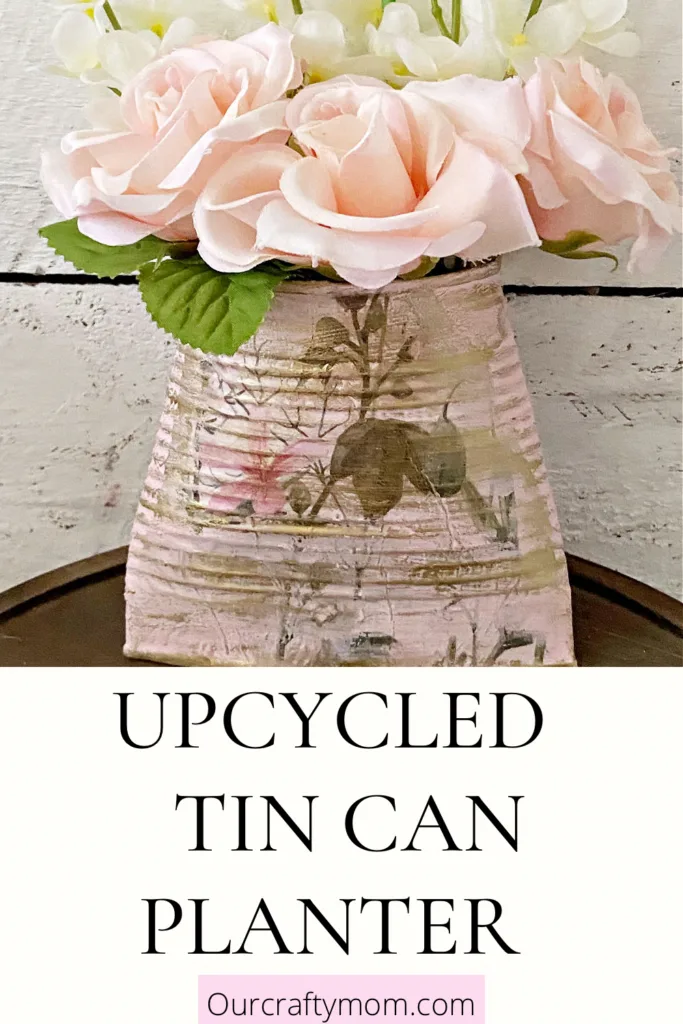
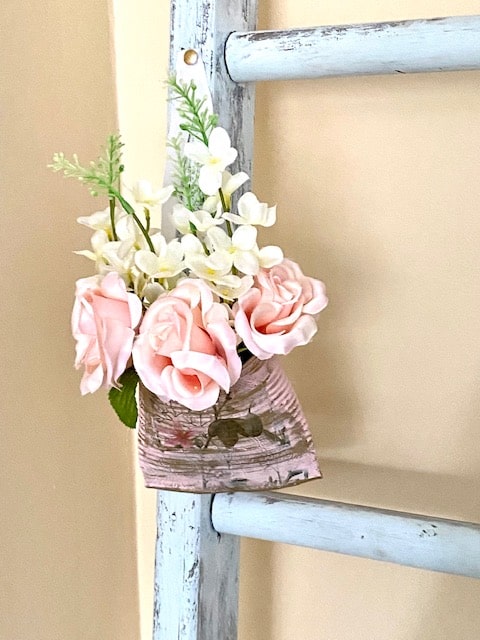
Here it is hanging on an old ladder with a piece of ribbon. You can also hang these on a wall with twine or floral wire.

Finished Tin Can Wall Pocket Planters
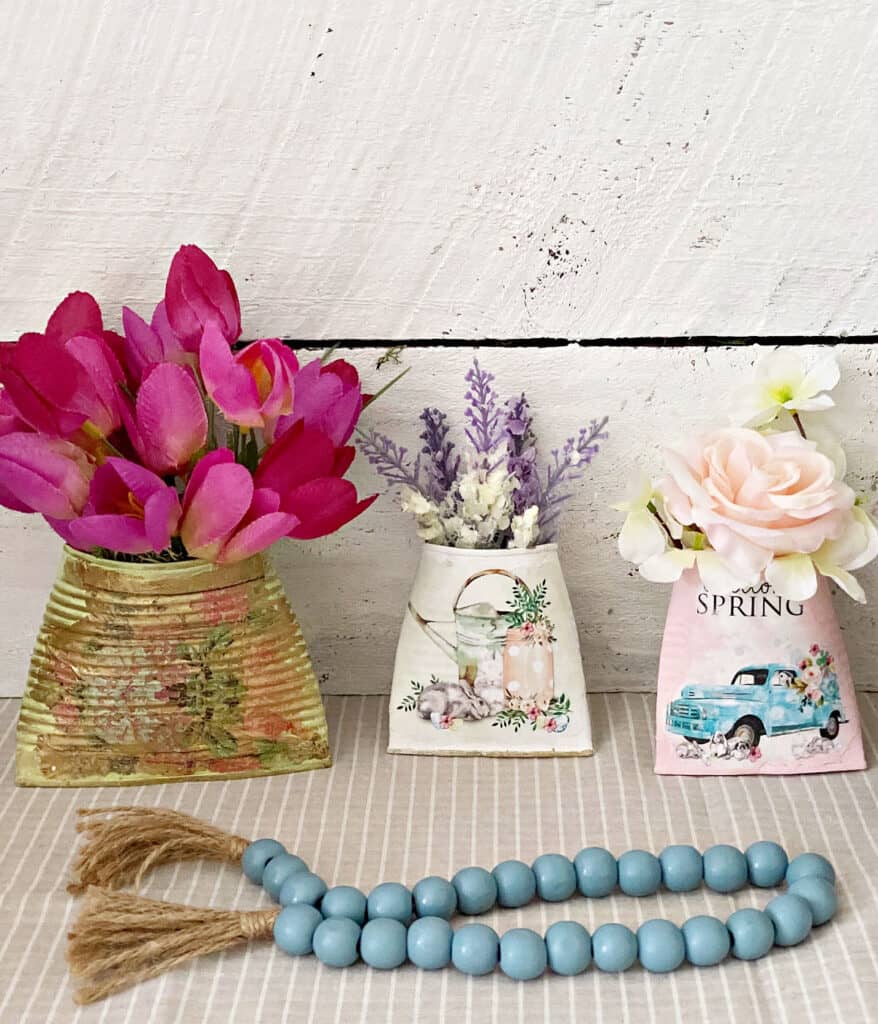
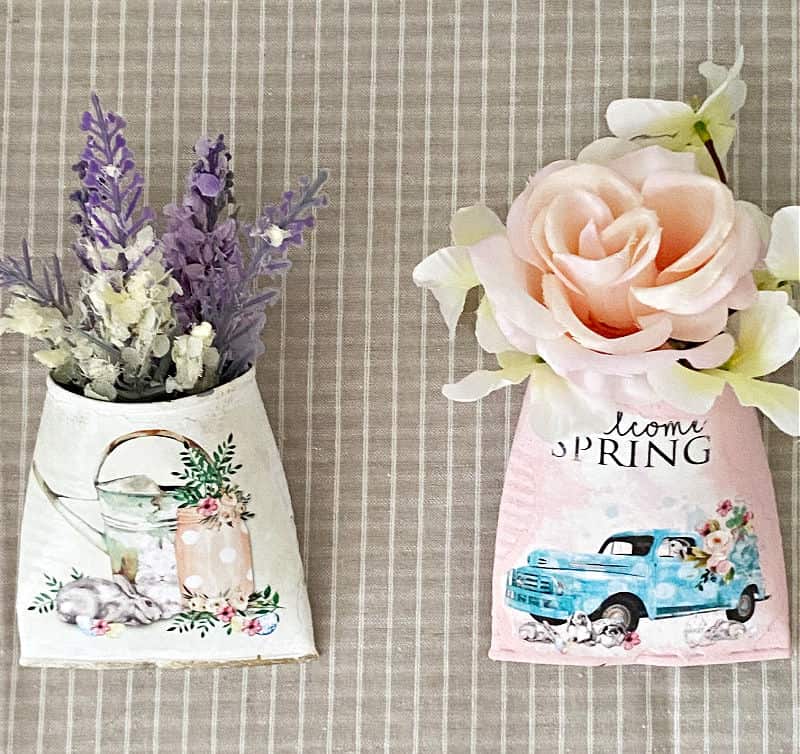
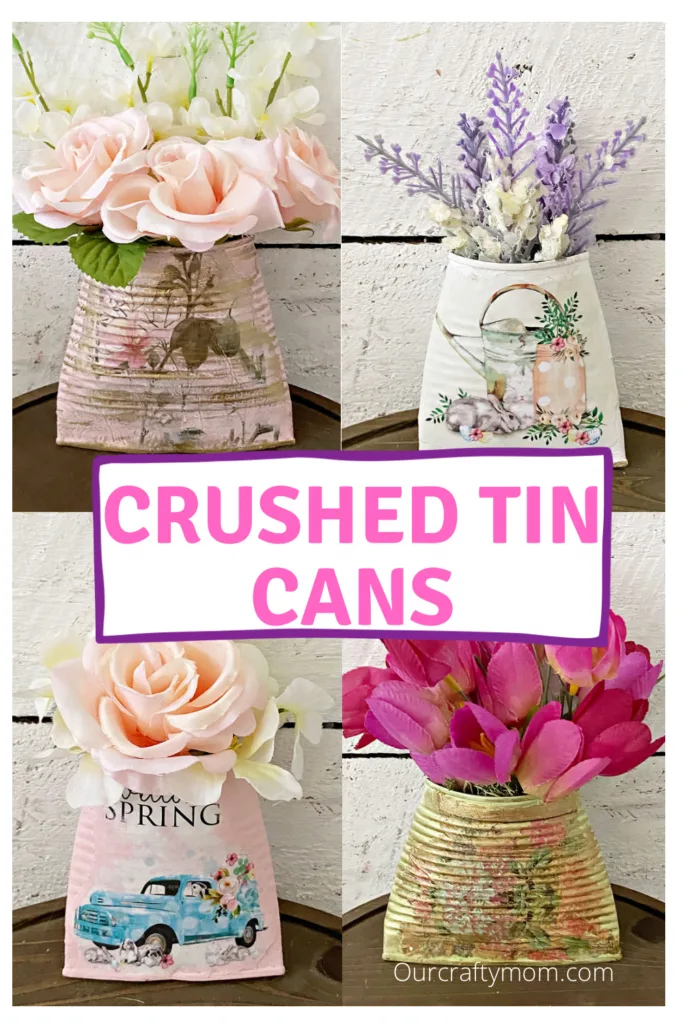
I made four different tin can planters and can’t decide which one I like best.
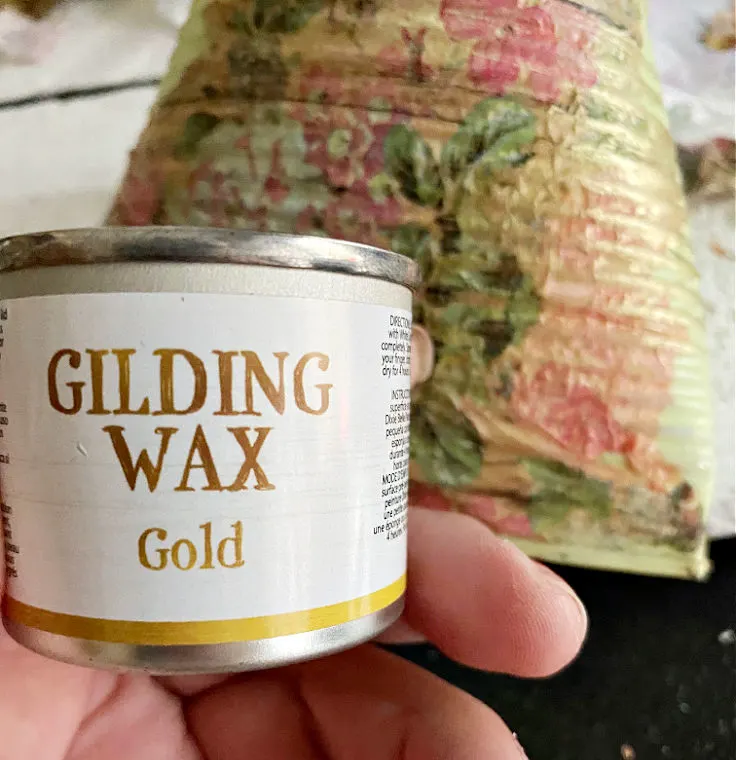
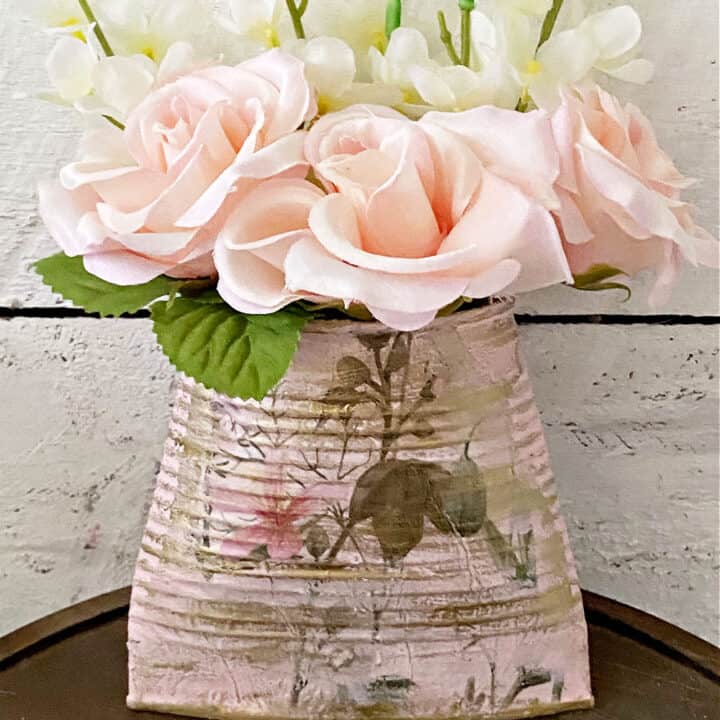
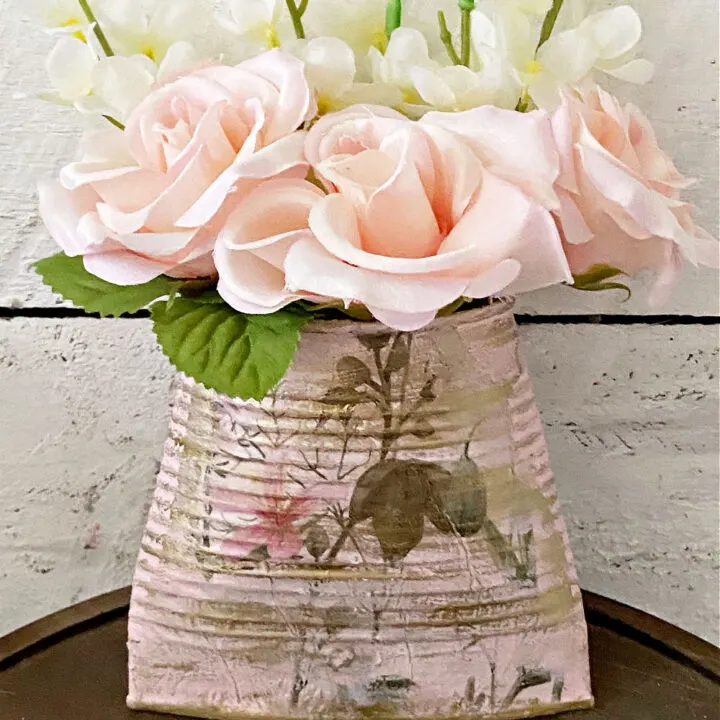
You may notice a little bit of gold on this pretty vintage style planter:

I used my finger to rub a bit of gold gilding paint onto the planter. I’m pretty obsessed with how it turned out.
This is what I used:

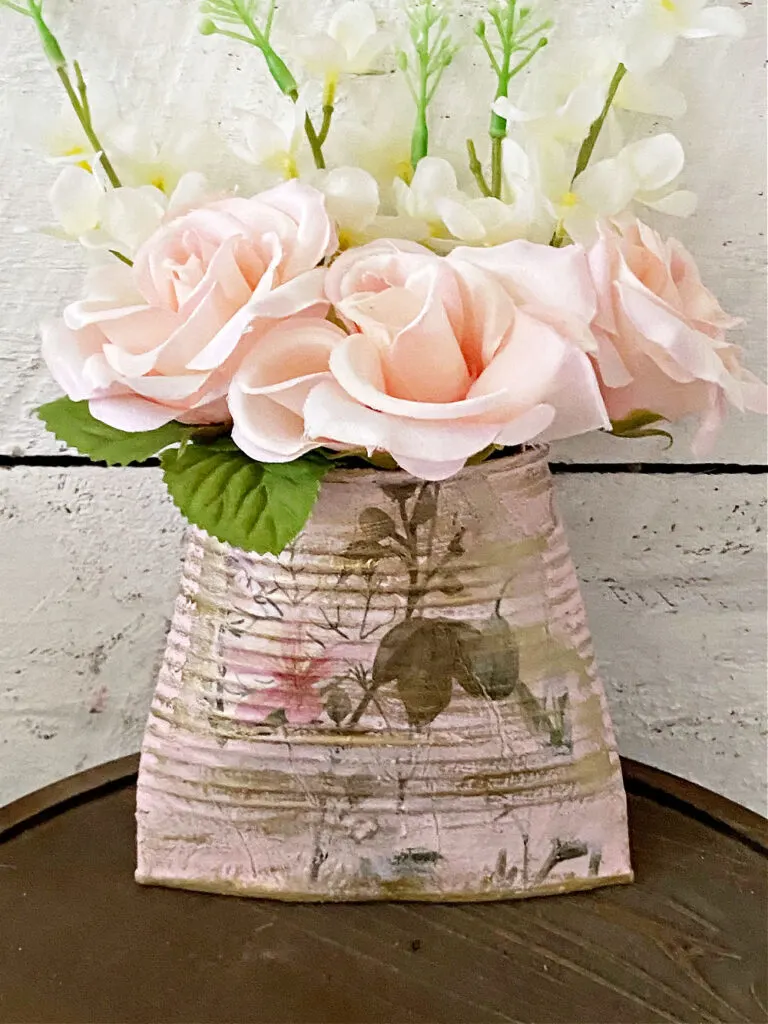
This tin can planter was made using rice paper:
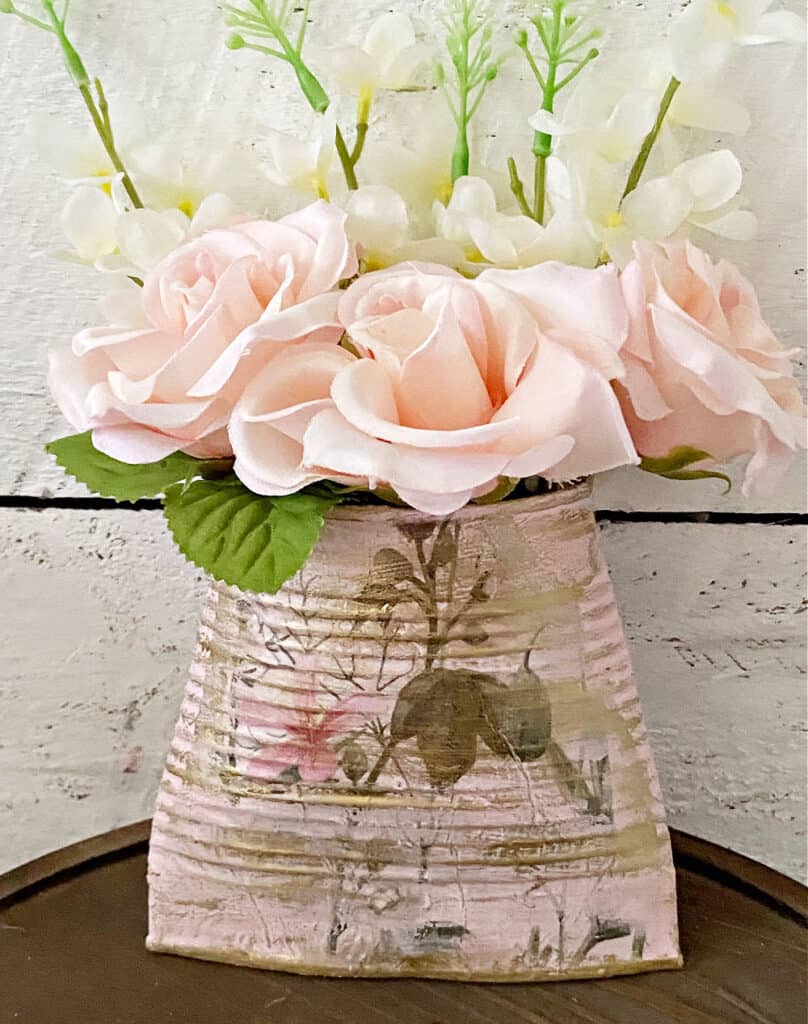

I added gold to this one as well. It really pops on the soft pink backdrop.
If you are a fan of all things little red truck you will love this next one:
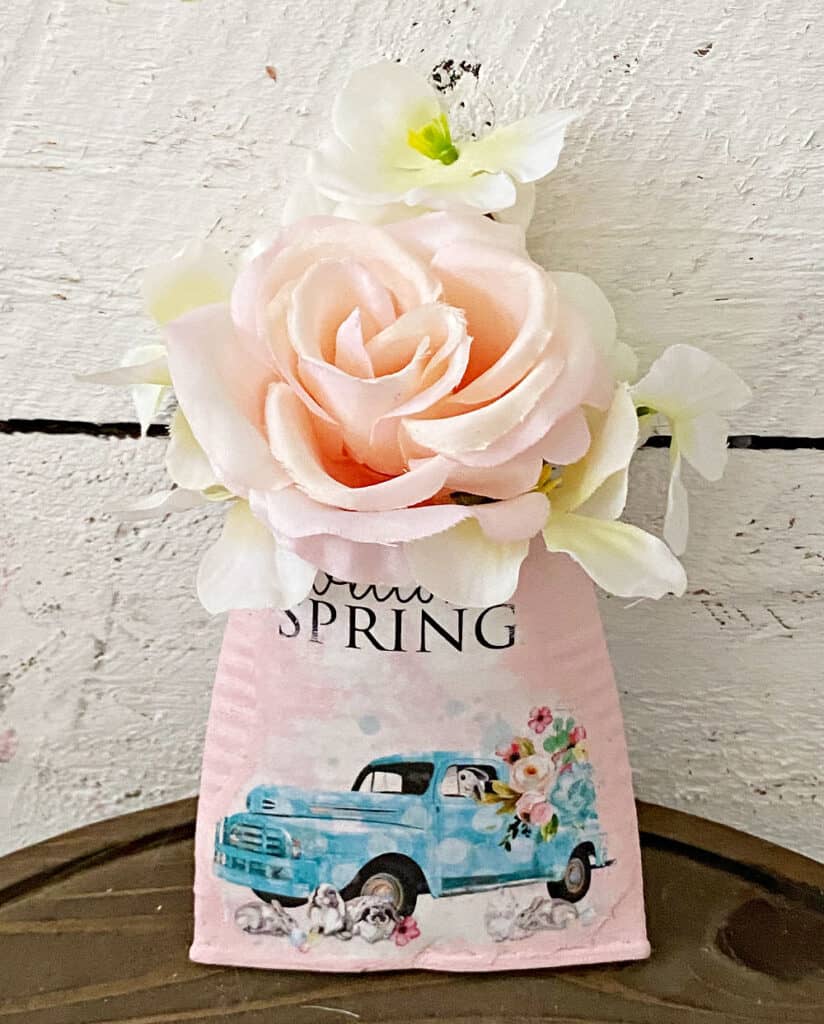
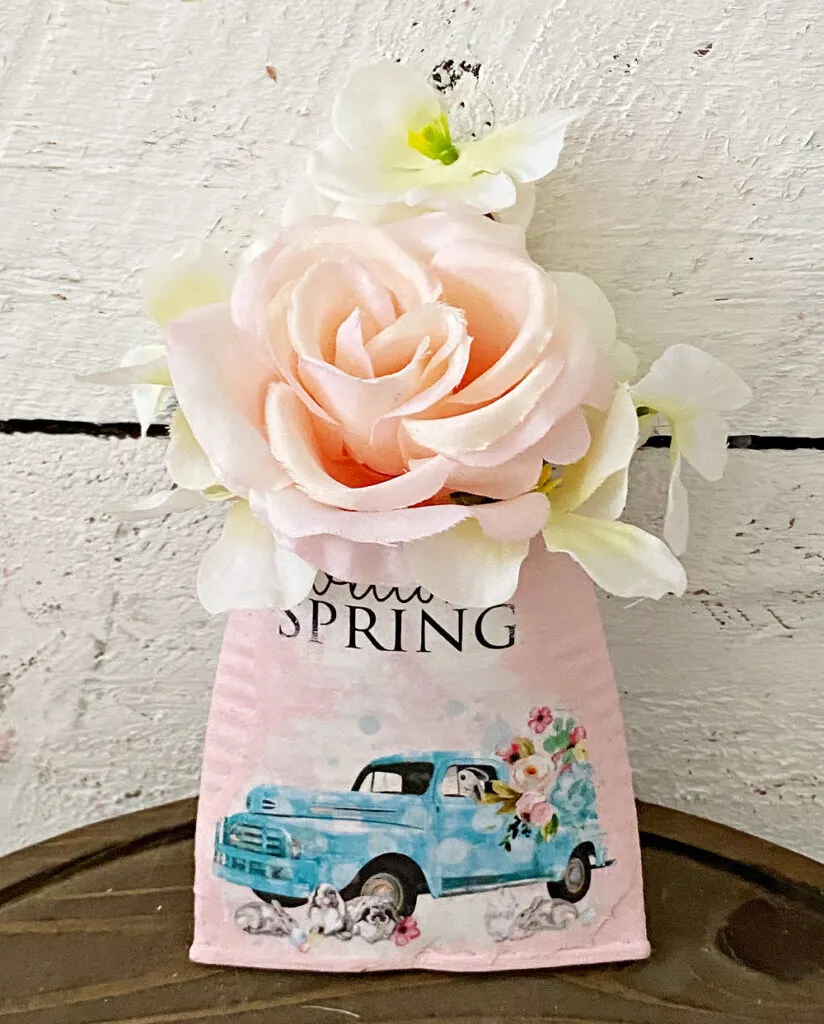
The fourth tin can wall planter I made also uses my spring printables and is an adorable design for Easter or spring:


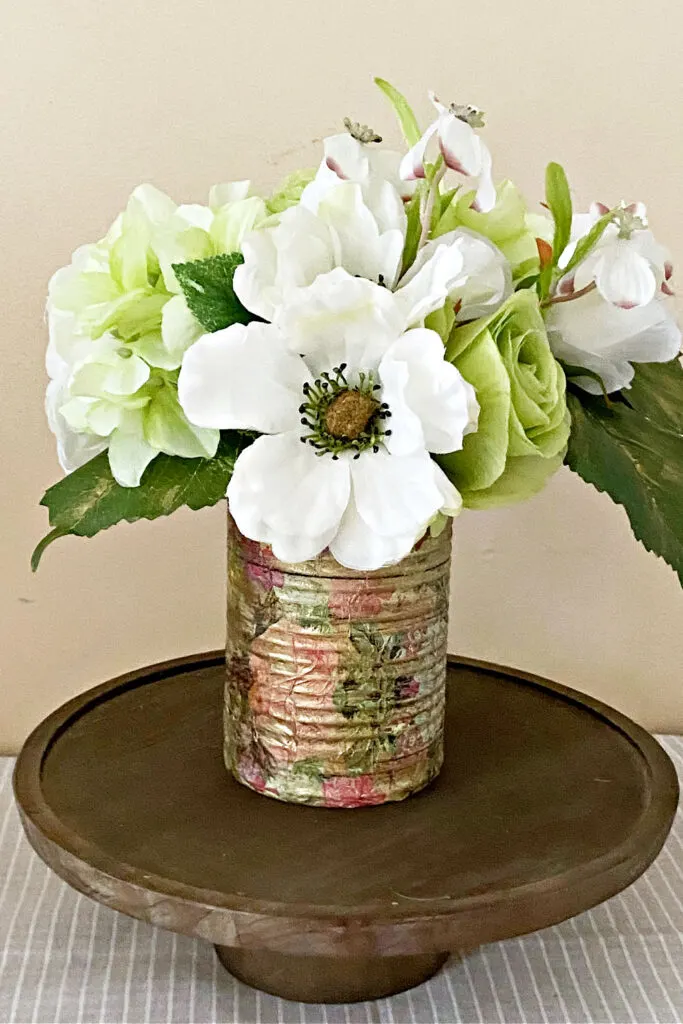
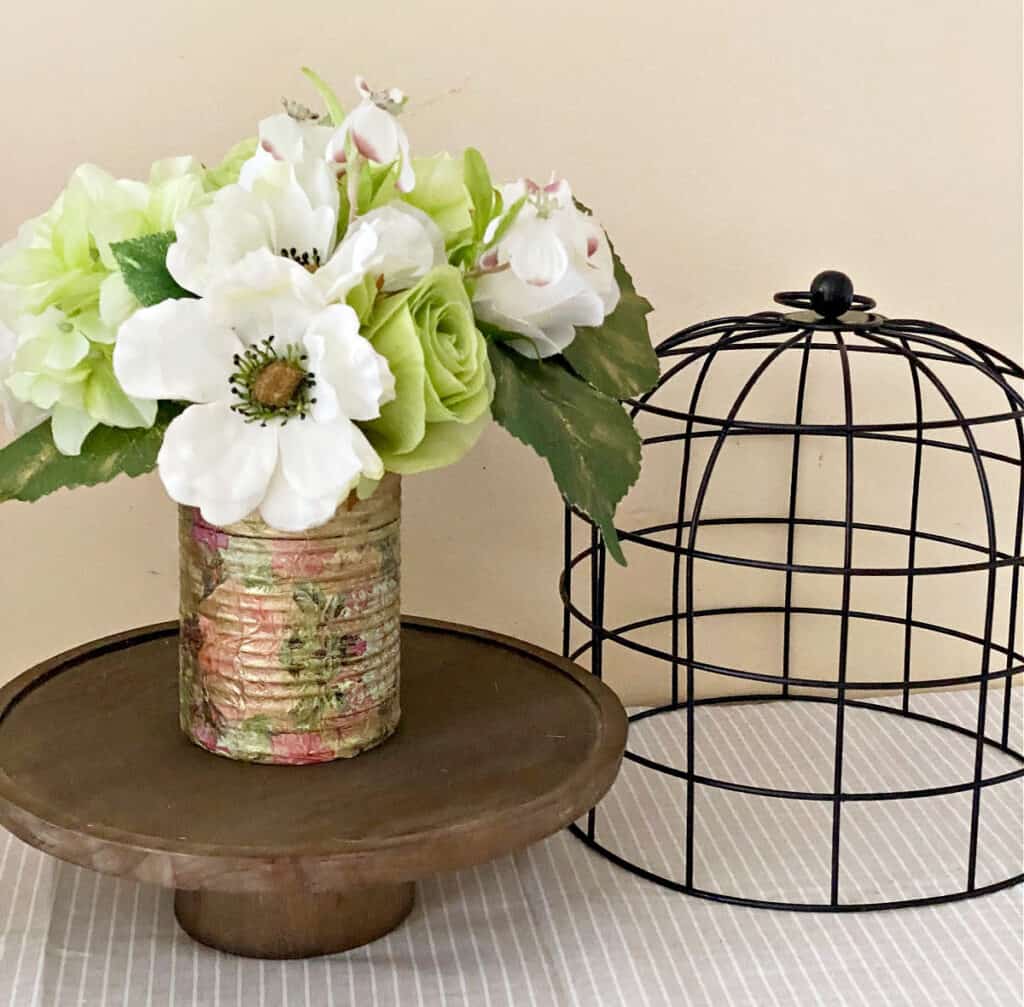
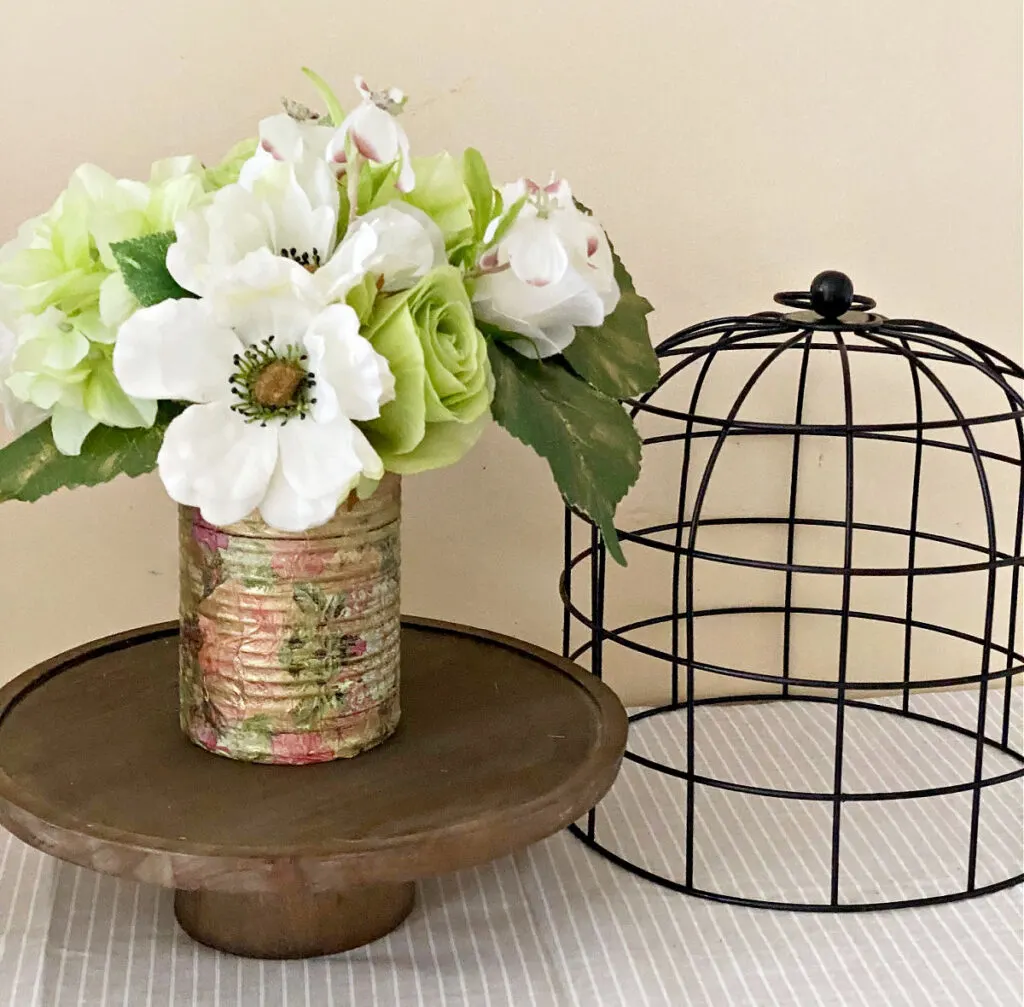
I kept one can uncrushed to make this beautiful spring vase:

Can you believe this was a soup can? Save all those tin cans so you can make your own hanging wall planters!
You can add wire, twine, or ribbon for hanging, or display them standing on a shelf.
The smaller tin cans are the perfect size for tiered trays.

Just because I took a million and one pictures, here are a few more:


There you have it! Four beautiful and simple DIY tin can wall pocket planters that you can make for just a couple of dollars!
I hope you enjoy these pretty planters as much as I enjoyed making them.
If so, please share this post with your friends.
It really helps my blog…and it doesn’t cost anything. 🙂
You may also want to check out these 35 tin can crafts for even more upcycled can ideas.

If you create anything with my free printables be sure to share your photos with me on Facebook and Instagram and use the hashtag #freeprintablecrafts.
Crushed Tin Can Wall Planters
I’m always looking for ways to recycle things and use them in a new way. So when I saw these tin can wall pocket planters, I knew I had to make some. They are slightly addictive to make and they turn out beautiful!
Materials
- Empty Tin Cans
- Download Free Printables or use napkins
- Mod Podge
- Moss
- White Chalk Paint
- Dixie Belle Soft Pink Paint
- Foam Brush
- Floral Foam
- Faux Flowers
Tools
- Hammer
- Hot Glue Gun
- Scissors
Instructions
- Gather your tin cans and remove the labels. If you have any glue residue left on the can you can use a little goo gone adhesive remover.
- Give them a quick wash to remove any leftover food inside.
- Place the tin can on its side so the seam is up. Then you can use your hand to flatten the can.
- Use a hammer or mallet to seal the tin can.
- Gather your favorite paint to paint the tin cans.
- Place a layer of mod podge onto your crushed tin can. use plastic wrap to “burnish” the image and remove any wrinkles.
Recommended Products
As an Amazon Associate and member of other affiliate programs, I earn from qualifying purchases.


Thank you so much for visiting. Happy crafting!
Google Web Story: Upcycled Tin Can Planter
You can find me on social media below:
Kim
Tuesday 2nd of December 2025
I saw that is says use chalk paint 1st before you put the napkin on. Do I have to use chalk paint or can I just use decoupage
Michelle James
Thursday 11th of December 2025
You don't have to use chalk paint, but you should paint the base white so the napkin design shows up more. If you just decoupage on the tin it won't show as bright. Happy crafting!
Tammy
Friday 7th of February 2025
I loved this craft so much I had to make one of my own. Thank you for sharing!
Michelle James
Sunday 9th of February 2025
I love hearing that!! Please share a picture if you can. :)
Patsy
Monday 1st of July 2024
These are beautiful! I cant wait to try my hand. Can these be used for fresh flowers… using floral foam? Or a small plant? Thanks Patsy
Michelle James
Monday 1st of July 2024
Hi! I'm so glad you like it. You can definitely add fresh flowers or a small plant as long as you add a few drainage holes to the bottom. I'll take a picture of one that I have on my balcony now. I just used a hammer and nails for the holes, or an awl would work too. Did you see the one I made with the faux vintage tiles from Dollar Tree? That's my favorite. You can see it here https://ourcraftymom.com/vintage-wall-pockets/.
Dawna
Friday 6th of October 2023
I love this! I was looking for something special for my friend. Do you think you could put succulents in these?
Karen
Friday 14th of July 2023
Thank you for these instructions. They are the best! Now I want to make all the tin cans! :)
ourcraftymom
Monday 31st of July 2023
Enjoy! They are addictive! 😁